MPC A New Hope Hans Solo Edition
This is the tenth part of the MPC Star Wars A New Hope Hans Solo Millenium Falcon 1/72 Scale MPC953 build and review.
I’ll admit something to you, I’m not that big a fan of weathering models. Now please don’t confuse this to mean I don’t like weathered models, because I in fact do. But in my own personal models, I sometimes find it difficult to draw that fine line between just enough, and too much.
There are times when I’m building a subject and I think that the weathering is going to look really great and then once it’s done I might realize I’ve gone too far and it’s too late to take it back. This is one of the reasons I like to use oil paints, or enamel when I’m weathering, if I don’t like it I can remove it and try again or get rid of it together.
In this post, I’m going to add some more weathering, and it’s going to be a lot of fun!
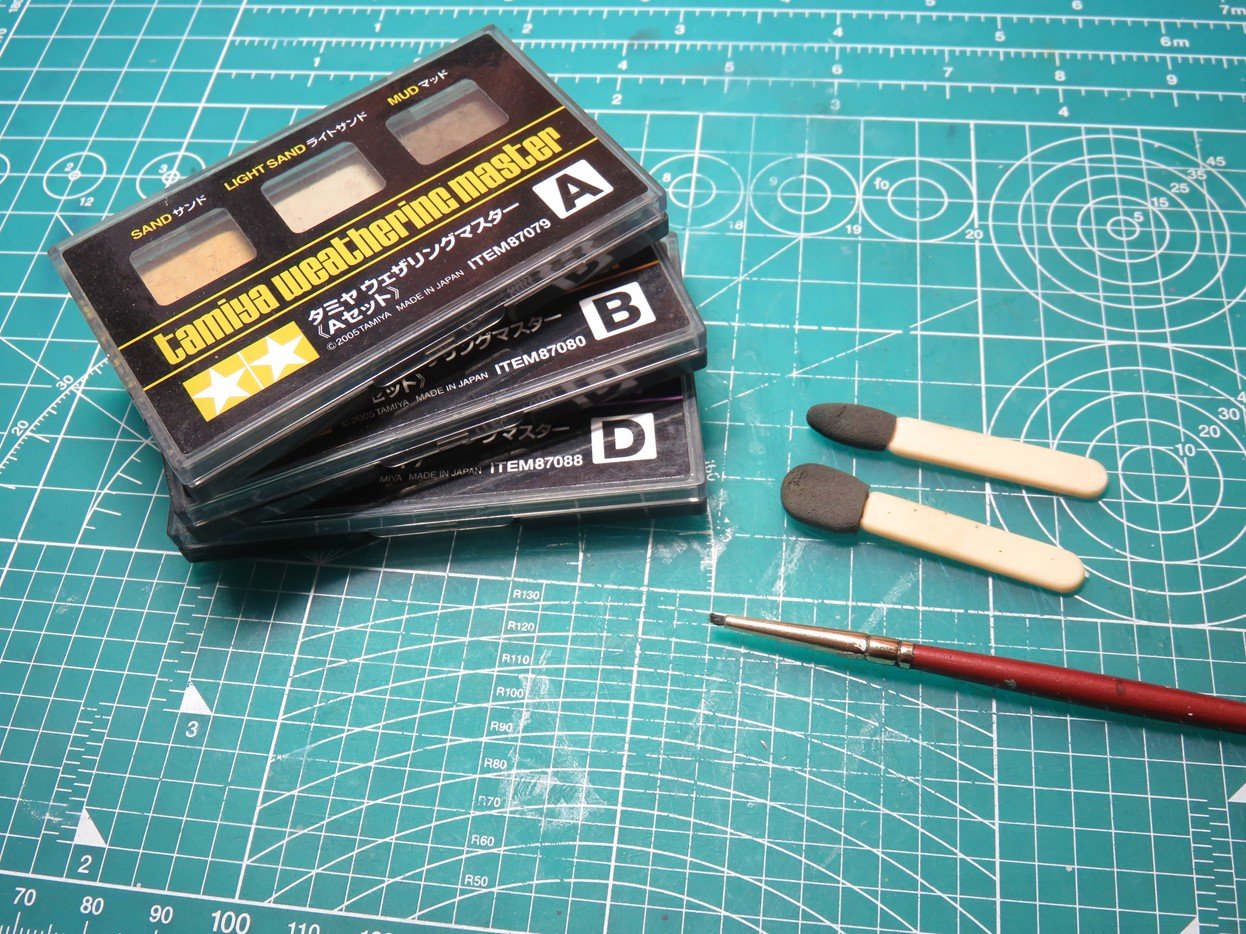
These are Tamiya Weathering Master sets. There are a variety of these to choose from and even a few rarer limited editions. But they are excellent for weathering, and best of all, if you don’t like it you can easily remove them by rubbing them off with a soft eraser, or a cotton swab dipped in water.
So if you don’t like the weathering or you just want to try it again, these Weathering Master sets are very easy to use. Inside they come with a rubber-tipped applicator/brush. Personally, I prefer these smaller makeup brushes, as they last a lot longer and are very inexpensive.
I’ve also cut down an older paintbrush so that just a few millimetres are remaining. This stubby brush is really useful for applying the pigments.
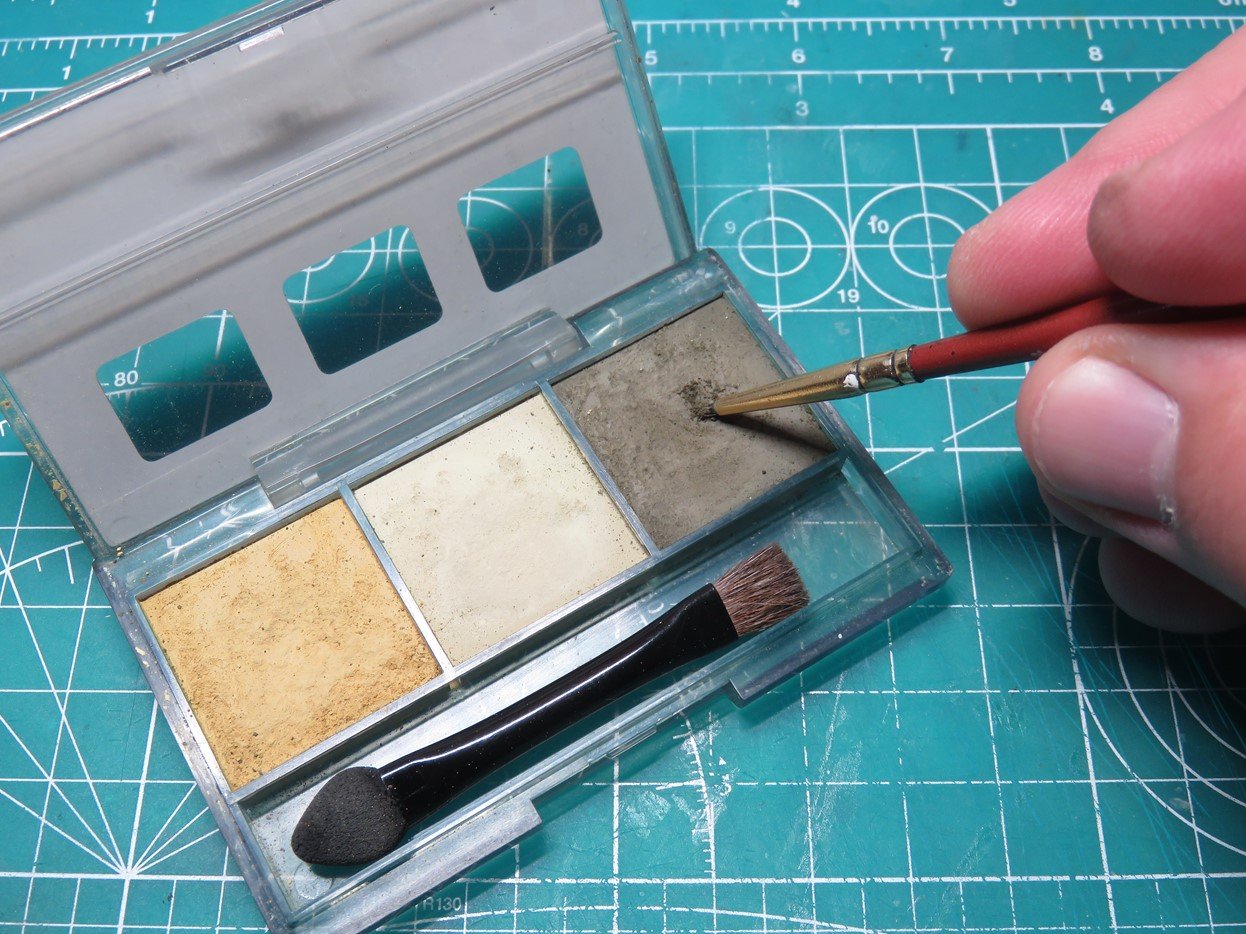
My sister jokingly calls these my Tamiya Make Up kits, and opening these sets up I can’t help but laugh and agree with her. Inside you’ll find 3 different pigments.
I’m using my tiny brush to collect some of the pigments. Don’t press the brush into the pigments, this will cause everything to break up. Just a few gentle passes are all you need to collect enough of the pigments for the model.
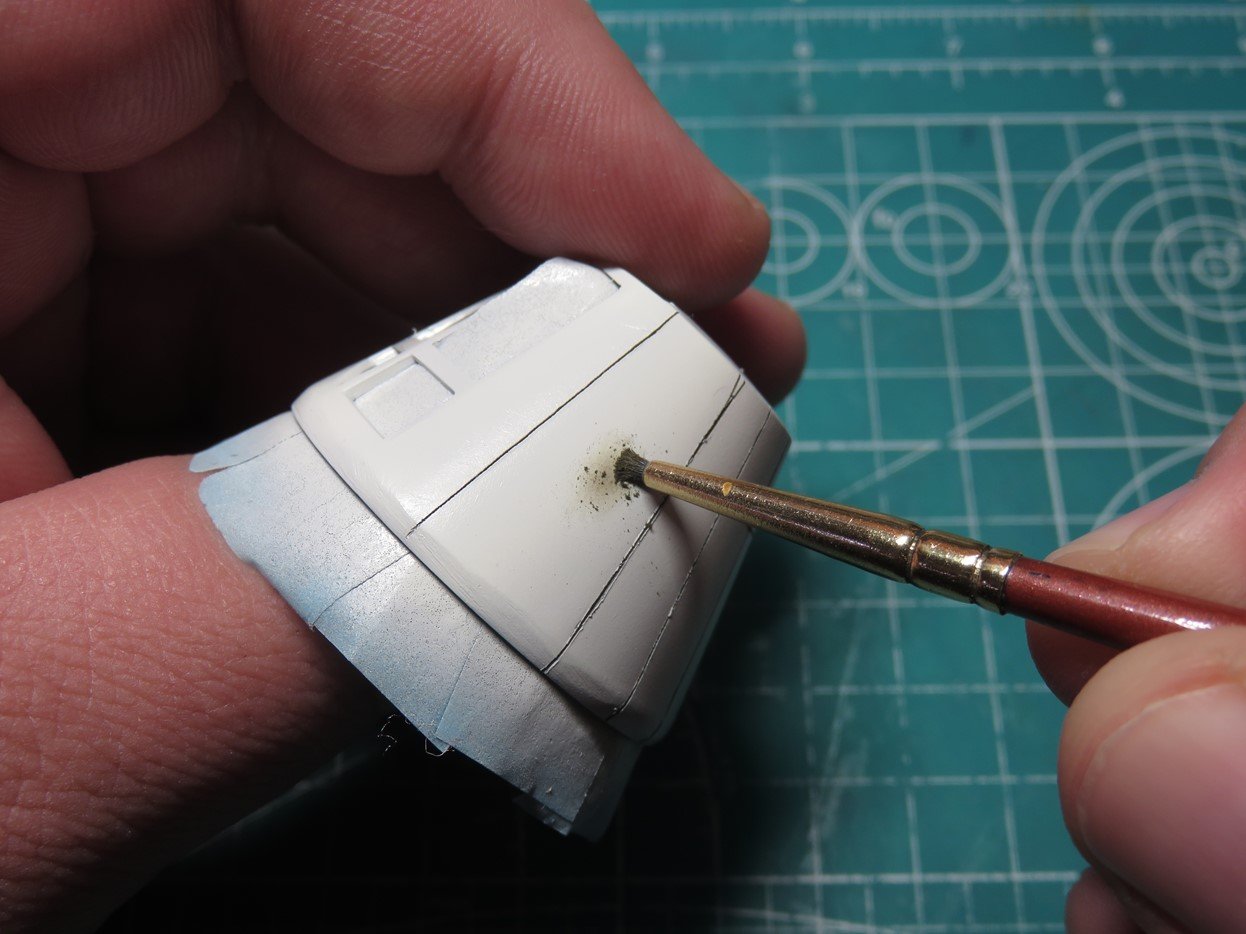
I wanted to create some carbon scoring or dirt debris around the ship. I’m brushing Mud from Tamiya Weathering Master Kit A 87079 into a small oval pushing the pigments into the paint.
When I’m done adding the pigments I simply blow off the excess.

And here is the finished result. I’ll be adding more scuffs like this around the rest of the model, but you can see how quick and nice this effect is. No airbrush was needed, and as I mentioned before, if you’re not satisfied with the effect it’s easy to remove with some water on a cotton swab or a soft eraser.
You can also try adding layers of pigments on top of each other for a unique effect. This works really well if you are painting on something like exhaust streaks on an aircraft, car, or tank.
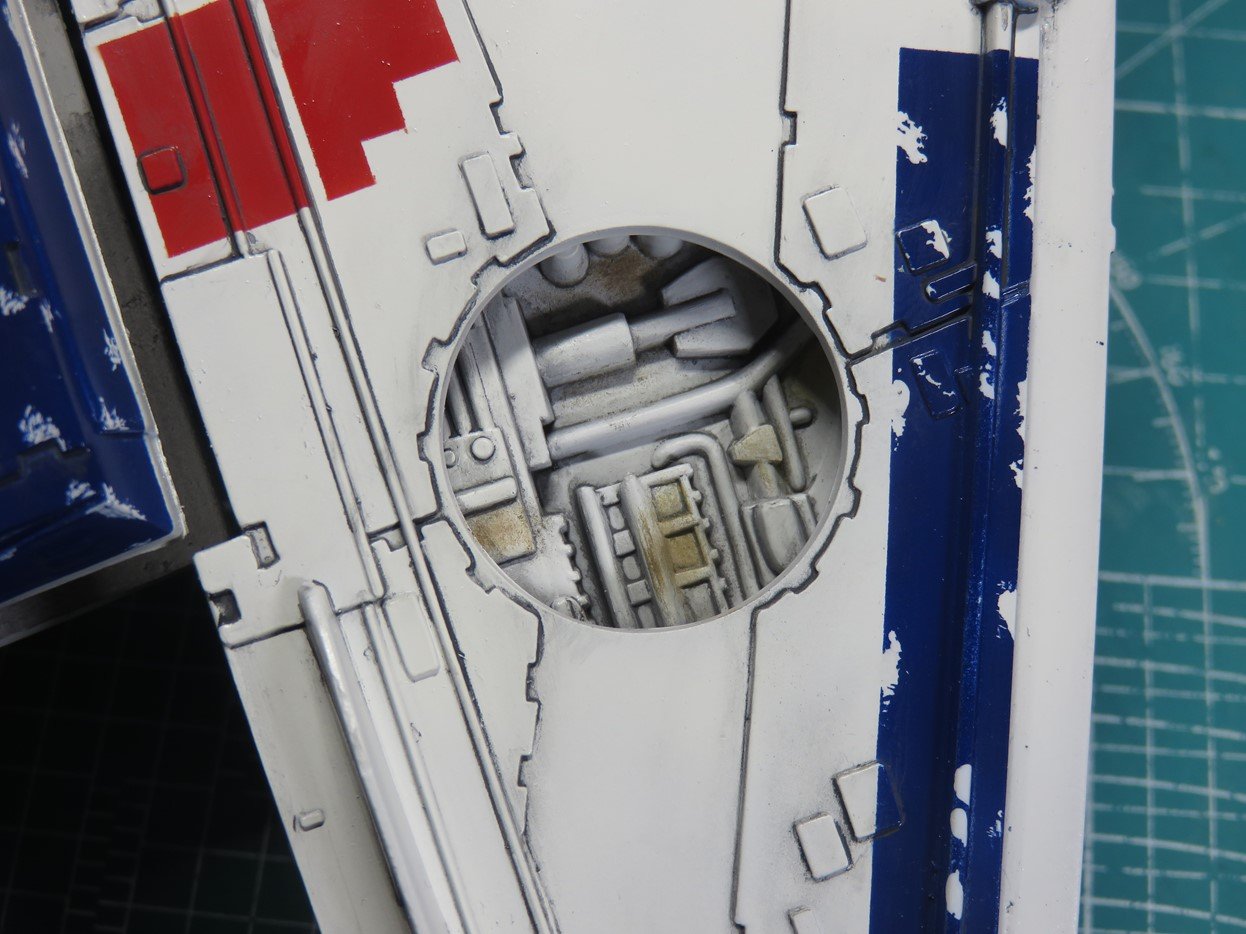
On the studio model of the Millennium Falcon, there are many areas where “space rust” is present. It’s one of those things that once you notice it, it’s pretty hard to ignore it. I added some to the insides of the exposed bays. And I think that it looks pretty good in there adding a bit of color to these sections. I used Rust from set B to create these effects.
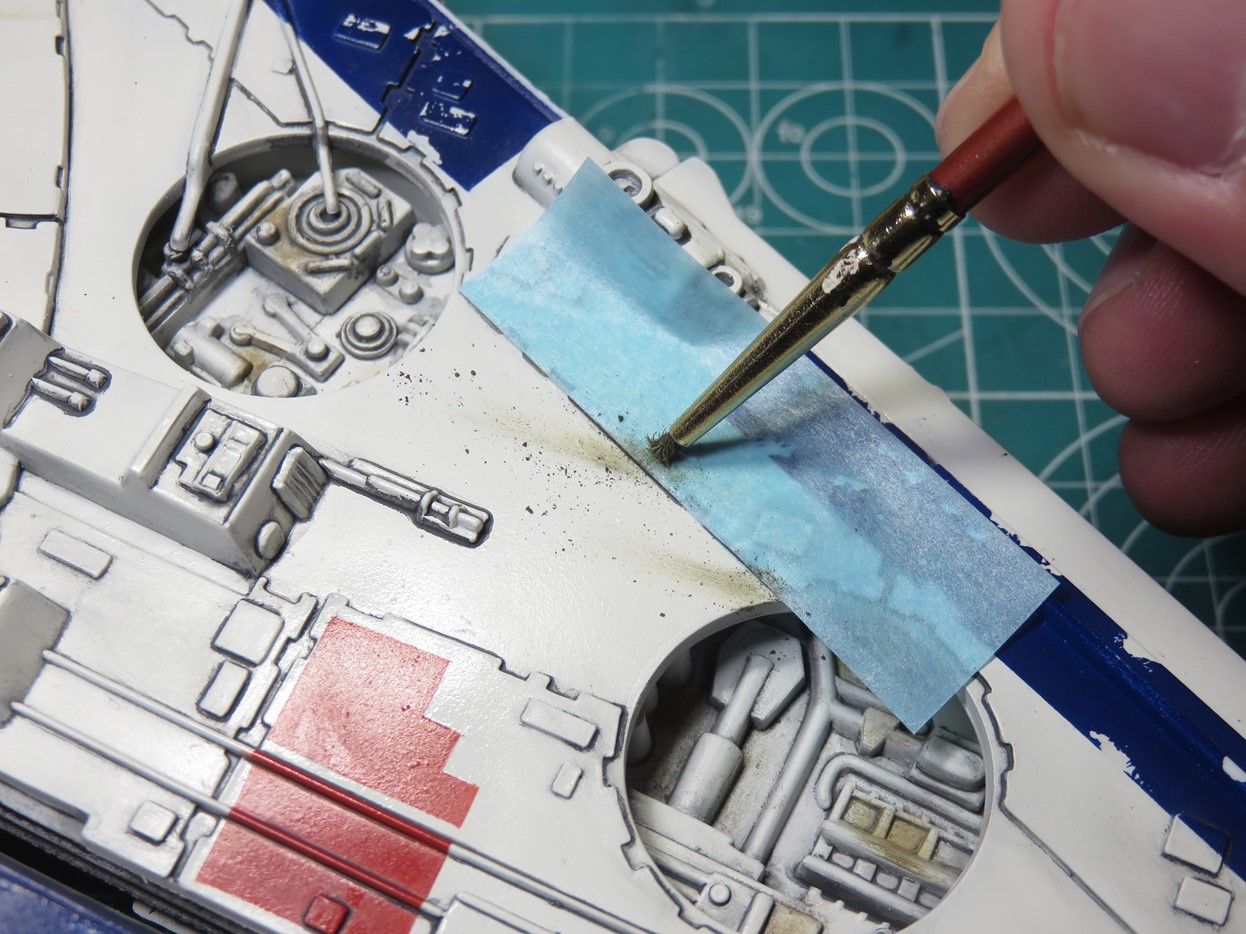
Lastly, I wanted to add some streak effects to the front of the mandibles. I’ve done this same effect on a few X-wings in the past and I think it looks great. I placed some hobby tape along the raised edge of the mandible, and then I brushed more Mud pigment starting on the tape and brushing backwards onto the model.
I brushed on the pigment in a few passes to darken the effect some more.
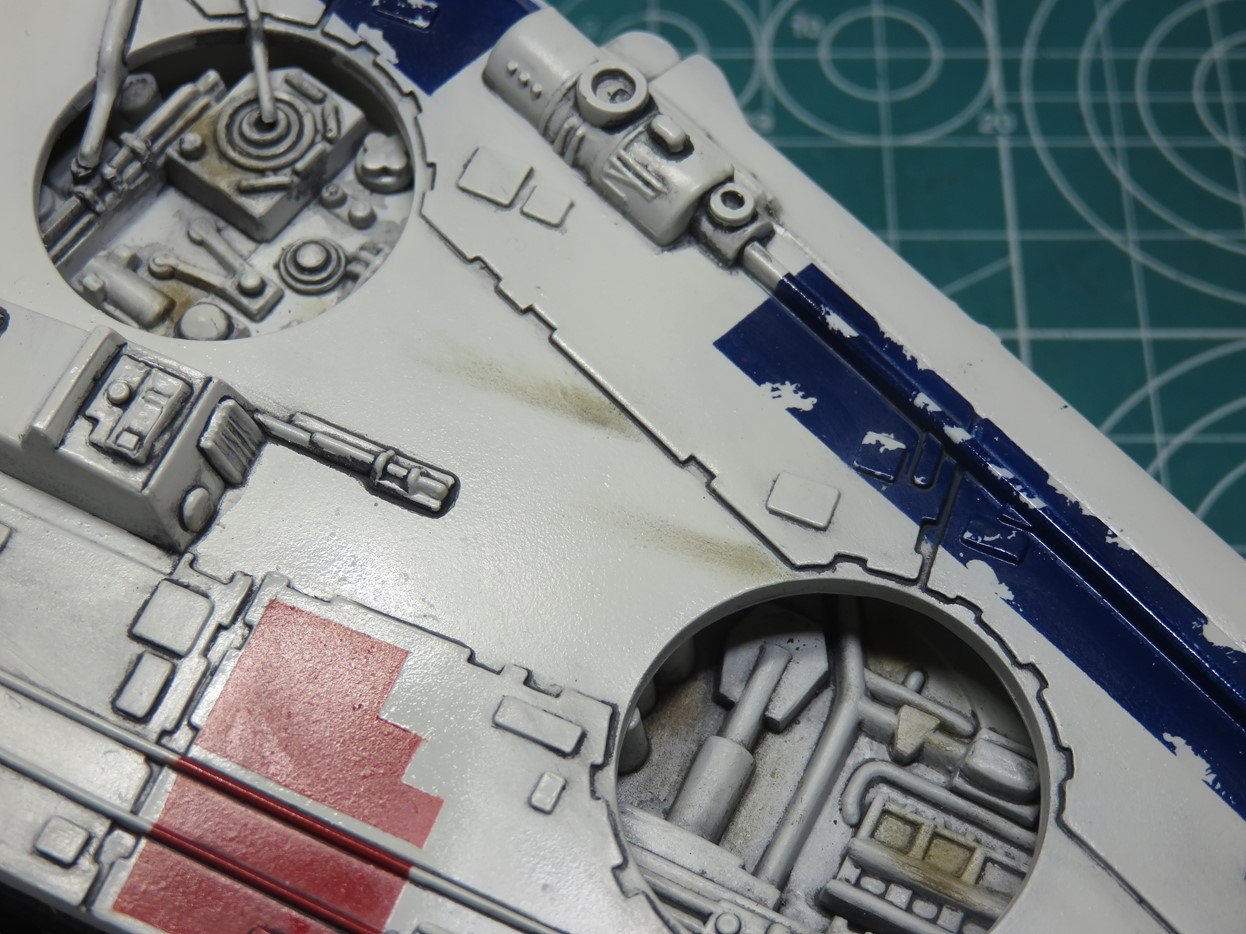
Once I was finished I removed the tape and this revealed the streaks. I really like this effect, and you can even use this on the rest of the hull to create streaking instead of using enamel or oil paints.
I tend to apply this a bit more on the heavy side, as there have been a few times when I’ve added too strong of a flat coat and these details end up vanishing.
These pigments are pretty sturdy, but they are vulnerable to fingerprints. So use care when you are handling your model until you can add a proper protective coat.
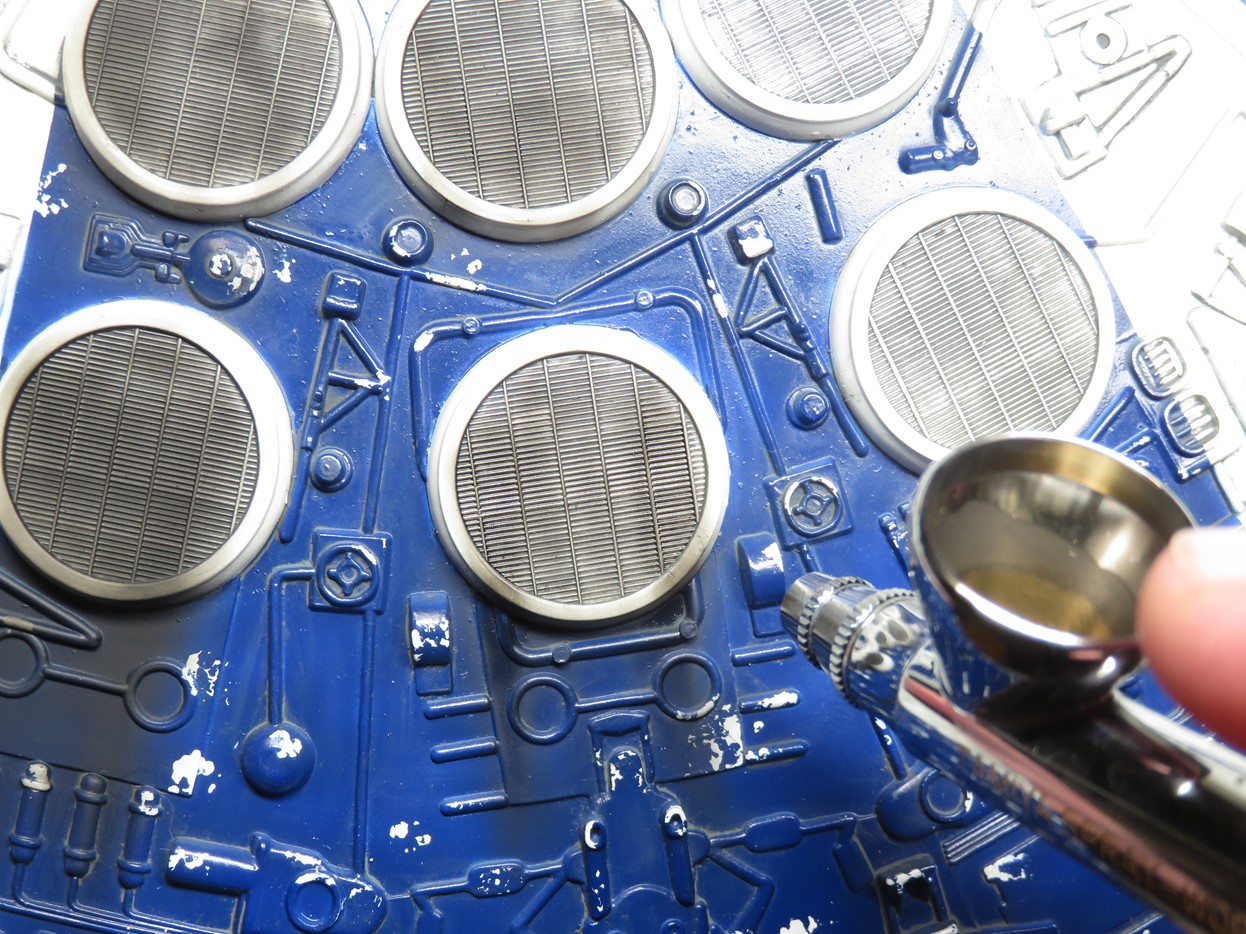
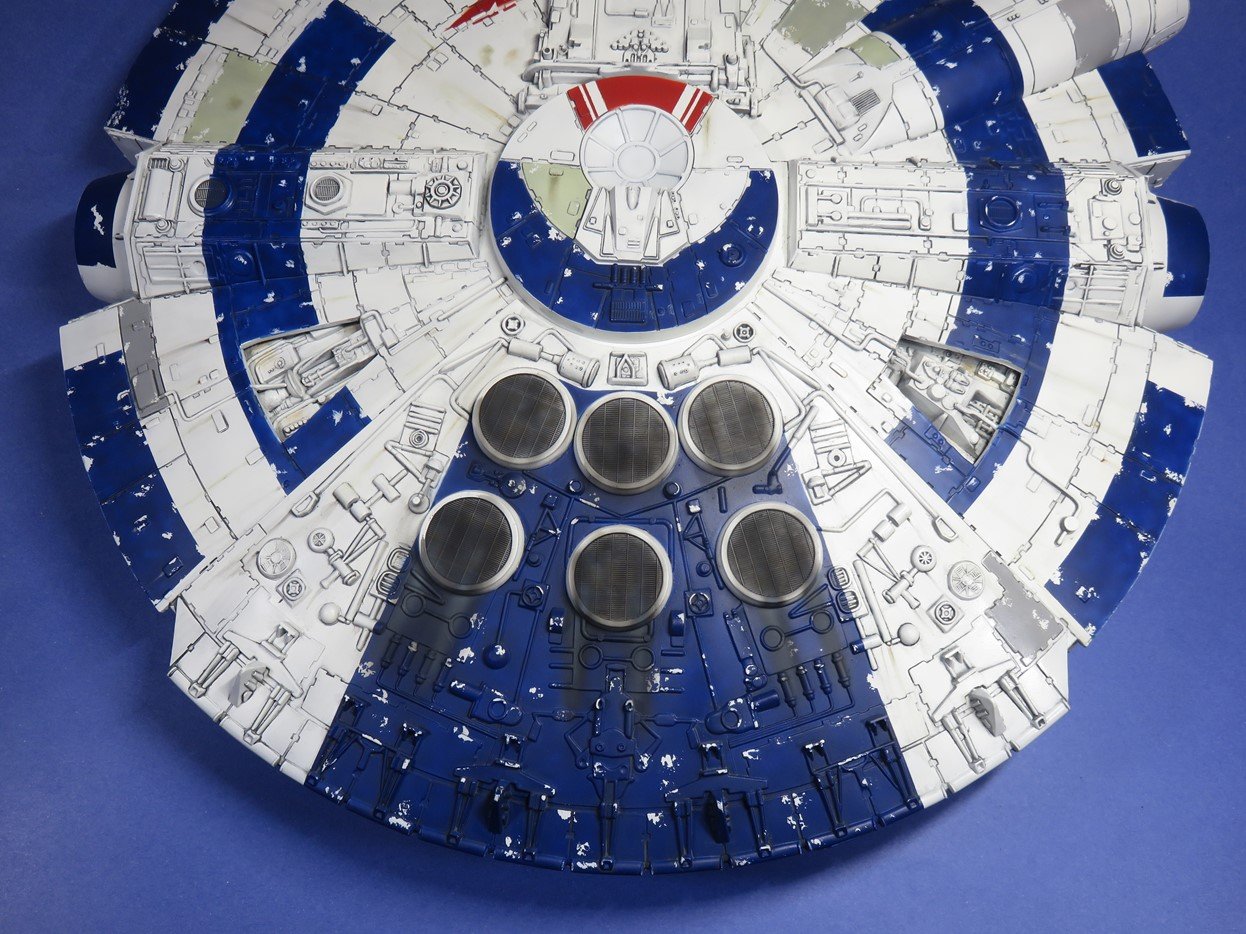
This next stage was going to be a lot of fun and that was adding the smoke streaks on the rear vents. To create the streaking effects I’m going to be using some Tamiya Panel Line Accent Colors with a few drops loaded into my airbrush.
I’ve used this effect on aircraft to create exhaust stains running down the fuselage. It’s a very nice effect but I will warn you that these paints are painted on very thin and they are very easy to rub off if you aren’t careful.
To start I used Tamiya Panel Line Accent Color Black 87131 and I sprayed this into the center of each of the vents. Once I had sprayed enough color to where I felt it was dark enough I then made quick passes spraying the paint down the hull to create thin streaks.
I have to spray quickly with this as my airbrush compressor sadly doesn’t have sufficient airflow power for me to lower the pressure. I hope to get myself a new compressor soon, one that I can lower the pressure on and still have the airflow I need to make these streaks tinier. But for now, quick passes will have to do, and they are looking really good so far.
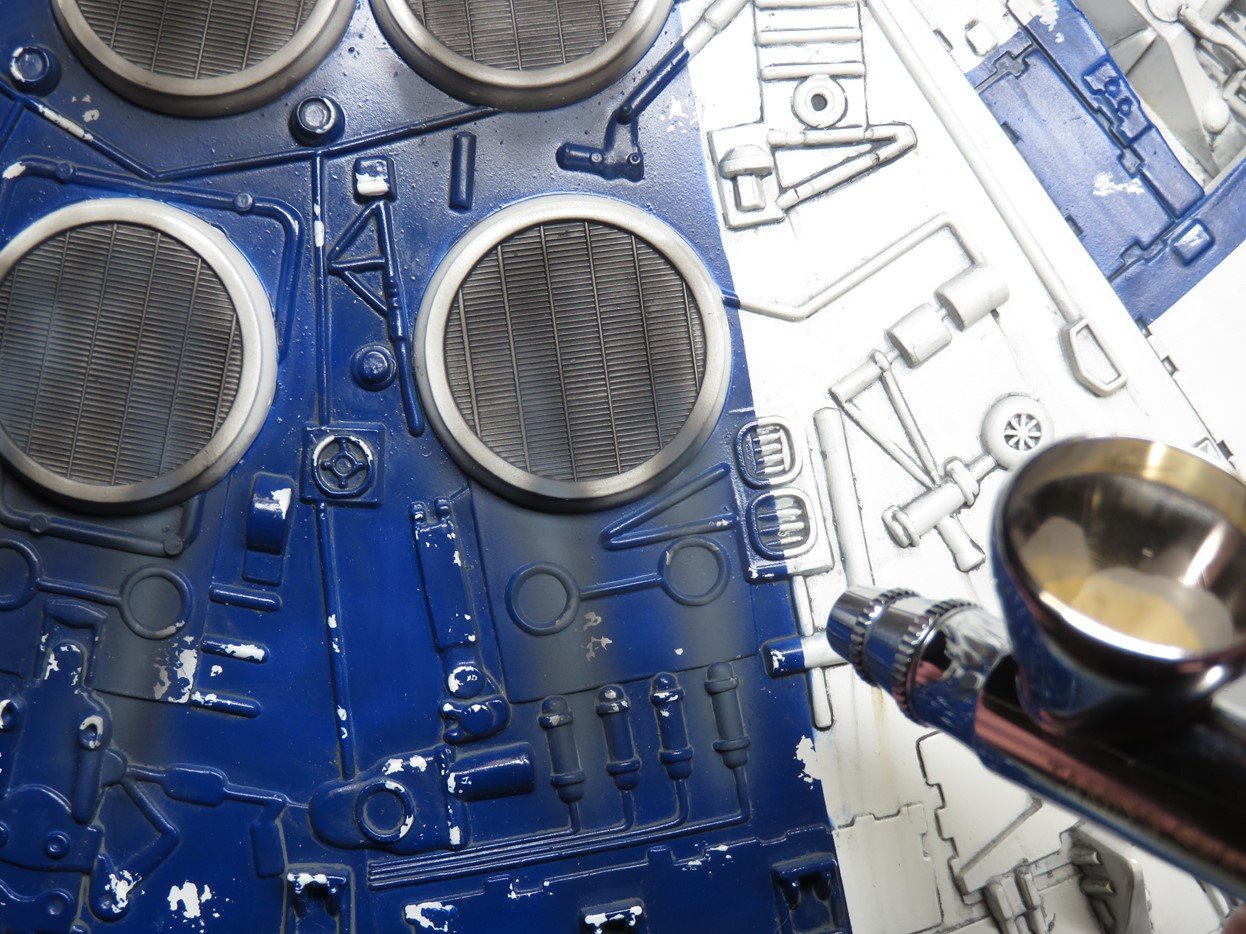
To brighten up the colors a bit and have the streaks be more visible, I added some Tamiya Panel Line Accent Color -Grey- to my airbrush. I positioned my airbrush really close and I sprayed the Grey paint into the middle of the Black as best as I could.
The grey paint layered onto the black will help the streaks to stand out a bit more and add more variety in the colors.
You can try adding other colors to your own models. I chose only a few colors for this particular project, but other times I like to add something like Dark Brown and Light Grey and layer these together.
And best of all, if you aren’t satisfied with the effect you can take some Enamel Thinner and rub it all off and try again.
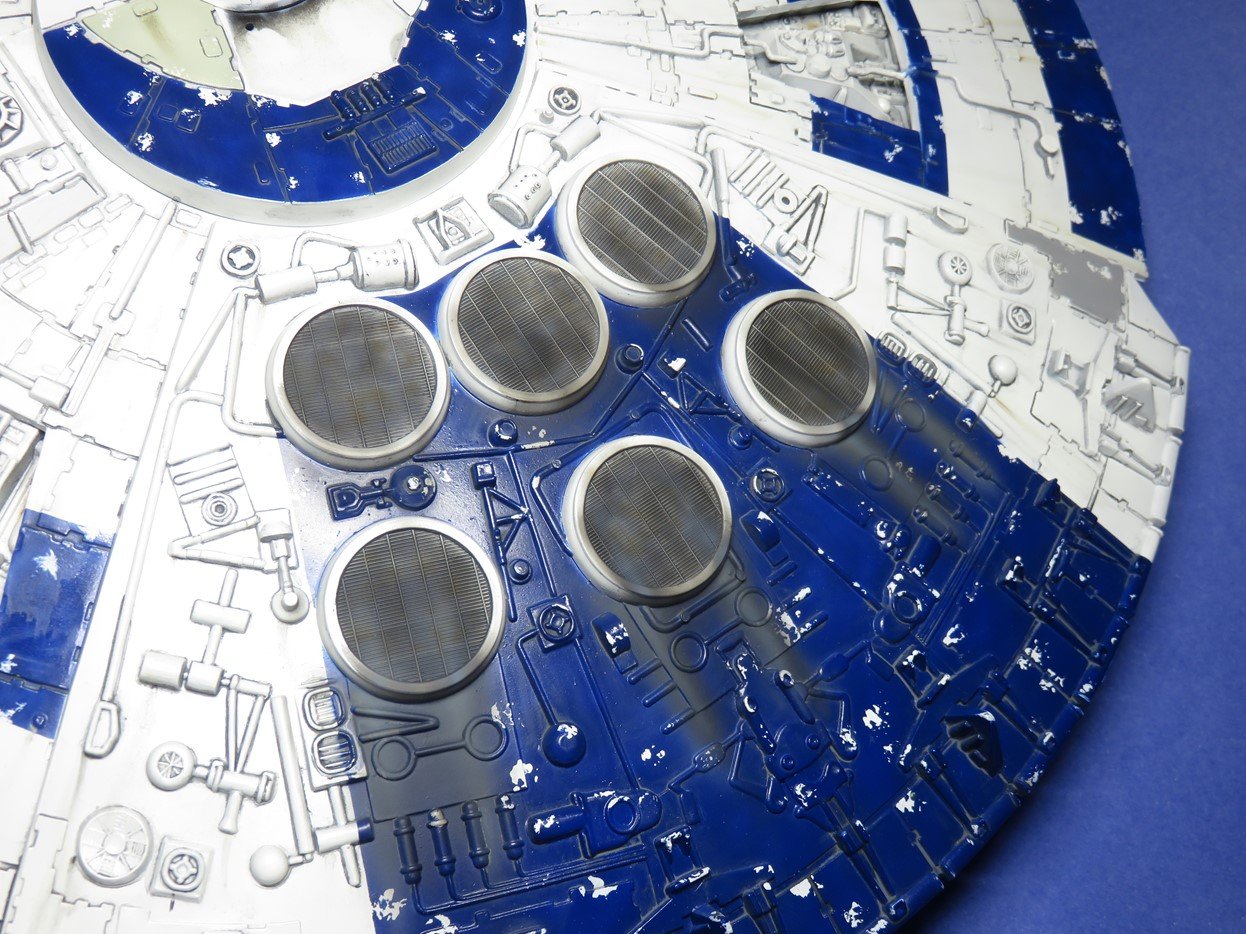
When I stood back and looked at the streaks I decided it still needed one more color. I added a few drops of Tamiya Panel Line Accent Color -Brown- into my airbrush, and I sprayed a few small splotches onto the vents.
They are a bit difficult to see in this picture, but the few drops of “space rust” really brought everything together with this side of the model.
With all of the weathering now completed, I added a flat coat to seal and protect the paints. My go-to flat coat is Mr. Color 182 Flat Clear. I’ve had a lot of great success with this paint, since it’s a Lacquer it dries to a hard finish and it dries pretty fast so I can continue with my work.
It does need to be stirred up very thoroughly, and I mix it with Mr Color Leveling Thinner T108 about 50-50. After I sprayed the model with the Flat Clear I left the Stellar Envoy alone to dry for about 12 hours, just to make sure the Flat Clear had hardened all the way through.
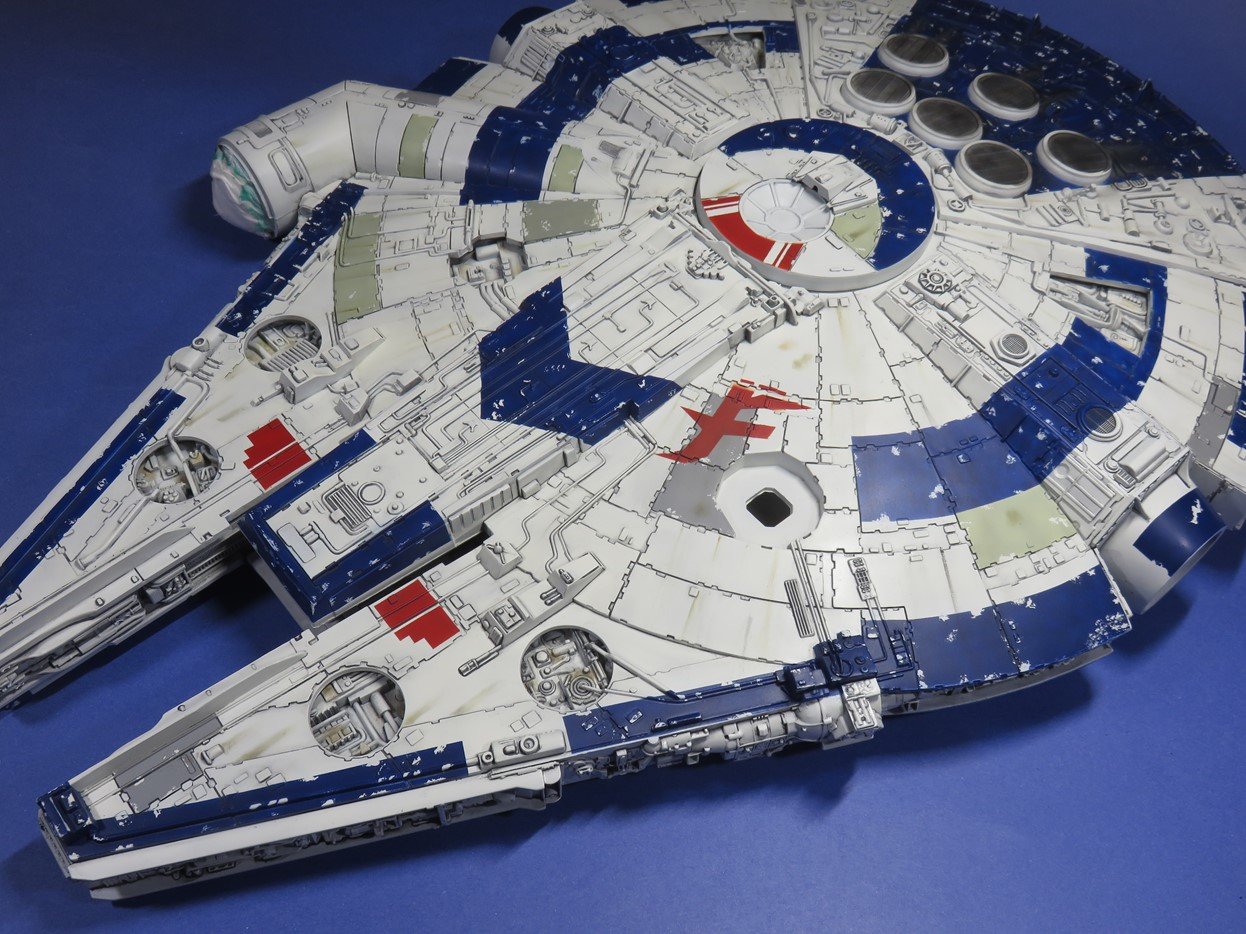
I think that I’ve added enough weathering to the Envoy, at least to a point I’m happy with. Like I mentioned at the beginning of this post, I usually worry that I’ve gone too far and it will end up looking like a mess. But here the Stellar envoy looks like a well-used spaceship.
I always find it amazing how adding a Flat Coat can really change the model. After all the time with it being glossy, it will take me a bit to get used to it seeing all of the colors uniformed together.
As I step back from this project and look at what else there is to do, I’m surprised that I actually don’t have a lot more left to work on until this model is completed. That is very exciting, and in the next post, I’m going to be sculpting the figures for the cockpit, until next time.
To be continued…
Jared Demes is a modeler from southern Alberta. He has been building models since he was 4 years old when his Dad first introduced him to the hobby. He has written for several magazines including, Fine Scale Modeler, Scale Aircraft Modeling, Phoenix Scale Models, and others. He has an interest in all modeling subjects, with a focus on WWII Japanese aircraft and Science Fiction.
Jared has won several IPMS awards for his modeling, and currently operates his YouTube channel rebelsatcloudnine, where he showcases model builds and product demonstrations.