MPC A New Hope Hans Solo Edition
This is the ninth part of the MPC Star Wars A New Hope Hans Solo Millenium Falcon 1/72 Scale MPC953 build and review.
I’ve received a lot of disgruntled comments over the past few years about adding panel washes to models. Many claim that real aircraft don’t have their panel lines painted in and therefore the model shouldn’t either.
I think this is a rather juvenile comment to make. No, panel lines aren’t painted in, but they do catch a lot of dirt and debris. On a model, however, it’s a great way to accent details and help these details stand out on a smaller scale.
As for accuracy, well, we’re building a fictional spaceship, this doesn’t have to be accurate. But it does need to be a lot of fun and that’s exactly what I intend to do, so let’s start weathering!
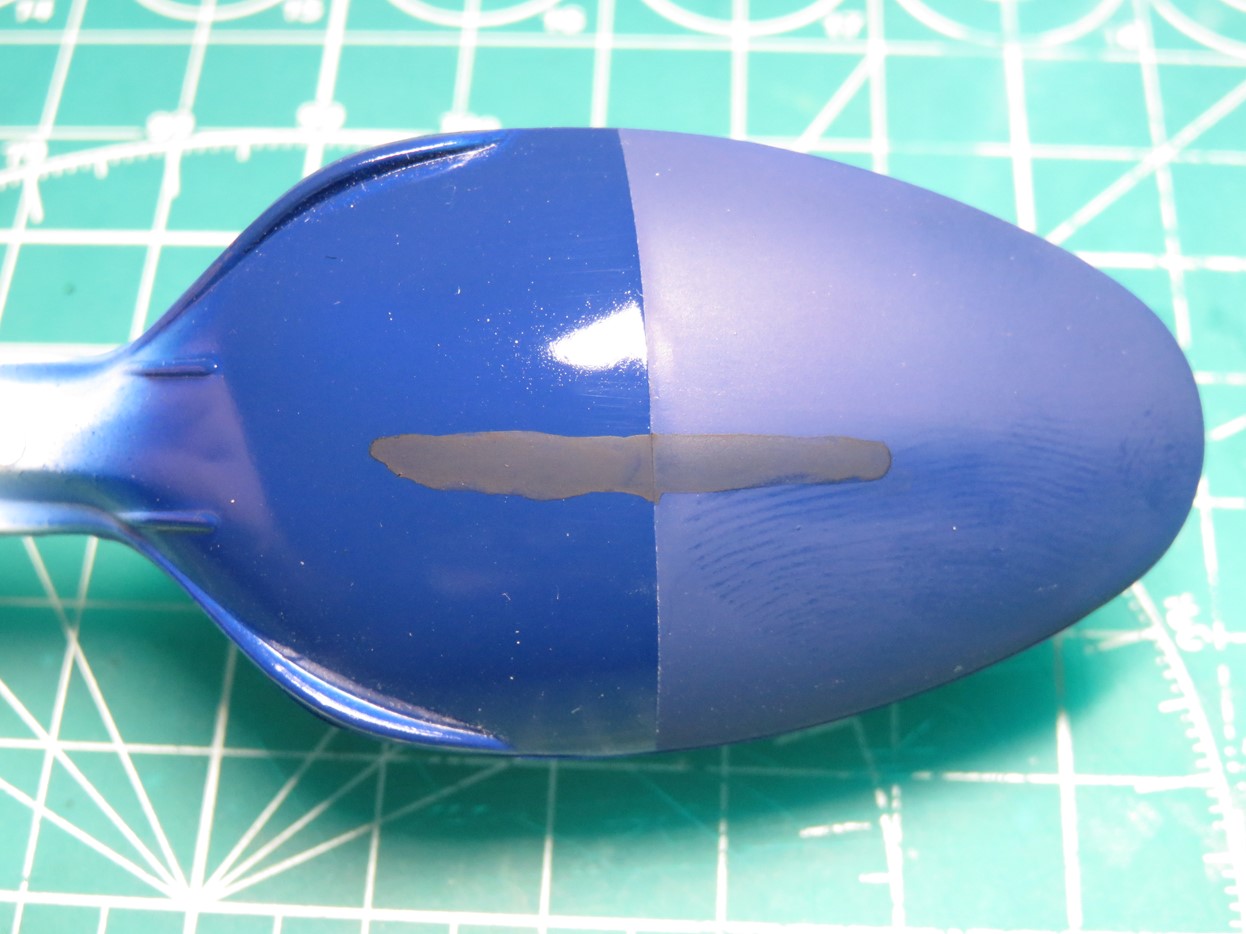
As I mentioned in Part 8, I would be glossing over the newly painted areas. This would help the flow of the enamel paint as well as help me to remove the excess paint. I painted Tamiya XF-8 Flat Blue onto this spoon and painted half of it with Mr Color 46 Clear Gloss.
I’ve taken some Tamiya Panel Line Accent Color Black 87131 and painted a line across both sides.
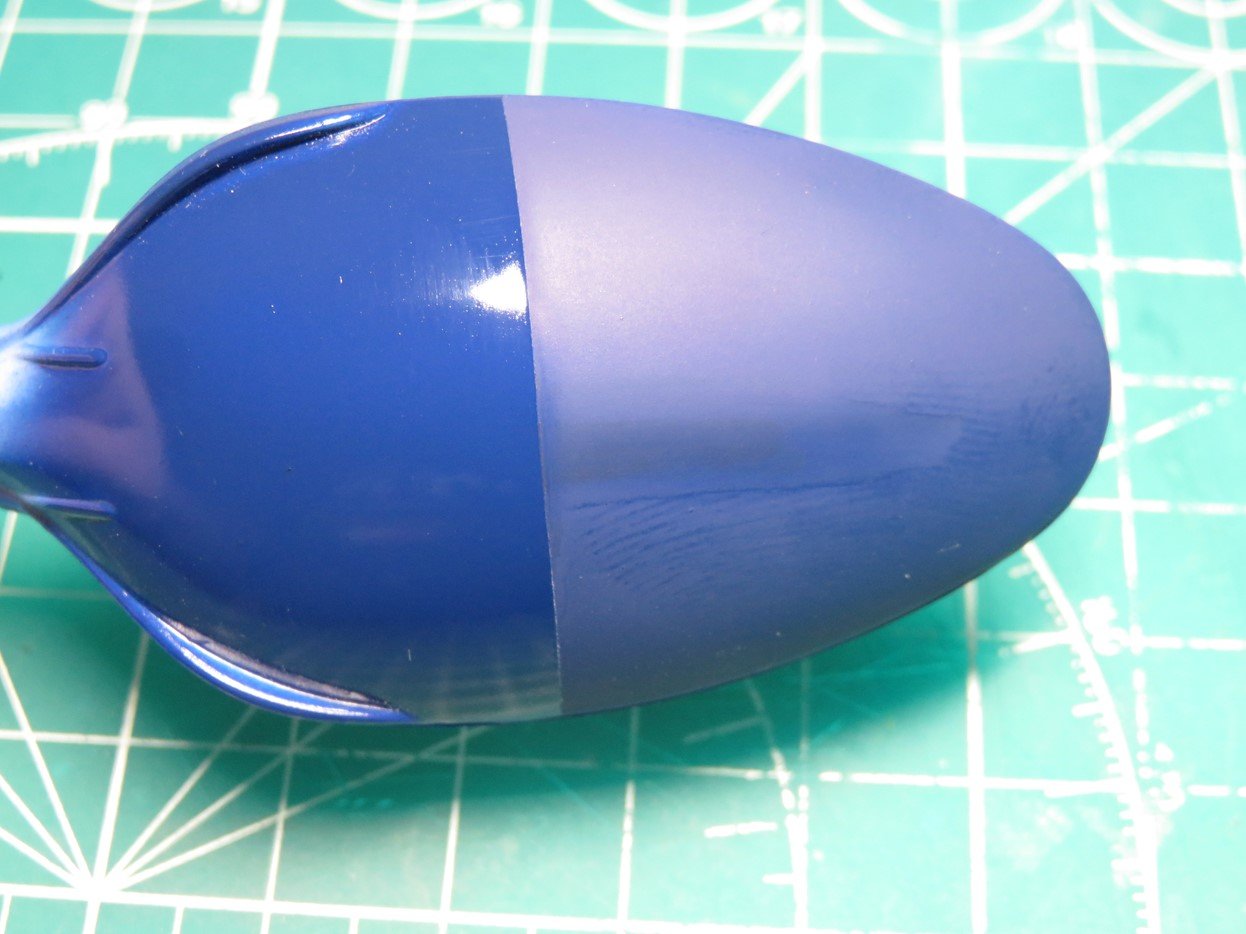
I removed the wash with Tamiya Enamel Thinner. Because the Mr Color Gloss was a smoother paint I was able to easily remove all of the wash from the Left side. On the Right side without the Gloss, you can see a faint black stain that has been left over from the wash.
Also when I was removing the wash from the right side I began rubbing off some of the blue paint because it wasn’t protected. So you don’t need to apply a gloss coat, but it does help a lot.
For a gloss coat, I like to use Mr Color 46 Clear. It’s a Lacquer paint so it dries really hard, and it won’t leave fingerprints. One of the nice features of Mr. Color and Aqueous paints is that they are usually Gloss or Semi-Gloss paints, so there are times like with the Insignia White when I don’t need to add a gloss coat. Mr Color usually prints on the front left side of the label what type of gloss the paint is.
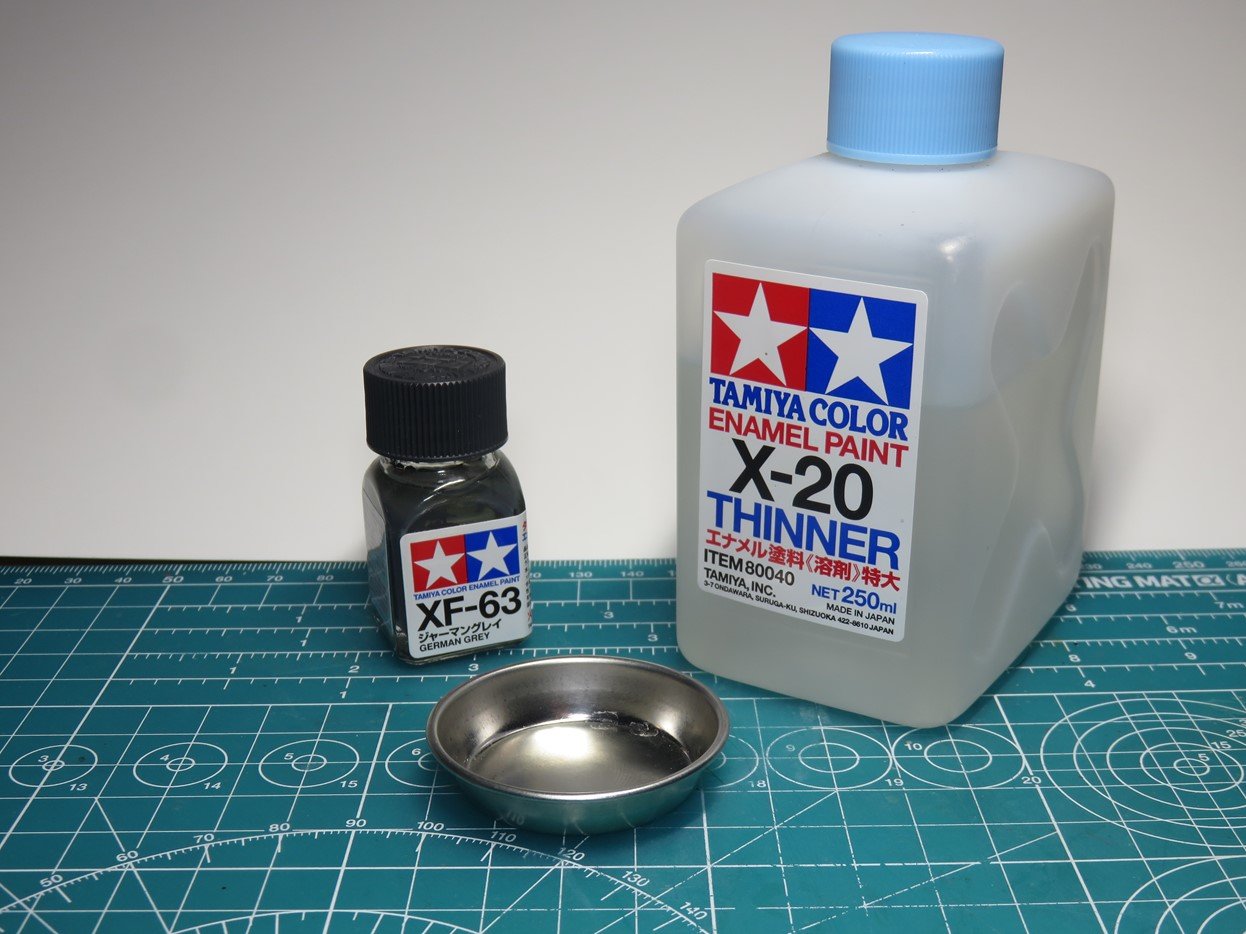
There are a lot of enamel washes on the market these days. I’ve invested in quite a few of the Tamiya Panel Line Accent colors, and AK Interactive has a wide range as well. But what do you do if no one makes the exact wash you’re looking for? Well, I’m going to make my own, and it’s easy to do.
Over the past few years, Tamiya Enamels have slowly become more common in North America. When I was a kid I used to paint all of my models with Testors, and Humbrol paints. And I wish that Tamiya Enamels had been around as these paints are incredibly nice to use.
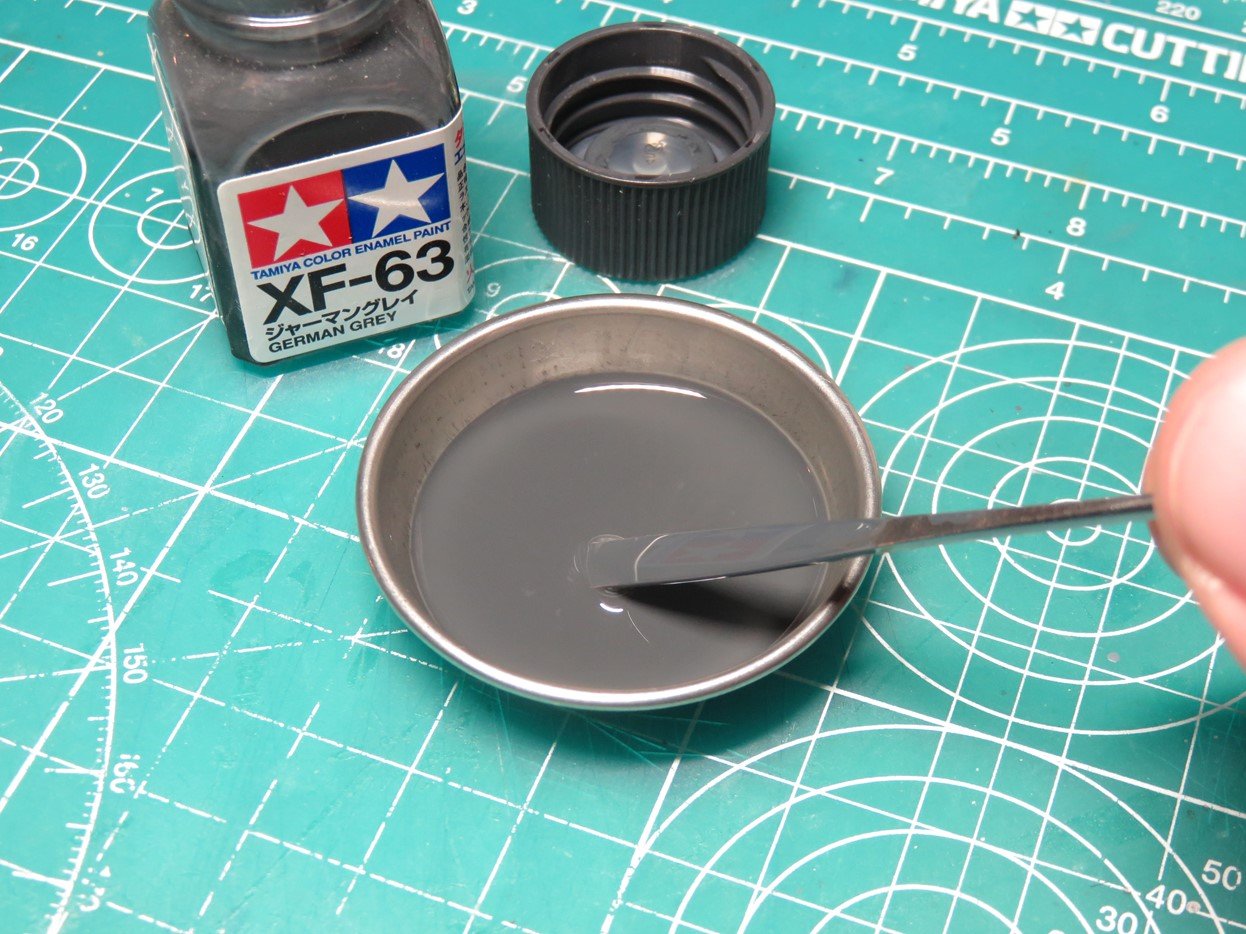
I added a few drops of XF-63 German Grey into my mixing pot. And then I thinned it down with Tamiya X-20 Enamel Thinner. I don’t have an exact ratio for this mixture, but it needs to be thinned down enough that it can easily flow over the details.
If it’s too thin and the paint comes out grainy, add a drop or two of XF-63 and stir up the wash again. Likewise is the wash is more of a sludge, add some more Enamel Thinner to the mix.
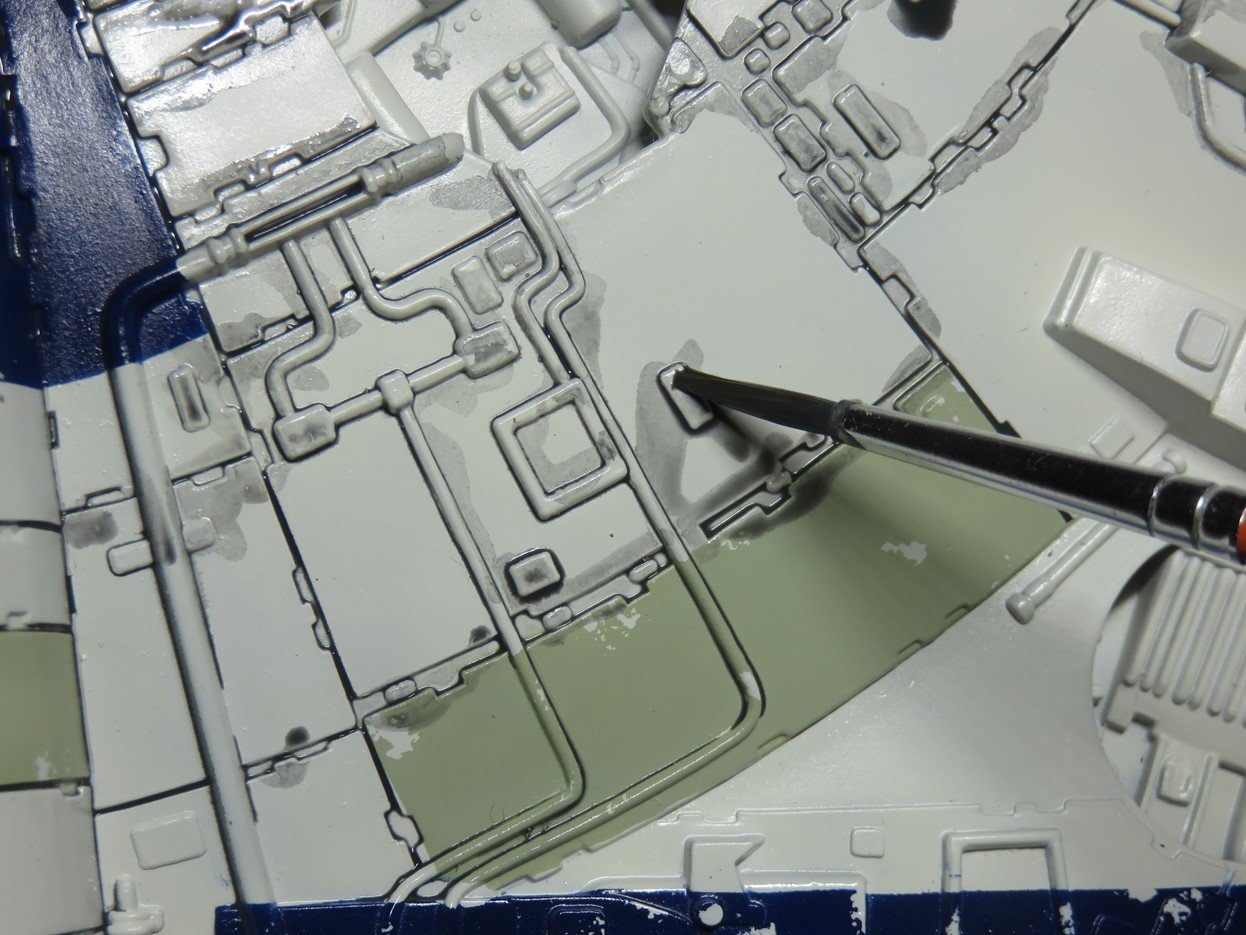
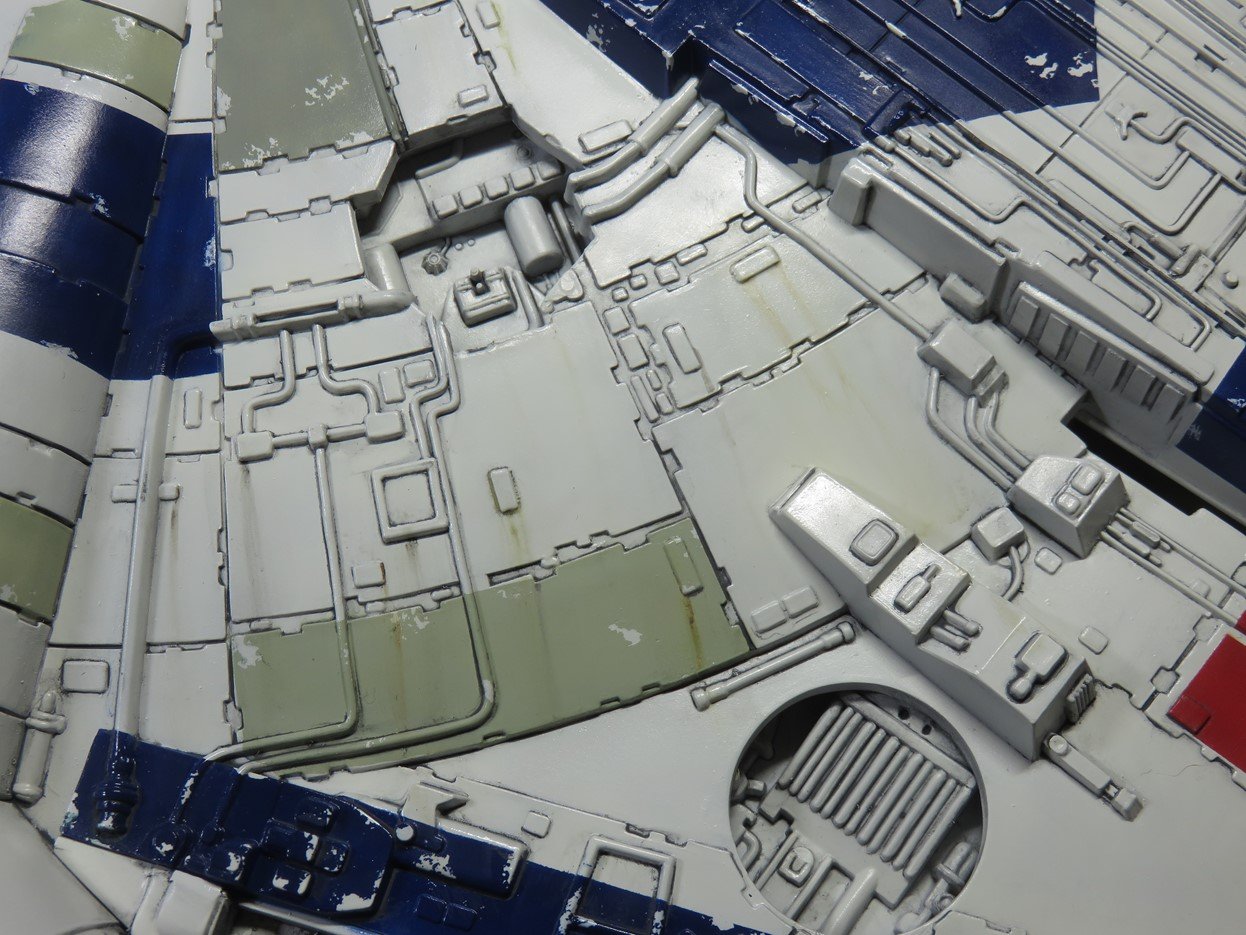
When the wash is properly mixed it should flow easily around the details. Here you can see the German Grey being painted on, and how the wash will highlight the raised parts like these squares and pipes. As well it falls into all of the recessed panels to show off these details.
This is one of my favourite parts of modeling as I really love watching the paint flow along all of the parts. What makes it even more fun compared to subjects like aircraft, cars, or tanks, is that sci-fi subjects usually have a lot of greeblie details that I can paint over.
I painted a very liberal amount of the German Grey into the recessed exposed sections as I wanted these areas to be a lot dirtier than the rest of the ship.
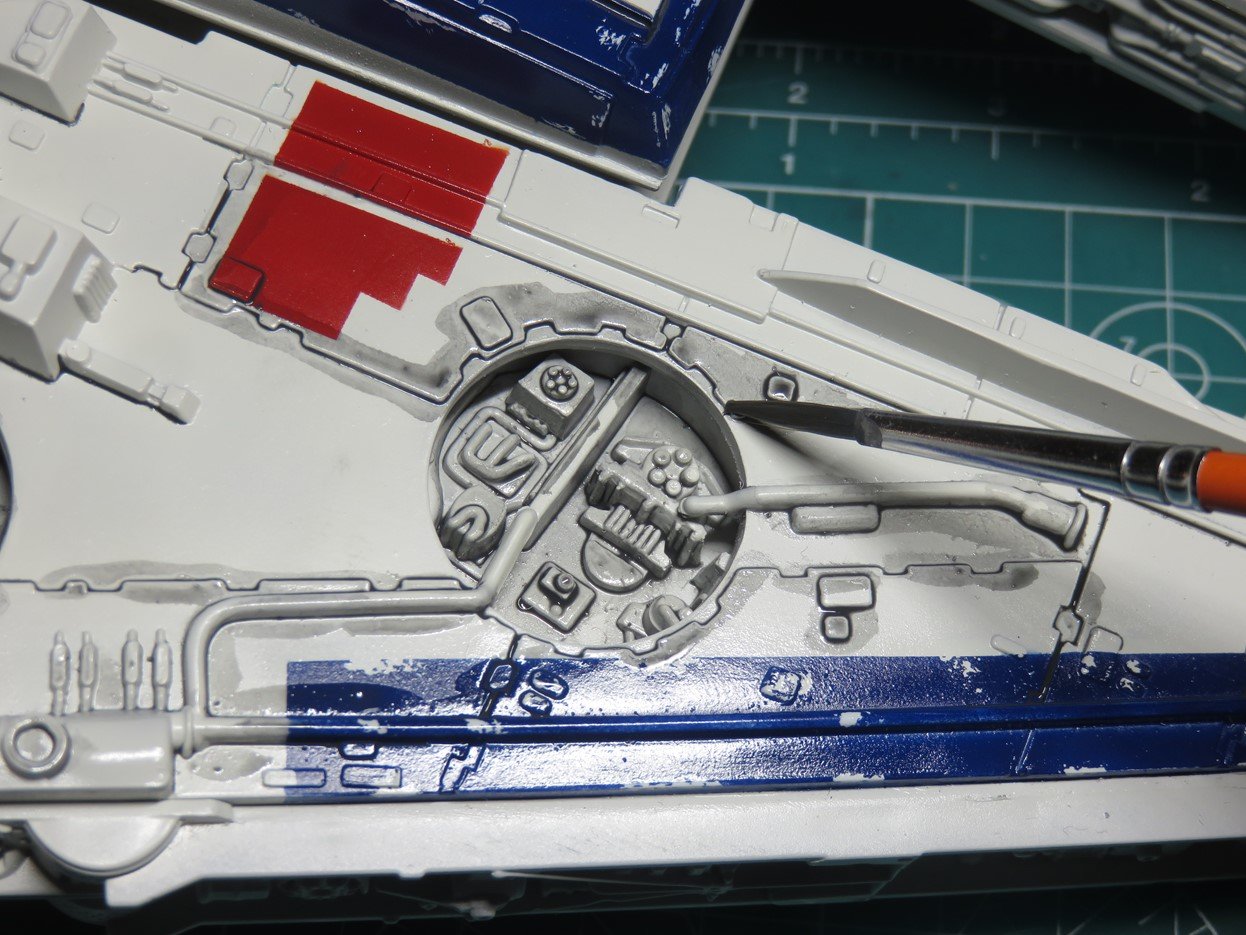
I’ve been looking forward to this moment ever since I started this project, and that was adding the wash over these aft vent details. This was really satisfying to see all of these tiny lines filled in with paint. I’ll be painting some more details to this section later, but for now, this was a lot of fun.
What a mess! I’ve finished adding the wash to the upper side, and now I’m going to leave the paint alone to dry for about 24 hours. This will be enough time for the paint to harden and then it will be easier for me to remove the excess paint from the model.
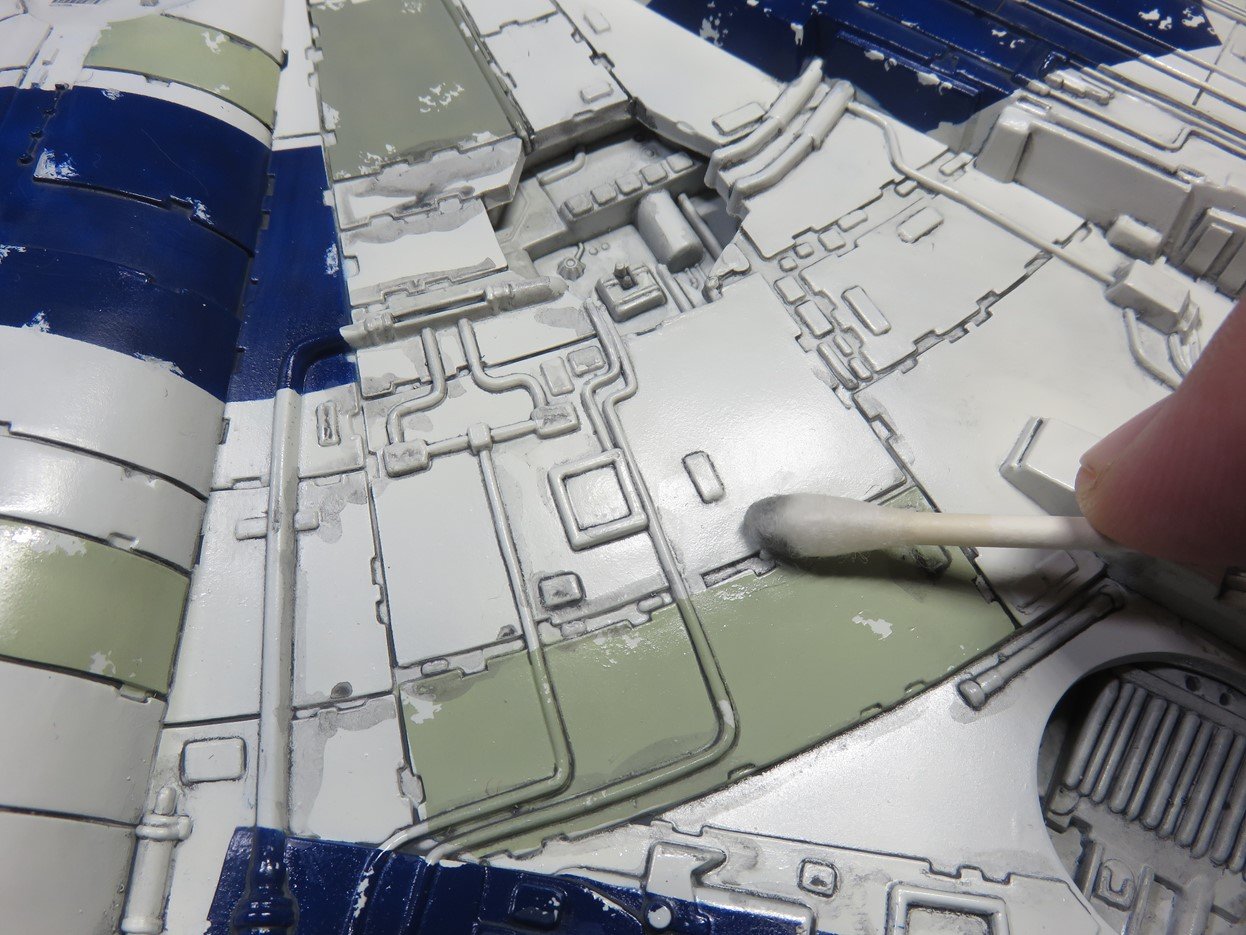
Now that 24 hours have passed I can remove the excess paint with a cotton bud that I’ve dipped into the Tamiya Enamel Thinner. It’s very easy to remove the paint, I rub it over with the damp cotton bud, and then with the dry side, I can further wipe away any lingering paint.
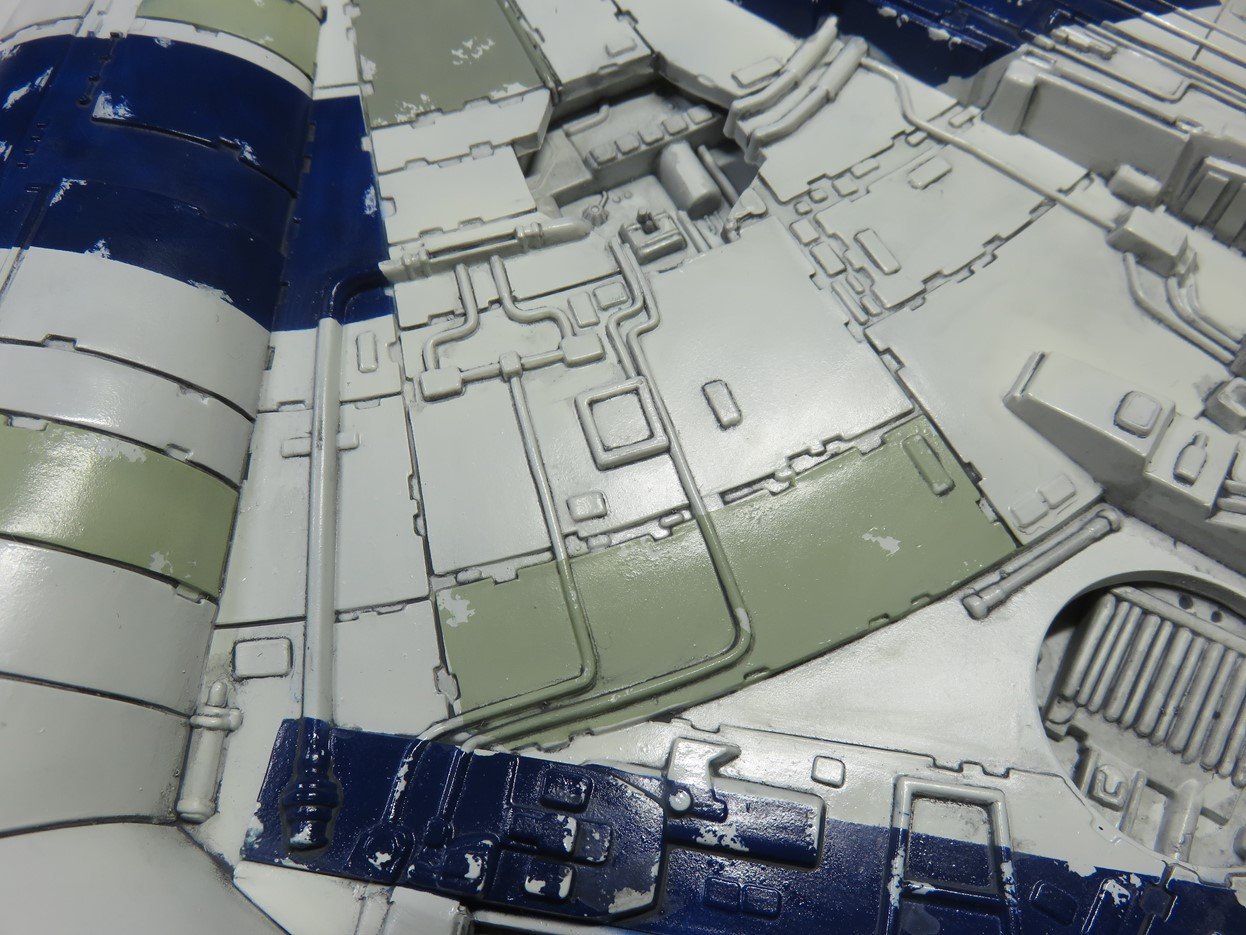
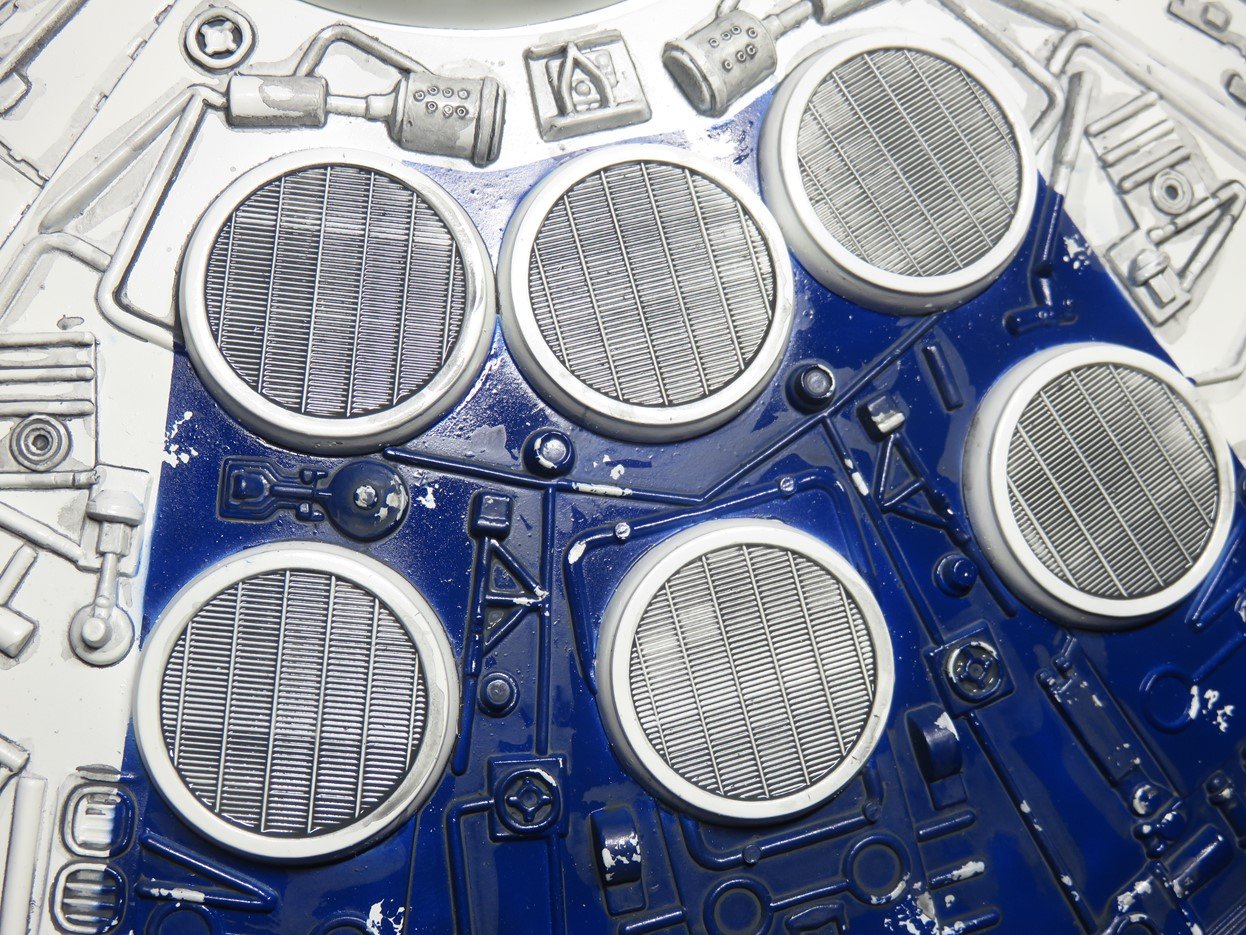
Here is the cleaned-up panel section. You can really appreciate all of the piping and other details with that thin line of paint around them. Because of the size of this model and a lot of the small details, this will take me a good while to clean up. I think on the topside alone it took me almost 2 hours to complete. But it’s time well spent as you see all of the details emerge.
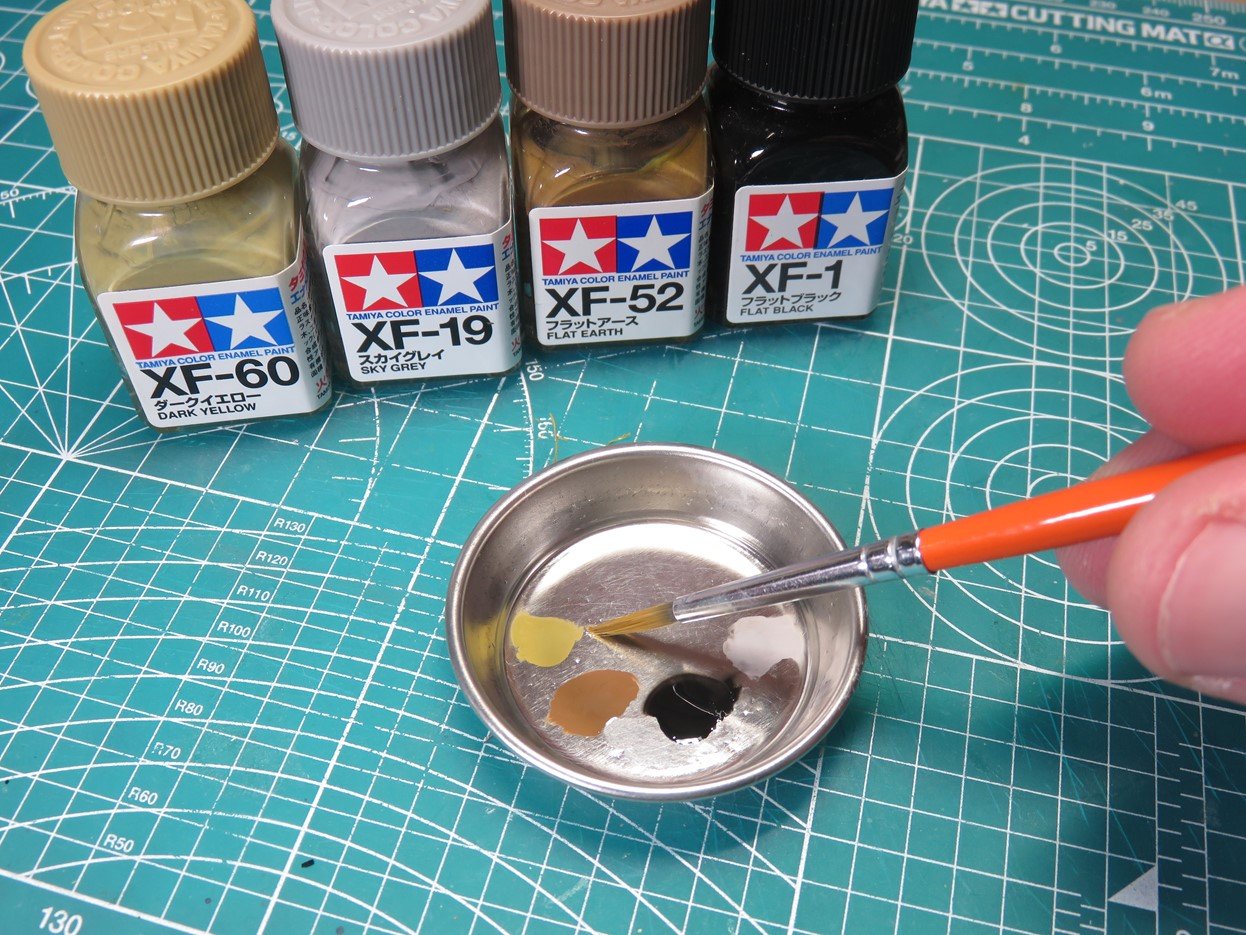
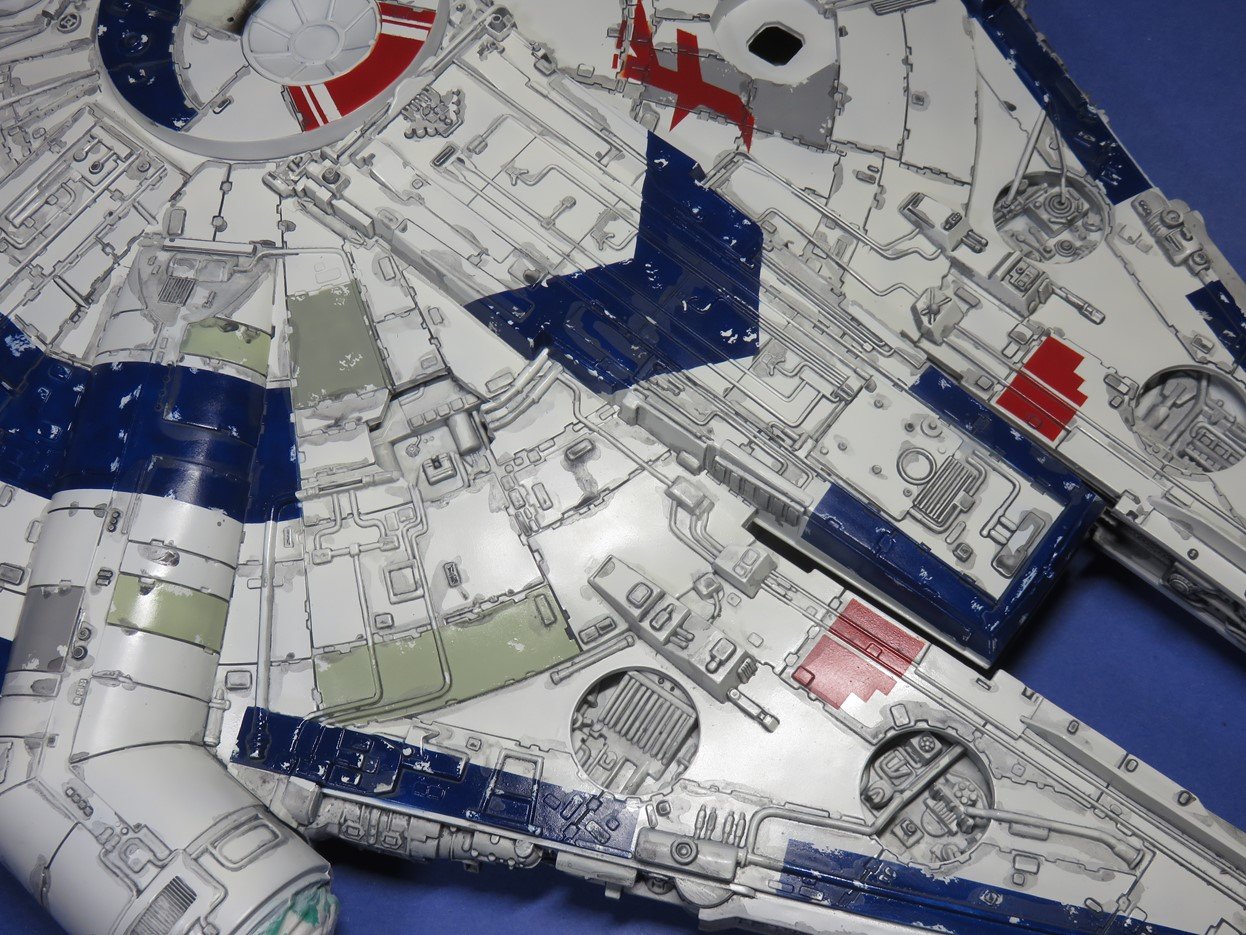
To add further streaks and grime to the model, I pulled out a few more Tamiya Enamel paints. I placed a small drop into my paint bowl and added a bit of Enamel thinner to the other side. This way I could quickly thin down the paint.
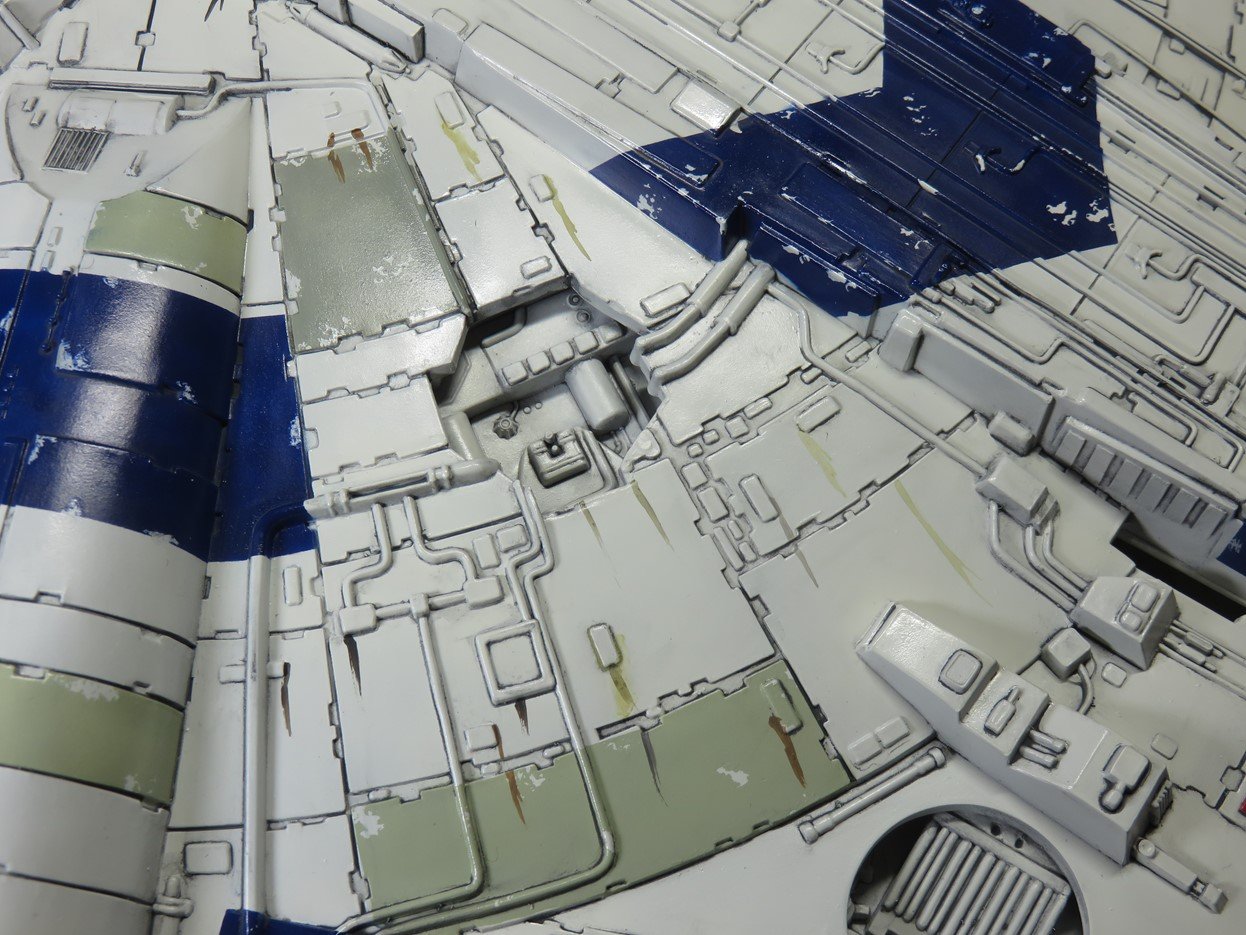
I painted these various streaks along the tops of the panels and at the base of some of the square details. Because I had slightly thinned the paints I didn’t need to wait too long for these paints to dry. I don’t know what exactly would cause all of these streaking effects to happen on a spaceship, but they are present on the studio model of the Millennium Falcon and they look good there so I added them to the Stellar Envoy as well.
Using a wide flat brush I dipped it into the Enamel Thinner just enough so that it was damp. I then slowly brushed it down the paint, pulling it and creating these streaks. It was a slow process and there were a few times when I completely removed all of the paint and had to try again, but this is the end effect and I’m pretty pleased with the results.
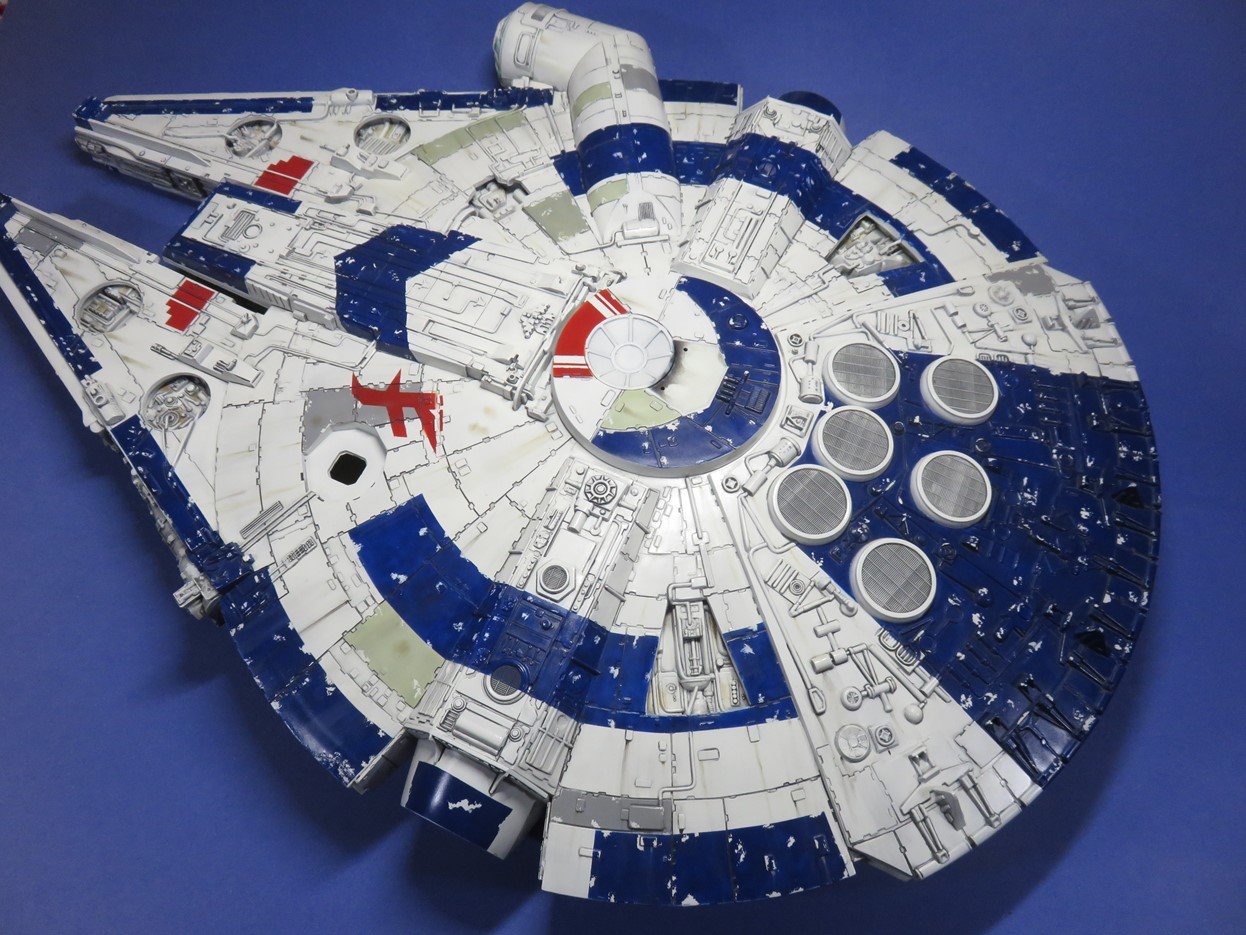
And this is where I’ll wrap things up for this week. I’m really pleased with the streaking effects that are on the hull, and I think I might wait a day or so and decide if I want to add some more. They look good, but it is easy to go overboard and I don’t want the Stellar Envoy to be as dirty as the Millennium Falcon.
I want to add some more dirt details to the model, some scuff marks as well as some smoke coming from the back of the vents.
This is one of the reasons why I have so much fun building sci-fi subjects is that you are freer to go overboard with these details, and just let your imagination loose for a while.
To be continued…
Jared Demes is a modeler from southern Alberta. He has been building models since he was 4 years old when his Dad first introduced him to the hobby. He has written for several magazines including, Fine Scale Modeler, Scale Aircraft Modeling, Phoenix Scale Models, and others. He has an interest in all modeling subjects, with a focus on WWII Japanese aircraft and Science Fiction.
Jared has won several IPMS awards for his modeling, and currently operates his YouTube channel rebelsatcloudnine, where he showcases model builds and product demonstrations.