
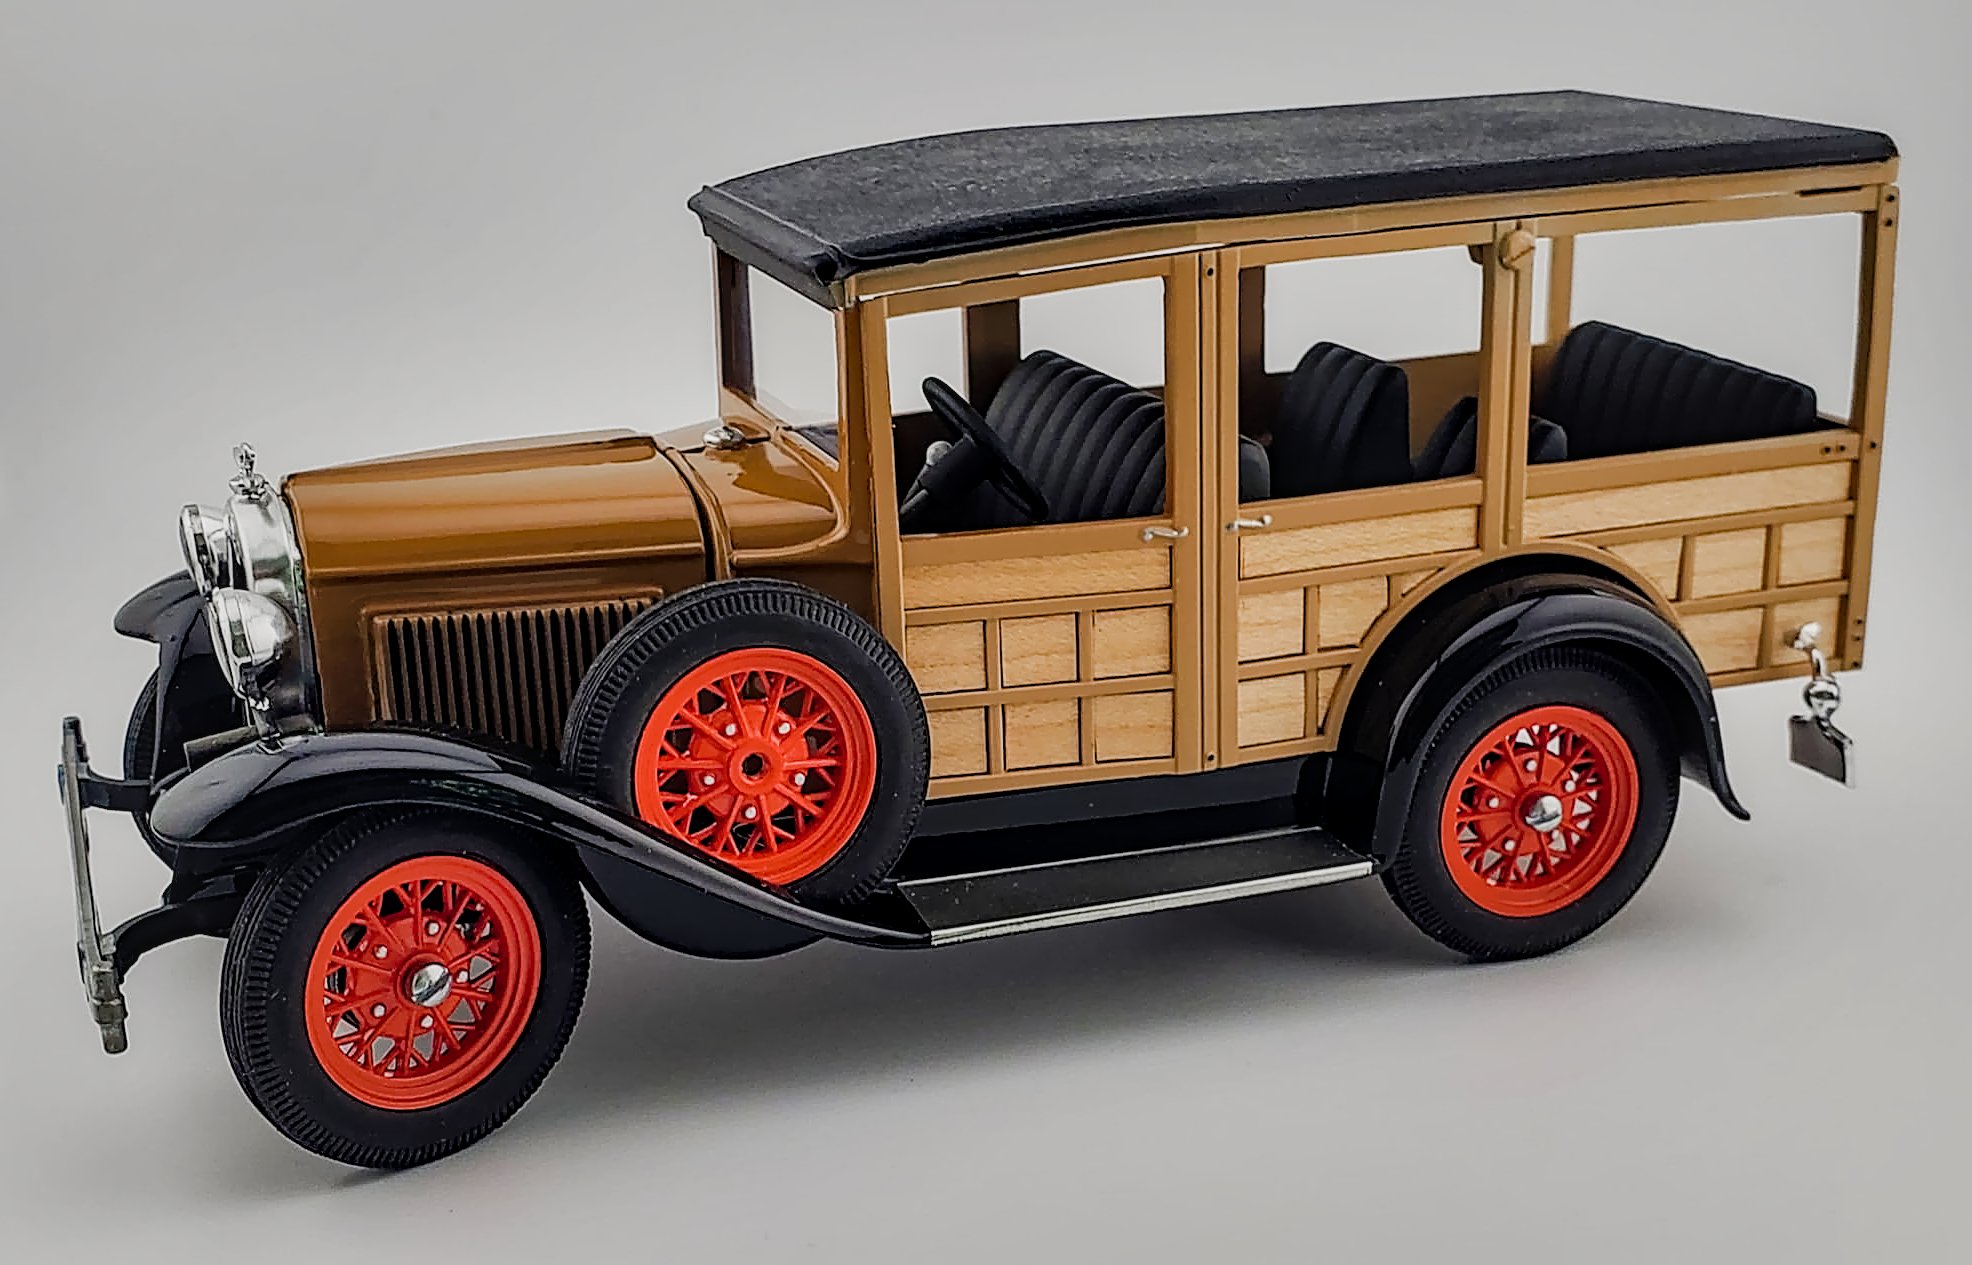
Avoid Too Heavy, Too Soon, and Too Far Mistakes—Lay Perfect Coats Every Time
Whether you’re picking up your airbrush for the first time or returning to a well-worn setup, nothing derails a project faster than runs, pinholes, or orange-peel textures. These issues—affectionately known as the “Terrible Threes” of airbrushing (Too Heavy, Too Soon, Too Far)—can spoil even the most meticulously planned paint job. They’re especially troublesome when working with automotive lacquers, enamels, or metallic aircraft finishes, where any irregularity in film thickness or texture immediately stands out under glossy, reflective surfaces. Armour modellers face similar frustrations: a thick or prematurely dried coat can obliterate fine panel lines, rivets, and crisp metal highlights. In this guide, you’ll learn how to identify each of these pitfalls, understand why they occur, and adjust your technique, paint consistency, and timing to lay down ultra-smooth, professional-grade coats. You’ll also discover how to use your airbrush’s preset handle (set-stop) to build consistent trigger control, how an airbrush MAC Valve gives you fingertip airflow regulation (rather than a fixed PSI), and why Tamiya masking-tape rails are a final piece of the puzzle. By the end, you’ll have the confidence and tools to avoid these common mistakes and achieve world-class finishes, regardless of your experience level or subject matter.

1. Too Heavy: Film Layer Is Too Thick
What It Looks Like
- Visual Clues: A glossy, almost “wet” puddle of paint that sits atop the model rather than conforming to panel lines or fine details. You’ll often see sags running down vertical surfaces, pooling in recesses, or a “plastic-coated” appearance that obscures crisp edges.
- Tactile Clues: Even after drying, the surface may remain slightly tacky or gummy if the layer was applied excessively thick.
Why It Happens
- Excessive Paint Flow/High Airflow: Opening the needle or airflow too far releases a flood of paint at once.
- Slow, Stationary Passes: Holding the airbrush over one spot for too long deposits more paint than intended.
- Insufficient Thinning: Using paint straight from the bottle (or only lightly thinned) resists fine atomization.
- Multiple Passes Without Flash-Off: Repeatedly spraying over an area before the previous layer has flashed traps solvent and builds a thick film.
Consequences
- Loss of Detail: Panel lines, rivets, and other fine features become filled or blurred.
- Runs and Sags: Thick paint can form drips, leaving tear-drop shapes or ridges.
- Extended Dry Times: More solvent requires longer drying, slowing your workflow.
- Potential Solvent Trapping: Trapped solvents can cause bubbling or lifting later in the finish.

How to Prevent or Correct
- Balance Airflow and Paint Flow: Aim for a gentle, even mist. Start with minimal airflow—open the fluid adjustment only until you see a fine, uniform spray on scrap plastic.
- Thin Paint to a Milk-Like Consistency: Dip a toothpick into your thinned paint; if the droplet retracts slowly instead of forming a point, it’s in range. Follow the paint manufacturer’s recommended thinner ratio (often 1:1 or 1:2 for many acrylics).
- Maintain Proper Distance: Keep the airbrush approximately 6–8 inches (15–20 cm) from the surface when laying base coats. For detail work, you may move slightly closer, but avoid “clouding” an area.
- Use Light, Even Passes: Think of “velvet-dusting” rather than brushing paint on. Swift, overlapping strokes build thin layers that preserve detail.
- Watch for Glossy Wetness: As soon as you see a high-gloss sheen, move on. Allow that coat to flash off (see Section 2) before reapplying. If you’ve already created a run, let it cure fully, gently sand with 2000–3000 grit, then recoat with thinner, lighter layers.

2. Too Soon: Film Layer Unable to Off-Gas Correctly
What It Looks Like
- Visual Clues: Shortly after spraying, tiny blisters, pinholes, or “fisheyes” appear in the film. These spots may be shallow dimples—or they may break open into craters once overcoated.
- Tactile Clues: The outer surface feels hard to the touch, but underneath, there’s still solvent trying to escape.
Why It Happens
- Incomplete Flash-Off Time: Recoating a layer before the previous coat has had a chance to off-gas traps solvent below.
- High Humidity / Low Temperature: Under damp or cool conditions, solvents evaporate more slowly—even a thin film may need extra time.
- Thick Initial Coat: A “Too Heavy” layer compounds curing time.
- Fast-Evaporating Thinners: Some “rapid” thinners evaporate almost immediately, requiring precise dwell times. Mixing incompatible solvents can also interfere with consistent flash-off.
Consequences
- Blistering & Pinholing: Trapped solvents form tiny bubbles that break through as pinholes.
- Lifting & Wrinkling: Subsequent coats can cause earlier layers to wrinkle or lift, since they never fully cured.
- Uneven Gloss Levels: Some areas cure faster than others, leading to patchy sheen.
- Poor Adhesion: Subsurface stresses frequently cause chipping or delamination along panel lines or edges.
How to Prevent or Correct
- Observe Flash-Off Times: After each light pass, pause until the coat transitions from glossy/wet to a dull shine, then reapply. Depending on paint and conditions, this can be 15 seconds (thin acrylics in warm, dry weather) to several minutes (thicker lacquer primers in cool, humid conditions).
- Follow Manufacturer’s Recoat Guidelines: Many paints list a “recoat window.” For example, some Model Master lacquers recommend waiting 2–3 minutes between coats; certain Tamiya acrylics may need only 30–45 seconds.
- Maintain Controlled Environment: Aim for 65–75°F (18–24 °C) and 40–60 % relative humidity. If humidity exceeds 70 %, consider a dehumidifier or a slower-evaporating thinner.
- Test on Scrap First: Spray a light coat on a spare sprue or piece of tape, wait 30–45 seconds, then recoat. If you spot pinholes, extend your flash-off.
- Correcting a Too-Soon Film: If pinholing appears after full cure (often 24 hours later), sand the area back to bare plastic or primer, reprime if needed, and start again with thinner coats and proper flash times. For isolated pinholes, some modellers fill them with a drop of Future or Micro-Mister before recoating.

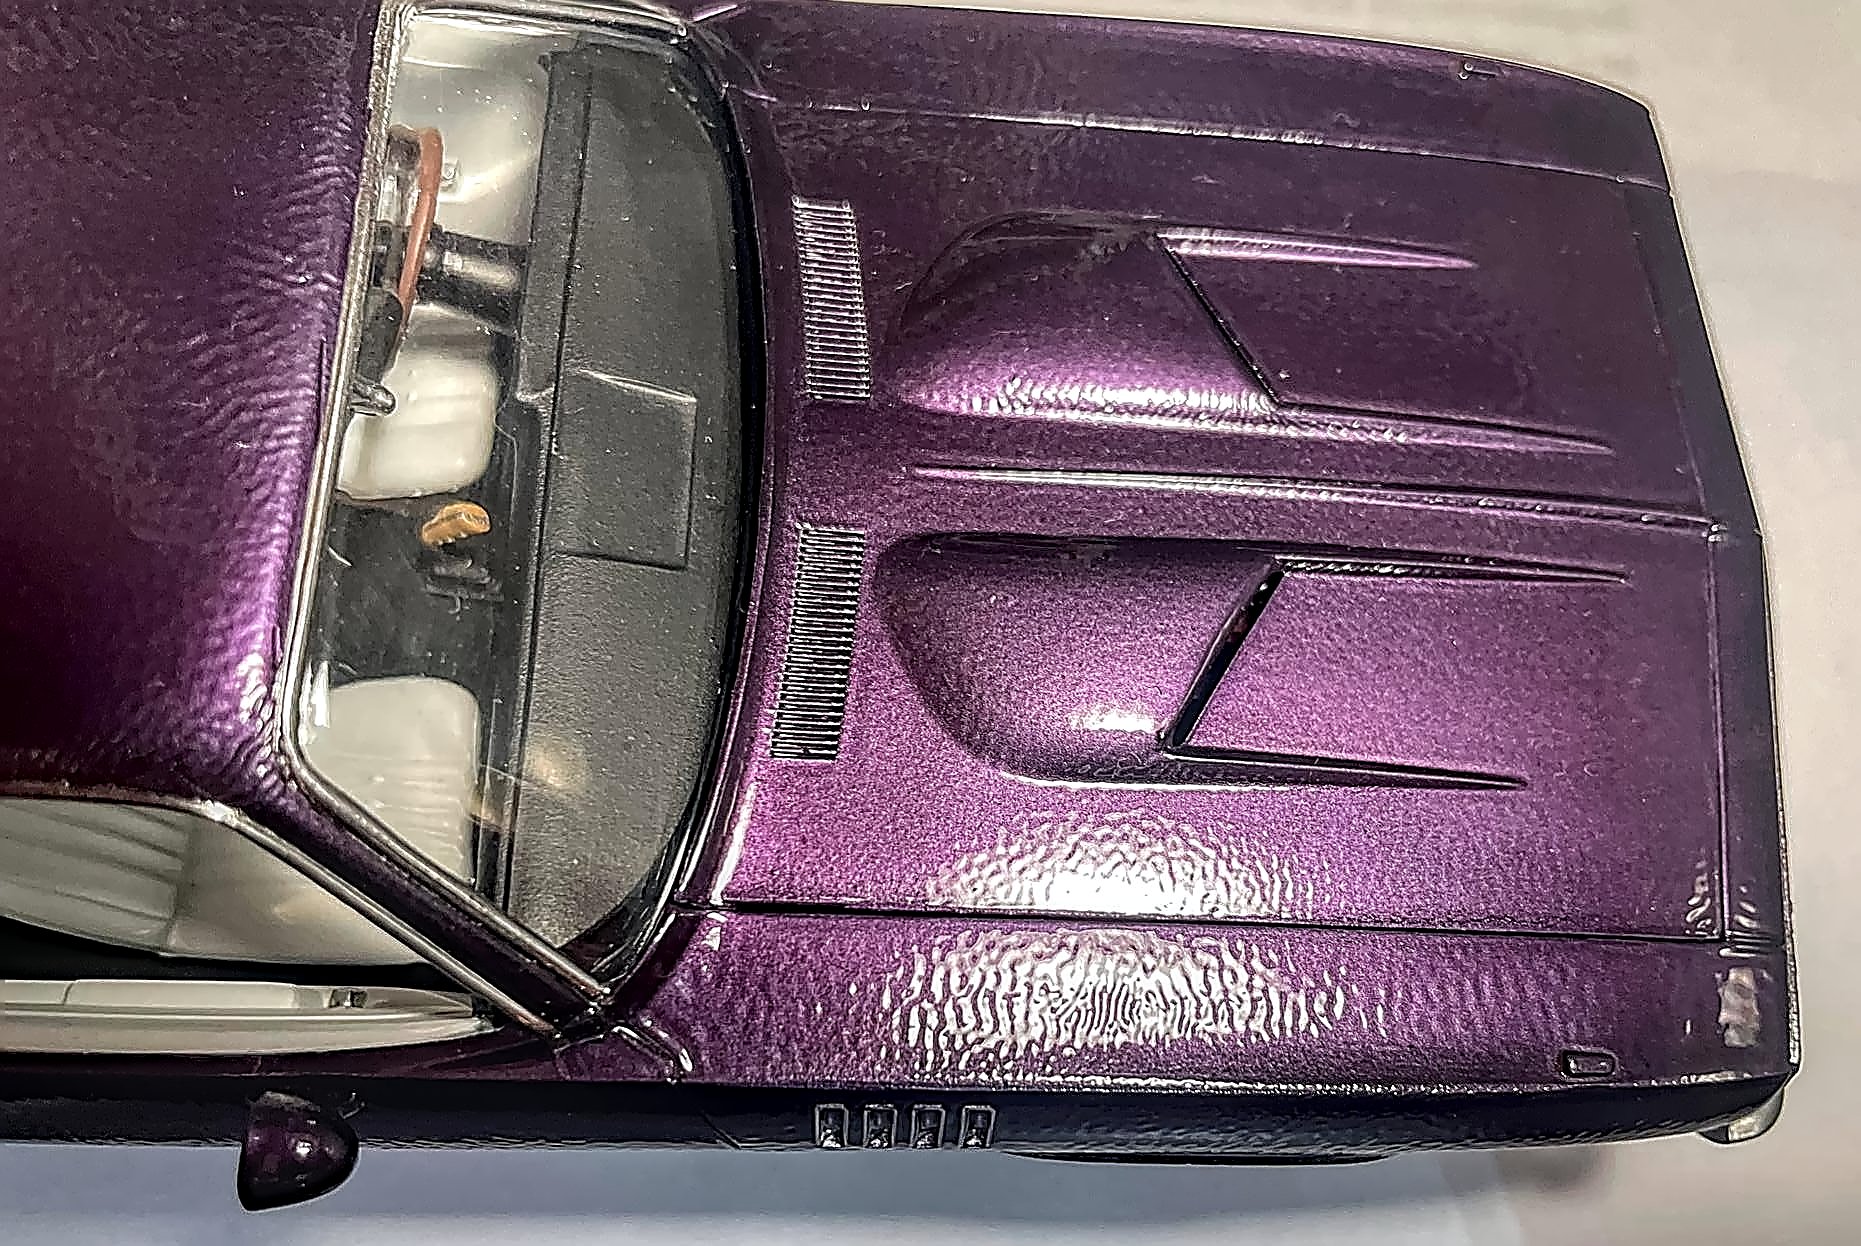
3. Too Far: Atomized Particulate Hardening Too Quickly (Pebbly Surface)
What It Looks Like
- Visual Clues: Instead of a smooth “veil” of paint, you see a fine, sand-like texture—an “orange-peel” effect. Under bright light or magnification, each droplet is slightly domed and distinct, rather than merging into a uniform film.
- Tactile Clues: The surface feels rough, as though paint adhered only at the peaks of micro-droplets.
Why It Happens
- Spraying From Too Great a Distance: Holding the airbrush 10–12 inches (25–30 cm) or more away lets droplets begin to dry before they reach the surface. By impact, they stack up as discrete beads.
- High Airflow with Low Paint Flow: Excessive airflow combined with a narrow fluid feed can “dry” droplets mid-air—fast airflow shears paint into near-dry particles before they land.
- Hot, Dry Conditions: In very warm or low-humidity environments, paint can flash off too quickly, especially with acrylics.
- Rapid-Evaporating Thinners: Some “fast” thinners vaporize almost instantly, so the paint thickens in flight.
Consequences
- Unintended Grainy Finish: Your base coats, highlights, and shadows look textured, harming visual realism and interfering with future layers.
- Reduced Gloss Control: A clear coat may gloss over peaks unevenly, exaggerating the orange-peel effect rather than smoothing it out.
- Poor Adhesion for Decals & Weathering: Washes or powders may not adhere properly to an uneven, bumpy surface.
How to Prevent or Correct
- Maintain Optimal Spraying Distance: For most miniatures and scale models, hold the brush 4–8 inches (10–20 cm) away. Use the nearer end only for ultra-thin accents; otherwise, hover around 6 inches for a smooth laydown.
- Balance Airflow and Paint Flow: Start with moderate airflow and open the fluid knob until the pattern is a fully atomized, continuous mist. If you observe speckling (dry tips), reduce airflow or add a few drops of slower-evaporating thinner until the pattern is a “wet mist” across its width.
- Adapt to Your Environment: On hot, dry days, switch to a slower-evaporating thinner or add a retarder to extend droplet wetness. In cooler, humid settings, you can speed evaporation slightly—just watch for “Too Soon” issues.
- Pre-Condition Your Paint Temperature: Some modellers briefly rest the paint cup in a warm (not hot) water bath to raise the fluid’s temperature, promoting consistent atomization without flash-drying.
- Correcting Orange-Peel: If a coat has already pebbled, let it fully cure (24–48 hours), then wet-sand with 2000–3000 grit under clean water until smooth. Remove residue, then recoat with properly thinned paint at the correct distance. For ultra-fine finishes, follow with a polishing compound after the clear coat.

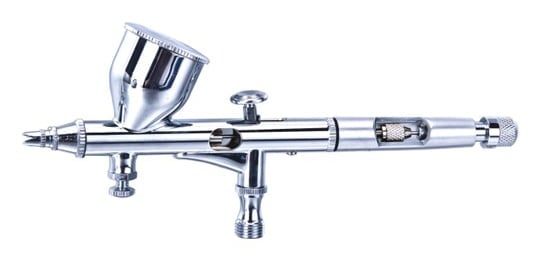
4. Why an Airbrush MAC Valve Rules
Mastering airflow at the nozzle is just as crucial as paint viscosity or spray distance. A MAC (Micro Air Control) Valve enables you to throttle real-time airflow—not “set a PSI”—giving you fingertip regulation that the compressor’s static regulator can’t provide. This precise control helps you avoid all three “Terrible Threes.”
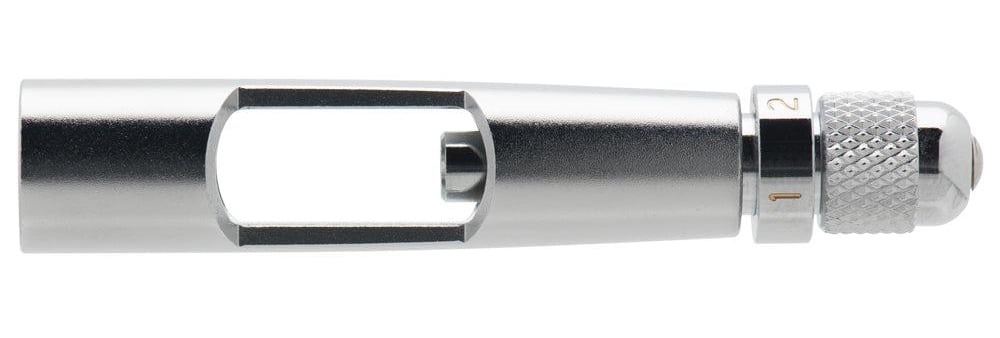
4.1 What a MAC Valve Is
- Definition: A small, inline device installed between your air source (compressor or tank) and airbrush. Its finely adjustable knob lets you restrict or allow airflow in tiny increments—without ever promising a specific PSI reading.
- Key Distinction: The compressor’s regulator sets maximum static pressure; the MAC Valve controls how many air molecules actually reach the brush. Think of it like having a faucet: the compressor turns on the water supply, and the MAC Valve determines how wide the tap opens.

4.2 How the MAC Valve Conquers the “Terrible Threes”
- Preventing “Too Heavy”
- Fine-Tuned Airflow Control: Rather than constantly guessing which compressor PSI yields a fine spray, the MAC Valve lets you dial in a gentle mist at the brush. You simply adjust until you see a steady, uniform atomization—never overwhelming the surface with paint.
- Steady Atomization Under Load: By throttling airflow right at the nozzle, you eliminate pressure spikes or dips from the compressor. The result is a consistent mist that builds thin layers rather than floods the model.
- Avoiding “Too Soon”
- Gentle, Controlled Mist: Restricting airflow sufficiently creates a slower-moving mist that lands more gently, giving solvents extra milliseconds to evaporate before fresh paint arrives. The outcome: fewer pinholes or fish-eyes from trapped solvent.
- Soft Initial Layers: Instead of blasting a thick film on your first pass, you can “tease” out a very delicate, slow-drying mist that forms a proper bond without prematurely sealing in solvent.
- Mitigating “Too Far”
- Reduced Mid-Air Flash: High airflow can cause droplets to flash-dry mid-flight, landing as partially hardened particles—a bumpy, orange-peel texture. Throttling back airflow slows solvent evaporation just enough so droplets remain wet until they hit the surface and fuse into a smooth film.
- Instant Adaptation to Conditions: On a hot, arid day, paint can begin losing solvent the instant it leaves the nozzle. With a MAC Valve, you reduce airflow at the brush, without walking back to the compressor, ensuring the pattern stays a fine mist rather than a dusty spray.

4.3 Practical Tips for Using a MAC Valve
- Begin with Airflow Closed: With the MAC Valve fully closed, pull the trigger—no air flows. Then crack it open until you hear a gentle, consistent hiss. Only after this crack do you introduce paint. This approach reveals the lowest airflow needed to atomize your specific paint/thinner combination.
- Mark Your Sweet Spot: Once you find the ideal MAC Valve setting for a given paint mix, place a tiny piece of colored tape or a marker dot beside the knob. Next time you swap paints, you can return instantly to that reference point—no guesswork.
- Pair with a Moisture Trap: Install a small filter upstream of the MAC Valve to catch oil, dust, or water droplets before they reach the valve. In humid environments, empty and clean the trap weekly to keep adjustments smooth.
- Balance Paint Flow & Airflow: Even with a MAC Valve, avoid forcing heavy paint flow at very low airflow. Thin properly first, then let the MAC Valve shape the mist. A narrow fluid setting combined with carefully dialled airflow yields the finest atomization.
4.4 ProTip: Slow Air — Fast Paint
- Counterintuitive Insight: If you’re used to “more air equals better atomization,” a MAC Valve can feel backward. In reality, throttling airflow just enough keeps droplets liquid longer. Think of it as slow air, fast paint—paint needs to land wet, not dry.
- How This Helps: Restricted airflow forms a soft, consistent mist. Droplets stay wet until they reach the surface, merging into an ultra-thin film that combats each of the Terrible Threes:
- Slow Air: Prevents dumping too much paint (Too Heavy).
- Gentle Mist: Buys extra milliseconds for solvent off-gassing (Too Soon).
- Eliminated Dry Mid-Air: Prevents orange-peel texture (Too Far).
4.5 ProTip: Set-Stop & Trigger Control for Consistent Coats
- Build Finger Muscle Memory: The secret to replicating thin, even swaths is developing finely tuned finger muscles. Practice pulling the trigger back to the same point each stroke—your finger will “remember” the ideal volume over time.
- Use Your Airbrush’s Preset Handle (Set-Stop): Most dual-action airbrushes include a “set stop” on the trigger handle. This mechanical limit locks the trigger at your predefined maximum travel, instantly delivering the same air-and-paint ratio every pass.
- Tackling the Terrible Threes:
- Too Heavy: A trigger-stop prevents accidentally opening the needle more on one pass, avoiding thick, detail-obliterating layers.
- Too Soon: Knowing exactly how much paint has landed each stroke helps you judge flash-off accurately—no guesswork.
- Too Far: Paired with a MAC Valve’s throttled airflow, consistent trigger pressure ensures a uniform mist, reducing mid-air drying and orange-peel.

5. Moving from Theory to Practice: Tamiya Masking-Tape Rails
Even when you’ve mastered airflow, trigger control, and the “Terrible Threes,” the final key to flawless results is repeatability, edge to edge. That’s where Tamiya masking-tape rails excel. These ultra-thin tapes provide razor-sharp guidelines that:
- Maintain a consistent nozzle-to-surface distance.
- Produce crisp masking edges for two-tone or complex camouflage patterns.
- Limit overspray, ensuring each pass stays under 80 µm and preserves every panel line, rivet, and fine detail.
By combining precise airflow (via a MAC Valve), consistent trigger travel (via set-stop), and repeatable masking (via Tamiya tape rails), you create a rock-solid workflow that transforms thin, fragile layers into durable, world-class finishes—on any subject, from automotive lacquers to metallic aircraft and armor kits.
Quick Visual Checklist
| Issue | Symptom on Model | Likely Cause | Prevention Step |
|---|---|---|---|
| Too Heavy | Runs, sags, obscured detail; glossy puddles | Excess paint flow or slow passes | Thin paint, use light passes, throttle airflow at the airbrush, use the preset |
| Too Soon | Pinholes, blisters, fisheyes; uneven gloss | Recoating before flash-off; humidity | Observe flash-off, maintain consistent trigger strokes, and control the environment |
| Too Far | Pebbly, orange-peel texture; rough finish | Excess airflow or fast-evaporating thinner | Shorten distance, throttle airflow with the MAC Valve, adjust thinner, refine trigger control |
By identifying exactly what “Too Heavy,” “Too Soon,” and “Too Far” look like and why they happen, you can diagnose problems on the fly and keep your work smooth, even, and rich in crisp detail. Pair finely honed trigger muscle memory (and set-stop) with a MAC Valve’s precise airflow control (not a fixed PSI), and lock in repeatable edge distances with Tamiya masking-tape rails to guarantee every coat stays under 80 µm. With these techniques and tools in your arsenal, the “Terrible Threes” fade into memory, and your finishes—whether on cars, aircraft, or armour—will be sharper, cleaner, and more professional than ever before.

James (Doc) Wooldridge
James is a dedicated scale modeller, researcher, author, and content creator with a passion for precision and historical accuracy. Renowned for his super-detailing techniques and authentic colour schemes, he’s been featured on Scalemates and in Google Featured Snippets.
An active contributor to a major scale modelling Facebook community and producer of video tutorials, James combines clear, encouraging instruction with professional-grade photography to inspire modellers at every level.
Guided by a philosophy of clarity, encouragement, and continuous learning, he empowers hobbyists to build both skill and confidence.
As a founding executive of KSM–IPMS and Kawartha Scale Modellers, James continues to lead and innovate within the hobby.💡📏 📐📱🎬 📷 🎥