

Measured to Perfection: How Drop‑Counting Transforms Your Thinner‑to‑Paint Mixing
Skill Level: For scale modellers who want better and consistent results.
Every scale‑modeller knows the frustration of an unpredictable airbrush session: heavy blobs here, wispy overspray there, unpredictable drying times turning a simple basecoat into a headache. What if you could remove the guesswork entirely and replace it with a proven, laboratory‑style protocol? By counting each drop of thinner and every drop of paint, you gain an unprecedented level of control—transforming every project from a roll of the dice into a reproducible triumph. This isn’t just about mixing; it’s about unlocking the full potential of your paints, your tools, and your own craftsmanship from the very first atomized mist to the final flawless finish.
In the competitive world of scale modelling, true craftsmanship hinges not only on your brush or airbrush skills, but also on how precisely you prepare your materials. A simple yet powerful technique—drop‑counting your thinner and paint—brings laboratory‑grade accuracy straight to your workbench. Below, we’ll explore why this method matters, how to record and reproduce your favourite mixes, the tools that make it effortless, why paint chemistry demands brand‑faithful thinners, and, finally, the key takeaways to carry forward.
Why Every Drop Matters
Every scale‑modeller knows the frustration of an unpredictable airbrush session: heavy blobs here, wispy overspray there, unpredictable drying times turning a simple basecoat into a headache. What if you could remove the guesswork entirely and replace it with a proven, laboratory‑style protocol? By counting each drop of thinner and every drop of paint, you gain an unprecedented level of control—transforming every project from a roll of the dice into a reproducible triumph. This isn’t just about mixing; it’s about unlocking the full potential of your paints, your tools, and your own craftsmanship from the very first atomized mist to the final flawless finish.
Why Precision Mixing Matters
- Consistent Atomization: Slight variations in paint viscosity can dramatically change spray patterns. Drop‑counting guarantees the same fluid consistency each time, so your airbrush behaves predictably.
- Reproducible Results: Once you discover “the perfect 7 % mix” for a fine‑weathering wash or basecoat, you can dial it in again and again—no guesswork required.
- Data‑Driven Troubleshooting: When a finish looks uneven, your airbrush sputters, or drying times fluctuate, you’ll know whether to adjust your technique or revisit your recorded thinner‑to‑paint ratio.
- Environmental Control: Temperature and humidity affect evaporation rates. By tracking your drop ratios alongside ambient conditions, you’ll learn how your mixes respond in summer’s heat or winter’s chill.
What Is Drop‑Counting?
Rather than eyeballing a “splash” of thinner, drop‑counting uses uniform droplets to establish exact ratios:
- Count Drops, Not Millilitres. Each drop is roughly 0.05 mL, so you get a consistent volume every time.
- Set Your Ratio. For a 10 % thinner mix, combine 1 drop of thinner with 9 drops of paint—simple maths that you can repeat at will.
- Log Your Formula. Jot down “1 : 9 (thinner : paint)” in your mixing journal for future reference.
Over multiple projects, you build an empirical foundation that turns intuition into a measured craft.
Building Your Mixing Log
- Record the Date & Project: “2025‑04‑20 – Panther G Build”
- List Your Supplies: Brand and type of paint, thinner brand, dropper model.
- Note the Drop Ratio: e.g., “2 drops thinner + 18 drops paint → 10 % thinner”
- Capture Conditions: Room temperature, relative humidity, and airbrush nozzle size.
- Observe & Rate Results: Atomization quality, drying time, surface adhesion, sheen.
💡 Pro Tip: Use a simple spreadsheet or note‑taking app. Create columns for date, mix ratio, environmental data, and outcome scores. Over time, you’ll spot patterns—like specific mixes that excel in cool, dry conditions.
Drops ↔ Millilitres: A Handy Conversion
While drop‑counting keeps you nimble, understanding volume helps when you scale up:
| Measurement | Approximate Volume |
|---|---|
| 1 drop | ~0.05 mL |
| 20 drops | ~1 mL |
| 5 mL (graduated jar) | ~100 drops |
Noter: Drop size can vary by dropper design and liquid viscosity. Always use the same dispenser for consistency.
Converting Fluid Ounces → Millilitres → Drops
When you purchase paint or thinner in fluid‑ounce bottles, you can convert to drops to translate commercial volumes into your drop‑count system:
- Fluid Ounces to Millilitres
- 1 US fl oz ≈ 29.57 mL
- 0.5 US fl oz ≈ 14.79 mL
- 0.25 US fl oz ≈ 7.39 mL
- Millilitres to Drops
- 1 mL ≈ 20 drops (assuming 0.05 mL per drop)
- → so 29.57 mL × 20 ≈ 591 drops per fluid ounce
- Putting It Together
- Example: A 2 fl oz bottle of thinner
- = 2 × 29.57 mL = 59.14 mL
- = 59.14 mL × 20 drops/mL ≈ 1,183 drops total
- To mix a 10 % thinner batch from that bottle, you’d need 1 drop thinner for every 9 drops of paint; knowing you have ~1,183 drops available means you could prepare ~10,647 drops of mixed paint (enough for dozens of airbrush sessions!).
- Example: A 2 fl oz bottle of thinner
Tip: If you measure out 5 mL of paint with a graduated jar (≈100 drops), you’d add 11 drops of thinner for a 10 % mix (11 drops thinner + 100 drops paint).
Quick Reference: Drop‑Count Ratios
| % Thinner | Drops Thinner | Drops Paint | Thinner : Paint |
|---|---|---|---|
| 5 % | 1 | 19 | 1:19 |
| 10 % | 1 | 9 | 1:9 |
| 15 % | 3 | 17 | 3:17 |
| 25 % | 1 | 3 | 1:3 |
| 30 % | 3 | 7 | 3:7 |
| 40 % | 2 | 3 | 2:3 |
| 50 % | 1 | 1 | 1:1 |
| 60 % | 3 | 2 | 3:2 |
| 70 % | 7 | 3 | 7:3 |
| 80 % | 4 | 1 | 4:1 |
| 90 % | 9 | 1 | 9:1 |
Print and keep this sheet at your bench for instant mixing guidance.
Tools of the Trade
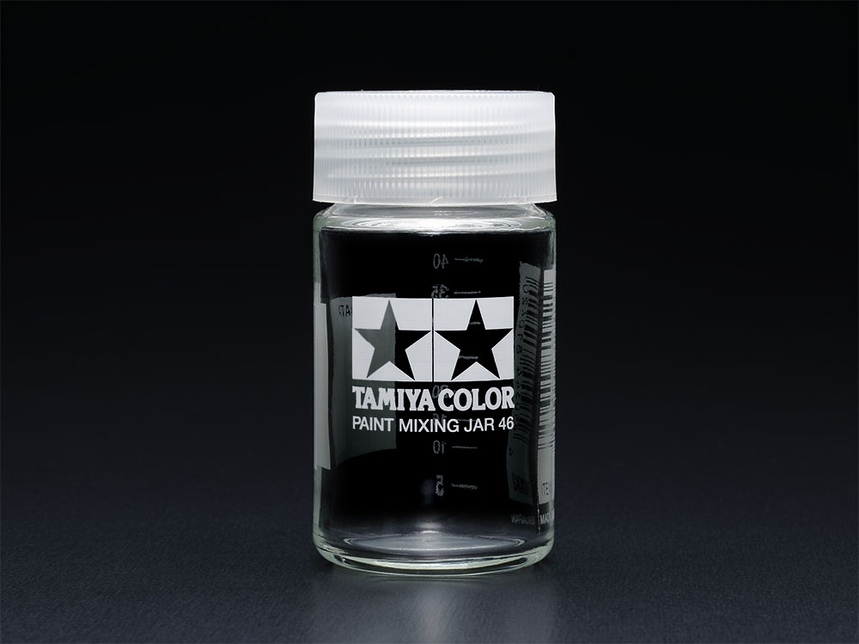
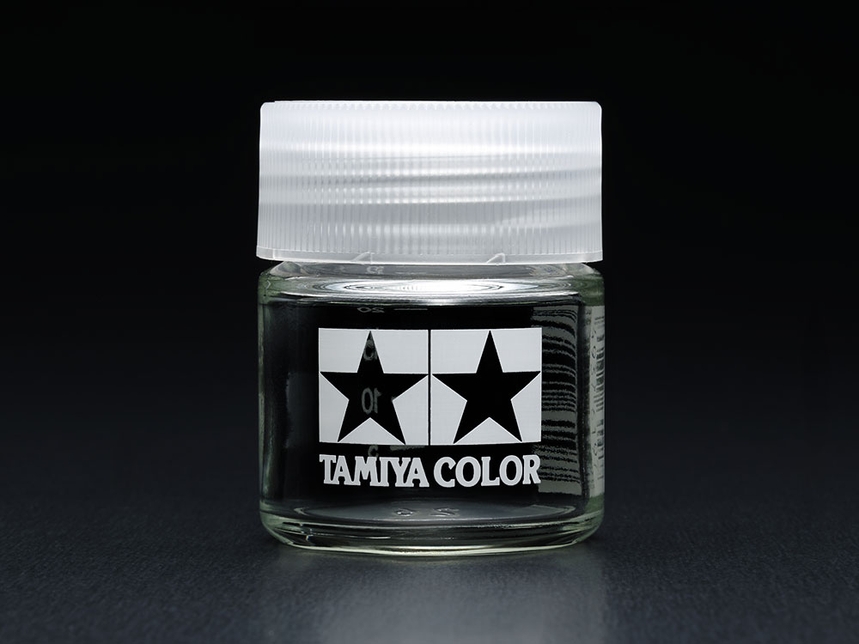
- Tamiya Graduated Mixing Jars (23 mL & 46 mL): Prepare small batches with clear volume markings.
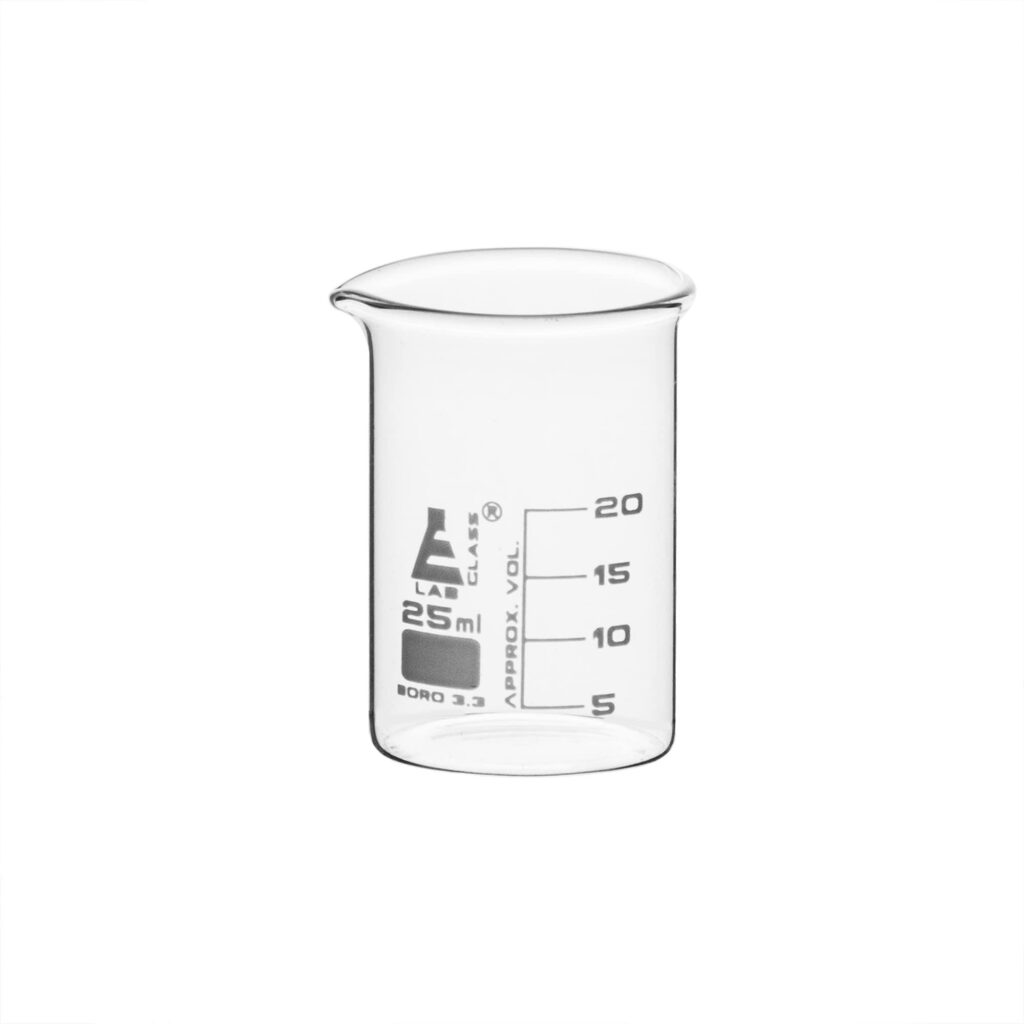
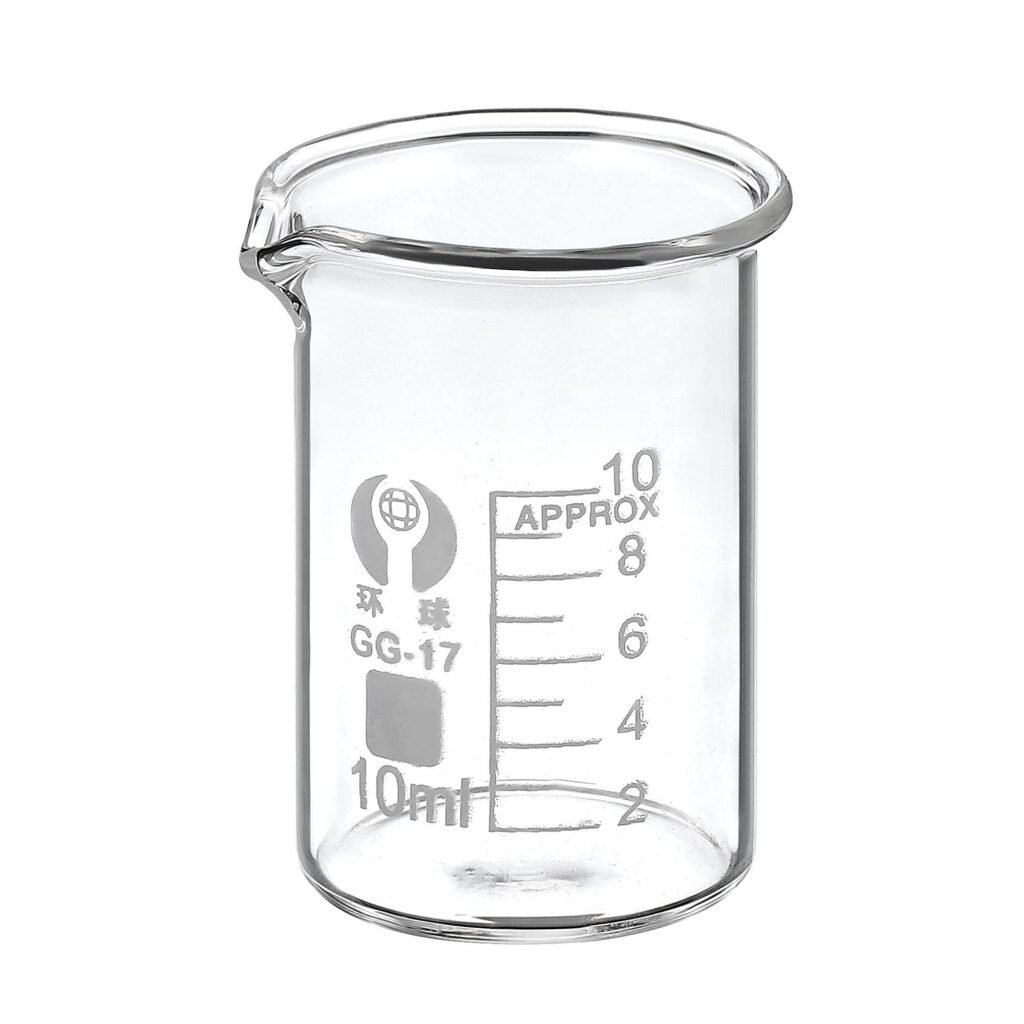
- Small Borosilicate Beakers (≤ 50 mL): Durable and precise, ideal when switching between drop‑counting and volumetric measurements.
- Consistent Dropper or Syringe: Ensures uniform drop size—crucial for accuracy.
- Digital Logbook App or Spreadsheet: Enables sorting by mix percentage, paint brand, or environmental conditions to spot long‑term trends.
Utilizing Small Graduated Lab Beakers and Tamiya Graduated Mixing Jars
When it comes to achieving precise thinner-to-paint ratios, using small graduated lab beakers (50 mL or less) or Tamiya Graduated Mixing Jars in 23 and 46 mL bottles can be a game changer. These tools allow for highly accurate measurement and mixing of small batches, which is especially important when drop-counting to ensure repeatability and consistency over time.

Advantages of Using Small Graduated Lab Beakers and Mixing Jars:
- Accurate Measurements:
Graduated beakers and mixing jars are calibrated to provide precise volume measurements, ensuring that your mixtures are prepared exactly to your desired ratios. This is particularly useful when working with small batches where every drop counts. - Efficient Batch Preparation:
With beakers of 50 mL or less, or Tamiya’s 23 mL and 46 mL bottles, you can mix smaller quantities without waste. This efficiency is ideal for test runs, troubleshooting, and perfecting your thinning techniques before applying them to larger projects. - Consistency and Repeatability:
Using these tools helps maintain consistency in every batch. With clearly marked graduations, you can reproduce the same mixture every time, making it easier to track results and adjust your technique based on recorded data. This is critical for troubleshooting airbrush performance and achieving the perfect finish. - Portable and Organized:
Small mixing jars are portable and take up less space on your workbench. They are perfect for keeping your mixtures organized and readily accessible during a busy project session. - Long-Term Data Collection:
By using standardized tools, you can record your measurements and corresponding outcomes over time. This data set becomes an invaluable resource for future projects, allowing you to refine your process and ensure consistent, high-quality results.
Integrating these tools into your workflow not only streamlines the mixing process but also reinforces a disciplined approach to scale modelling. By ensuring that each drop is measured and recorded accurately, you set the stage for repeatable success in your current projects and pave the way for predictable, professional outcomes in the future.
Formulation Fidelity: Why Paint Chemistry Demands the Right Thinner
Not all paints are created equal—and their chemistry dictates which thinners they tolerate.
- Lacquers: Solvent‑based and fast‑drying, lacquers require specially formulated lacquer thinners. Introducing enamel or acrylic thinner can cause fisheyes, cracking, or even complete solvent separation.
- Enamels: Oil‑based enamels rely on enamel thinners or mineral spirits. Water‑based acrylic thinner will not dissolve the binder, resulting in poor atomization and adhesion issues.
- Water‑Based Acrylics: These eco‑friendly paints call for acrylic thinners or retarders. Isopropyl alcohol, Windex, or household solvents may seem cost‑effective, but they can disrupt pigment dispersion, cause pitting, or leave sticky residues.
Why Brand Ecosystems Matter
Manufacturers engineer each paint and thinner as a matched set. Straying outside that ecosystem for a “bargain” thinner—whether isopropyl, window‑wash fluid, or other DIY concoctions—undermines the paint’s performance, and often leads to costly and timely reworks. The false economy of snake‑oil advice circulated online not only wastes your time and money, but also damages your confidence when finishes fail unpredictably. Respect the chemistry: remain faithful to the brand‑recommended thinner and you’ll preserve the integrity of every formula.
Tips for Fine‑Tuning Your Mix
- Test on White Styrene Test Cards: Always airbrush a white test card first to confirm atomization and coverage.
- Adjust for Environment: In high humidity or heat, add 1–2 extra drops of thinner to maintain the same spray behaviour.
- Watch for Clogging: If paint dries in the nozzle, back‑flush with a wetter mix (e.g., 60 % thinner) rather than over‑thinning your entire batch.
- Standardize Your Equipment: Use the same dropper, jar, and airbrush tip size across all tests to reduce variables.
- Leverage Statistical Insights: After logging 20–30 mixes, calculate the average ratio that yielded the sharpest lines or smoothest finishes—and treat that as your new baseline.
Predictability Breeds Confidence: A Critical Perspective
In academic circles, reproducibility is the gold standard—yet far too many hobbyists still rely on “cover‑your‑eyes and pour” approaches touted by paint manufacturers or charismatic YouTube influencers. These methods, often promoted without acknowledging variances in humidity, dropper design, or paint formulation, foster a precarious false confidence. A single “splash” more thinner can turn a crisp, even coat into an underwhelming, patchy mess.
Empirical Rigor vs. Anecdotal Guesstimates
Where influencers tout “just eyeball it,” drop‑counting insists on quantifiable data. In the same way a scientist wouldn’t adjust reagent volumes by instinct, the professional modeller rejects subjective mists of thinner in favour of a disciplined, repeatable protocol. The result is less frustration, fewer ruined paint jobs, and a steadily increasing mastery of one’s materials.
Undermining Confidence Through Vagueness
Pouring directly from a bottle or “loading” a brush leaves too many variables—drop size, tilt angle, and even subconscious muscle memory alter the mix. When a colour doesn’t behave as expected, the culprit remains mysterious, eroding the modeller’s confidence. Conversely, by logging each ratio and outcome, you own every stage of the process. Even when conditions change, your data‑driven approach equips you to anticipate—and compensate for—those shifts.
Professional Standards Over Hobbyist Habits
Academic dissertations prioritize methodological clarity; every experiment must be documented to replicate findings. Drop‑counting applies that same principle to scale modelling, elevating the craft above the realm of casual pastime. It’s time to question practices that sacrifice reliability for theatrical demonstration, and to demand the same accountability from content creators and manufacturers that you demand of yourself.
Key Takeaways
- Precision Equals Predictability: Drop‑counting eliminates guesswork, ensuring every airbrush session starts with the exact same fluid consistency.
- Data Builds Expertise: Maintaining a detailed log of dates, ratios, and environmental factors converts your bench work into a verifiable science.
- Formulation Fidelity: Use the correct thinner for lacquers, enamels, and acrylics—avoid DIY snake‑oil solutions that jeopardise performance.
- Conversions Keep You Flexible: Knowing how to transform ounces → millilitres → drops lets you scale recipes up or down without sacrificing accuracy.
- Tools Drive Consistency: From graduated jars to digital logs, the right equipment and record‑keeping tools make repeatability effortless.
- Continuous Improvement: Analyze your mixing data periodically—refine your ratios, adapt to changing conditions, and discover new “sweet spots” for different techniques.
Embrace drop‑counting today, and transform every drop into a step toward flawless, professional‑quality scale models.
Airbrush Pitfalls: How Paint Misuse and Poor Maintenance Undermine Performance
Even the most expensive airbrush can betray you if fed the wrong paint or neglected in cleaning. Below are common issues directly tied to misuse of paint types, mixing brands, and thinning practices—and how thorough post‑session maintenance saves your sanity.
1. Brand Mixing & Incompatible Formulations
- Symptom: Sudden sputtering mid‑spray or irregular atomization.
- Cause: Combining two brands—say, enamel over acrylic—often leads to binder incompatibility. The solvents in one formulation can break down the other’s binder, causing separation and nozzle gels.
- Example: You prime with Brand A’s acrylic primer, then switch to Brand B’s lacquer without cleaning. Microscopic acrylic residue reacts with lacquer thinner, resulting in mini “fisheyes” and clog points.
2. Improper or Household Thinners
- Symptom: Uneven flow, bubbling, or paint “boiling” in the cup.
- Cause: Using isopropyl alcohol, window‑wash fluid, or windshield‑washer solvent disrupts pigment dispersion and alters evaporation rates. These substitute thinners lack the precise solvent blends of purpose‑made products.
- Example: An enthusiast adds a dash of Windex to “loosen up” enamel paint. The ammonia and surfactants cause foaming and sticky residue, forcing frequent nozzle clearances.
3. Inadequate Thinning for Application
- Symptom: Heavy, spattered deposits or dry‑spray mist (fine particles drifting rather than coalescing).
- Cause: Too‑thick paint overtaxes the airbrush’s needle and nozzle assembly. Conversely, over‑thinning can produce an uncontrolled mist that never forms a cohesive coat.
- Example: You attempt a smooth basecoat with only a 5 % thinner mix—ideal for detail work—but find it “pops” in your airbrush, leaving pock‑marked surfaces. A 15–20 % mix would have yielded even coverage without clogging.
4. The Non‑Negotiable Need for Thorough Cleaning
- Symptom: Persistent ghosting of previous colours, reduced airflow, or jammed needle movements.
- Best Practice:
- Immediate Flush: After each colour change or session, spray a cleaning solution (manufacturer’s cleaner or suitable thinner) until the expelled fluid runs clear.
- Disassemble & Soak: Remove the needle, nozzle cap, and cup. Soak in the correct thinner for 10–15 minutes to dissolve residual paint.
- Brush & Swab: Use dedicated airbrush brushes and lint‑free swabs to clear every port and channel.
- Re‑lubricate & Reassemble: A drop of airbrush‑safe lubricant on threads and the needle ensures smooth operation.
Neglecting any of these steps invites build‑up, erratic spray patterns, and, ultimately, the frustration of troubleshooting what appears to be a “faulty” airbrush—when the real culprit is dried paint residue.
Key Takeaways
- Laboratory-Style Precision
- Drop-Counting replaces guesswork: each drop ≈0.05 mL ensures identical viscosity and atomization every time.
- Reproducibility: Log “1 : 9 (thinner : paint)” or any ratio, then nail it again and again.
- Data-Driven Workflow
- Mix Log: Record date, project, brands, drop ratios, temperature, humidity, nozzle size, and results.
- Continuous Improvement: Analyze your spreadsheet or app data—identify your “sweet spot” mixes for each technique and environment.
- Conversions for Flexibility
- Drops ↔ mL: 1 drop ≈ 0.05 mL, so 20 drops ≈ 1 mL.
- Fluid Ounces to Drops: 1 US fl oz ≈ 591 drops. Scale up or down without losing accuracy.
- Tooling Matters
- Graduated Jars & Beakers: 23 mL, 46 mL Tamiya jars or small borosilicate beakers for precise volumetric checks.
- Consistent Dispensers: Use the same dropper or syringe each time to maintain uniform drop size.
- Formulation Fidelity
- Match Thinner to Paint: Lacquers need lacquer thinner; enamels need enamel thinner; water-based acrylics need acrylic thinner/retarder.
- Avoid DIY Solvents: Household isopropyl, Windex, etc., can cause fisheyes, separation, or poor adhesion.
- Fine-Tuning & Troubleshooting
- Environmental Adjustments: In heat or humidity, add 1–2 extra drops of thinner to compensate.
- Clog Prevention: If the nozzle starts drying, back-flush with a wetter mix rather than over-thinning your entire batch.
- Maintenance as Prevention
- Immediate Flush & Disassembly: Clean between colours; soak and swab all parts to remove residue.
- Lubrication & Reassembly: Keeps needle movement smooth and spray patterns consistent.
Embrace drop-counting today to turn every airbrush session into a predictable, professional-grade process—where precision, data, and proper chemistry converge for flawless results.
By respecting paint chemistry, adhering to correct thinning protocols, and committing to rigorous cleaning, you’ll avoid most airbrush headaches. Proper maintenance not only prolongs your equipment’s lifespan but also guarantees that every drop you measure is faithfully translated onto your model.
James Wooldridge
James is a dedicated scale modeller, researcher, and amateur historian whose expertise elevates every project he undertakes. Specializing in super detailing and the application of authentic colour schemes, his scholarly articles have been published in esteemed platforms such as Scalemates and have been recognized through inclusion in Google Featured Snippets. As an active contributor to a distinguished Facebook group, he disseminates innovative techniques and forward-thinking ideas within a vibrant community of enthusiasts. Moreover, James presents informative video content for a prominent Scale Modelling Club, further demonstrating his commitment to advancing the craft. His leadership is underscored by his role as a founding executive member of both KSM–IPMS and Kawartha Scale Modellers, thereby solidifying his influential position within the scale modelling field.💡📏 📐📱🎬 📷 🎥