
The Completed Model
This is the eleventh and last part of the Revell 1969 Camaro Z/28 3in1 1/12 Scale 85-2812.
In the previous post, I went through the steps to remove the unfortunate AK Interactive Super Gloss, and I had gotten everything repainted with Bright Green again.

But I still needed to add a gloss coating to the model. And I decided to use Mr Color GX100 Super Clear III. This clear was sprayed on in thin coats with Mr. Levelling Thinner, about 60-40, and using about 20 psi.
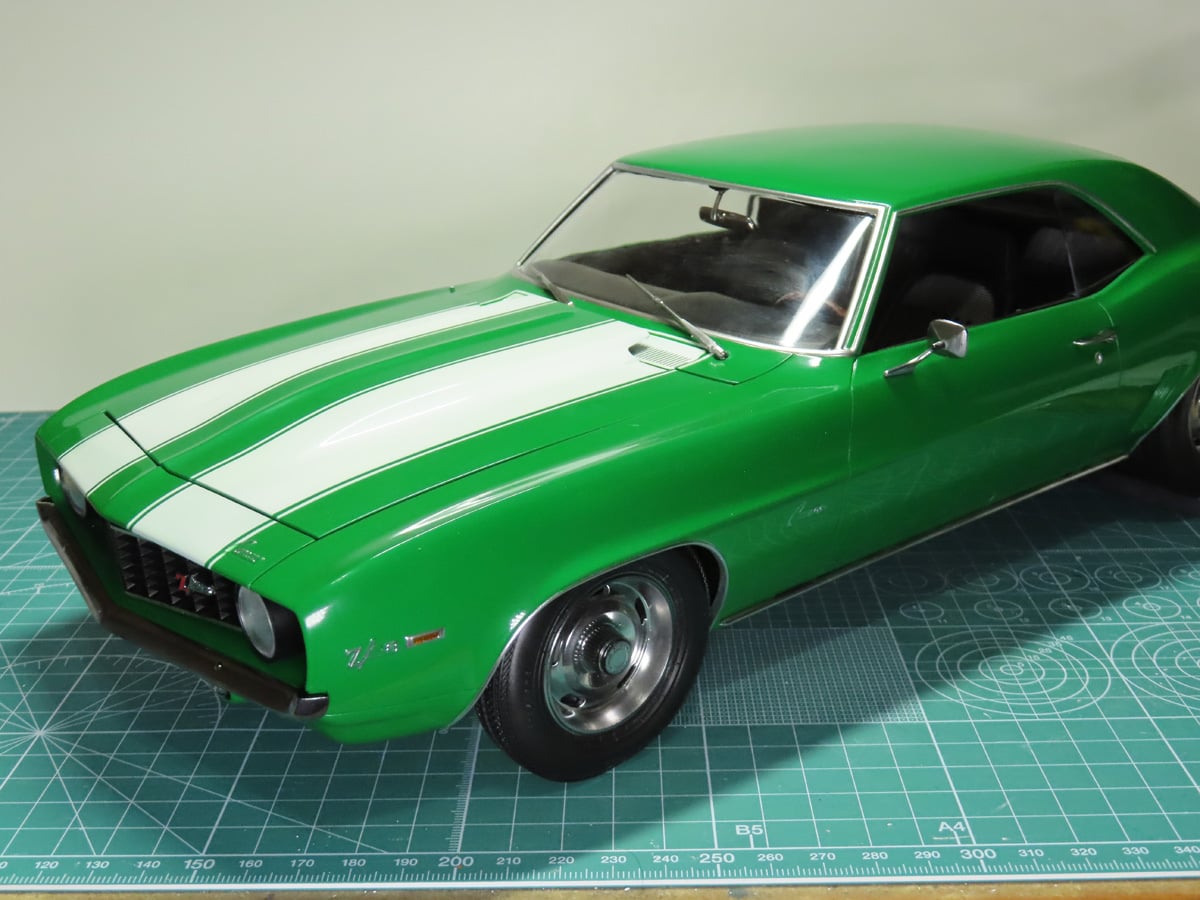
The Super Clear III was very easy to use, and with just 2 passes, I had restored my lost gloss coat. I left the model alone to dry, and I was very impressed with how bright the gloss was and what a wonderful reflection it produced.
Just as I had done previously, I polished the clear with Tamiya Polishing Compounds: Coarse and Finish. This enhanced the gloss quite a bit more, and I was very impressed with the results. I wish that I had used the Super Clear III to begin with, but that’s just part of the learning process, and I’m glad to finally have the body restored, and now we can proceed with the build and complete this model.
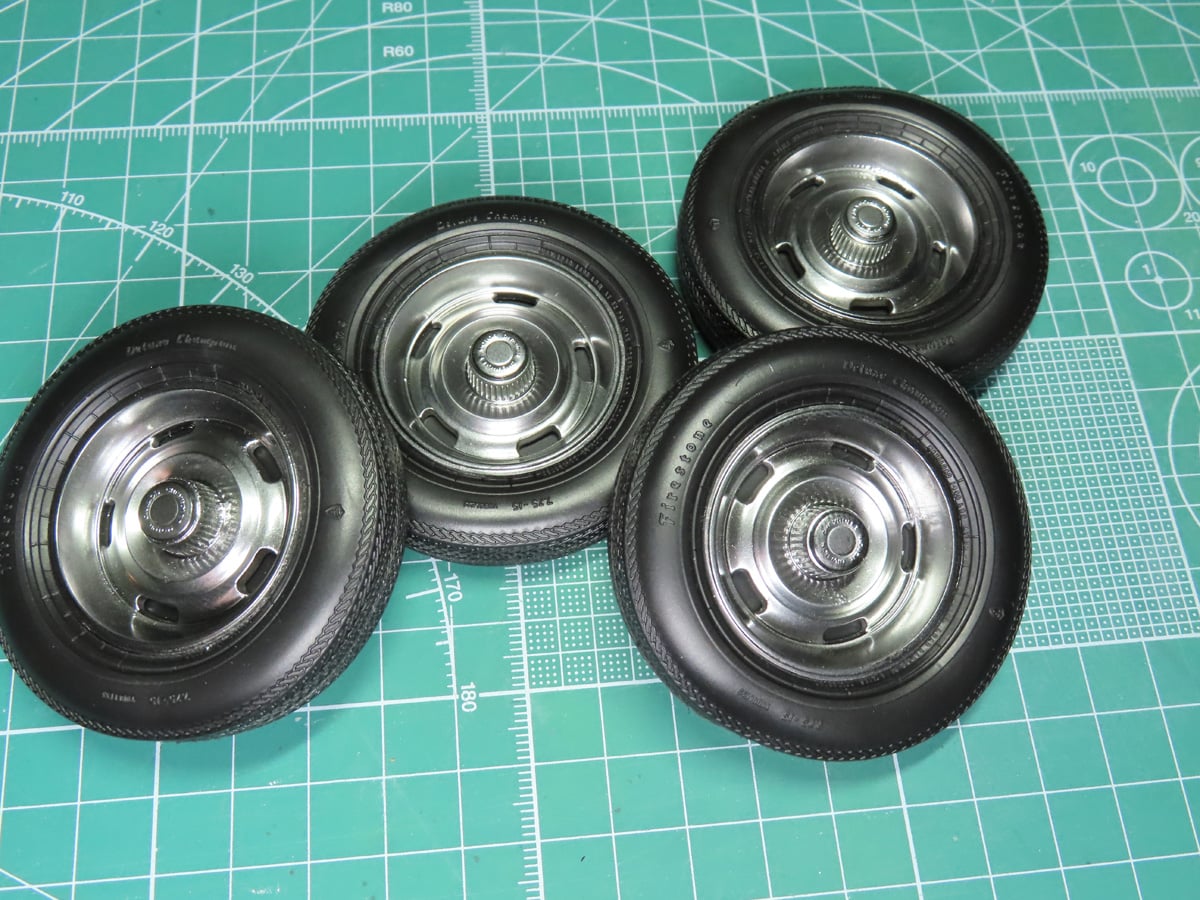
Before I add parts to the body, I need to assemble the wheels so that the model can stand on its own without damaging the underside again.
The tires are a bit unfortunate, as the rubber is quite thin, and this makes placing the hubs and the rims together a bit more difficult, as they are quite flimsy. Also, with the way the rubber was shot into the mold, there is a flat spot on the tires. To help hide this, I’m going to make this the bottom of the tire, where it will have a more realistic effect. This will meant however, that the tires will be glued to the model instead of allowing them to freely roll.
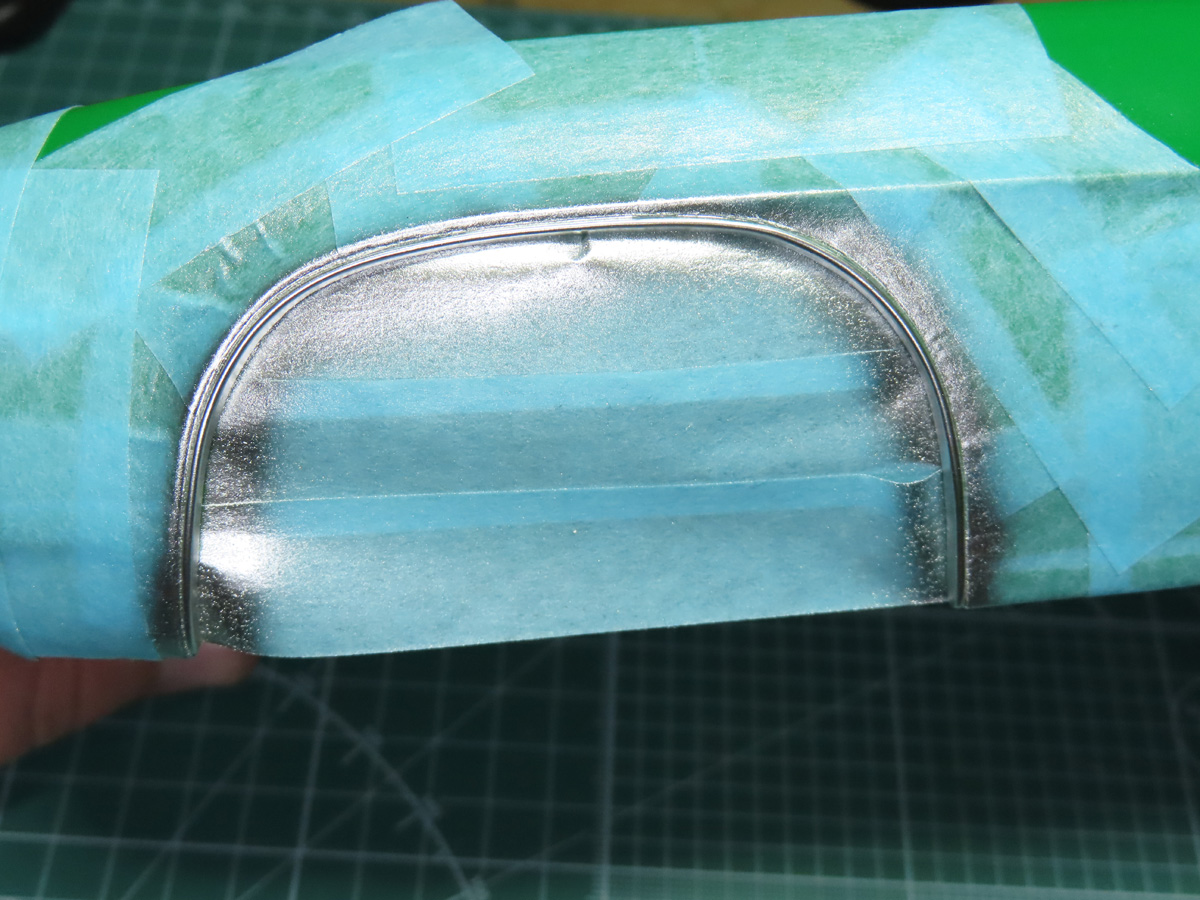
Now that I don’t have to worry about the gloss ghosting, I was able to mask the chromed parts on the body. Here I’ve masked around the wheel hubs, and I’ve painted the chrome trim with Tamiya LP-48 Sparkling Silver. I decided to use this paint instead of the Alclad Chrome because it’s a tougher paint, and I thought that with all the handling I’ll be doing during assembly, it would be better to use a more durable paint for these sections.
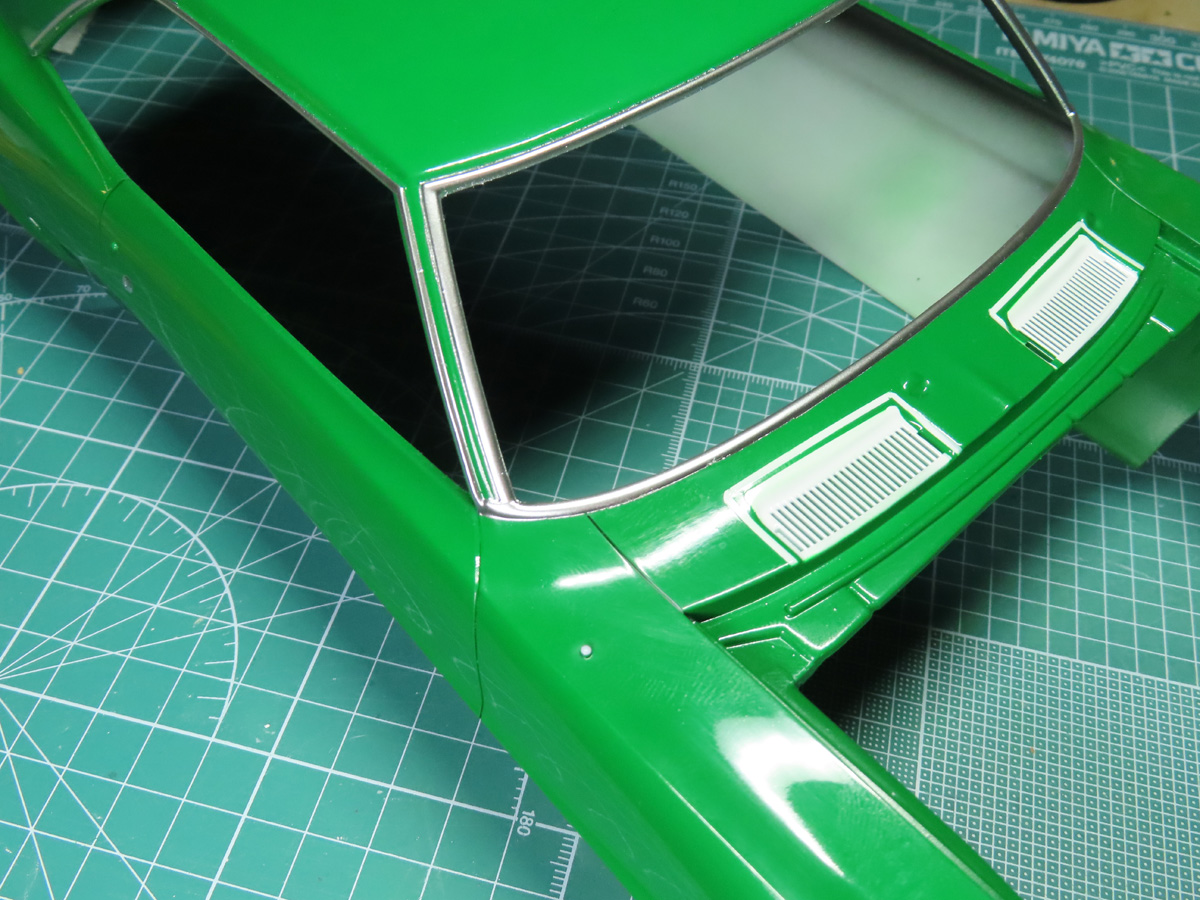
Here I’ve painted the trim around the windows. It took quite a bit of masking to accomplish, but I’m very happy with the end result.
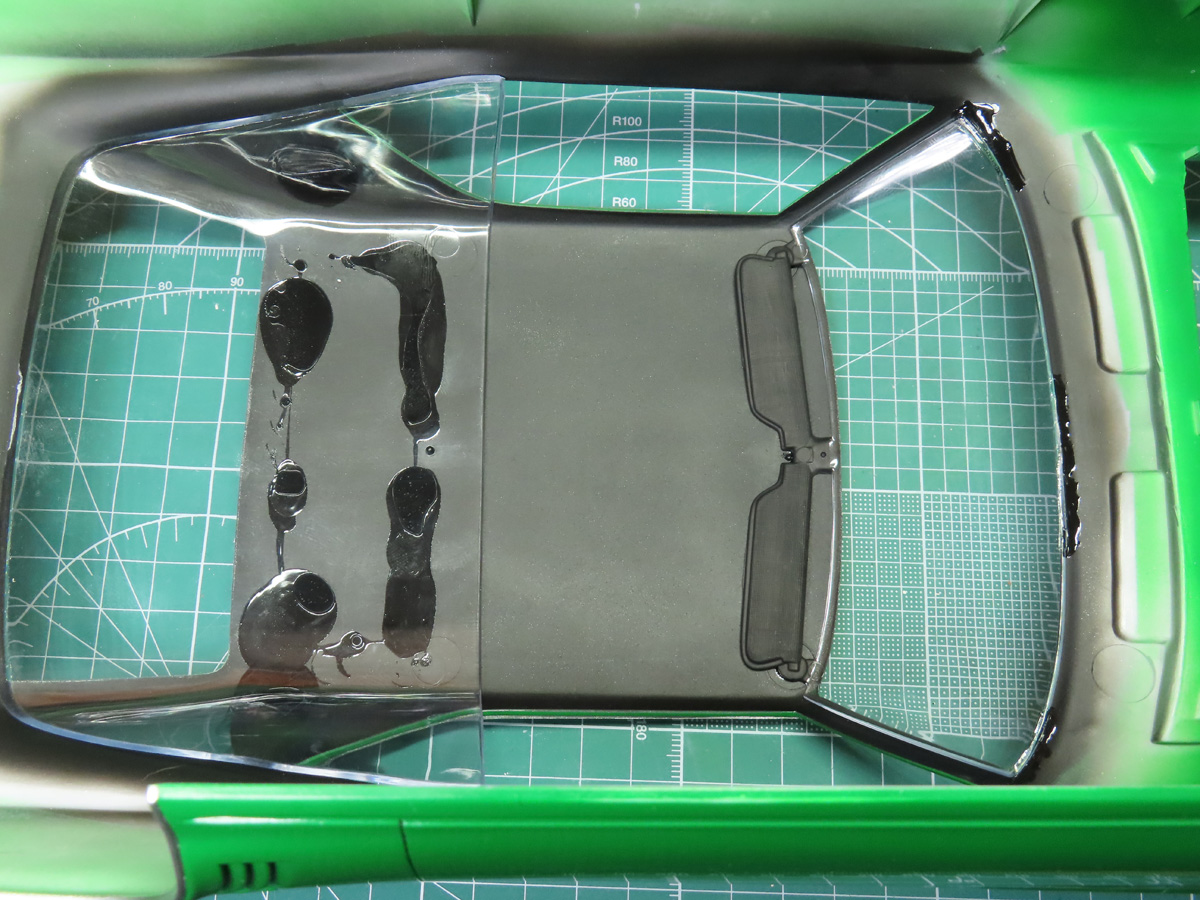
I glued the clear parts in with Ciment transparent polyvalent Tamiya 87188. This was my first time using this glue, and it’s basically designed for clear parts so that they don’t fog the plastic. It works very slowly and takes longer to dry than I’d like, but once it’s dry, it’s very tough, and the parts were very secure.
I think it will be good for aircraft canopies, but again, it has a rather slow drying time. And depending on the project, this could be frustrating.
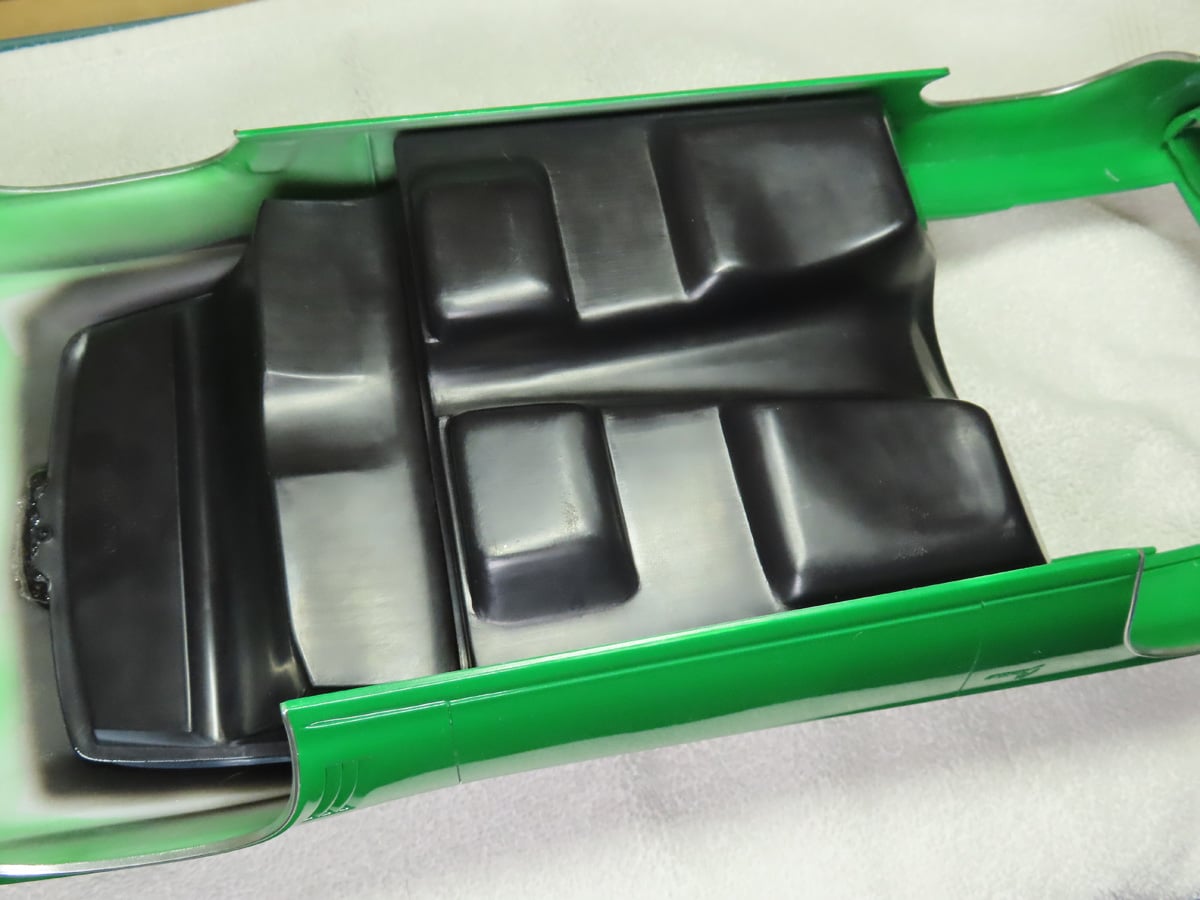
Next, I added the interior tub section. This was held in place with a large amount of BSI CA Glue in each of the corners. I wanted this to be very secure, so that it didn’t run the risk of falling out when I attached the lower chassis. And make sure that the glue is properly dried, as this section is quite heavy.
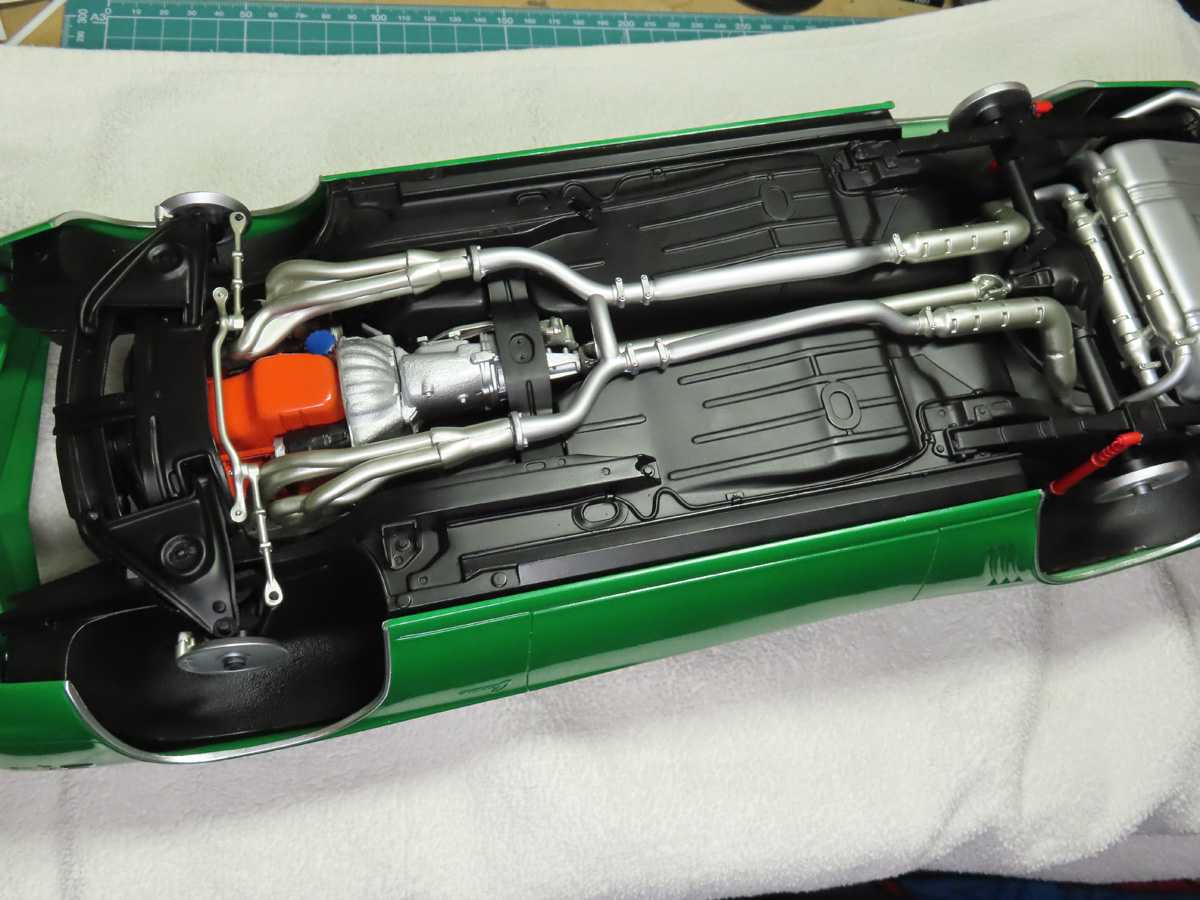
Now I was ready to add the lower chassis to the body. This was by far the most difficult thing I’ve ever done in all of my modeling. I placed a soft towel down, and I carefully tried to twist the chassis around to fit into the body.
There were a lot of croaks and groans, and the model made noises too. But with quite a bit of persuasion (and one broken radiator), I managed to get everything in its place. This was very difficult for me to do; I struggled with this stage for quite a long while, and I thought that it was never going to fit in place. It does, but it’s a lot of work.

Before I flipped the car around, I glued the wheels in place. The fit was excellent, and all of the wheels lined up nicely.
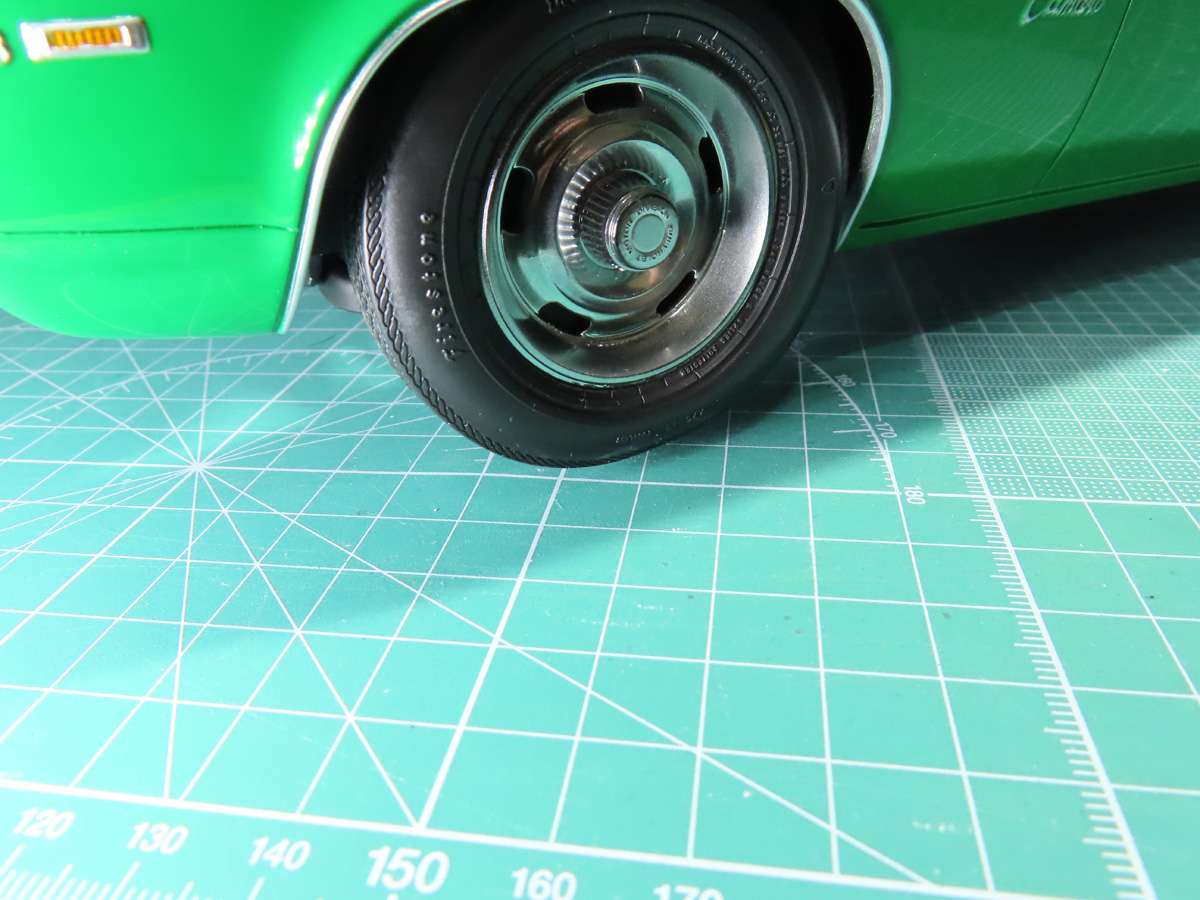
When I flipped the car around, I made a terrible discovery. My car was a 3-wheeled Camaro! I was quite distraught at this stage, and I prodded the car at all angles to see what I could do to get things level.
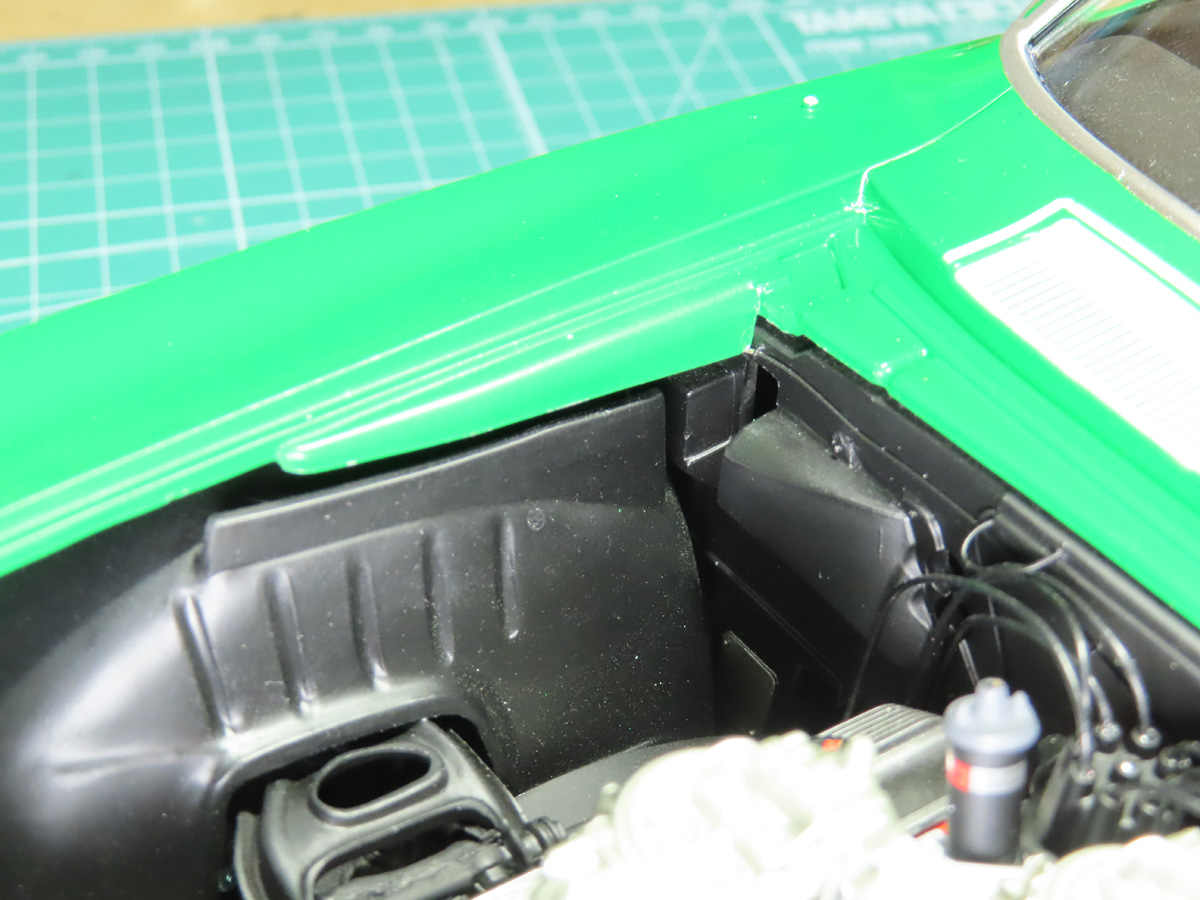
Looking at the passenger side of the car around the engine, I can see there is a gap between the car body and the engine bay interior. I tried for quite a while to get rid of this gap and have it flush like the other side. But no matter how much I tried, I couldn’t get it down and level. Something in there is pushing back!
I think that this could be caused by the details on the left side of the firewall. These stick out on this side, and as you can see here, they aren’t visible. If you are building this kit, I would strongly suggest sanding down these details, as well as considering sanding down the edges of the firewall. I think this would allow you an easier time fitting the chassis to the body, as well as creating a tighter join.
Given how much time it took me to get the chassis fitted in place (not to mention the damage the occurred), I decided to leave this, and just live with the fact that I’ve built a 3-wheeled Camaro.
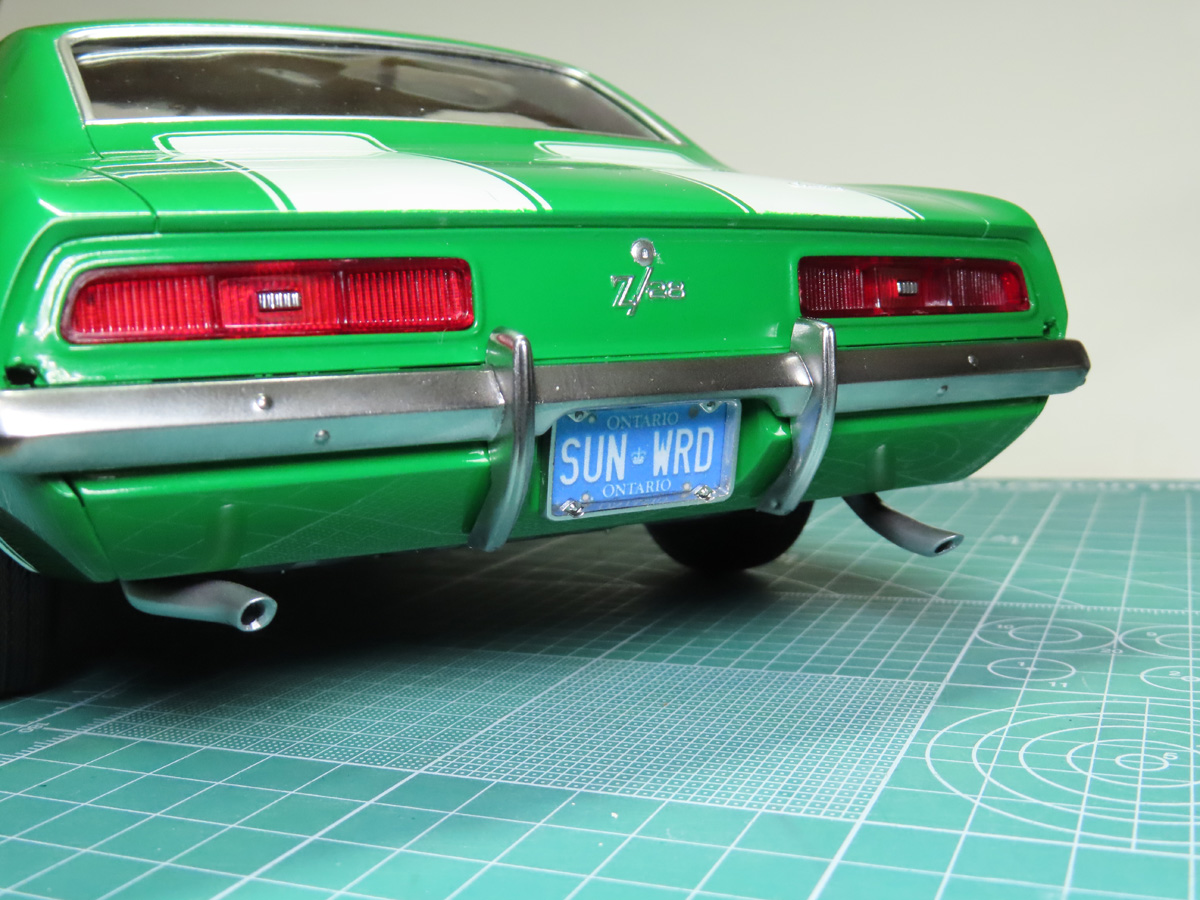
Moving to the rear of the car, I added the lower panel of the body and carefully glued using BSI CA glue the bumper in place. I also added a custom license plate, which I made and printed onto some photo paper.
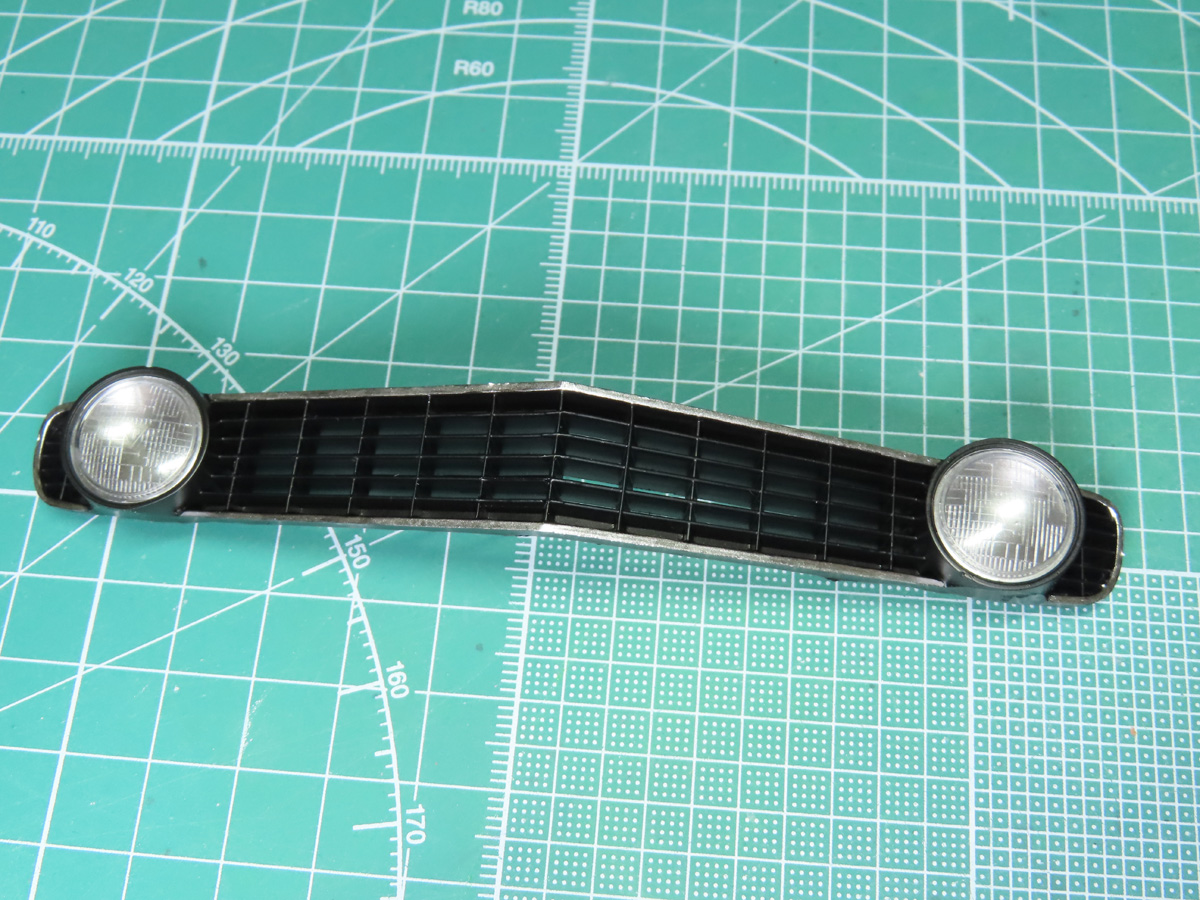
I had originally painted the front grill chrome, and though that looked good, I just didn’t think it looked quite right with the Bright Green. So I repainted the grill with Mr Color C92 Semi-gloss Black. And painted the outside trim with Tamiya LP-48 Sparkling Silver.
Here I’ve added the grill and the front bumper. I also added the Z-28 badge to the grill. This was painted with Alclad Chrome, and for the Red I used Tamiya EX-7 Gloss Red Enamel paint. Not much left to do now, and this kit will be done.
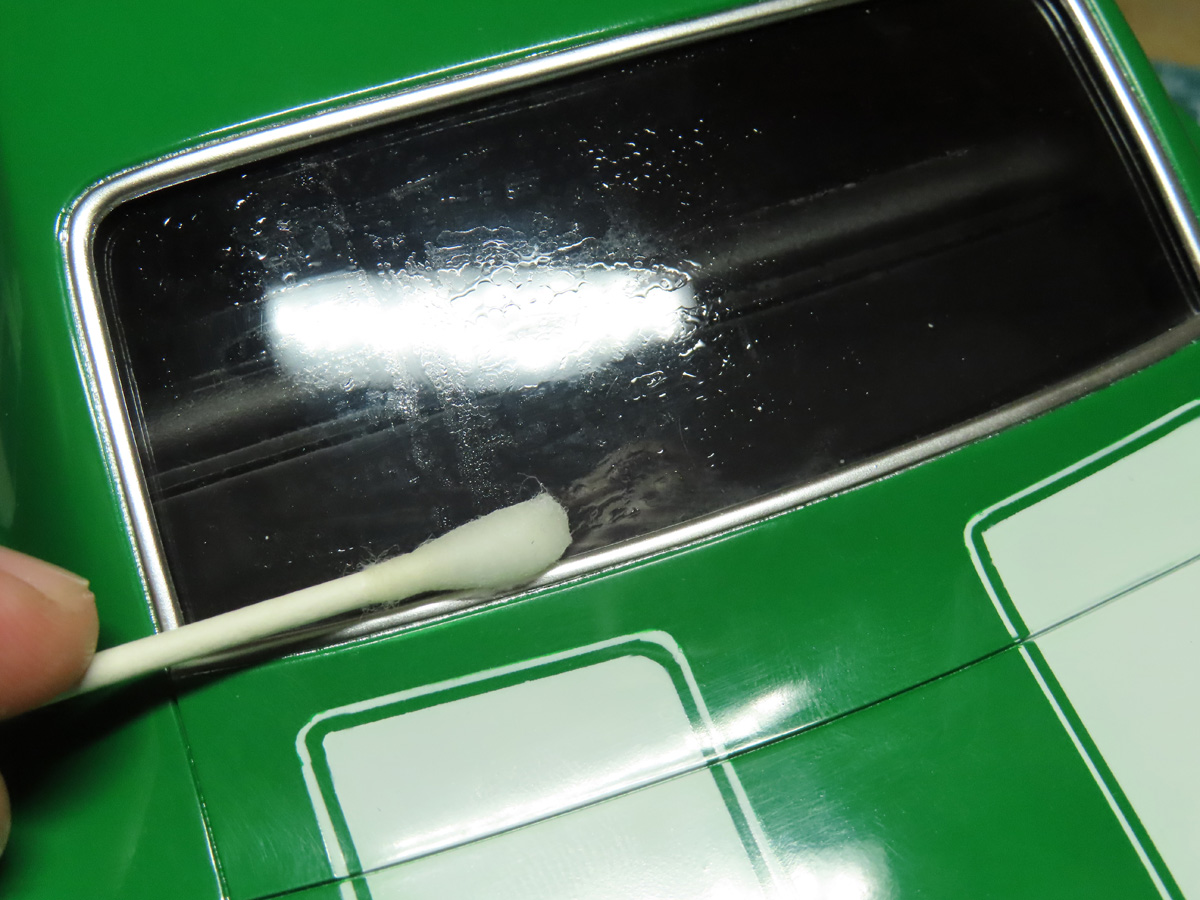
To clean the windows, I’m using Novus 1 applied to a cotton bud. Once I’ve scrubbed the clear parts, I’ll use the dry side of the cotton bud to polish the plastic. Novus 1 is an excellent product; it’s a plastic polish, and it will greatly clean off fingerprints from your model. It will also brighten up the plastic and help repel dust in the future.
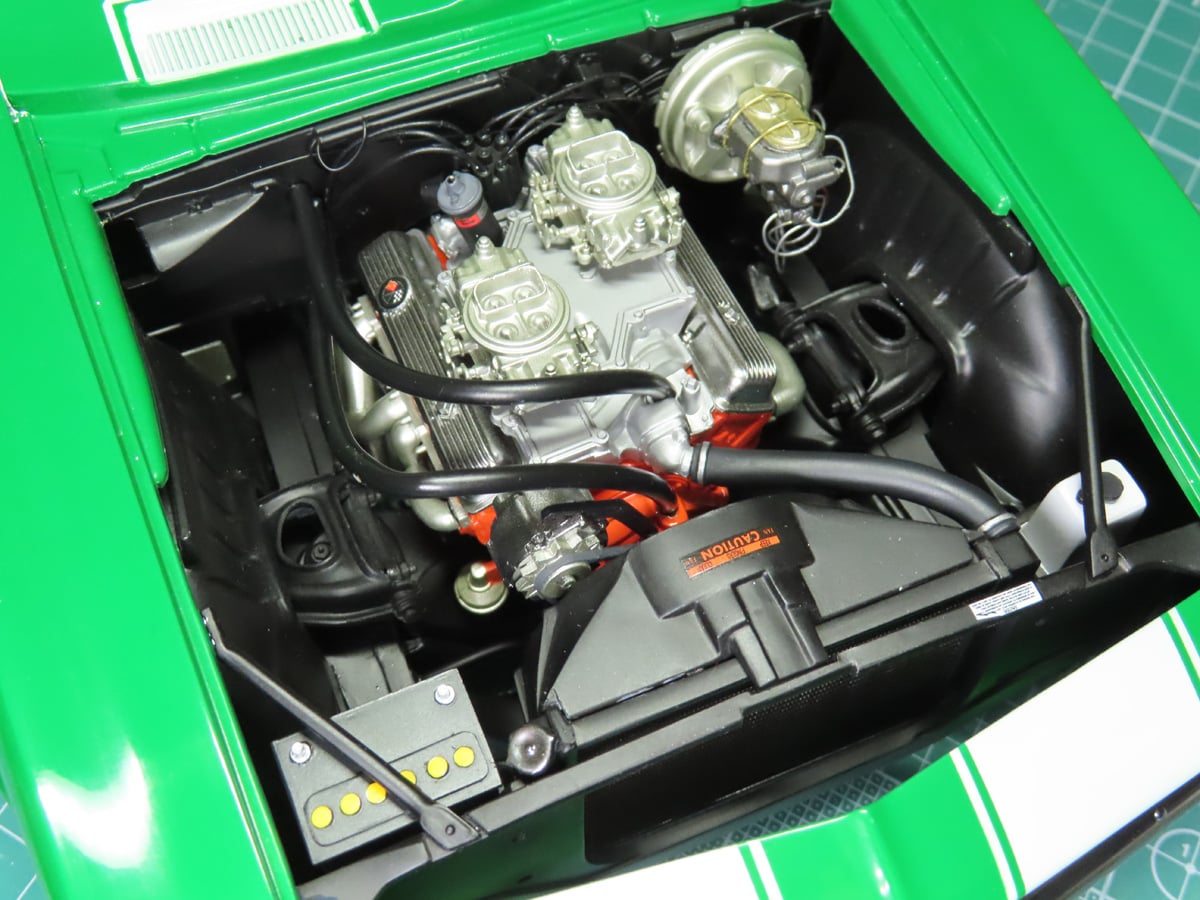
Lastly, I went back to the engine and added in a few of the tubes and hoses connecting to the radiator. The hoses are very rigid, so I very carefully heated them with a lighter to bend them into the correct shape. I’m not a fan of these parts, and I would strongly suggest you consider an alternative, as they also push up on the hood. Possibly something like Tamiya braided hose.
Now that the engine is completed. I’ve added the last chrome parts to the body, and taken a polishing cloth to remove all the fingerprints from the body. And before I knew it, this Camaro was completed!
What a journey this project has been. And has it ever been a challenge. But it’s been a very good challenge. This kit has issues, and the biggest one is that the fit isn’t the greatest. I get the feeling that they simply designed this kit around a 1:25 Camaro and scaled it up to 1:12. It feels like they didn’t fully consider the size of this kit. And also the weight, I forgot about that! Once this thing is together, it’s surprisingly very heavy. And I had one of the rear axles break off just from its own weight.
For someone like me, who’s really only built 2 cars successfully before this, I thought that it was going to be an easier project, just bigger. And I think that this kit could be more suited for more advanced modelers.
That being said, this was also a really fun challenge to complete, and seeing it completed is very satisfying. Learning about chroming parts and about applying a proper gloss has been an excellent learning experience. I’m a lot more confident now when it comes to cars, and I’m even more confident about building some of the motorbike kits that I have. I find gloss coats to be a lot less daunting now than when I first started, and I look forward to more like this in the near future.
Thanks for following along. I hope that these posts can be helpful for you when you take on this project. Until next time!
About the Author:
Jared Demes is a modeler from southern Alberta. He has been building models since he was 4 years old when his Dad first introduced him to the hobby. He has written for several magazines including, Fine Scale Modeler, Scale Aircraft Modeling, Phoenix Scale Models, and others. He has an interest in all modeling subjects, with a focus on WWII Japanese aircraft and Science Fiction.
Jared has won several IPMS awards for his modeling, and currently operates his YouTube channel rebelsatcloudnine, where he showcases model builds and product demonstrations.
Next Post: Part 12 Completed Images
Previous Post: Part 10
First Post: Part 1