
Large 1/12 Scale Kit
This is the sixth part of the Revell 1969 Camaro Z/28 3in1 1/12 Scale 85-2812.
A slight set back occurred from the previous post. As I laid the chassis down on some foam pads, the weight of the parts caused the exhausts to break slightly. Because I was so occupied with this week’s progress, I wasn’t sure if I should abandon the work I was doing and save it for another week.
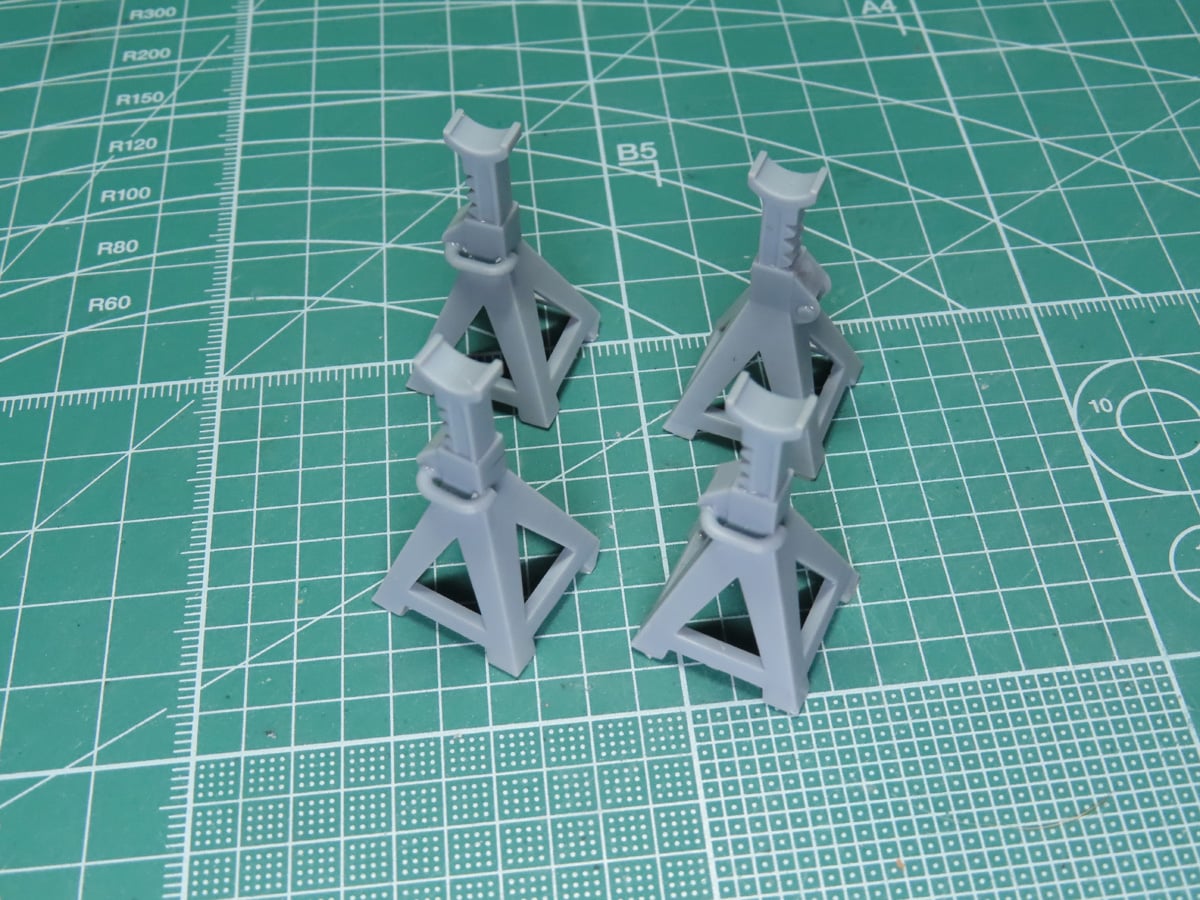
Fortunately I found a solution. I found some STL files for standing jacks, and thanks to my brother, he printed me a few scaled jacks that would support the chassis while I continued working.

I painted the jacks red and placed them under the model. Now I could work on other parts of the car and not have to worry about any more parts being damaged.
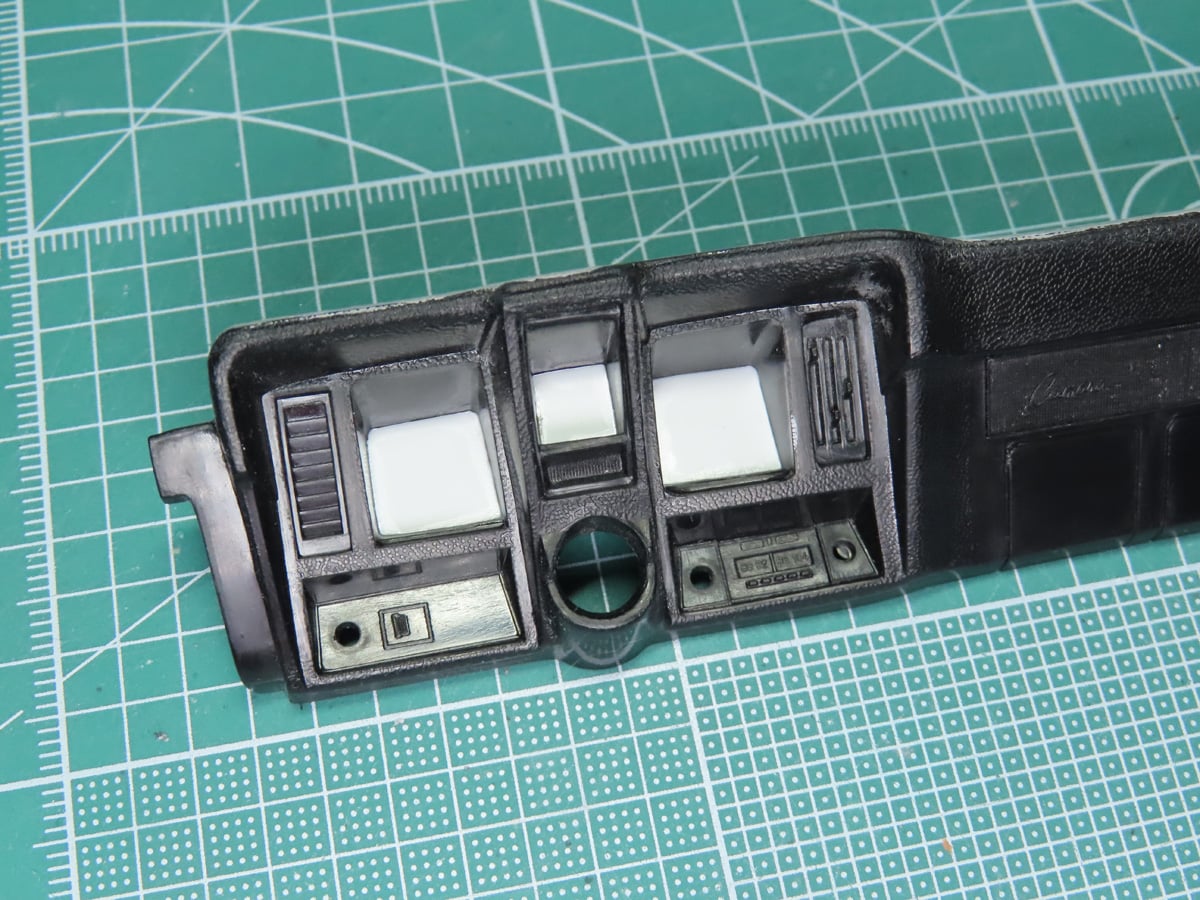
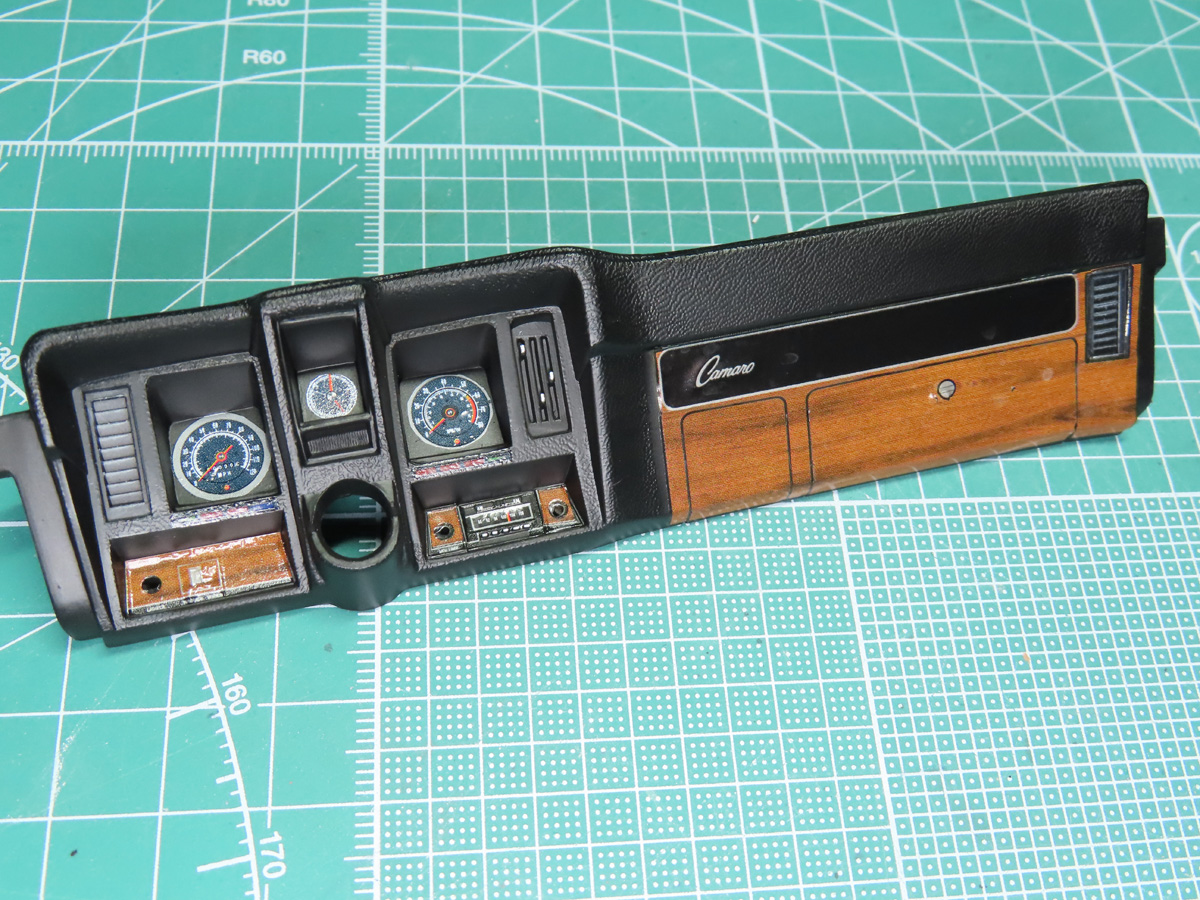
Moving on to the dash, I noticed that there wasn’t any glass for the dials, just open squares. I filled these sections in with some Evergreen styrene sheet.
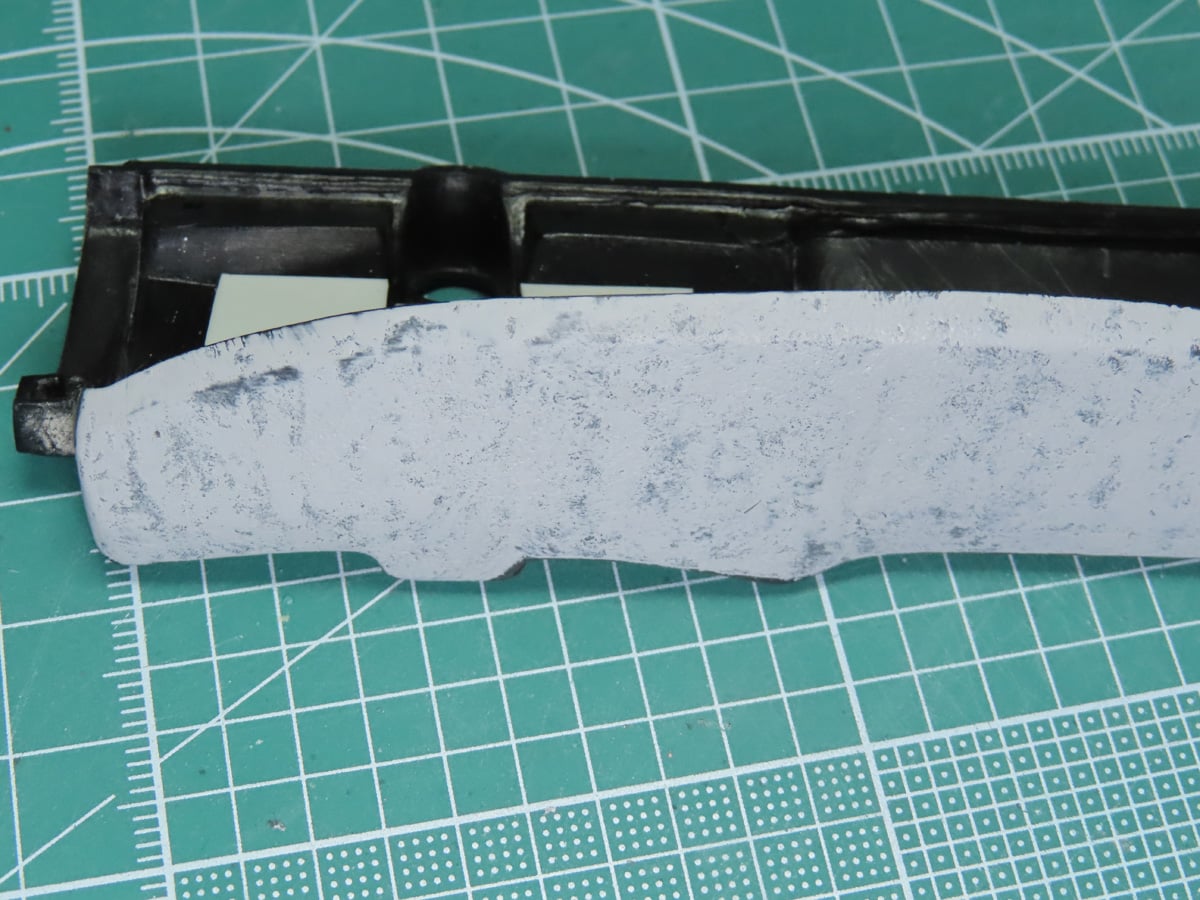
Moving to the top of the dash, I noticed that some of the pitting texture was missing or incomplete. I decided to correct this by first sanding the top to a smooth finish.
Just as I had done previously with creating the texture on the transmission, I painted on Mr Surfacer, and as it dried, I dabbed the surface with a stiff brush to create the texture.
This time, however, I used Mr Surfacer 1200, instead of 500, as I wanted to have a much smoother texture. Once it dried, I lightly sanded the surface to smooth out any bumps that might have occurred.
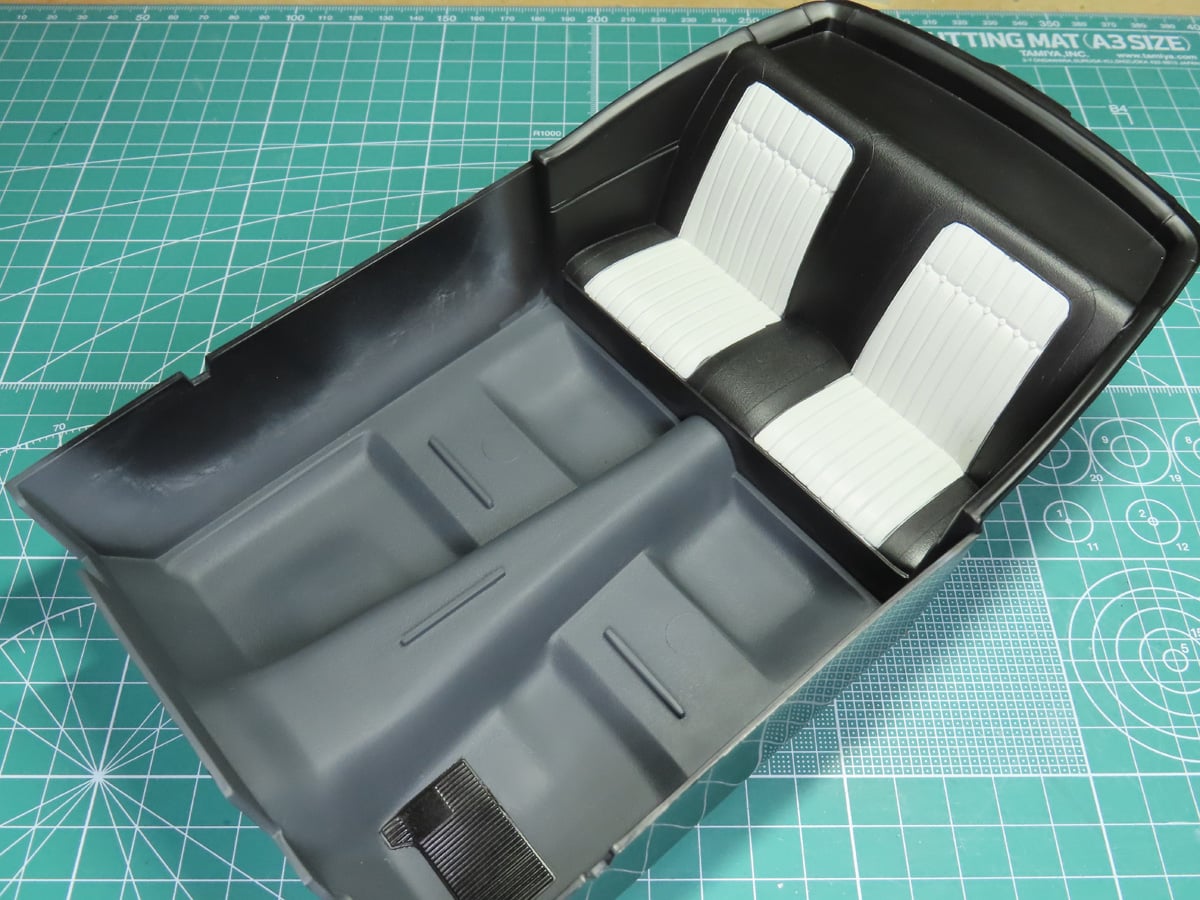
Moving on to the interior tub, I looked around online and saw that there are a lot of options for the interior. But the most common is all black. I decided to follow the kit instructions, as this added a bit more color.
The front section was painted with Tamiya XF-63 German Grey, and the back seats were painted with Mr Color C92 Semi-Gloss Black. For the inner sections of the seats, I wanted to use a white-gray, but I unfortunately seemed to have run out of that color. So I used Mr Color C315 Gray FS16440, which was a tad darker than I had wanted, but I think it looks the part.
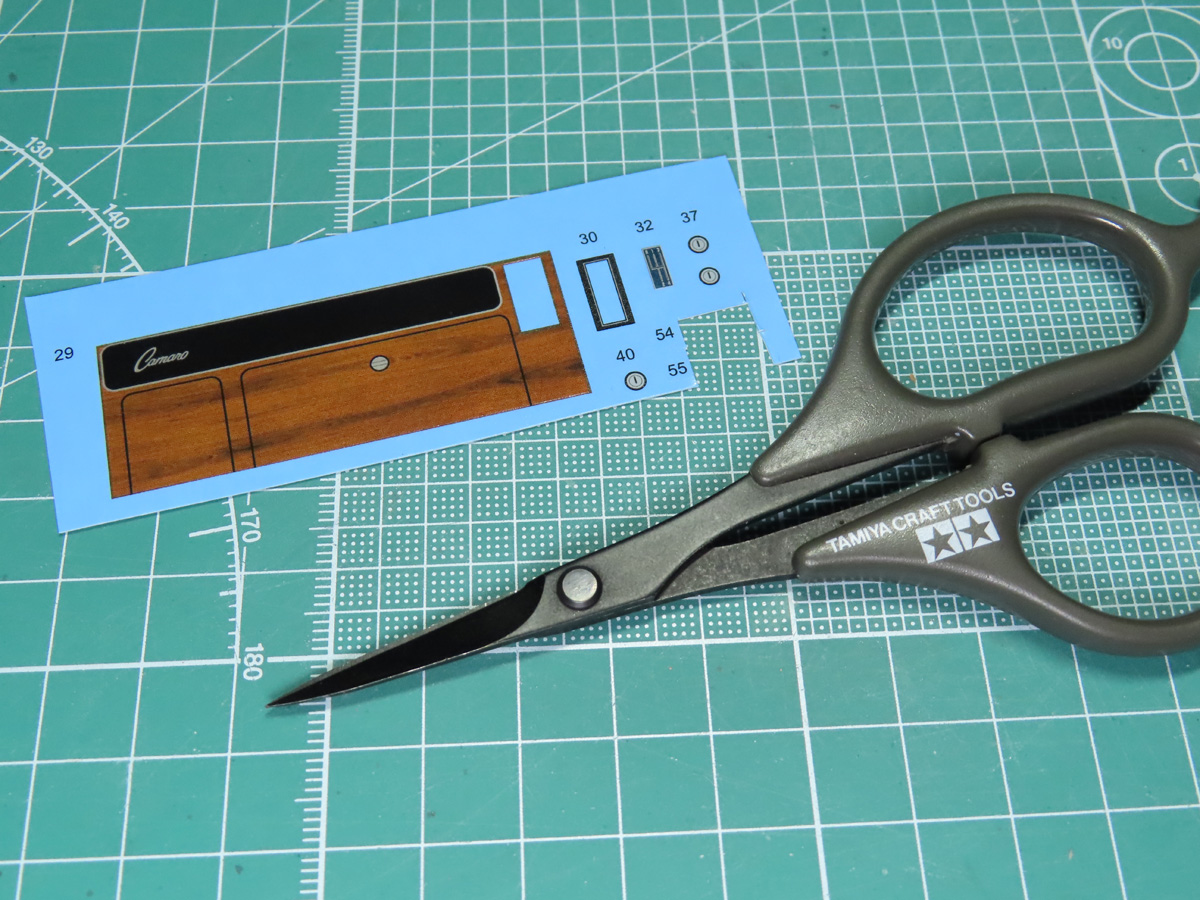
Now it was time to decal the parts, and there were a lot to cut out. I used my Ciseaux à décalcomanies Tamiya 74031, which made easy work of removing the decal film, to help the decals fit properly into place.
I use these a lot when I’m decaling a model, and with this project, these decal scissors made trimming some of the over scaled decals a painless process.
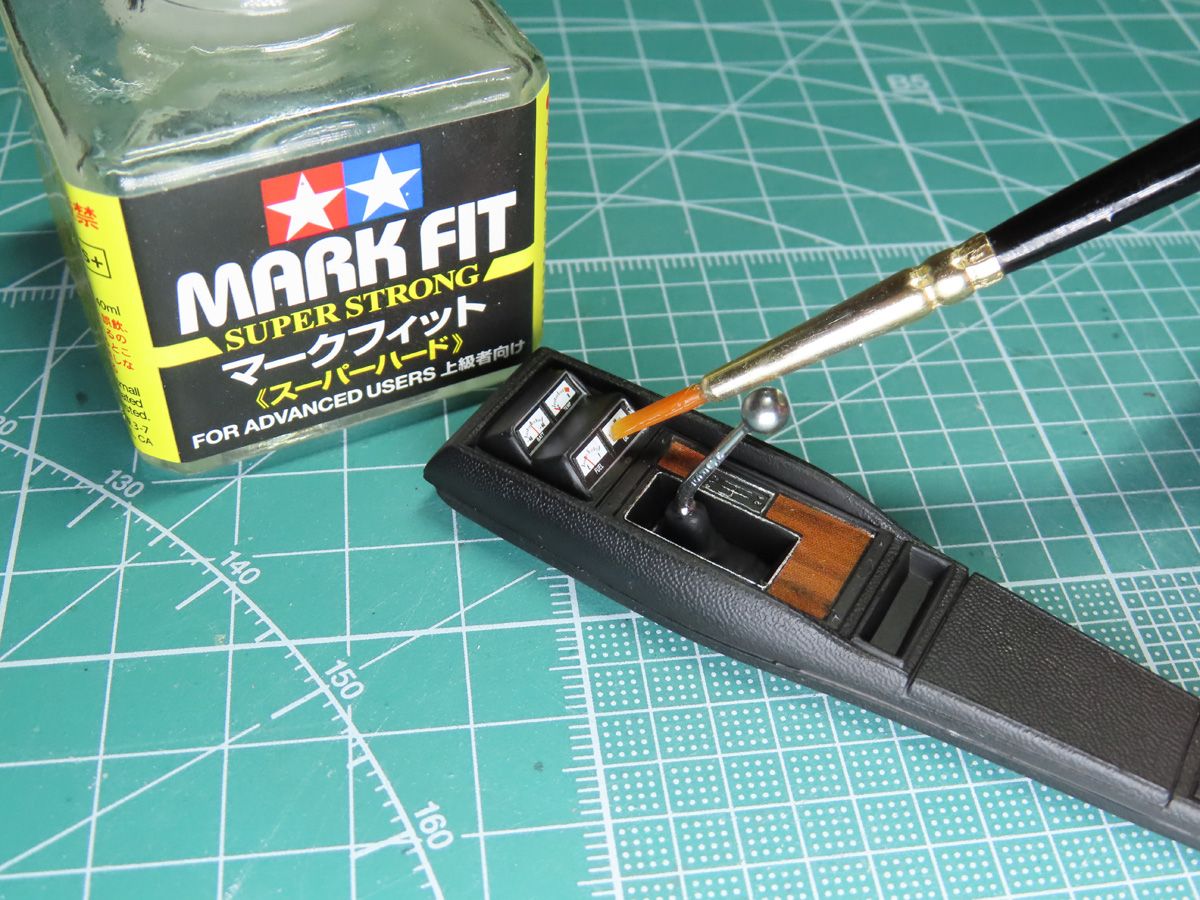
To help the decals melt and secure in place, I used Tamiya Mark Fit Super Strong. This is my preferred decal solvent, but use it with caution, as it’s quite aggressive.
The front dash proved tricky in a few places. Most notably, the dial decals were over scaled and needed to be trimmed quite a bit to fit in place. Also, some of the decals will need a few coats of Tamiya Mark Fit Super Strong to properly lay down over the raised details.
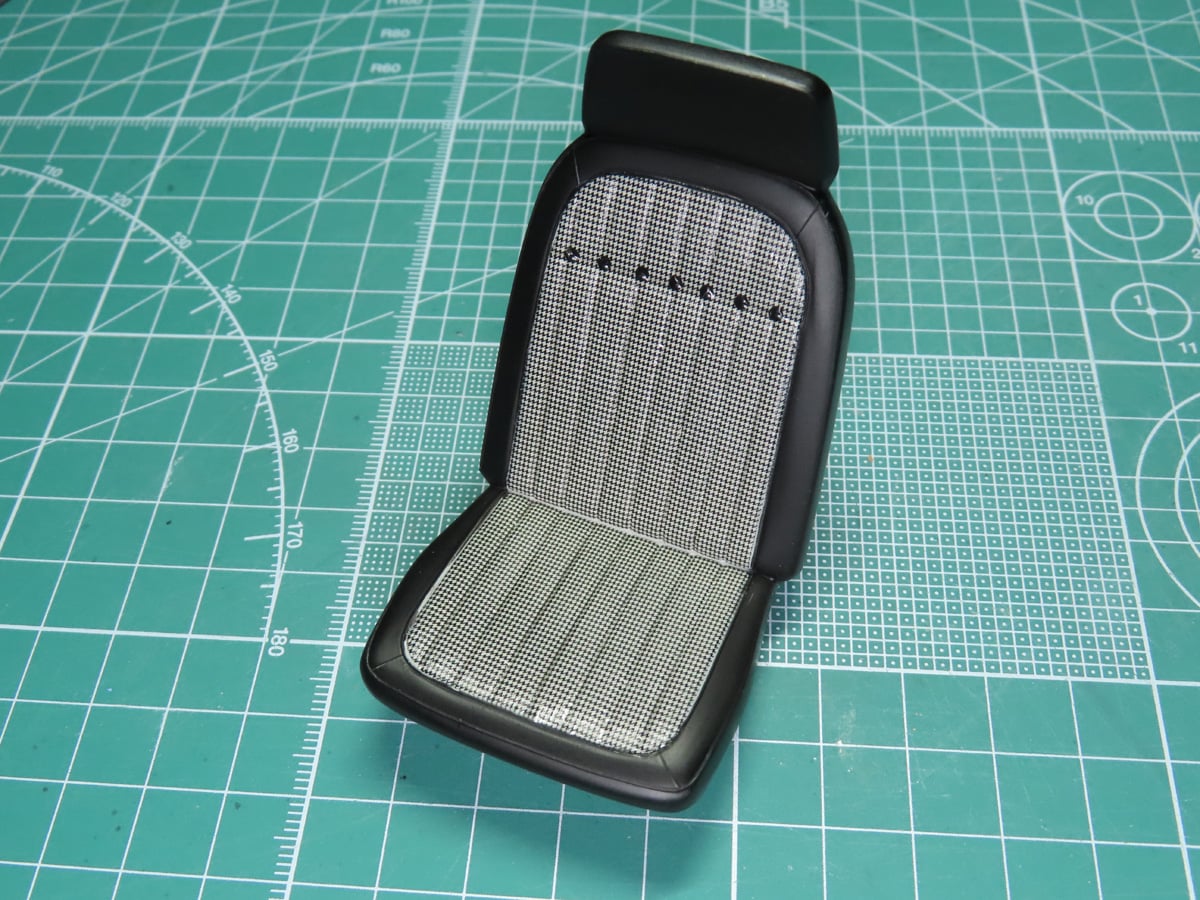
The decals that form the pattern over the gray sections of the seats proved to be a bit more challenging. I hadn’t really noticed this before with some of the smaller stencils around the engine, but with the bigger decals, I realized that these decals are more on the thicker side. Once the decal was set in place, I poked holes into the decal with a needle. This will allow the decal solvent to settle underneath the decal and release any trapped air.
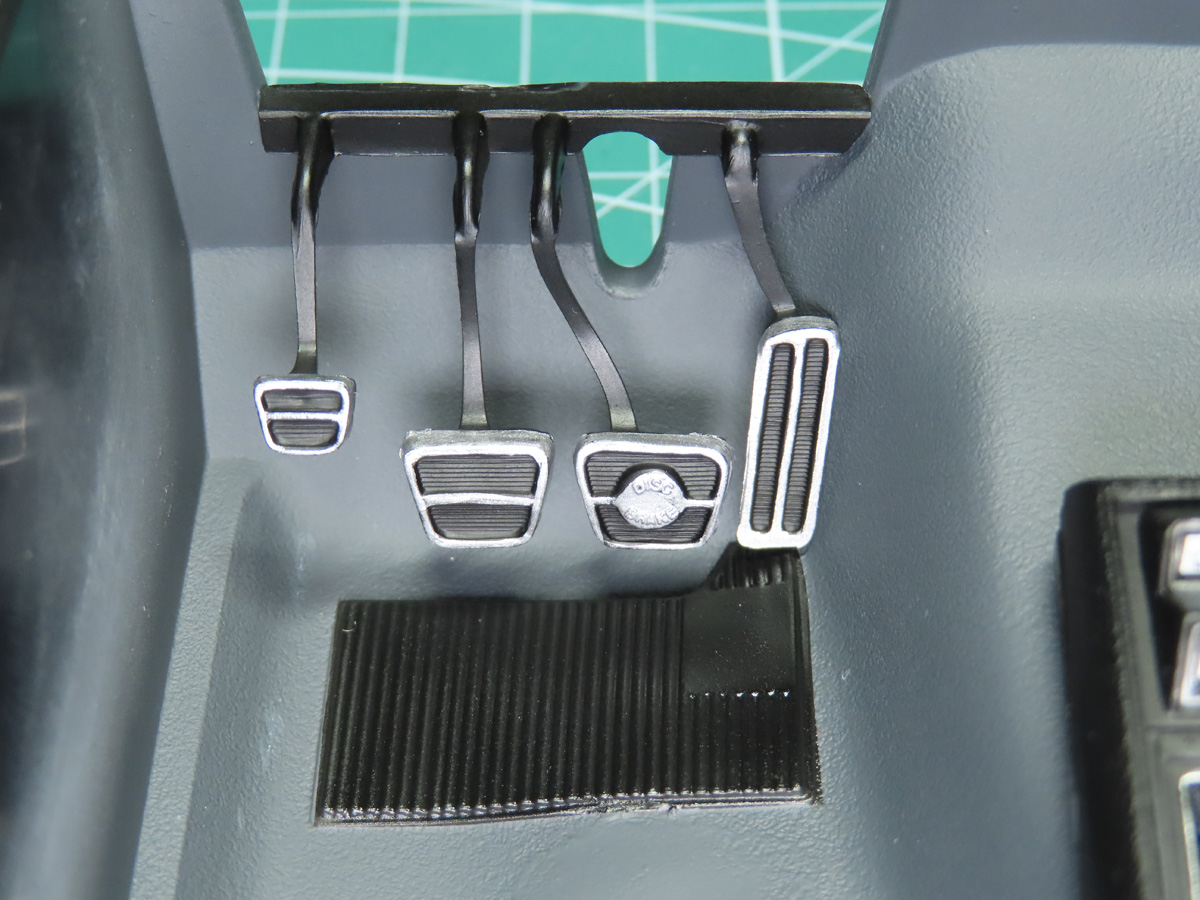
Now that the parts were all completed, I was ready to begin adding them to the tub. I started with the foot pedals, which were painted black, and Tamiya LP-72 Mica Silver.
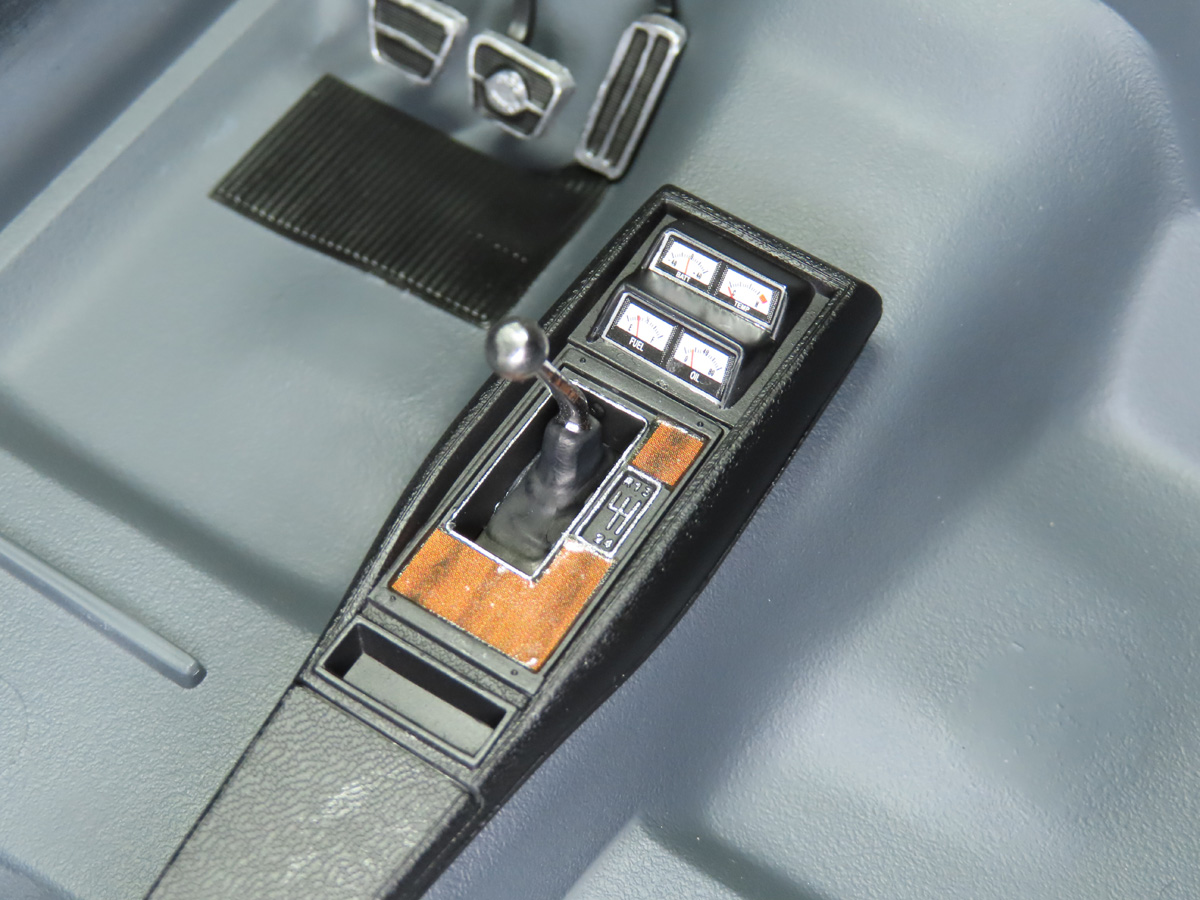
The center console was added next and super-glued into place. The shifter was re-chromed with Alclad Chrome II (ALC 107), and the silver details were hand painted with Tamiya LP-48 Sparkling Silver.
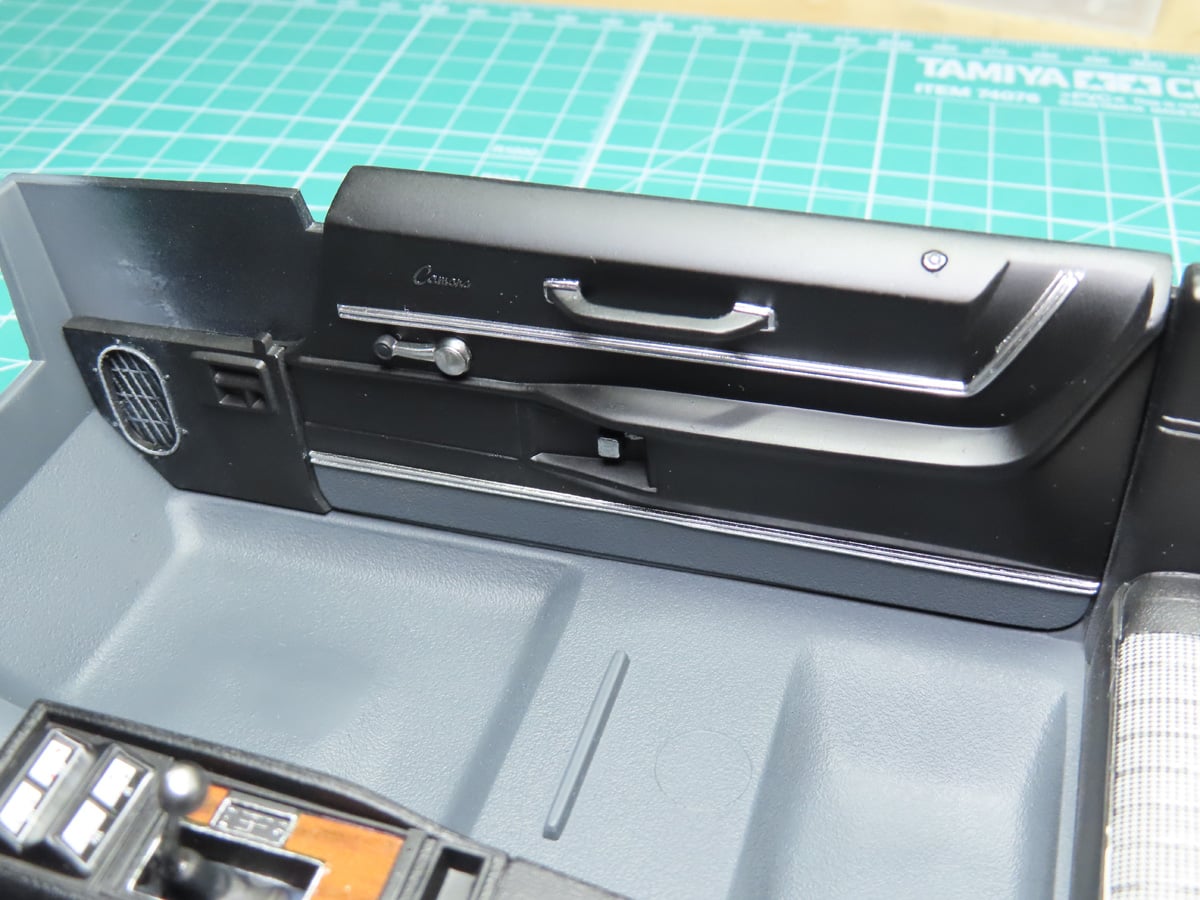
The side walls were then glued in place. Most of the silver details were painted with Tamiya LP-48 Sparkling Silver, as the Alclad Chrome is nearly impossible to paint on by hand. While the Alclad Chrome gave off a nice reflective finish, I was surprised how much the Sparkling Silver lived up to its name, and was, by comparison, a much brighter silver.
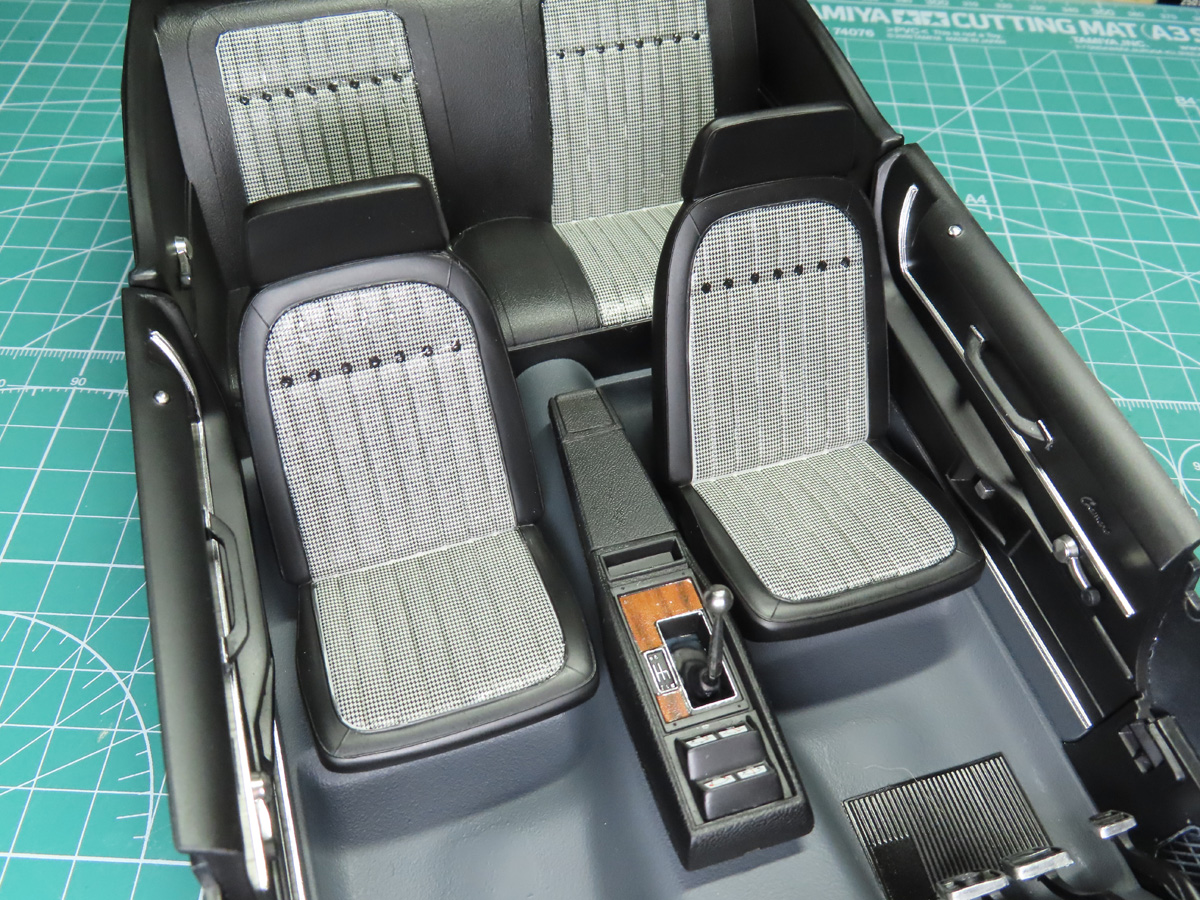
The driver and passenger seats were glued into place. With those set in place, I got to admire that unique pattern in the center sections. I really like it, and I think it adds a great contrast to the rest of the interior.
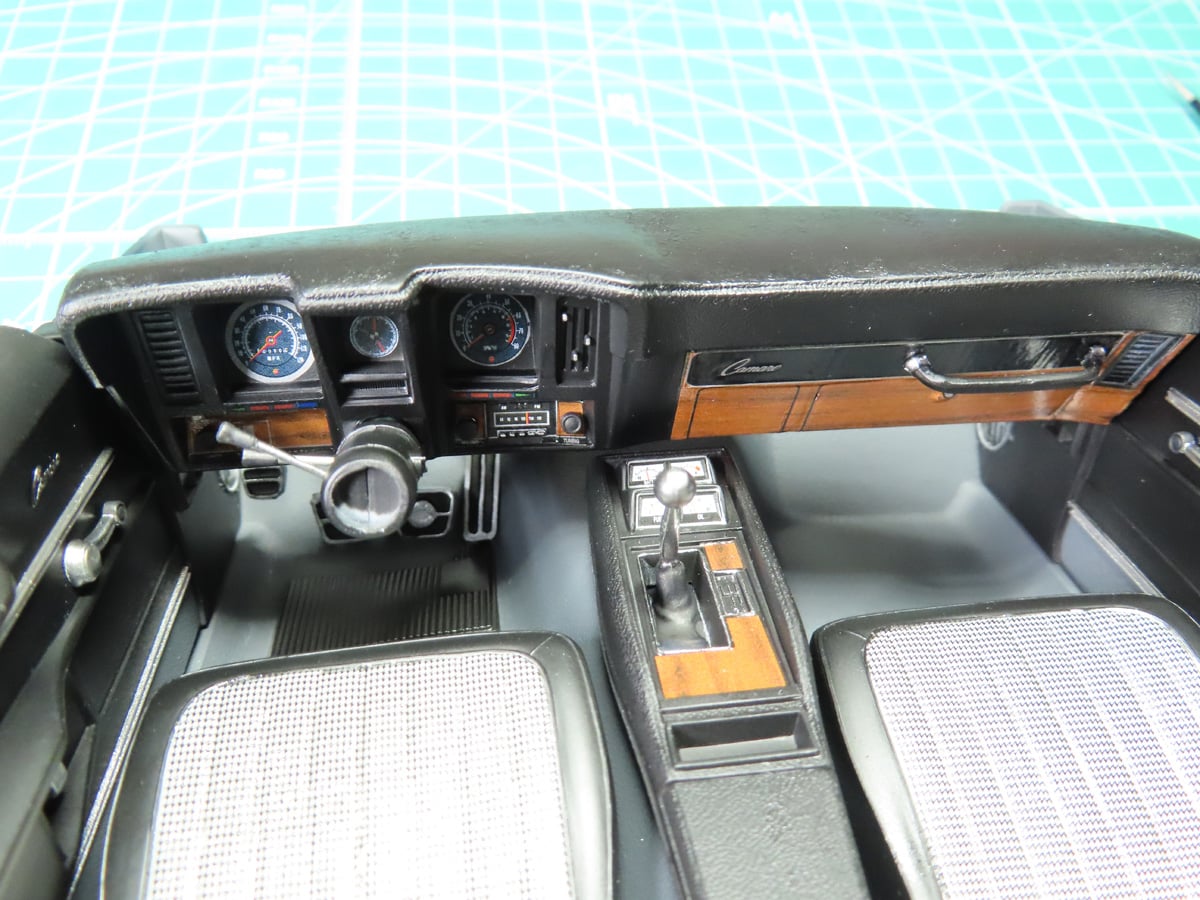
With the dash glued in place, I was able to look at all of the wood grain details. This is something I really like, and I think is missing from modern vehicles, as it adds a bit of elegance to the car.
The steering column was also added, and it connects to an opening between the pedals.
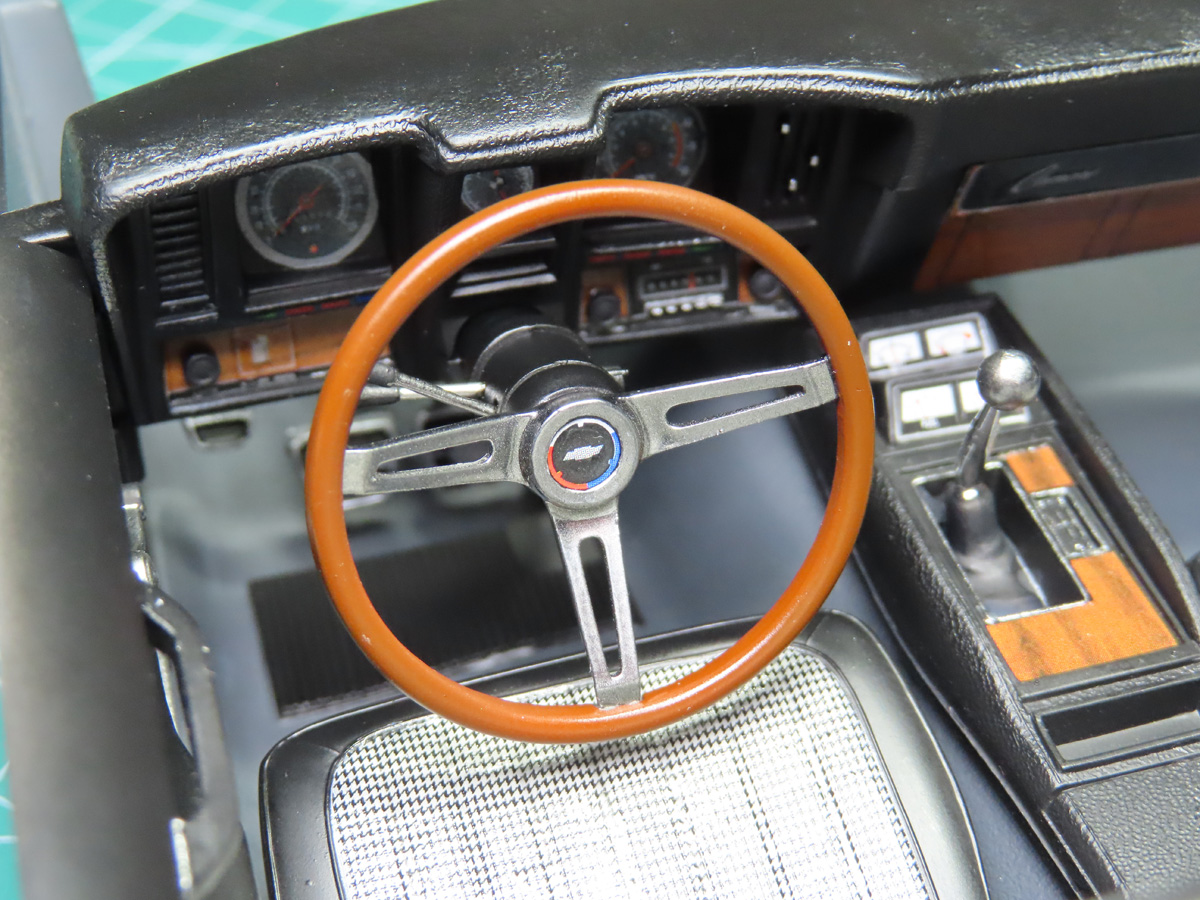
The steering wheel was also re-chromed with Alclad, and the outer section was painted with one of my favourite paints, Tamiya XF-79 Linoleum Deck Brown. Once that had dried, I replicated a lacquer coating by painting it with a light coat of Tamiya X-26 Clear Orange.
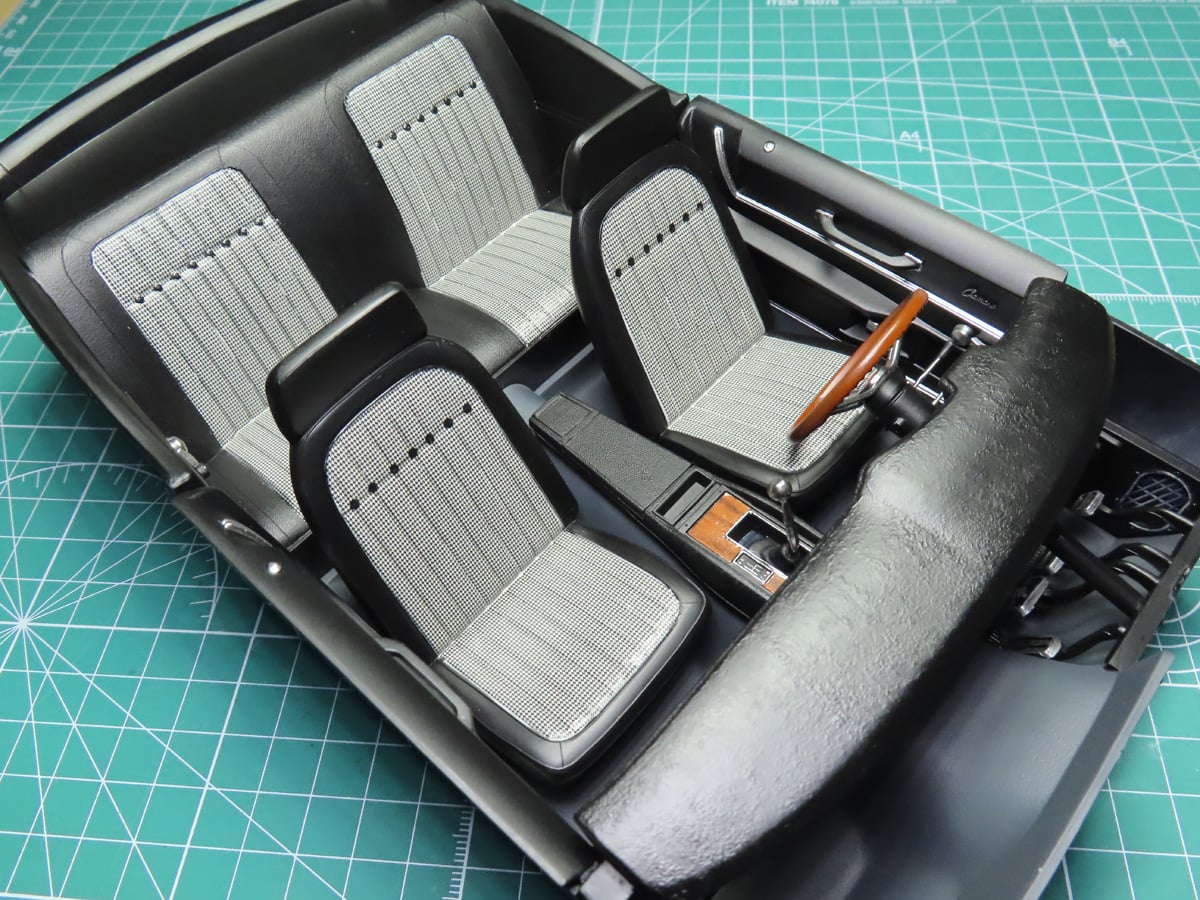
And just like that, the interior is all done. And this was especially fun to build and detail. I should mention that on the dash, a lot of the details are present, so if you don’t want to use the decals, you can have a fun time painting them yourself.
I still find that odd with the open sections for the dials on the dash, and I wonder if there were parts there at one point, and if those parts have sadly been lost to time. I expected them to be clear parts, but there is nothing there on the sprues. It seems I missed the little scissor image on the instructions that states they need to be cut out and glued to the back of the dash.
Next time comes the part I’ve been waiting for ever since this project arrived! And that is to prep the car body and get it painted. I learned a lot when I painted the last car, and I’ve got a few ideas in mind for painting such a large model. And it’s going to be an interesting challenge to paint such a large subject smoothly with just an airbrush. But it’s one I’m eager for!
To be continued…
About the Author:
Jared Demes is a modeler from southern Alberta. He has been building models since he was 4 years old when his Dad first introduced him to the hobby. He has written for several magazines including, Fine Scale Modeler, Scale Aircraft Modeling, Phoenix Scale Models, and others. He has an interest in all modeling subjects, with a focus on WWII Japanese aircraft and Science Fiction.
Jared has won several IPMS awards for his modeling, and currently operates his YouTube channel rebelsatcloudnine, where he showcases model builds and product demonstrations.