
WWII Bomber 1/72 Scale – All Done!
This is the seventh and last part of the Revell Avro Lancaster Mk.I/III Échelle 1/72 04300
Today I’ll be finishing this Lancaster, and I’m quite excited to see it finally standing on it’s own. But before I glue the wings onto the main spar, I want to add a panel wash to the model.
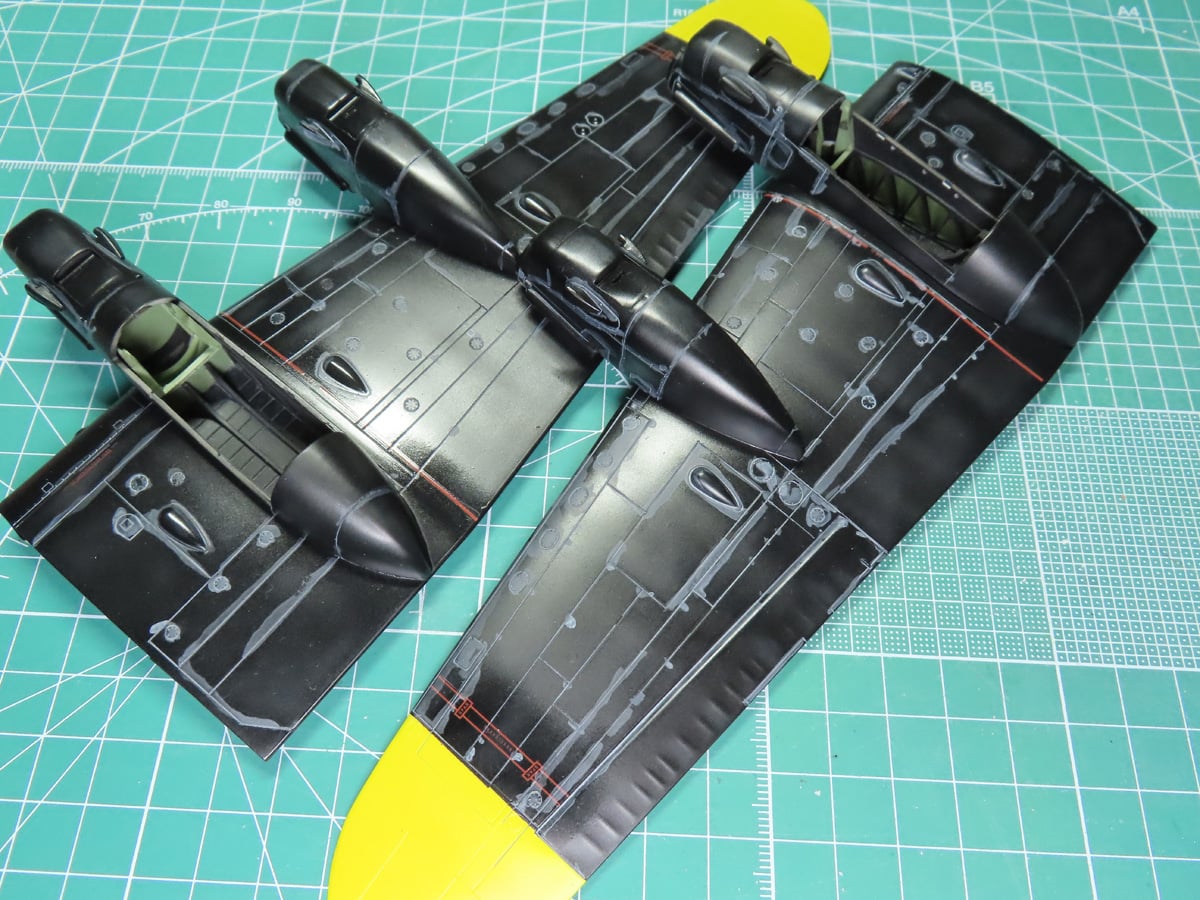
Usually, when I add on a panel wash, I’ll add one color to the entire model. But in this case, with the black underside, I’m going to be starting by applying Tamiya Panel Line Accent Color Grey 87199 to all of the panel lines.
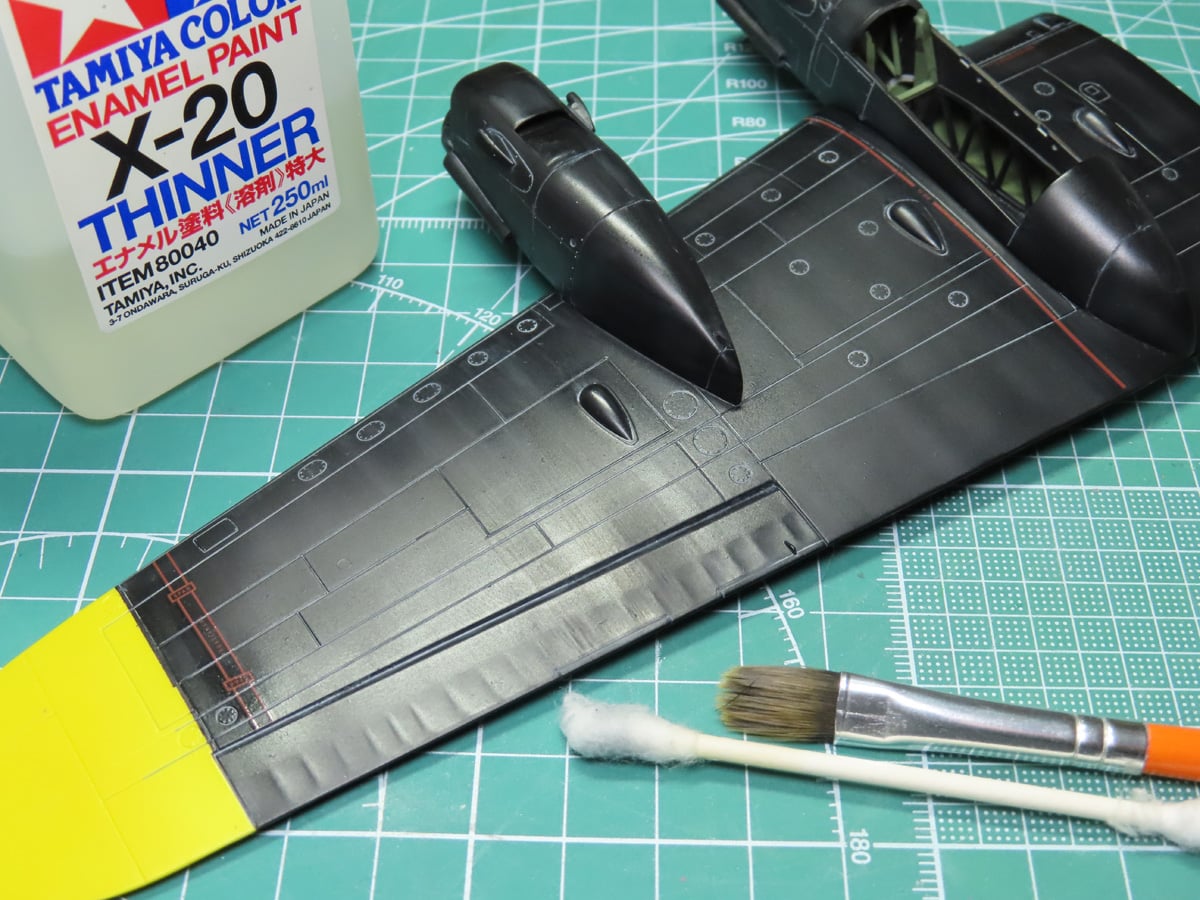
I like to leave the wash alone to dry for around 24 hours. This gives the wash (which is a thinned down enamel paint) plenty of time to dry out and harden. This makes it easier for me to remove the wash and have the majority stay within the panel lines.
Using a wide brush or some cotton buds, I drip them into Tamiya Enamel Thinner X-20. They just need to be dampened a bit, and you can easily begin removing the excess wash.
I also take care at this stage to pull the paint downwards in the direction of the wind flow along the wing. I should also mention that I’ve applied the Panel Line Accent Color, over a gloss coat. The gloss is necessary at this stage as it allows you to remove the excess wash, whereas a flat coat will leave staining marks from the wash.
For the upper surfaces, as well as the yellow wing tips and tails, I’ve applied Tamyia Panel Line Accent Color Dark Brown 87140. I find that Dark Brown has a much nicer appeal than Black, as it’s not quite as harsh and tends to blend in more with the model.
However, for natural metal subjects, I will apply a black wash as it stands out against the reflective nature of the silver paints.
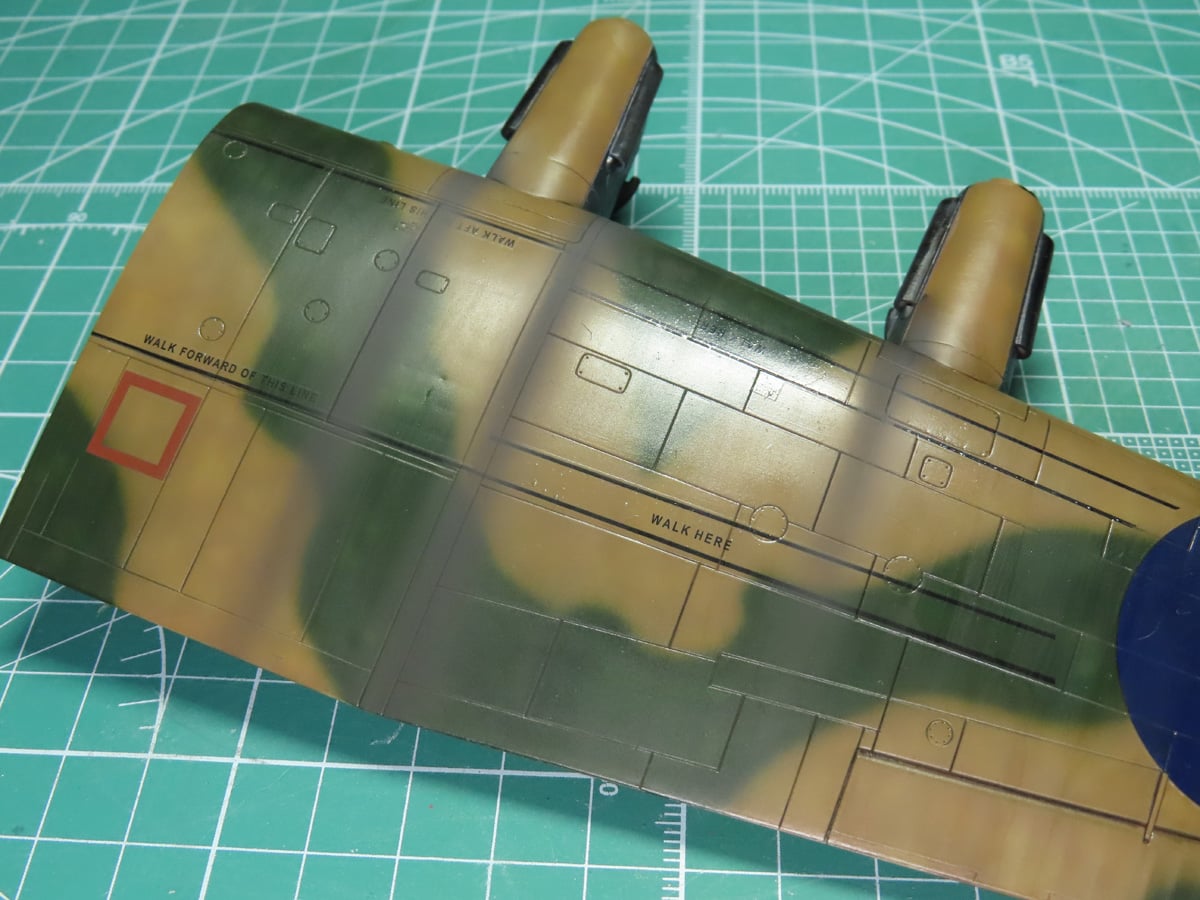
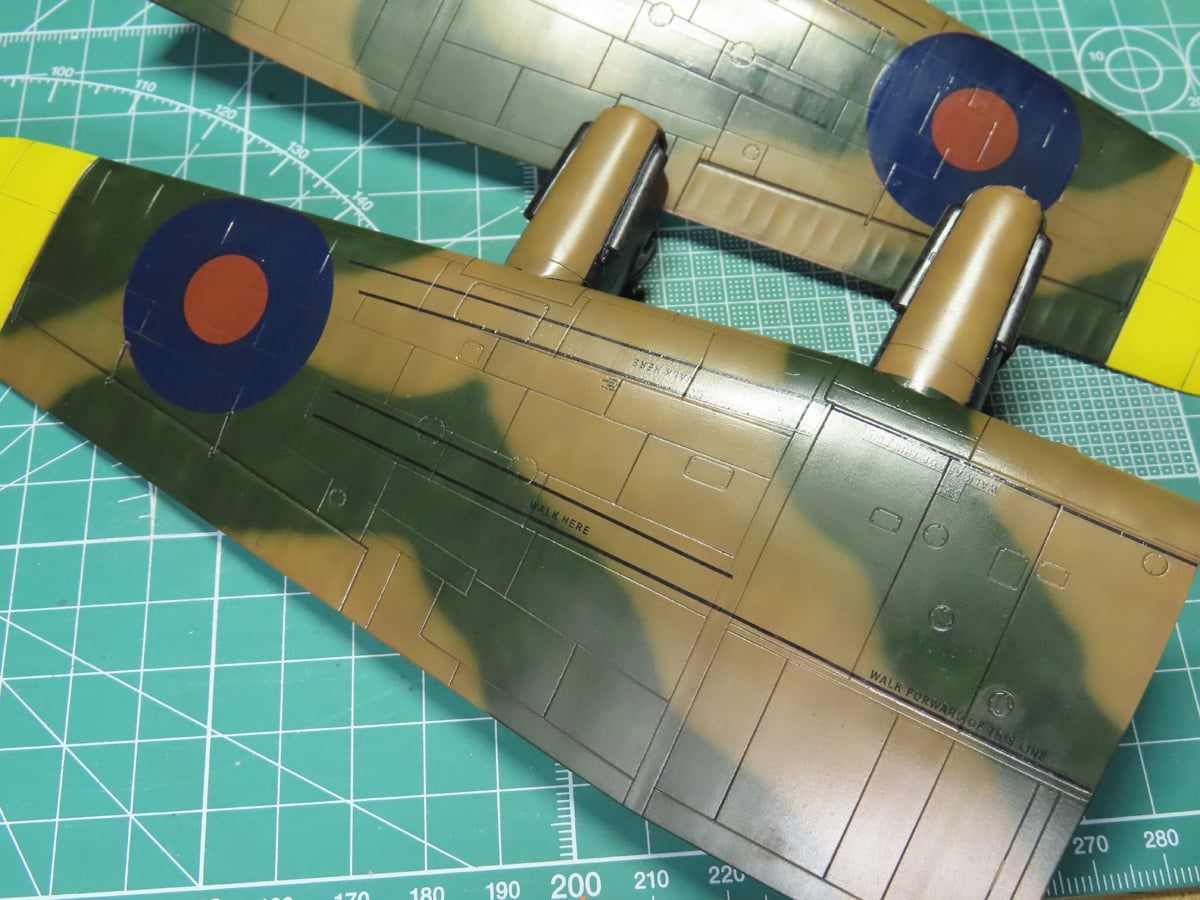
Lancasters are quite well known for their large exhaust streaks that run along the wings, and I wanted to replicate this effect.
Once again, I’m using the Tamiya Panel Line Accent Colors. These are easy to spray on, and if you don’t like the effect, you can quickly wipe it away and try again. I like to layer several colors and this creates a unique effect that you can see on the real aircraft.
I started with a base layer of Dark Brown, and then I sprayed on top of that a few light coatings of Gray to replicate the lead effect from the gasoline.
This paint is very thin, and with the air from your airbrush, you can dry it out and spray on another layer. I will also mention that because this paint is so thin, it’s incredibly delicate, and simply touching it can leave fingerprints. I would suggest that when you are done painting, add on a gloss or a flat coat to protect the streaks.
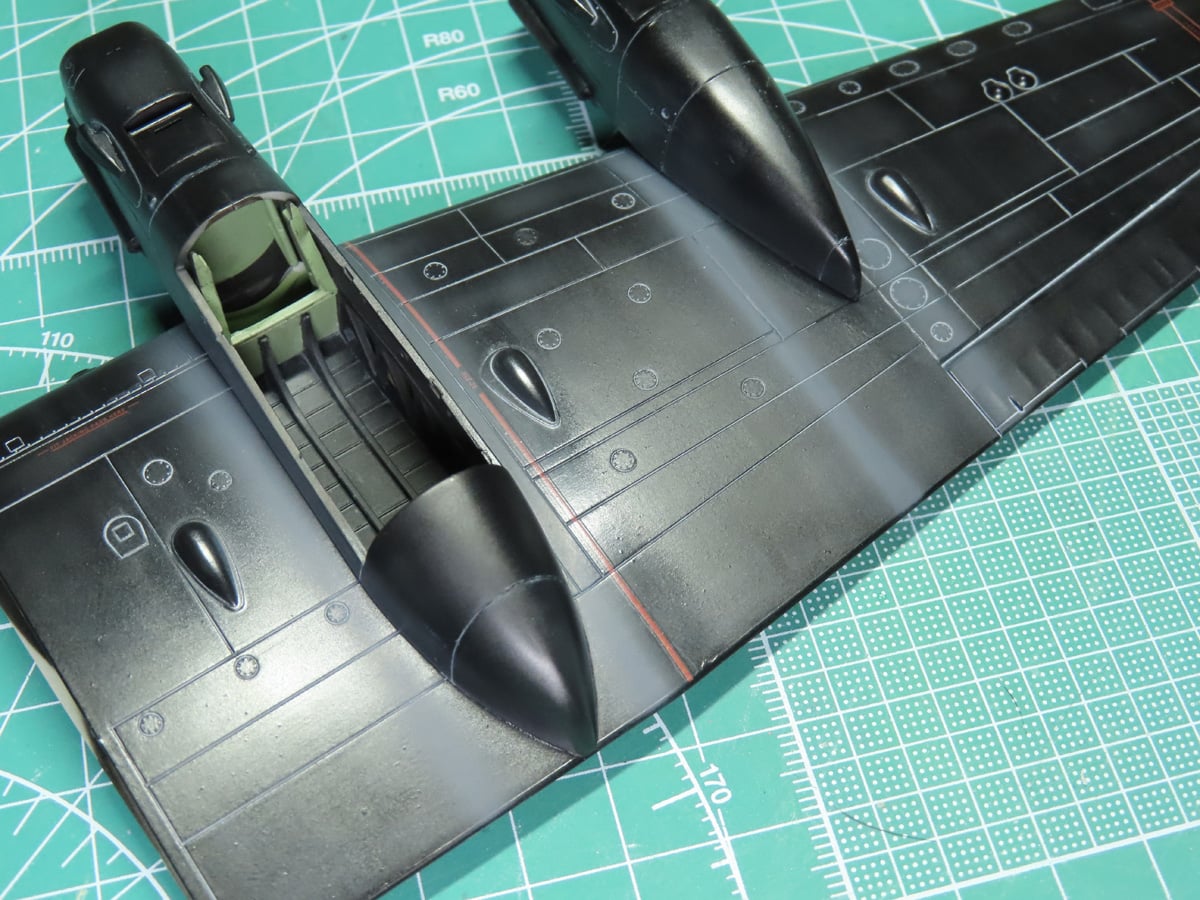
Because of the black underside, I decided to only apply Gray as this color would stand out the most. I sprayed the washes on with 25 PSI, and this was about 4-5 passes until I had built up the color and tone I desired.
I also like to keep these streaks random, maybe making a few a bit wider, or some that are more faded. This helps add a sense of reality to the subject.

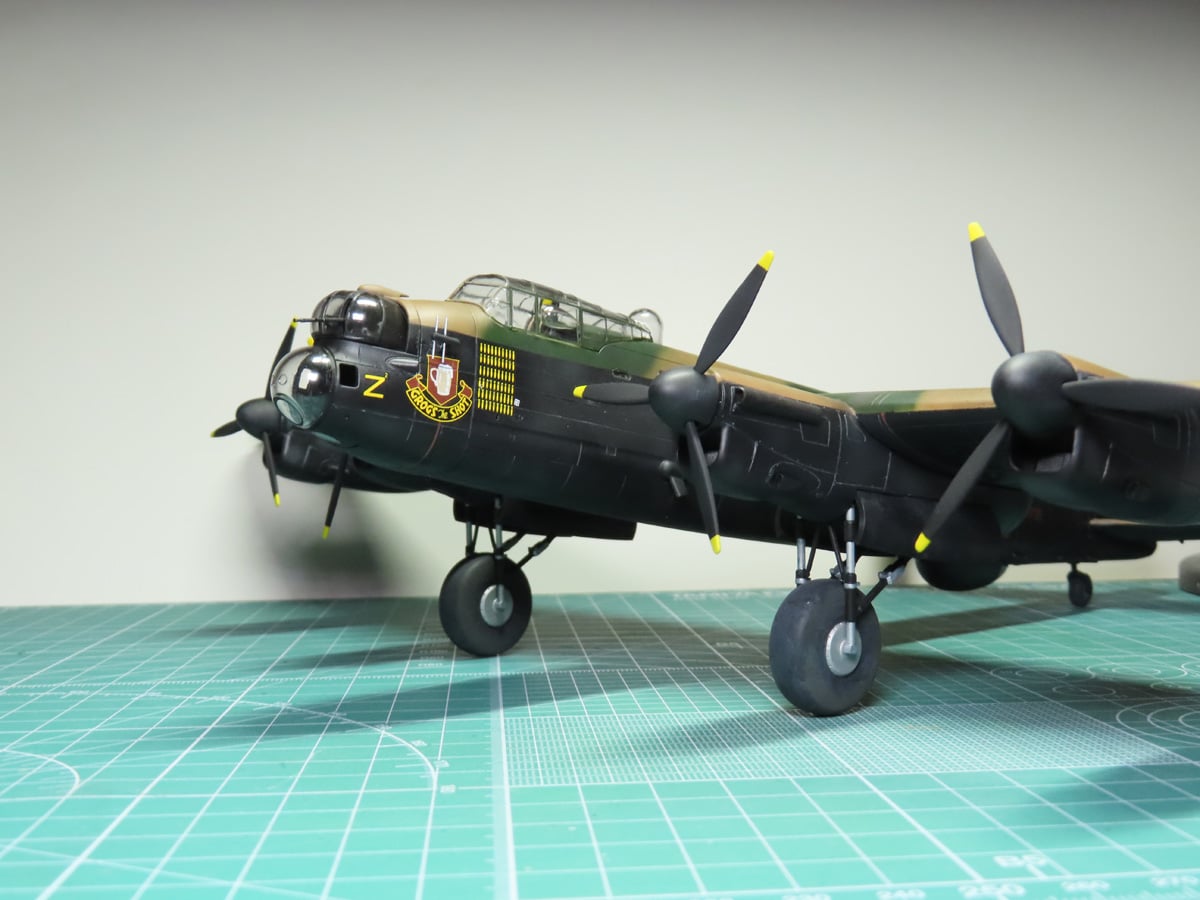
The landing gear struts were added next, and this step is probably the most difficult stage of the model. The struts do fit together quite well, which was a relief; however, it is a bit of a fussy assembly, and I ended up super-gluing a lot of the parts to ensure they were properly secured to take the weight of the model.
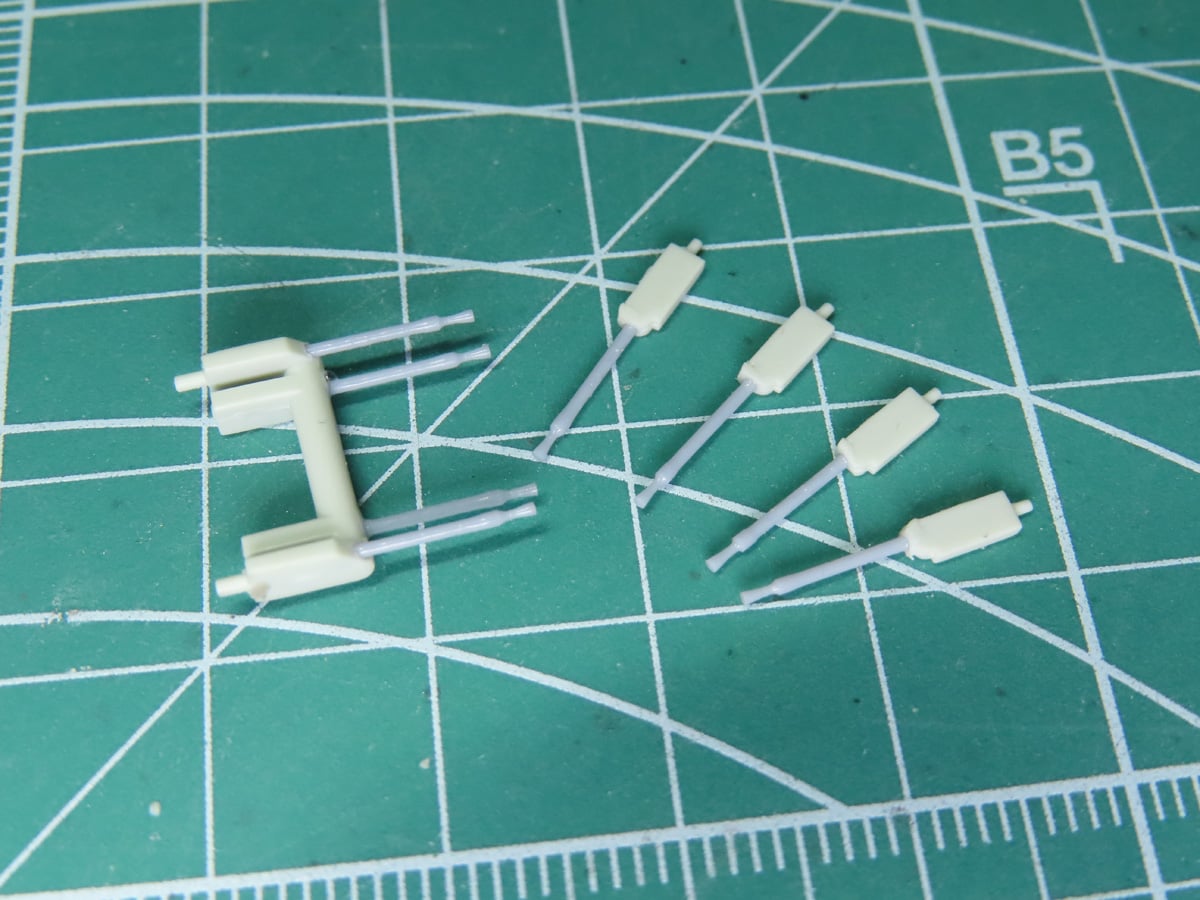
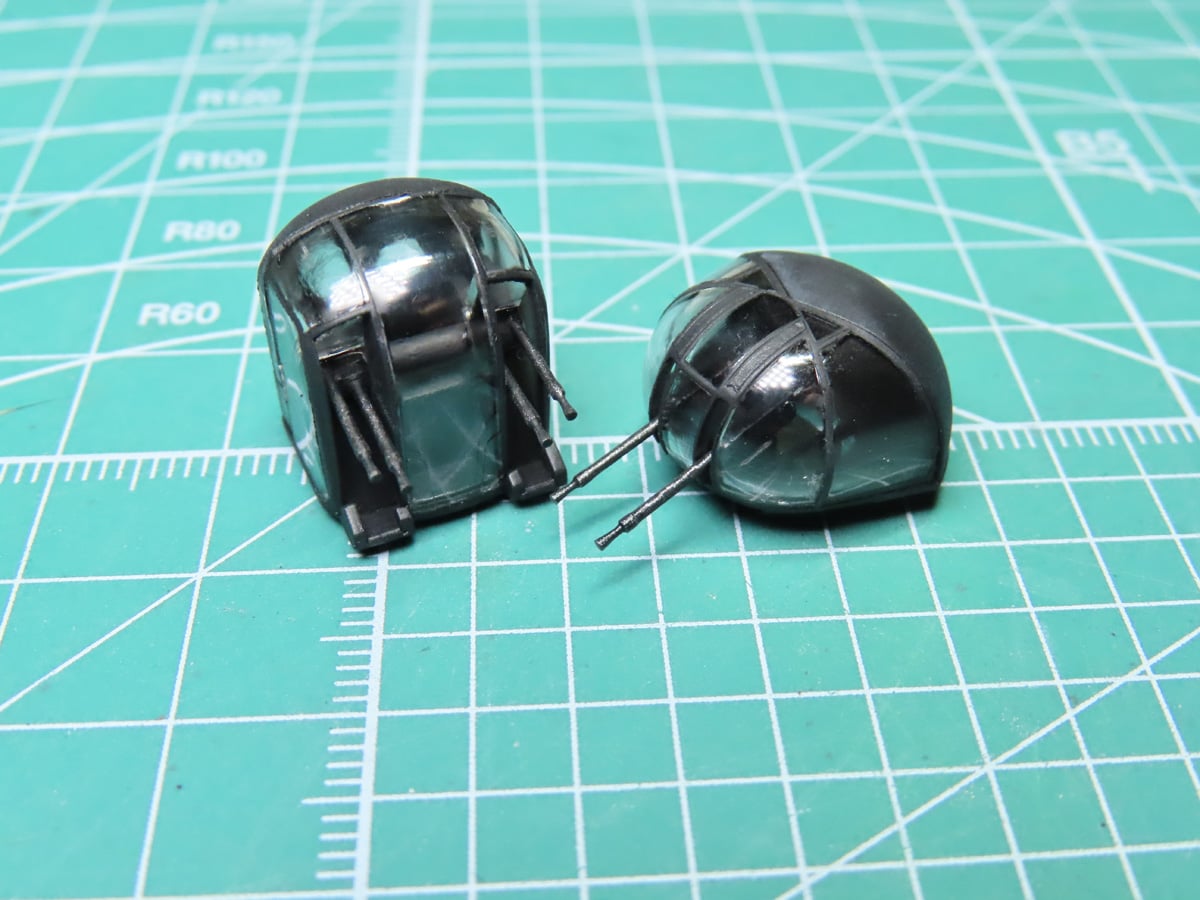
You might recall from the first post that I showed the gun barrels, and that they were just long, rounded rods with no detail to them.
Well, thanks to my brother, he 3D printed me some 303 gun barrels that I could use. They are missing the cooling jacket holes, but you can see the flash hiders, and I think that they look really great.
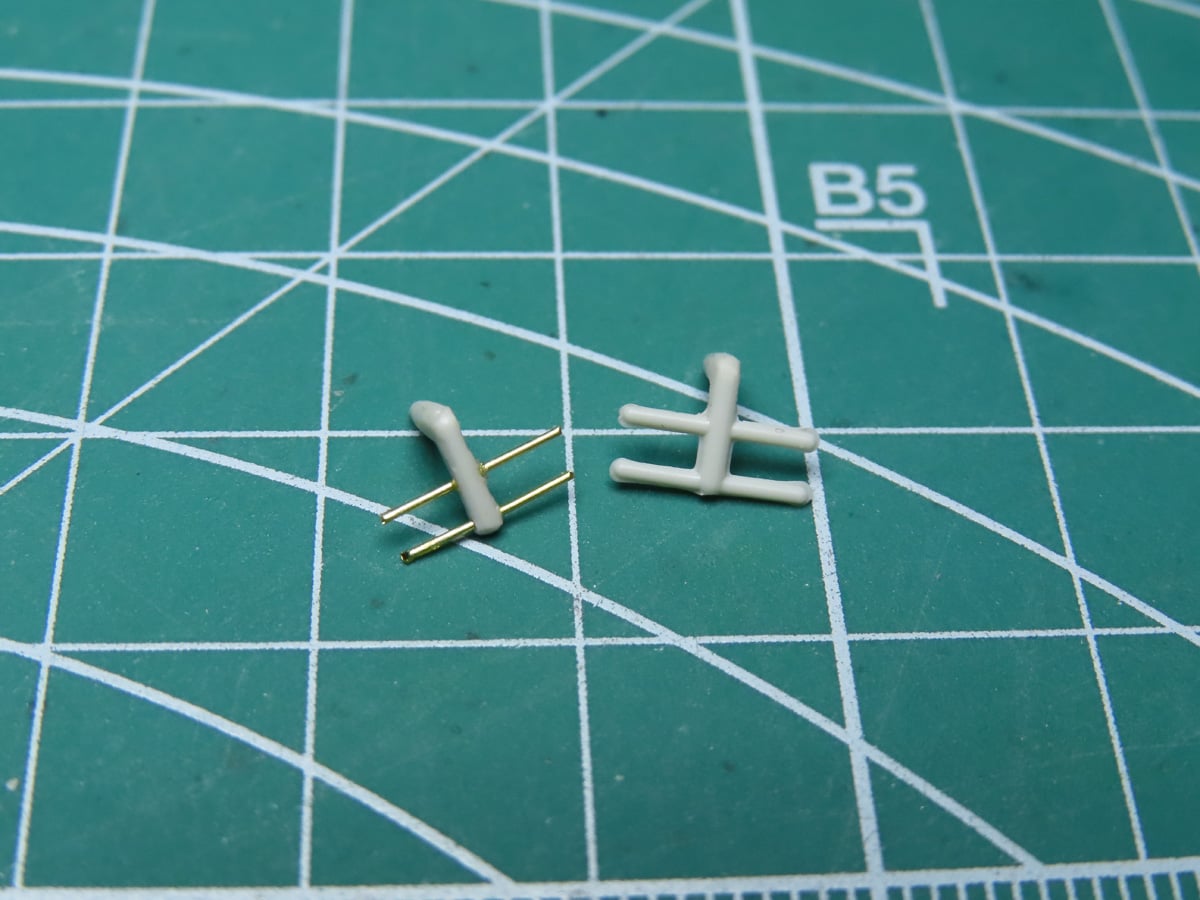
I decided to replace the antenna the sit on the nose. I cut off the thick plastic and replaced it with brass wire.
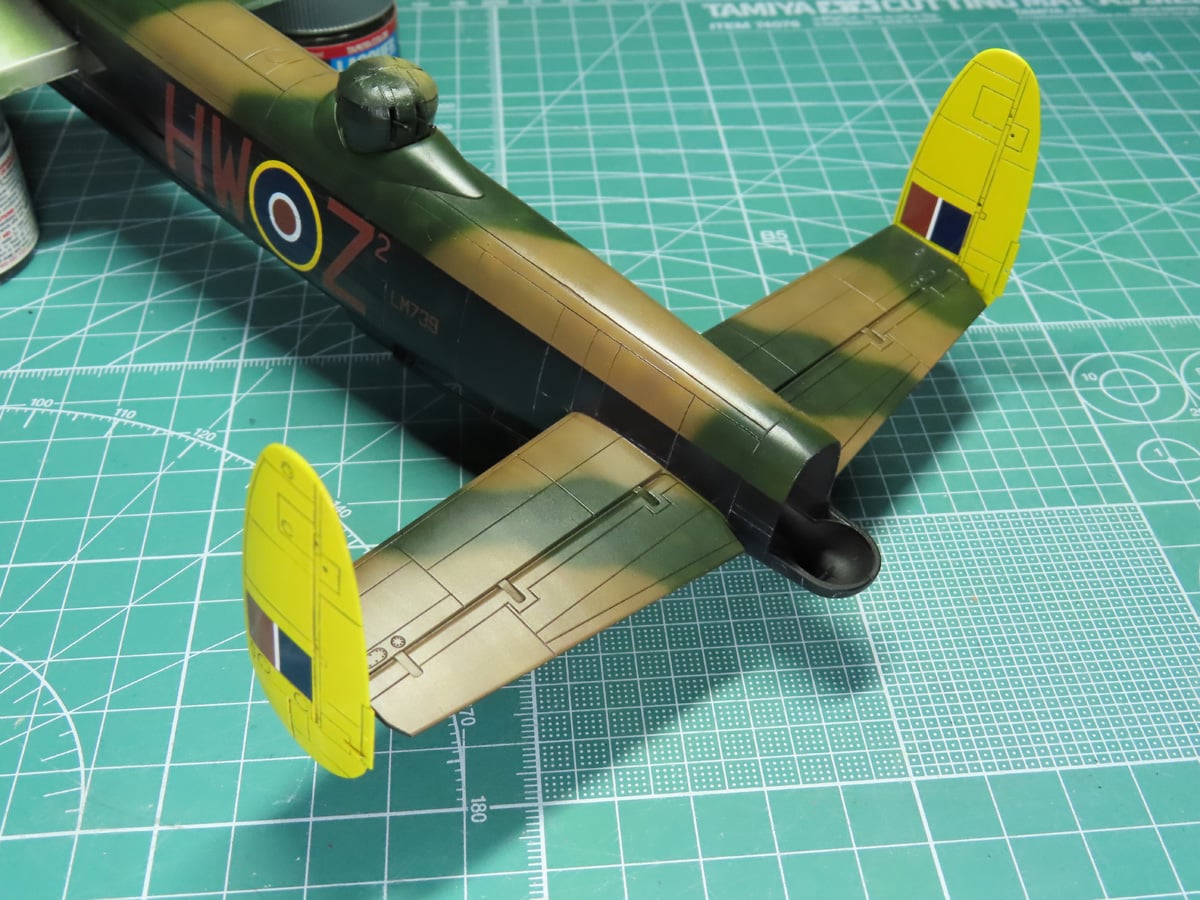
Moving back to the fuselage, I’ve added on both of the tails. These don’t really have a snug fit, so take care to properly align the tails.
I sprayed a flat coat on the entire model and the last of the smaller parts. Mr Color C182 Flat Clear is my preferred paint, as it’s very durable and restores the paint to its original tone.
With the flat coat applied, I removed the maskings from the turrets. The new gun barrels do indeed look a lot nicer. To help them stand out more against a mostly black aircraft, I lightly drybrush a bit of Tamiya XF-56 Metallic Gray with my Vallejo Small Drybrush B07001.
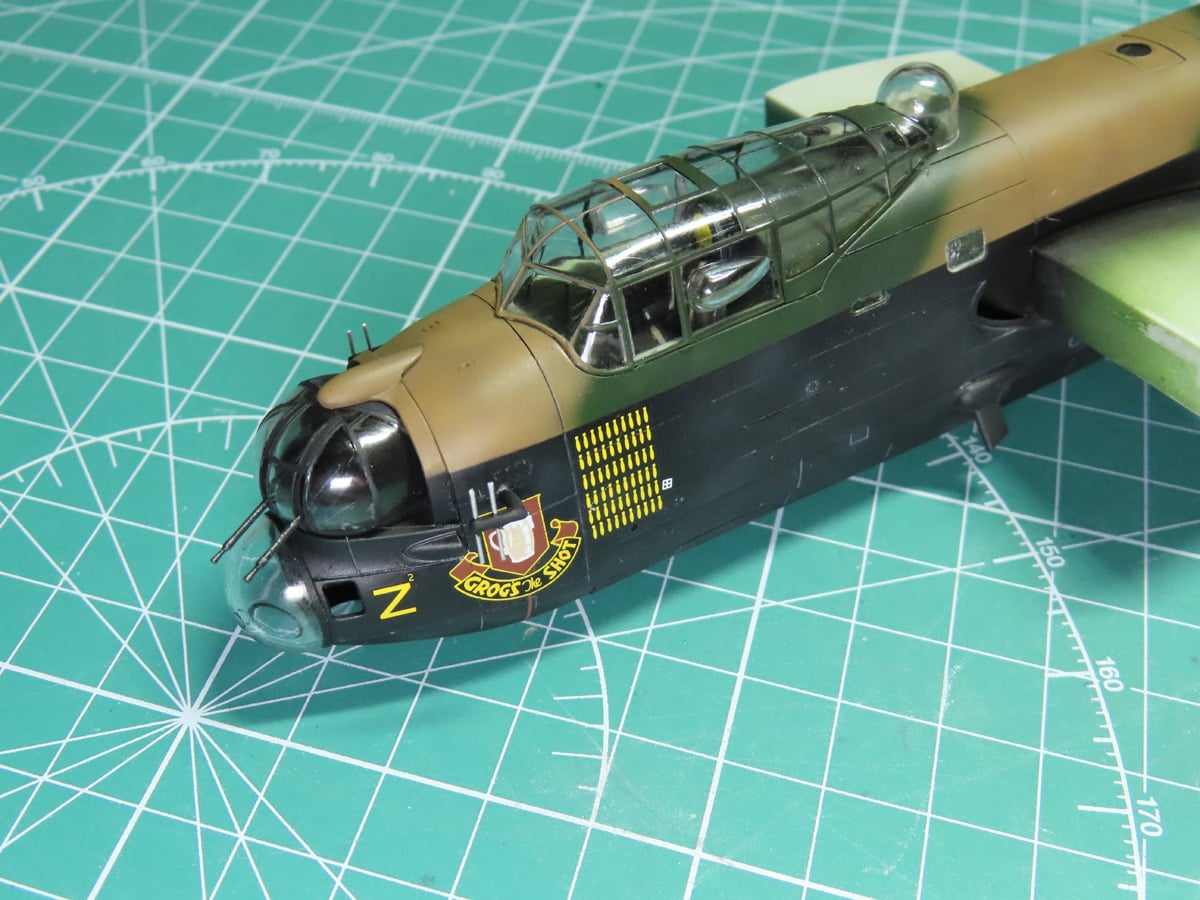
I removed and cleaned the canopy, and it’s nice to see all of those details in the cockpit again. The antennas were added to the nose, and like the gun barrels, they look much more to scale with the rest of the aircraft.
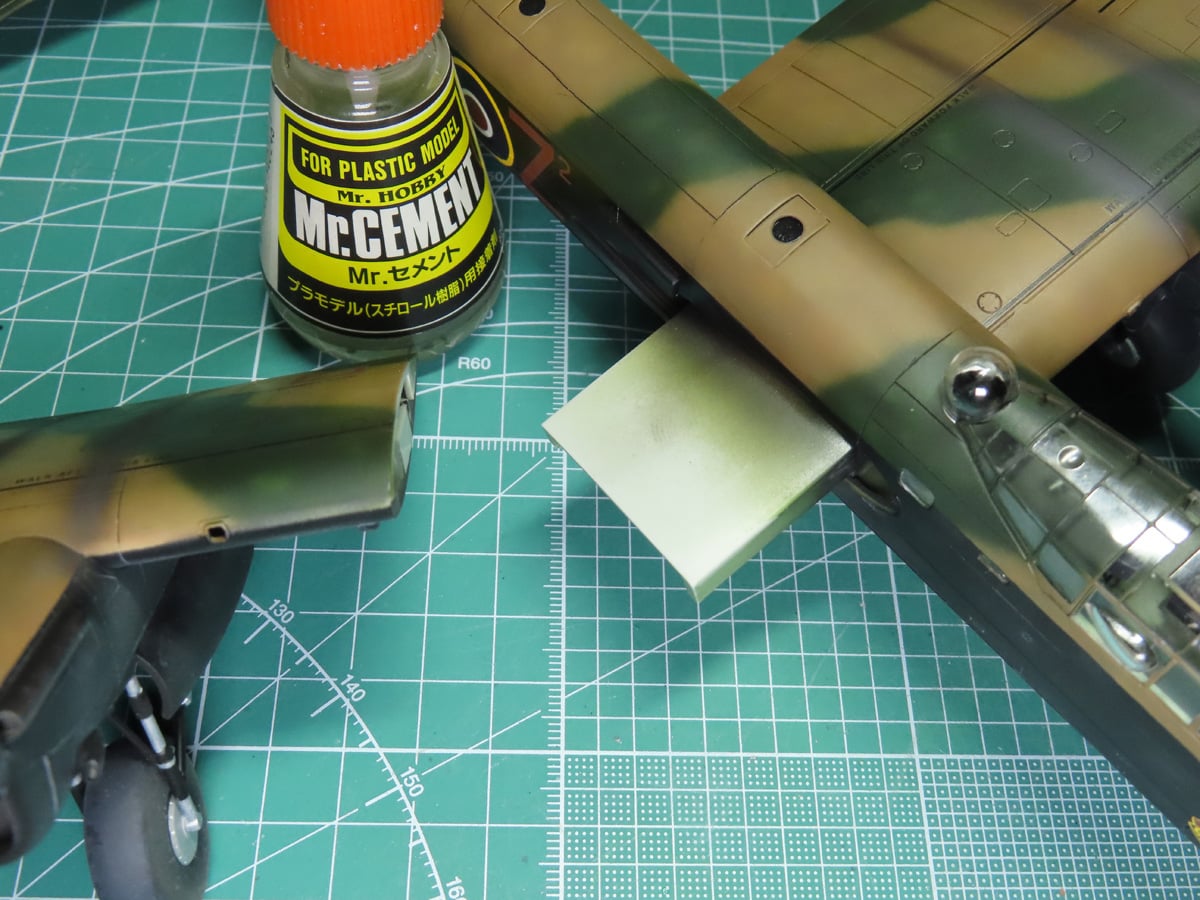
I applied a good amount of Mr Cement along the top of the wing spar. And then I could carefully guide the wing into place. It’s a good and tight fit, so I feel that the wings are quite secured to the model.
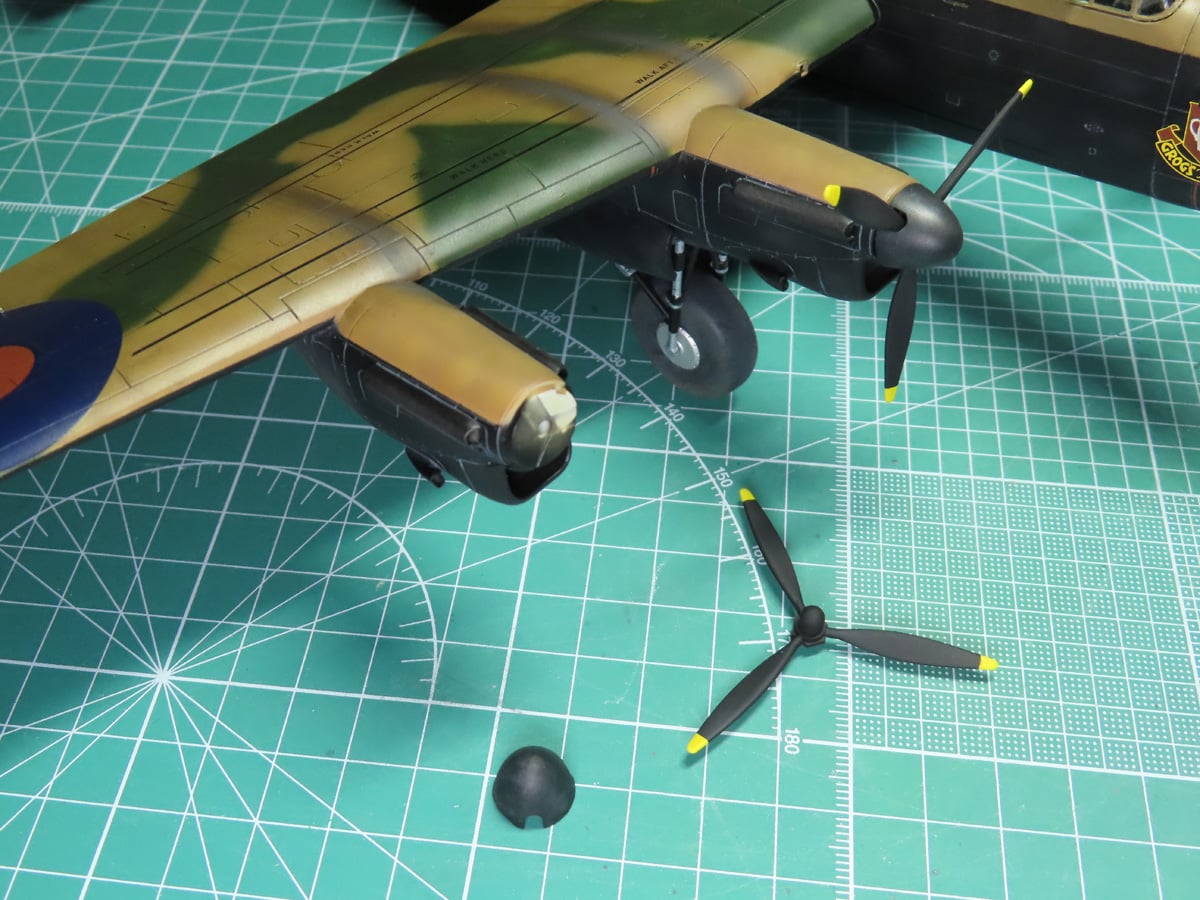
Lastly, I added the propellers and spinners. The propeller tips were painted with Tamiya LP-8 Yellow, and the rest of the blades were painted with XF-1 Noir mat, and a light coating of XF-50 Neutral Gray around the edges.
The spinners were painted in the same manner as the underside of the Lancaster. Adding the propellers to the model was easy. Once the spinners are in place, it’s easy to get glue around the mount, and this will prevent the propellers from turning.
I’ve got a few things left to do on this model. The wing tip lights need to be added. I need to find my Micro Scale Kristal Klear MI9 glue so I can fill in and make those 2 small windows on the nose. And the pitot tube that sits on the fuselage has vanished, and I’m hoping it’s not been swallowed up by the carpet monster.
Those things aside, this Lancaster is done!
This was a fun project to take on, and it was interesting to see how everything went together compared to the Airfix Lancaster. I built that one about 8 years ago, and it’s fun to see how the 2 companies handled this subject.
Revell went with an interesting choice; they wanted to keep things as thin and to scale as possible. And this certainly adds to the accuracy and finesse of the model, but it also makes things a bit on the fragile side. It’s actually very impressive to have a kit this big, only to pick it up and see just how lightweight it is.
I think that some modelers might get frustrated with the landing gear assembly. They go together well, but you’ll need a set of sturdy pointed tweezers. And the rods for gun barrels is an interesting choice, especially when you consider how detailed the rest of the kit is.
I had a lot of fun with this project, especially with all of that painting. I’m eager to get those final details completed and take some final pictures of this kit. I hope that you’ve enjoyed following along with this build, and that it might be helpful for you if you are building a Lancaster.
About the Author:
Jared Demes is a modeler from southern Alberta. He has been building models since he was 4 years old when his Dad first introduced him to the hobby. He has written for several magazines including, Fine Scale Modeler, Scale Aircraft Modeling, Phoenix Scale Models, and others. He has an interest in all modeling subjects, with a focus on WWII Japanese aircraft and Science Fiction.
Jared has won several IPMS awards for his modeling, and currently operates his YouTube channel rebelsatcloudnine, where he showcases model builds and product demonstrations.
Last Post: Part 6
First Post: Part 1
Completed Images: Part 8