
Tamiya North American F-51D Mustang
This is the seventeenth part of the Tamiya North American F-51D Mustang Korean War 1/32 Scale 60328 with RCAF Markings.
I decided to keep on painting a few more of the details on the Mustang before adding on the rest of the decals.
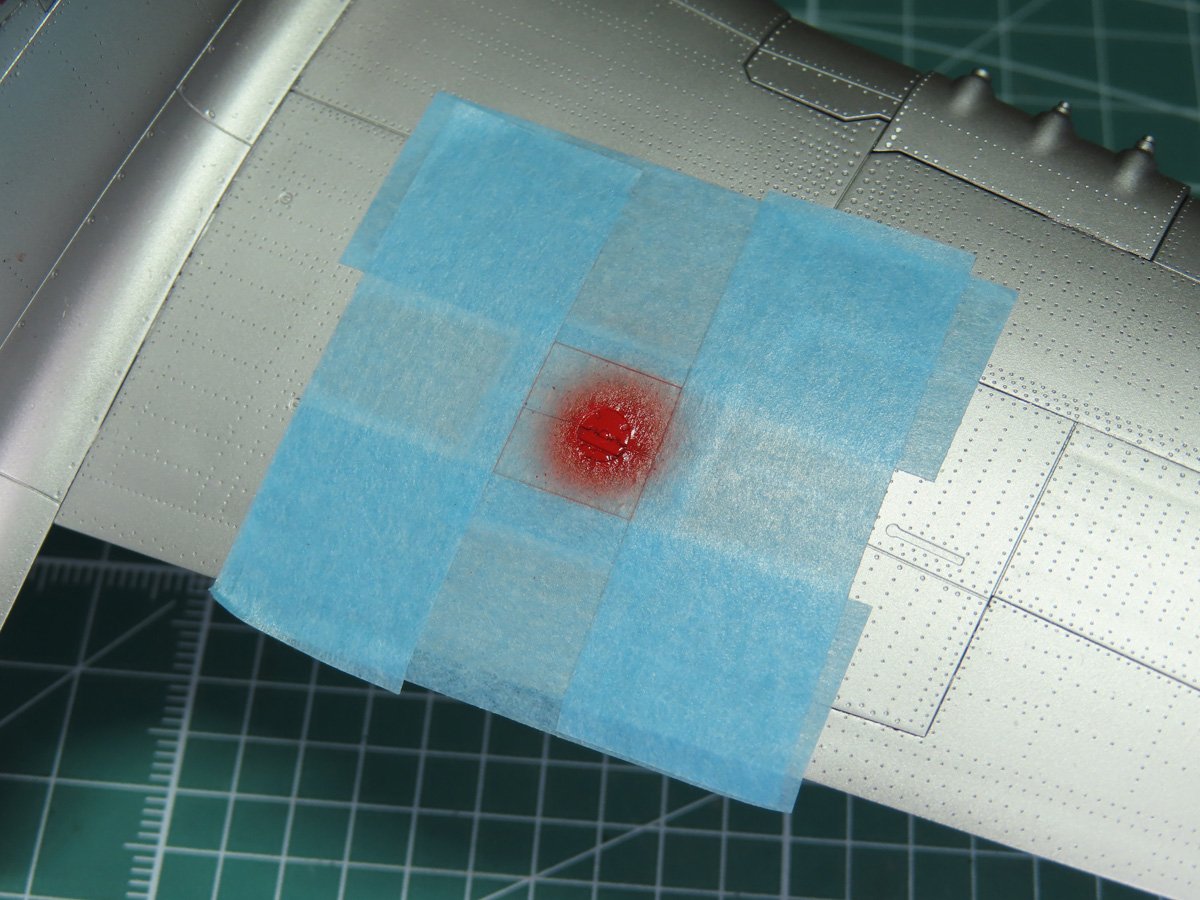
I started by using a circle template to cut some holes to go around the fuel caps. There is one on either wing and one on the fuselage at the back of the canopy. The fuel caps were painted with Tamiya LP-50 Bright Red, and they nicely stand out on the model.
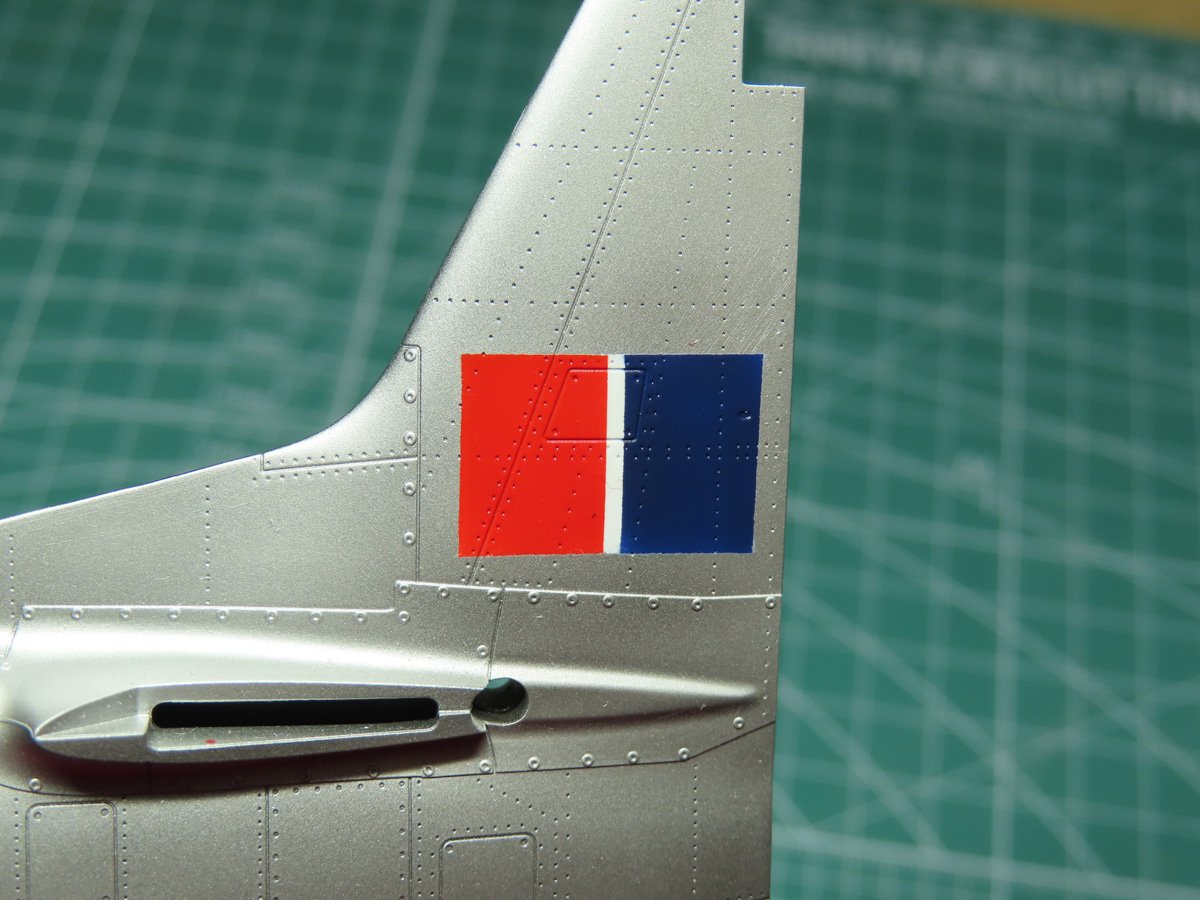
I carefully masked off and painted the fin flash onto the tail. This was fairly easy to do given the shape, and I used the same colors as the roundel.
I started with a base layer of Mr Color C62 Flat White, and then I masked the center line with Tamiya 1.0mm masking tape.
The red side was Tamiya XF-7 Flat Red, and the Blue was my custom mix of Tamiya XF-8 Flat Blue, et XF-17 Bleu de mer at an 8:1 ratio.
I sealed the fin flash with a gloss coat to protect the paint. I used Mr Color C46 Clear, as it is a nice gloss to work with, and it has a very hard finish.
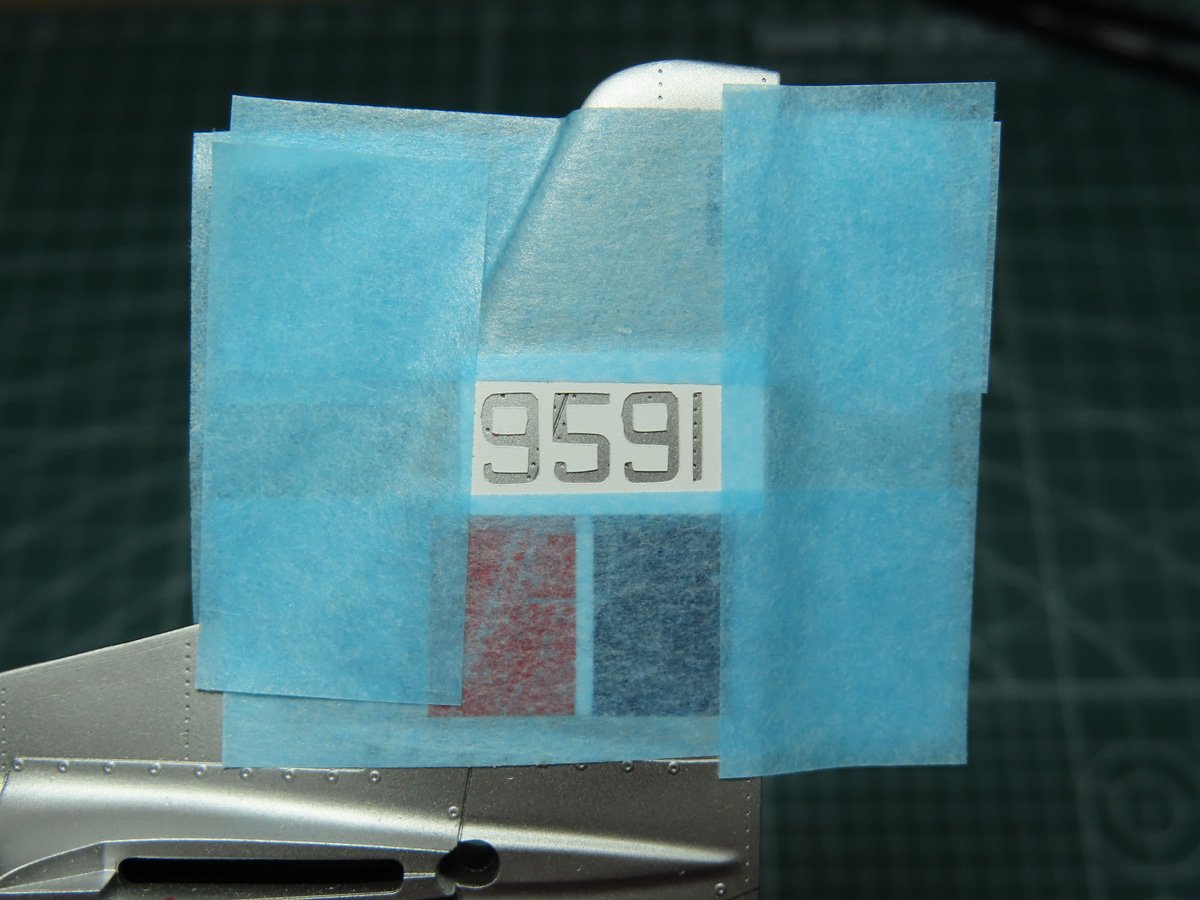
The last stencils were the numbers just above the fin flash. The numbers are a bit bigger than they should be, but this was the smallest we could get the cutter to create with this design.
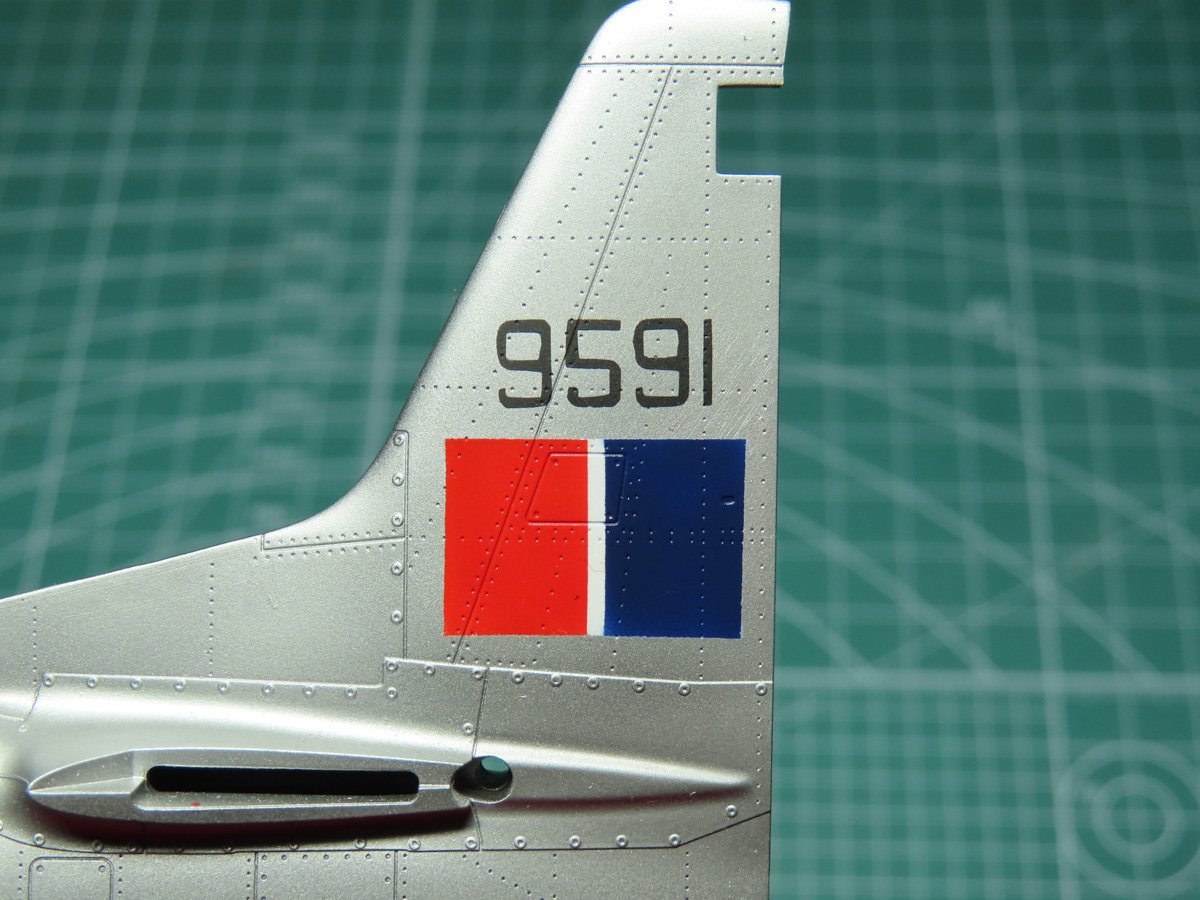
The numbers were painted with Mr Color C92 Semi-Gloss Black. After the paint had dried, I carefully removed the maskings to reveal the completed tail section.
I’m very pleased with this result, and that the vinyl didn’t lift any of the paint. Now that the tail section is completed, I can move on to the decaling process.
Decals can be a difficult process, and oftentimes, even with the best preparation, the decals can have a mind of their own. Tamiya decals, though beautifully printed, are on the thicker side and can have issues conforming to the surface of a model.
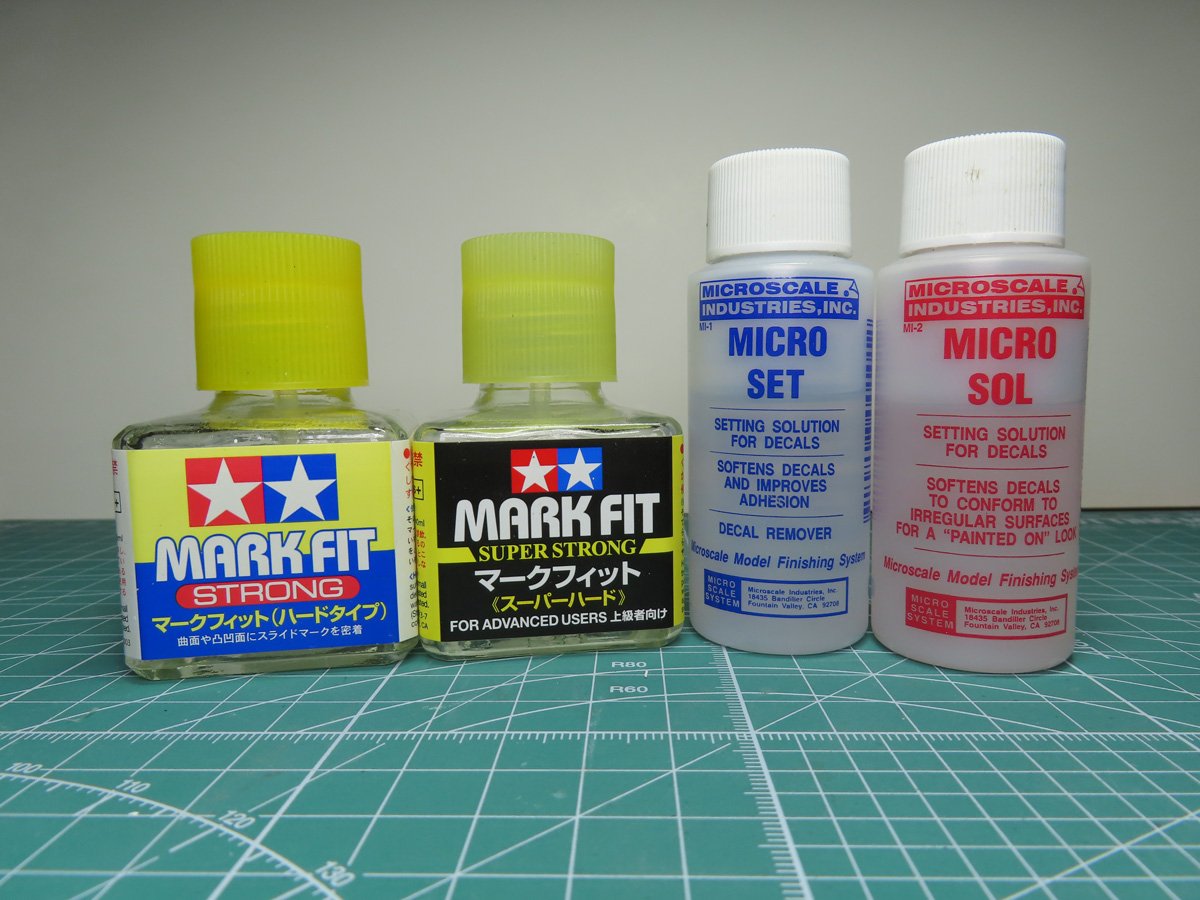
Tamiya makes their own decal solvents, beginning with Mark Fit, and then more aggressive Mark Fit Strong, which I personally never found to be that strong. And the latest version, Mark Fit Super Strong.
I really like this solvent as it’s quite aggressive, so you do need caution, but it can produce wonderful results on tougher, more stubborn decals, and give a painted on effect.
Micro Set MI-1 and Micro Sol MI-2 have been a modelers best friend for many years now, and they are a much slower-acting solvent. Usually, I’ll use these on thinner decals, starting by applying a thin layer of Micro Set onto the model. And once the decal is set in place, I’ll brush on a layer of Micro Sol to help melt the decal and conform to the surface.
There are many other decal solvents out there, and it can be difficult to know which solvent is the best. Sadly, I can only speak from my own experiences, but give different brands a try and see which you find works best for your modeling needs.
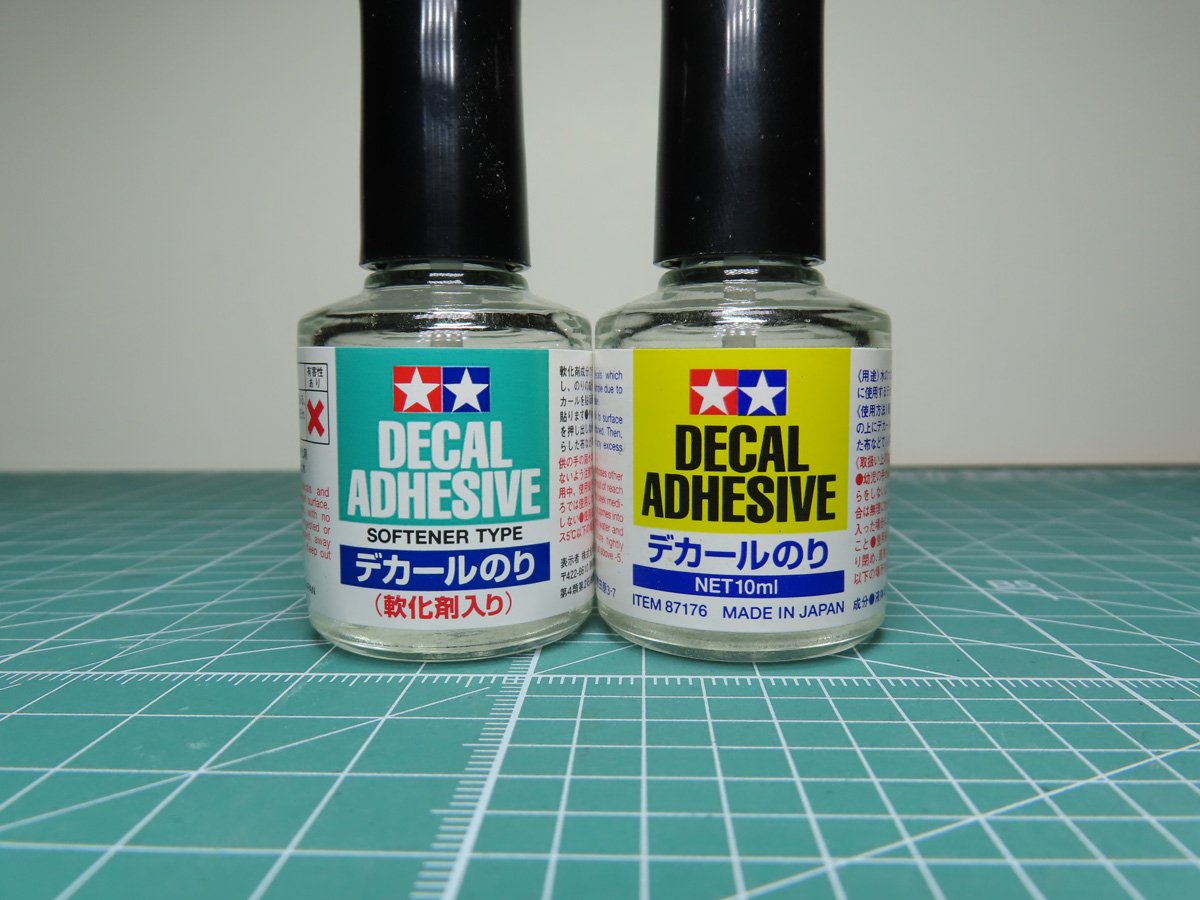
Since I painted most of the major details, I’m really only going to be applying the stencils to the model. And these tiny stencils run the risk of losing their adhesive backing due to their small size.
To remedy this situation, Tamiya had created Decal Adhesive 87176. Decal Adhesive is basically a glue that you apply to the model first before you add the decal. The newer version with the blue label is the Softener Type 87193, which is designed to melt the decal after it’s been laid down.
I’ve used this a few times now, and I haven’t really seen any grand results from it. However, I strongly suggest trying out the basic Decal Adhesion, as it has saved me many a tiny decal over the years.
And on a last note, this stuff does react quickly, so if the decal is set and in the wrong place, simply add some water to the decal, and the Decal Adhesive will eventually let go, and you can reposition your decal.
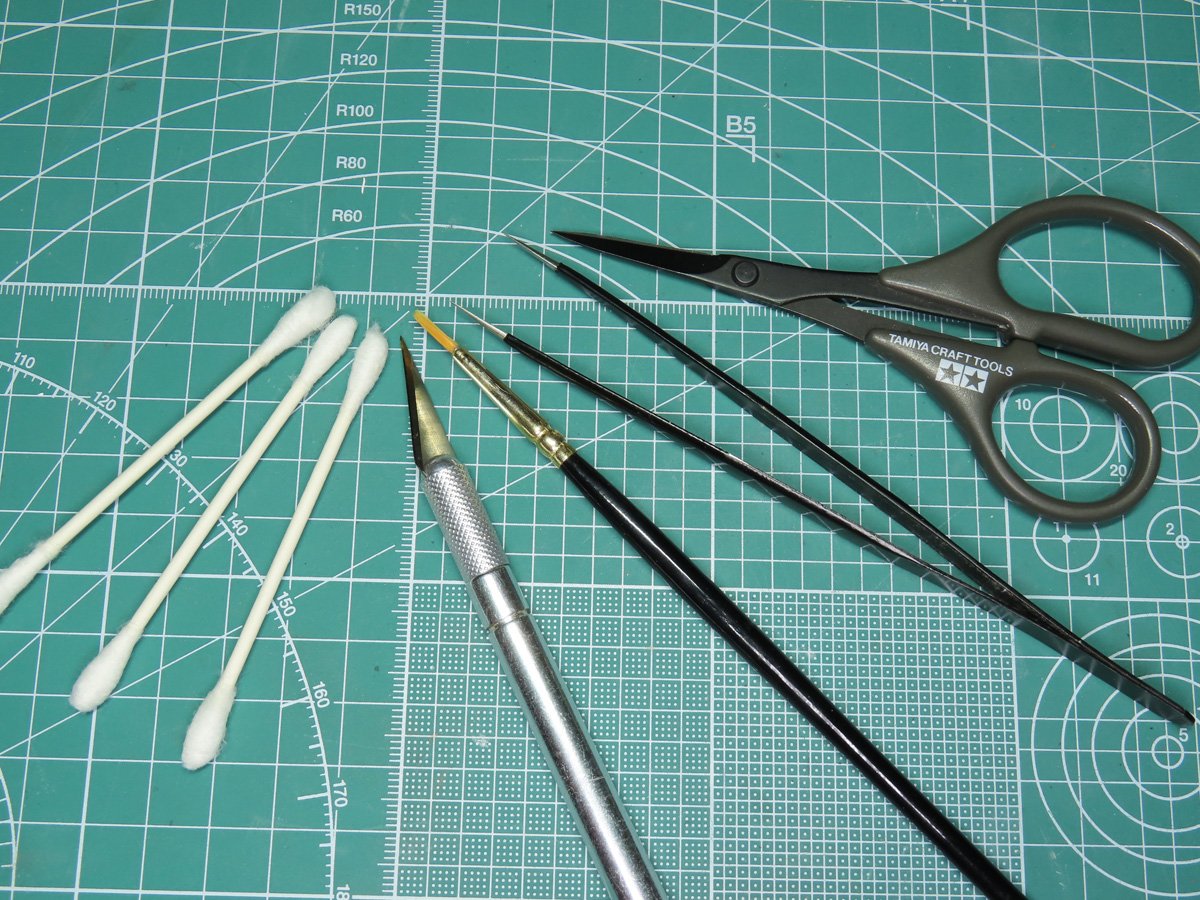
Some of the tools I use for decaling are Ciseaux à décalcomanies Tamiya 74031. These are fantastic small scissors with a lot of control, and I mainly use them for trimming away excess carrier film from around the decals.
Pointed Tweezers are essential for not only grabbing the decals from off the paper backing, but also getting the decals positioned in difficult places.
This is my decaling brush; it’s a brush that was included with an Airfix starter kit, and I only use it for decal solvents.
An Excel hobby knife with a brand-new blade. In this case, it’s an Excel #11 blade, and a new blade will make cutting out the decals much easier.
And lastly, some cotton buds, so that I can roll out the excess water from the decal and gently press the decal to the surface.
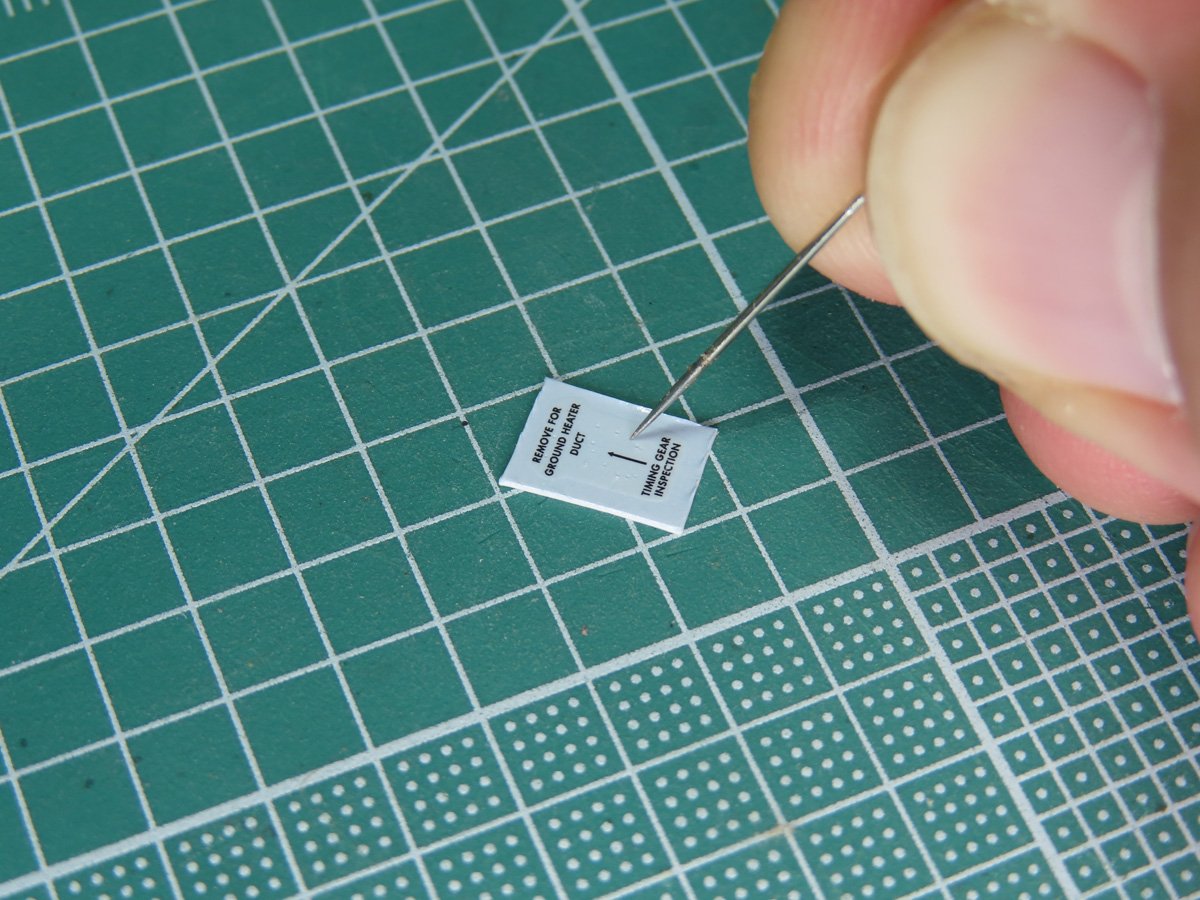
To help the solvent get under the decals to provide a better reaction, I’m carefully stabbing at the carrier film on the stencils, adding small holes with a shape sowing knife.
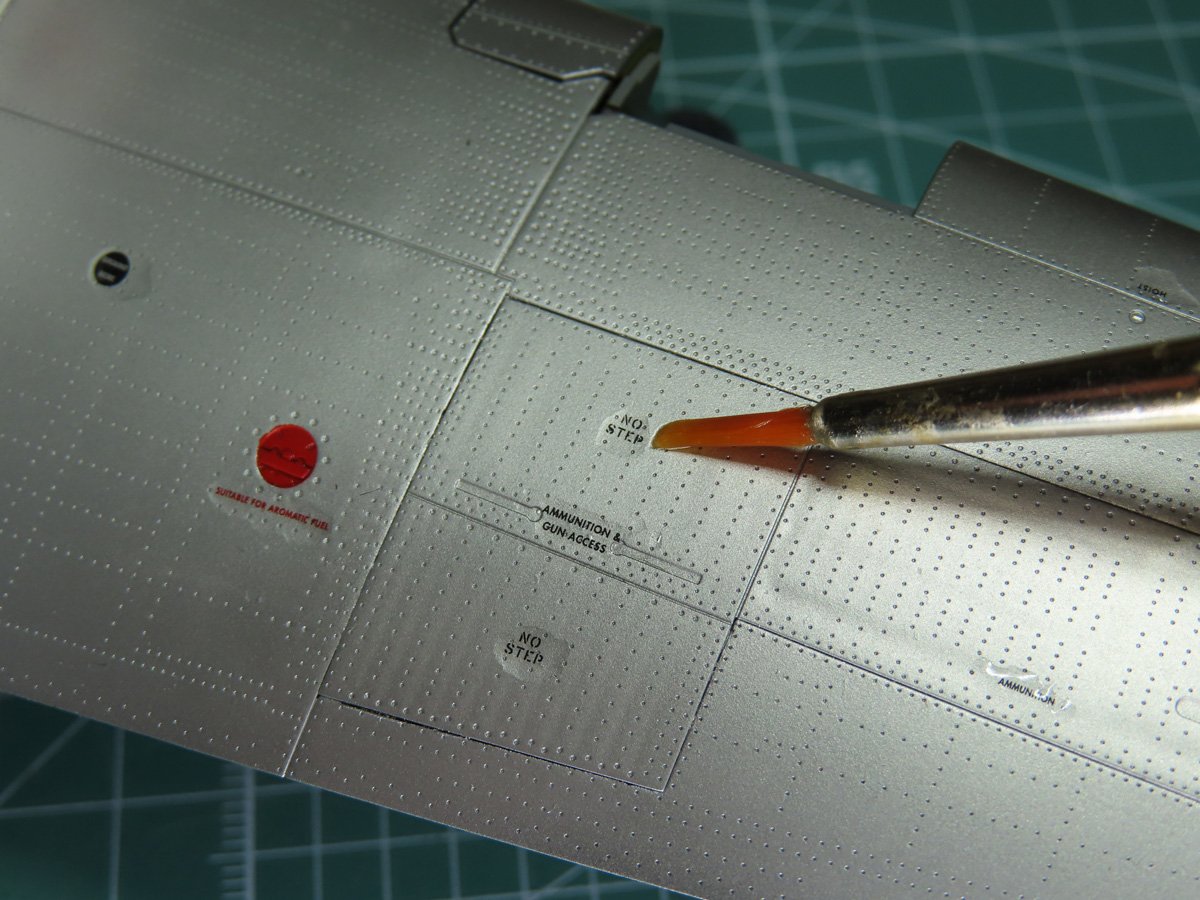
Once I was satisfied with the placement of the stencils, I went over each decal with a good amount of Tamiya Mark Fit Super Strong. Once all the decals on the wing here were coated, I put the model aside for a while to let the solvent do its job at melting the decals down to the surface.
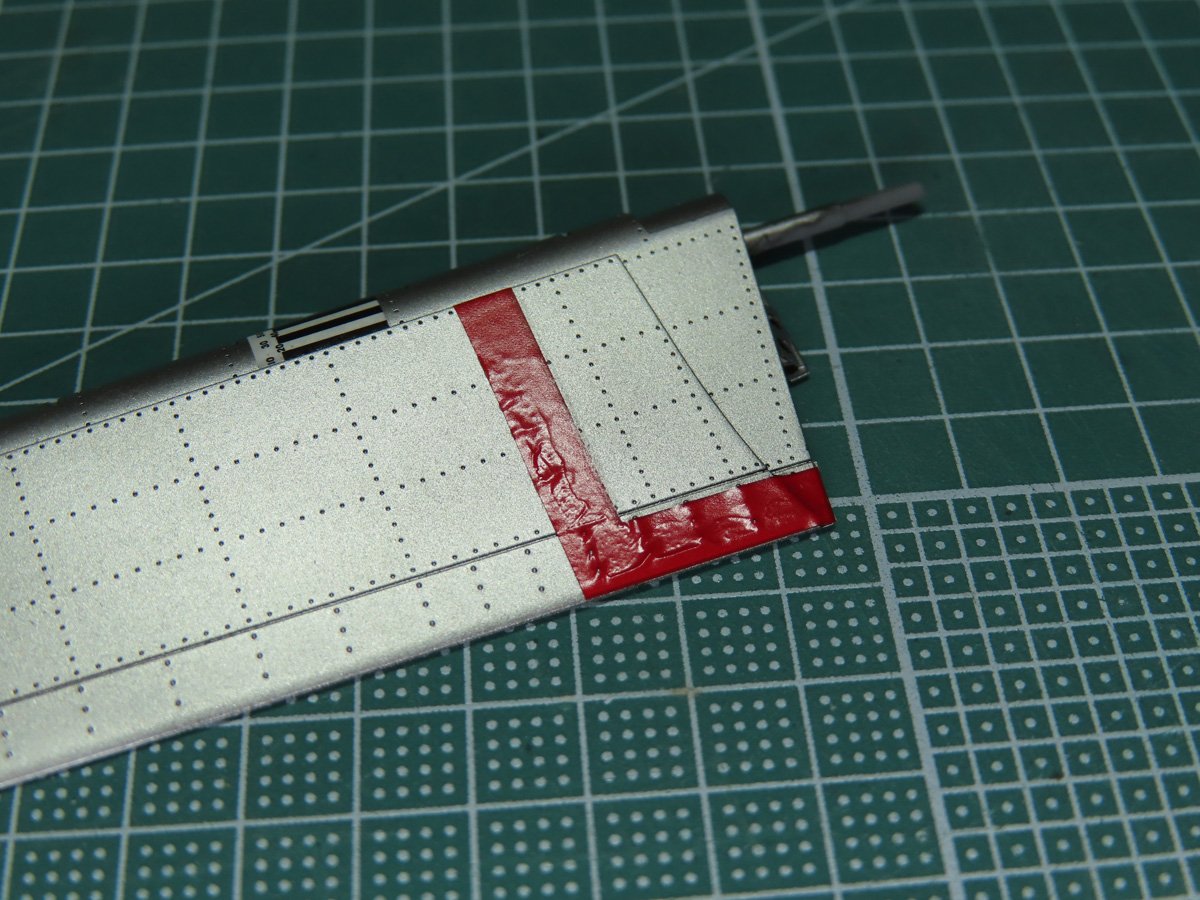
Here on the red band on the landing flap, I’ve added the decal solvent, and the decal has started to wrinkle. Don’t panic at this stage, as this is exactly what should happen. Leave the decal alone, and don’t add any more solvent!
Currently, the decal solvent is working and melting the decal. This is part of the process, and soon the decal will level out again.

I wish that I had more to show you about the decals for this post, but there are just so many stencils to add on to this model. It’s slow and tedious work, but incredibly rewarding to see all of those stencils around the Mustang.
Usually, when I’m working on an aircraft, I’ll start adding the decals to the tail and then work my way forward to the nose. This way, I can hold onto the wing and not disturb any of the fuselage decals. Once the Fuselage is done, I’ll then move on to the lower side of the wings and lastly the top.
The decals will finally be sealed in with a gloss coat, and this is to protect them when I handle the model, which is very important with the next step, adding on a panel wash.
This kit is almost done. In the next post, we’ll be adding a panel wash, as well as some general weathering to the model. And after that, it will be time to put everything together, polish up the clear parts, and sit back and enjoy the completion of this long project.
To be continued…
About the Author:
Jared Demes is a modeler from southern Alberta. He has been building models since he was 4 years old when his Dad first introduced him to the hobby. He has written for several magazines including, Fine Scale Modeler, Scale Aircraft Modeling, Phoenix Scale Models, and others. He has an interest in all modeling subjects, with a focus on WWII Japanese aircraft and Science Fiction.
Jared has won several IPMS awards for his modeling, and currently operates his YouTube channel rebelsatcloudnine, where he showcases model builds and product demonstrations.
First Post: Part 1
Previous Post: Part 16
Next Post: Part 18