
Tamiya North American F-51D Mustang
This is the third part of the Tamiya North American F-51D Mustang Korean War 1/32 Scale 60328 with RCAF Markings.
Canada first acquired the P-51 during World War II. Many of these were early Mustangs used for photo reconnaissance; however, as the war progressed, the Mustangs took on a more aggressive role, including bomber escort and ground attack.

Post-war, Canada purchased even more Mustangs and spread them across Canada, including 403 Squadron located in Calgary. The “City of Calgary Squadron” flew the latest F-51D, otherwise known as the Mustang Mk. IV. These Mustangs featured extra pylons along the wings to carry rockets. And the 403 Mustangs had the spinner, rudder, and wing tips painted white, with the squadron’s emblem, a griffon painted on either side of the fuselage.
For this build, I’ll be attempting to recreate a 403 Mustang, partially because I live in the area, but mostly because I had the rare opportunity to meet a former pilot from this squadron. I’ll talk about this in more detail in a future post.
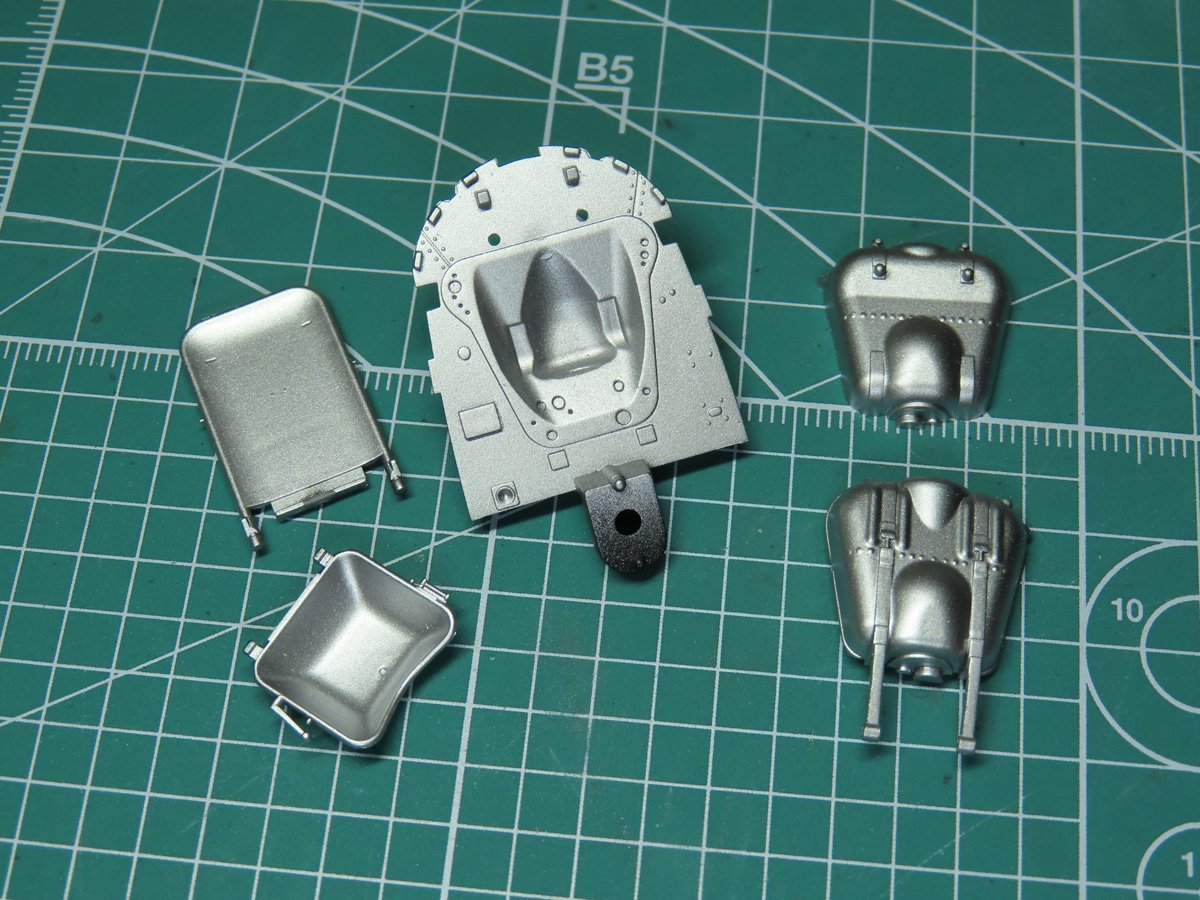
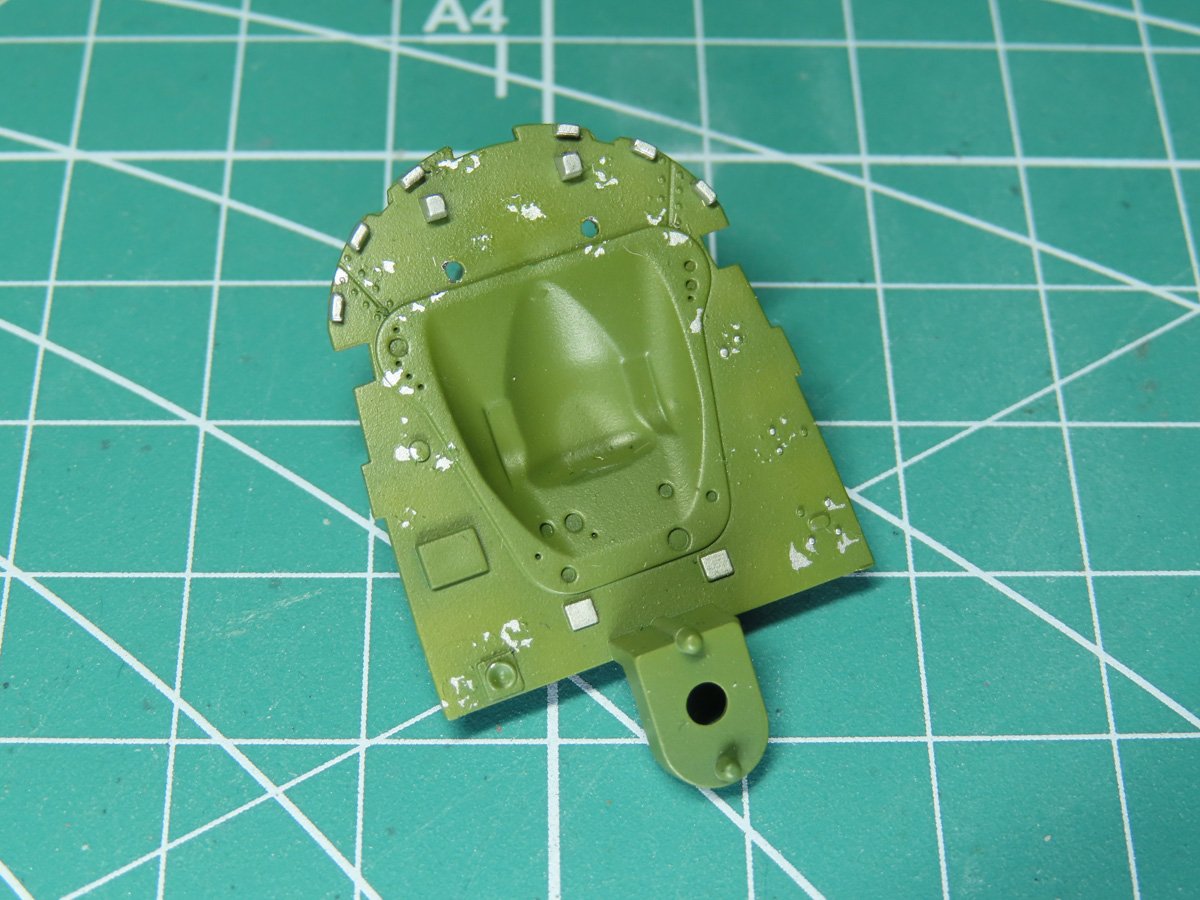
In this post, we’ll be working on the firewall that holds the oil tank and connects to the engine. As well, we’ll be building the seat and attaching the belts.
Since many of these P-51s were used well into the late 50s, I decided it would be fun to weather up some of the details with chipping.
I started by cleaning the parts and then priming them with Mr Finishing Surfacer 1500 Black. Once that had dried, I applied Tamiya LP-72 Mica Silver.
I really like Mica Silver for a weathered silver, it’s a bit duller of a silver with a grey tone to it, and I think this paint looks quite realistic.
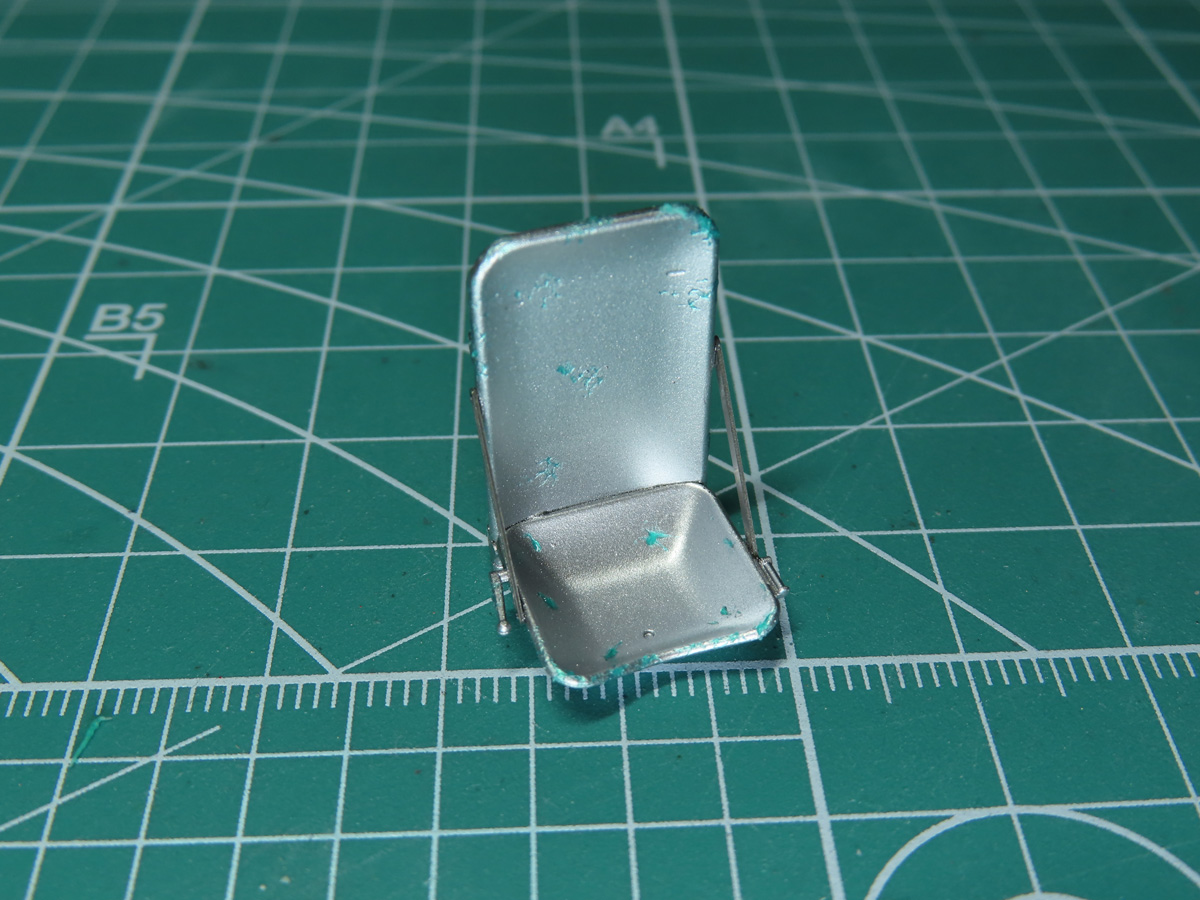
Using a sponge, I carefully applied Mr Masking Sol NEO onto the parts. I tried my best to keep the chipping small and to scale, and I focused on areas that would have the most wear, such as the bottom and top edges of the seat.
The Masking Sol NEO was also applied to the firewall and oil tank.
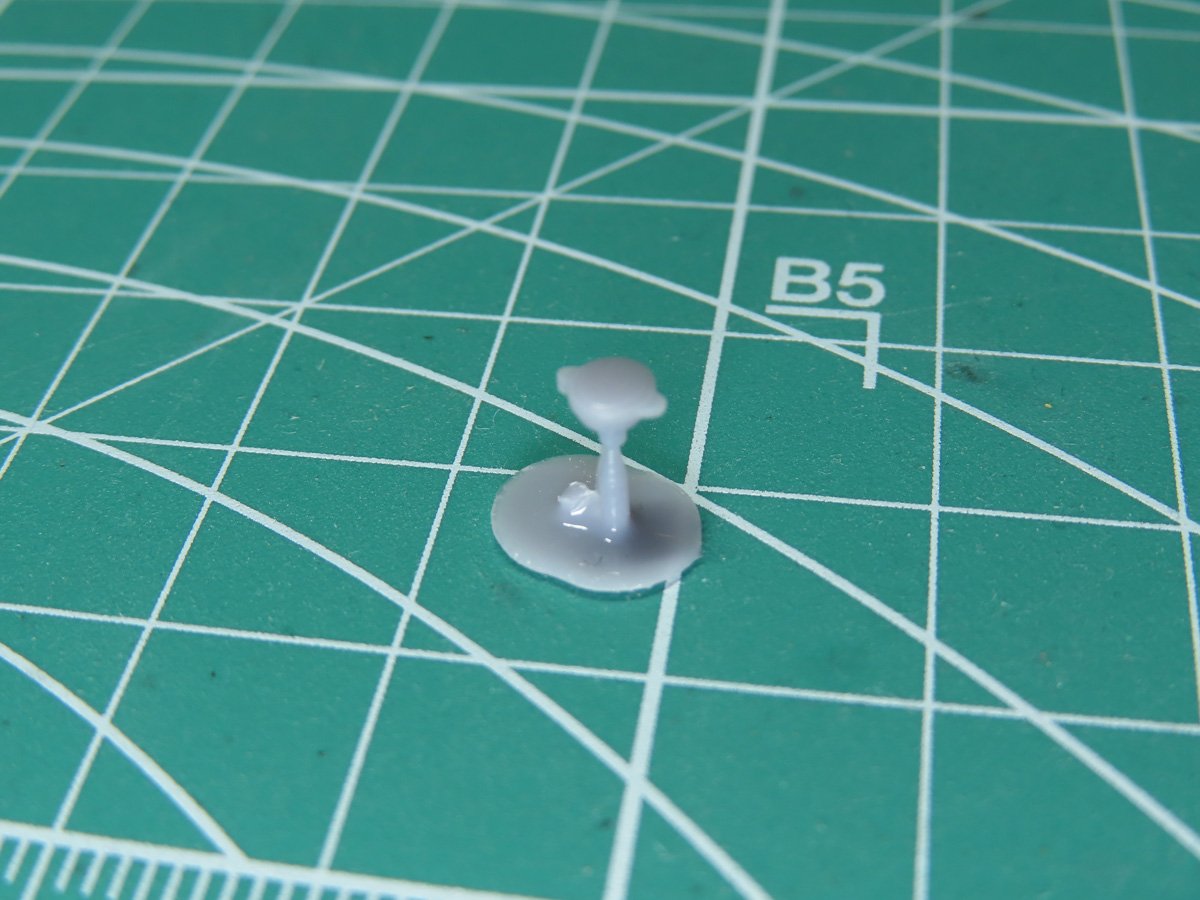
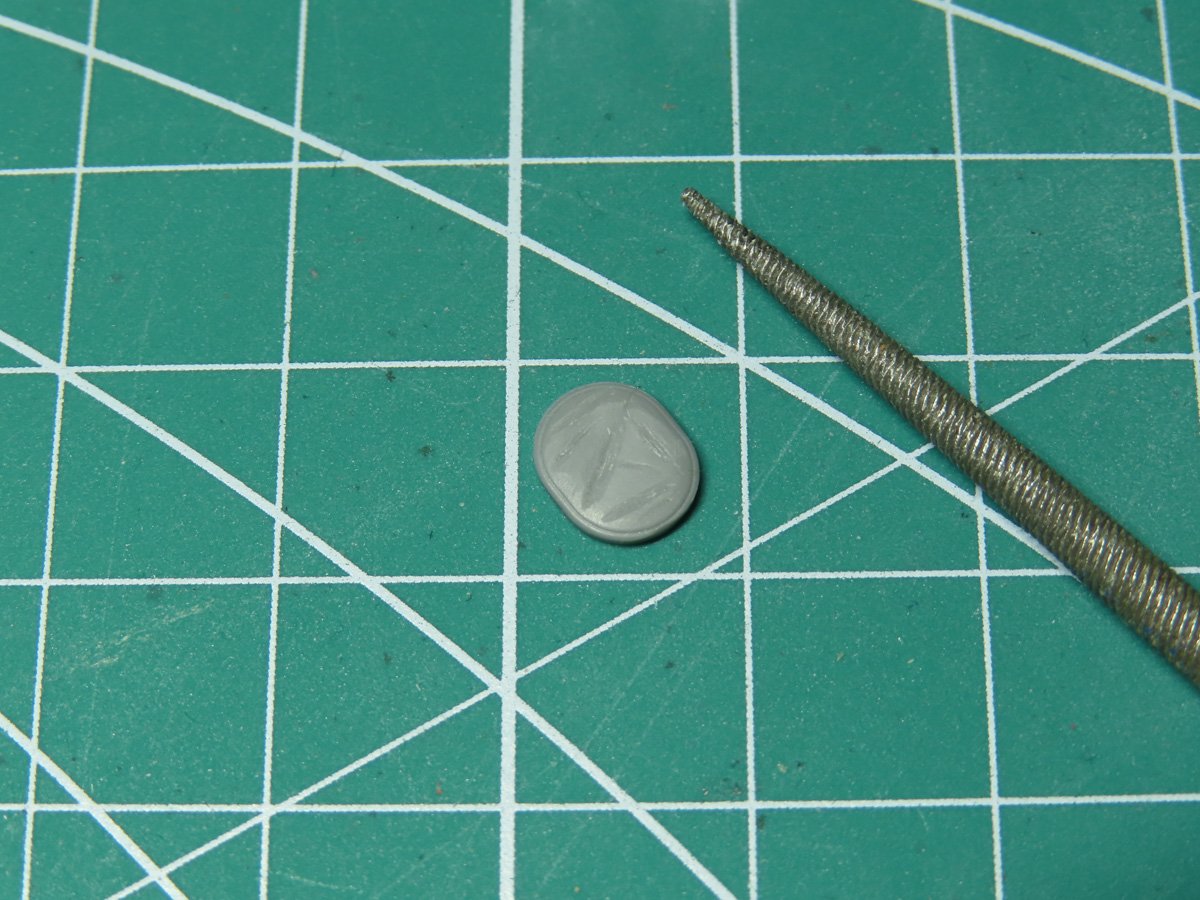
On the oil tank, there is a missing detail; for some reason, Tamiya never designed an oil cap.
I decided to correct this part, and I set out to scratch build a small cap, but given its small size, I thought this might be difficult.
Instead, I went out and designed my own oil cap with my computer. And once I had an STL file created, my brother kindly printed it for me, this tiny part, all ready to be painted and attached to the model.
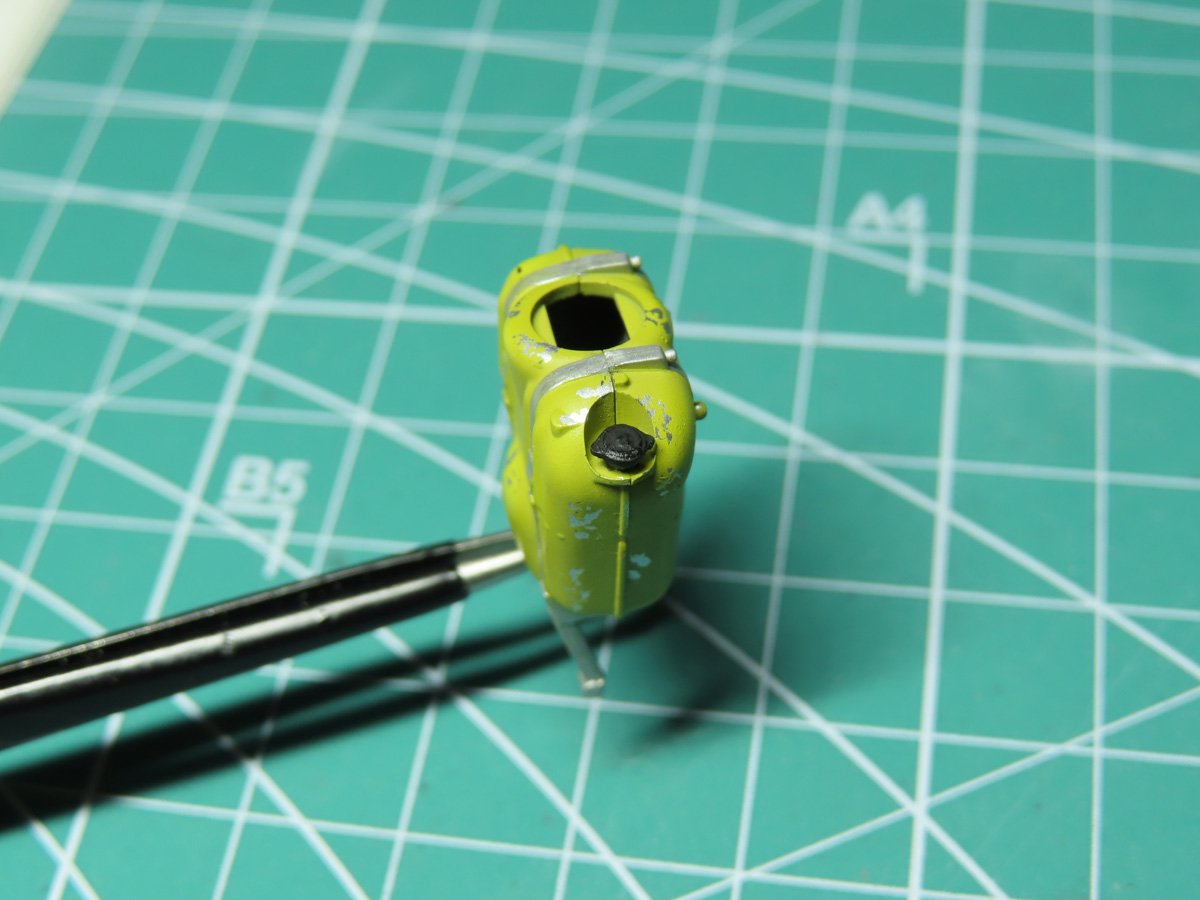
And here is the completed oil cap, fitted to the tank. This detail might not ever be noticeable when you view the completed model, but it was a lot of fun to create and see become a reality. And it was a good first step to learning to further learning how to create more complicated parts for future projects.
To replicate the Zinch Chomate Yellow, I’ve used Tamiya XF-4 Yellow Green. I’ve tried a few others from Humbrol, Mr. Color, and AK Interactive, and personally, I like Tamiya’s representation the best.
For the interior green, Tamiya has a paint mixture in the instructions, XF-3 Flat Yellow + XF-5 Flat Green (2:1). I’ve used this mixture before, and it is a very nice and accurate interior green, albeit a bit brighter than some modelers might prefer.
I decided for this project that I wanted to use Mr Color 351 Zinc Chromate Type 1. This was my first try at using this color, and I have to say I really like the green tone Mr Color replicated.
Using a Vallejo Fibre Glass Brush, I was able to easily remove the Mr Masking Sol NEO and reveal the chipped silver paint.
I wanted to create some texture in the leather headrest. To do this, I carefully carved out a few trenches with my rounded metal file.
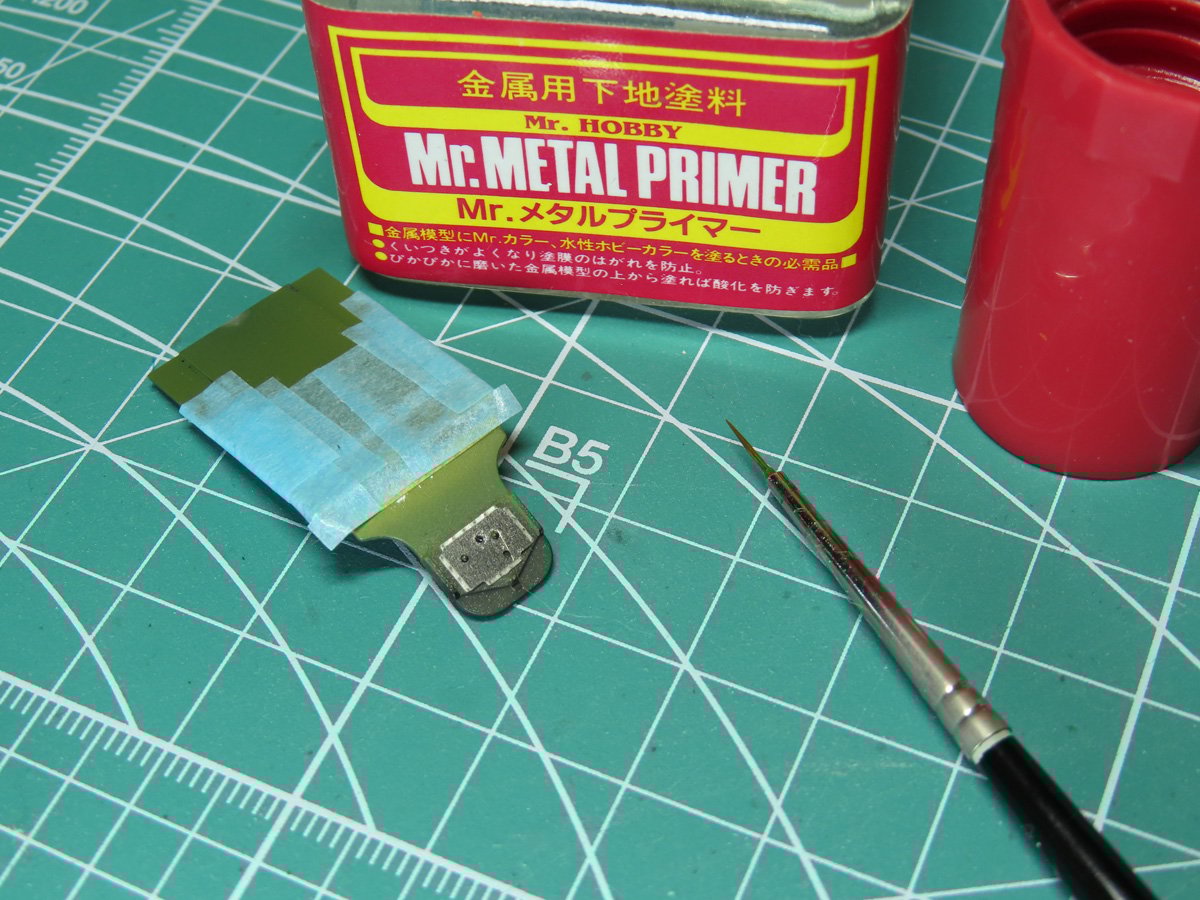
A small piece of etched metal was attached to the back of the bulletproof plate. To help with the parts’ adhesion, I brushed on Mr Metal Primer.
I use this one with all etched parts as it has an excellent grip, so I don’t need to lightly sand the etch before painting.
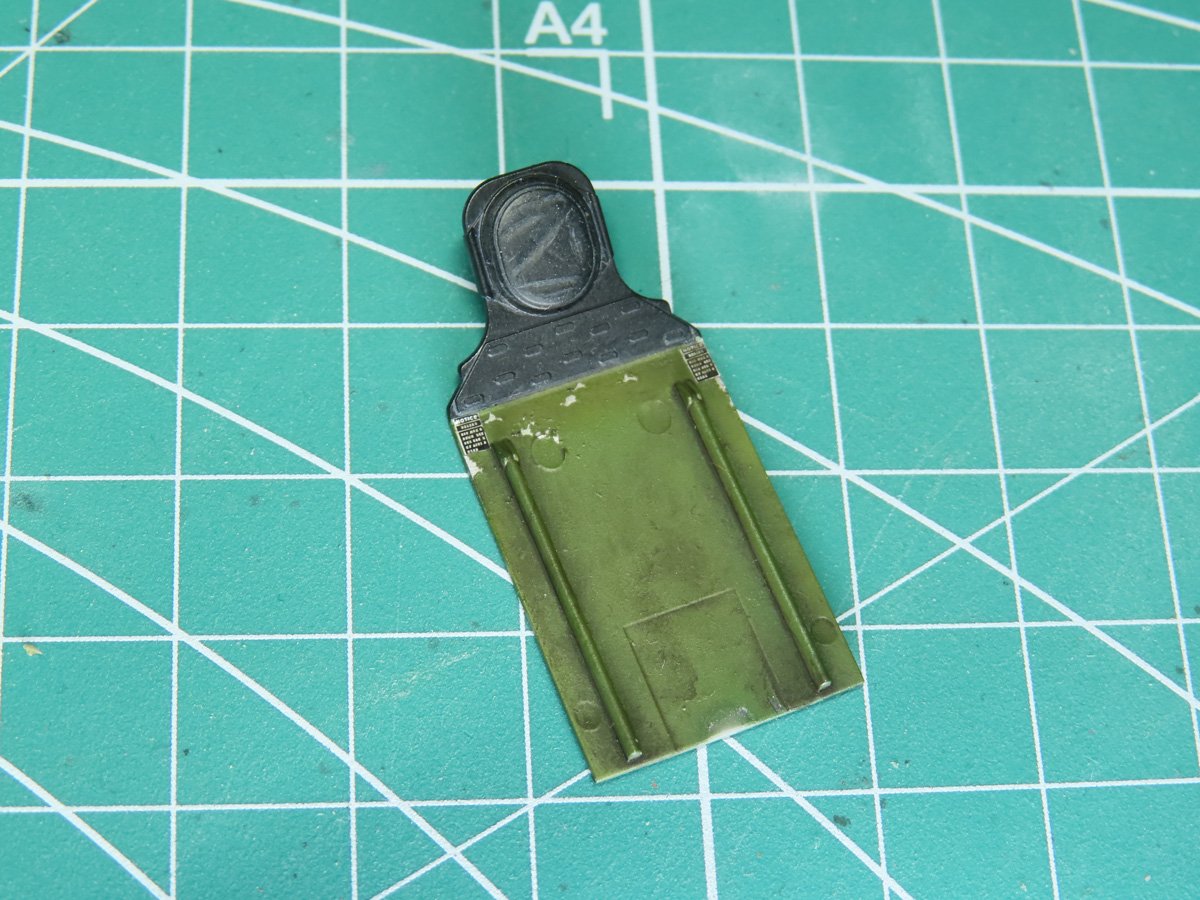
Here is the completed bulletproof plating with the stencil decals added to the corners. The top section was painted with Mr. Color 92 Semi-gloss Black, and weathered with Tamiya Panel Line Accent Color (Gray). Likewise, the lower section was weathered using Tamiya Panel Line Accent Color (Dark Brown).
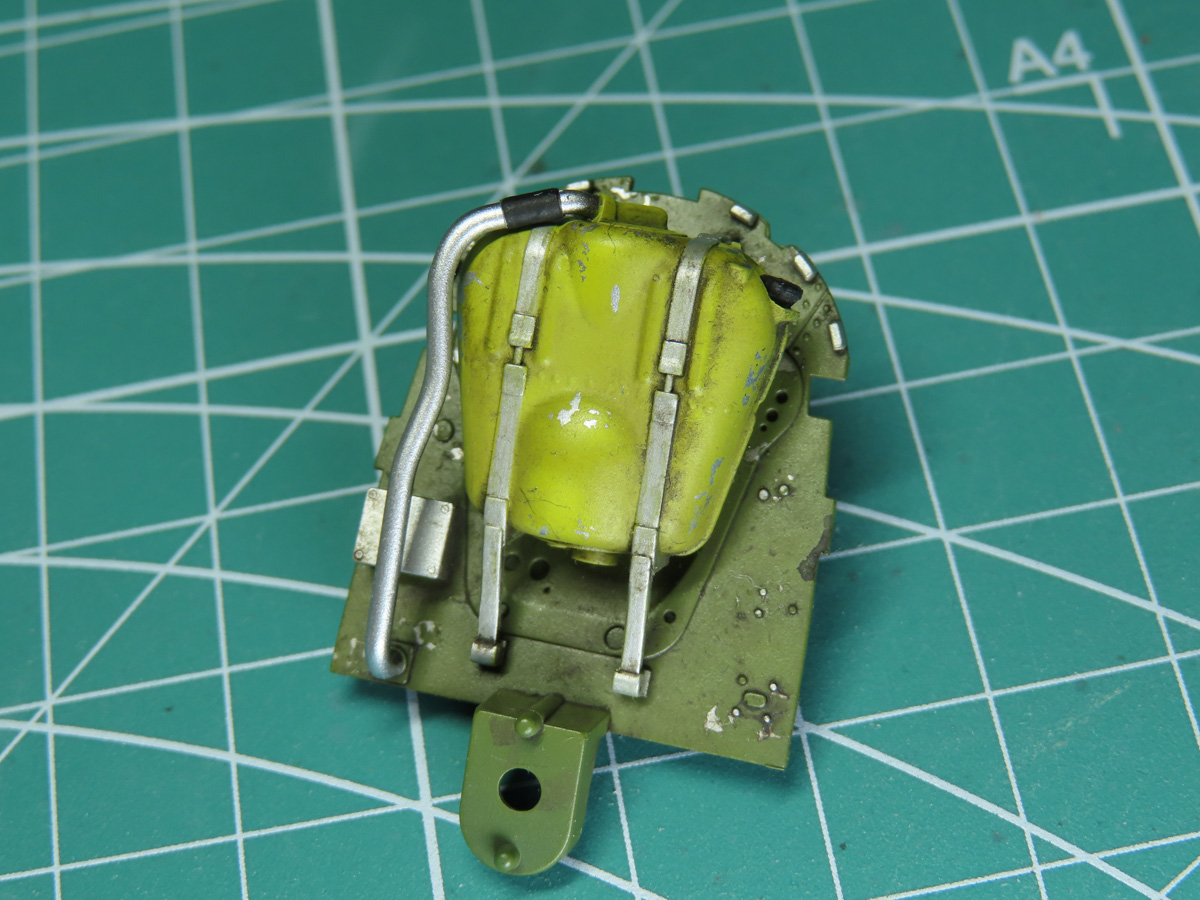
Just as before, I applied Tamiya Panel Line Accent Color (Dark Brown) to the firewall and oil tank. Once the paint had dried, I glued the oil tank in place.
It might be more accurate to have the oil tank painted Zinc Chromate Green just like the firewall; there are P-51s out there with a Yellow tank, and I like the bit of contrast this adds to the model.
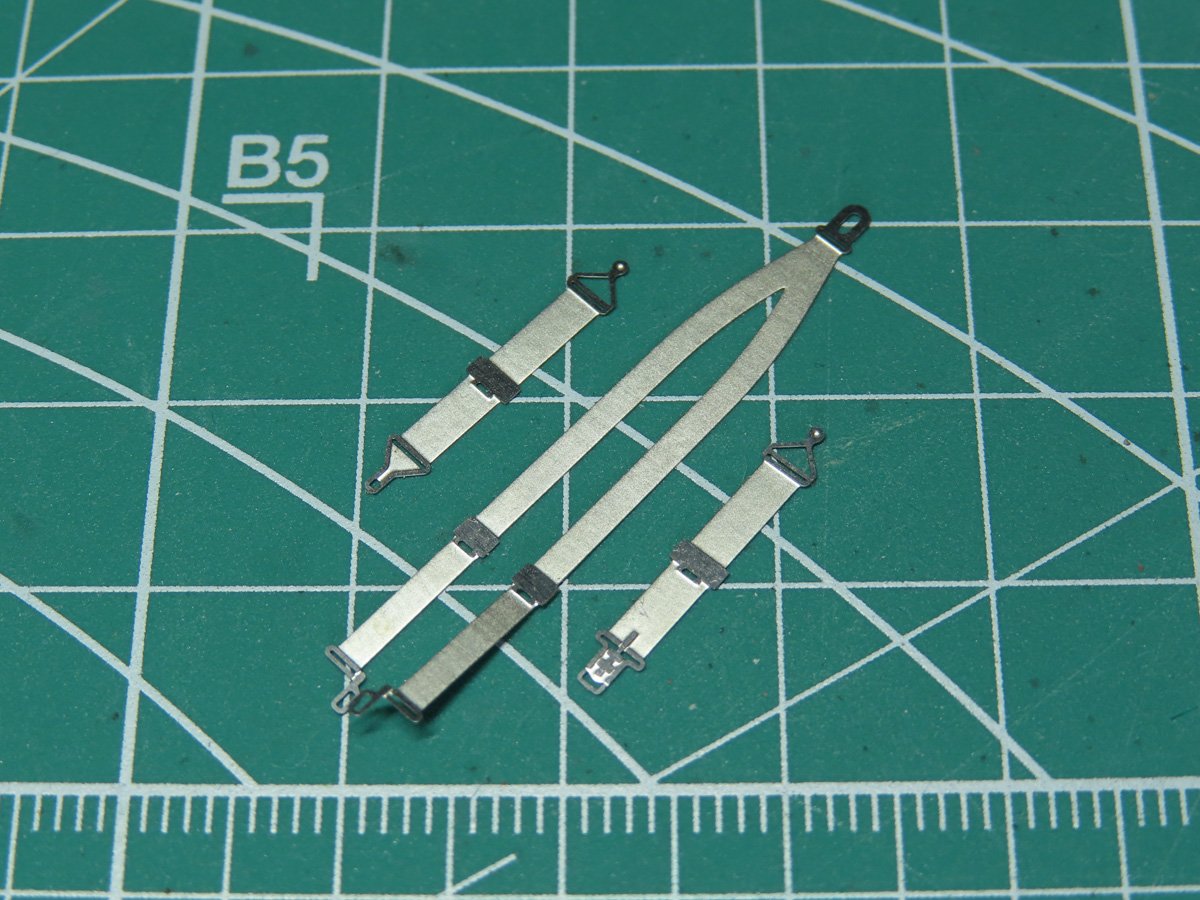
The seat belts included with this kit are steel, and these aren’t always the most popular among modelers as they can be difficult to bend and get a realistic look. Though there are alternatives out there online, I’m going to go through a few steps to get these ready to be added to the model.
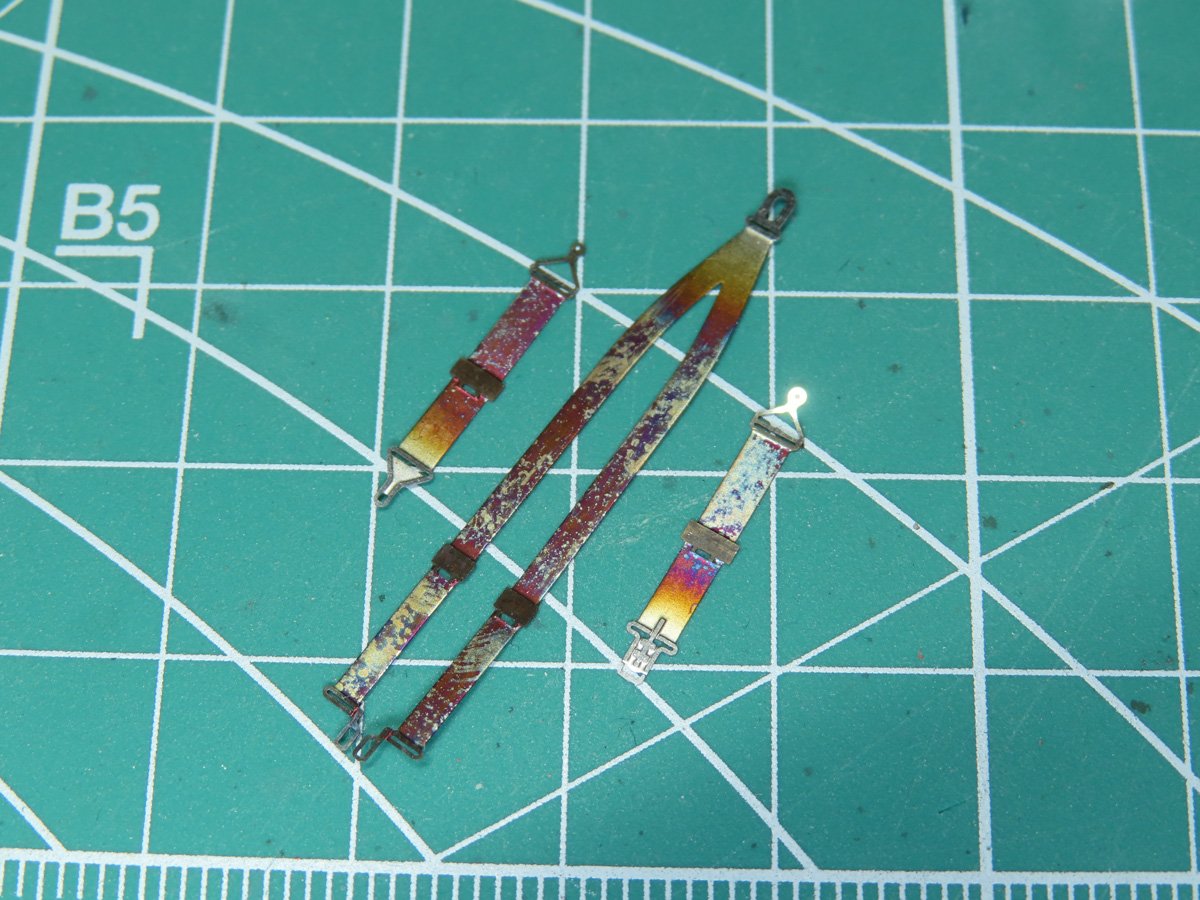
I heated the parts through a flame using a lighter. Adding this heat will anneal the parts, causing them to become softer and more flexible. Once they had cooled, I brushed on a layer of Mr Metal Primer.
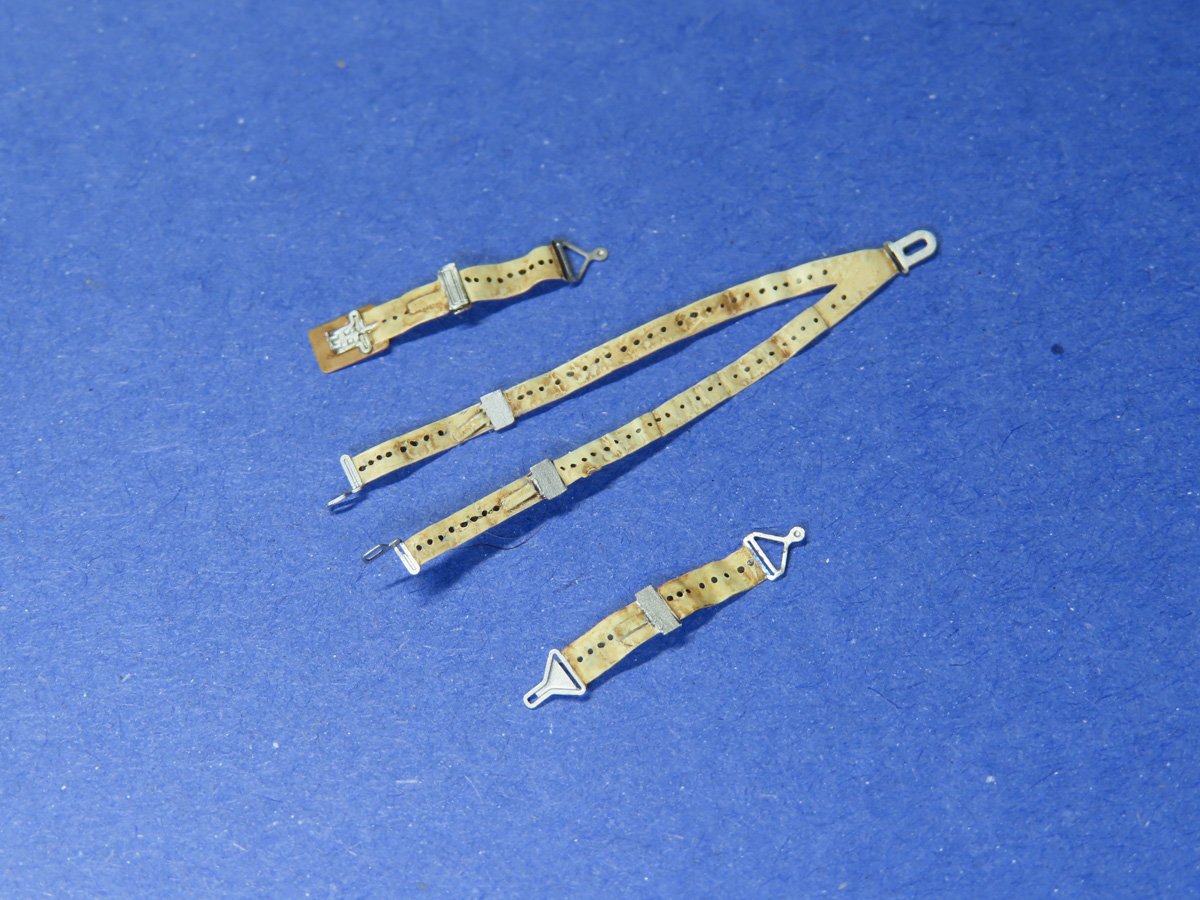
My go to color for painting seat belts is Vallejo Game Color Elfic Flesh 72098. It’s a very nice white beige color that matches a lot of aircraft. Next, I used a fine tipped Gundam Marker and carefully dotted the center of the belts.
After that had dried, I used Tamiya Panel Line Accent Color (Brown) and sparingly painted it around the belt to add aging and highlight the details.
Lastly, I painted the buckles with Mr Color 8 Silver, and once these had dried, they would be added to the seat.
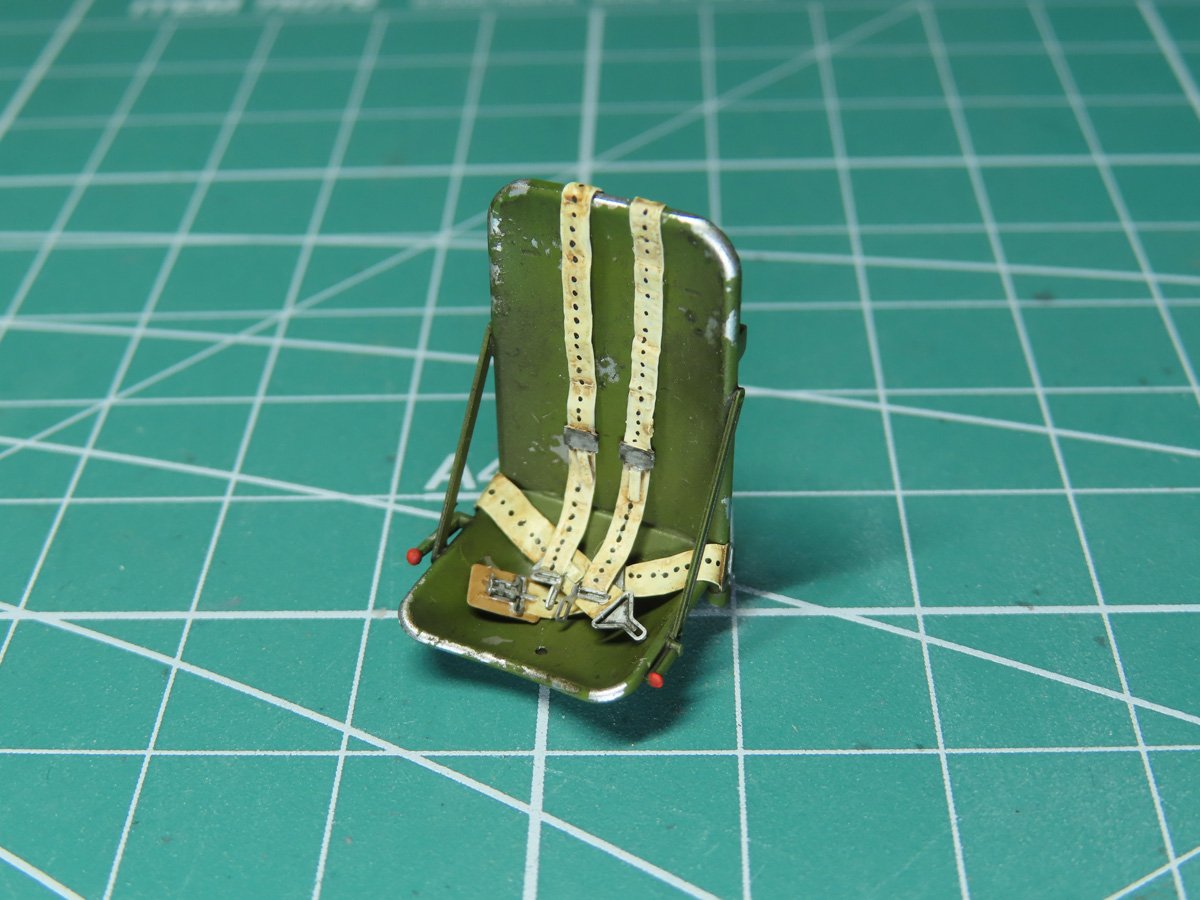
The belts were first superglued with BSI CA Glue to the base and back of the chair, and once the glue had dried, I carefully folded the bottom belts in place, and then folded down the shoulder straps.
For steel belts that I painted myself, I think these look pretty good, especially now that they have been added to the seat.
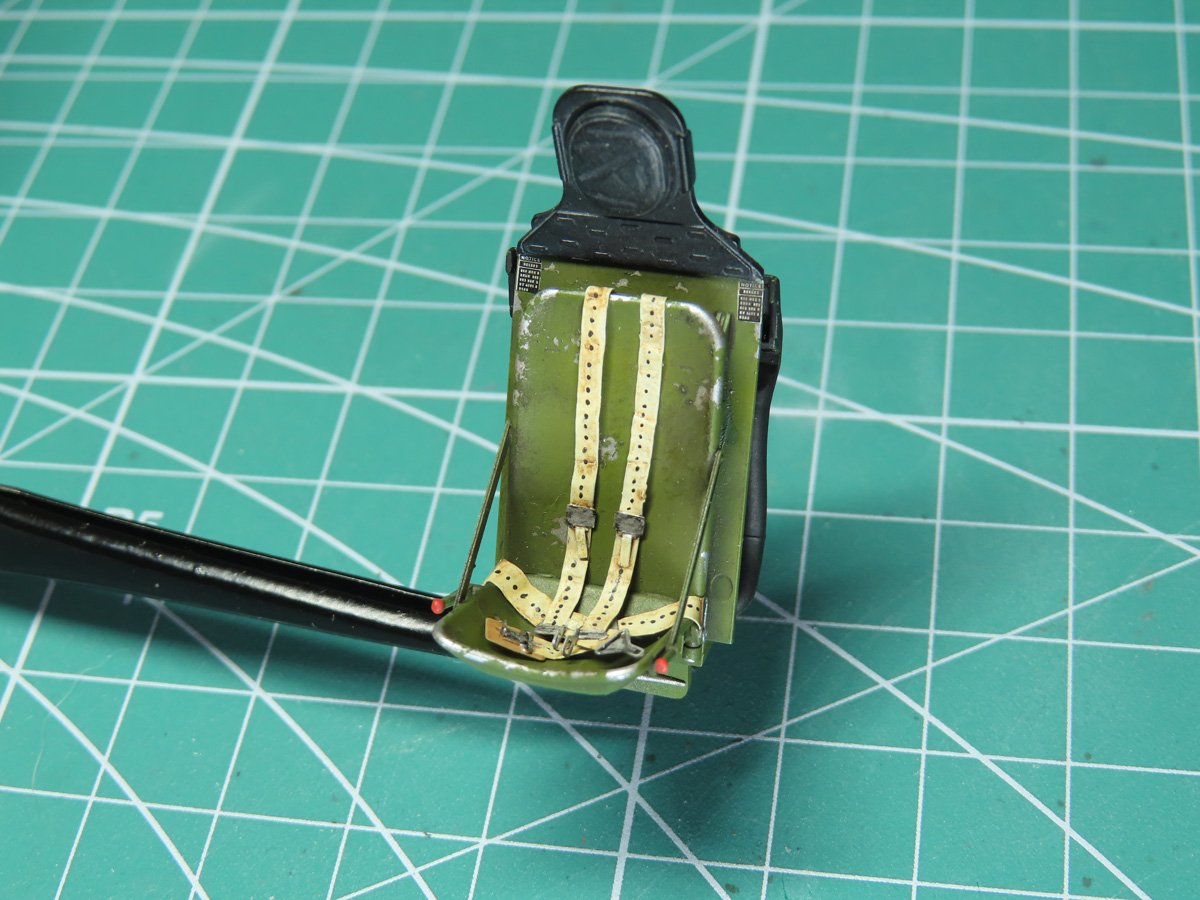
Lastly, I glued the seat to the bulletproof plating. I will be giving it a flat coat later on to seal everything together.
I haven’t used etched seat belts in a long time. To be honest, I’m not a big fan of them, and these Tamiya kits were partially responsible for that. Back then, I didn’t know about annealing the metals, and I think it helped out a lot, as these belts don’t look as stiff and rigid as my previous models.
There are pre-painted belts that you can buy, and some fabric ones that are very realistic looking, but they can be difficult to assemble. Many modelers like the simplicity that pre-painted belts have, just glue them to the seat and you’re done.
With all the options out there, I’m really pleased with how these look. I bent them around a lot with my tweezers so they would lose their stiffness, and I think it worked.
Next, we’ll be working on more of the cockpit details, and that includes more weathering.
To be continued…
Jared Demes is a modeler from southern Alberta. He has been building models since he was 4 years old when his Dad first introduced him to the hobby. He has written for several magazines including, Fine Scale Modeler, Scale Aircraft Modeling, Phoenix Scale Models, and others. He has an interest in all modeling subjects, with a focus on WWII Japanese aircraft and Science Fiction.
Jared has won several IPMS awards for his modeling, and currently operates his YouTube channel rebelsatcloudnine, where he showcases model builds and product demonstrations.