
Tamiya North American F-51D Mustang
This is the fourth part of the Tamiya North American F-51D Mustang Korean War 1/32 Scale 60328 with RCAF Markings.
Summer time, that magical time of the year when the modeler emerges from their hiding to engage in the outdoors! A time to revisit with friends and family, and for many modelers they are too busy to work on any of their projects. This is the time when smoothly leveled paint is replaced with the satisfaction of an even and beautifully cut lawn.
But if you are like me and model year-round, you know that summers can be difficult to model in. The weather can change from hot to HOT, and this heat can make painting difficult as the heat causes the paint to dry out faster, which is where a retarder becomes a necessity. Then it can start raining, and you’ve got to deal with humidity, which can cause the paint to dry more slowly or become tacky.
Despite the many hurdles that can occur during the summer, some of my fondest modeling memories were the nights when I had the fan at my back, a new Tamiya kit on my desk, and the window open. Looking out occasionally as the wind tossed the leaves around, and a full moon came into view. All while some quite jazz played in the background. I look forward to this every year.
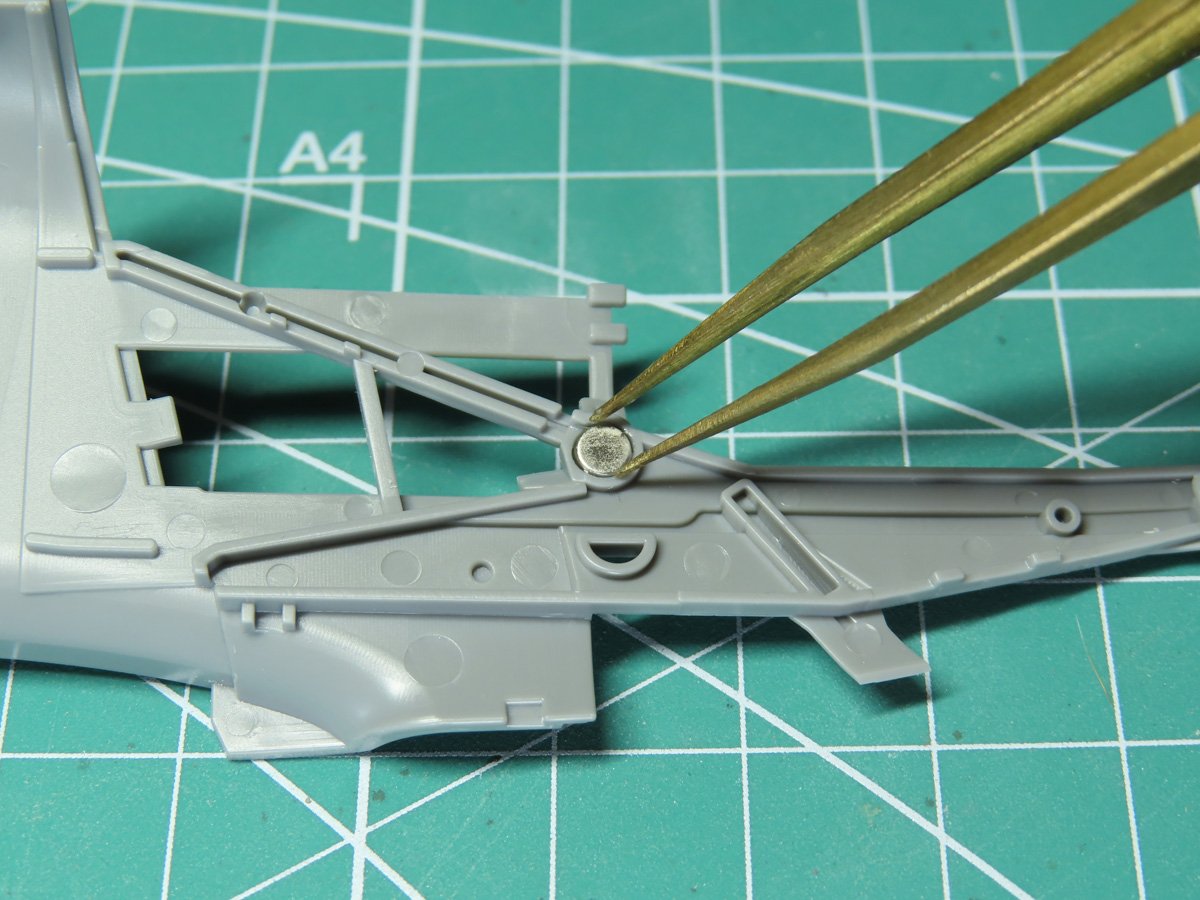
I’ve cut out the main fuselage sections, and I’m using some brass tweezers to carefully place the small earth magnets into the inside of the engine mount.
I picked up these brass tweezers on my last P-51. These Earth magnets are very powerful and cling to almost everything. Since the brass isn’t magnetic, I placed some super glue into the hole, and then I could easily hold and position the magnet into the socket.
These magnets are going to be used later on in the build to help keep the engine cowlings in place.
When the Korean War broke out, many F-51s were taken out of storage, and the interiors were painted black. It’s my understanding that RCAF Mustangs had black interiors as well. I could really only find one F-51 cockpit, and it was interesting to see the different levels of wear down that occurred. I really liked this effect and so I decided to replicate it here with this project.
I started by painting the interior with Tamiya LP-72 Mica Silver, and then I sponged on some Mr Masking Sol NEO.
I painted Mr Color 351 Zinc Chromate Green, and then applied more Mr Masking Sol NEO. I also added it over the sections that were previously masked in silver. This way, you could see different tones of colors in the weathering.
Lastly, I painted Tamiya XF-1 Flat Black, and with a Vallejo Fibre Brush, I easily removed the masking. And I’m really pleased with the effect of all the different paints layered together. The next step will be to paint all of the smaller details.
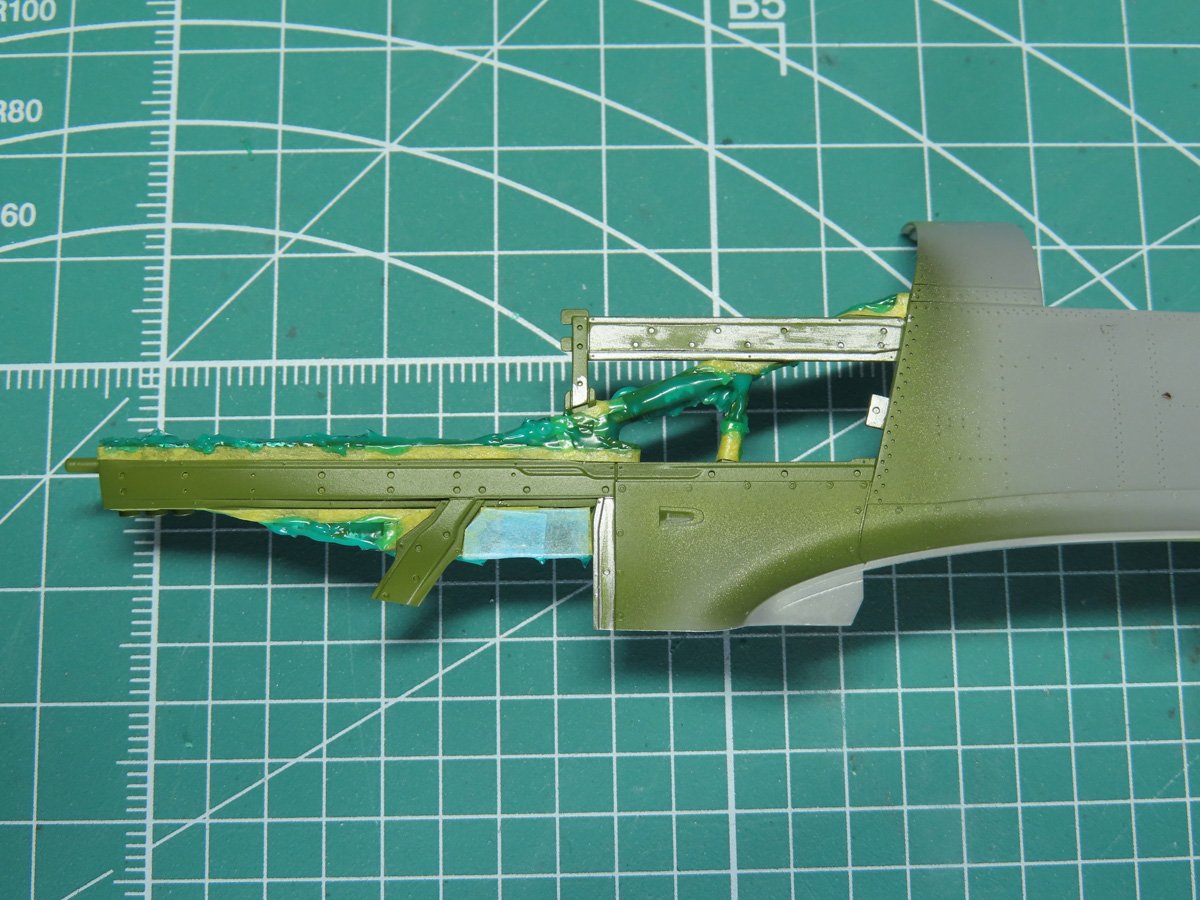
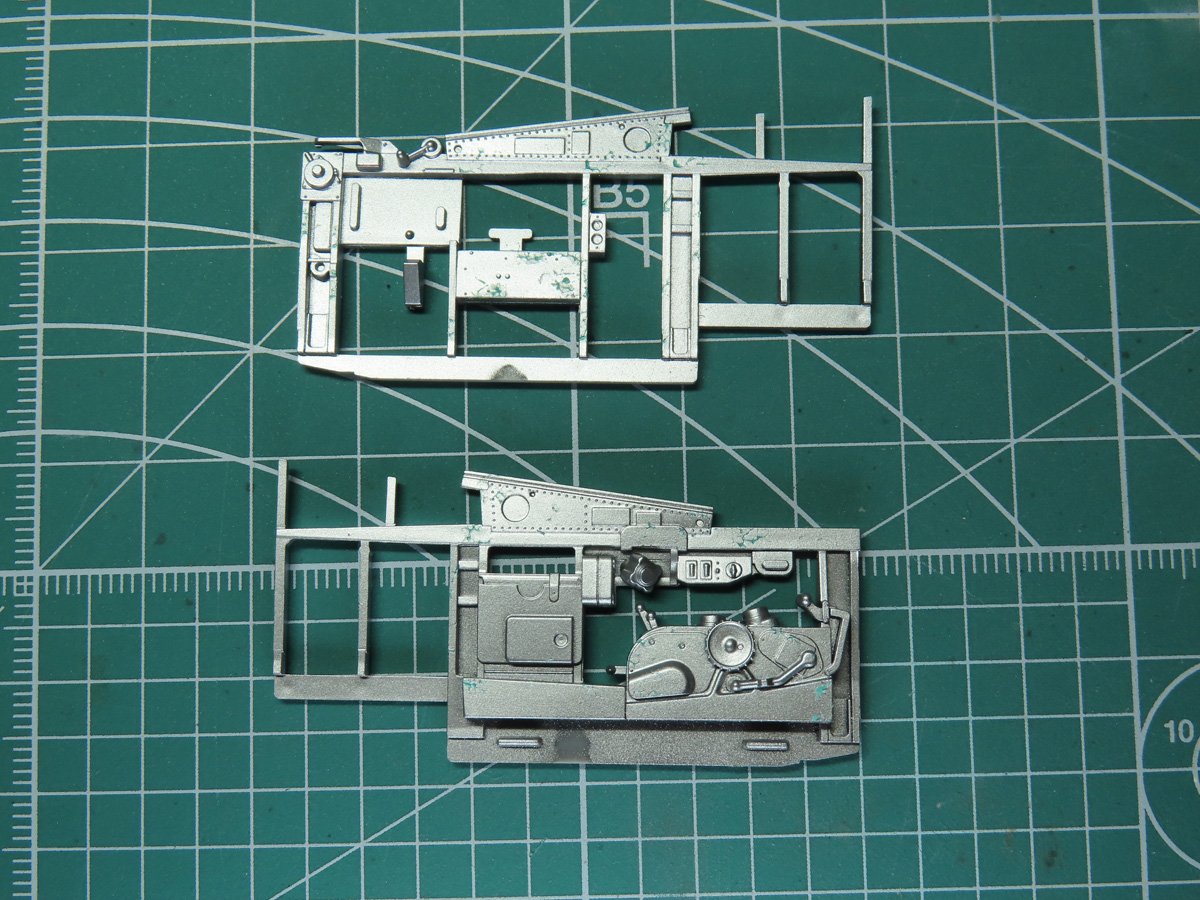
This next stage is the most difficult part of the build for me, and that is painting the engine mount and the engine frame. Tamiya molded this all as one part, but it requires some fancy masking. I first painted the engine mount with Mr. Color 351, and then using Tamiya 1.0mm Masking tape 87206 I could carefully mask everything I wanted to keep Zinc Green.
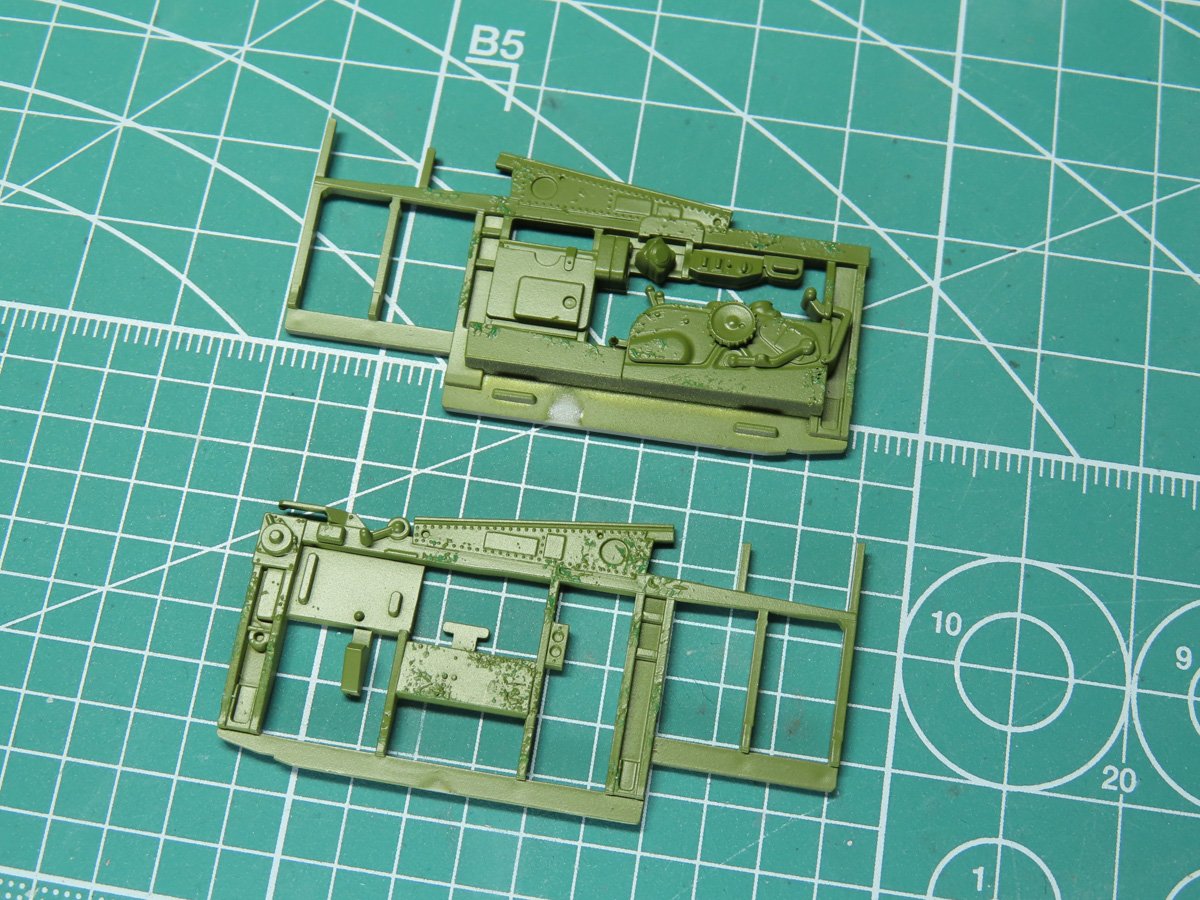
When everything was masked off, I used wider tape to fill in some of the larger open spaces, and then a rather generous layer of Mr. Masking Sol Neo.
With the engine mount properly masked off, I painted the engine frame with Tamiya AS-11 Bare Metal Silver. Sadly, this color is no longer available in Canada; however, I’ve been told that Tamiya LP-11 Silver is a very close substitute.
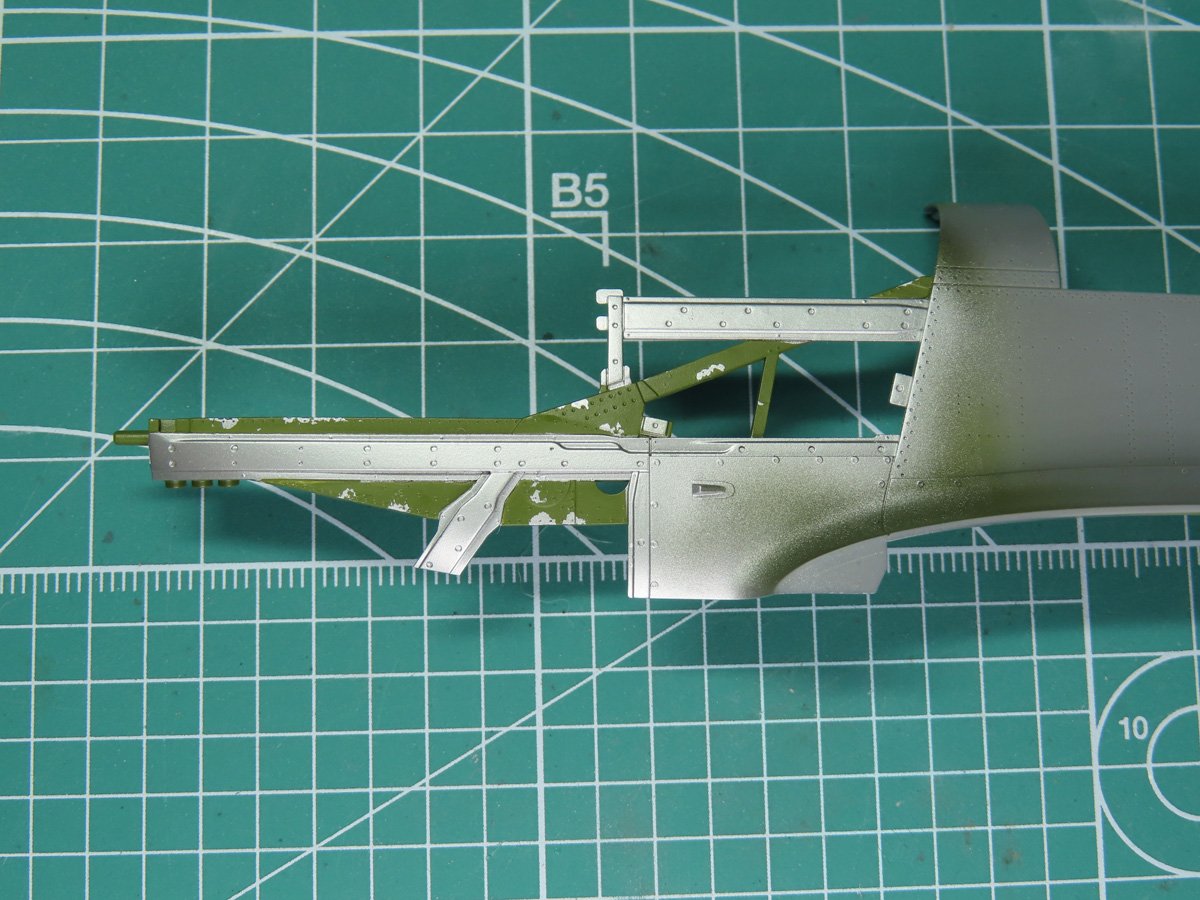
I thinned the Tamiya AS-12 Bare Metal Silver with Mr. Rapid Thinner, and this produces a wonderful bright sheen to the silver.
I’ve removed the tape and Masking Sol NEO, as well from the Green sections, and I’m very pleased with how well everything held together.
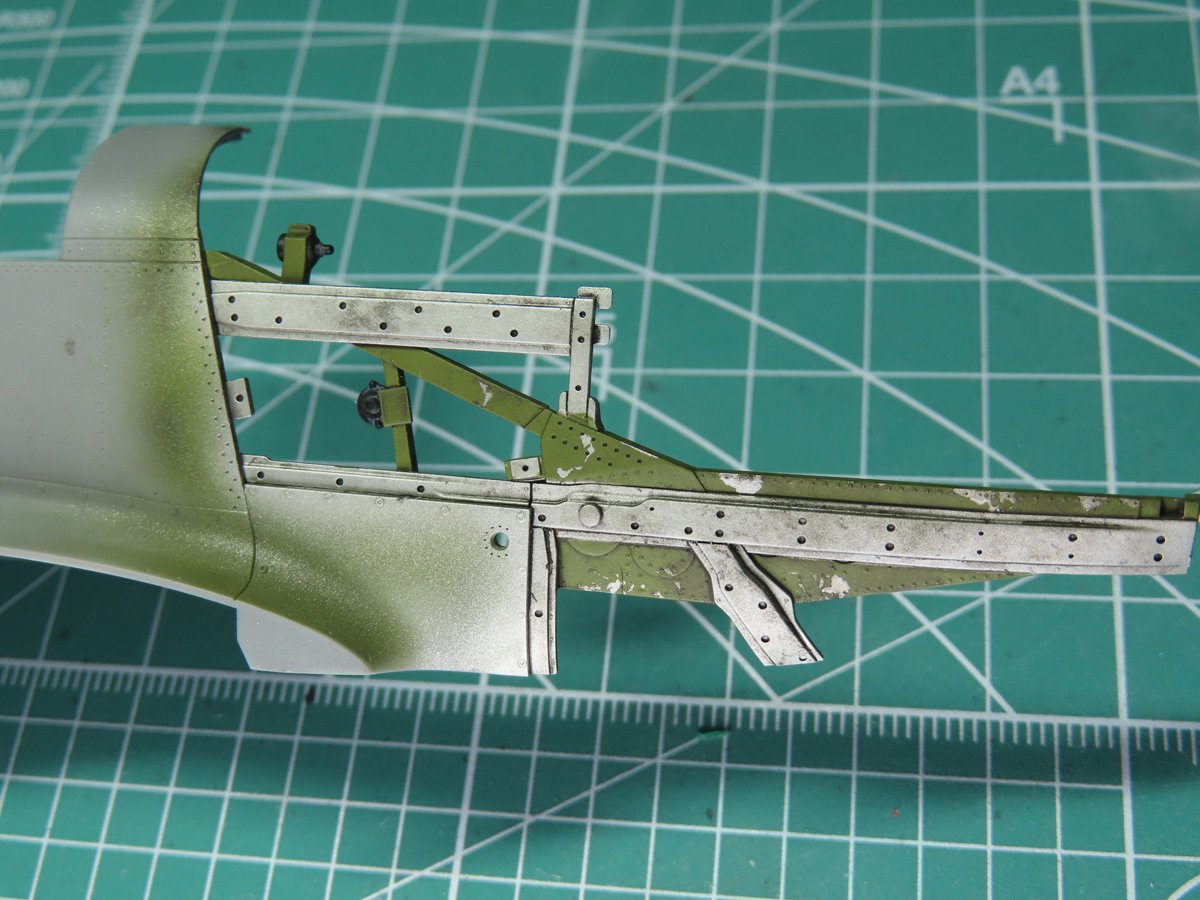
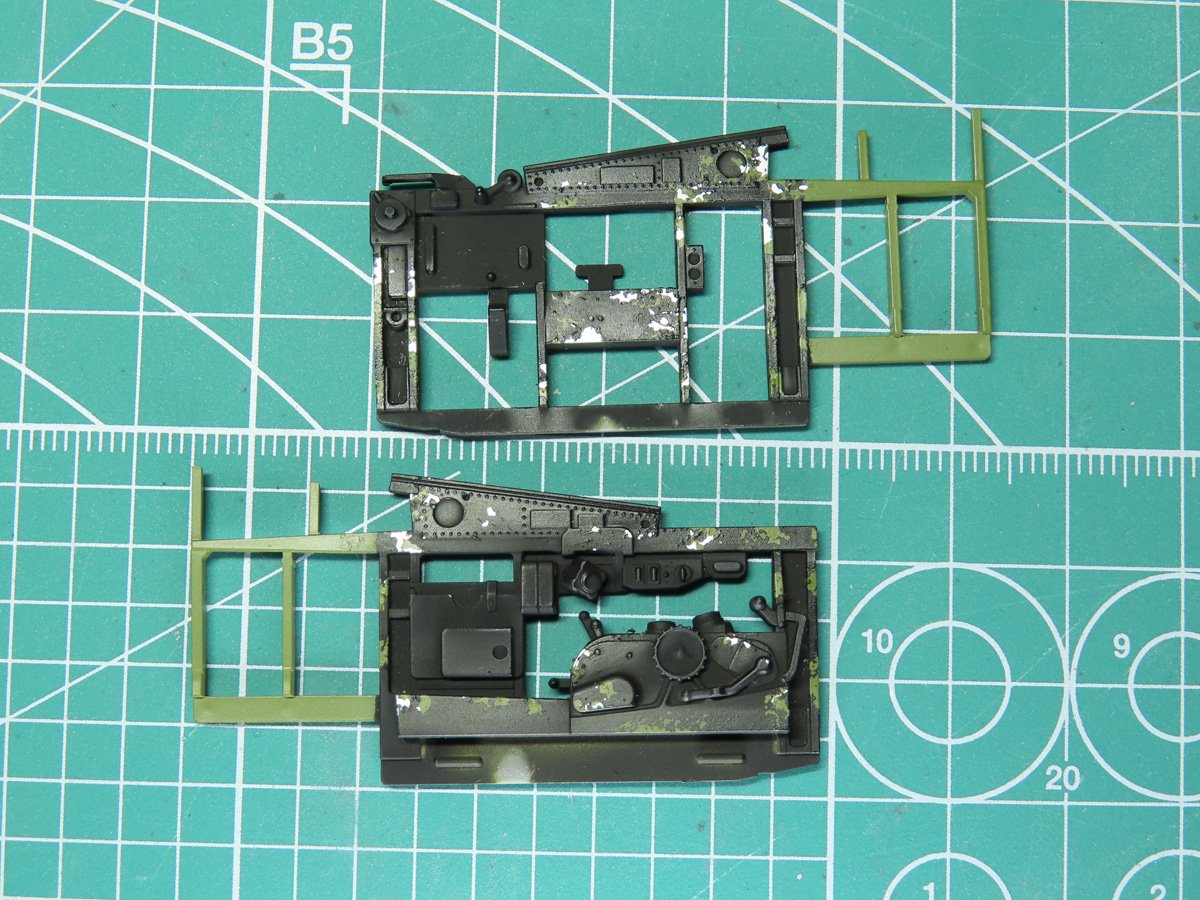
I weathered the parts by lightly stippling on Tamiya Panel Line Accent Color Black 87131 over the silver sections. And Dark Brown, over the Zinc Green. These washes beautifully filled in the recessed details as well as created a nice worn effect.
Once the washes had dried, I painted Mr Color 182 Flat Clear to seal everything together.
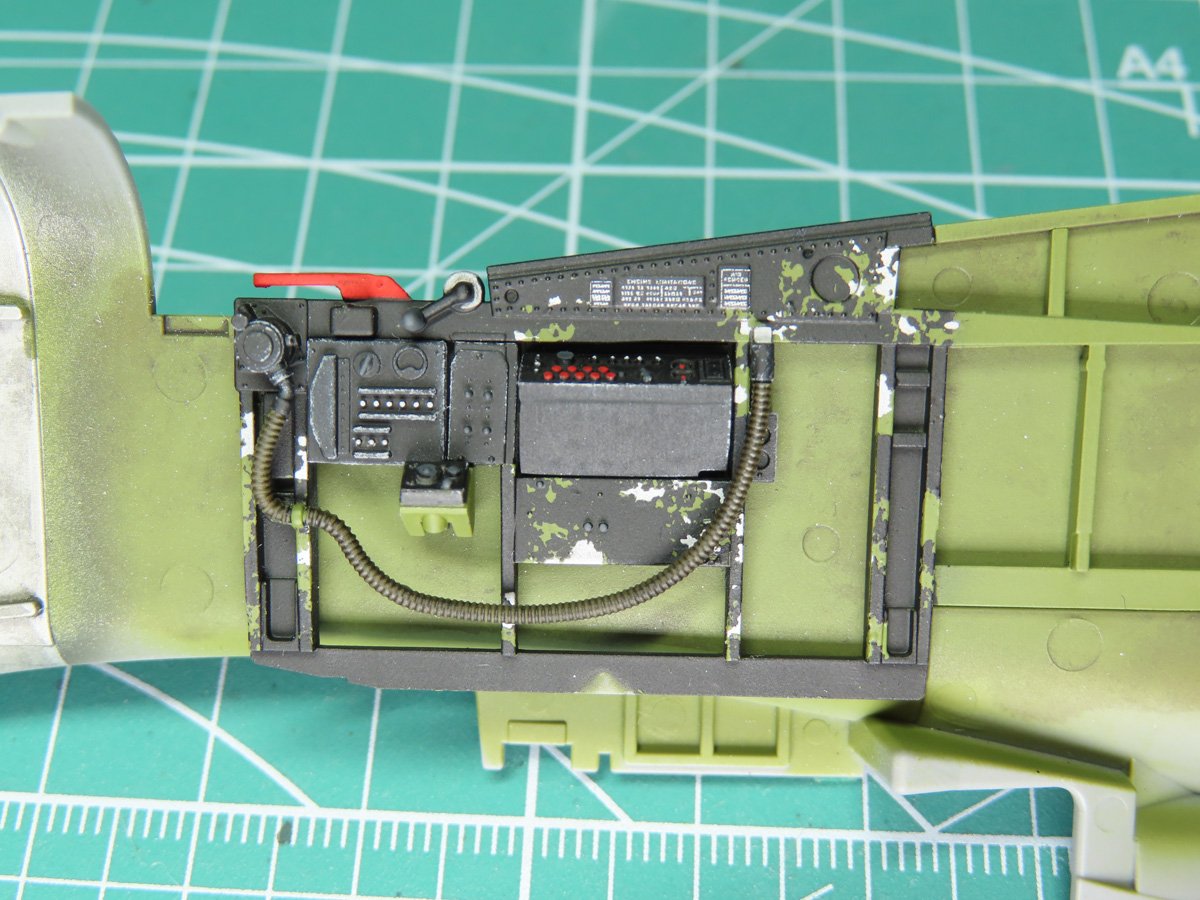
Here is the completed sidewall temporarily set into the fuselage. The red handle on the front is the emergency canopy release I mentioned in the previous post. And the handle next to that is the crank to open and close the canopy. The F-51D also featured new radio equipment, which you can see in the center.
One picture I found had parts of the side walls left in Zinc Chromate Green and not painted black. I don’t know if this is 100% accurate, but I thought that leaving the walls green would allow more of the cockpit details to be seen once the model was completed.
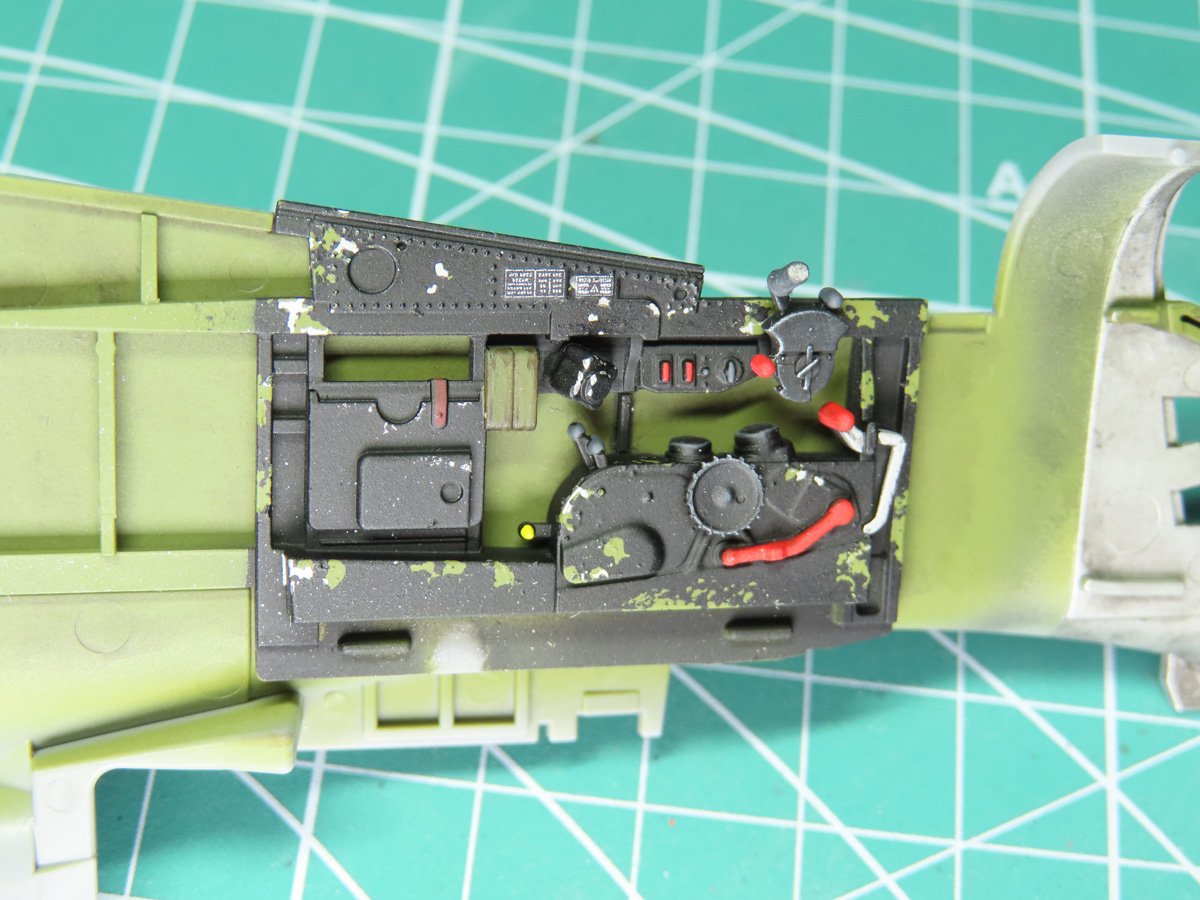
Looking at the other side of the cockpit now, I decided to paint the bomb release and landing gear levers red, again so that these details would stand out more when you looked in the cockpit.
Most of the black details were lightly painted with Vallejo Sky Grey 70989. I used my new Vallejo Dry Brush B07001 for this effect.
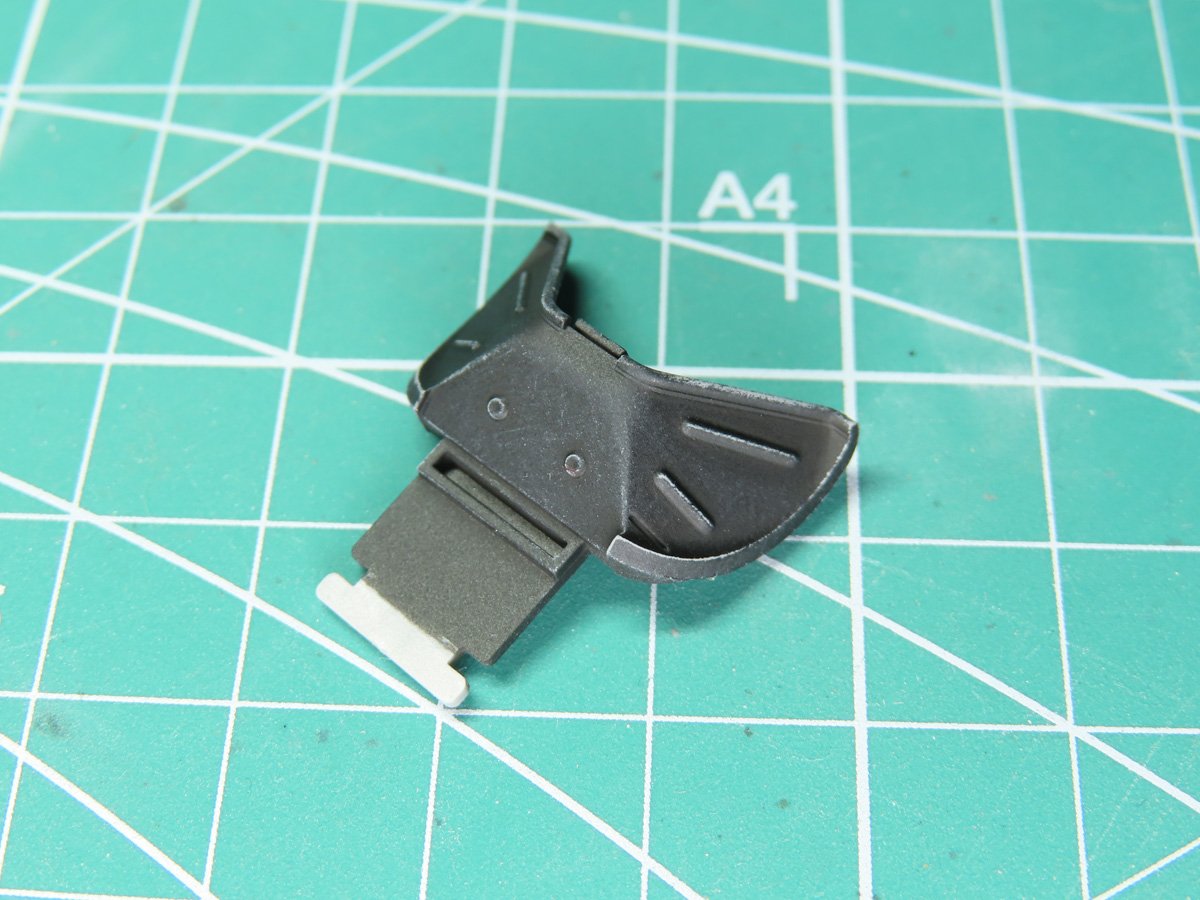
I enjoyed using my new dry brush that I decided to brush some more Vallejo Sky Grey over the cockpit shroud, and this did a very nice job at highlighting the raised details.
The slit in the front of the shroud is where the bulletproof windscreen will rest. I decided to leave it off until later on in the build to avoid the possibility of damaging the part.
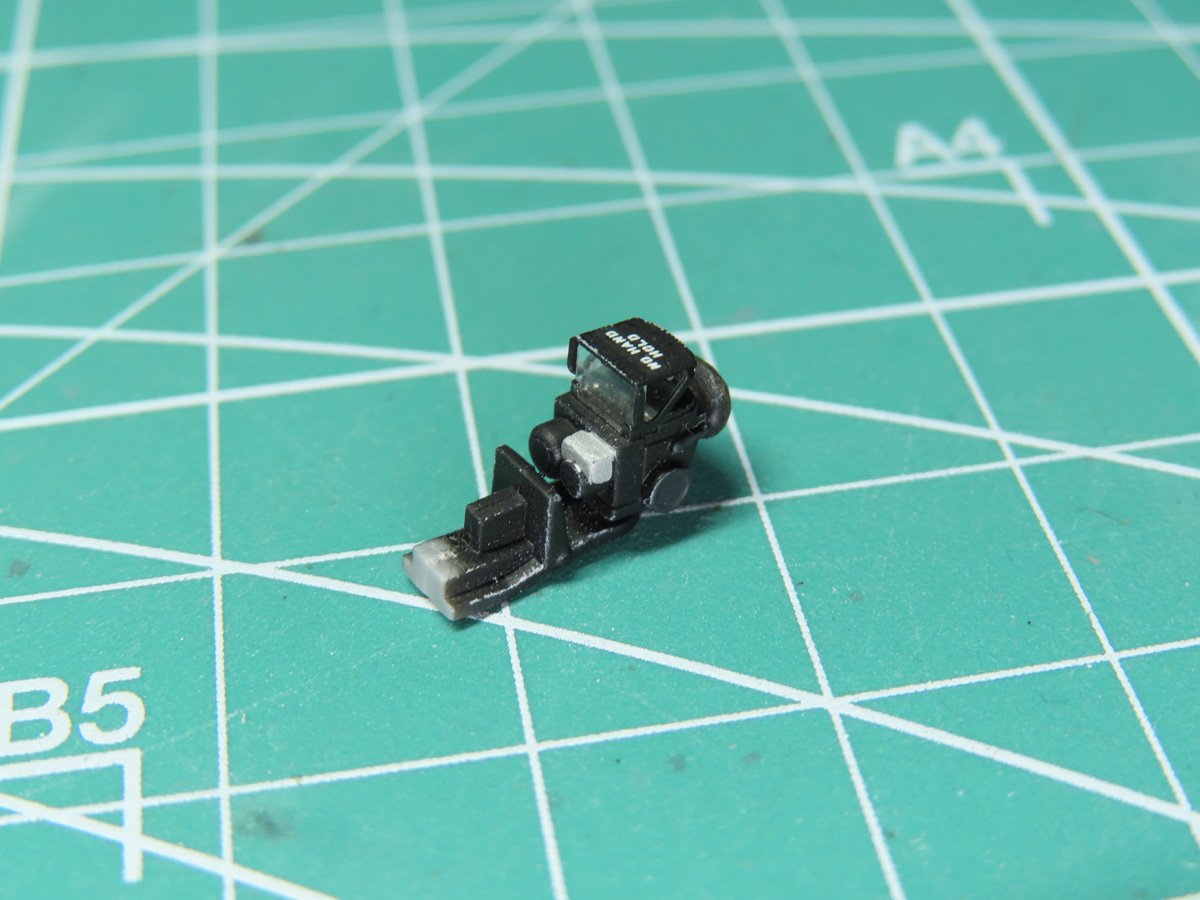
The K-14 Gunsight was a bit of a tricky build as it’s made up of tiny parts, including 3 clear and one photo-etch piece on top.
I masked off the glass sections and painted everything Mr Color 92 Semi-Gloss Black. I then added the “No Hand Hold ” decal to the top of the etched part, and sparingly glued it in place with Tamiya Multipurpose Cement 87188.
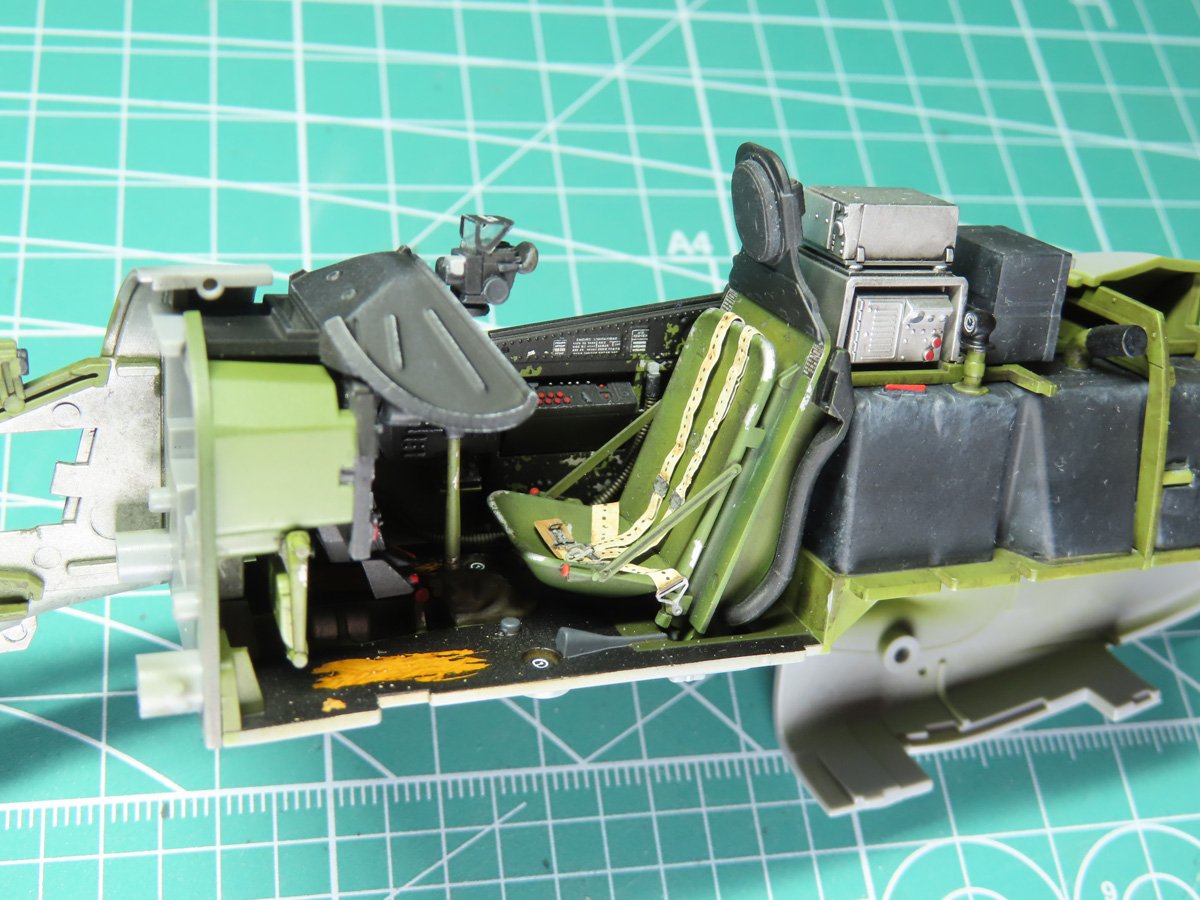
With the engine, oil tank, and cockpit now completed, it’s hard to believe that there is still more to be built and added to the interior.
In the next post, we’ll be working on the intake system, as well as some more of the parts around the engine, and hopefully, I’ll get enough completed that the fuselage can be sealed up and completed.
Painting and detailing a cockpit is always one of my favourite pasts of a build, but it can be tough to appreciate those details once the model is completed. Especially at a smaller scale, and that’s the nice thing with this kit, the canopy will easily slide back, and you can still appreciate all of those details.
To be continued…
About the Author:
Jared Demes is a modeler from southern Alberta. He has been building models since he was 4 years old when his Dad first introduced him to the hobby. He has written for several magazines including, Fine Scale Modeler, Scale Aircraft Modeling, Phoenix Scale Models, and others. He has an interest in all modeling subjects, with a focus on WWII Japanese aircraft and Science Fiction.
Jared has won several IPMS awards for his modeling, and currently operates his YouTube channel rebelsatcloudnine, where he showcases model builds and product demonstrations.