


From perfect hair‑thickness layers to the right thinners—and why professional airbrushers leave leveling additives behind.
Backstory: From Frustration to Finish-Line Precision
Every seasoned scale modeller has experienced it—you apply a flawless base coat, step away for a moment, and upon returning, your final lacquer pass crimples, blisters, or develops an unexpected texture. You followed the standard advice—“light coats,” “lower pressure,” “use a good thinner”—yet something still went wrong. Why? Because vague terminology and inconsistent techniques often miss the single most critical factor: film thickness and the way solvent-based lacquers off-gas.
This guide is born from years of frustration, experimentation, and careful observation. We eventually discovered that controlling paint thickness, not pressure or brand alone, is the key to success. To clarify this abstract concept, we use tangible, intuitive visual references:
- Human hair (approximately 70–100 μm thick) becomes our unit of measurement for a “wet” lacquer coat.
- Tamiya masking tape (~80 μm thick) provides a real-world comparison to judge your airbrush passes.
By reframing your spray passes as measurable “tape-layers” or “hair-levels” of film, this guide offers a precision-based method for gauging lacquer thickness, improving atomization, and eliminating off-gassing disasters. Whether you’re a beginner trying to avoid the heartbreak of solvent blisters or an experienced modeller fine-tuning metallic finishes, you’ll find exact thinning ratios, MAC-valve control techniques, and a new way to visualize when you’re applying too much paint.
Why Film Thickness Matters
Achieving a flawless finish on scale models is as much science as art. In this comprehensive guide, you’ll learn how visualizing wet film in “hair-levels” helps you avoid pinholes and blisters; why precise thinning ratios (from 3:1 to 9:1) are critical for smooth off-gassing; and how a MAC (Micro UNir Control) valve delivers the consistent airflow needed for razor-sharp detail work. We’ll explore beginner-friendly levelling thinners—Mr. Color, Tamiya Retarder, and Real Colours High Compatibility—and reveal why advanced modellers eventually dispense with them. Finally, you’ll discover why Mr. Rapid Thinner is the go-to choice for metallics and matt finishes, keeping pigments perfectly suspended and flat lacquers crisp. Whether you’re just starting or refining pro-level technique, this article equips you with every tool to elevate your lacquer finishes from amateur to museum-quality.

Using Human Hair as a Visual Reference for Wet Paint Thickness
When airbrushing lacquers—especially in scale modelling where precision matters—it can be difficult to gauge just how thin each paint layer should be. Human hair, with an average diameter of about 75 μm (range 17–181 μm), offers a relatable, real-world comparison. Since a wet lacquer coat typically measures around 80–100 μm (before drying to a much thinner film), thinking of each pass as “about the thickness of a human hair” gives you a tangible benchmark for controlling paint application.
- Nominal Value: 75 μm per hair
- Wet Film Thickness (WFT): ~80–100 μm per coat
- Hair-Levels Calculation: Hair-levels≈ (80–100 μm) ÷ 75 μm ≈ 1.0–1.3 hairs
If your target dry film is 20 μm (a common per-coat build), your wet film ends up at roughly 4–5 times that thickness. By picturing a hair-thickness as one “unit,” you can keep each coat consistent and avoid over-building.
Visualize Wet Film as “Paper-Layers” Instead of Hair-Levels
If hair-levels feel too abstract, switch to a standard sheet of copy paper—about 100 μm thick:
- ≤ 1 sheet (≤ 100 μm WFT) per wet coat: Solvents escape smoothly, minimal risk of trapping.
- 1–2 sheets (100–200 μm WFT) cumulative: You enter the danger zone for pinholing or early “orange peel.”
- > 2 sheets (> 200 μm WFT) cumulative: Solvent vapours struggle to migrate, causing blistering or “popcorn” defects.
Once fully cured, a lacquer coat measures only 15–20 μm—about ⅕ of a sheet of paper. This stark contrast underscores how incredibly thin and precise your final finish must be.
Visualize Wet Film as “Tape-Layers” Using Tamiya Masking Tape
For many modellers, masking tape is already on hand. A single strip of Tamiya masking tape is roughly 80 μm thick. Use it just like the hair or paper analogy:
- ≤ 1 tape (≤ 80 μm WFT) per wet coat: Solvents escape smoothly, minimal risk of trapping.
- 1–2 tapes (80–160 μm WFT) cumulative: Danger zone for pin holing or early “orange peel.”
- > 2 tapes (> 160 μm WFT) cumulative: Solvent vapours struggle to migrate, leading to blistering or “popcorn” defects.
After curing, a lacquer coat is only 15–20 μm—about ¼ of a tape layer. Again, this highlights how thin your wet coats must be to avoid off-gassing problems.

Solvent‑Based Lacquer Off‑Gassing & Outgassing Glossary
Use this glossary to diagnose and communicate precisely about off-gassing defects, so you can adjust thinning ratios, flash-off times, and application techniques for truly flawless lacquer finishes:
- Pin holing: Tiny, crater-like holes caused by solvent vapour erupting through before the surface skin has fully set.
- Blistering: Raised bubbles where solvent accumulates under the surface, lifting the cured film and often popping to leave rough spots.
- Popcorning (Solvent Pop): A severe form of pinholing where numerous small bubbles burst, resembling popcorn. Usually results from very thick wet films or rapid recoating.
- Cratering: Larger, irregular depressions where solvent pockets collapse after bursting, leaving visible divots.
- Orange Peel: A textured, dimpled surface resembling an orange’s skin—often an early sign of uneven solvent evaporation and surface-skin vs. inner-core curing differences.
- Fish-Eyes: Circular spots where the lacquer retracts from the substrate, exposing the layer beneath. Often caused by contamination; rapid outgassing can exacerbate their formation at edges or high-build zones.
- Lifting/Crawling: When the recoating lacquer pulls away from an uncured or partially cured layer below, driven by trapped solvent at the interface. Appears as bare patches or shrunken film.
- Solvent Blush: A cloudy, matte haze on the surface caused by condensed solvent vapour reabsorbing into the lacquer before it cures. Common in high-humidity or low-temperature environments.
- Sinking: Localized depressions where the film thins and solvents drain or collect before evaporating, leaving “low spots” in the finish.
- Vapour Eruption: The dramatic release of trapped solvent as a visible mist or spray through the film, typically when recoating too soon or applying very heavy wet coats.
Use this glossary to diagnose and communicate precisely about off‑gassing defects—so you can adjust your thinning ratios, flash‑off times, and application technique for truly flawless lacquer finishes.

Why Off-Gassing “Popcorn” Occurs
Solvent vapours must escape through the paint film as it cures. When you exceed a critical cumulative wet thickness, the still-liquid under-layers trap solvent beneath, leading to tiny blister “popcorn” in the top coat. Empirical experience and technical guides (e.g., conformal coatings run 25–127 μm WFT; above that, solvent entrapment climbs steeply) suggest:
- Below ~1 hair (≤ 75 μm WFT) per wet pass: Solvent release is smooth; risk is minimal.
- Around 1–2 hairs (75–150 μm WFT) cumulative: You enter the danger zone; expect tiny pinholes or slight orange-peel texture as off-gassing struggles to escape.
- Above ~2 hairs (> 150 μm WFT) cumulative: Trapped solvents form visible blisters, runs, and adhesion problems.
Practical Takeaways for Model-Scale Spraying
- Keep each wet pass under ~1 hair thickness (~75 μm).
- Flash-off (let solvents evaporate until the surface is just tack-free) before re-coating; typically 5–15 minutes, depending on temperature and reducer.
- If you need more build, do multiple thin passes rather than a few heavy ones—aim for no more than 1 hair per wet coat, and avoid stacking more than 2 hairs’ worth total before allowing a full cure.
By visualizing your wet spray as “hair-layers,” you can literally count how many hair-thicknesses you’re laying down and stop before solvent traps become an issue.

Uneven Off-Gassing in Extra-Thick Coats (> 2 Hair-Levels)
When you build up more than roughly 2 hairs’ worth of wet lacquer (~150 μm+) in a single pass or before a full cure, you create a highly uneven solvent-escape scenario:
- Surface vs. Body Solvent Gradient
- The very top of the wet film is closest to the air, so its solvents begin to evaporate immediately.
- Deeper down, solvents must diffuse through an increasingly viscous polymer network. The interior stays “wet” far longer than the surface skin.
- Airbrushing Across Multiple Sections
- As you work across a large surface, the first areas you painted start shedding solvent and become tacky while you continue laying fresh, thick layers elsewhere.
- By the time you return to add more lacquer, those early zones have formed a semi-solid skin. New solvent from subsequent passes tries to escape through this hardened layer, trapping itself in the underlying paint.
- The “Perfect Storm”
- Returning to spray another heavy pass on an area that’s already “skinned over” creates internal pressure pockets.
- These pockets rupture the brittle surface as tiny pinholes or larger blisters, often just minutes after the final coat.
How to Avoid This Disaster
- Sectional Thin-Pass Strategy: Work in small, contiguous zones no larger than your gun’s flash-off window (a few square inches). This keeps all areas in roughly the same curing phase.
- Frequent Flash-Off Between Passes: Even if you’re building toward a thick finish, pause after each light pass (≤ 1 hair) for its tack-free time. Resist the urge to “fill in” immediately.
- Monitor Surface “Give”: Gently touch a test edge—if it leaves residue or feels sticky, wait longer before recoating. If it’s hard but cold to the touch, the solvent is likely trapped—better to let it rest fully before proceeding.
By recognizing how a hardened skin can outpace the solvent-rich core, you can plan your airbrushing sequence to maintain uniform curing and avoid nasty pinholes or blisters.
Proper Thinning Ratios and the Role of MAC Valves in Scale Modelling
Why Thinning Ratios Matter
In scale modelling, control and finesse are paramount. Using the correct thinning ratio ensures that each hair-level coat dries evenly and off-gasses properly, preventing pinholes and blisters on tiny details:
- Common Scale-Model Ratios
- 3:1 (thinner : paint): For heavily pigmented colours or metallic base coats. Slows cure enough to let pigments settle evenly without clogging fine nozzles.
- 4:1 to 6:1: The sweet spot for most lacquer paints on 1/35 to 1/72 scales. Fluid enough for smooth, narrow spray lines yet viscous enough to build colour opacity in two thin passes.
- 7:1 to 9:1: Ideal for clear coats or micro-glazes on fine details, where you need rapid solvent release to avoid softening adjacent decals or masking edges.
- Off-Gassing Benefits on Small Parts
- Low Viscosity Layers: Let solvents diffuse quickly through the film—even in recesses and panel lines—so you can flash-off without waiting ages.
- Consistent Wet Film Thickness: Keeps each pass under ~75 μm (1 hair), letting you build up colour without exceeding the 2-hair danger zone.
- Uniform Cure Across Tiny Surfaces: Prevents localized soft spots that cause detail loss or orange peel on curves and rivets.

📝 Tech Note: Thinning Ratios Are Just Baselines!
Brand Variability: Every lacquer formulation is unique. Pigment load, resin type, and solvent blends differ between Mr. Color, Tamiya, and Real Colours. What works perfectly for one brand may be too thin—or too thick—for another.
- Ratios Are Starting Points: 3:1, 4:1–6:1, and 7:1–9:1 thinner : paint guidelines get you in the ballpark. Then fine-tune:
- Test on a scrap piece.
- Adjust by small increments (e.g., 0.5 parts thinner).
- Observe atomization and film thickness.
- Match Your Skill Level: Beginners may prefer thicker mixes (lower thinner : paint) for more forgiving flow and slower cure. Advanced painters can push higher thinning ratios for ultra-fine detail, relying on perfect trigger control and airflow.
- Equipment Matters: Airbrush nozzle size, compressor output, and MAC valve calibration all affect ideal viscosity. What sprays beautifully through a 0.2 mm needle at 1.5 bar may clog a 0.3 mm setup—or vice versa.
- Continuous Improvement: Keep a log of your personal “sweet spot” mixes for each brand/airbrush combo. Over time, you’ll dial in your custom ratios faster than ever!
Remember: Thinning is as much art as it is science. Start with the baseline, then adjust until your spray pattern, film build, and off-gassing behavior sing in harmony!

 and you’ll notice the texture of the styrene test card still visible — a true testament to ultra-high paint dilution and the legendary MAC Valve magic!

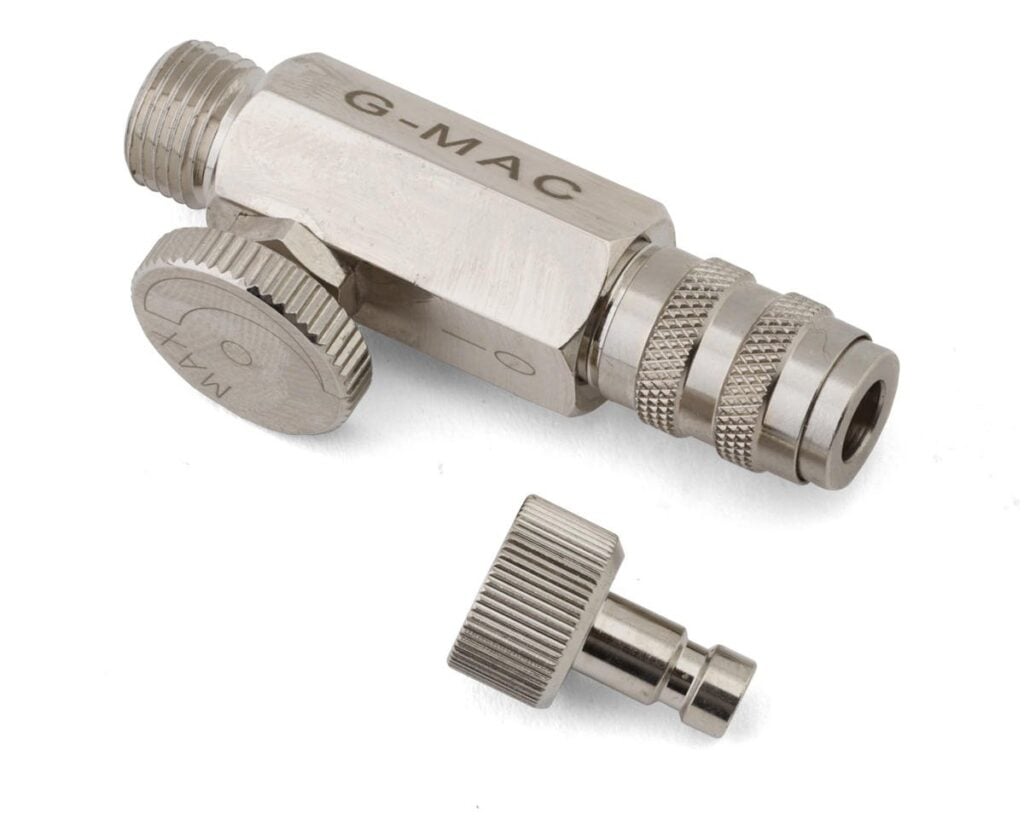
Why a MAC Valve Is Indispensable for Scale Modelling
When you’re painting a model’s turret, cockpit interior, or landing-gear struts, you need rock-steady airflow. A MAC (Micro UNir Control) Valve lets you fine-tune that airflow in real-time—a far superior method to throttling your compressor.
You can even “pulse” the valve closed briefly between strokes—letting solvents escape—then reopen it at the same calibrated airflow for your next fine detail pass.
Manual Calibration for Optimum Airflow
Rather than setting a target pressure at the valve, you adjust the MAC valve by feel: tune the airflow to suit your chosen thinning ratio (3:1 up to 9:1).
This ensures perfect atomization—tiny, uniform droplets—so even the most intricate stencil or camo pattern on a 1 mm-wide panel line is crisp and clean.
Steady Flow Prevents Sputter on Miniature Parts
Turning down compressor pressure directly often causes lags that show up as spitting—devastating when you’re airbrushing minute details.
The MAC valve’s rapid modulation delivers exactly the air volume you need, when you need it, for a flawless, even coat every pass.
Improved Flash-Off Without Cooling
Because the compressor operates at its optimal setting, the airstream remains warm and dry, accelerating solvent evaporation on very small surfaces.
📝 Tech Note: In scale model airbrushing setups—whether you’re detailing a 1:24 scale car, weathering armour, or blending camouflage on a 1:35 tank—a MAC (Micro Air Control) valve is often integrated into the airbrush or an accessory. Though sometimes referred to colloquially as a “pressure valve,” its true function is to control the flow of air (how many litres per minute reach your airbrush nozzle), rather than to hold or actively regulate a specific pressure at the nozzle.
By channeling air through a fixed orifice when the valve opens, a scale model airbrush MAC valve also generates a localized pressure drop as the air accelerates—an effect predicted by Bernoulli’s principle and essential for the Venturi action that draws paint out of the jar or cup. In other words, the valve’s orifice accelerates the air (increasing its velocity and lowering its static pressure), which helps siphon acrylics, enamels, or lacquers into the airstream. However, that pressure drop is a passive consequence of airflow dynamics and the venturi geometry downstream in your airbrush, not an active pressure-holding feature of the MAC valve itself.
Scale‑Model Workflow Example:
- Thin your lacquer according to your needs (3:1 for base coats, up to 9:1 for clear glazes).
- Set your compressor to deliver approximately 1.5 bar at the hose.
- Manually calibrate your MAC valve by spraying a test panel: adjust until atomization is smooth and droplet size is correct for your thinning ratio.
- Spray consistent, hair‑level passes on wheels, tracks, and tools—pausing briefly (via the MAC valve) before each new area to flash off solvents.
By pairing scale‑model‑optimized thinning ratios with the precise, manually calibrated airflow of a MAC valve, you’ll achieve ultra‑smooth, detail‑preserving lacquer finishes—no pinholes, no softening of decals, just museum‑quality results.
Recommended Leveling Thinners for Inexperienced Airbrush Users
Beginners often struggle with uneven flow, orange peel, or premature drying in fine-detail work. Leveling thinners add surfactants and retarders that help paint self-level and extend open time, making smooth, hair-level coats easier to achieve.
- Mr. Color Leveling Thinner T108 (🟡 label)
- Self-leveling Additives: Reduces surface tension, helping paint flow out uniformly after each pass.
- Moderate Retarder: Slows solvent evaporation enough to prevent “fisheye” or dry tips without risking sagging.
- Compatibility: Designed specifically for Mr. Color lacquers for consistent gloss and adhesion.
- Tamiya Lacquer Thinner – Retarder Type 87194 (🟧 cap)
- High Retarder Content: Extra open time for working small stencils or camo masks on 1/72 and 1/144 scales.
- Fine Atomization: Balances viscosity so that even with lower compressor pressures (around 1.5 bar), you still get a smooth spray.
- User-Friendly: Helps hide minor technique issues—if your trigger release is a bit abrupt, the paint still settles out nicely.
- Real Colours High Compatibility Thinner RC701 (🟦 cap)rapid
- Broad Brand Support: Works with Real Colours lacquers and many third-party or vintage formulations.
- Self-levelling Polymers: Actively smooth out brushstrokes and airbrush passes—great for those just dialling in their MAC valve feel.
- Fast Flash-Off: Despite its levelling properties, it won’t over-soften decals or masking edges when used at 4:1–6:1 ratios.

- Real Colours High Compatibility Thinner RC701 (🟦 cap)
- Tamiya Lacquer Thinner 87077 (🟨 cap)
- Tamiya Lacquer Thinner Retarder Type 87194 (🟧 cap)
- Mr.COLOR Thinner T104 (🔵 label)
- Mr.COLOR Leveling Thinner T108 (🟡 label)
- Mr.COLOR Rapid Thinner T117 (🔴 label)
When Advanced Modellers Can Forgo Leveling Thinners
Experienced airbrushers who have mastered MAC-valve calibration, thinning ratios, and trigger control can often skip leveling thinners altogether:
- Precise MAC Valve Flow Control: By adjusting airflow to match the paint’s viscosity, advanced users maintain perfect atomization without extra surfactants.
- Optimized Thinning Ratios: Knowing that 3:1–9:1 thinner : paint ratios yield predictable WFT and solvent release, they rely on pure lacquer and standard thinner.
- Flawless Application Technique: With a steady hand, consistent trigger pressure, and strategic flash-off pulses, they avoid edge-drying and orange-peel issues that leveling thinners mitigate.
In short, leveling thinners are a crutch that accelerates learning and masks minor technique flaws. Once you’ve internalized airflow feeling, thinning precision, and application timing—especially on micro-scale details—you can achieve perfectly flat, pinhole-free finishes using only hobby-standard lacquers:
- Mr.COLOR Thinner T104 (🔵 label)
- Tamiya Lacquer Thinner 87077 (🟨 cap)
- Real Colours High Compatibility Thinner RC701 (🟦 cap)
Optimal Thinner for Metallics and Flat-Finish Lacquers: Mr. Rapid Thinner
Metallic and flat-finish lacquers have unique requirements—metallic pigments must remain uniformly suspended and aligned to catch the light, while matt formulations need rapid solvent release without surface defects. Mr. Rapid Thinner excels in both:
- Enhanced Pigment Suspension
- Low Surface Tension, No Surfactants: Unlike leveling thinners, Mr. Rapid uses solvating agents that keep aluminum and stainless-steel flakes evenly dispersed without surfactants that cause clumping.
- Rapid Re-Suspension: If settling occurs during a break, a quick stir and spray cycle redistributes flakes, ensuring consistent metal-flake orientation.
- Fast Flash-Off for Flat Finishes
- Ultra-Fast Evaporation: Flat lacquers benefit from shorter open times to avoid dust nibs and “lapping.” Mr. Rapid’s solvent blend evaporates cleanly without leaving a glossy halo.
- Minimal Retarder Content: Prevents matting agents from over-softening or migrating, preserving the intended low-sheen surface.
- Why Levelling Thinners Hurt Metallics
- Surfactants in leveling thinners reduce surface tension too much, causing metal flakes to blanket together, creating a mirror-like patch (“tin-foil” effect) instead of dynamic shimmer.
- Extended open time lets pigments settle out of suspension before the film sets, producing streaks, pinholing, or bare basecoat areas.
Best Practice Workflow for Metallics & Flats
- Thin metallic or flat lacquers with Mr. Rapid Thinner at 3:1 to 4:1 thinner : paint for optimum flake flow or matt build.
- Stir the cup gently just before spraying to lift any settled flakes.
- Spray hair-level passes, letting the first pass flash-off briefly (10–20 s) to lock flakes in their initial orientation.
- Build additional coats as needed, always giving each layer just enough time to become tack-free—this locks in pigment alignment or flat-finish smoothness without agitating the suspension.
By choosing Mr. Rapid Thinner for metallics and flat lacquers, you ensure pigments stay suspended and aligned, and matting agents set cleanly, avoiding the pitfalls of leveling thinners and achieving true-to-intent finishes.
🗝️ Key Takeaways
Key Takeaways
- Visualize Wet Film as “Hair-Levels”: Aim for ≤ 1 hair (~75 μm) per wet coat; avoid exceeding 2 hairs total to prevent trapped vapour and defects.
- Optimal Thinning Ratios (Thinner : Paint):
- 3:1 for heavy base coats or metallics
- 4:1–6:1 for general colour build on 1/35–1/72 scale
- 7:1–9:1 for clear coats, glazes, and fine detail
- MAC Valve Control:
- Manually calibrate airflow (not pressure) to match the thinning ratio for perfect atomization.
- Use brief valve pulses between passes to flash-off solvents without cooling the airstream.
- Beginner-Friendly Leveling Thinners:
- Mr. Color Leveling Thinner, Tamiya Retarder, Real Colours High Compatibility
- Contain self-leveling additives and retarders that mask technique flaws and extend open time.
- Advanced Modelling Technique:
- Master airflow, thinning, and trigger control to skip leveling thinners and rely on standard lacquers (Mr.Color Thinner, Tamiya Lacquer Thinner, Real Colours High Compatibility Thinner).
- Mr. Rapid Thinner for Metallics & Flats:
- Keeps metal flakes suspended and aligned; fast-evaporating blend preserves matte agents.
- Avoid leveling thinners with metallics to prevent pigment clumping and “tin-foil” effects.
- Common Off-Gassing Defects: Pin holing, blistering, popcorning, cratering, orange peel, fish-eyes, crawling, solvent blush, sinking, vapour eruption.
Use these distilled principles—coat thickness, mix ratios, airflow mastery, and the right thinner—to achieve flawless, museum-quality lacquer finishes on your scale models.

The Tape-Edge Litmus Test on a Styrene Test Card
Despite precision methods—measuring hair-thin layers with micrometres, consulting MAC-valve airflow charts, and logging thinning ratios—many modellers prefer a simpler, more tactile gauge of wet film thickness: a swath of lacquer laid between two strips of masking tape. Here’s how and why this no-frills method works:
- Setup Is Effortless
- Affix two parallel strips of standard Tamiya masking tape on your test panel, spaced a few millimetres apart.
- Spray a single pass of your mixed lacquer directly between the tape walls—no calipers, gauges, or microscope needed.
- The Tack-Free Check
- Wait until the lacquer is tack-free (no longer sticky to a light fingertip touch).
- Carefully peel away both tape strips.
- Feeling the Paint Ledge
- Gently run your fingertip across the gap where the tape was.
- If you feel a pronounced ledge—an obvious paint ridge—your wet film was too thick. This edge is an early warning of potential pinholes, blistering, or orange-peel defects.
- Refinement by Iteration
- Rinse and Repeat: Adjust your mix (more thinner, lighter trigger pull, or faster pass), then re-spray between fresh tape strips.
- With each cycle, aim to reduce the ledge’s prominence. When the edge becomes hardly detectable, you’re reliably laying down coats at true micron-level thickness.
- Why It Works
- This tactile feedback loop instantly correlates your technique—thinning ratio, airbrush speed, and airflow modulation—with real-world film thickness.
- It trains your muscle memory: you learn exactly how a “correct” pass feels against the tape guides, internalizing that ideal wet-film thickness for future freehand work.
By embracing this analog litmus test, you gain an intuitive “feel” for microscopic control—no special tools required. Use it as a quick pre-session warm-up or a troubleshooting drill whenever off-gassing blemishes threaten your final finish. Over time, the tape-edge test hones your technique so thoroughly that your eye—and your fingertip—becomes the ultimate thickness gauge.
You’ve achieved true mastery when you can write your name or sketch notes with your airbrush, just like using a fine-tip artist’s pen.

Coming Up Next: Unleashing the Magic of Enamel Acrylic Paint
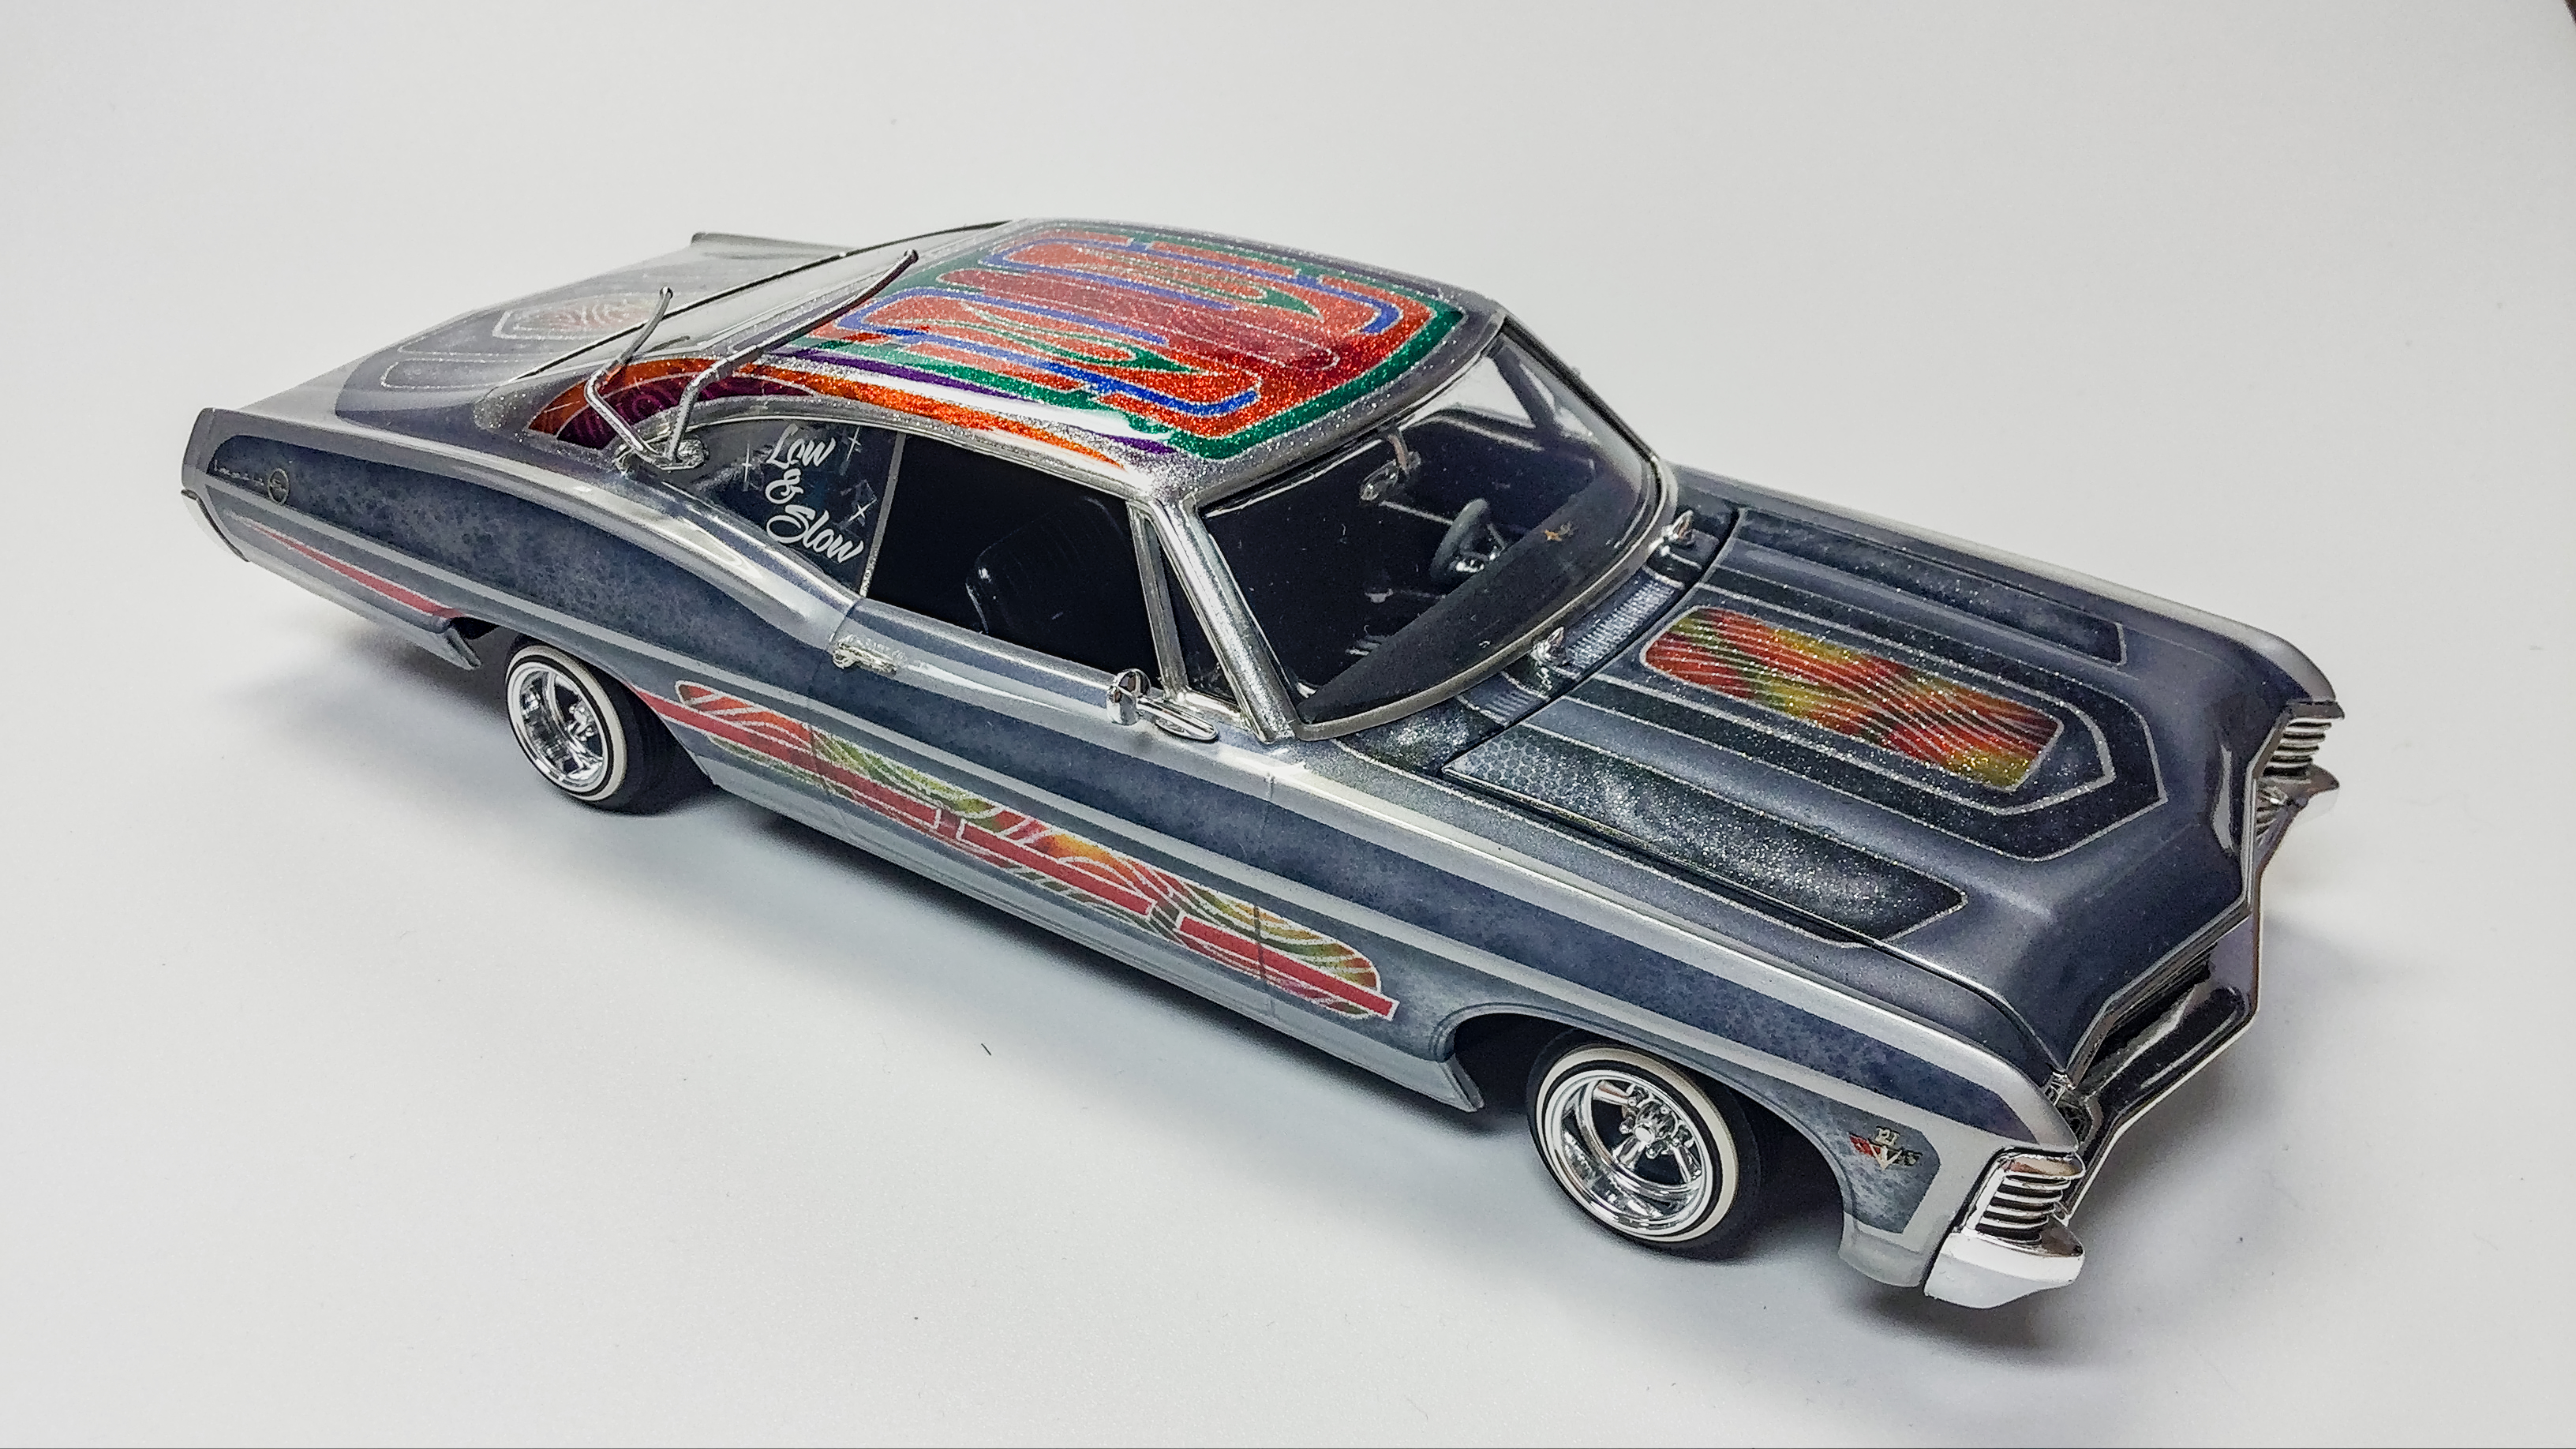
While lacquer’s lightning-fast flash-off and razor-smooth sheen can be a godsend for modellers craving an almost-instant rock-hard finish, there’s another world of possibilities waiting in the slow, buttery cure of enamel acrylic. Imagine being able to feather in subtle shadow lines, blend panel edges seamlessly, and coax that deep “wet look” gloss on your scale car’s fenders—all without the panic of a paint film setting up before you’ve finished your work. Enamel’s extended open time and self-leveling nature offer a creative playground that lacquer can’t match, especially when you want to stretch out that final layer into a perfectly smooth, museum-grade finish.
In our next article, we’ll peel back the curtain on enamel acrylic—from its dual-stage cure (surface drying by solvent evaporation, followed by a gradual oxidative hardening) to the insider tips that prevent those pesky fingerprints from “burning in” while the paint is still finding its legs. Whether you’re intrigued by the rich, nuanced depth that enamel brings to metal and chrome details or you’re looking to master techniques like wet-blending and micro-panel shading, stay tuned: we’ll guide you step by step through achieving a flawless enamel finish that stands toe-to-toe with lacquer’s hallmark rigidity and shine.
📝⚠️ TechNote: Enamel Acrylic Paints – require their dedicated thinner (X-20 🟦 cap).

- Tamiya Colour Enamel Paint Thinner X-20 🟦 (80040 – 250ml)
- Tamiya Colour Enamel Paint Thinner X-20 🟦 (80030 – 40ml)
- Tamiya Colour Enamel Paint Thinner X-20 🟦 (80020 – 10ml)
James (Doc) Wooldridge
James is a dedicated scale modeller, researcher, author, and content creator with a passion for precision and historical accuracy. Renowned for his super-detailing techniques and authentic colour schemes, he’s been featured on Scalemates and in Google Featured Snippets.
An active contributor to a major scale modelling Facebook community and producer of video tutorials, James combines clear, encouraging instruction with professional-grade photography to inspire modellers at every level.
Guided by a philosophy of clarity, encouragement, and continuous learning, he empowers hobbyists to build both skill and confidence.
As a founding executive of KSM–IPMS and Kawartha Scale Modellers, James continues to lead and innovate within the hobby.💡📏 📐📱🎬 📷 🎥