
Large 1/12 Scale Kit
This is the seventh part of the Revell 1969 Camaro Z/28 3in1 1/12 Scale 85-2812.
Now we’re ready to begin working on cleaning the body of the Camaro, and then we can paint it. I want to split this section into 2 posts. In this post, we’ll be focusing on the prep work and the painting. In the next post, we’ll go into more detail about adding a clear coat and polishing it up.
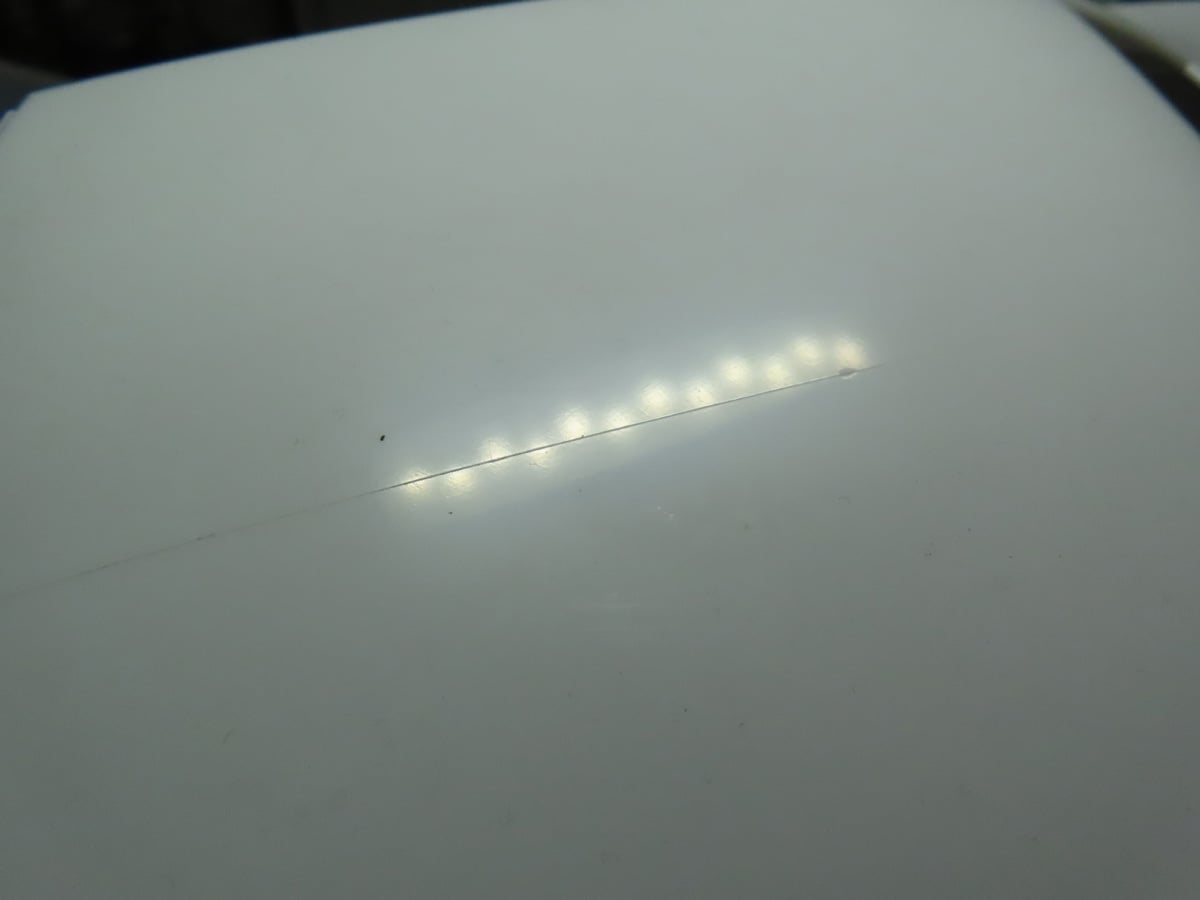
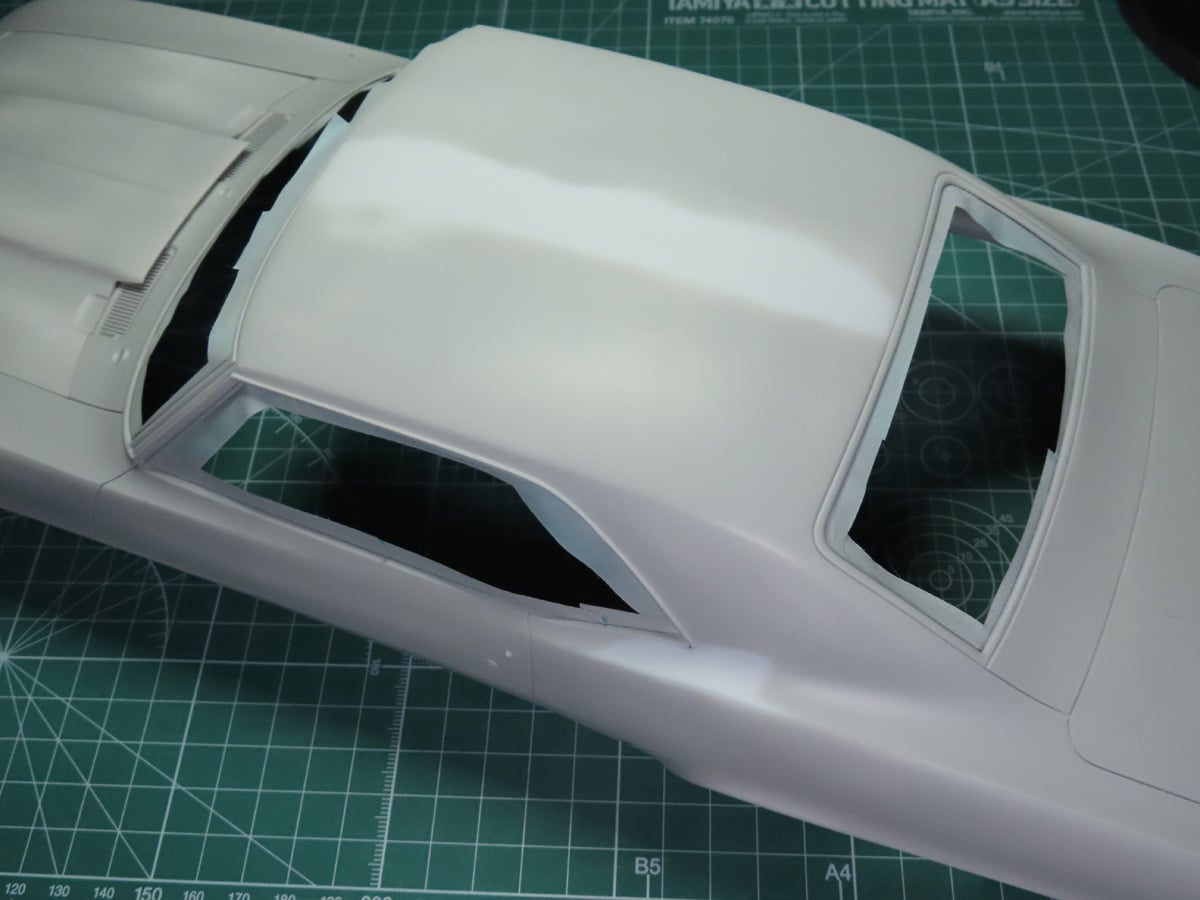
Looking closely at the roof of the Camaro, you can see a thin seam line that runs the length of the car. This will need to be properly sanded and smoothed out before we can do any painting. Take a close look at the body; there are quite a few seams and blemishes hiding around that aren’t as noticeable with the white styrene.
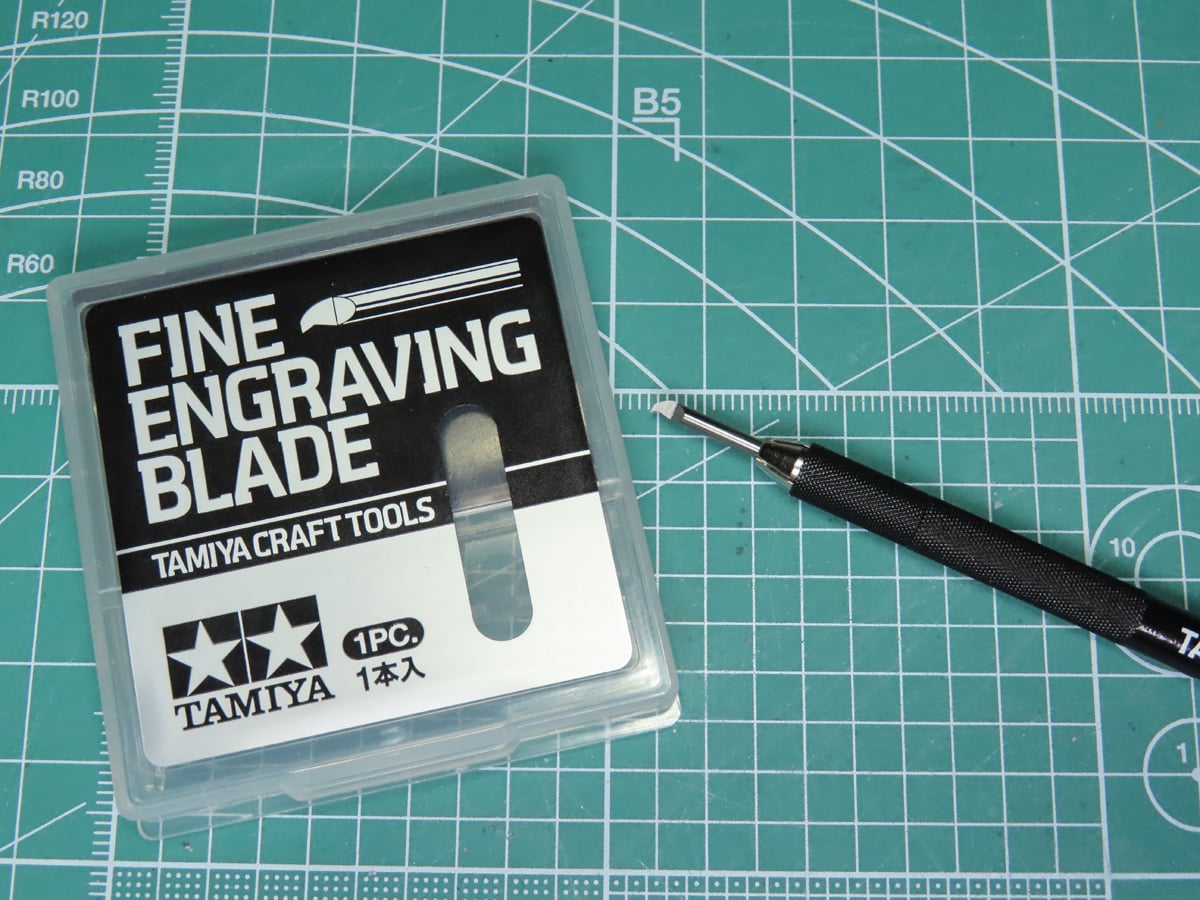
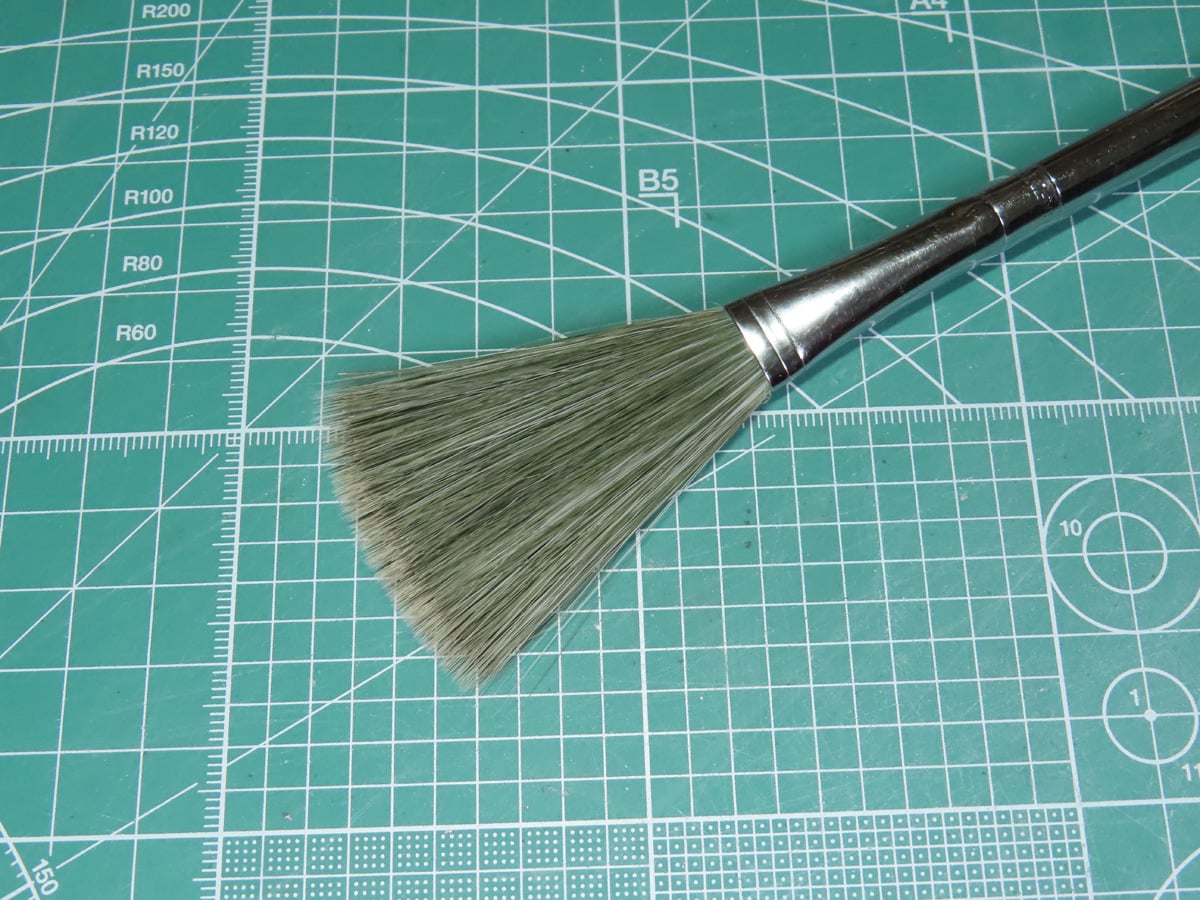
This is the Tamiya Fine Engraver 74139, the handle and the cutting tips are sold separately and they come in various sizes. The blades are tungsten steel, and I really like this scriber compared to others that I’ve tried in the past.
Everything is very light and not cumbersome, as some other scribers can be. And I find the pulling motion of the tool makes scribing details a lot easier.
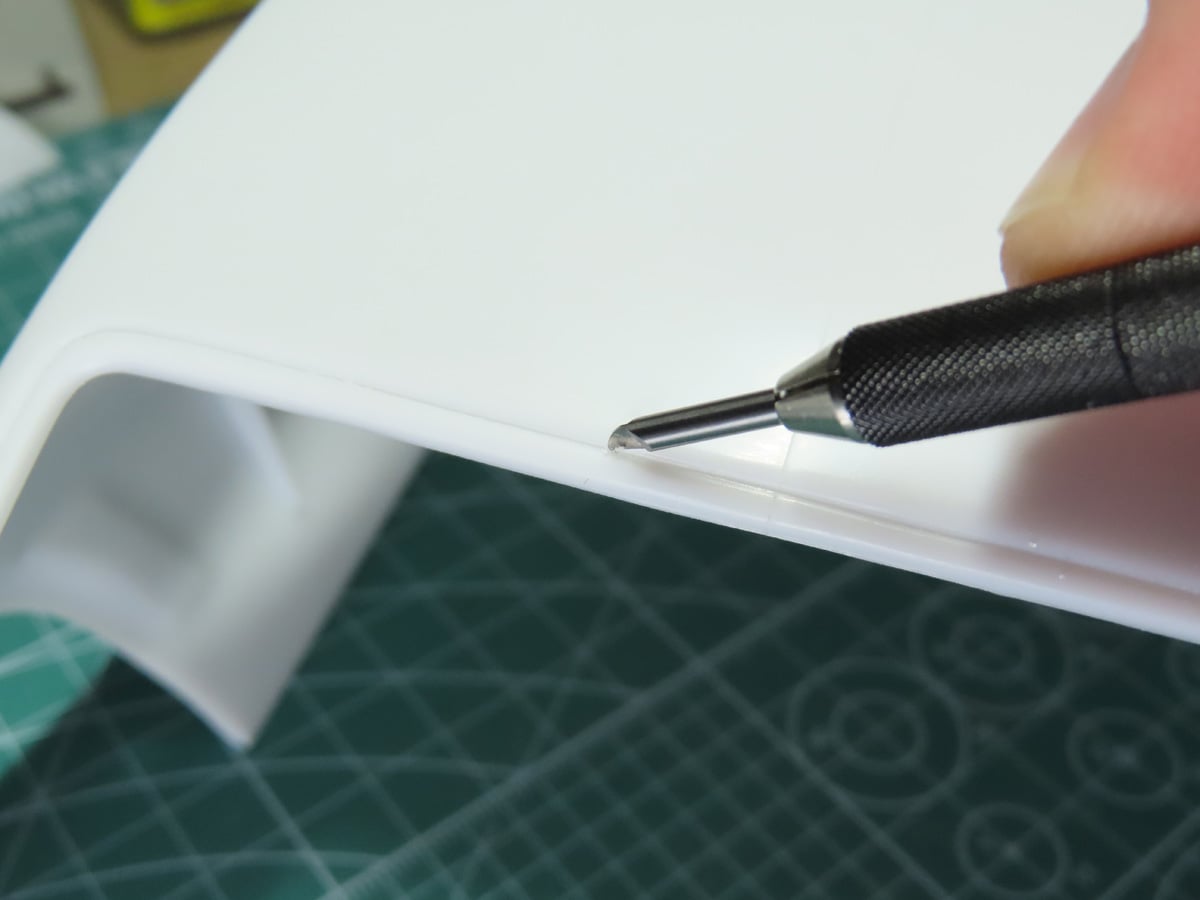
Some of the details, like the doors and the chromed window frame (as seen here). Are a bit soft on the detail, and scribing these lines out will help these features to stand out better, and in the case of the doors, provide a more accurate and deeper look.
This is a slow process; rushing can cause the engraver to pull in the wrong direction and potentially damage a section you didn’t want scribed.
For this process, I found that the 0.2mm Engraver 74136 was the proper size to rescribe the details on this particular project.
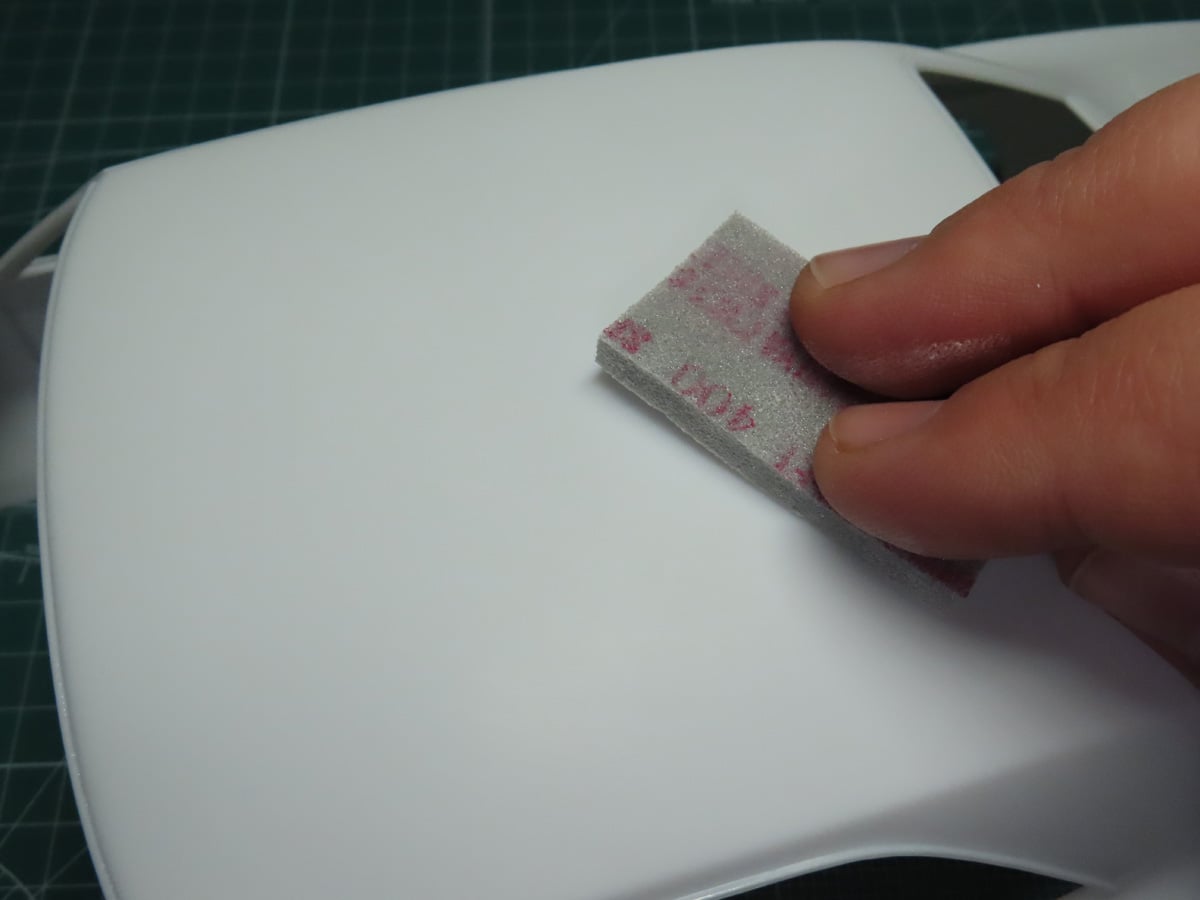
I sanded the seam lines and the rest of the car with Tamiya Sanding Sponge 400 grit 87147. The surface of the car body was very smooth, and I wanted to rough it up a bit to remove unwanted details, as well as to help the primer adhere better to the surface.
Once I was done with the 400-grit, I washed the body with warm water and a soft toothbrush. I also cleaned it with some dish soap to help remove any oils that had built up while I was handling the body. I then moved up to Tamiya 600 grit 87148 and polished the plastic out to remove any scratches that might have been left from the previous grit.
I primed the body with Tamiya Liquid Surface Primer G 87075, and this showed off a few places that needed more sanding, including a faint ghost seam on the roof of the car. Once I was satisfied with the sanding, I added a second coat of primer.

Before I added paint, I wanted to sand down and smooth out the primer. I used Tamiya 1500 Grit 87150, and I lightly sanded the primer. You don’t really need to apply any pressure here; simply moving the sponge back and forth is enough, and you’ll quickly achieve a beautifully smoothed surface.
Because of the dry winter weather and all of the handling I’ve done with the car body, there is a lot of static built up. And this is causing small bits of sanded primer and fibres to stick to the body. Exactly the sort of thing we don’t want before we begin painting.
I used 2 products. First, the Tamiya Anti-Static Brush 74078. This is a fantastic tool to have; it’s amazing at gently removing dust from models, but I’ve used it many times to clean off a model before painting.
The second product was a used dryer sheet. Simply rubbing the dryer sheet over the model is supposed to be enough to remove static build up from plastic. And between these 2 products, I quickly had a clean surface to paint on.
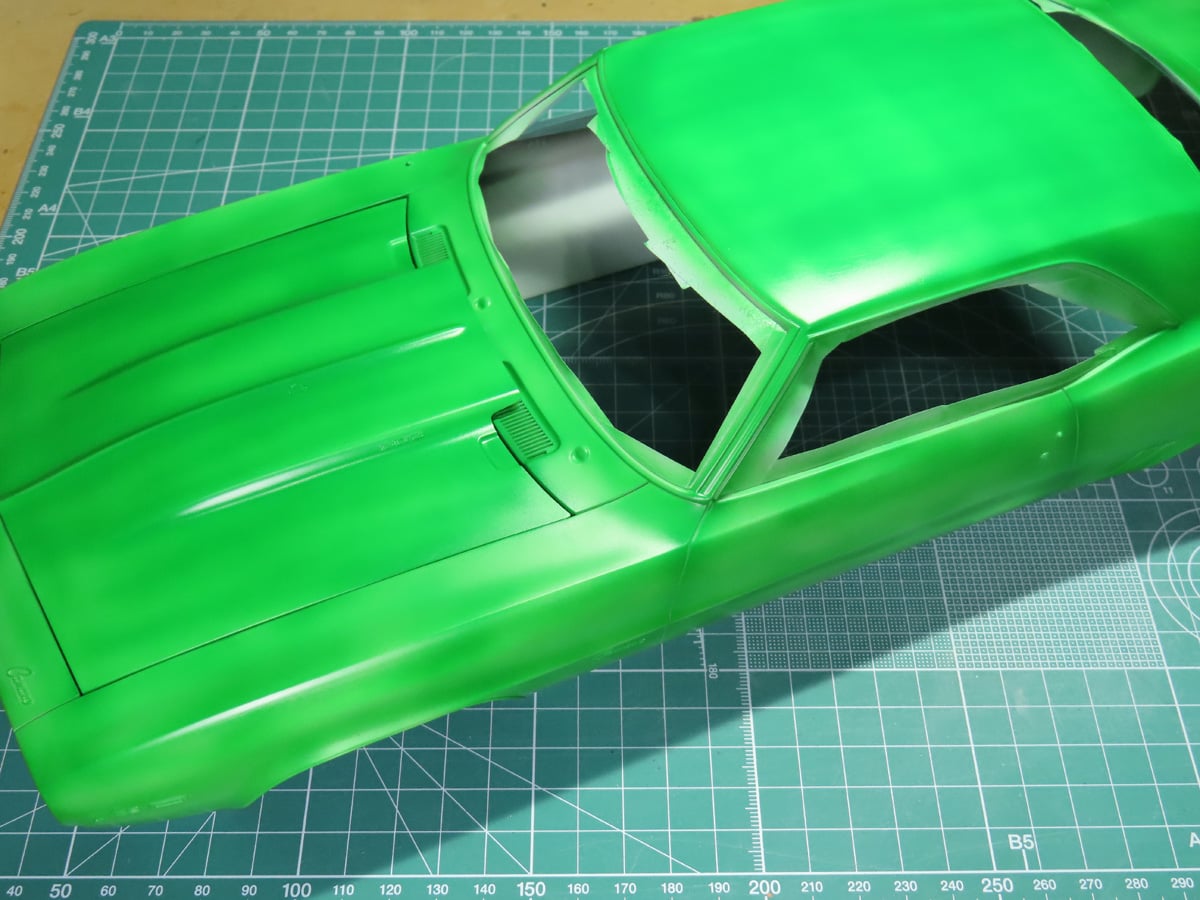
Looking at the color options Chevrolet provided for the Camaro in 1969, I was really taken in by the Rallye Green. And I decided to use Mr Color C66 Bright Green as it looks quite close to Rallye Green (or Rally Green).
The green was painted in 3 stages. Each stage would gradually bring in the color. The first coat you see here was lightly painted on, and parts of the Gray Primer can partially be seen through the green. Taking the 1500 sanding sponge, I gently sanded between coats to remove any imperfections in the paint, just as I had previously done with the primer coat.
This paint is very thin, so use caution when sanding. It’s also a good idea to let the paint dry a bit after sanding, as you could reactivate the paint.
Here is the completed green with 3 coats of paint. The paint was thinned about 50-50 with Mr Levelling Thinner, and it smoothed out beautifully.
This is a gloss paint, and what you see in the picture is about as glossy as this paint is going to get. But this isn’t important, and something you shouldn’t worry about yet. Later on the in the next post, we’ll get more into the gloss, but for now, all I wanted to achieve was a nice and even coat.
It’s a very bold color, and I’m afraid my lighting isn’t doing the Green the proper justice it deserves. I hope that in a few days, when the clouds and snow let up, I’ll be able to take this outside and see the full potential of this color.
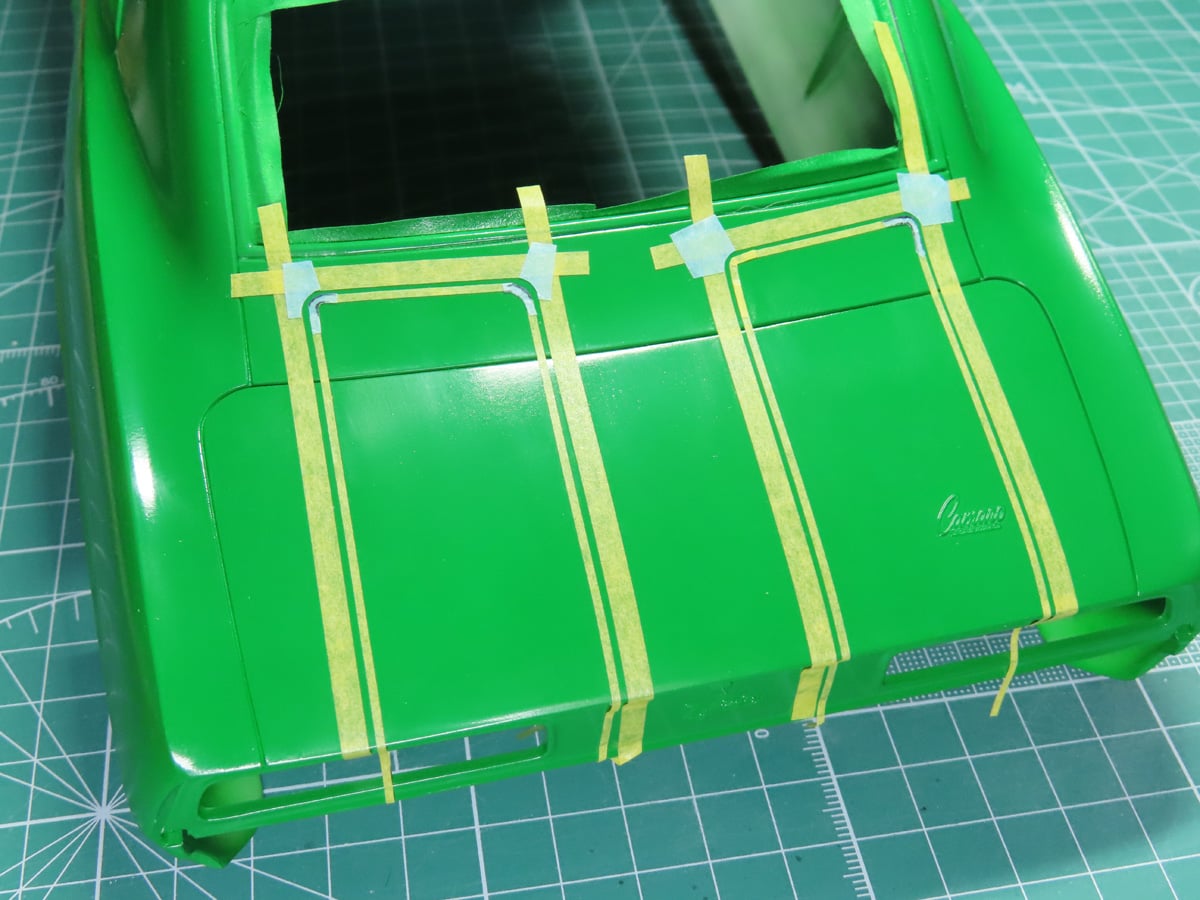
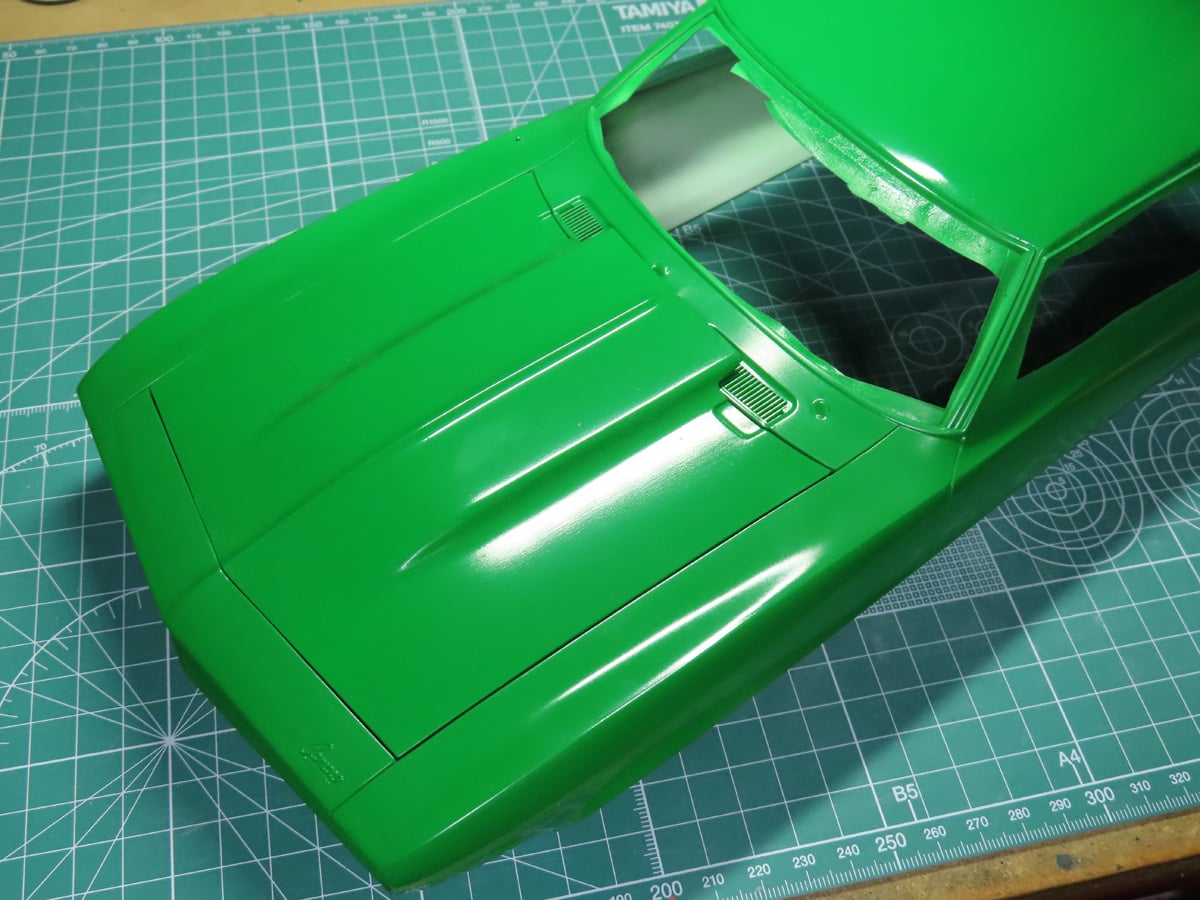
Rather than dealing with placing the decals down in difficult positions, mainly around the front of the car, I decided to mask the racing stripes and paint them myself.
I mostly used Tamiya 1.0mm & 3.0mm masking tapes to sort out the lines, and the process wasn’t as difficult as I thought it was going to be. Honestly, I think that this was easier than using the decals.
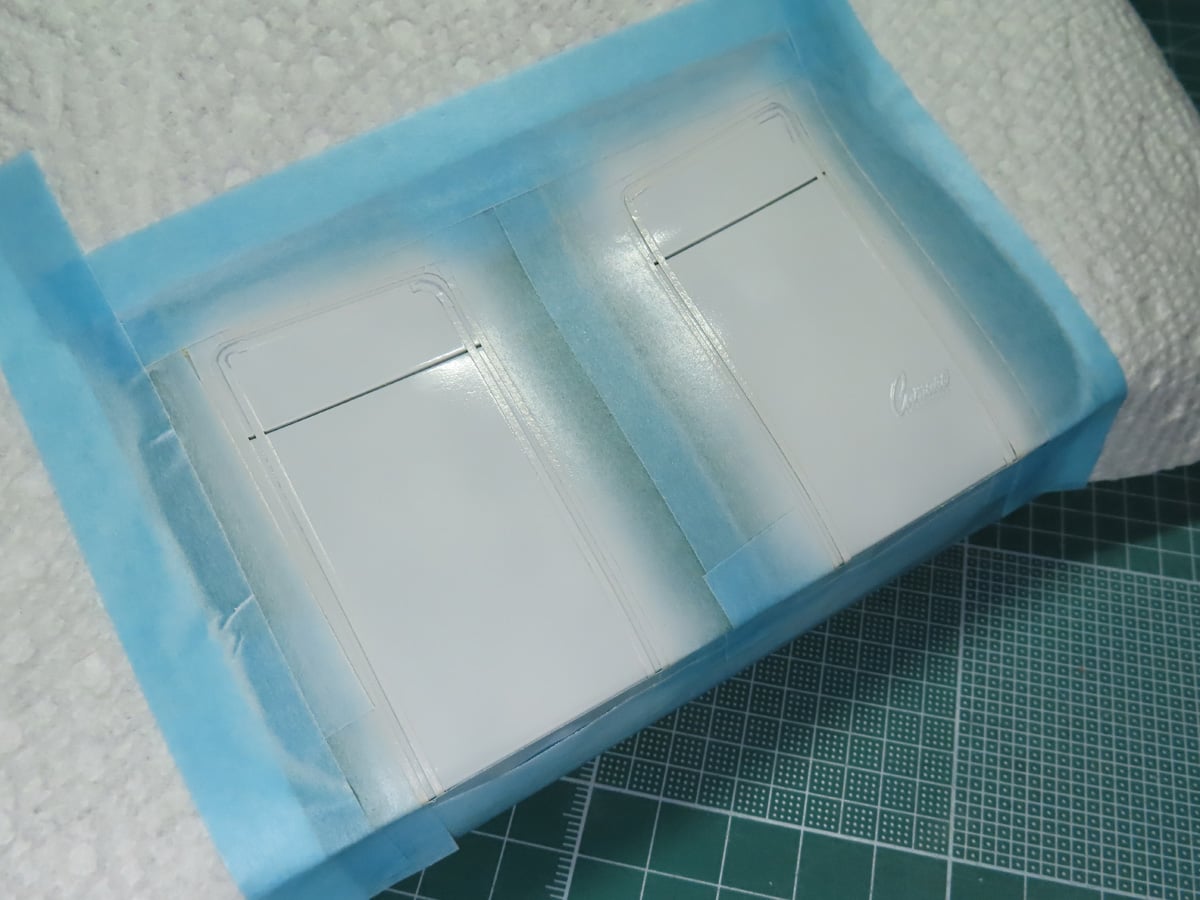
Just as I had done with the green, I painted Mr Color C1 White in thin layers. White can be a tricky paint to color on, and so this took me 5 layers instead of 3.
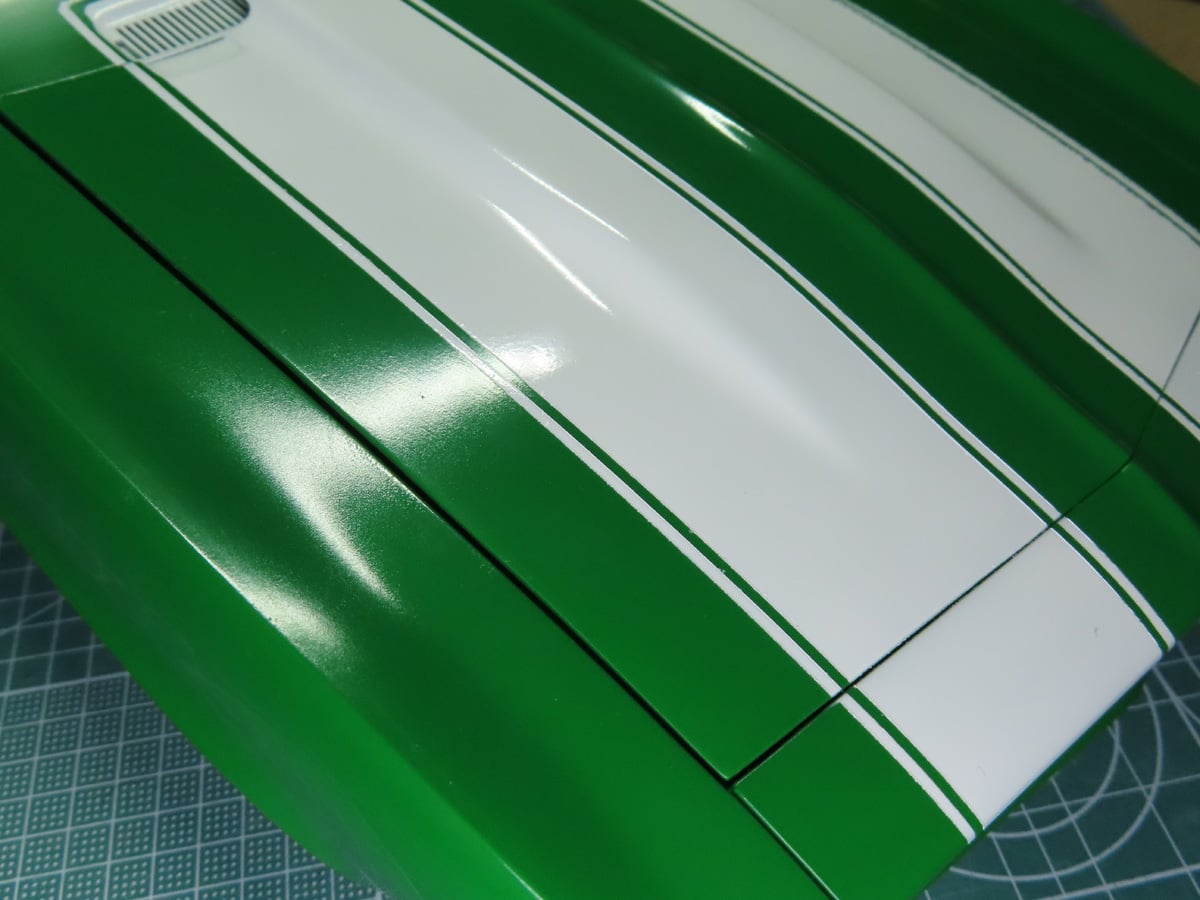
I carefully removed the tape, and it revealed the painted racing stripes. I’m really thrilled with how these look, and there are a few areas that need touching up, and you can see a bit of paint build up from the tape. And this is an easy fix, but first, I’ll need to leave the model alone for a few days to dry and harden before I handle it any further.
And this is where I’ll leave the car for now. I do want to mention that I used an airbrush with a large cup and a 0.3mm needle for this project. The pressure was around 20 PSI, and the paints and primer were thinned about 50-50.
With this in mind, I had some challenges painting on such a large project and getting an even coating of colors. I found it easiest to spray in smaller sections, gradually moving around the car body.
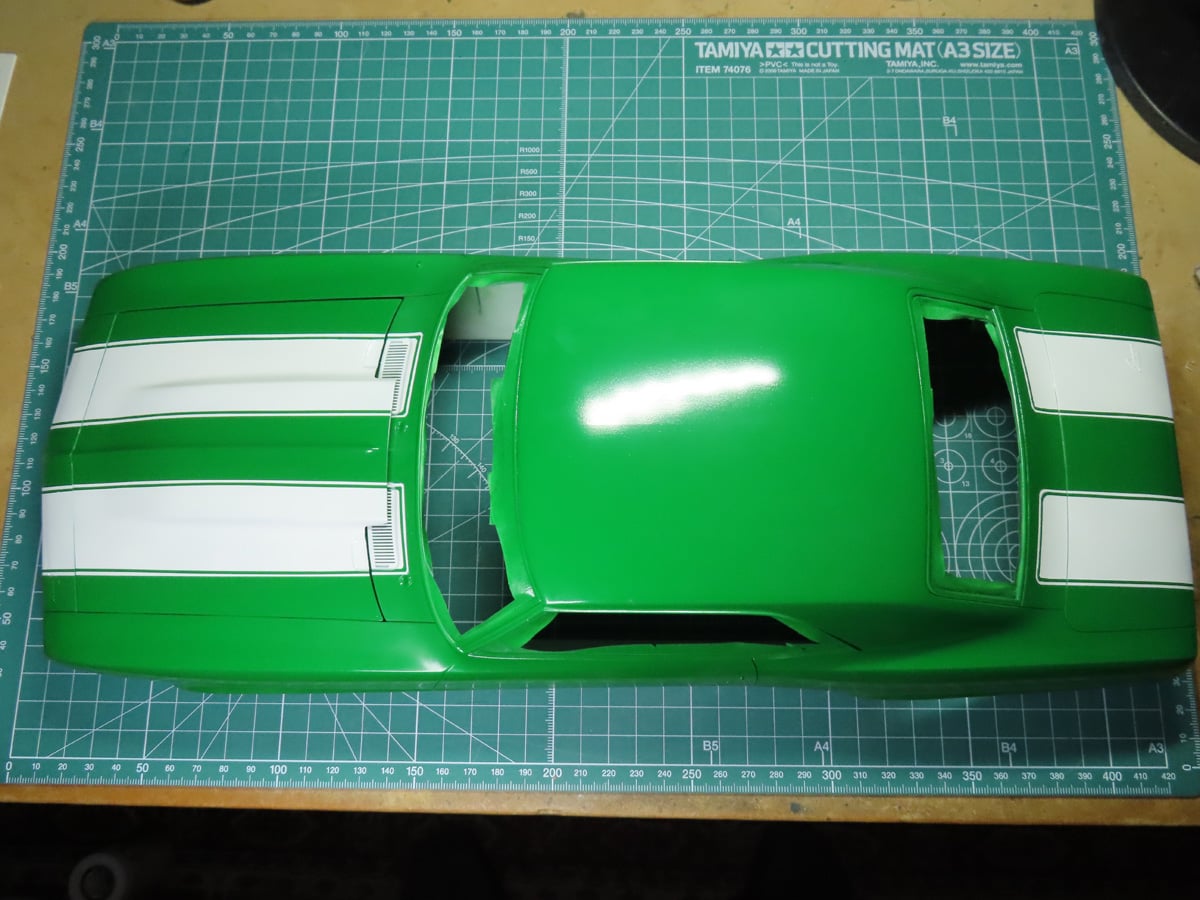
The prep, painting, and masking were all big tasks to achieve these results, but seeing the car painted with those white stripes really made the task worthwhile. I should also mention that I used about 2 jars of Bright Green paint to cover the car body, and I nearly got out a third bottle. Just something to keep in mind when you are picking out paints for this project.
I really like the Hugger Orange that was featured on the box art, but I just found the Rallye Green Camaros to be so bold and striking. I’ve only used Mr. Color 66 Bright Green once before, and it was on a small section of an aircraft. So to see it on such a larger scale has been very rewarding, and it’s only going to get better once we add on that gloss coat.
To be continued…
About the Author:
Jared Demes is a modeler from southern Alberta. He has been building models since he was 4 years old when his Dad first introduced him to the hobby. He has written for several magazines including, Fine Scale Modeler, Scale Aircraft Modeling, Phoenix Scale Models, and others. He has an interest in all modeling subjects, with a focus on WWII Japanese aircraft and Science Fiction.
Jared has won several IPMS awards for his modeling, and currently operates his YouTube channel rebelsatcloudnine, where he showcases model builds and product demonstrations.