
WWII Bomber 1/72 Scale with Display Images at Nanton
This is the fourth part of the Revell Avro Lancaster Mk.I/III Échelle 1/72 04300
I had forgotten that this is the Easter Weekend, and that the mail would be delayed for several days as a result. And this meant that the window maskings I ordered wouldn’t come in, and I wouldn’t be able to begin painting as I had planned.

I decided to spend this week taking care of a lot of the smaller parts and getting as much done in preparation as I could. Though my window masks didn’t arrive in time, another parcel did, and this one contained the new sciber I had ordered. And I decided to put it to work.
But first, I needed to sand down and fill in the seam lines with putty along the fuselage. And for that, I’m going to use Tamiya Putty.
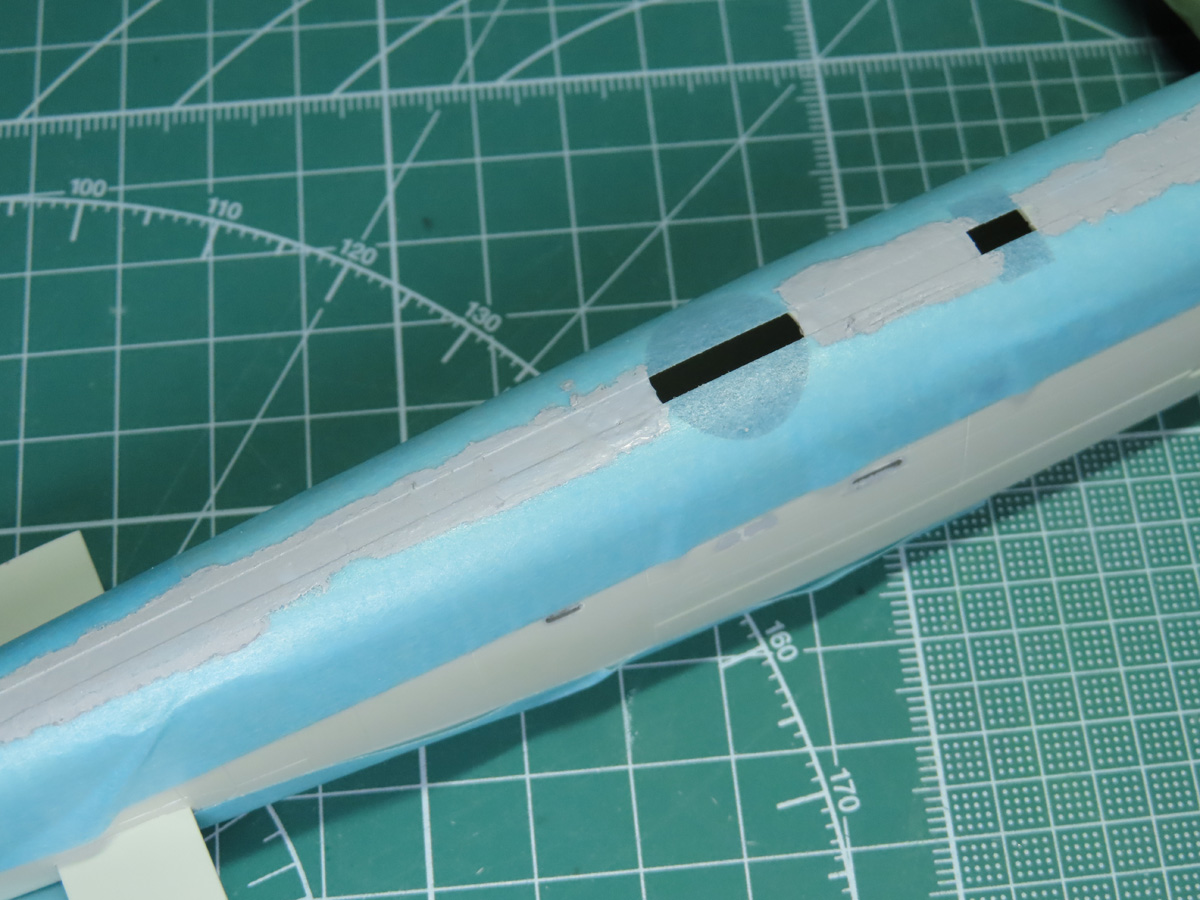
Because of the warped fuselage, I had a lot of sanding to do on this model. And there was still a faint seamline I needed filled in. I placed tape on either side of the center seam line, and then I filled it in with the Tamiya Putty. I rolled the putty out with a cocktail stick, and this allowed me to evenly spread the putty around.
The tape will keep things tidy and require less sanding later on. I’ll be able to easily remove this tape once the putty has dried.
Tamiya Putty is a Lacquer based putty, and I know that a lot of modelers these days prefer acrylic putty like Vallejo Plastic Plastic Putty. Which is a really great putty, as it dries quickly and doesn’t shrink when it dries. Tamiya, on the other hand, will shrink a bit as it dries, but I like it because it bites into the plastic. And after 12-24 hours of drying, I find it’s really easy to sand down and smooth out. Plus, you can thin it with Tamiya Lacquer Thinner, which will make it easier to get into tighter gaps.
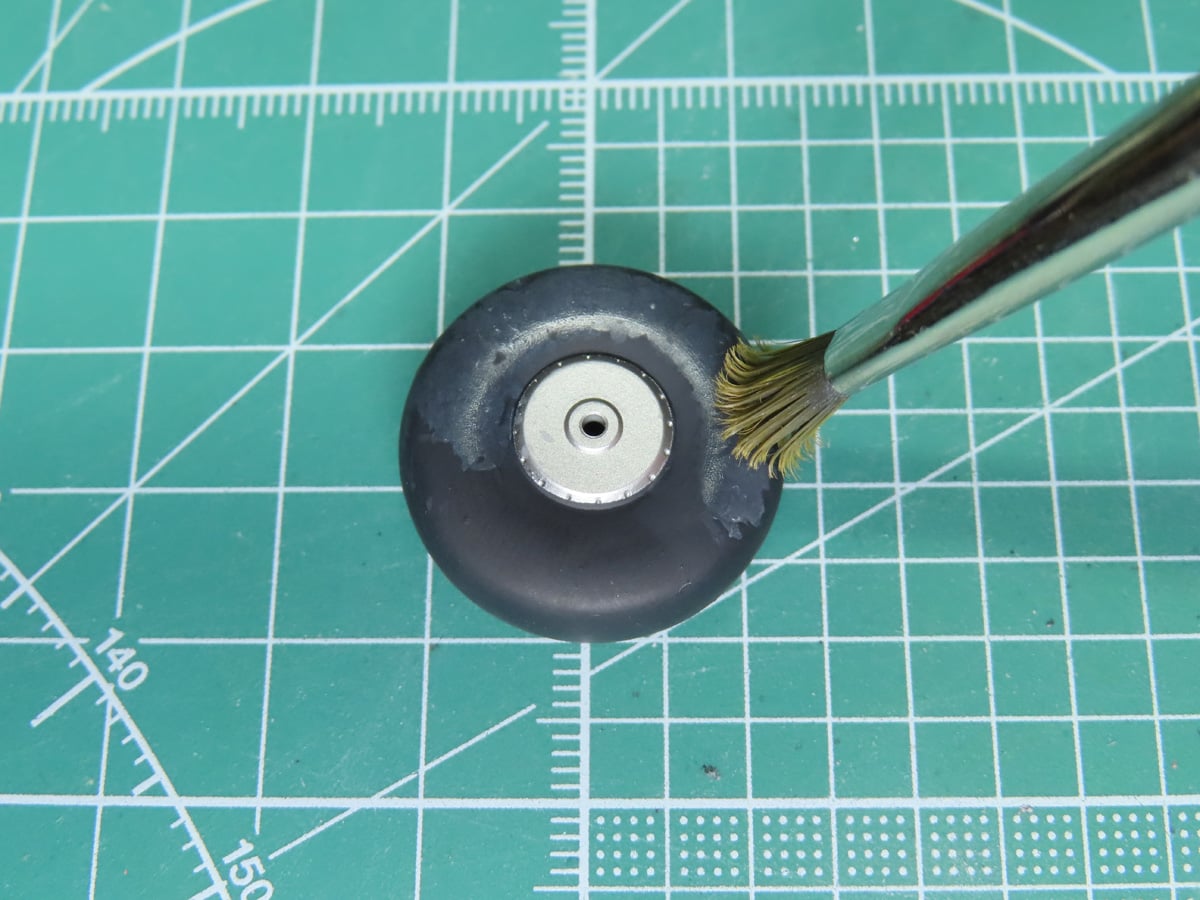
I decided to paint the tires, and my go to color for rubber is Vallejo Black Gray 70862. I brushed this on by hand, and then I masked off the center sections of the wheels. For the center, I painted Tamiya LP-11 Silver.
I wanted to add some weathering to the rubber, so I grabbed an old brush that I use exclusively for stippling. And I dabbed on a light layer of Tamiya Panel Line Accent Color Grey. Once it was dry, it produced a nice worn effect.
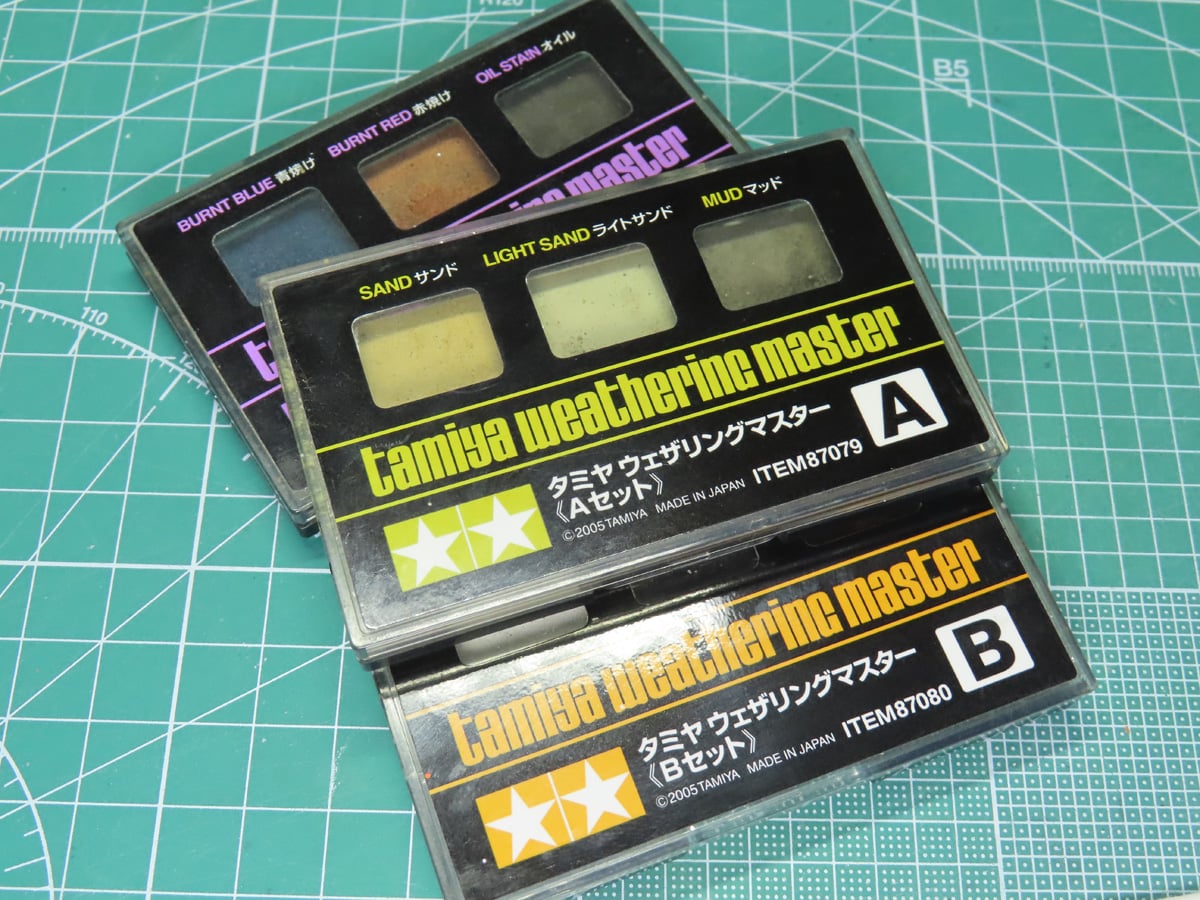
I wanted to add on a bit more weathering to the tires, and I thought some dried mud around the edges would look good. I wanted to keep it faint and give the impression that most of it fell off while the bomber was taking off.
I decided to use the Tamiya Weathering Masters. These are pigments that are applied with a rubber applicator or a brush.
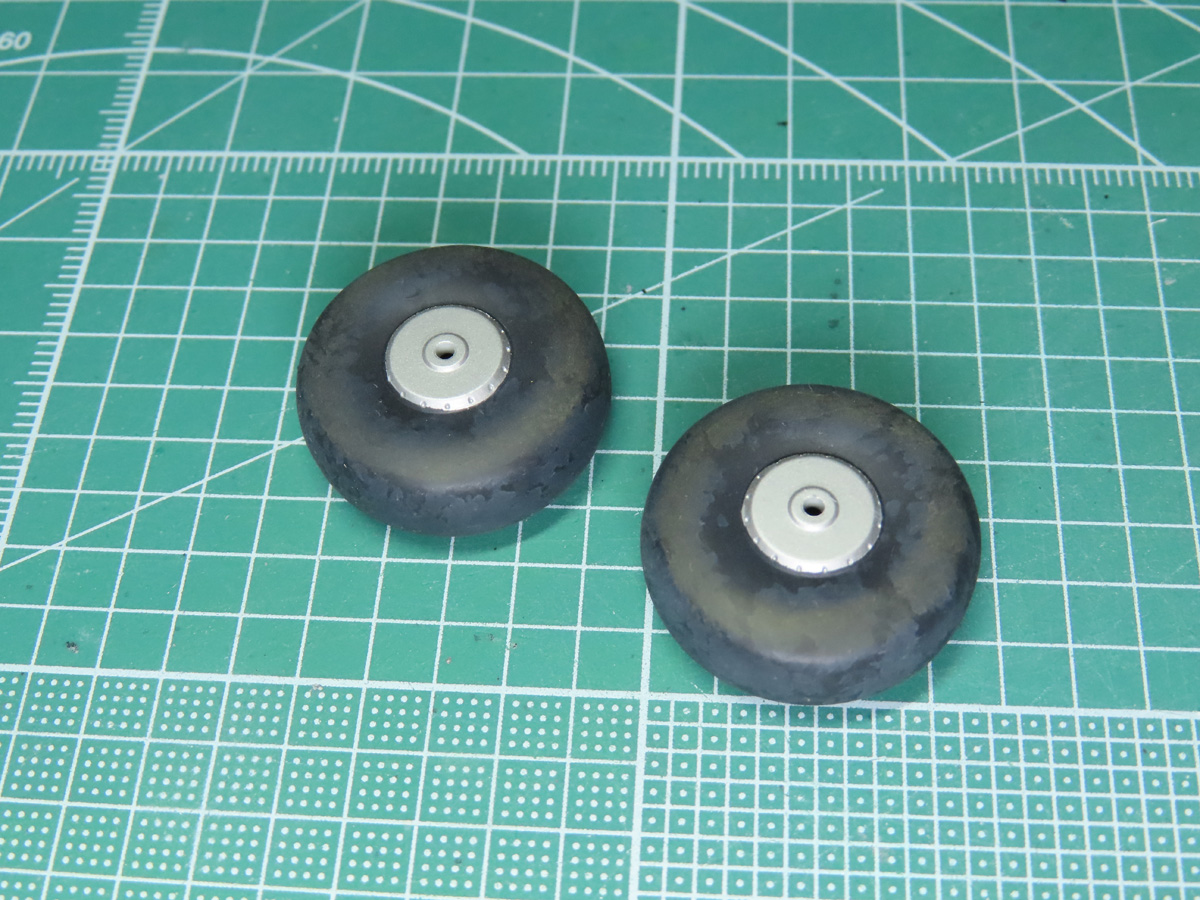
I decided to use the Mud pigment from Set A 87079, and this was rubbed onto the edges and sealed in with Mr Color C182 Flat Clear. I will mention that adding a gloss or flat coat over the pigments can cause the pigments to disappear if a flat coat is applied too heavily.
To counter this effect, I like to add pigments that are normally too bright, and that way, when the flat coat hits the pigments, they are darkened slightly, but to the desired effect.
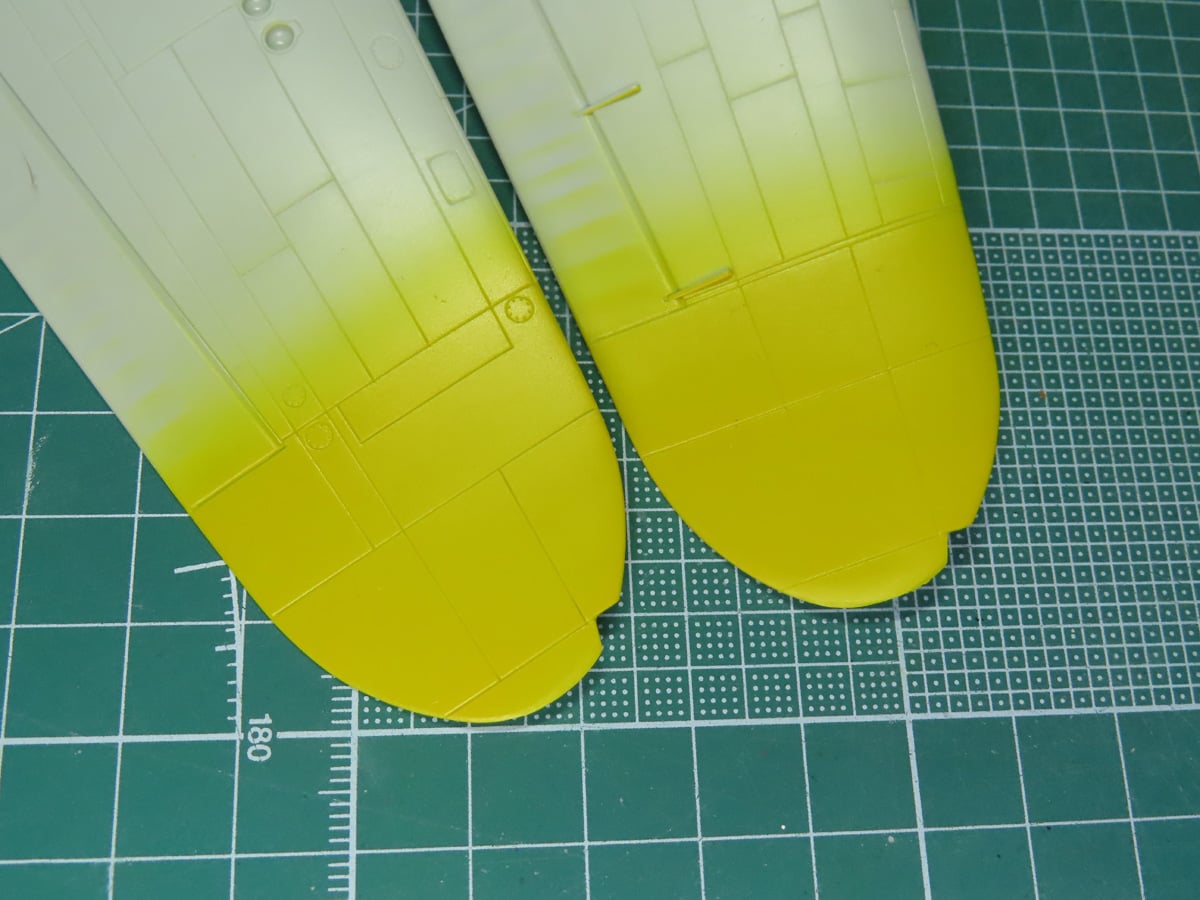
Grog’s the Shot was the lead Lancaster in the last bombing raid for the RAF in WWII. Because it was the lead, it had the unique feature of yellow wingtips and tails.
I looked through my collection of paints, and I decided to use Mr Color C329 Blue Angels Yellow. I really like this color, and I’ve used it on a few other projects, as it’s not a pale yellow, but nice and bright, so it will stand out on the completed model.
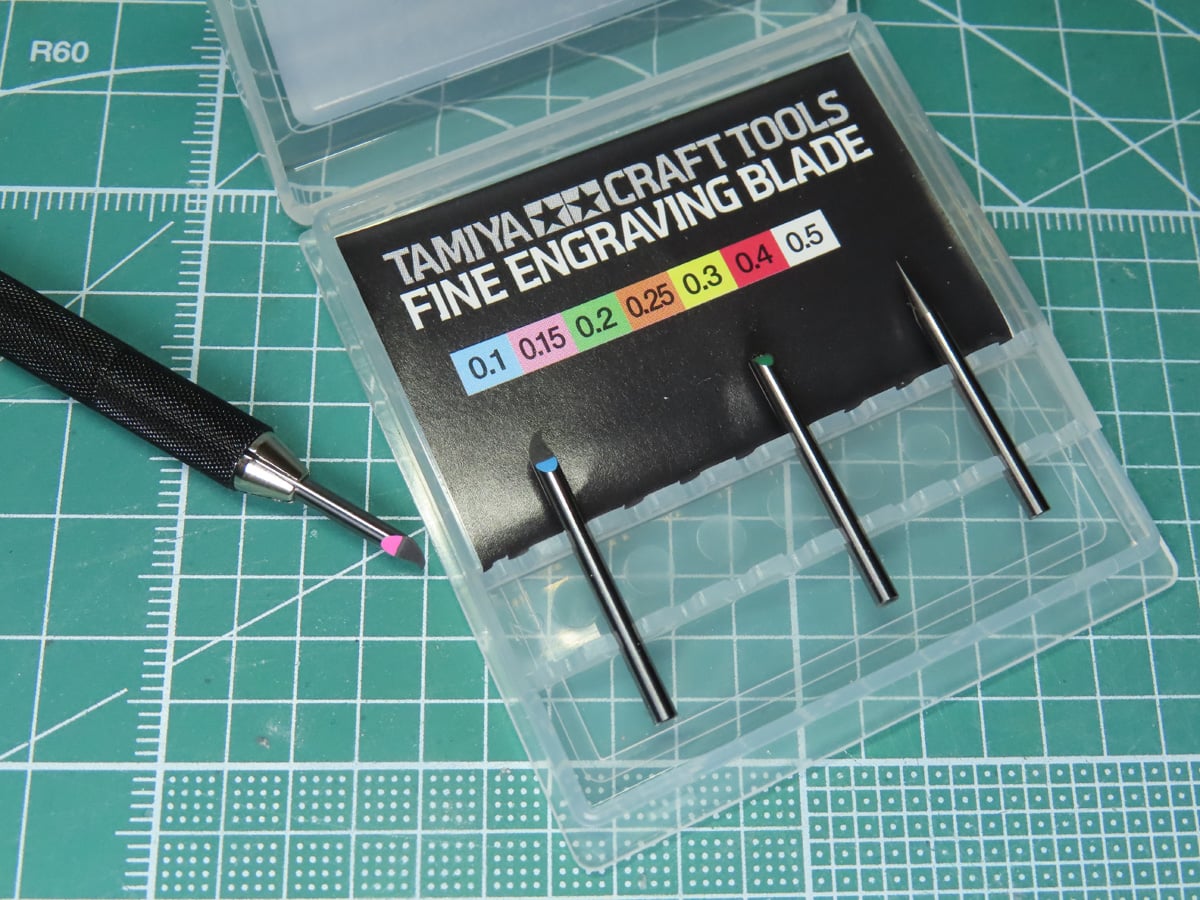
I’ve tried several scribing tools over the years, and none of them really worked that well for me. Some were too clunky, and this made things very difficult. Some had long thing blades that wobbled when I tried to score the model. So when Tamiya released their new Engraver set, I was quite excited to give this a go.
The handle and each of the Tungsten Engravers are sold separately. I’ve collected a few that are appropriate for the scales that normally build. For this Lancaster I’ve decided to use the 0.15mm Blade 74145.

I placed some scribing tape along the panel line. You can also use Dymo Embossing Tape, which might have been easier, as there were times I couldn’t see and follow along the clear scribing tape.
I placed the Engraver next to the tape, and I slowly pulled it across. Gradually, with each pass, I carved deeper into the plastic. You need to work slowly here; if you start going too fast, you can fall out of the groove and carve a new line that will need to be filled in.
The Tamiya Engraver is an expensive setup, but this has been the best and easiest way for me to rescribe my models. I really love how sturdy the blades are and how easily they carve into the plastic. And the tool is thin and very light, which allows me to see where I’m scribing.
The ease and flexibility of this tool have allowed me to work more quickly than I expected. Within an hour, I had most of the fuselage rescribed. There is a learning curve to this tool, but I found it to be a quick one, and I’m glad that I’ve invested in these engravers.
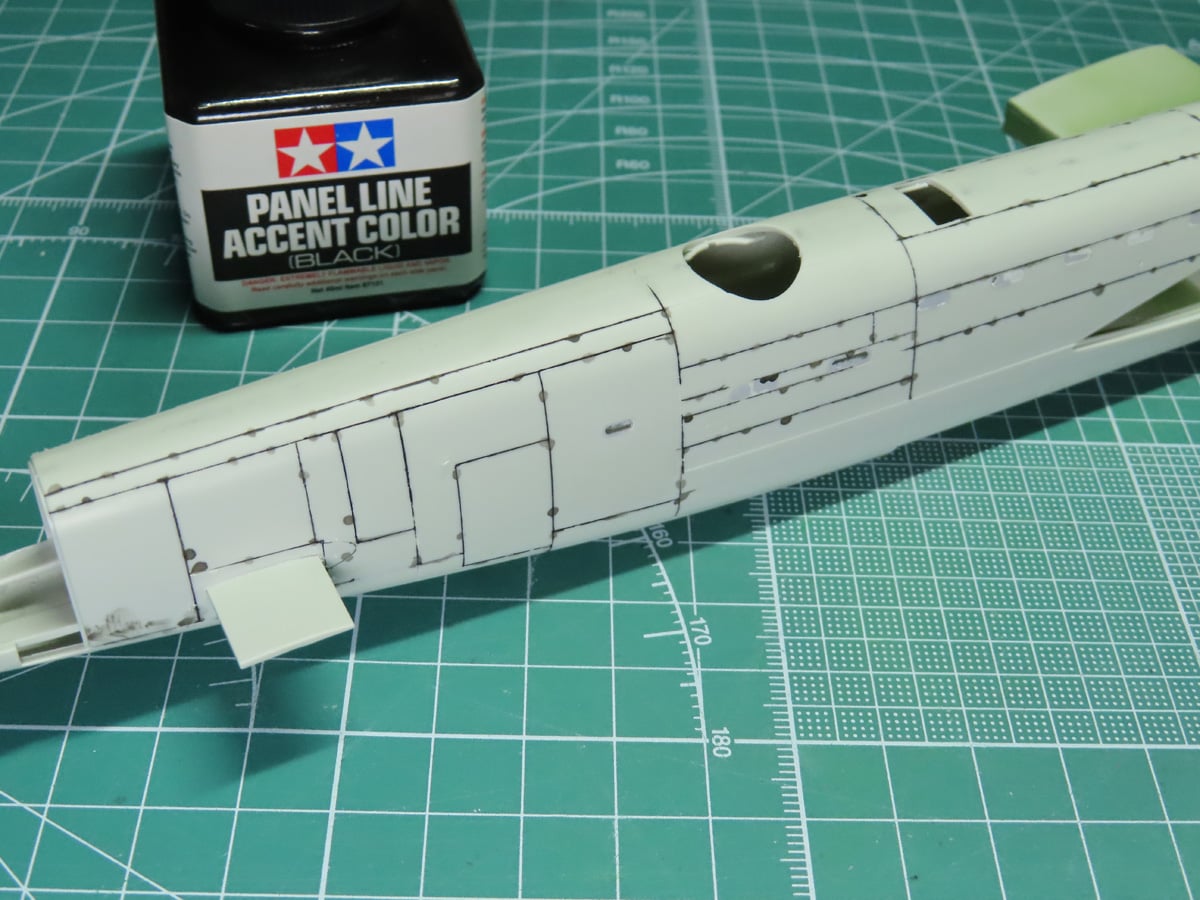
To check the flow of the panel lines, I painted them in with Tamiya Panel Line Accent Color Black. I just have a few left to scribe on the underside, and then I’ll add on the bomb doors and glue on the wings.
And this is where I’ll leave the Lancaster for now. Hopefully, the mail won’t be too backed up, and those masks will arrive. I’m really eager to get some paint added, but I’m also very pleased with how easy it was to scribe this model.
I’ve got several vintage kits that I’ve wanted to build, but never attempted because rescribing them was too daunting. And even on some modern kits, the panel lines can be inconsistent and faint (which coincidentally happened on the last Lancaster that I built). Just a few passes and the panels are good as new.
The following pictures are from Lancaster FM 159 in Nanton Alberta.
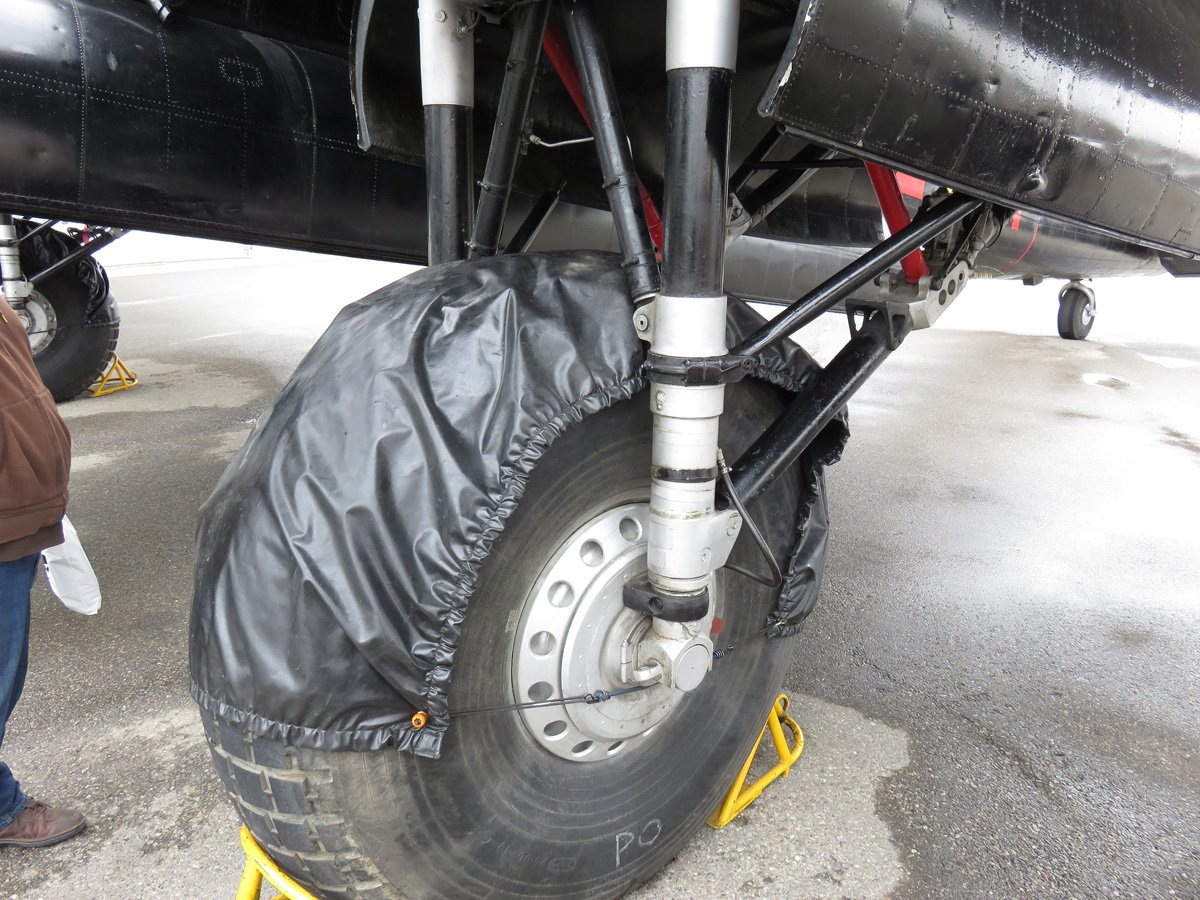
The Lancaster wheel with the treading was usually found on post-war Lancasters.
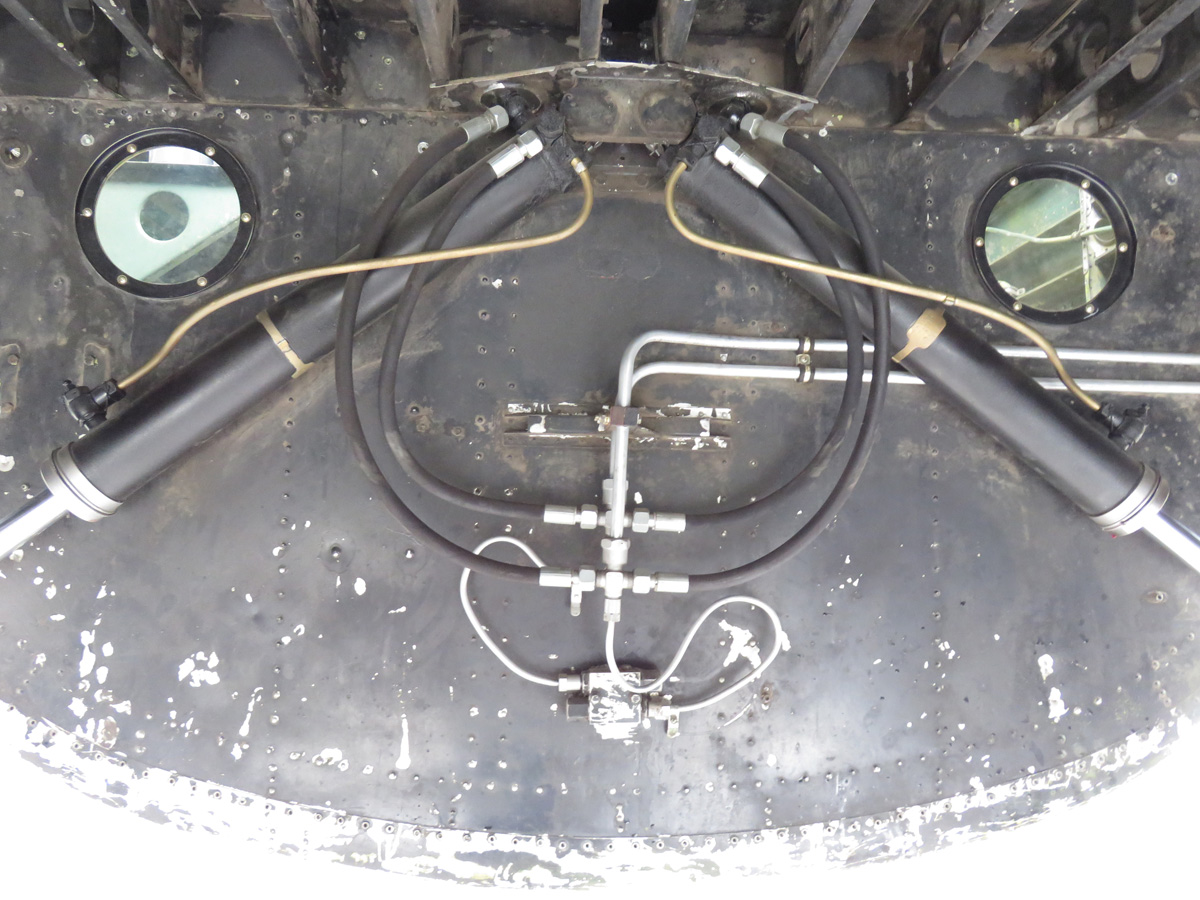
Looking aft of the bomb bay, you can see the round observation windows through which the gunner could look to make sure all the bombs had dropped. And the large pistons that open and close the bomb bay doors.
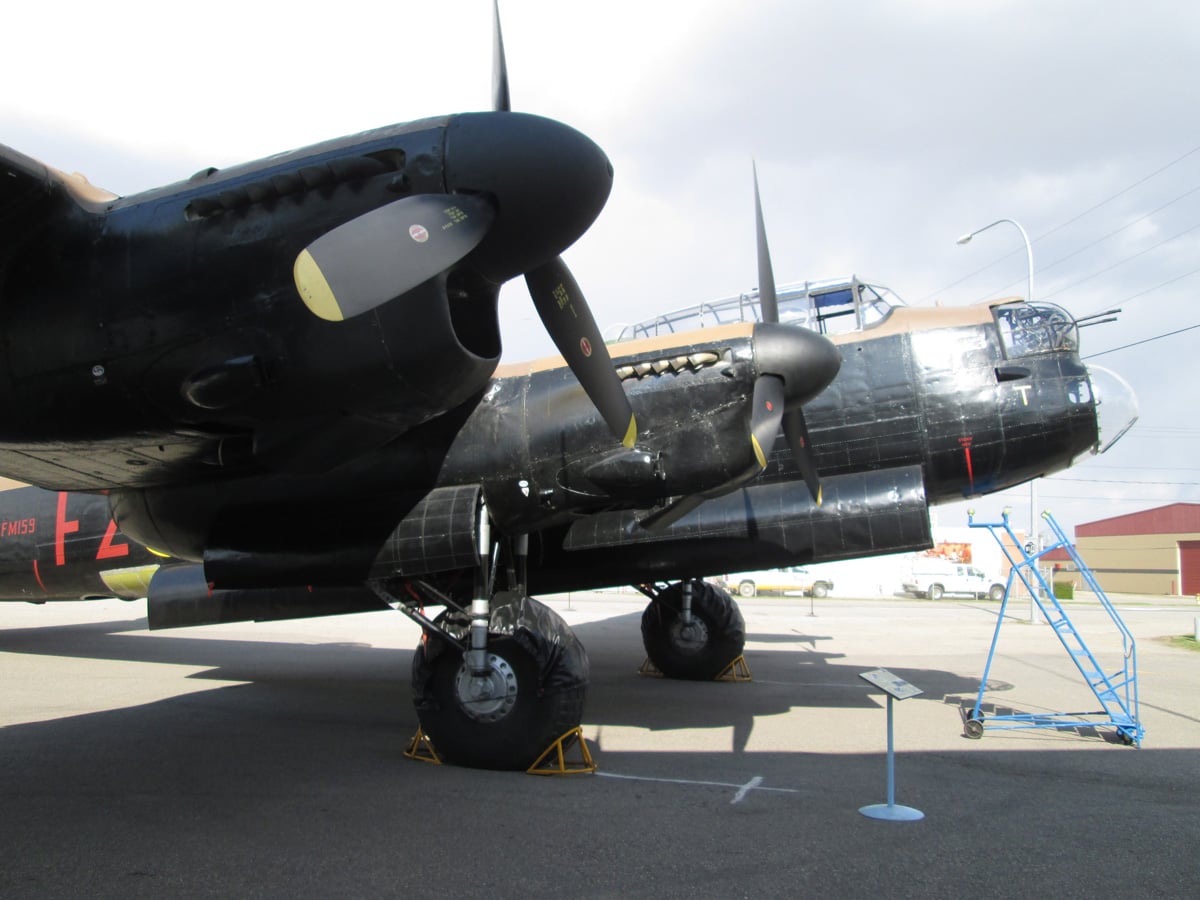
Side view of the Lancaster, you can see how dirt has fallen around the rivets, creating a light gray profile around the black sections of the aircraft.
To be continued…
About the Author:
Jared Demes is a modeler from southern Alberta. He has been building models since he was 4 years old when his Dad first introduced him to the hobby. He has written for several magazines including, Fine Scale Modeler, Scale Aircraft Modeling, Phoenix Scale Models, and others. He has an interest in all modeling subjects, with a focus on WWII Japanese aircraft and Science Fiction.
Jared has won several IPMS awards for his modeling, and currently operates his YouTube channel rebelsatcloudnine, where he showcases model builds and product demonstrations.