

Engine Attachments
This is the third part of the Airfix Messerschmitt Bf109G-5/6 1/24 Scale A17003 trousse.
This week I’ll be finishing the extra parts and details that go around the engine. A lot of these wires and details will take some time to properly clean and paint. I’ve decided to start with the exhausts. Airfix has already hollowed out the exhaust stacks, but I felt that they weren’t wide enough.
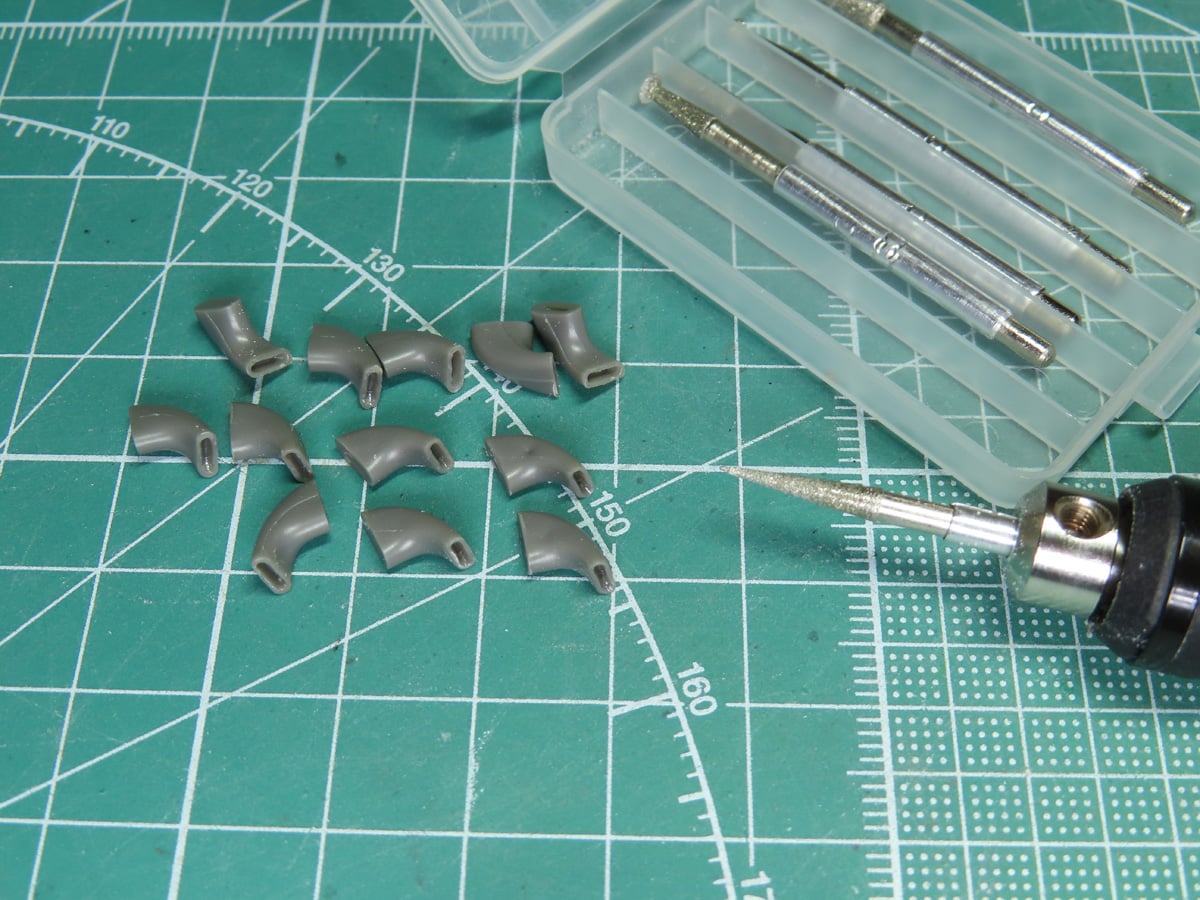
I used the pointed bit from the Tamiya Router Bit Set 74043, and with my rotary tool, I was able to quickly widen the exhausts for a more realistic look. The plastic was still a bit rough, so I used a drop of Mr. Cement S, which melted the plastic and smoothed everything out.
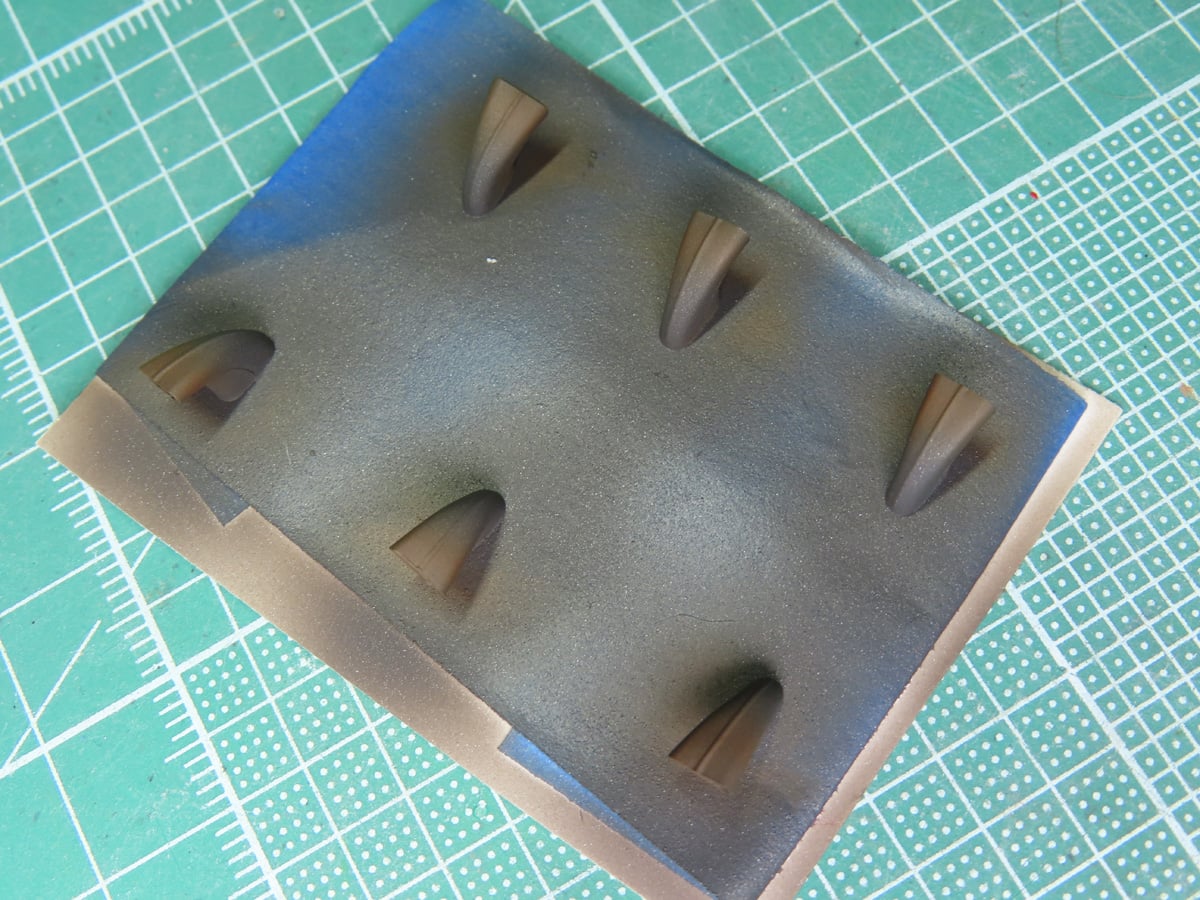
I taped the exhausts in place and painted them with a base coat of Tamiya XF-84 Dark Iron. Now you could just leave it here, as the Dark Iron is a nice look and accurate to many aircraft. But I wanted to create a burnt effect that I had seen on airworthy Me 109s.
So I’ve sprayed on a light coating of XF-64 Rouge Marron near the ends of the exhausts. I kept the spray random, as I noticed from my reference material, each exhaust stack seems to be burnt to different degrees. Nothing was ever really uniform.
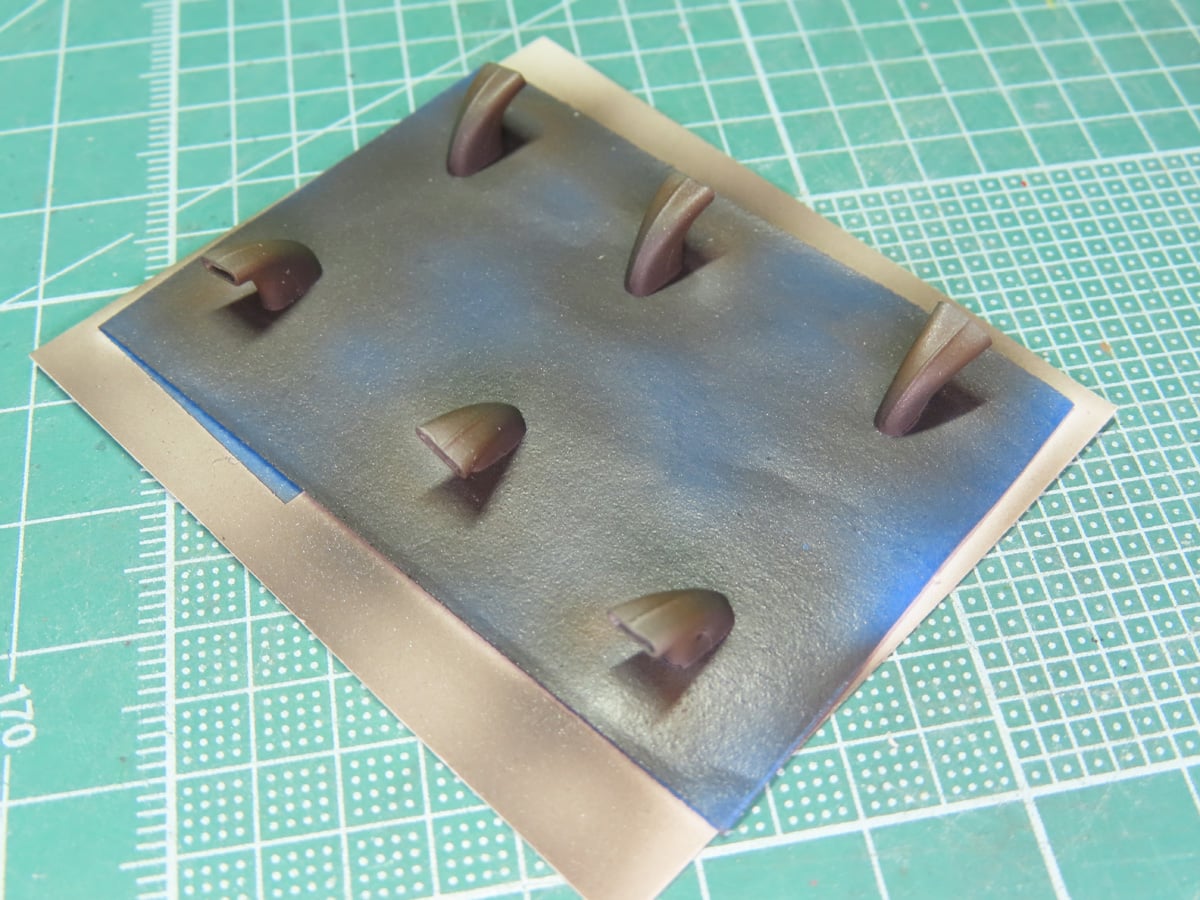
Lastly, I painted a lighter colour on the edges of the exhausts. Again, these would be burnt to various extents, so don’t be so concerned with keeping everything perfectly uniform. For the lighter sections, I added some XF-19 Sky Gray to the remaining Red Brown I still had in my airbrush.
The paint was thinned down a bit more with Mr Levelling Thinner T108, and this allowed me more control to lightly spray the edges. Once I was finished, I sealed the paint with a coating of Mr Color C181 Semi Gloss Clear.
You can also achieve a similar effect by carefully drybrushing each layer.
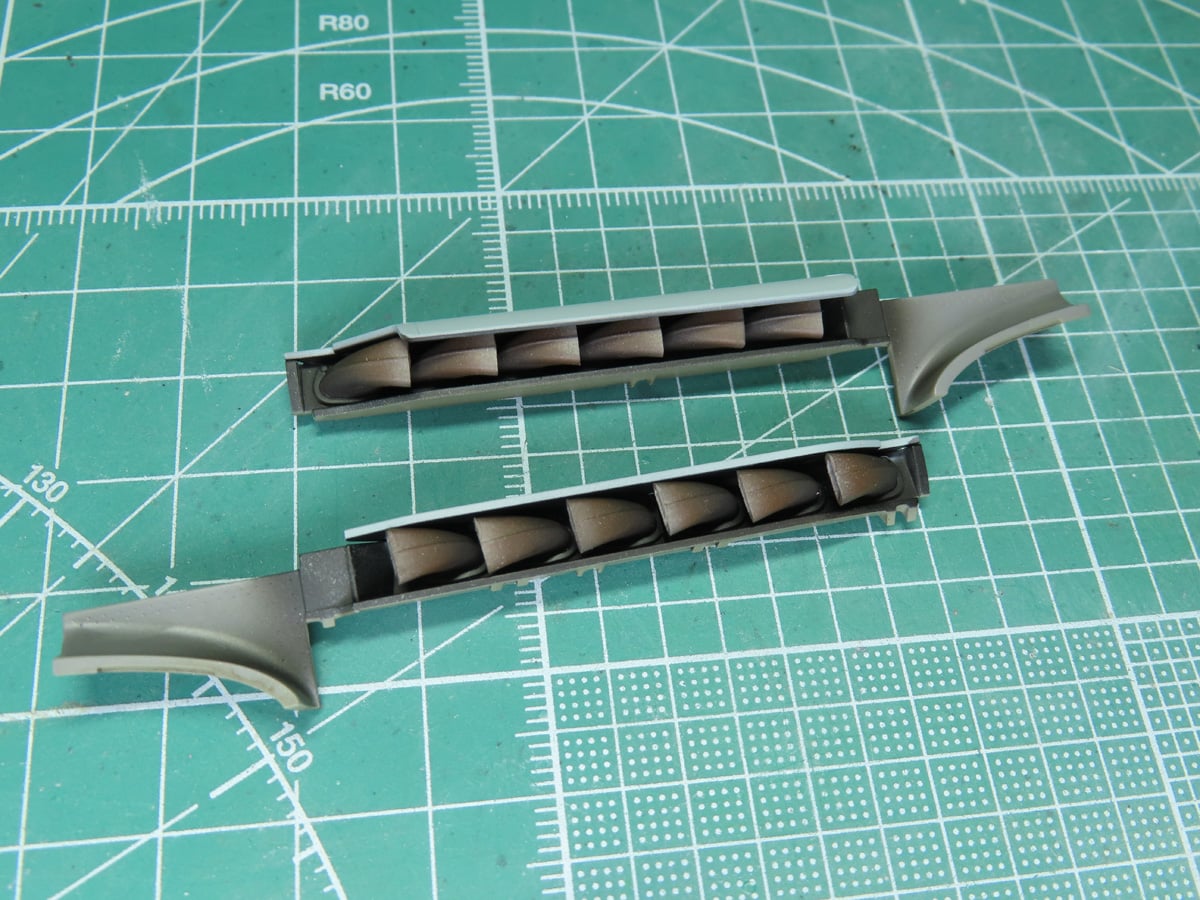
I carefully placed each of the exhausts into the cowling. The fit was great, and it just took a drop of glue to fuse everything together. The inside of the cowling was painted with Tamiya LP-5 Semi-Gloss Black.
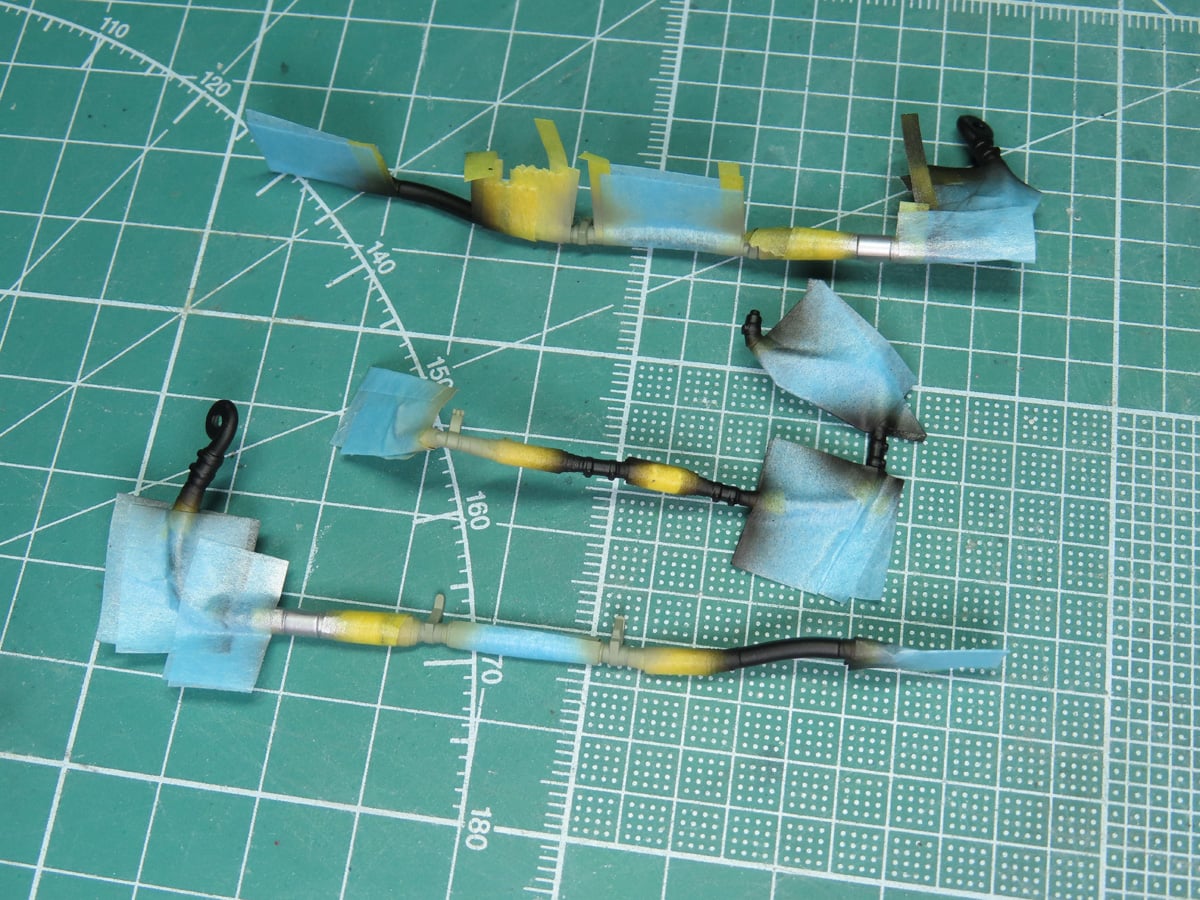
Most of my time this week was spent carefully masking and painting all of the pipes and hoses. Using the Tamiya 1mm, 2mm, et 3mm masking tapes made things a lot easier.
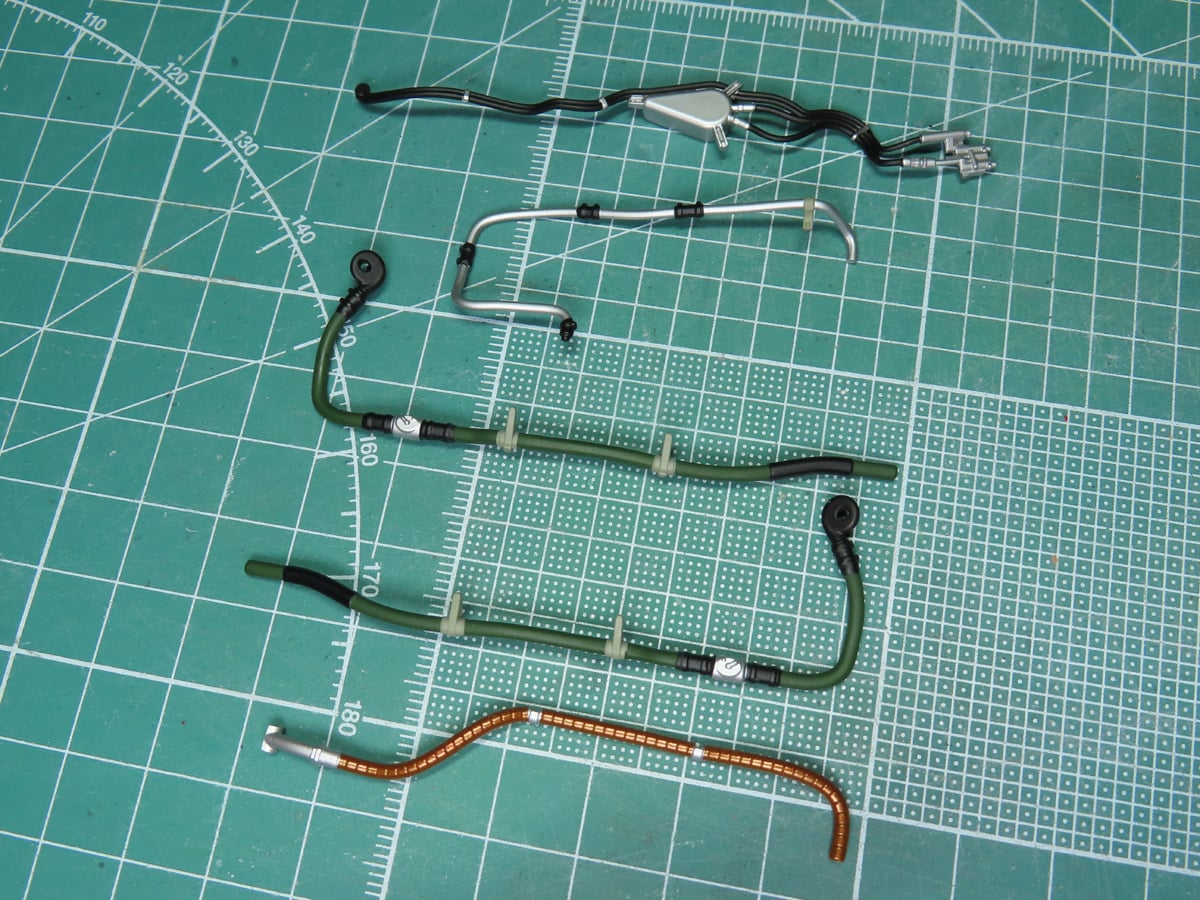
Though it took a long time to mask and paint everything, it was worth it in the end. The parts look great, and I’ll now weather them with Tamiya Panel Line Accent Colors, Black and Dark Brown.
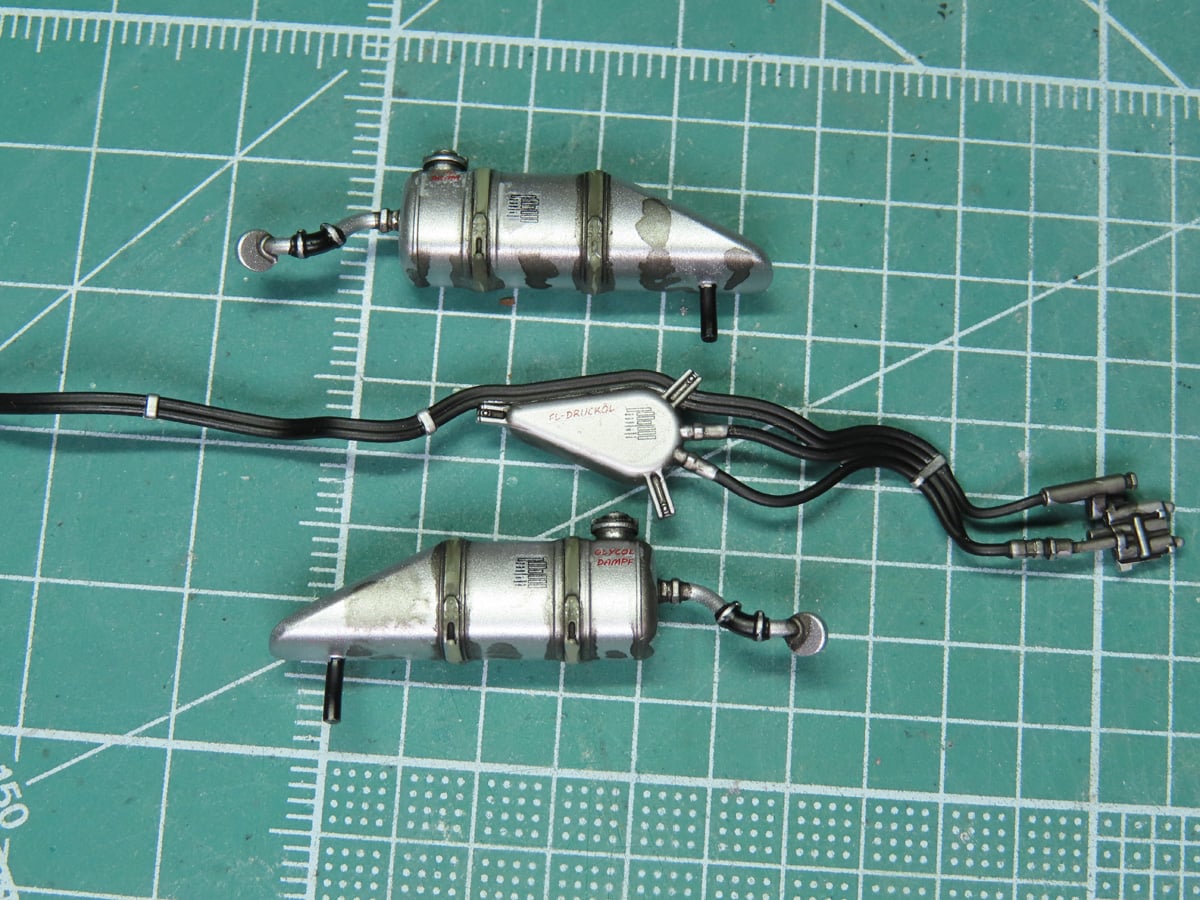
As I was weathering the coolant tanks, I realized that I forgot to add the stencils. I had a bit of a fussy time with one of the decals, but the rest went on easily. I’m glad that I caught this mistake. As tricky as these decals can be to add to the already small parts, they really add to the realism of the project.
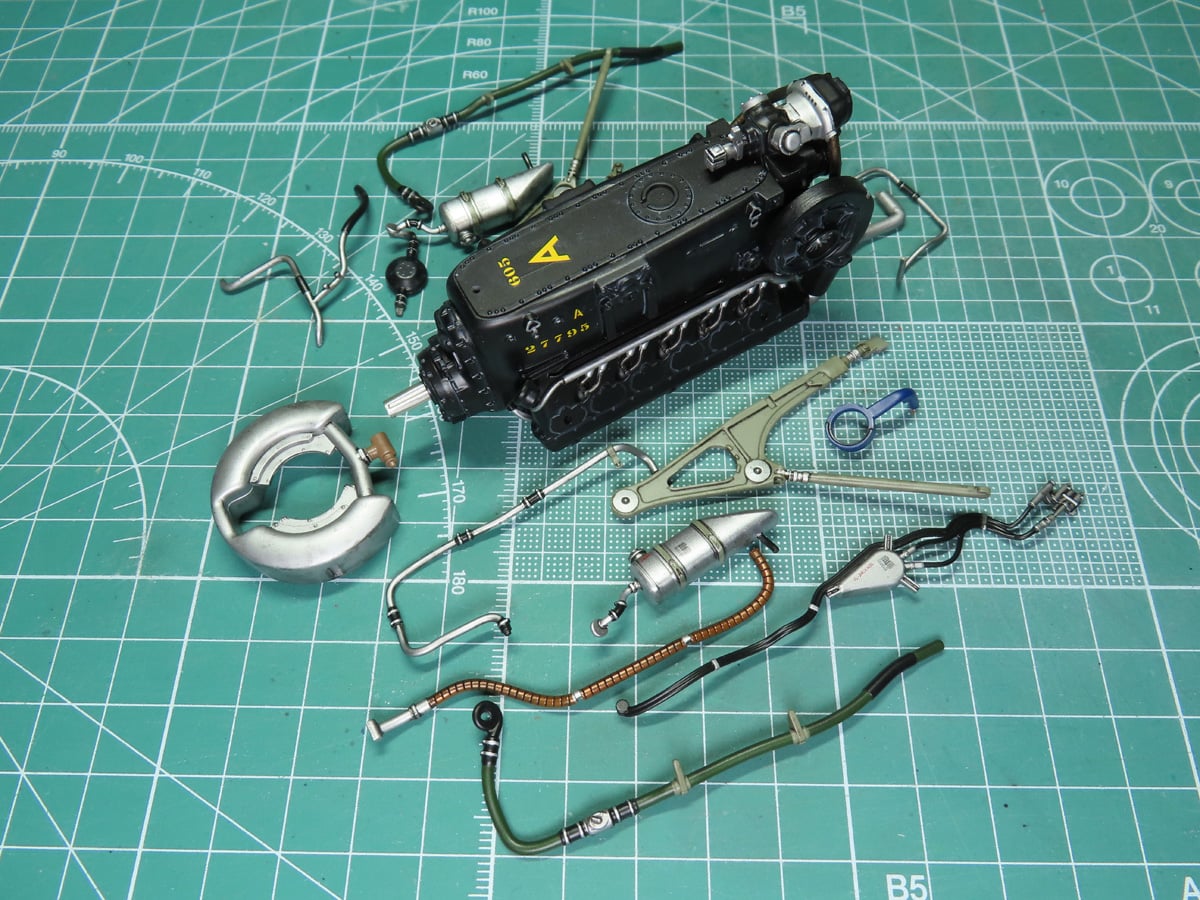
With the excess wash removed, I covered the parts with Mr Color C181 Semi-Gloss Clear. Now I have all the parts ready to add to the engine. With how excellent the fit and engineering of this kit has been so far, I’m hoping that this will be an easy task and that the parts will easily fall into place.
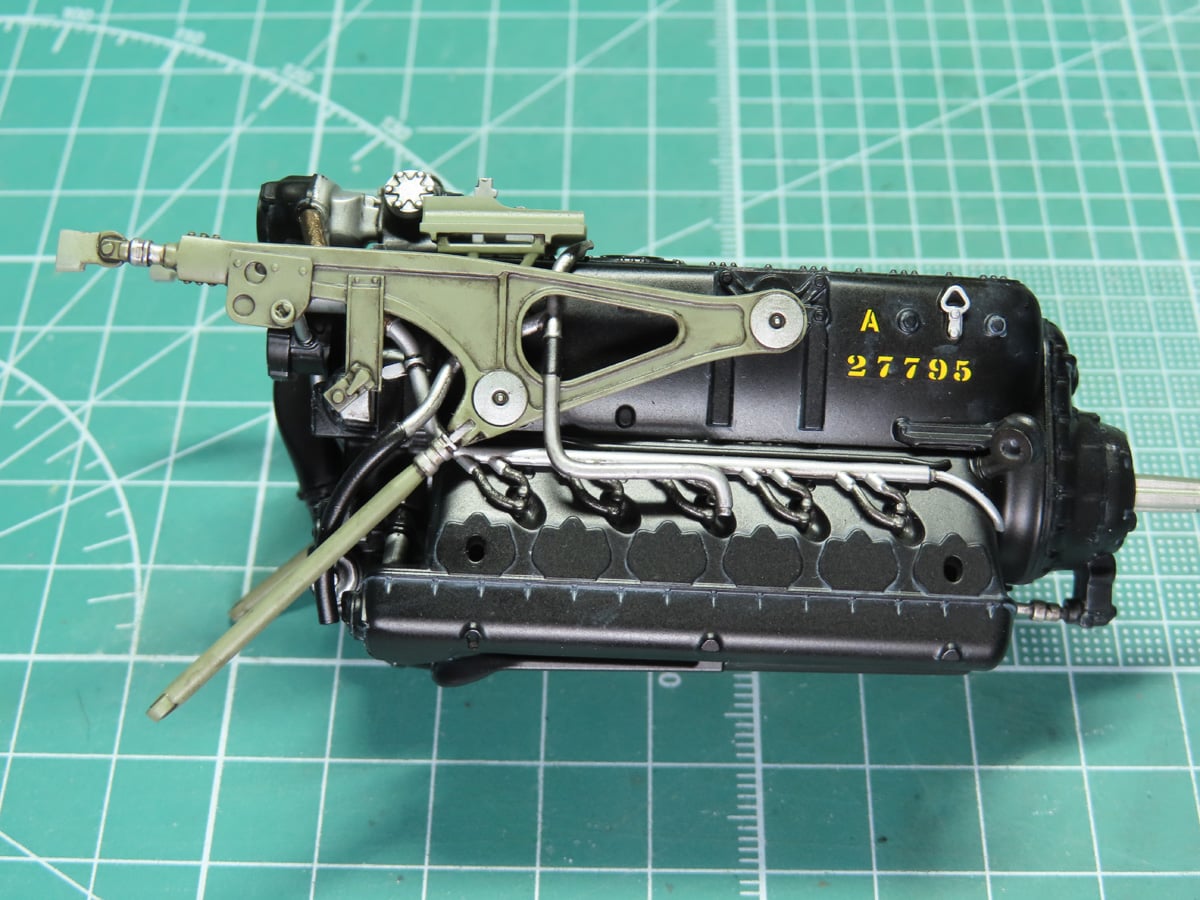
First, I’m adding on the engine mounting brackets. On this side, a small section of tubing needs to be glued to the back of the bracket first. These were painted with Mr Color C60 RLM 02 Gray, and the circles were painted Tamiya LP-71 Champagne Gold. I saw this on a few restored 109s, and I thought it would look nice to add some more color to this section of the model.
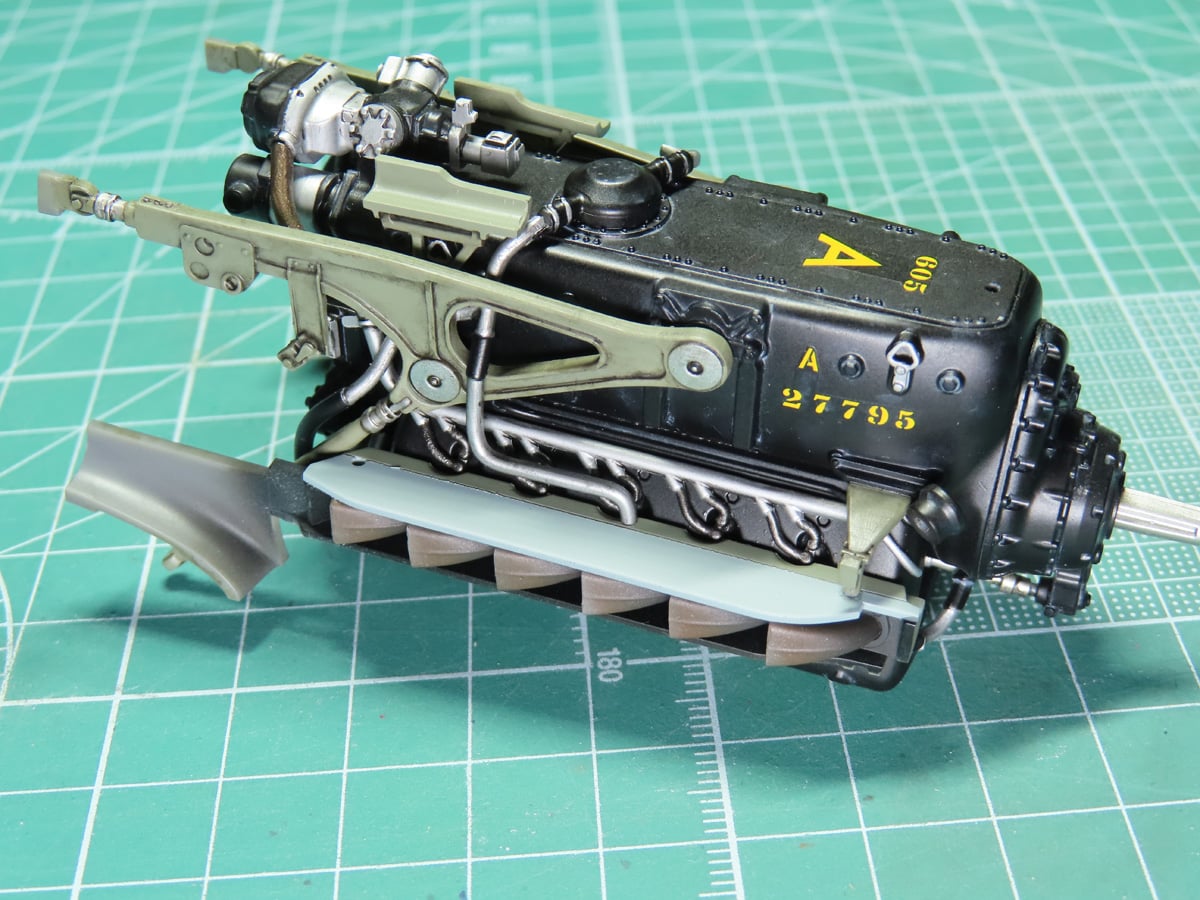
Now I could add the exhausts and connect the pipe. I also added the oil breather to the top. I left it off until now so that I could properly connect it to the rest of the hose section.
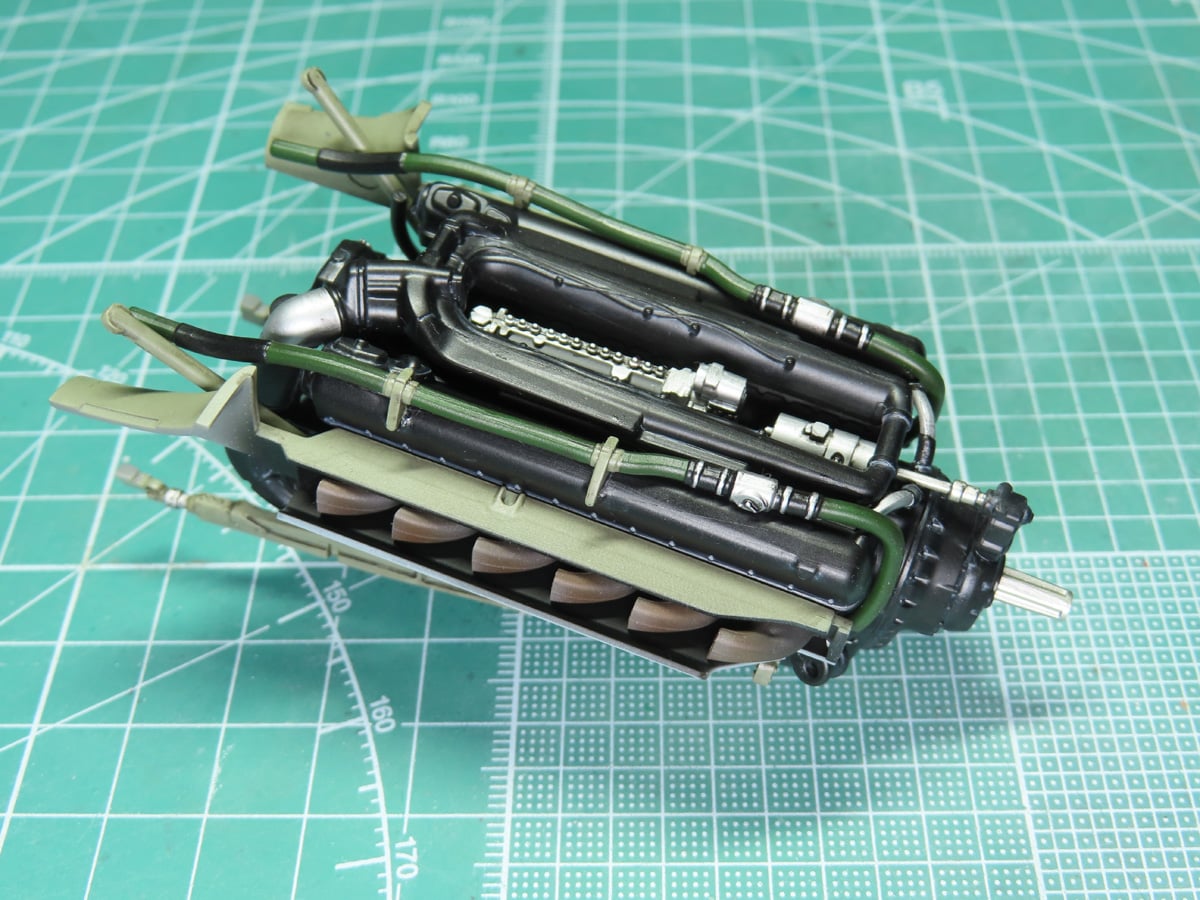
Flipping the engine over, I added the 2 green coolant pipes that run along the engine. These were mainly painted with Tamiya XF-5 Flat Green. They were a bit tricky to add on, as they sort of “rest” on the engine, and plugs and sockets would have been preferred. This would have made the fit easier, as well as getting the alignment correct.
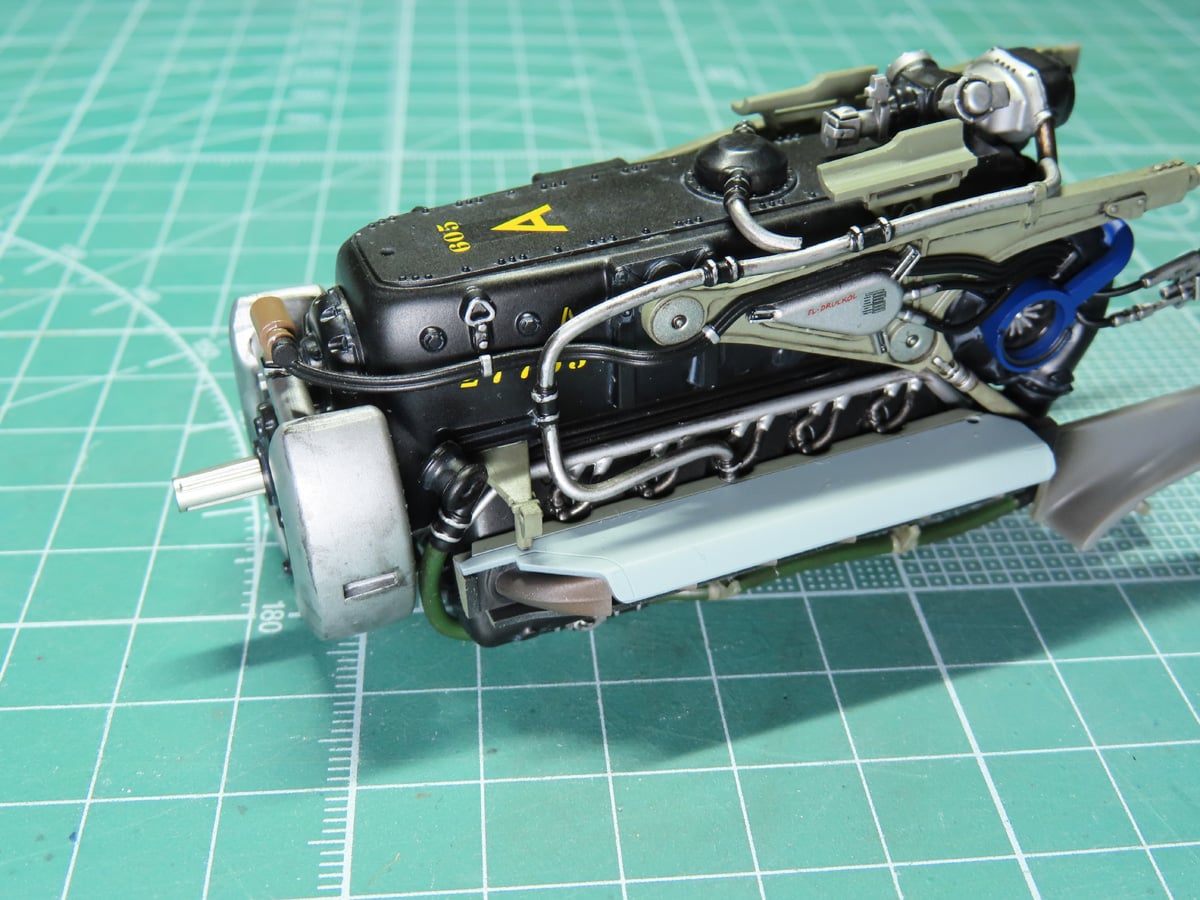
Returning to the top of the engine, I added the oil tank to the front. This was painted with Tamiya LP-11 Silver. And there are indents on the sides where the front of the cowling will fit in place. I’ve decided to add these parts on at a later time when I have more of the aircraft painted.
I also connected the hydraulic tank, which sits in the engine bracket, and connects to the top of the oil tank.
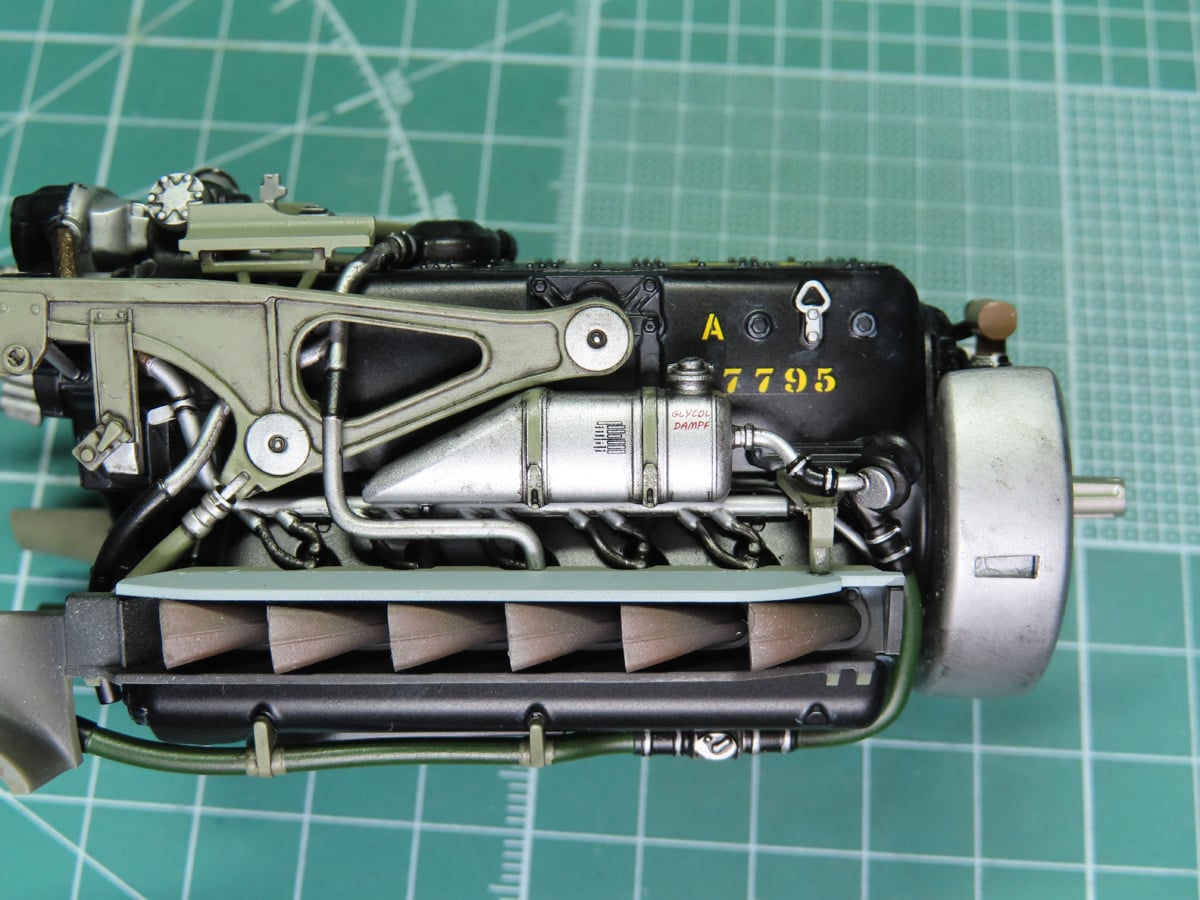
Now I could add on the coolant tanks to either side of the engine. With all the parts added, it took a bit of careful manoeuvring to get the tanks in place. But I’m pleased to report they were easy to add, and fitted to the engine with a few drops of super glue.
These coolant tanks are sometimes painted in RLM 02 Gray, but I decided to paint them with LP-71 Mica Silver. Mica Silver is a bit duller and a bit on the grayer side of silver paints. And I think it will stand out a bit more on the completed model. That being said, should the modeler prefer, there’s nothing wrong with painting these RLM 02 either.
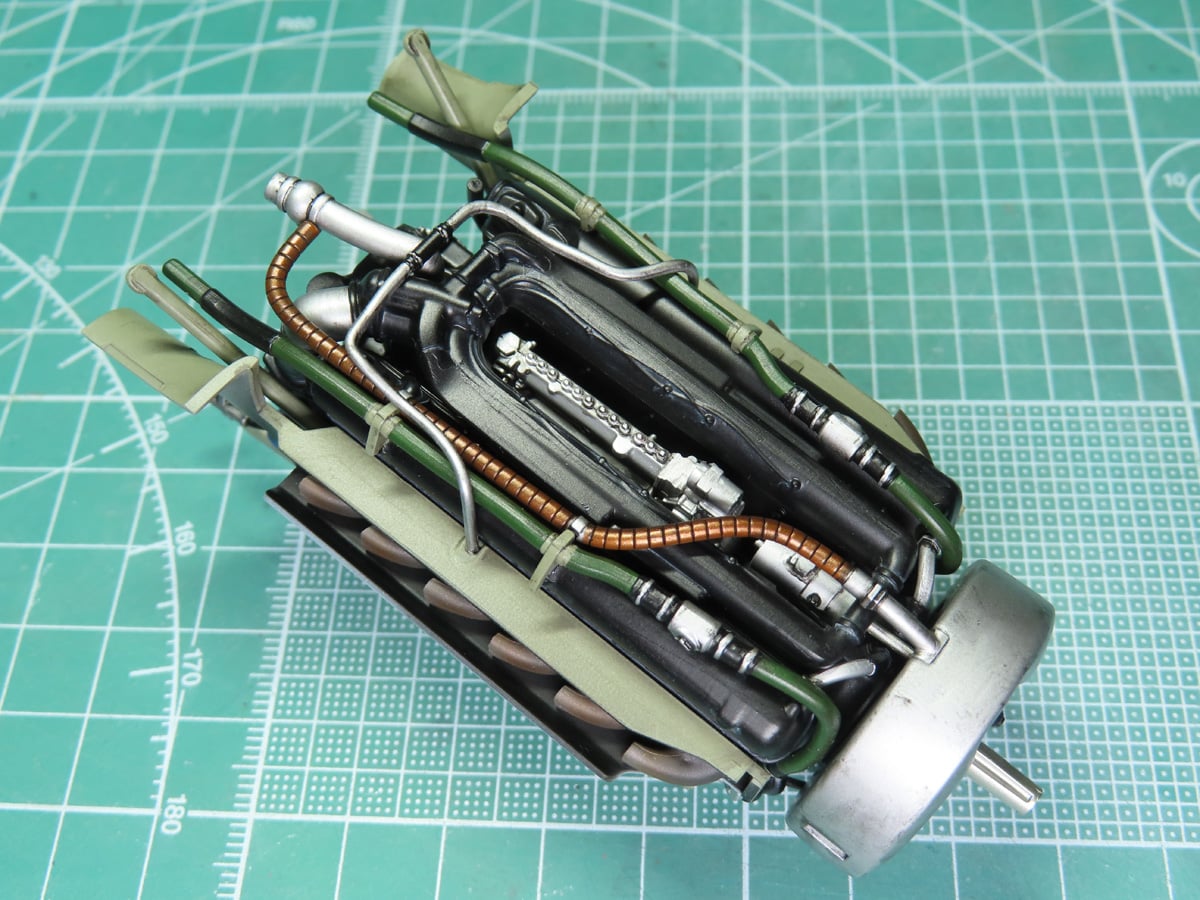
Flipping it over one more time, I added the Oil Feed Pipe and the pipe which connects to the coolant pump. Airfix suggests a bronze color for the oil feed pipe, but I was limited in my paint selection. So I decided to buy and try out Tamiya LP-44 Metallic Orange. The metallic orange is an excellent color, but a bit too bright, I think, for a Messerschmitt.
So I covered it with Tamiya Panel Line Accent Color Black 87131, which dulled the paint and brought out all those great-looking recessed panel lines. And then, to further dull the color, I sprayed it with Mr. Color 181 Semi-Gloss Clear, and this created the metallic finish I wanted.
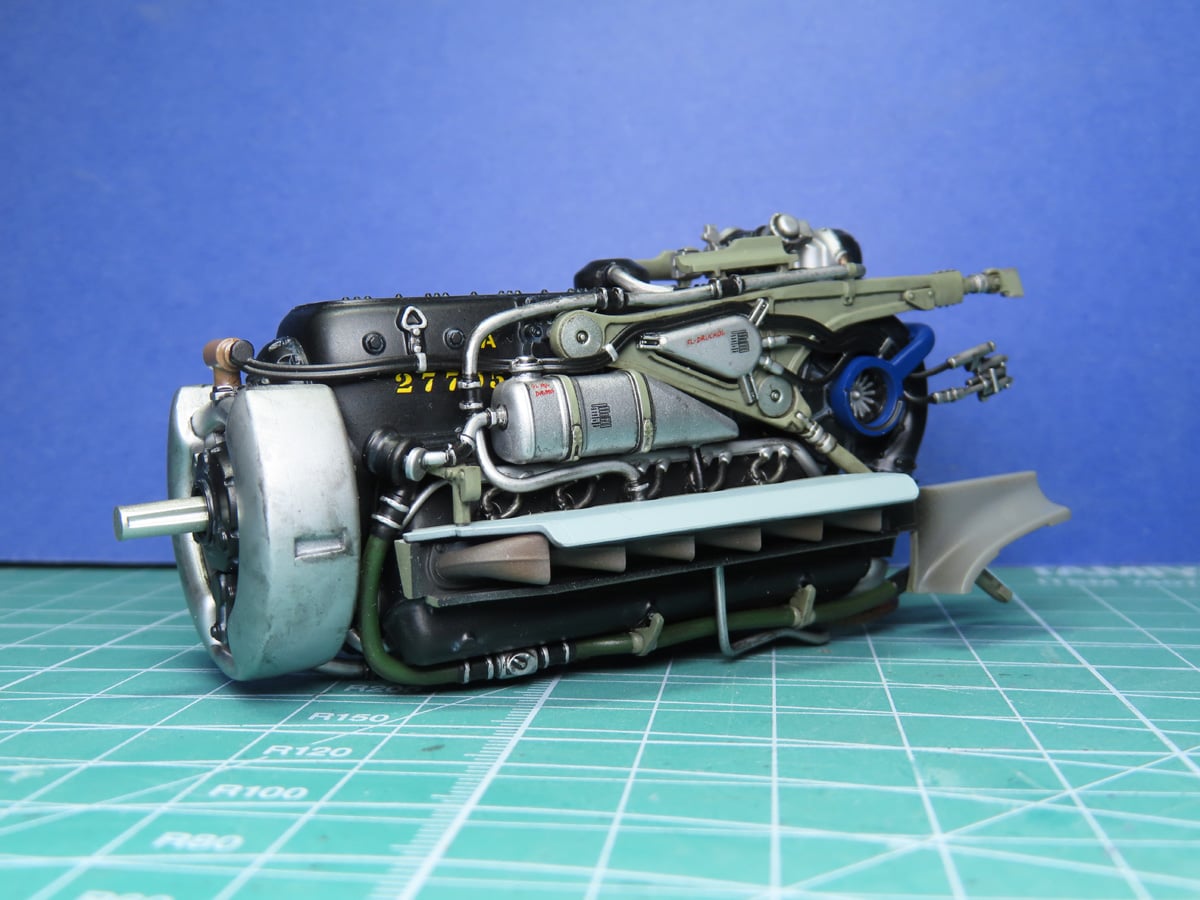
At the 2025 Scale Model World, when this kit was announced, I remember that on the table with all the 109s, there was a large, oversized 3D printed engine Airfix produced to properly show off the details of this engine. At the time, I thought, “I wish that was a kit”. At the time, I didn’t see myself building this model in the future.
Now I’m delighted to have built it. I feel like I’ve barely started with this project, and already there’s so much that’s been done. As far as fit and easy assembly goes. For the most part, this went together beautifully. The only real issue was the green coolant pipes; they took a bit more time to correct and fit to the model.
I’m impressed so far, and very eager to continue on with the rest of this project. Now that it’s completed, I’ll store it in my display case for protection. And I’m looking forward to the next stages, where we’ll begin building and detailing the cockpit. And if that is anything like this engine, we’re in for a fun time!
To be continued…
About the Author:
Jared Demes is a modeler from southern Alberta. He has been building models since he was 4 years old when his Dad first introduced him to the hobby. He has written for several magazines including, Fine Scale Modeler, Scale Aircraft Modeling, Phoenix Scale Models, and others. He has an interest in all modeling subjects, with a focus on WWII Japanese aircraft and Science Fiction.
Jared has won several IPMS awards for his modeling, and currently operates his YouTube channel rebelsatcloudnine, where he showcases model builds and product demonstrations.