

Cockpit Assembly
This is the forth part of the Airfix Messerschmitt Bf109G-5/6 1/24 Scale A17003 trousse.
The last Messerschmitt kit I built was an Édouard 1/48 Me 109 G-4. I decided with that project to build it with the flaps dropped and the canopy open. I usually prefer to build my aircraft with the flaps and the cockpit closed, as I like to show the aerodynamic profile of the aircraft. It was a fun project, and I remember having a very fun time detailing the cockpit. But at 1/48 scale, it’s a bit hard to appreciate all the details, even with the canopy open.
That’s one of the things that make 1/32 and 1/24 subjects so much fun, and a great challenge for adding details. As you and the viewers will be able to better appreciate the work that you’ve put into your project.
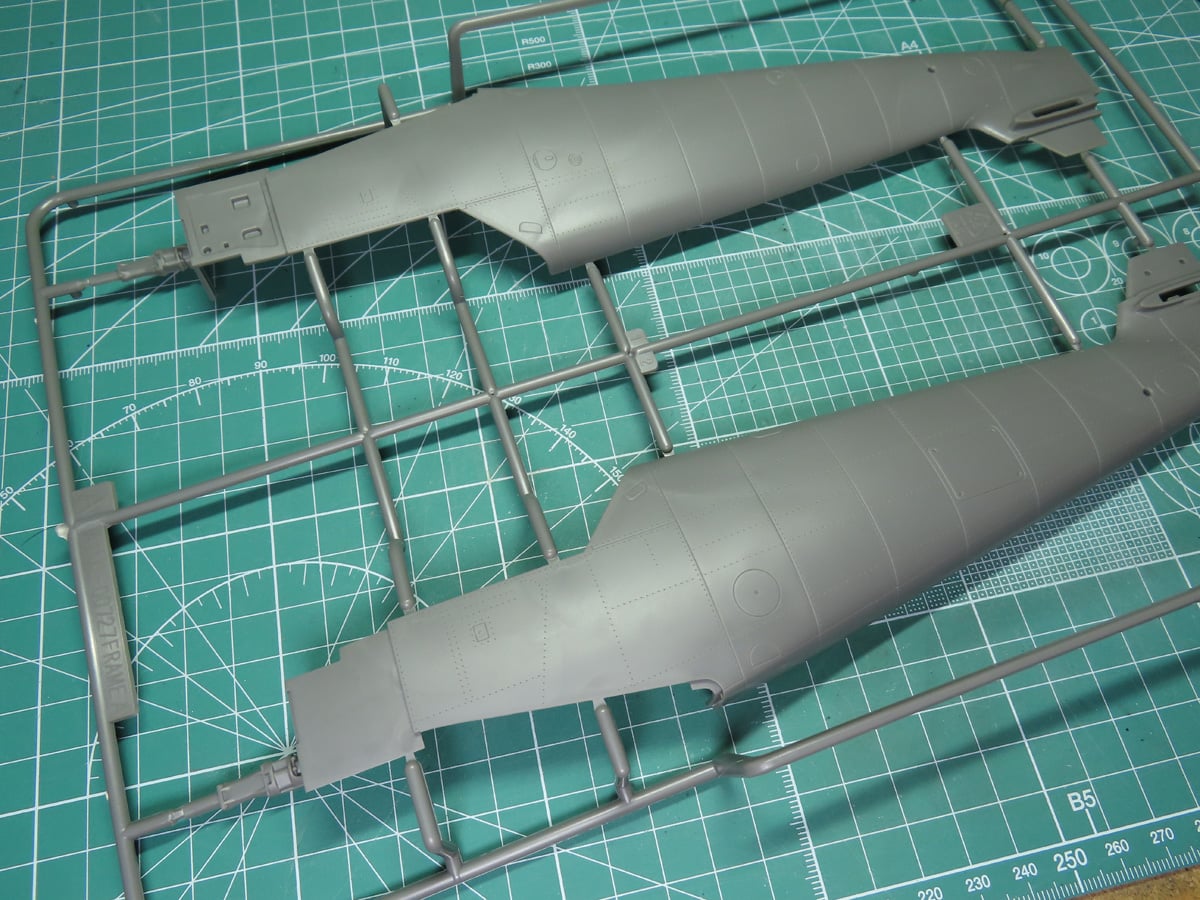
Starting off with the cockpit, I needed to separate the fuselage from the sprues. When this kit was first released, there were quite a few modelers reporting that the fuselage was very warped, so I wanted to see if this was going to be an issue with my kit.
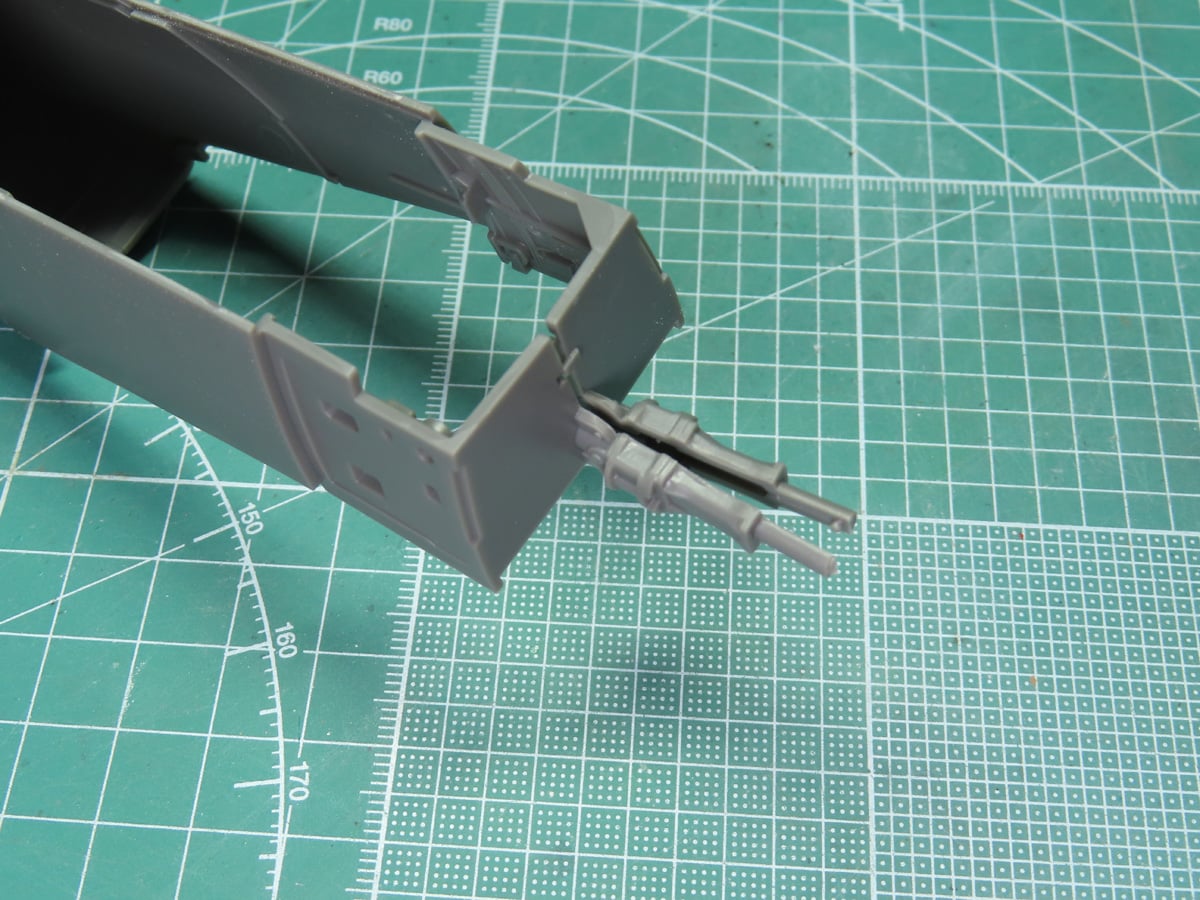
Reading around online, I saw some of the warping that people had with their kits. Some of them were pretty badly warped. And I had heard that this was an early production issue and something that Airfix had corrected. I’m pleased to report that there isn’t any warping with these parts, just a minor gap that will be easily resolved further on with the build.
And with that out of the way, I can proceed with building the cockpit.
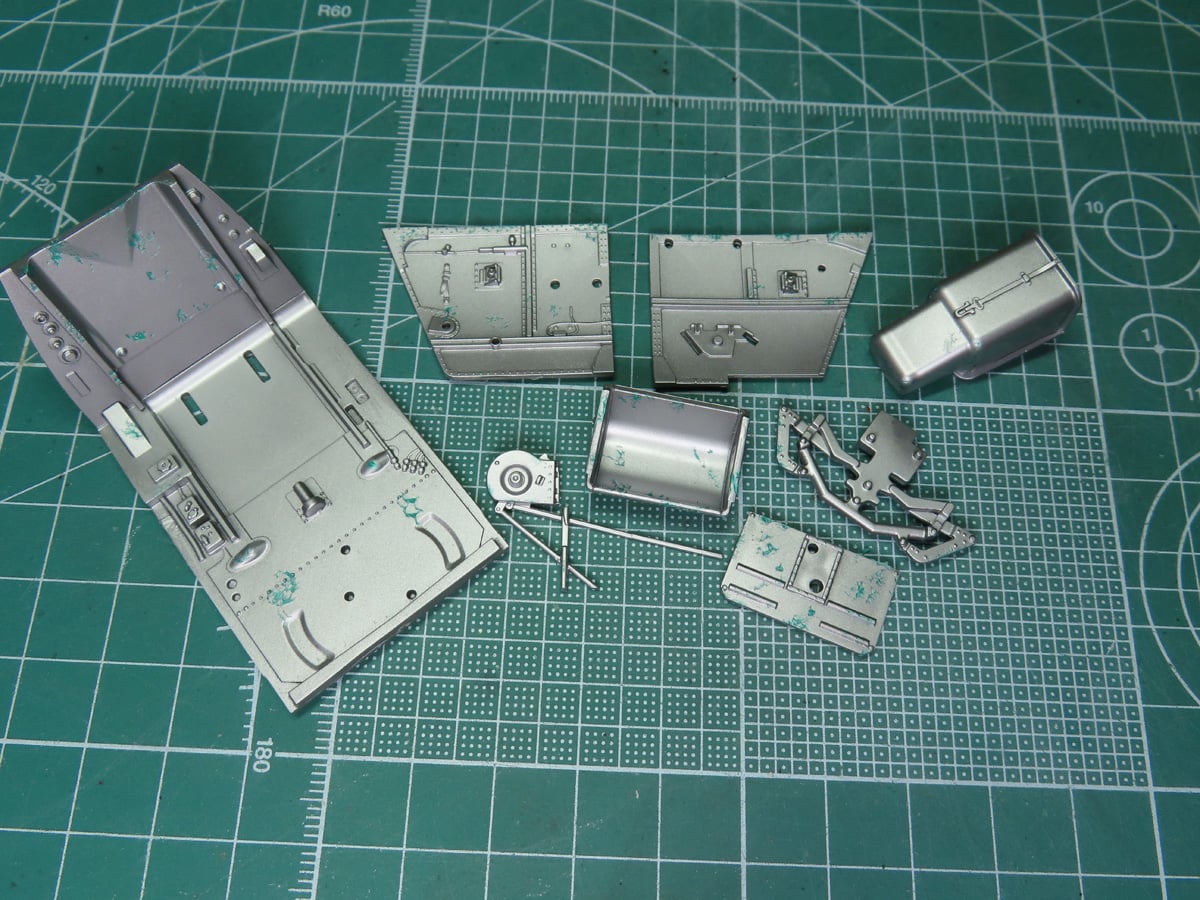
I cut out the cockpit parts and spent a nice afternoon cleaning everything. Once I was finished, I painted the parts with Tamiya LP-11 Silver. I wanted to add some chipping to the interior, and I used some sponge dipped in Mr Masking Sol Neo M132.
Mr Masking Sol Neo M132 is great because it dries raised, and this makes it easier to remove after everything has been painted. The other great thing is that if you don’t like the chipping, at this stage it’s very easy to remove and try again until you get the desired texture.
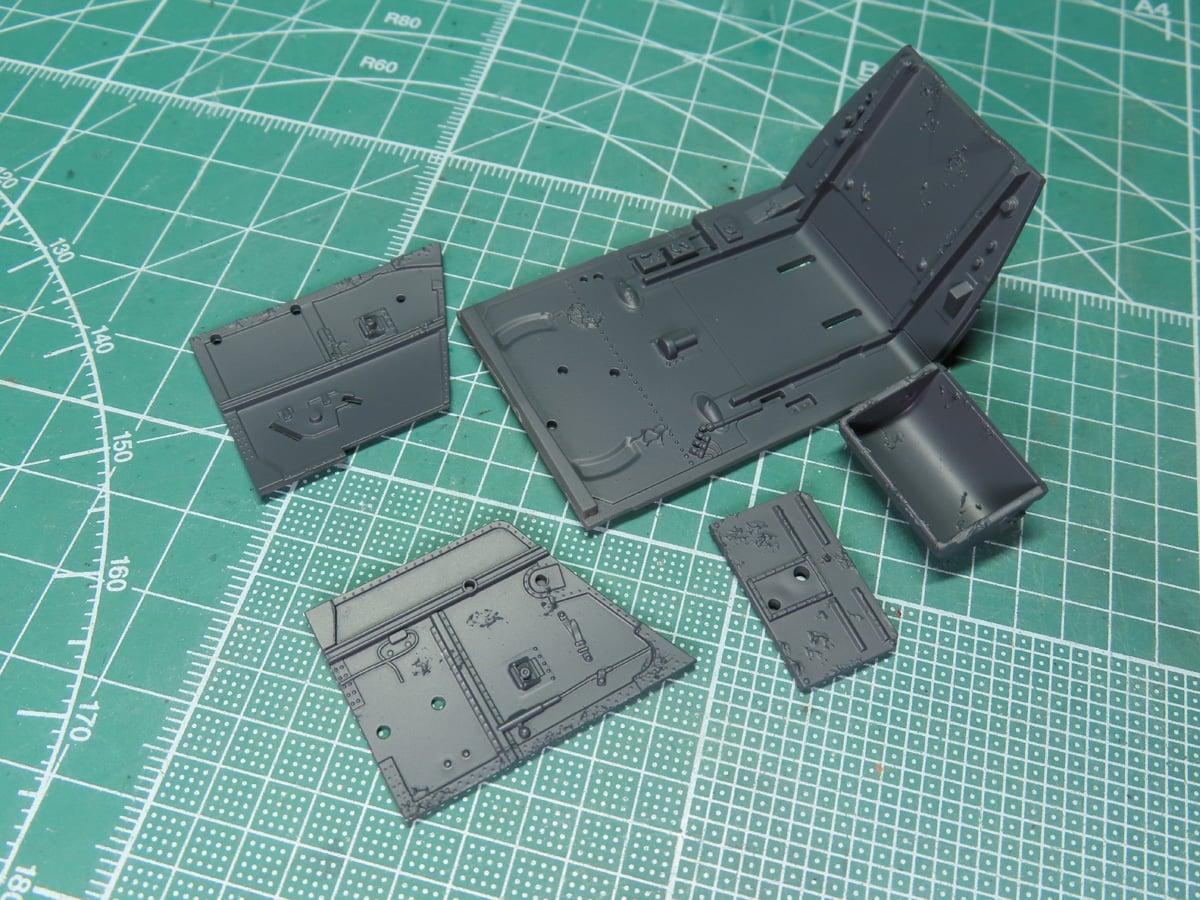
I then sprayed everything with a base coat of Tamiya LP-27 German Grey. This was my first time using the new Lacquer version. I normally go for Tamiya XF-63, and I was surprised, as I felt that the LP was a bit brighter than the XF.
Then again, I think it’s all personal preference. I know that we as modelers want to have as accurate a color as possible, but looking around online you can see how varied the colors can be on the real aircraft. So I try not to worry too much about getting the colors 100% accurate.
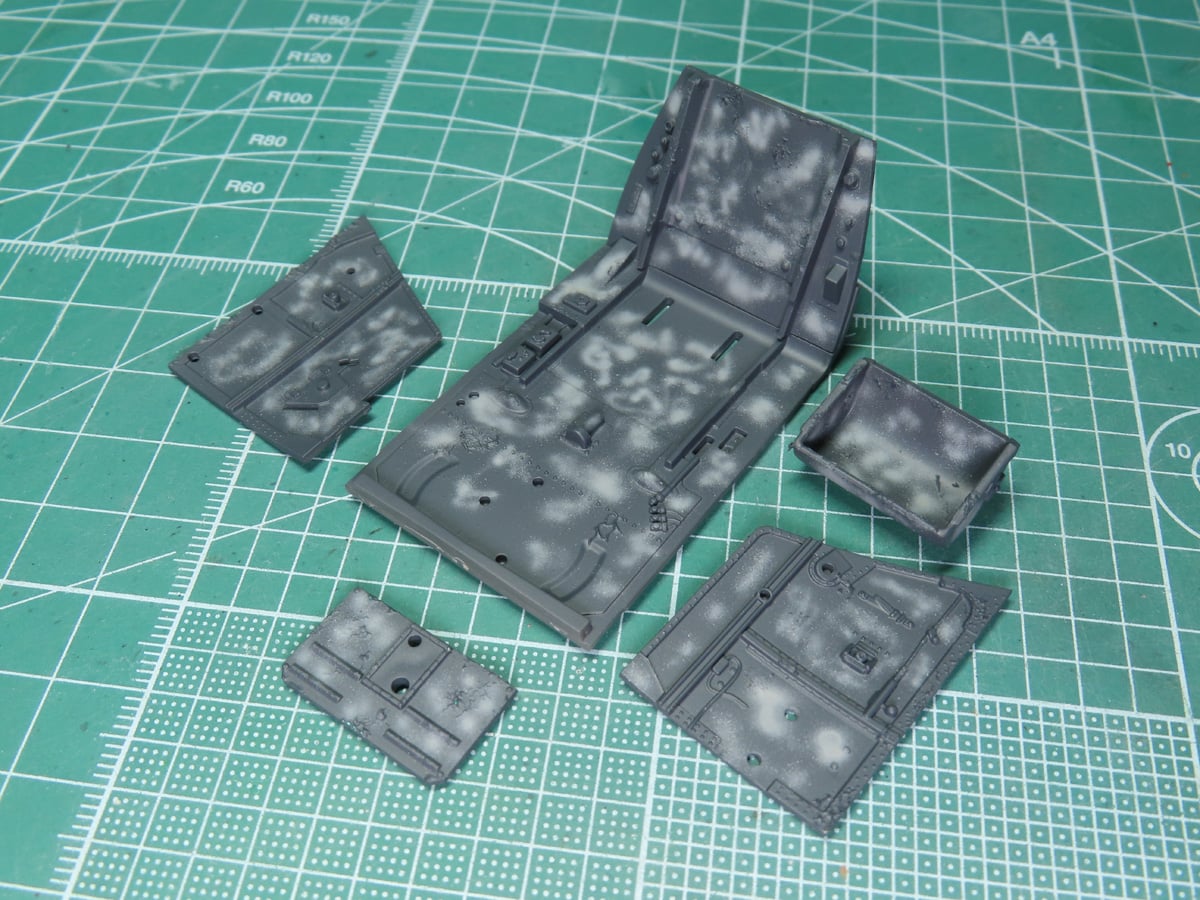
I wanted to create a marbled tone to the German Grey, and to brighten it up a bit to make viewing the interior a bit easier. So I lightly sprayed some Tamiya XF-19 Sky Grey around the parts.
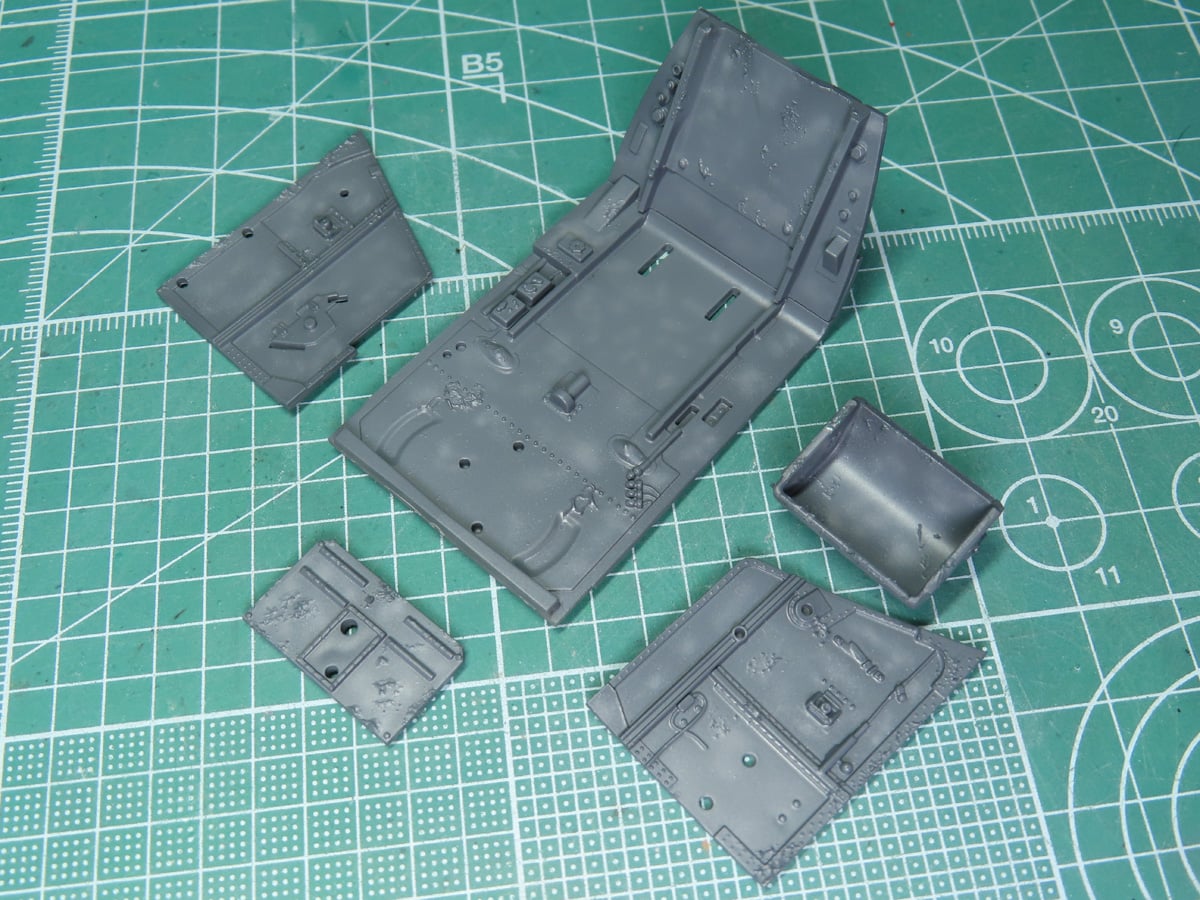
To blend all of the colors together, I thinned Tamiya XF-53 Neutral Grey about 70% and very lightly sprayed it over the parts. It’s a bit brighter than I was expecting (again, I thought that the German Grey was going to be darker). So if I were to do this again, I might use Tamiya XF-24 Dark Grey instead.
I should also mention that the lights I used for taking this picture also make it look a bit brighter than it really is.
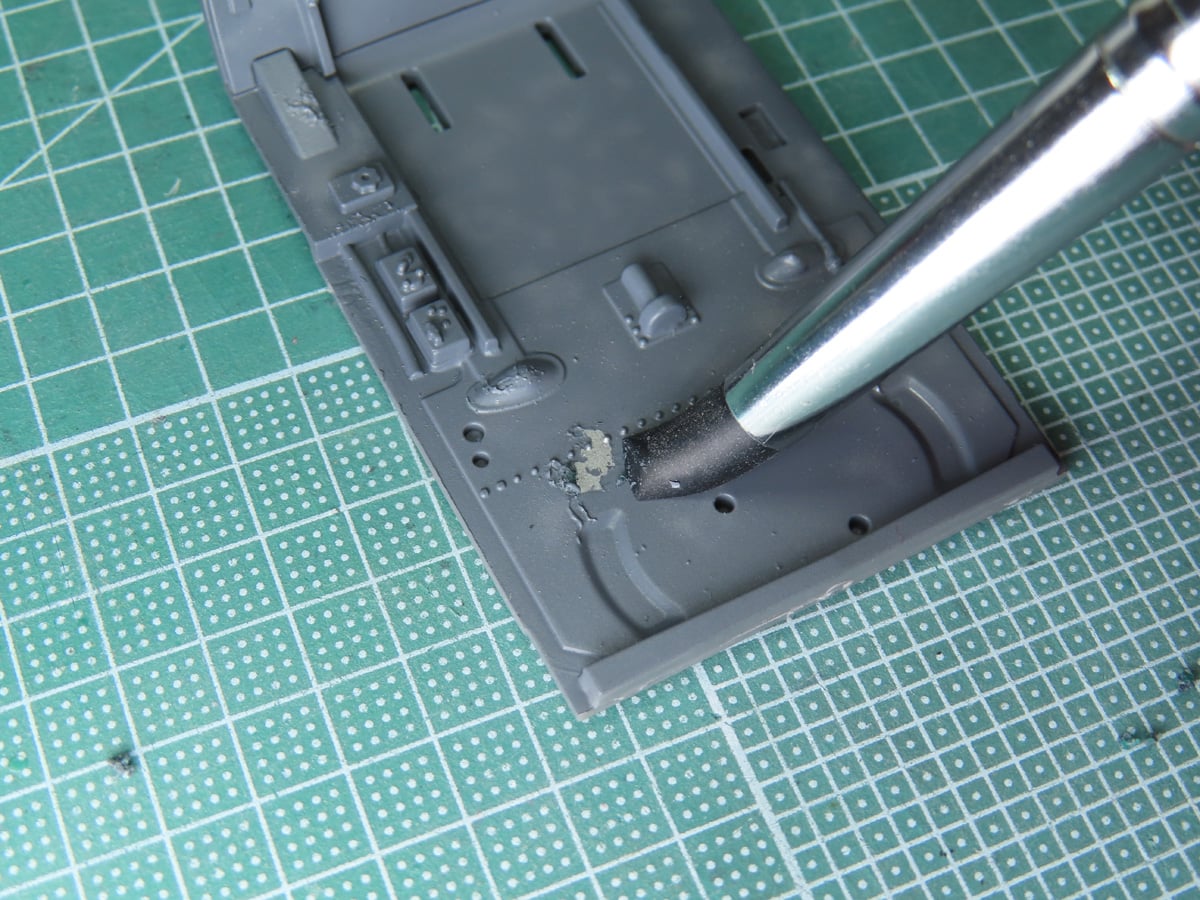
To remove the Masking Sol Neo, I’ve found that a soft eraser does an excellent job. However, with all of the small sections, this would be difficult, so I used Silicone Brushes from AK Interactive AK9088.
These brushes have a wide range of uses. They are great for sculpting, spreading around diorama textures, and getting into the tight corners to remove the masking. I’ve even used them a few times to apply the Masking Sol Neo into smaller sections of a model that would have otherwise been difficult with the brush in the cap.
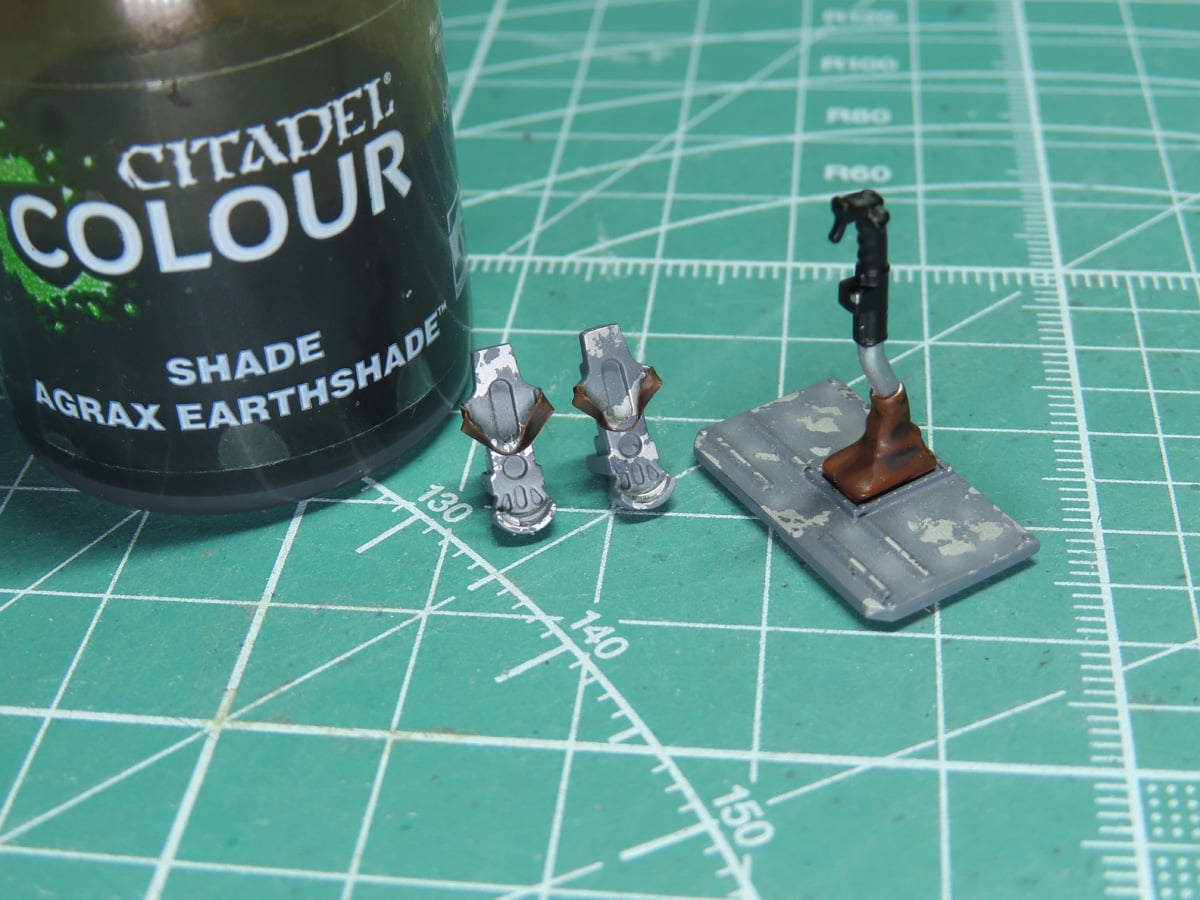
For the leather sections, like the bottom of the control stick painted with Tamiya XF-68 NATO Brown, I like to apply an acrylic wash. As much as I prefer enamel washes for weathering, acrylic washes like Agrax Earthshade from Warhammer Color (formerly Citadel Colors), have this wonderful ability to pool into all of the recesses and slightly tint the base color darker. It’s also excellent for canvas sections or clothing on a figure.
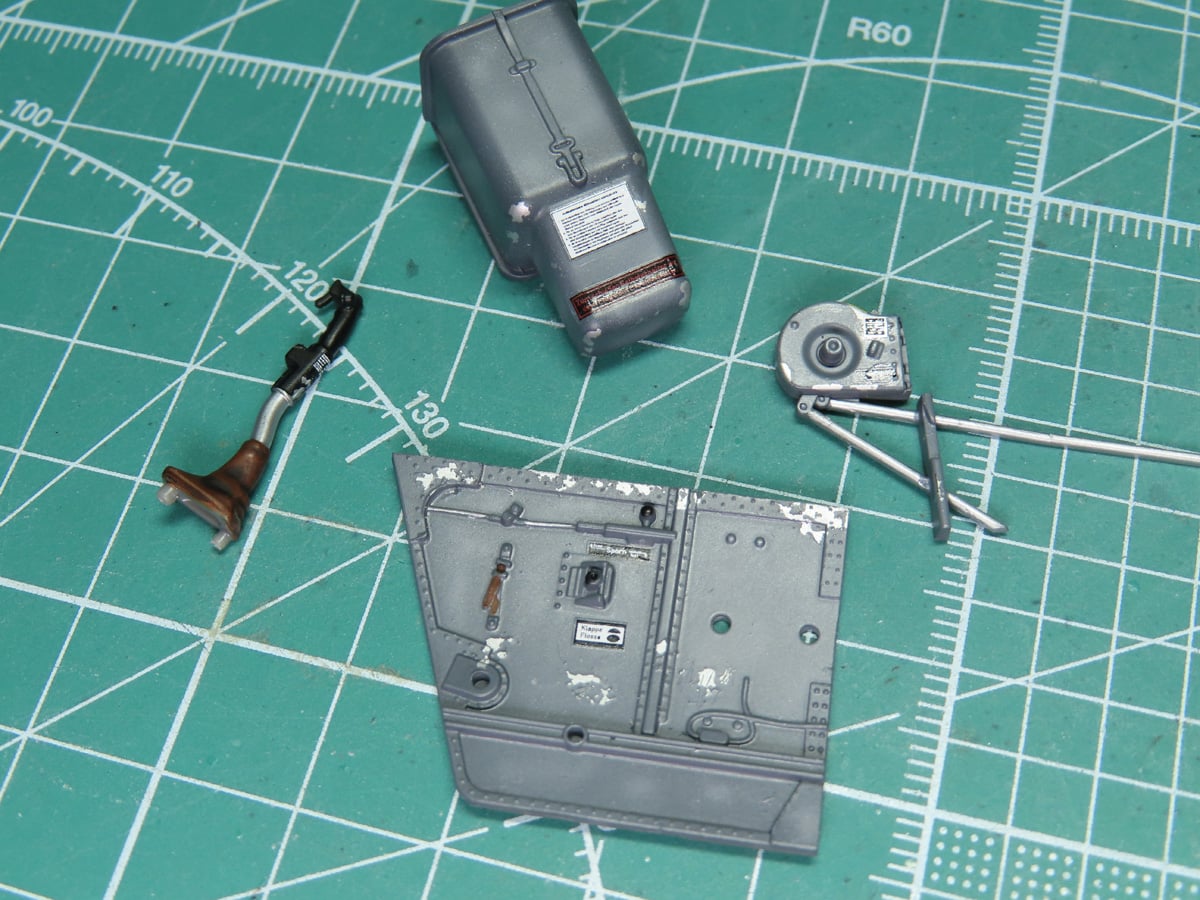
With the parts all detailed, I was ready to apply the stencils. I used Mr Mark Setter MS232, et M. Mark Softer MS231, which I will discuss in more detail in a future post. But they reacted extremely well to the decals.
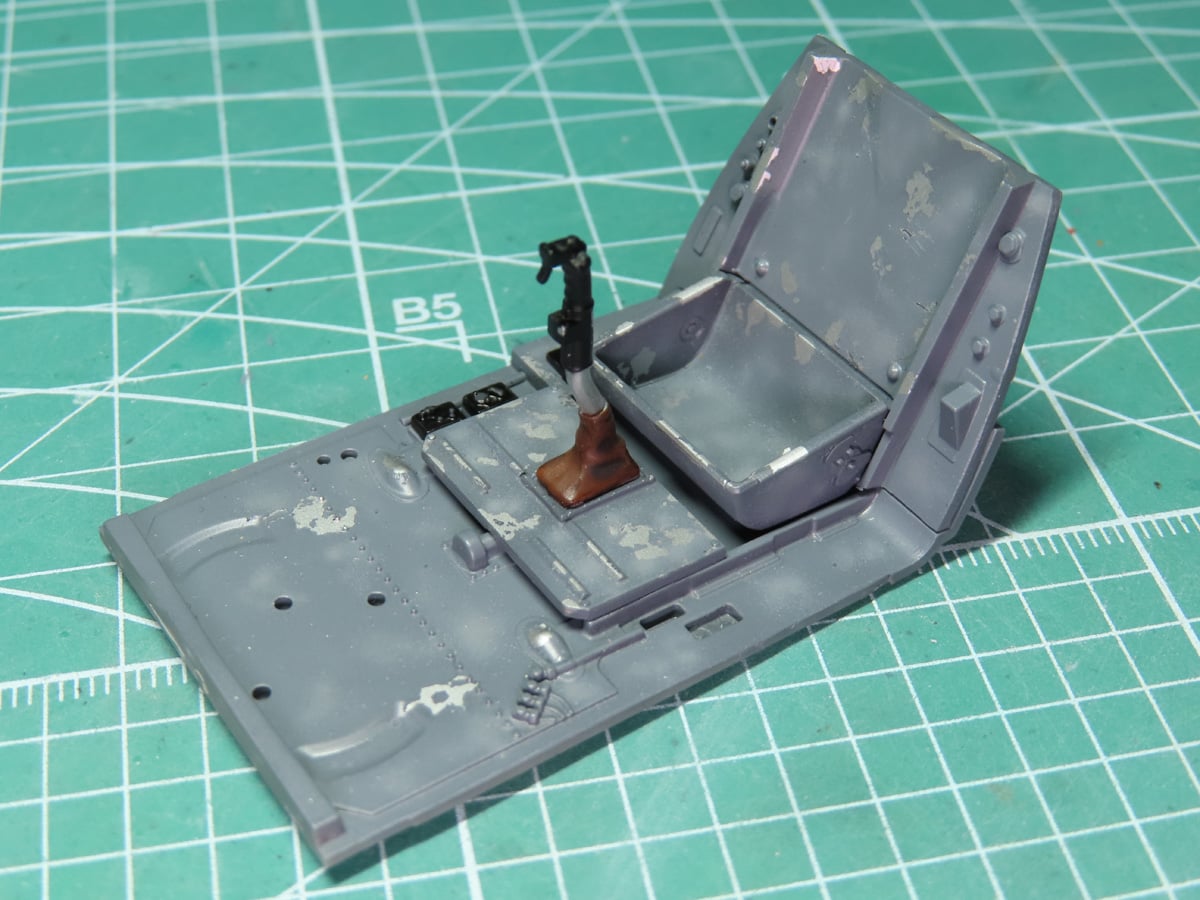
Once the decals had dried I was ready to assemble the parts. I fitted the bucket seat to the bottom of the canopy floor, and then glued the control stick in place.
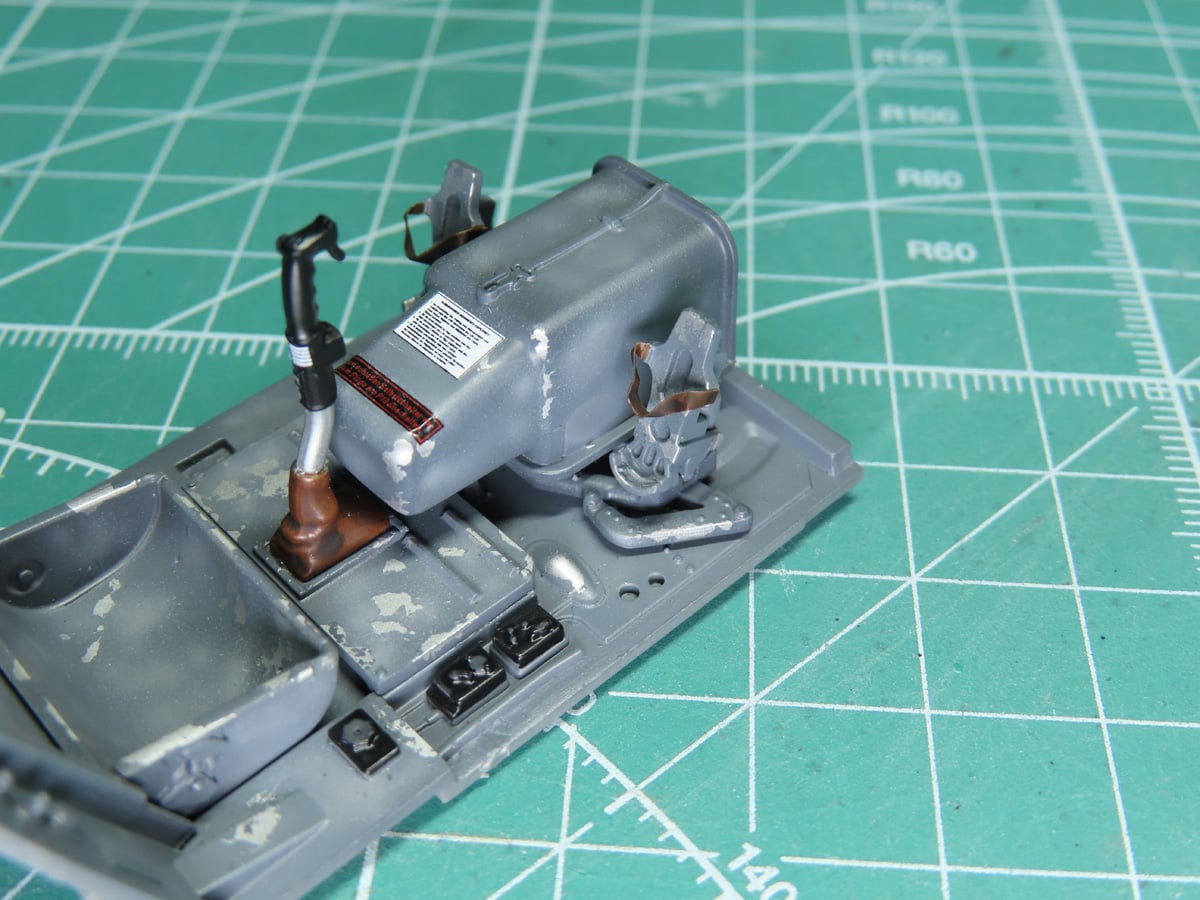
Now I was ready to glue in the foot pedals, mounting bracket, and the canon cover. I added leather straps to the pedals using aluminum tape. I really love aluminum tape for small seatbelts, and sections like this, as it’s rigid, but it looks flexible like leather.
The straps were painted with XF-10 Plat Marron, and given a coating of Agrax Earthshade. I wanted these straps to be darker than the leather around the control column.
For the black boxes on the floor, I painted the buttons with Vallejo Black Grey 70862 I like to paint the buttons on black sections a slightly lighter color so that they will stand out a bit, instead of blending together with the background.
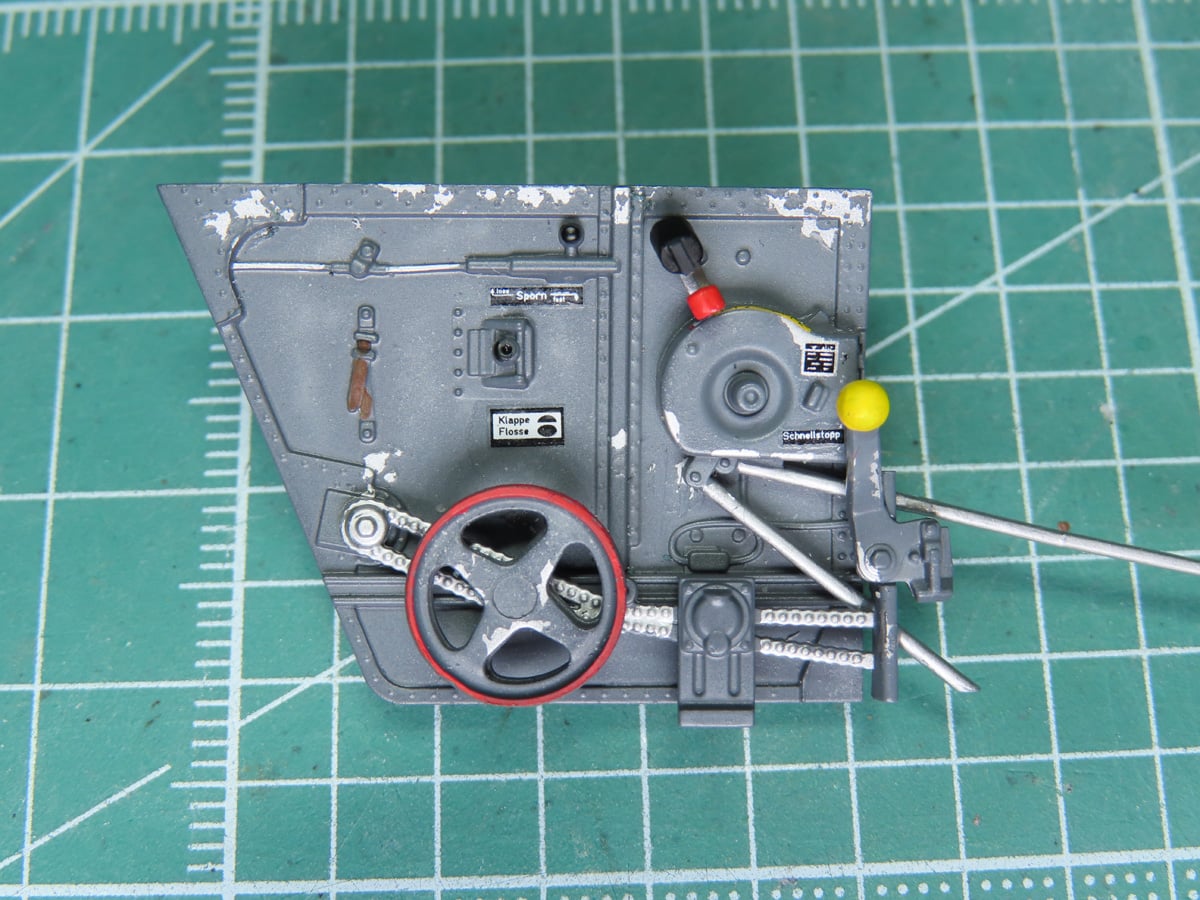
Now I could move on an add parts to the left sidewall. The flaps and trim wheels were carefully painted with Vallejo Vermillion 70909, and well as the fuel cock lever. The throttle was painted with Tamiya LP-5 Semi-Gloss Black. And I added a small piece of styrene to the side to replicate the pitch control.
All of the parts fit together really well, and I love how the stencils really add to the realism of the model. They are so finely printed that you can clearly read what they say.
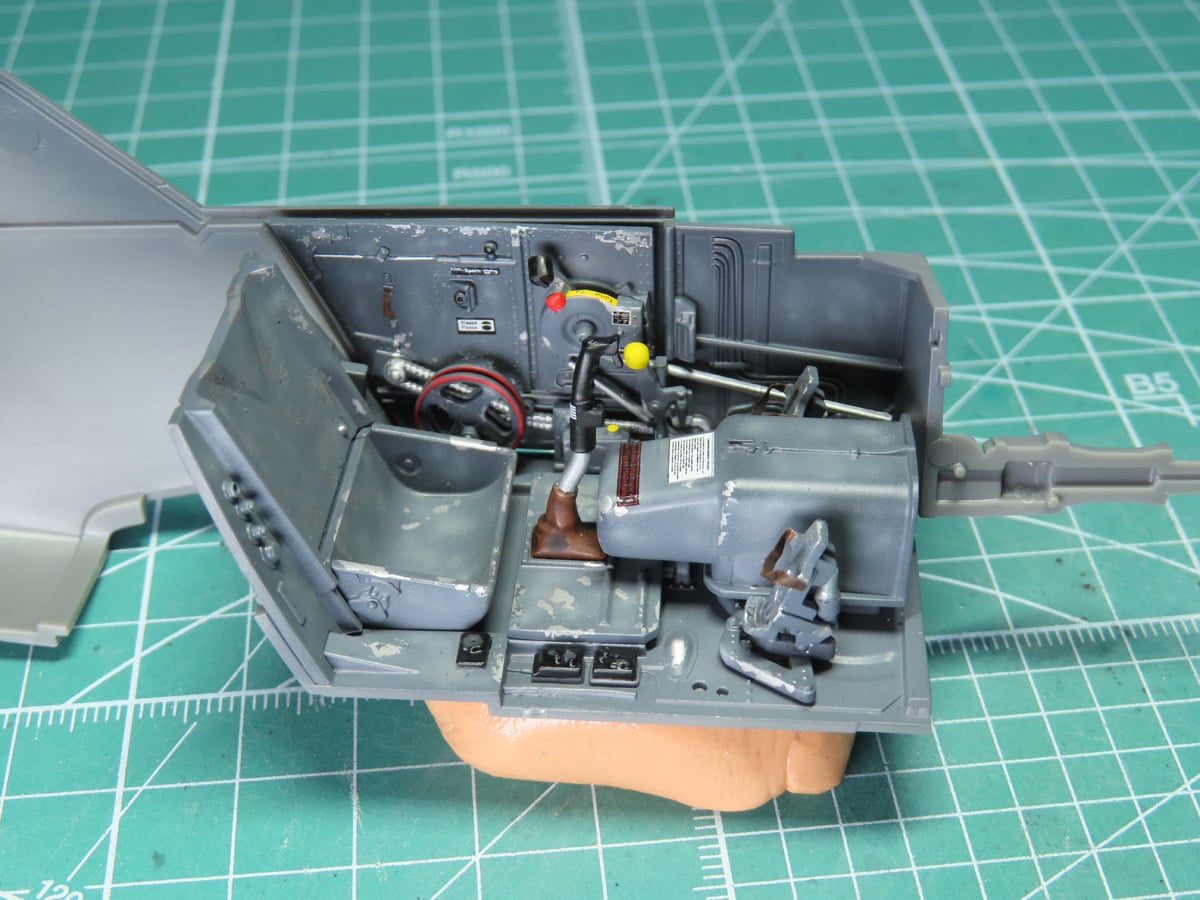
Detailing the cockpit is always a process that I enjoy. And it was very relaxing to paint and detail all of these parts. I’m quite pleased with how the straps on the pedals turned out. I’ve sprayed everything with a coating of Mr Color C181 Semi-Gloss Clear, and next time we’ll work on the right sidewall, and possibly get the cockpit completed.
I still need to add some more weathering to the interior, this will help the details pop out. But I decided it would be better to do this once all the cockpit parts were completed so that I could weather everything uniformly.
I wish that this past week wasn’t so busy so that I could have build the right sidewall. But that’s probably for the best so that I don’t speed through and rush things. But I think this is going to look great when everything is completed and I can’t wait!
To be continued…
About the Author:
Jared Demes is a modeler from southern Alberta. He has been building models since he was 4 years old when his Dad first introduced him to the hobby. He has written for several magazines including, Fine Scale Modeler, Scale Aircraft Modeling, Phoenix Scale Models, and others. He has an interest in all modeling subjects, with a focus on WWII Japanese aircraft and Science Fiction.
Jared has won several IPMS awards for his modeling, and currently operates his YouTube channel rebelsatcloudnine, where he showcases model builds and product demonstrations.