
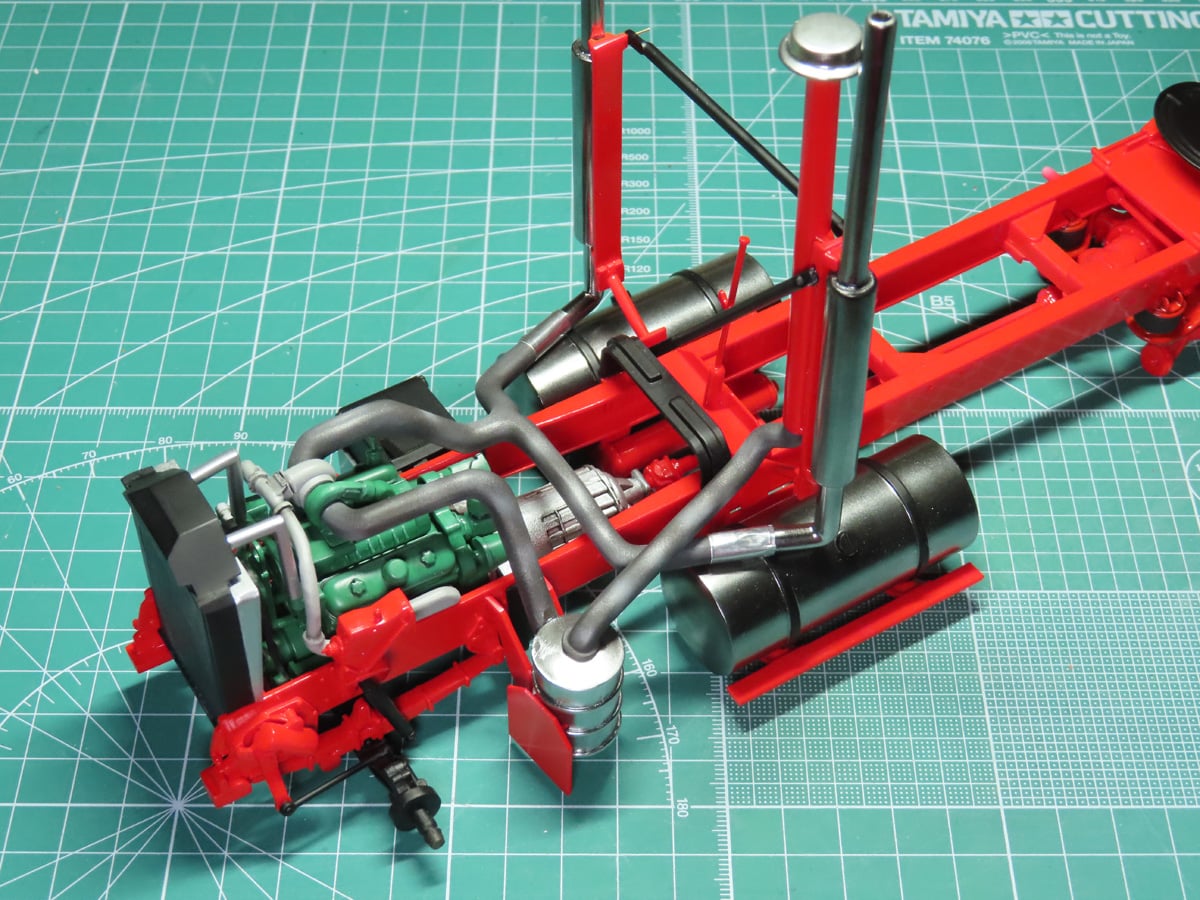
Radiator and Exhaust Assembly
This is the fifth part of the AMT Kenworth Aerodyne Cabover Tractor Truck 1/25 Scale 1463
This week, I’m getting into some of the more difficult parts of the build. There are a lot of fiddly and delicate parts that are going to be added. It’s crucial at this stage to make sure that the parts are well aligned and properly secured to the model.
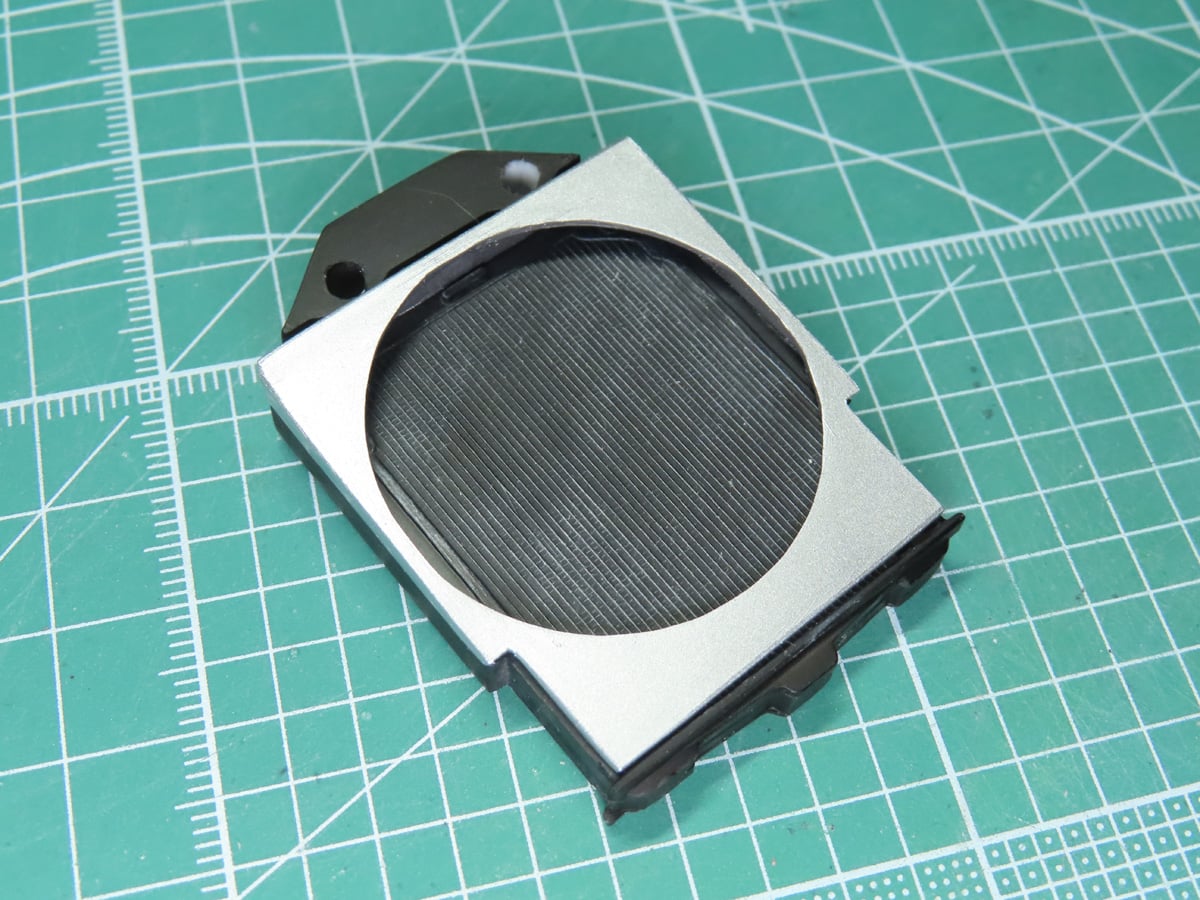
I’ve started by painting the radiator. I painted the main body with Tamiya LP-5 Semi-Gloss Black, and the shroud was painted with Tamiya LP-72 Mica Silver. To highlight the grills on the center section, I lightly dry brushed some Tamiya XF-19 Sky Gray Enamel paint.
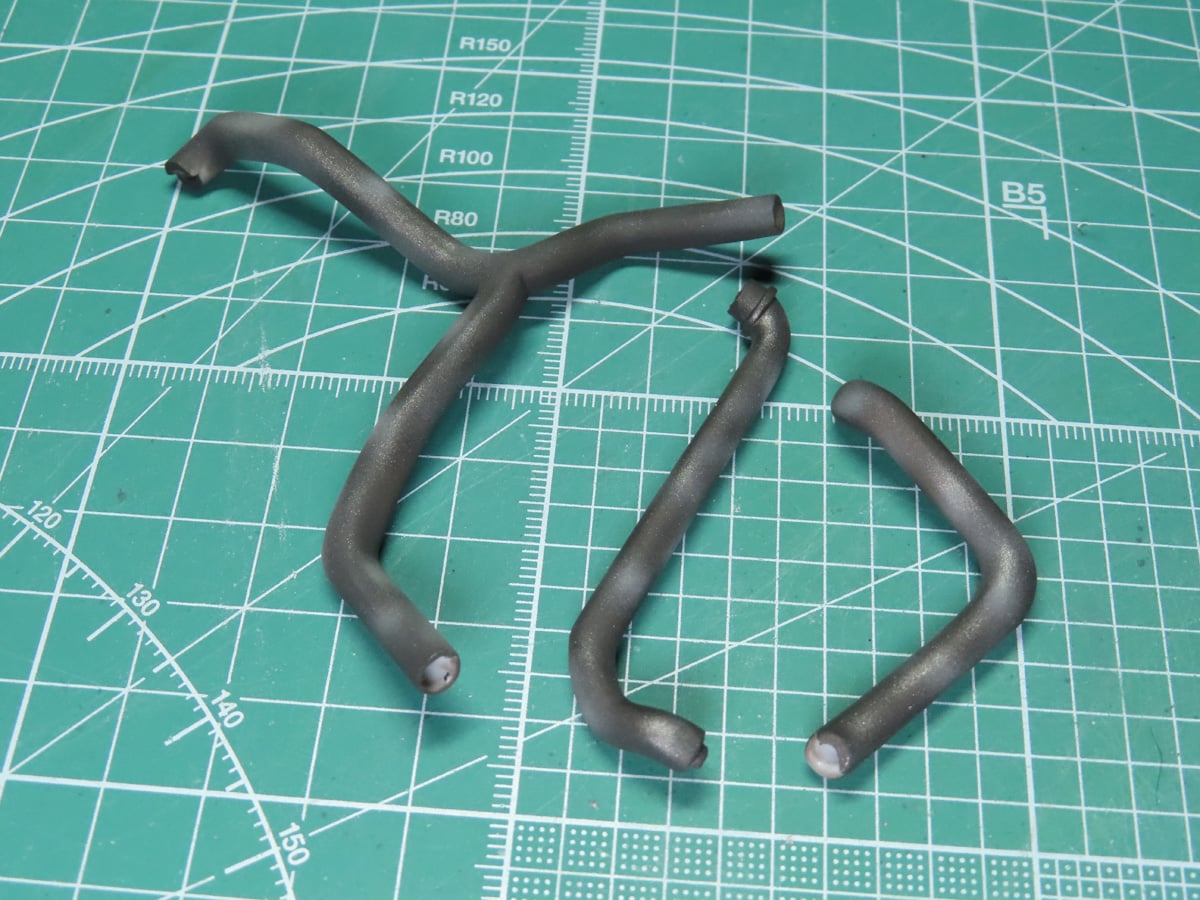
The exhaust sections took quite a bit of time to properly clean and sand down. Of all the parts, these were the most warped, so I glued them together with a very generous amount of Mr Cement SP. I then used several Excel Blades clamps to help fuse the plastic together.
I painted them with a base coat of Tamiya XF-84 Dark Iron. I wanted to add some more color to the parts, so I painted Mr Color C61 Burnt Iron around in a very splotchy and random pattern. To finish off the parts, I painted Tamiya XF-19 Sky Gray, again keeping the paint splotchy and random.
I quite like the effect that layering these colors together created.
Moving back to the fuel tanks I chromed in the previous post. I wanted to paint the cap and straps with Semi-Gloss Black. I was nervous about this, as I’ve heard from many modelers in the past that the Alclade paints are incredibly fragile and can easily lift with tape.
I have to say that this wasn’t what I experienced. I was pleased that the paint held to the parts well and that the tape didn’t dull the chrome. Now that these are completed, I can add them to the truck.

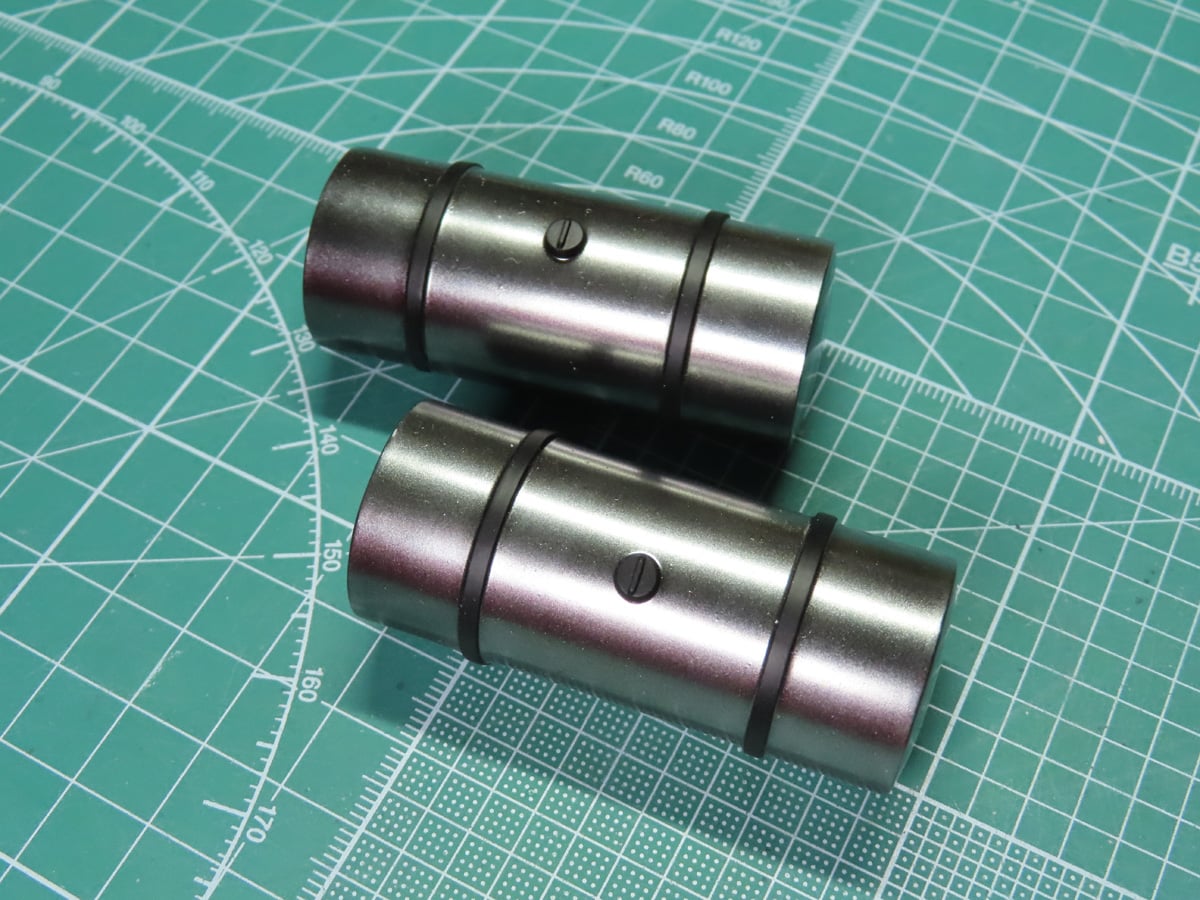
The main exhaust stacks had a lot of raised imprints of the holes on the cooling sleeve. With my Tamiya Electric Handy Drill 74041, I was easily able to drill out a bunch of the holes.
Unfortunately, I really didn’t like the effect, as the plastic was too thick, and the holes that I was following, which AMT placed on the parts, were very crooked. I decided to abandon drilling more holes, and instead, I filled them with Milliput 2-part Epoxy Putty Clay.
I then glued the stacks together and decided to sand the parts completely smooth. I think that these holes would work, and look much better if they were photo-etched parts.
I primed the stacks and front bumper with Alclad Gloss Black ALC 305. I wanted to test whether the Alclad Gloss Black had better results than Mr Color C2 Gloss Black. I sprayed the Black on as Alclad directed, and I waited over 24 hours (also as they directed) to let the paint fully dry.
I then sprayed on the Alclad Chrome ALC 107 and left the parts to dry overnight. When I took the parts to add them to the model, I glued the exhaust stacks to the red barriers, and I noticed that the paint was unusually tacky. Sadly, at this point, the parts were already glued together, and there was nothing I could do without potentially damaging them.
I looked at the front bumper, and you can see in the center that it’s more gray than chrome. And again, it’s tacky and not fully dried.
I used the Alclad Gloss Black a few times before, and I’ve never had this happen. It’s certainly more glossy than the Mr. Color, but I think I’ll be using that from here on, as I just find it to be more reliable. Quite odd that a Lacquer still wasn’t dry after 72 hours, but I’m going to strip the paint off the bumper and try painting it again.
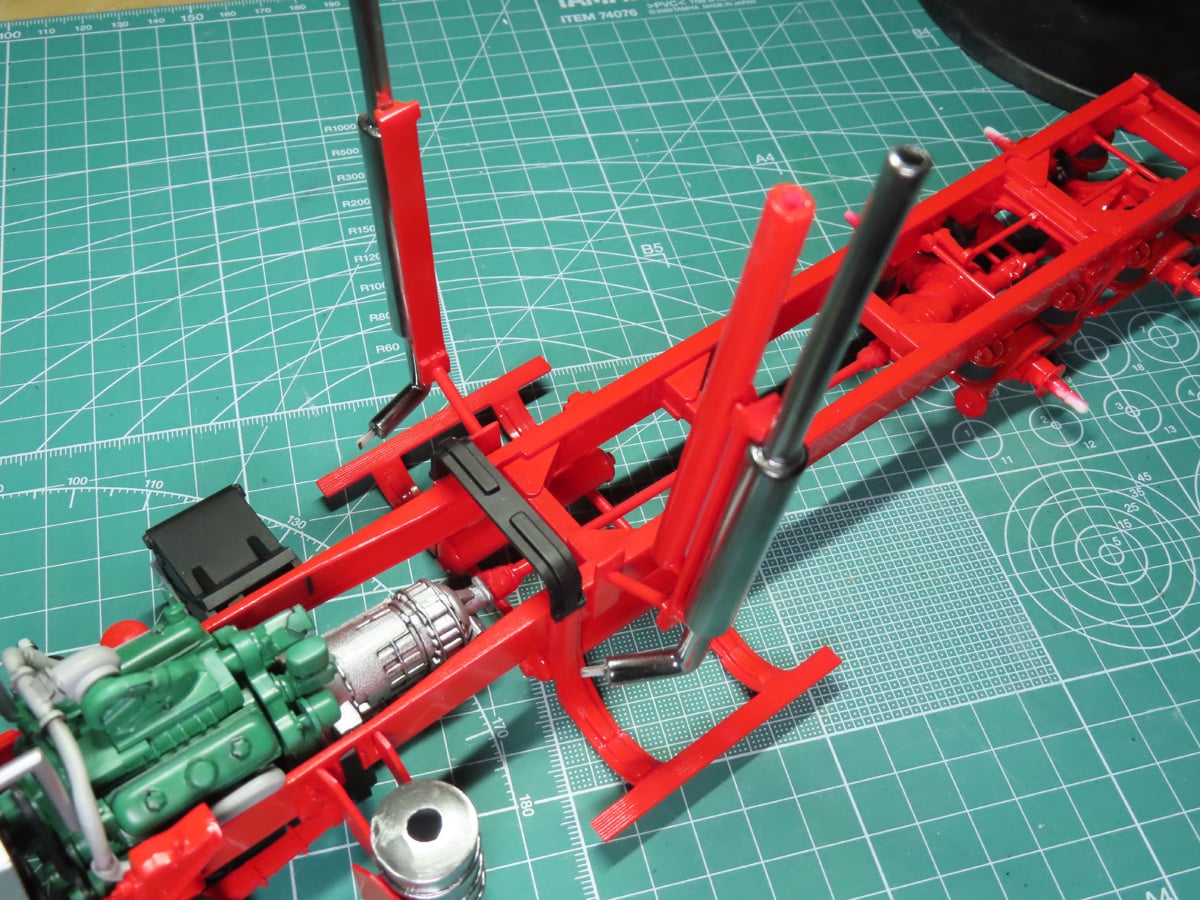
I glued the exhausts to the mounting brackets that are attached to the frame. Double check with your alignment at this stage and make sure that the stacks are parallel with each other and standing straight.

I placed the exhaust leading from the engine to the exhaust stacks. Unfortunately, I’ve run into an issue in that the parts don’t connect. No matter how I tried to get them to fit, they simply wouldn’t budge.
I’m not sure where I went wrong here, but I’ve got an idea that just might do the trick.
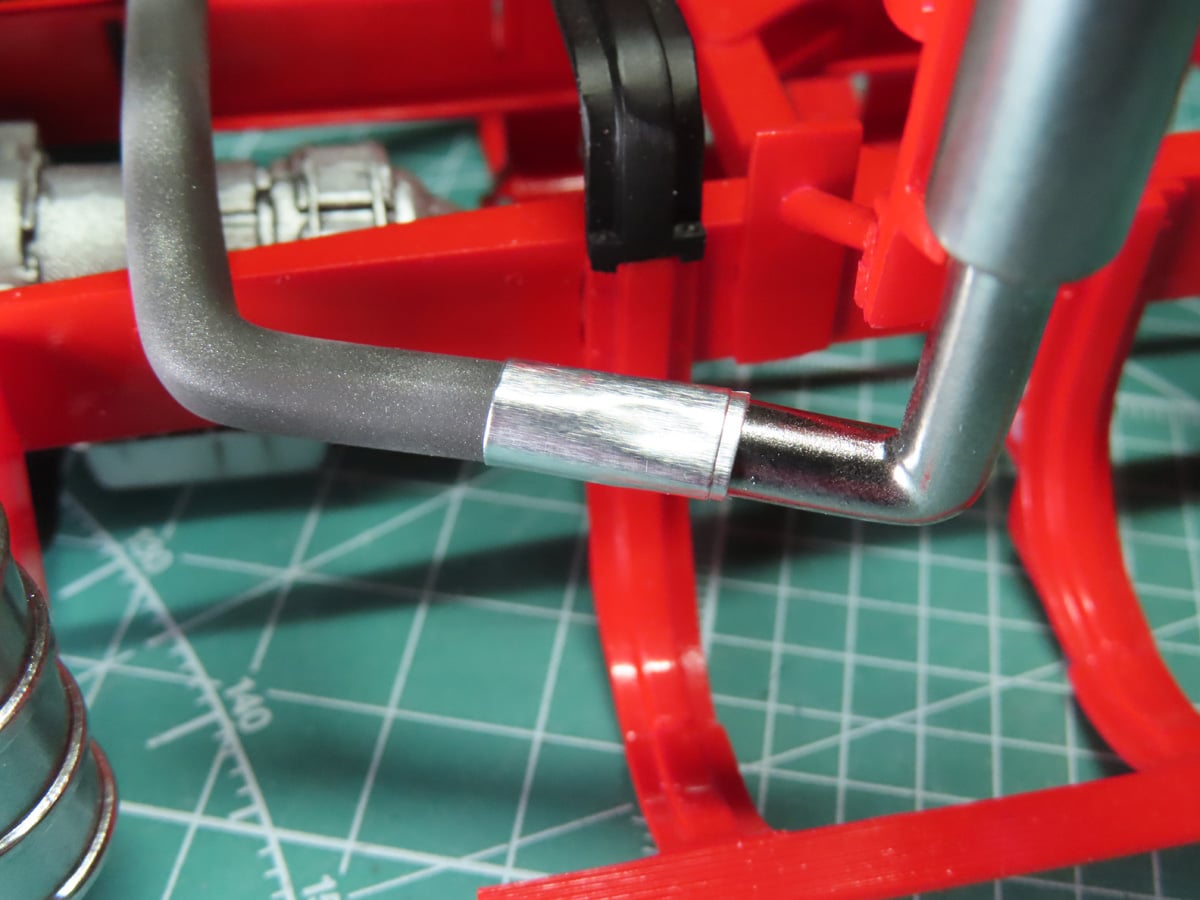
Something I saw on the real trucks was cuffs that would run along the exhaust system. I took some Aluminum Tape, which is stuff meant to connect ducting, and I wrapped it around the parts.
I think that this looks pretty good for a quick fix, and it’s quite sturdy tape, which helps strengthen the join on these parts. I repeated this on the other side so that they would match, and this would look more intentional.
I really love using Aluminum Tape with scale modelling. This stuff has so many uses and unique applications.
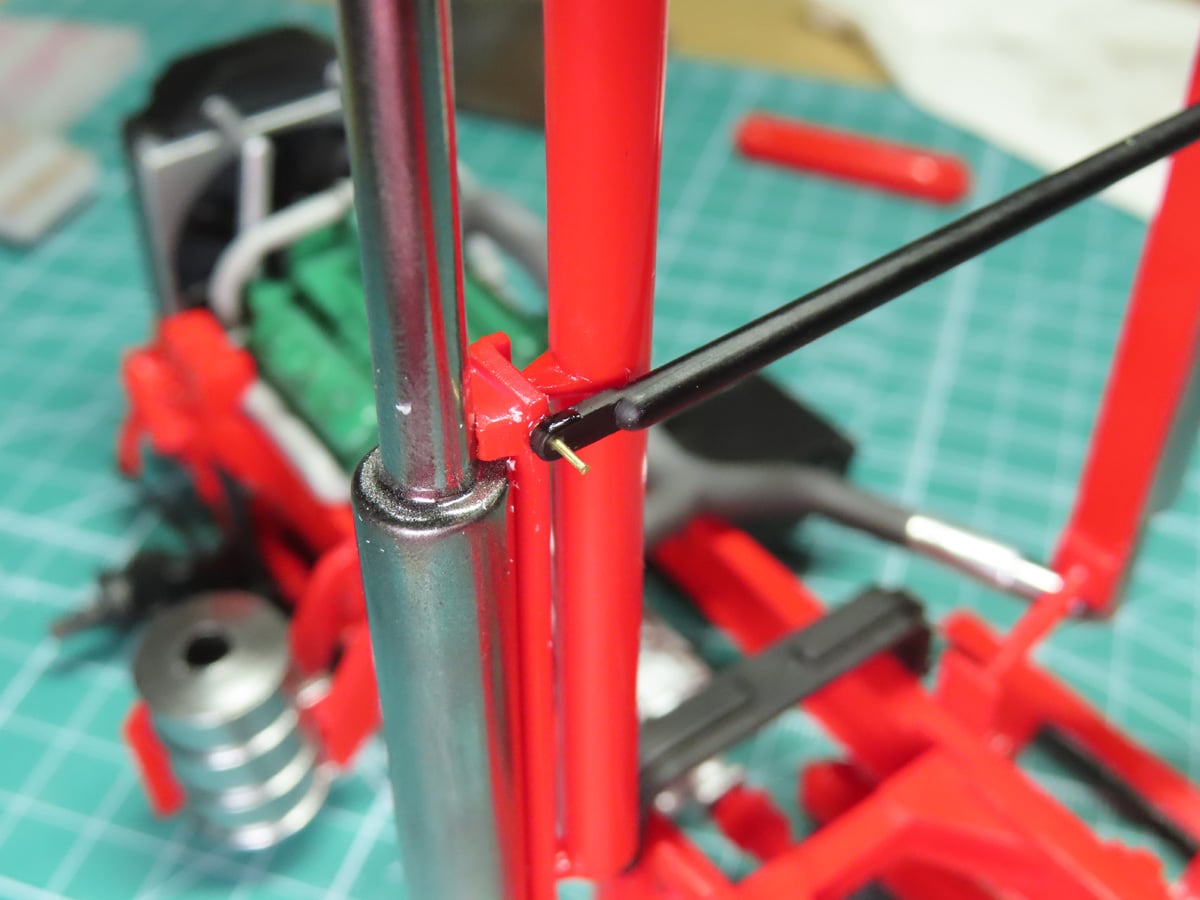
Now for the rod that connects the exhausts together. This was tricky as I found the instructions to be very unclear about where it goes. This is also where I learned that my exhausts were sitting too far apart from each other for the rod to join.
I fussed over this for a while, as I wanted to superglue the parts, but they needed reinforcement. I decided to drill holes into each of the brackets. Again, I used my Tamiya Handy Drill, which made things a lot easier for me. And then I CA super glued a bit of brass rod into the brackets.
I drilled 2 holes into the rod, and I was able to easily pull the exhausts together. I added a drop of superglue to the parts, and once this has fully dried, I’ll trim the excess brass rod. This worked out much better than I thought it would. And that brass rod has made everything here a lot stronger, which is a bonus.
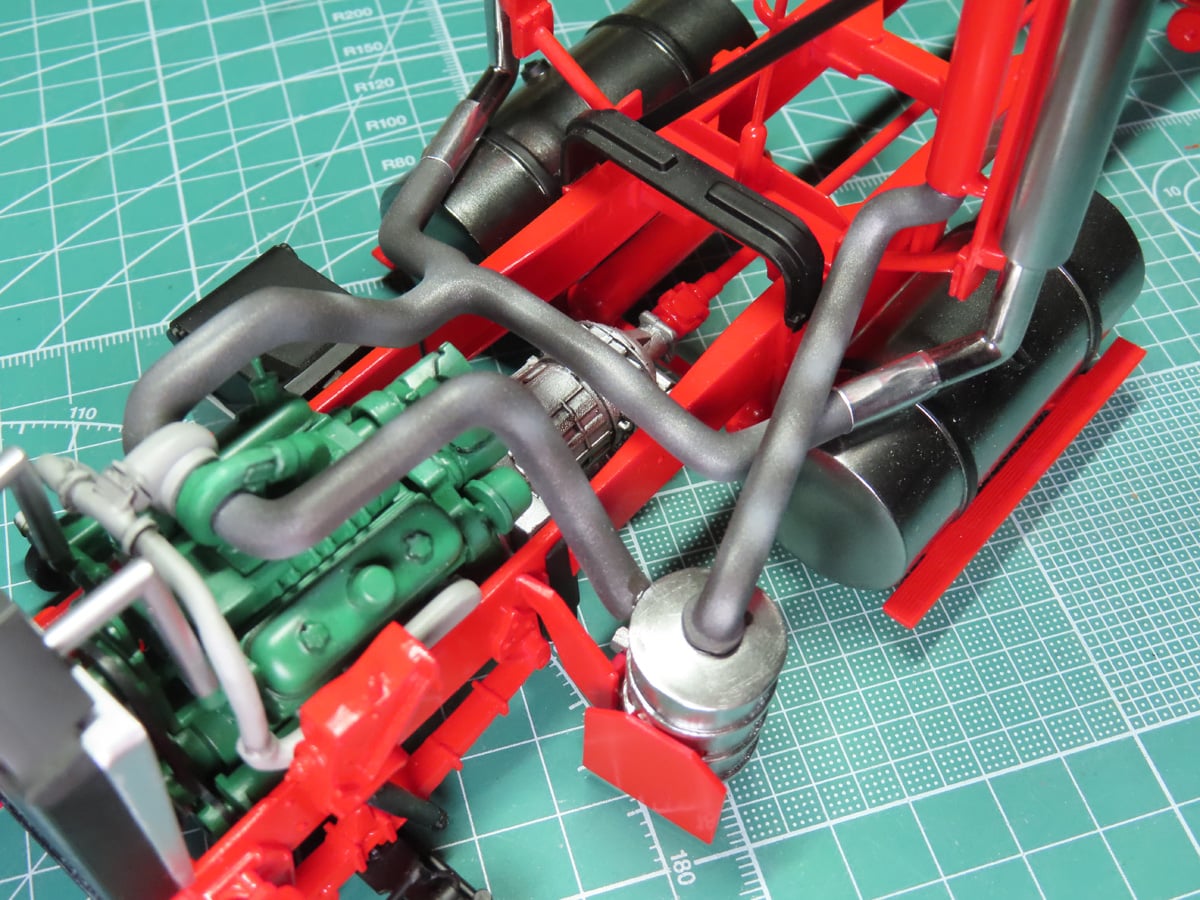
I added the last 2 sections of the exhaust that lead up to the air filter. They fit well enough, but I wish they were a bit more secure in their design.
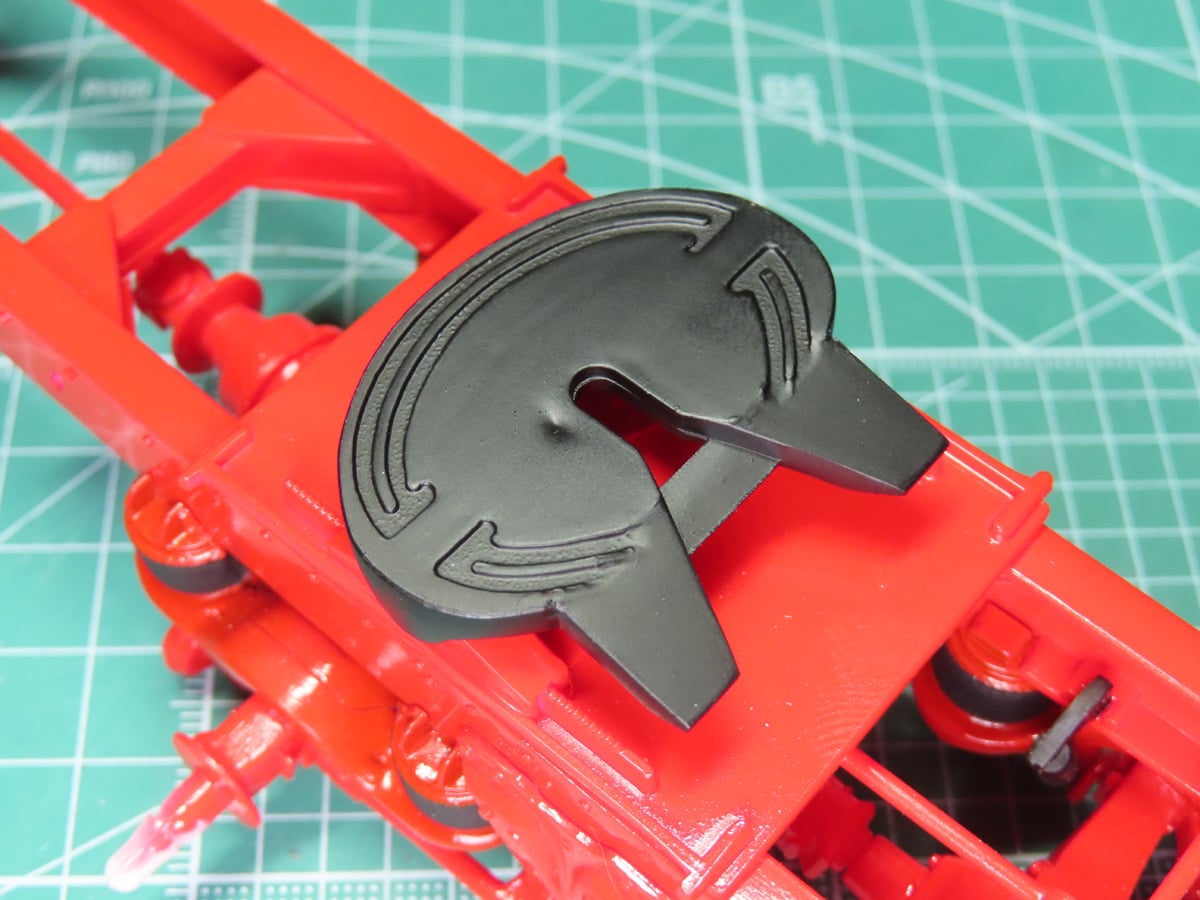
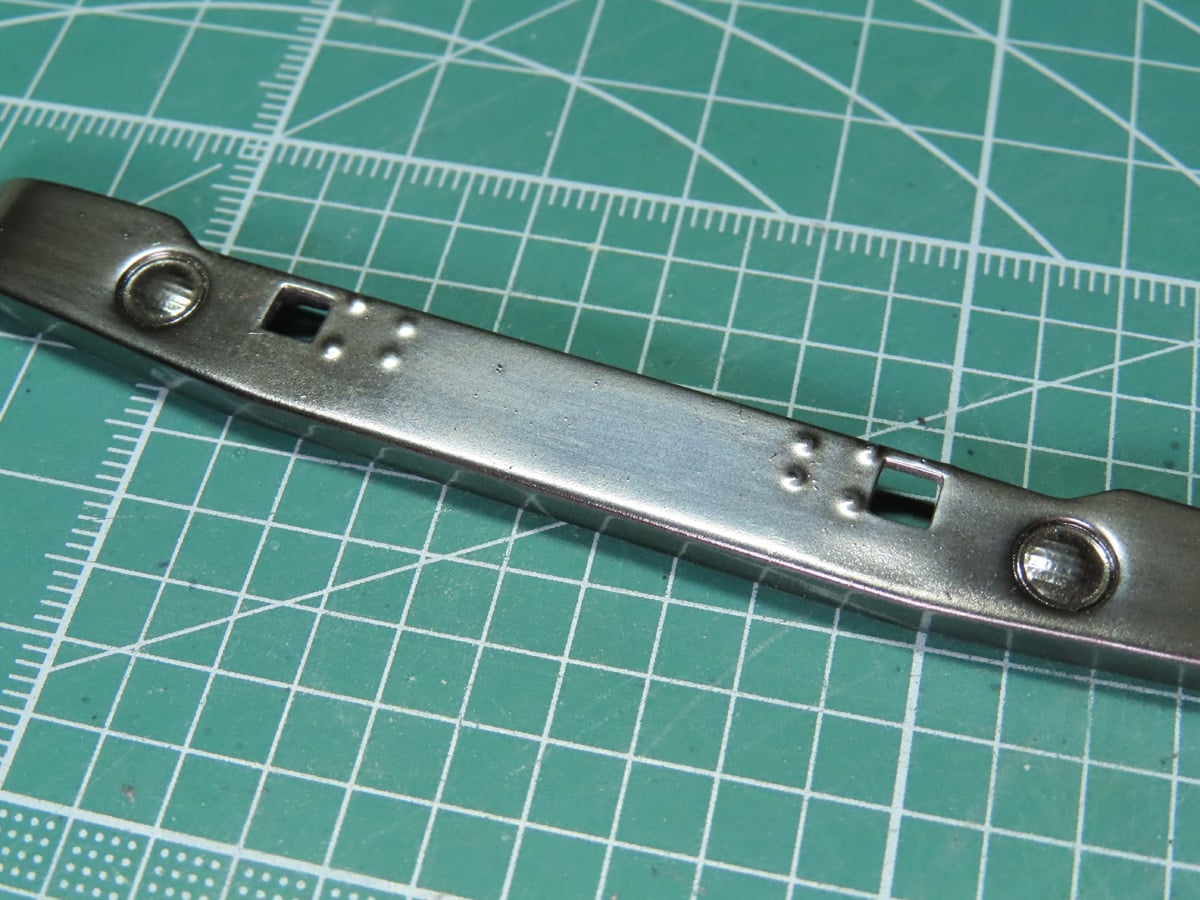
Lastly, I turned to the back of the truck, and I added the 5th wheel.
Whew! This was tough to get these parts together. Nothing really “fit” into place, and I sort of had to hope that the next part would fit properly with the previous parts.
But in the end, we got there. Everything is in place, and again, thanks to those brass pins, things are a lot stronger now. I’m finding that this is still a fragile model, and much more delicate than modern toolings. One thing that’s been particularly odd with this project is the styrene. A lot of the time, I have great difficulty getting the plastic to fuse compared to other model kits.
Last week, I had the chance to travel to Regina, and on the way, I of course passed by many semi-trucks. And given my newfound appreciation for these rigs, I studied them a lot more carefully than I have in the past and noticed that some of the newer trucks still share some of the parts featured on the Aerodyne.
In the next post, we’ll add the wheels to this kit and begin working on the interior sections of the cab. There’s not too much left to build on this now.
To be continued…
About the Author:
Jared Demes is a modeler from southern Alberta. He has been building models since he was 4 years old when his Dad first introduced him to the hobby. He has written for several magazines including, Fine Scale Modeler, Scale Aircraft Modeling, Phoenix Scale Models, and others. He has an interest in all modeling subjects, with a focus on WWII Japanese aircraft and Science Fiction.
Jared has won several IPMS awards for his modeling, and currently operates his YouTube channel rebelsatcloudnine, where he showcases model builds and product demonstrations.