

Truck Cab Decal
This is the seventh part of the AMT Kenworth Aerodyne Cabover Tractor Truck 1/25 Scale 1463
Before moving on and working on the exterior of the body, I needed to first paint the interior. This was painted in 2 sections. The first section was more Mr Color C19 Sandy Brown.
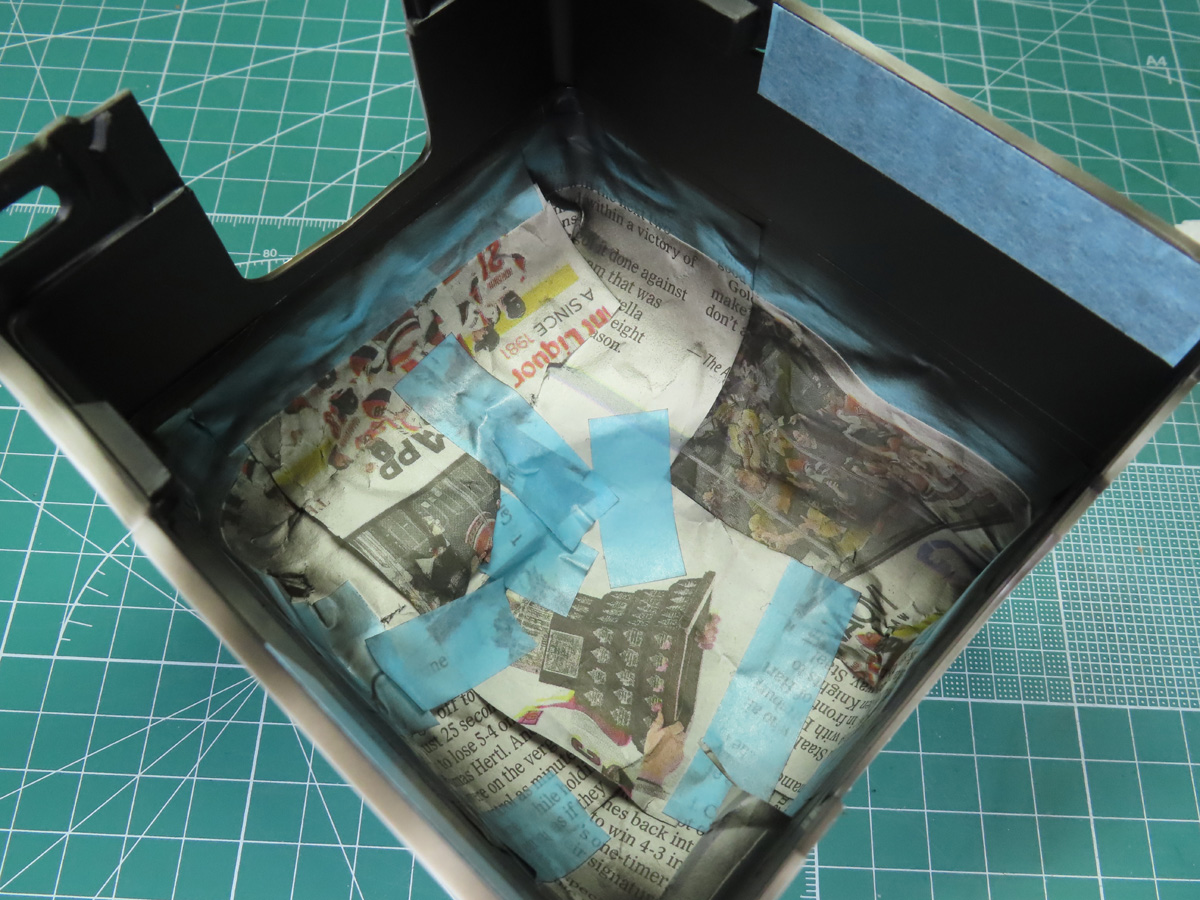
This was masked off at the middle, and the rest was painted with Tamiya LP-5 Semi Gloss Black to match the underside.
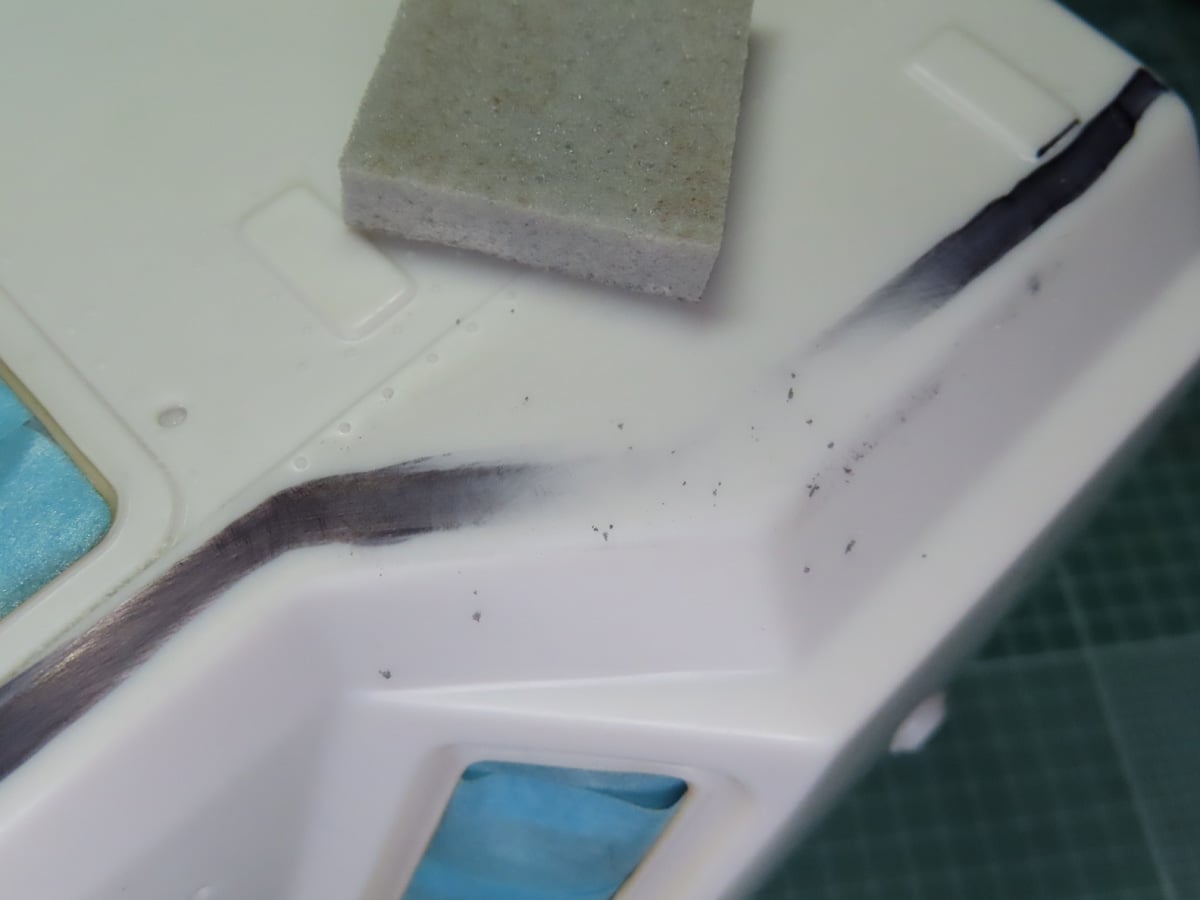
Now that the interior is completed, I can turn my attention to the few seam lines running along the body. I sanded these down with various grits of Tamiya Sanding Sponges, and carefully smoothed out the plastic to avoid any scratches.
To check that the seam lines were all gone, I took a wide Sharpie marker and drew it along the section where the seam lines were. This would allow me to see if the seams were all gone; it would reveal any larger scratches that were left behind. I used some Tamiya 600 grit Sanding Sponge 87148 to sand away the marker.
Using a marker on seams is an older trick, but it is still one that works really well. And it doesn’t take up a lot of time or primer.
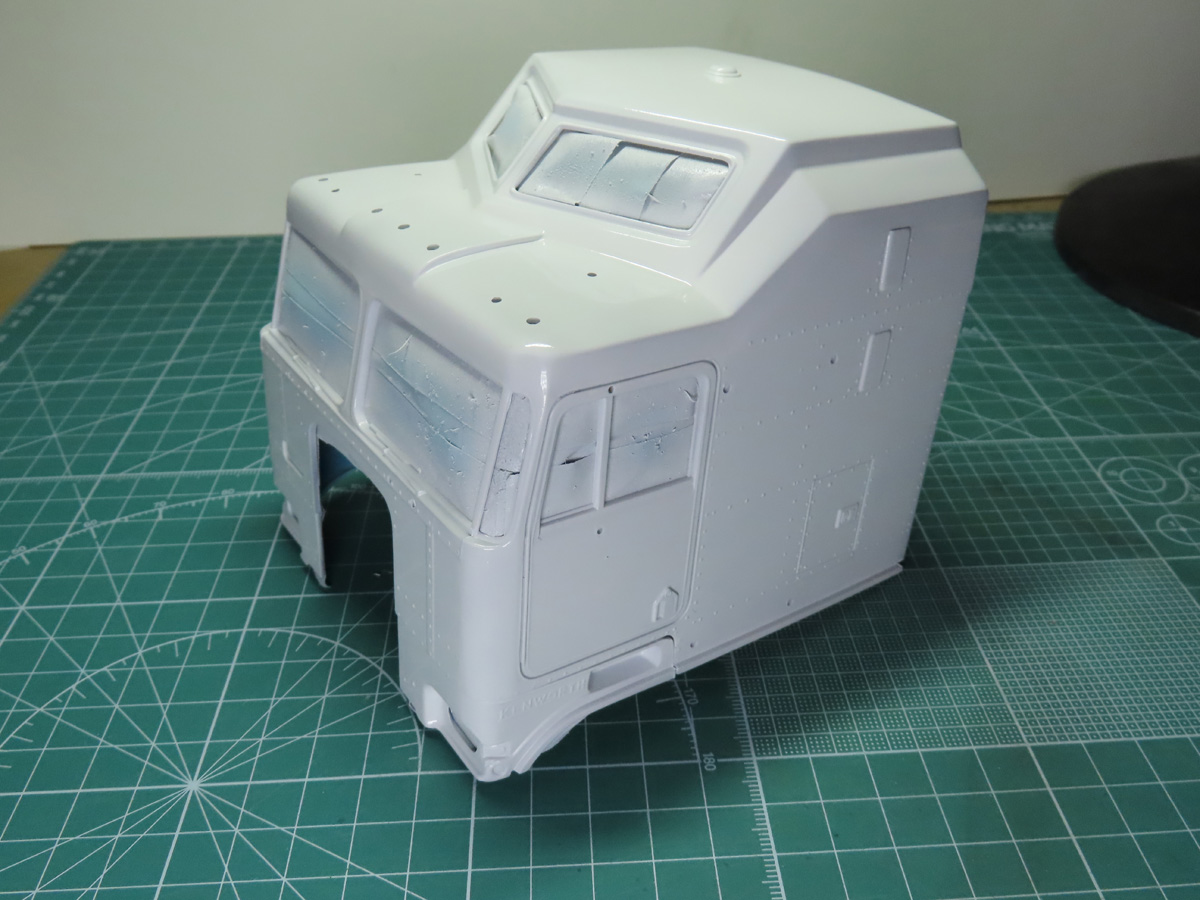
I primed the body with Tamiya Liquid Surface Primer 87075, and once it had dried, I inspected the model only to find that I had missed some seam lines near the windscreen. These were quickly sanded smooth, and I decided it was ready to paint.
I studied quite a few trucks for ideas on how I was going to paint this project. I really liked how many trucks were custom to the drivers or the corporations. So I decided to invent my own scheme with a Canadian motif.
I started by painting a base coat of Tamiya LP-2 Gloss White over the entire model. This paint was a bit tricky to get the proper thinner ratio. I found the paint to be quite thin already, so I only added a bit of Mr Levelling Thinner T108 to the mix, at about a 4-1 ratio.
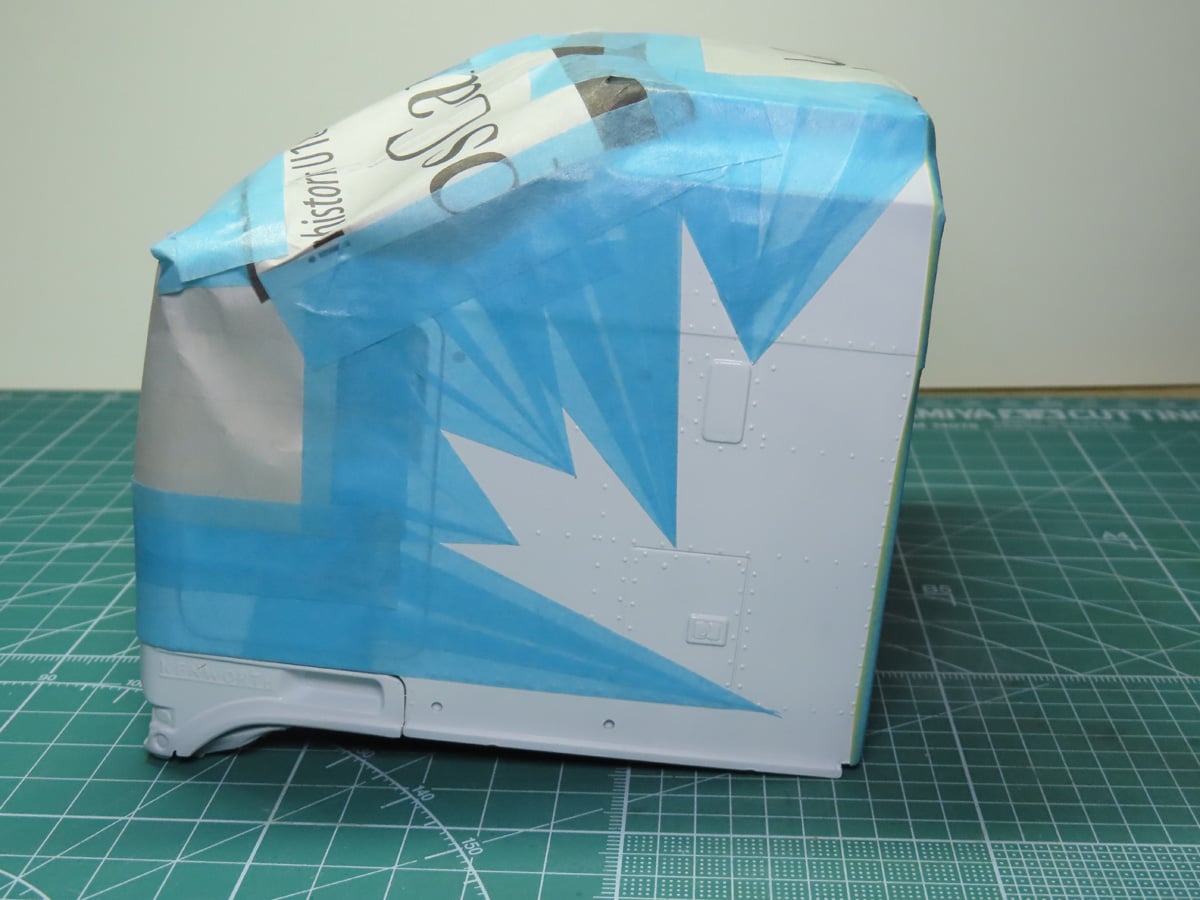
I decided to put a large maple leaf slightly askew on the back half, with a line running around the bottom half that would wrap around the front. The maple leaf is stylized a bit, and it took some trial and error to get the correct shapes, which I made more difficult for myself by having it crooked.
But with some patience and careful cutting, I was able to mask it off, and I think it looks pretty good. I also masked off the rest of the body with newspaper, as I didn’t want to have to worry about any over spray. Better safe than sorry, especially when dealing with white.
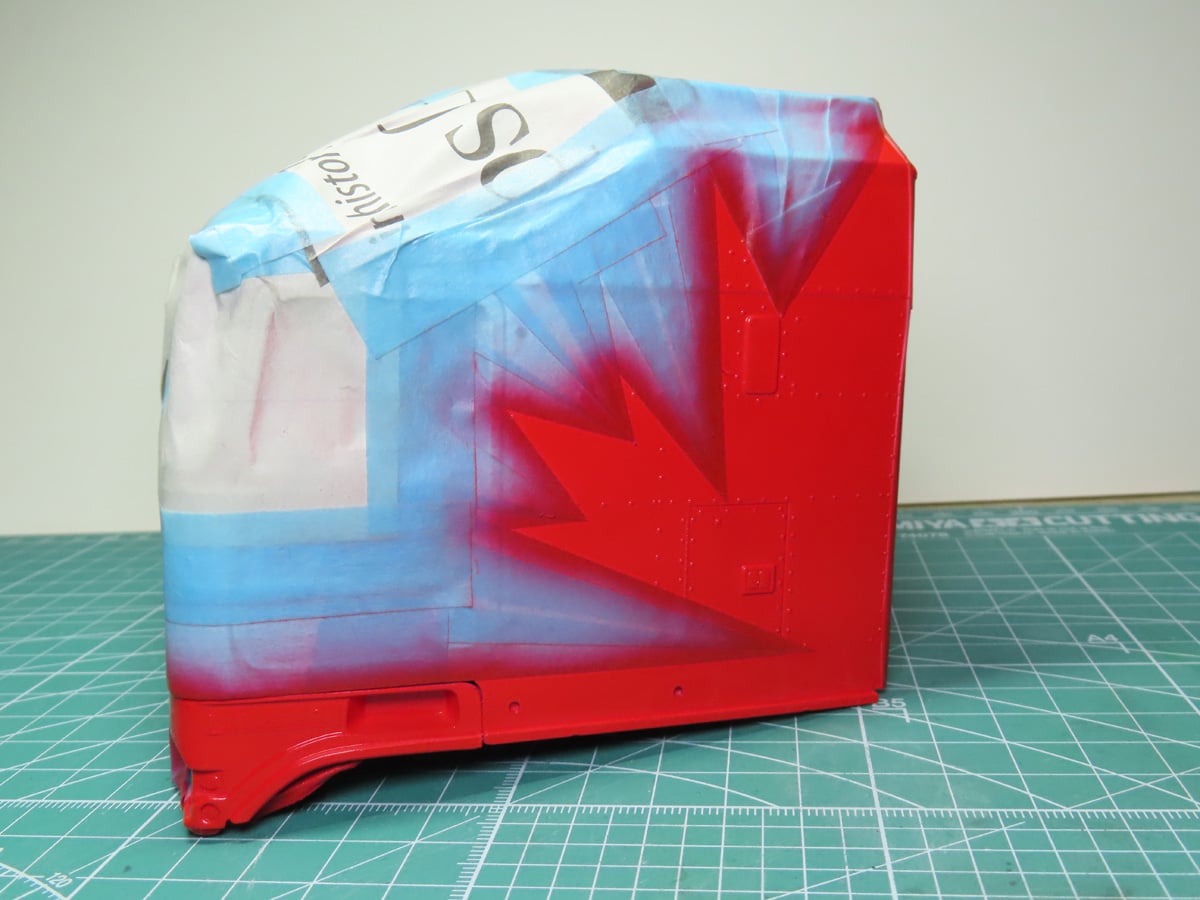
I painted the leaf with Tamiya LP-7 Pure Red to match the rest of the truck.
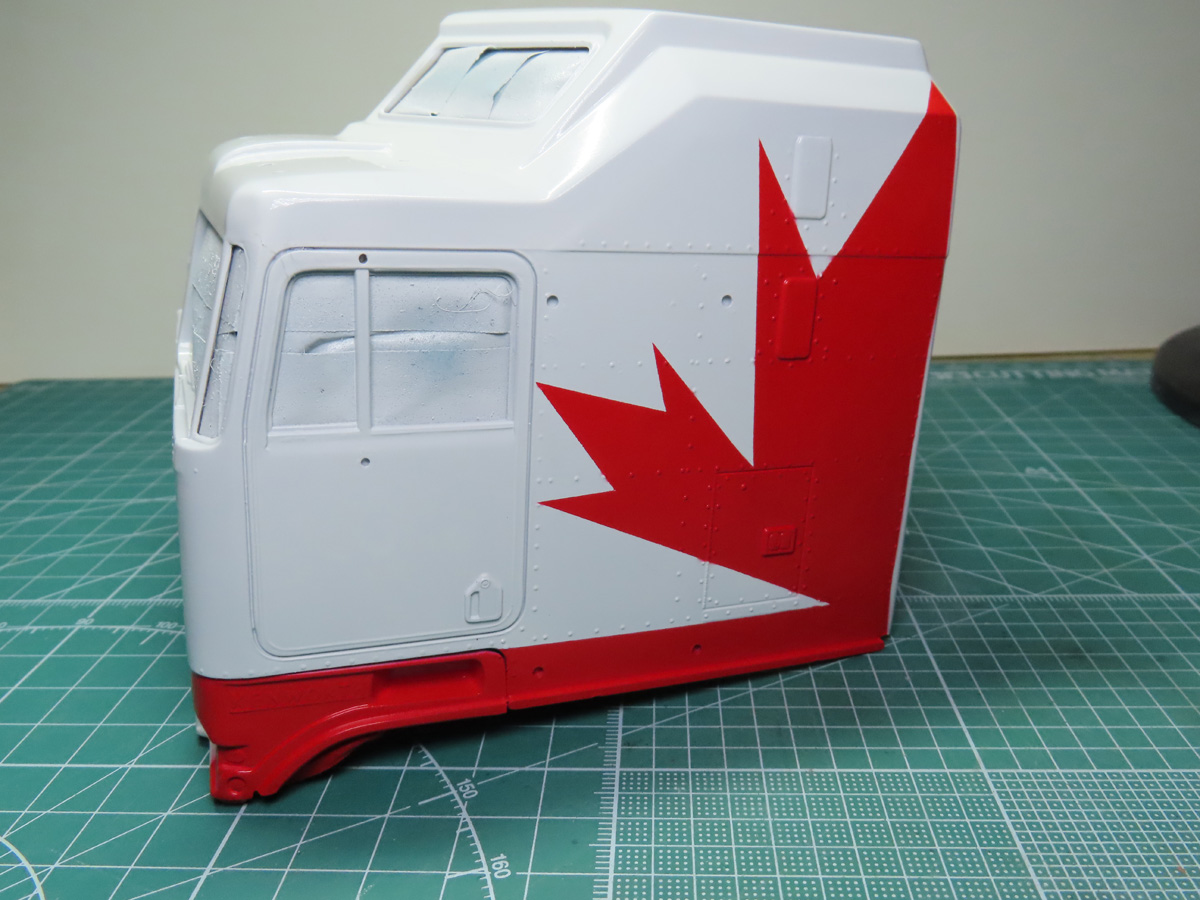
The masking was removed, and for the most part, the tape held up really well. There were a few sections where bleeding occurred, but I had anticipated this due to the raised sections and the rivets. Despite this, I think it looks really great, and I’m very pleased with the results.
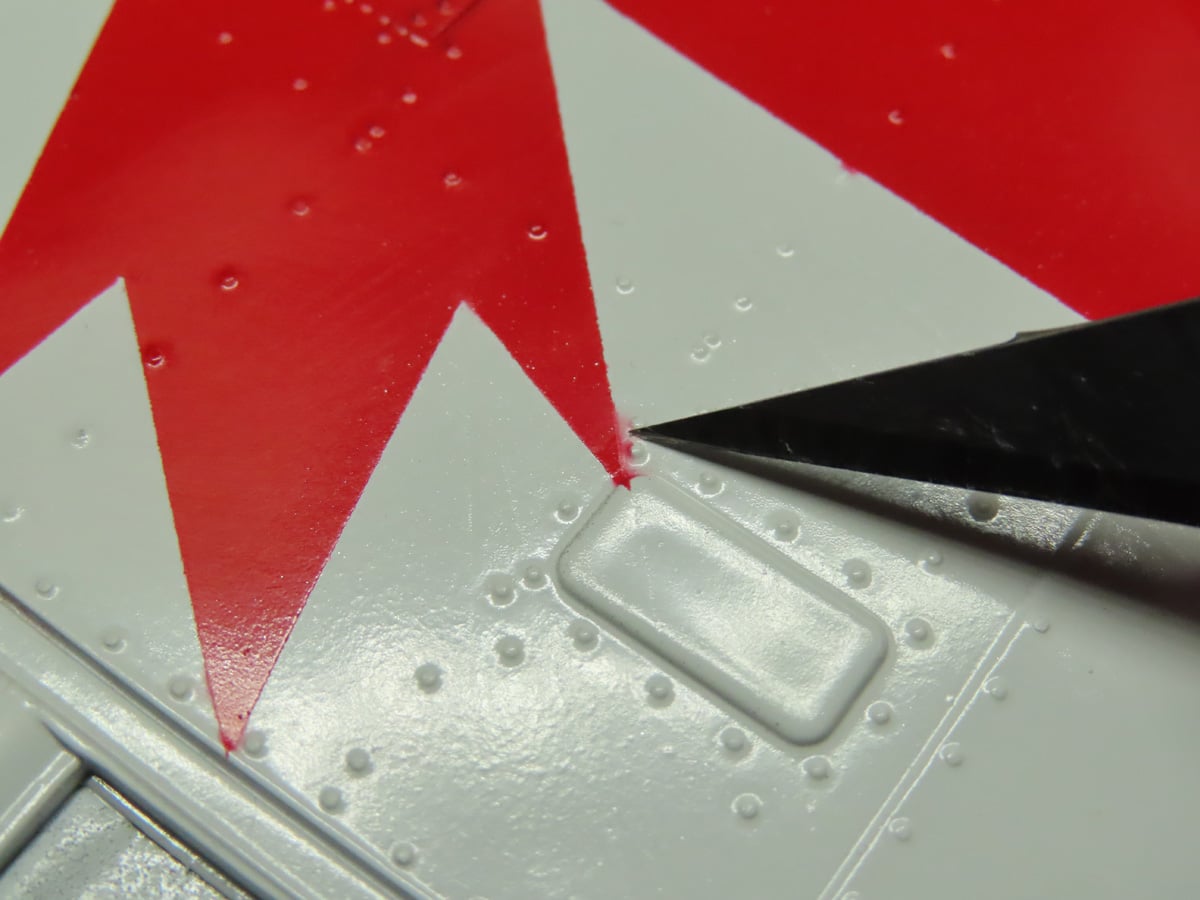
Some of the bleeding was very easy to remove. I used my hobby knife and carefully and gently scraped the red paint from off the white. This is easier to do when you are working with Lacquer based paints.
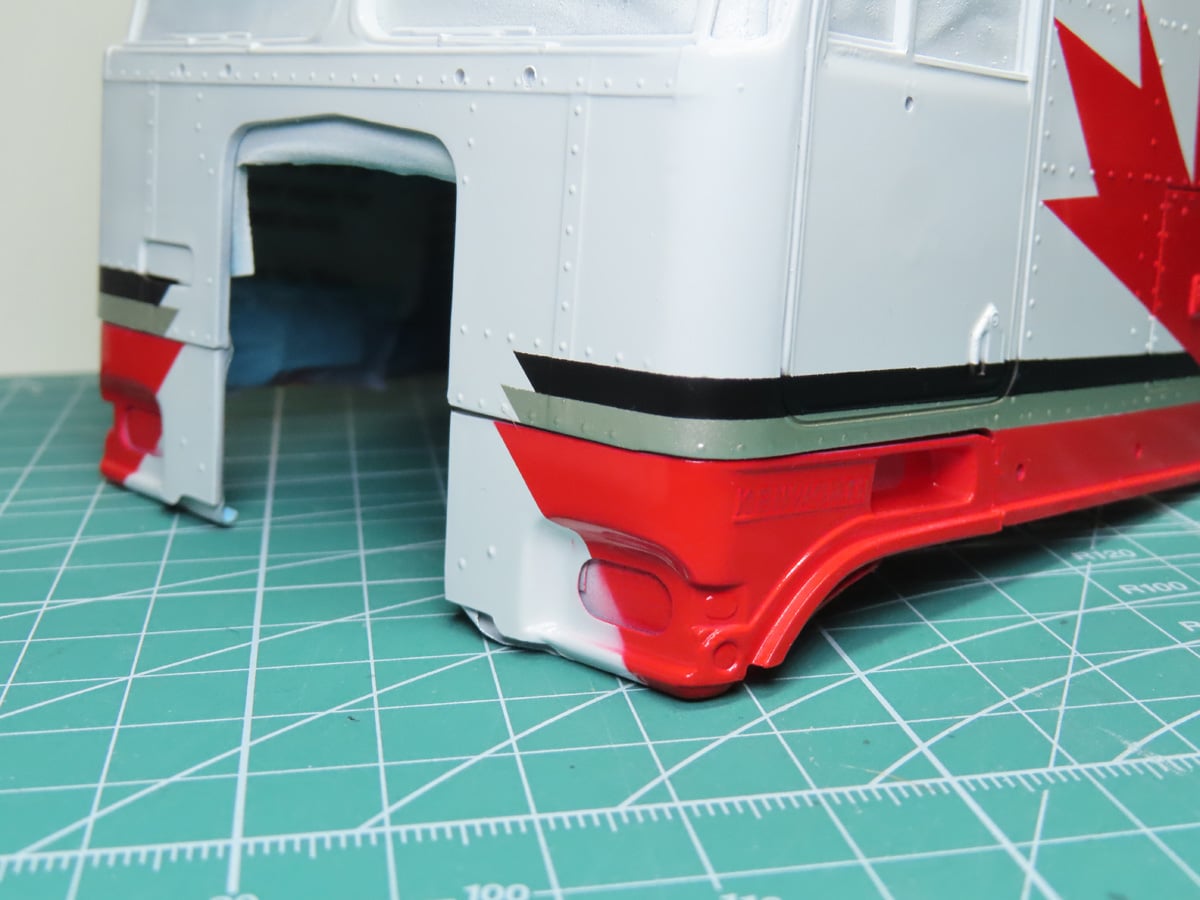
With the touch-ups completed, I masked off extra stripes that would run along the body. The middle section was painted with Tamiya LP-71 Champagne Gold, and the top with Tamiya LP-5 Semi-gloss Black. I think these stripes add a bit of extra color to the model without being too flashy or distracting.
I had thought about and even drew up a few more designs with extra striping. These designs had a focus on the top of the truck as well as on the back. But I just wasn’t too thrilled with any of them, and I decided that the truck looked a lot better with them off, so this is as far as I’m going to go with painting the exterior.
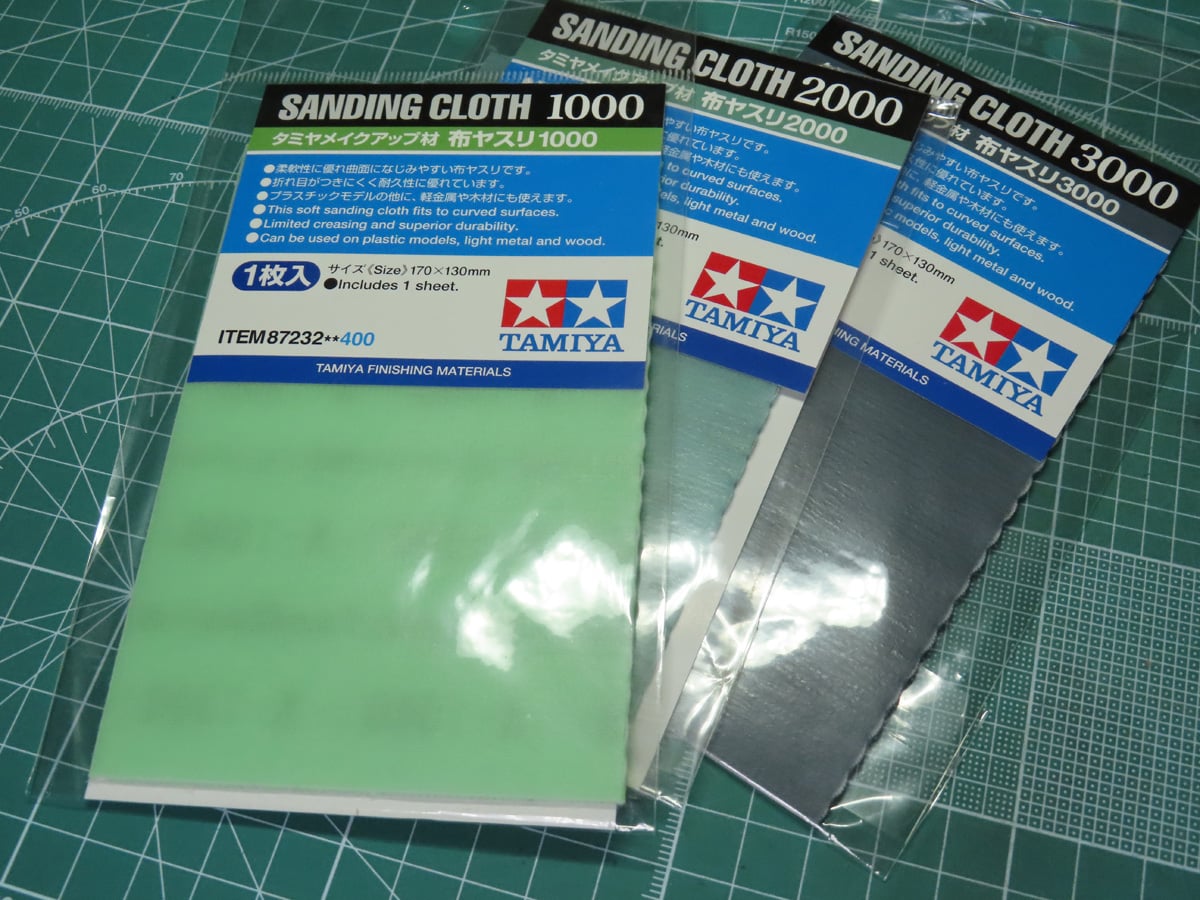
I decided to purchase and try out the new Tamiya Sanding Cloths. These haven’t been out for too long now, and they come in 600, 1000, 1500, 2000, and 3000 grits. I wanted to see what they were like and if they were a good investment for use on future car projects.
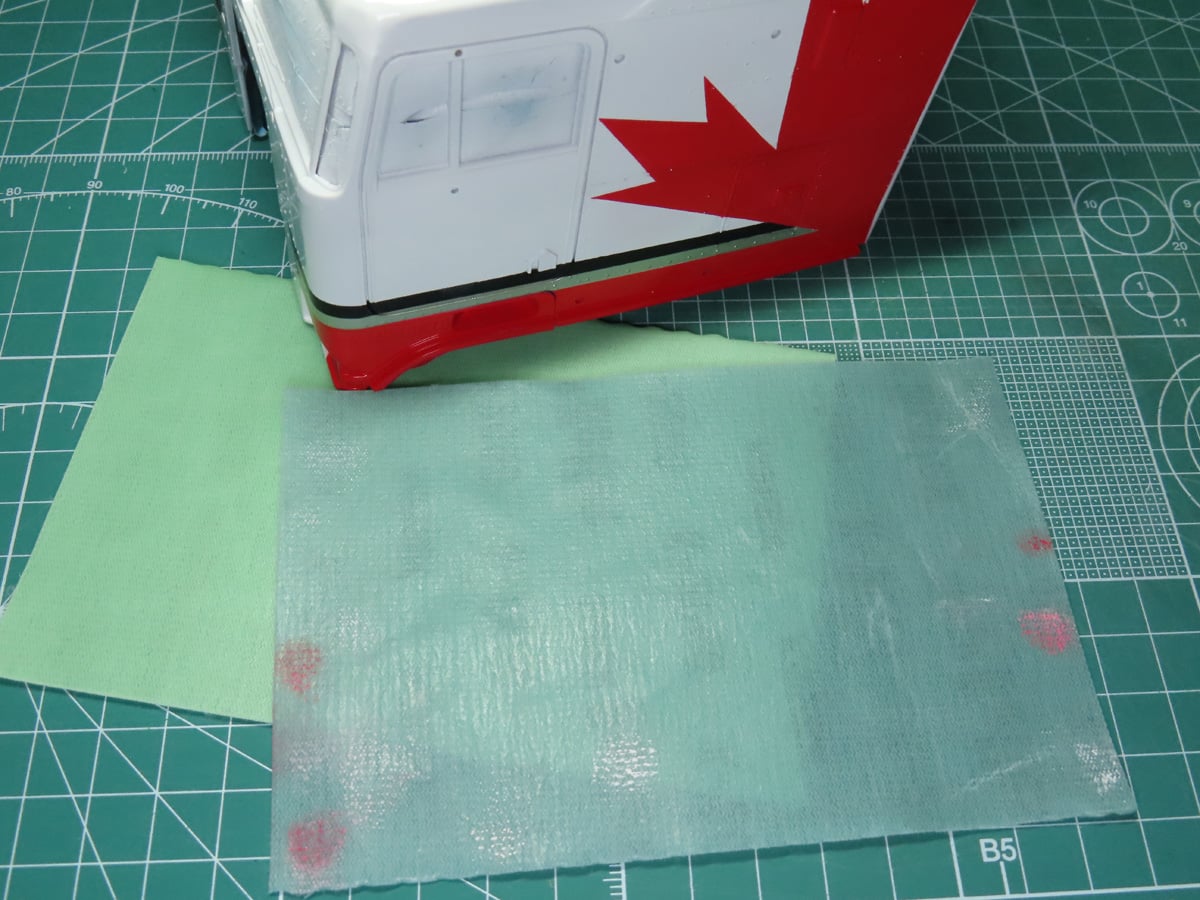
I first used the 1000 grit 87232, but I found it to be a bit too aggressive for the paint, so I switched and used the 2000 grit 87234. This grit worked wonderfully, and I was really impressed with how flexible the sanding cloth was. I dry sanded this, and this was done intentionally so that I wouldn’t have any red particles flow over and dye the white sections pink.
However, on the white sections, I wetted the cloth, and this made sanding a lot easier. I expected this to be a one time use product, but as long as you aren’t abusive with the cloth, I can see these lasting a very long time. They are very durable, and I was pleased by how much easier they made sanding.
I think I’m going to invest in the 600 and 1500 grits. The 600 and the 1000 won’t be the best for smoothing out paint, but they will be very useful at sanding down and smoothing out plastic. This will be especially useful when prepping car bodies for priming.
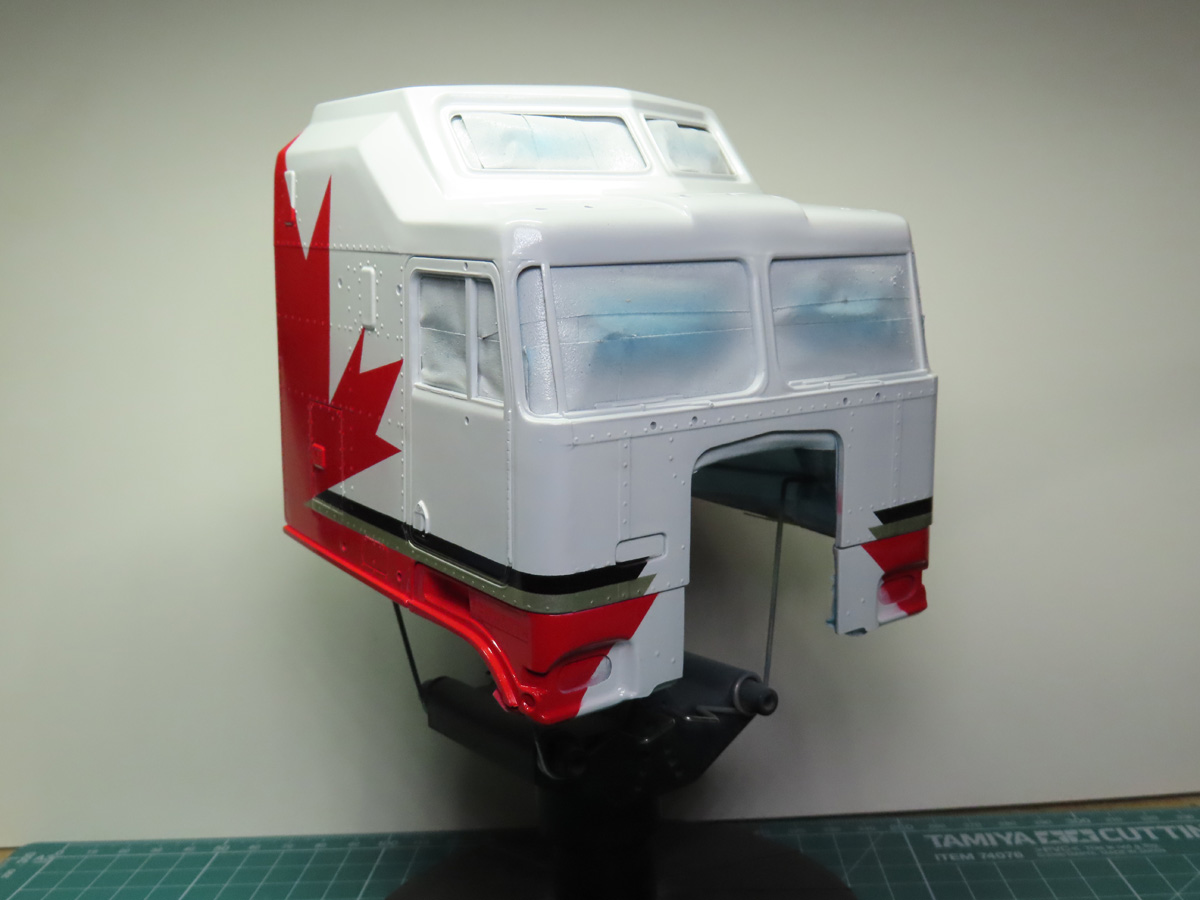
With the sanding completed, I had to go back with a thin, pointed brush and touch up some of the raised rivets with red paint. I left the body alone to dry and harden again, as sanding can reactivate the paint.
I mounted the body onto my Tamiya Painting Stand 74522, which made things a lot easier to hold and paint. Now that the paint was prepped, I was ready to add on a gloss coat and seal everything together.
I used Mr Color GX 100 Super Clear III. This was thinned about 50-50 with Mr Leveling Thinner T108, and sprayed over the entire body.
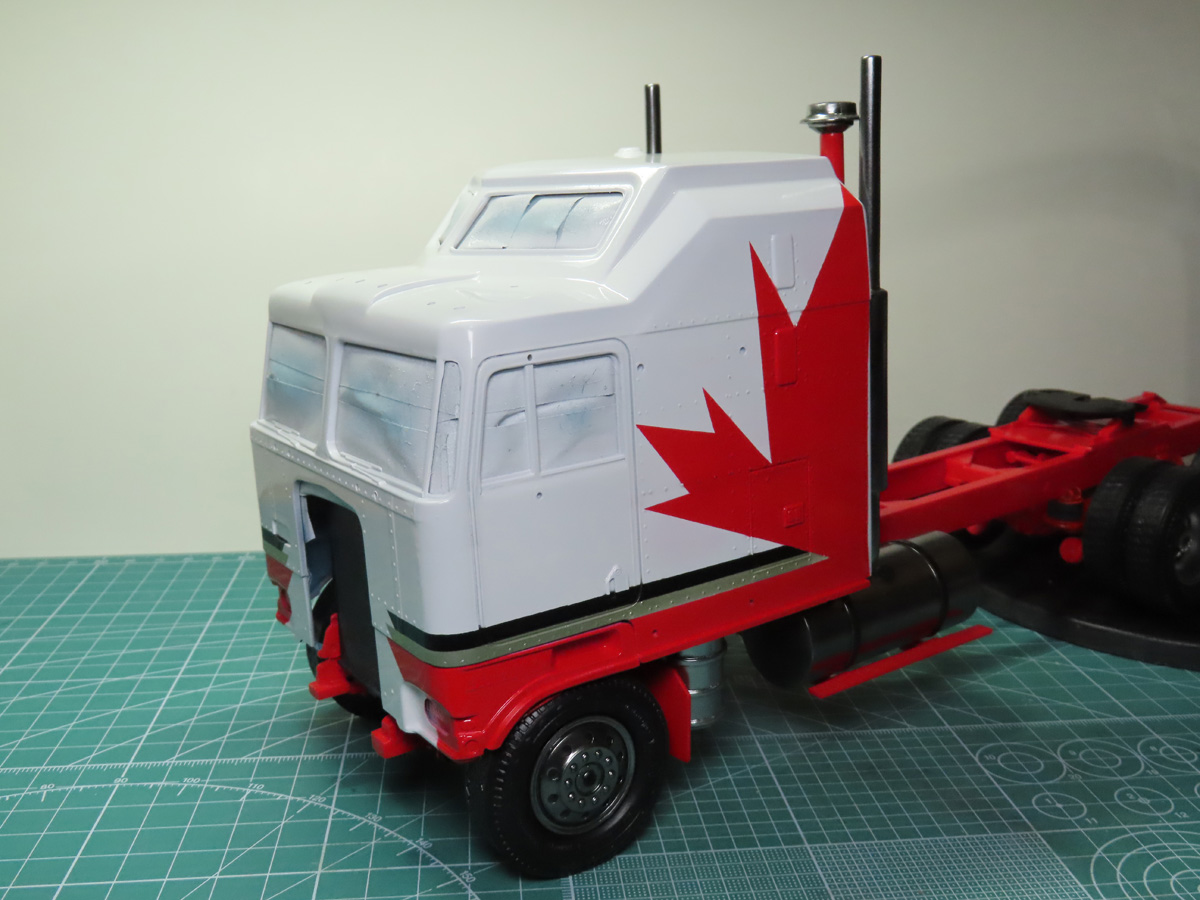
With the gloss coat added, I’m going to leave the body alone for about a week. This will allow the gloss and the paints to properly harden and gas out. This will make it easier when I give the clear a final polish.
I’m really liking the look of this, and as difficult as it was to mask that leaf, it was worth the effort. I’m also glad that I didn’t add more striping to the model. I think that this is enough, and any more would have made things too busy.
While I leave the body alone to dry, I’m going to finish the rest of the external details. Most of these pieces are going to be chrome, and once that’s done, I’ll just have to assemble the rest of the cab and fit it to the chassis.
Looks like this truck is nearing completion!
To be continued…
About the Author:
Jared Demes is a modeler from southern Alberta. He has been building models since he was 4 years old when his Dad first introduced him to the hobby. He has written for several magazines including, Fine Scale Modeler, Scale Aircraft Modeling, Phoenix Scale Models, and others. He has an interest in all modeling subjects, with a focus on WWII Japanese aircraft and Science Fiction.
Jared has won several IPMS awards for his modeling, and currently operates his YouTube channel rebelsatcloudnine, where he showcases model builds and product demonstrations.