
Fixing High Gloss Finish
This is the tenth part of the Revell 1969 Camaro Z/28 3in1 1/12 Scale 85-2812.
I had quite the setback this week, and unfortunately, it required me to be back and fix the body of the Camaro. In Part 8, I was quite thrilled with the results of the Super Gloss Finish 1K by AK Interactive. I had left the body alone for a week to dry and harden, which would make it safer to handle without leaving any marks.

However, when I went to paint on the chrome trim around the windows last week, I ran into an issue, and I noticed that this gloss wasn’t working the way I thought it would.
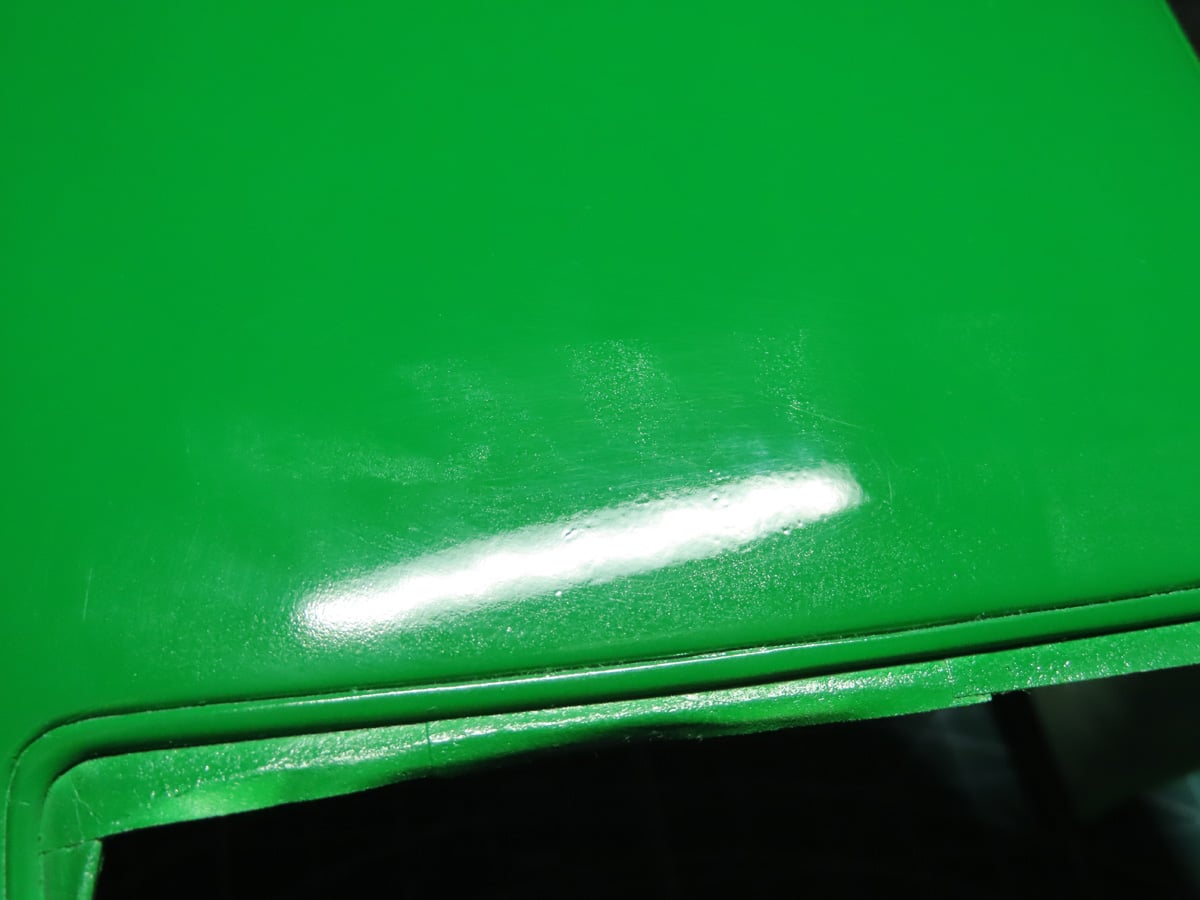
I placed tape down around the edge of the trim, and I decided to tape some paper towels around this area so that any over spray from the chrome wouldn’t fall onto the green. When I lifted the tape to reposition it, I discovered that the tape had left an impression on the car.
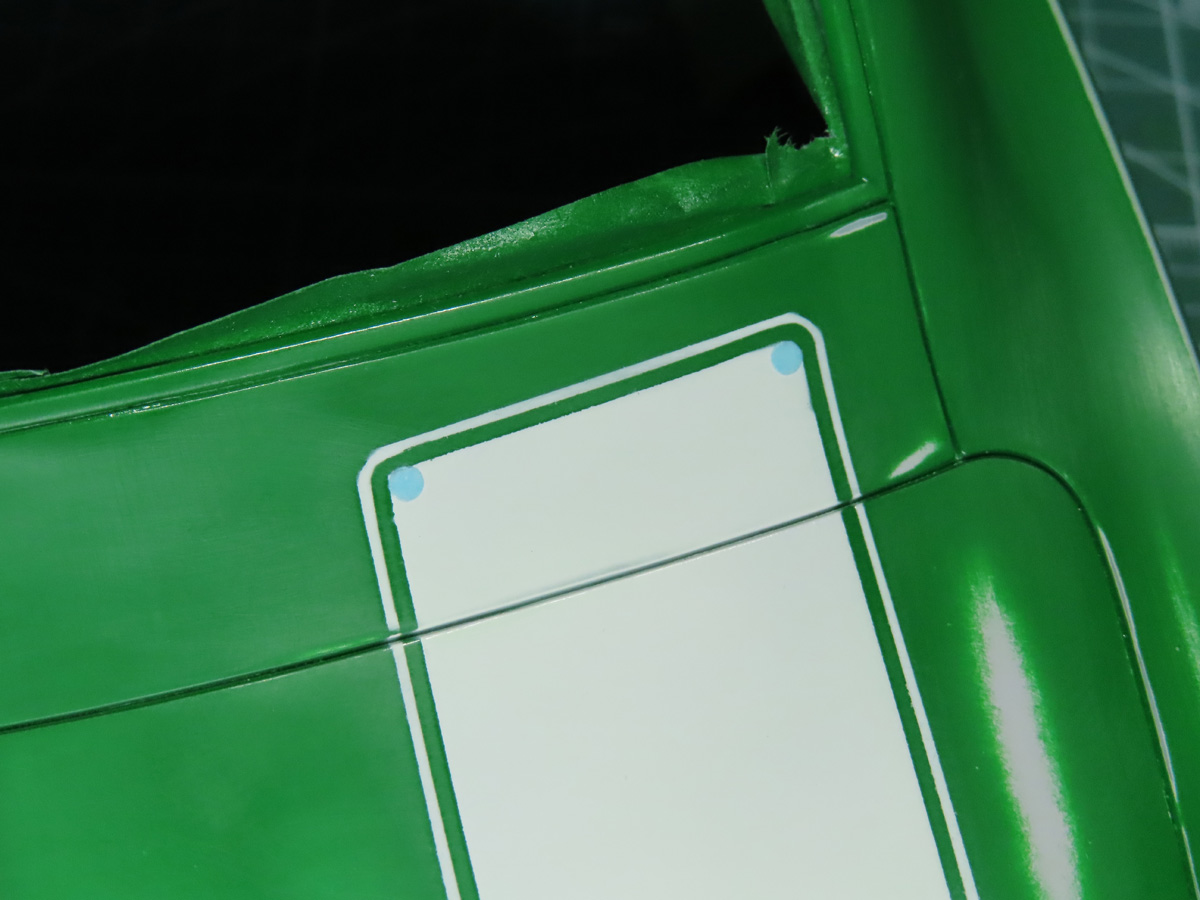
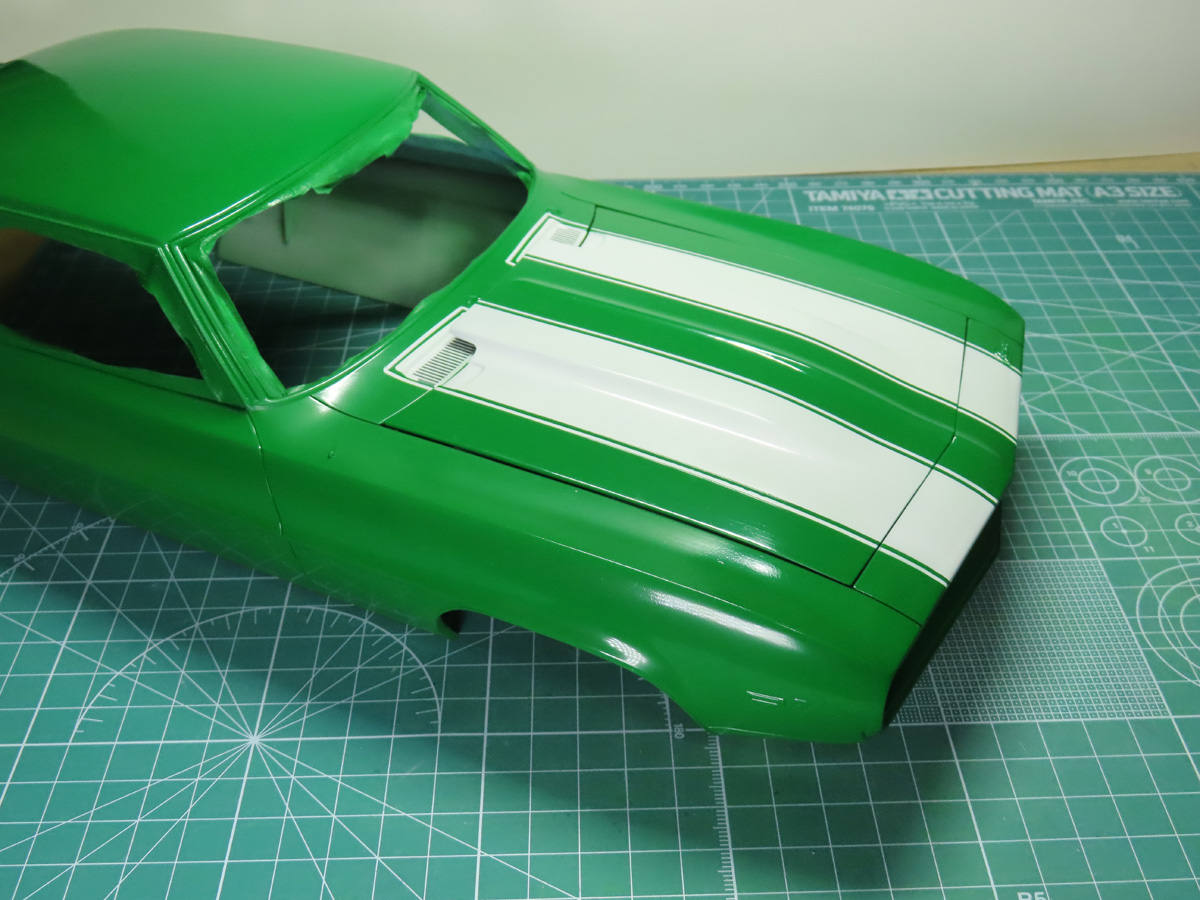
It’s difficult to see in this picture, but in person the impression is easily visible. This is called ghosting, and it can come from the gloss not curing and hardening all the way. Gases in the clear get trapped under the tape, and it causes a reaction.
I’ve had this happen with Acrylics before, like Tamiya X-22 Clear (I sprayed it on way too thick), but I thought that this Super Gloss was a very tough Lacquer and that it would be safe from ghosting.
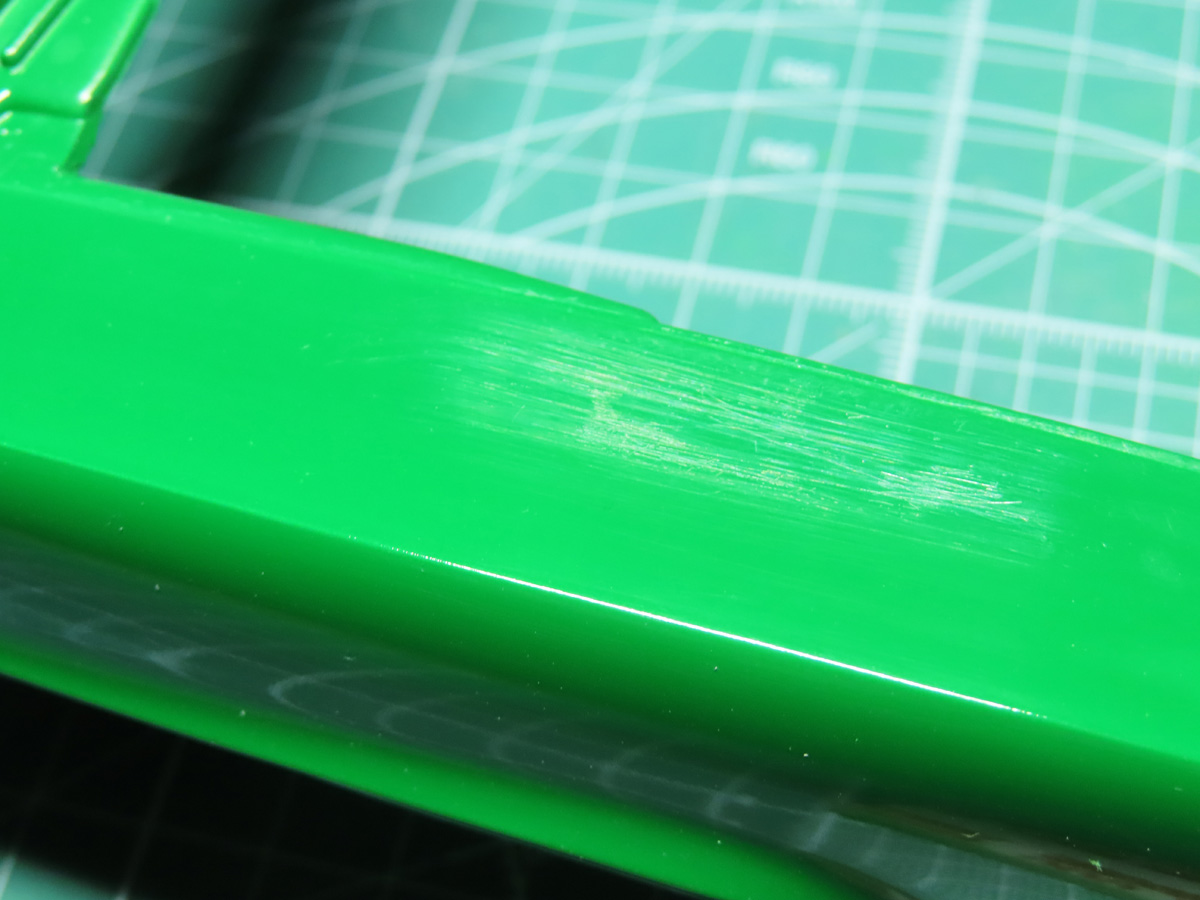
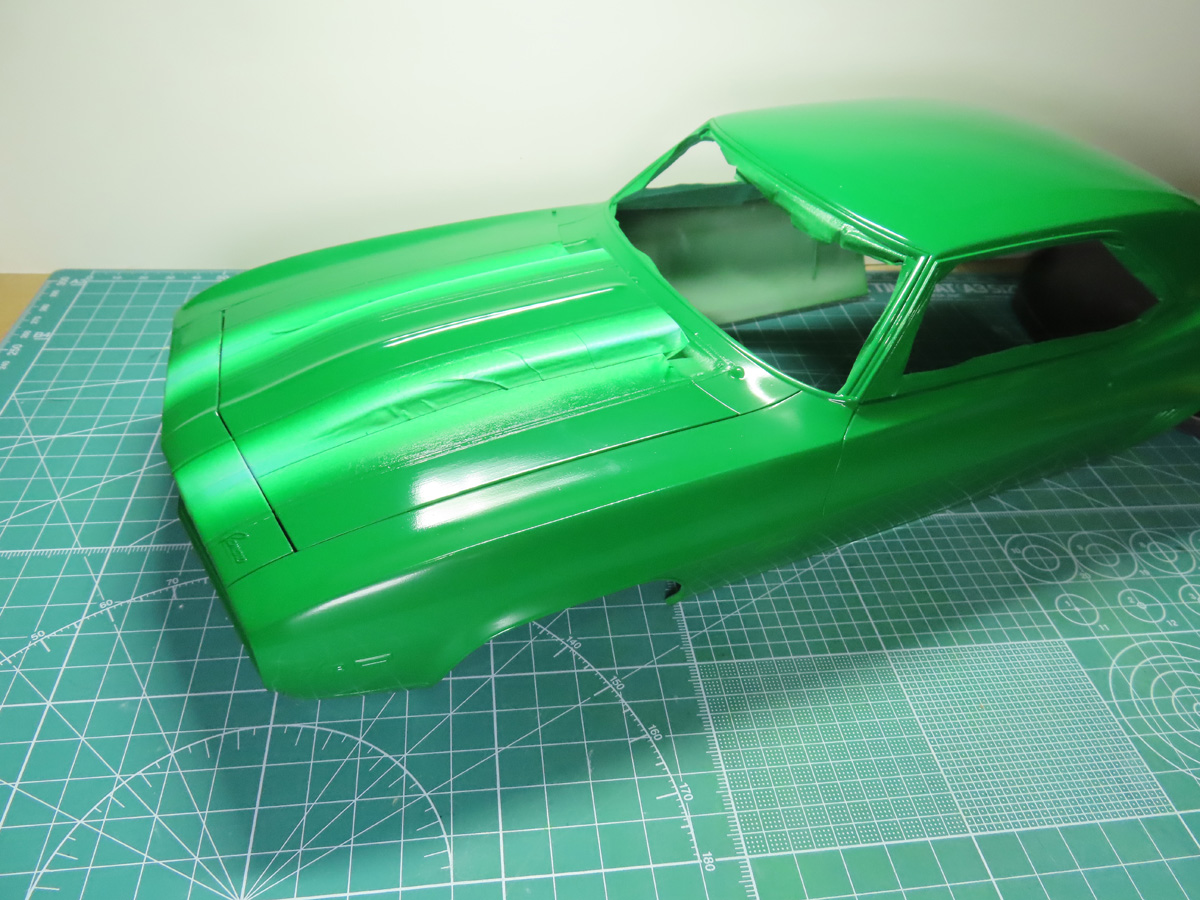
As I inspected the rest of the car, I noticed that there were more imperfections that had come up as the body was drying. On the front of the car, you can see what looks like fine scratches running down the length of the car. It almost looked like I took 400-grit sandpaper and ran it along the car.
These scratches were all over the place, as well, and I had some orange peeling that had developed.
This is very frustrating after all the work that had gone into this project. I was feeling quite defeated, and I needed to come up with a plan to restore the car.
I could strip the body down completely and re-prime and repaint everything. This would take a bit of time to do, as the body is quite big. And I wasn’t looking forward to the idea of repainting the white racing stripes, as I put a lot of effort into getting them in the correct position and properly aligned.
I decided that I would sand off the Super Gloss and get it back down to the Bright Green. This would be a slow process, but it would save me time starting all over again.
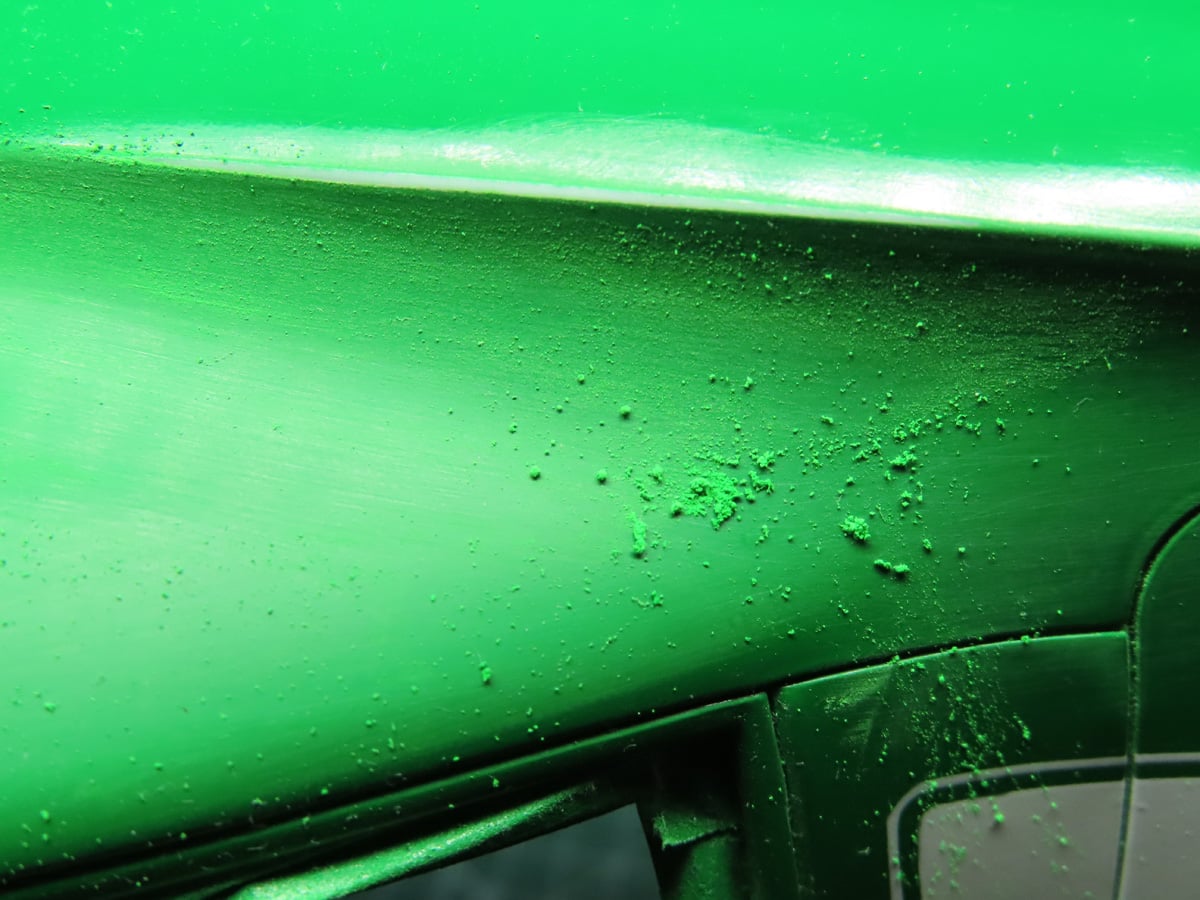
I used some Tamiya 600 Grit Sanding Sponge, as this was just abrasive enough to remove the Super Gloss and not leave deep scratches in the paint. If you look closely at the picture, you can see these tiny balls mixed in the dust. This is the Super Gloss. As I sanded away, I realized how tacky this clear was; with the heat from sanding, these small balls were formed.
As I sanded, the Super Gloss would make a loud and slightly irritating squeaking noise. However, once this squeaking had stopped, that was usually the indication that I had sanded away the Super Gloss and was down to the Bright Green paint.
The car looks a far cry from its once polished reflective coating, but things are going to improve now. Parts of the Super Clear were more difficult to remove in some areas, and this caused some of the sanding to go through to the primer.
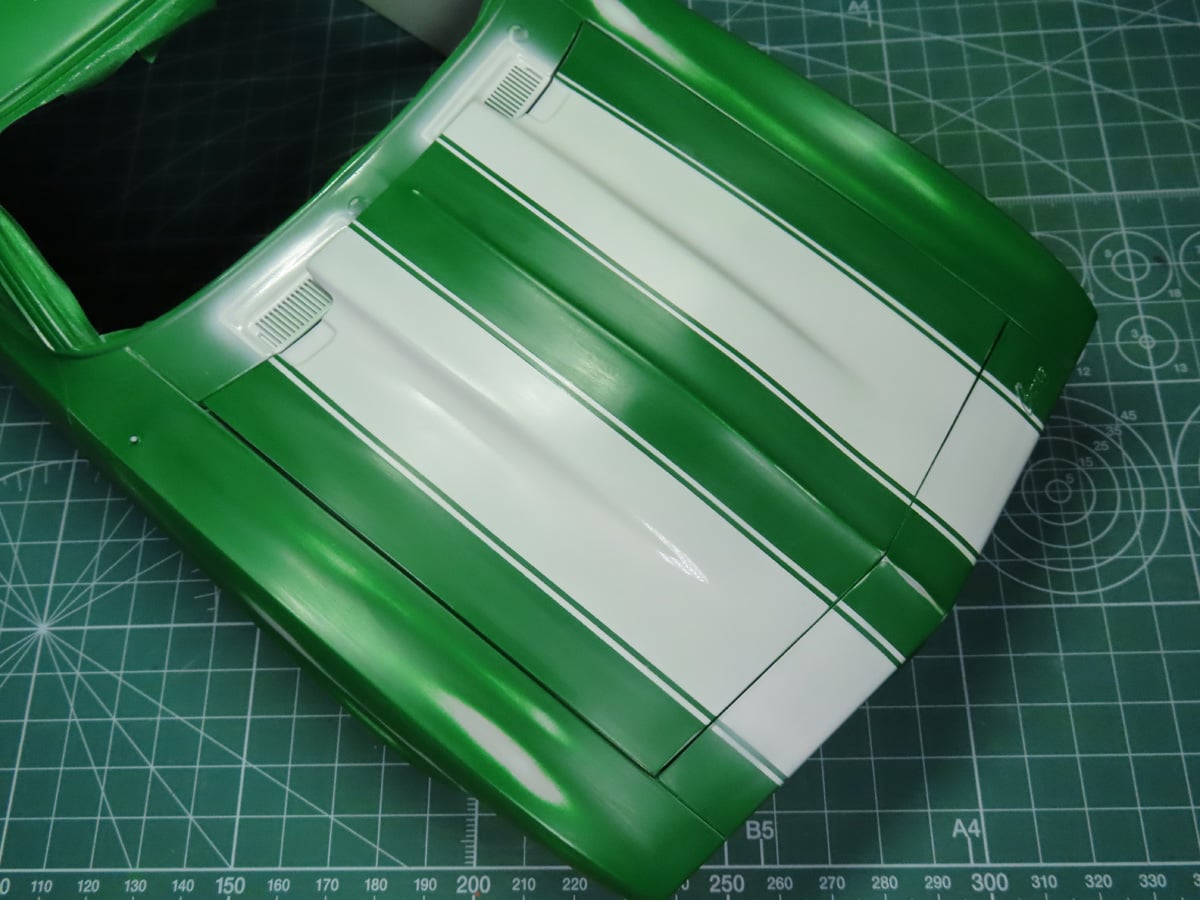
On the white racing stripes, I was very careful to remove the gloss, and for the most part, this worked really well. I did have to repaint a few sections with Mr. Color 02 White, but now the sanding is all done, and I can begin masking.
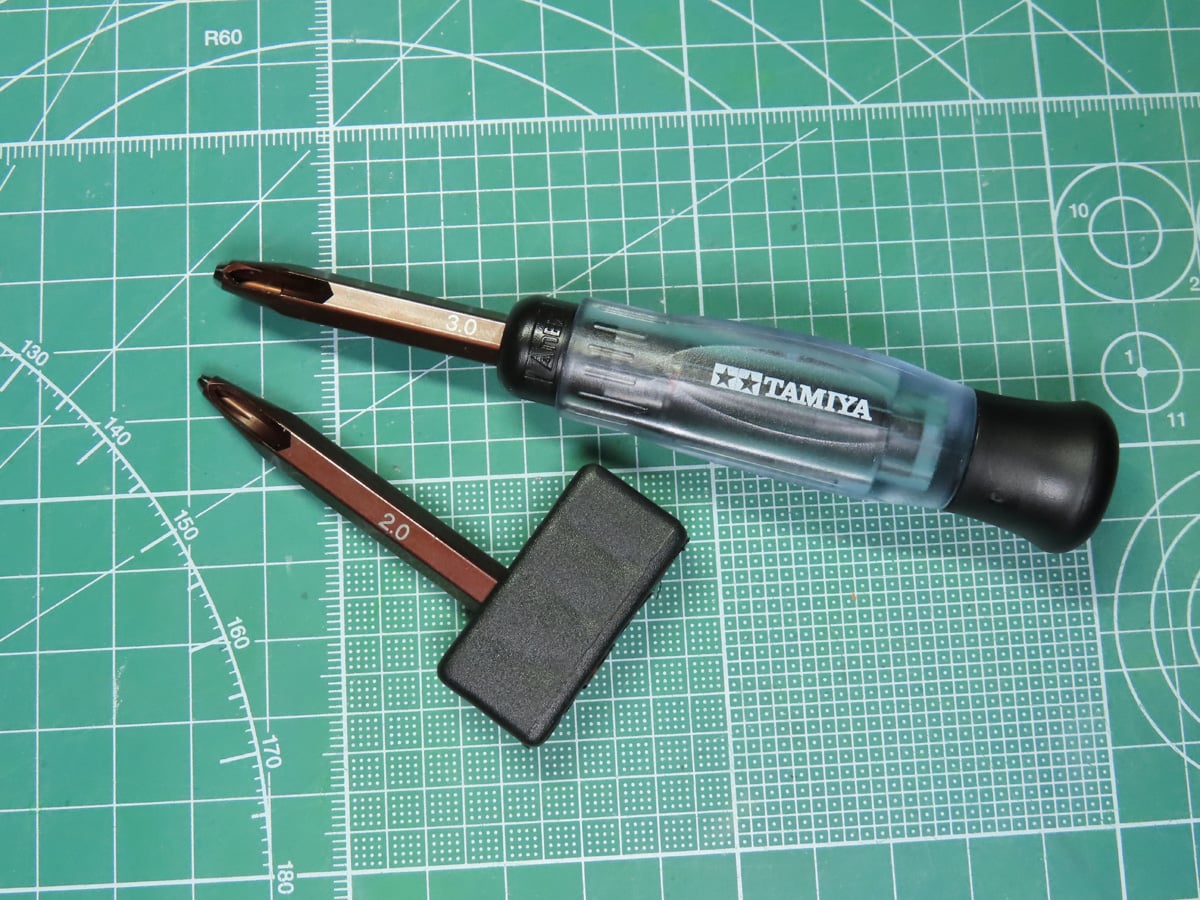
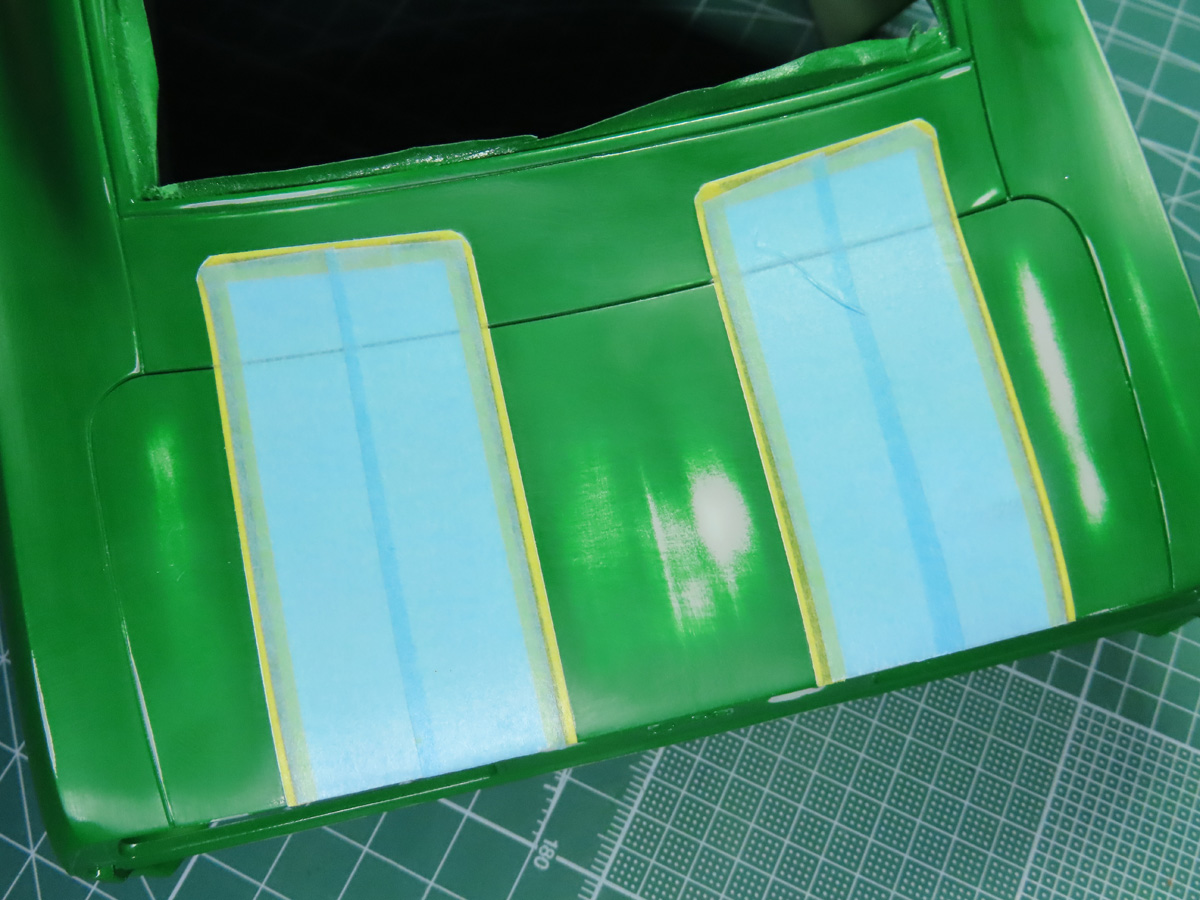
I round an easy way to mask the stripes was to cut curved sections of tape and place them in the corners. I used the Tamiya Modelers Punch 74122 with a 3mm and 2mm heads. This allowed me to quickly cut out some circles in my tape and place them onto the model.
With the circles placed in the top corners, I could now run Tamiya 3 mm tape 87208 along the edges. You might have seen this done with curved window frames on military aircraft.
With the racing stripes now masked off, I was ready to begin repainting. Before this project started, I purchased 6 bottles of Mr. Color 66 Bright Green. When I first painted the car, I thought I was being excessive, but now I’m glad I’ve got plenty to spare.
Just before I started painting, I wiped down the car body with a dampened cloth to remove any dust that might have still been on the car when it was sanded.
I thinned the Mr Color C66 Bright Green with Mr Levelling Thinner, about 35%. I wanted this first batch of paint to be a bit thicker, as it was intended to be sprayed over the exposed sections where I had sanded the most. This wasn’t a heavy coat, but it was intended to help blend all of the green together.
I gave the paint a good hour to dry, then sprayed on a lighter coat, unifying the paint. This second coat was a 50-50 mix, and it went on really smoothly. Again, I left the car to dry for another hour, and I repeated the 50-50 mix, and this was the final layer to give me a uniform and even Bright Green coating.
Lastly, I removed the maskings and the tape held well, and I had nothing bleed through onto the white.
I’m going to leave this for a few days, sand it down one last time, and then spray on a new gloss coat.
Setbacks like this with scale modeling can be really frustrating. You spend so much time working on a project, and one mishap can quickly derail any enthusiasm you might have had. It certainly happened to me when I removed that tape from around the window frame; I was cursing like a sailor that day.
I’m also disappointed with the Ak Interactive Super Gloss, and with these results, I don’t think I’ll ever use it again. The fact that it stays soft and never really hardens just makes it too risky for me to use on future projects. Which really saddens me, as I was initially very excited about this product.
I wish that I had gotten further with this post and had a gloss coat painted on by now. Unfortunately, I had a family emergency over the weekend, and that ended up costing me a lot of time. But that break did allow me to further think about this project, and what I wanted to do to recover it. I don’t like abandoning my models, though admittedly it does happen on occasion. When a situation like this occurs, I like to give myself a few days to cool down, and then plot out what I’m going to do to fix it. And you know what, I actually found myself having fun again.
To be continued…
About the Author:
Jared Demes is a modeler from southern Alberta. He has been building models since he was 4 years old when his Dad first introduced him to the hobby. He has written for several magazines including, Fine Scale Modeler, Scale Aircraft Modeling, Phoenix Scale Models, and others. He has an interest in all modeling subjects, with a focus on WWII Japanese aircraft and Science Fiction.
Jared has won several IPMS awards for his modeling, and currently operates his YouTube channel rebelsatcloudnine, where he showcases model builds and product demonstrations.