
Large 1/12 Scale Kit
This is the eighth part of the Revell 1969 Camaro Z/28 3in1 1/12 Scale 85-2812.
The hardest part of modeling for me is patience. I’ve struggled with that ever since I was a kid building my first model kit. I was so impatient that I never really got the wings on the plane properly. Then again, in hindsight, an Airfix 1/72 Scale HS 126 might not have been the best starter model.
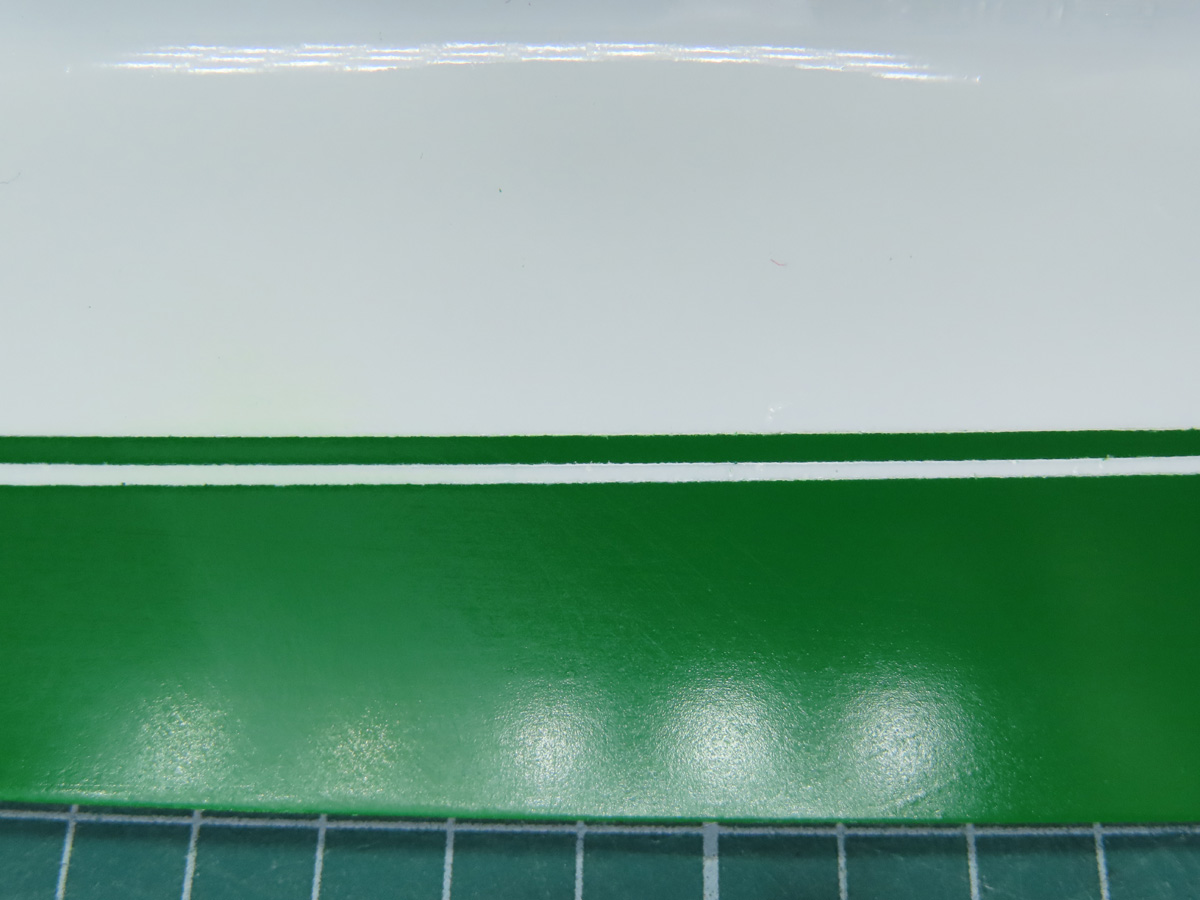
And it still applies today. You might recall in the previous post that I sprayed on a bit too much white, which resulted in higher and uneven paint. This would need to be sanded down and could easily be fixed, but first I’d have to wait and let the paint dry for a few days.
This will allow the paint to properly vent out and harden, making it easier for me to smooth out again.
This is one of the reasons why I used Lacquer paints for the car body, as lacquers are a very hard paint, and they can be sanded and polished much easier than many acrylics. I used some Tamiya 1500 Sanding Sponge 87150, and I carefully sanded the white sections in small circular motions.
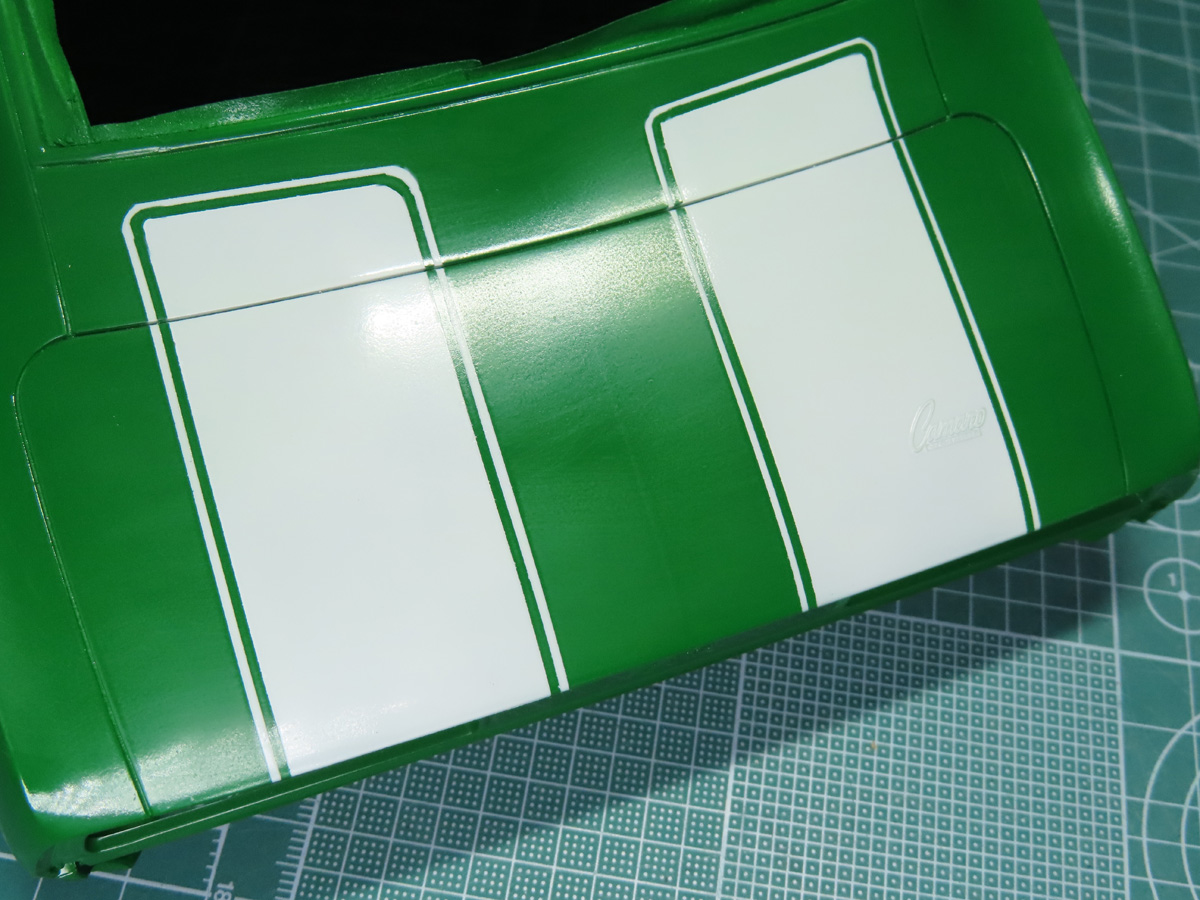
Here I’ve sanded and smoothed the white racing stripes on the back of the car, and you can faintly see that the green has a slight grey or foggy tint to it now that it’s been sanded. This isn’t anything to worry about at the moment, as it will be gone once a clear coat is added.
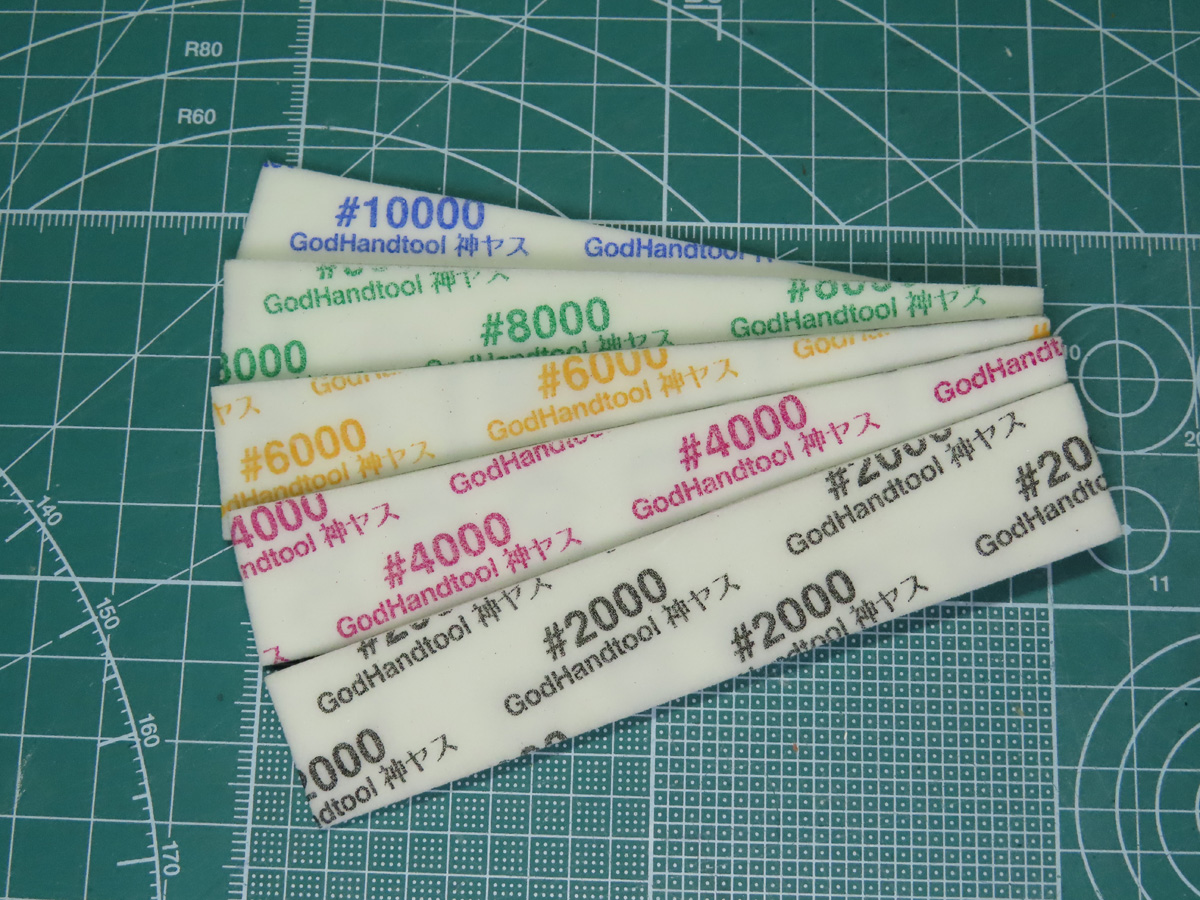
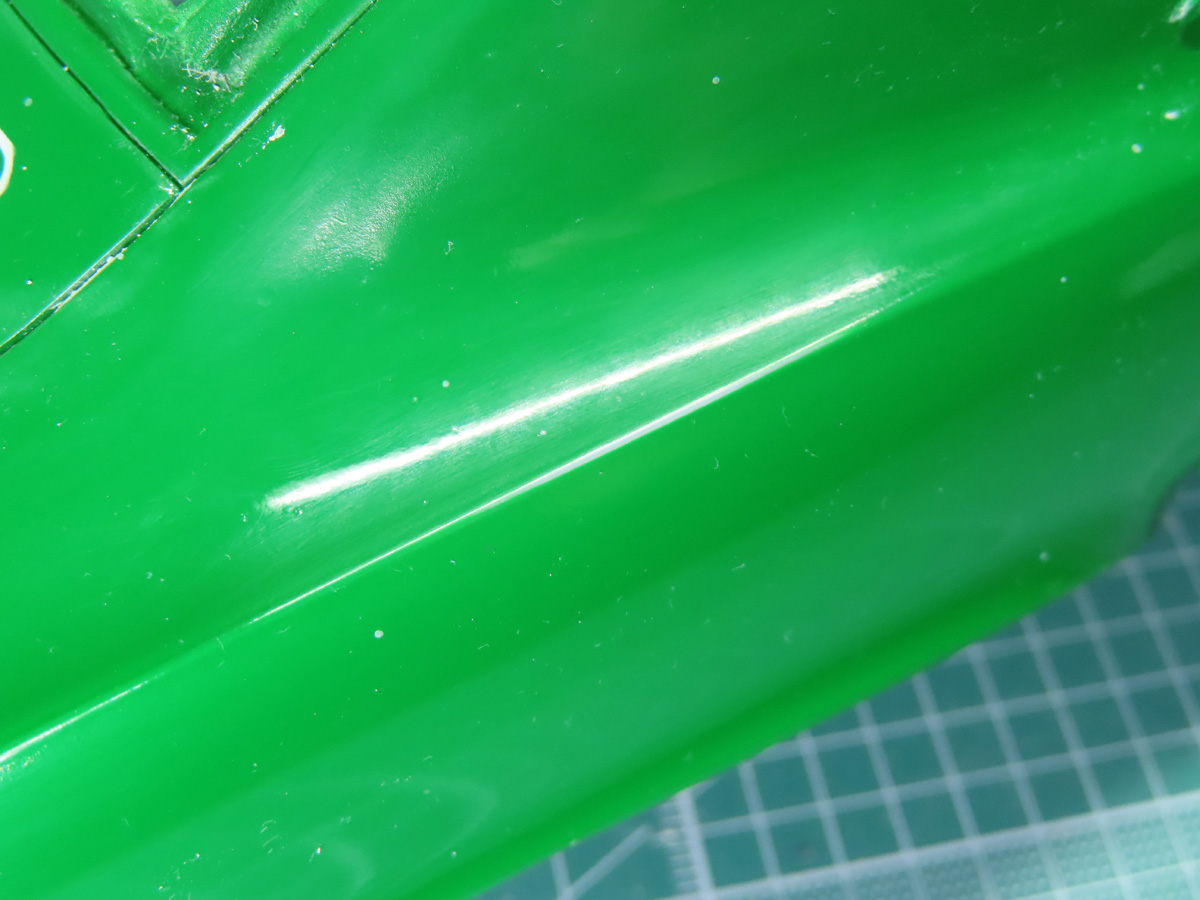
Before I add on the gloss coat, I want to take some time to sand down and polish the green, just to help smooth out the paint from blemishes.
I’m using a set of very fine abrasives from Godhand or Abrasifs Alpha, the lowest grit being 2000, and the highest 10,000. This grit feels like a piece of leather compared to the rest and will be used to polish the paint.
Working around the car section by section. I started with the 8000 grit, and I dipped the abrasive in water so that I could wet-sand the finish. Wet Sanding will help reduce friction on the paint and will make sanding easier.
As you can see, the 8000 grit has removed a small bit of the paint. Not near enough to need touch ups, but more than enough to create an even surface.
Once I was satisfied with the 8000 grit, I would wet sand the area with the 10,000 grit, and this would polish up any scratches that might have been caused by the previous grit and further smooth out the paint.
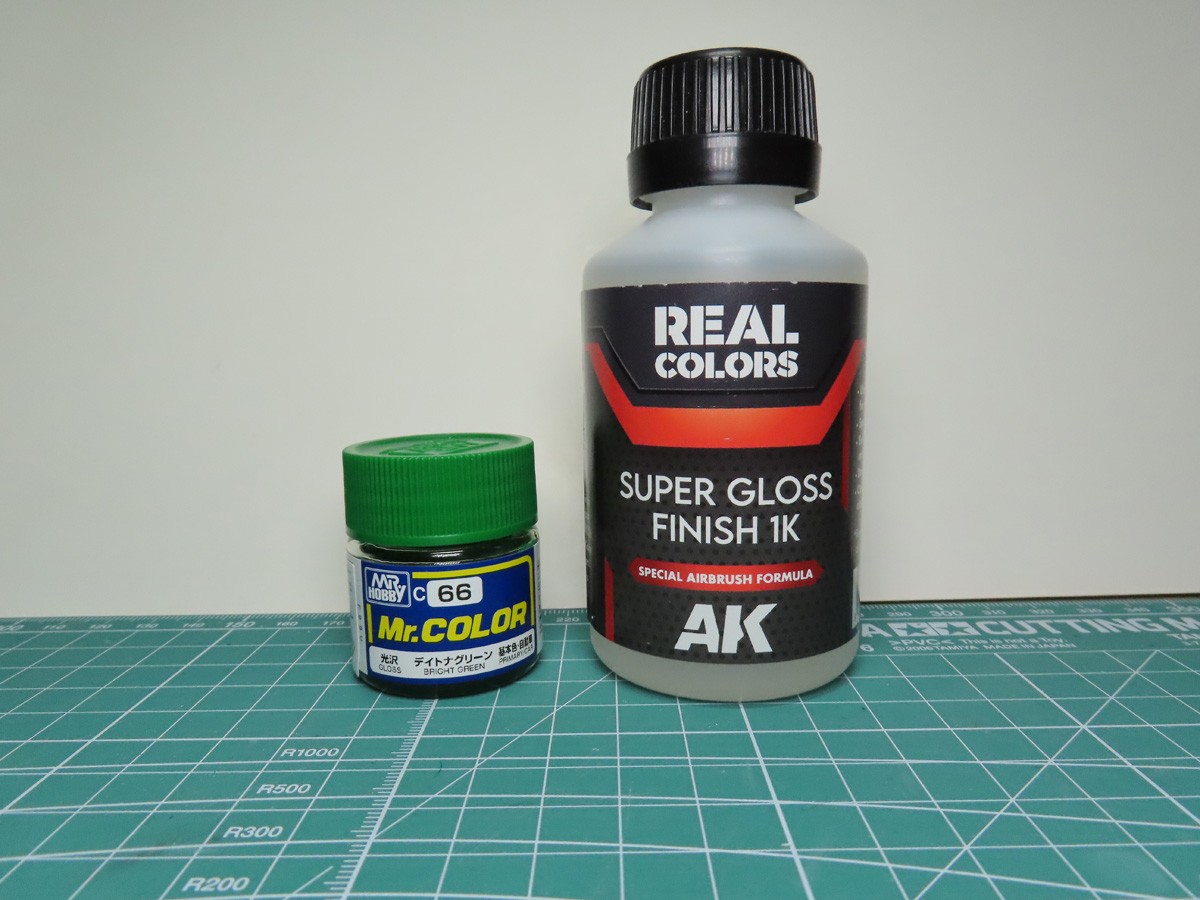
Before I started this project, I was looking for gloss coats, and I stumbled on Super Gloss Finish 1K from AK Interactive RC705. At first, I thought that there were other glosses and that 1K was the lowest of the set. But I was wrong, this is a standalone gloss, and something that I think is really unique.
Super Gloss 1K is a special lacquer gloss that is designed to replicate the gloss appearance of most cars. It’s airbrush-ready, so all you have to do is shake the bottle, pour it out and spray. It has self-leveling properties, and AK states that it’s perfectly safe to apply over decals. Finally, it can be polished out further for a richer gloss effect.
It’s also very reasonably priced, and I’ve put a standard Mr Color C66 paint jar next to it so you can see just how much gloss you are getting.
I lowered the pressure on my compressor to about 20 PSI because I thought the 1K Gloss would lay down better. I was also concerned that the gloss might be a bit too thick, so I added a bit of Mr Leveling Thinner T108 to the batch and mixed it up.
I sprayed a few tests on my painting table, and I was immediately impressed by the effect of the gloss. So now that I felt more confident, I was ready to paint the car.
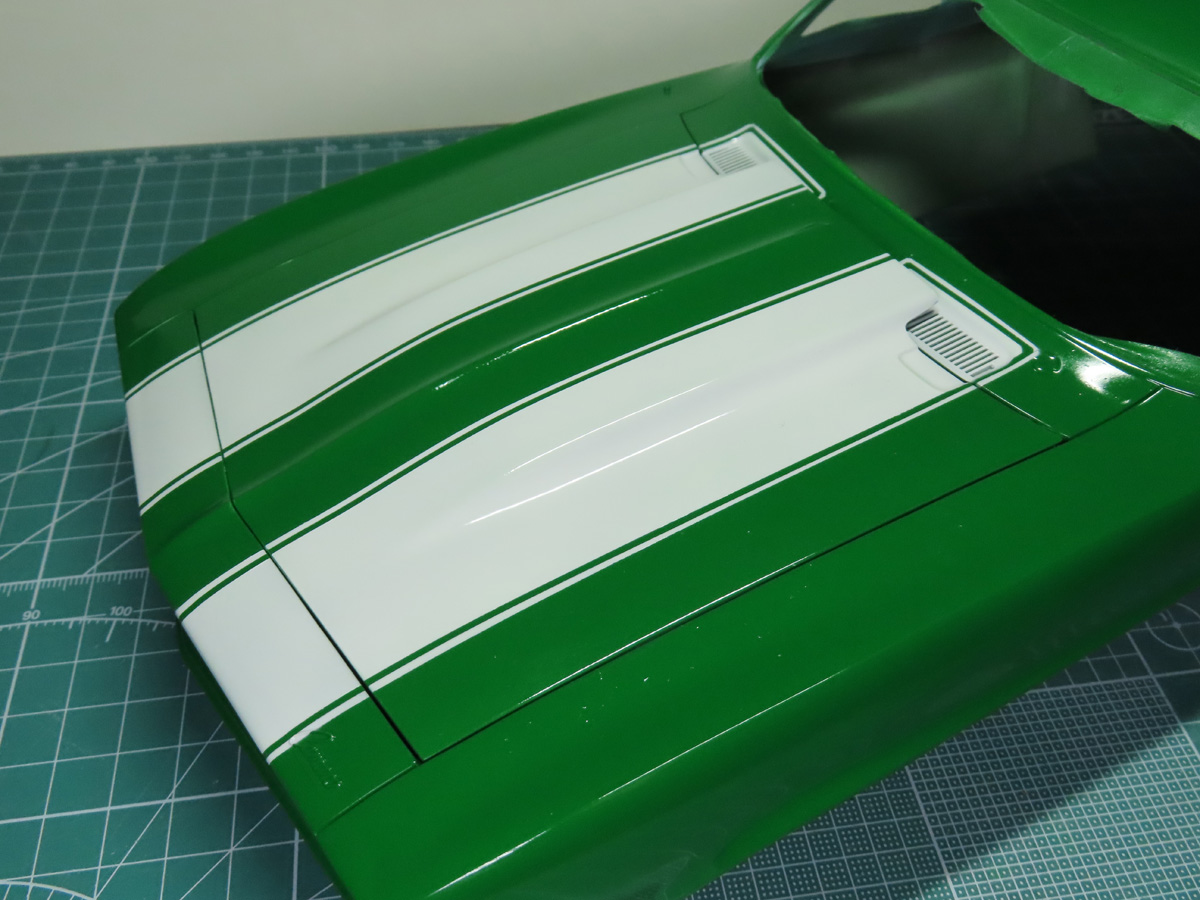
To my amazement, only 2 quick passes of the gloss were needed, and I had restored my vibrant and beautiful bright green paint. With Mr Color, my usual go-to Gloss, it can take 3-4 light layers to really build up a nice gloss, but this was done in just 2!
As impressed as I have been with the 1K Gloss, it still needed to be fixed up a bit. Some particles had landed on the surface, and some of these were stuck on from the static in the winter air.
Another strange issue I encountered was particularly evident on the roof of the car, where some of the over spray made a slight frosting effect. I believe that this could have been caused by the pressure being too high, or that the paint needed pure retarder added. I plan to test these theories later on.
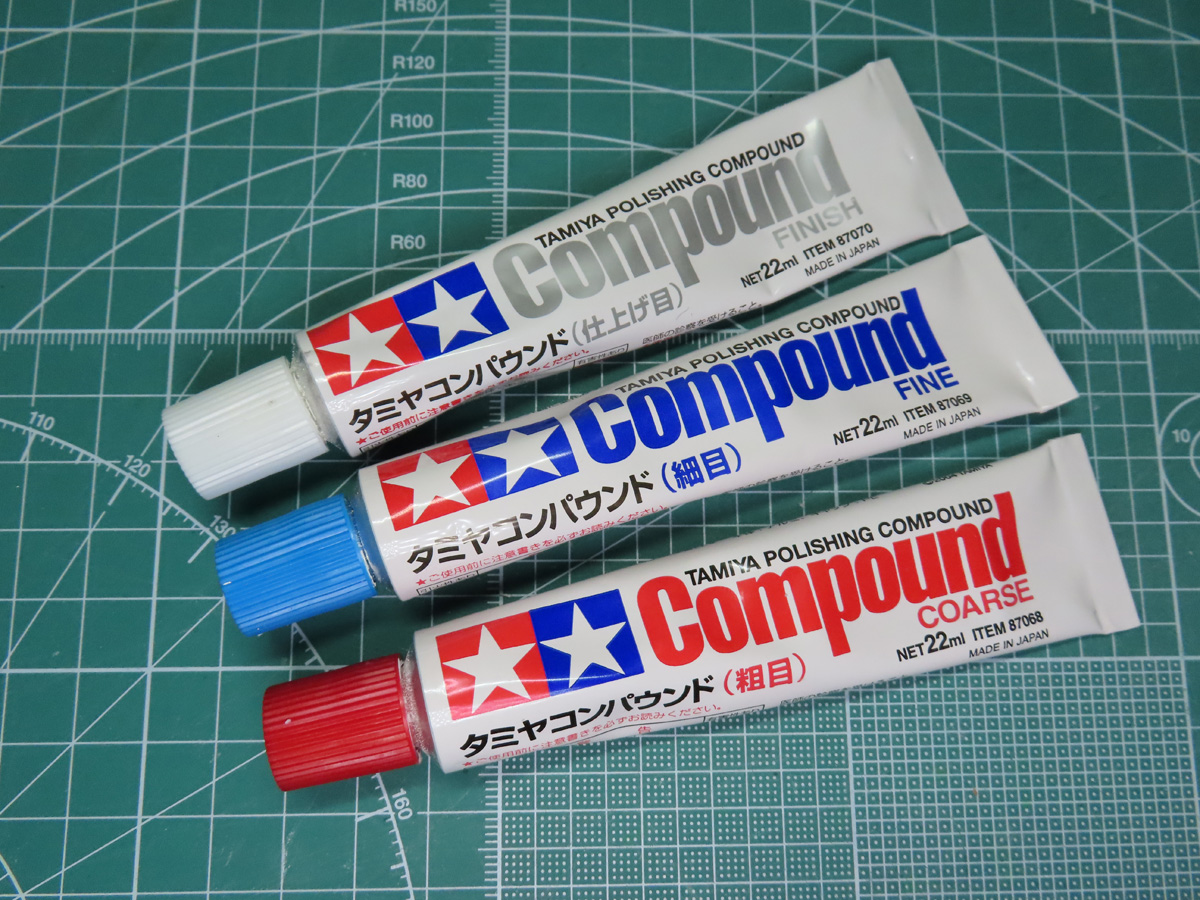
To fix this issue, I’m going to be using the Tamiya Polishing Compounds. Starting with Coarse 87068, then moving onto Fine 87069, and finally ending with Finish 87070 to smooth out and polish the gloss.
And because this is such a large area to clean, I’m using a rotary tool and some polishing sponges, which should make the work go a lot quicker.
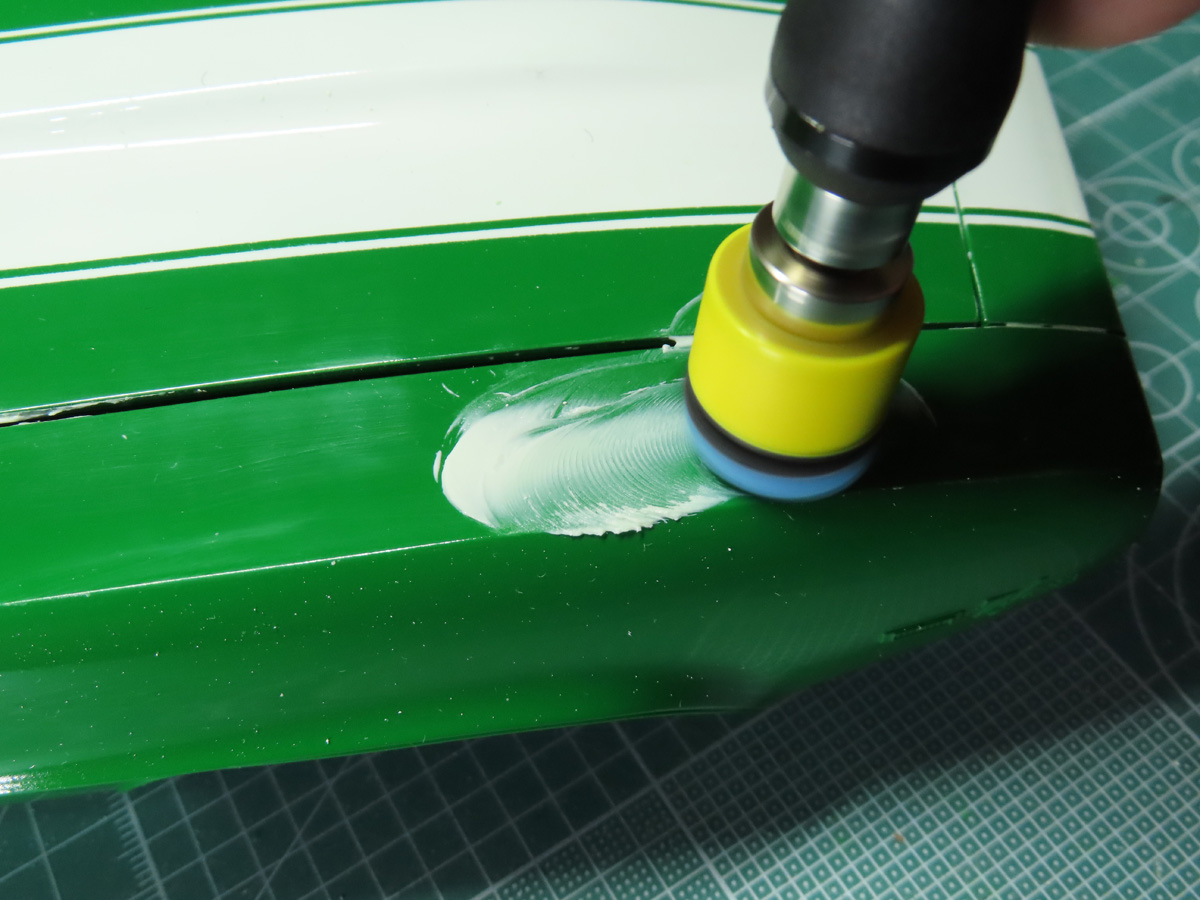
I started with the Coarse compound and slowly moved around the car. A few things to keep in mind here are that this can create a bit of heat, which could reactivate the paint. And don’t leave it spinning in one place for too long, or you’ll end up creating small circles in the gloss.
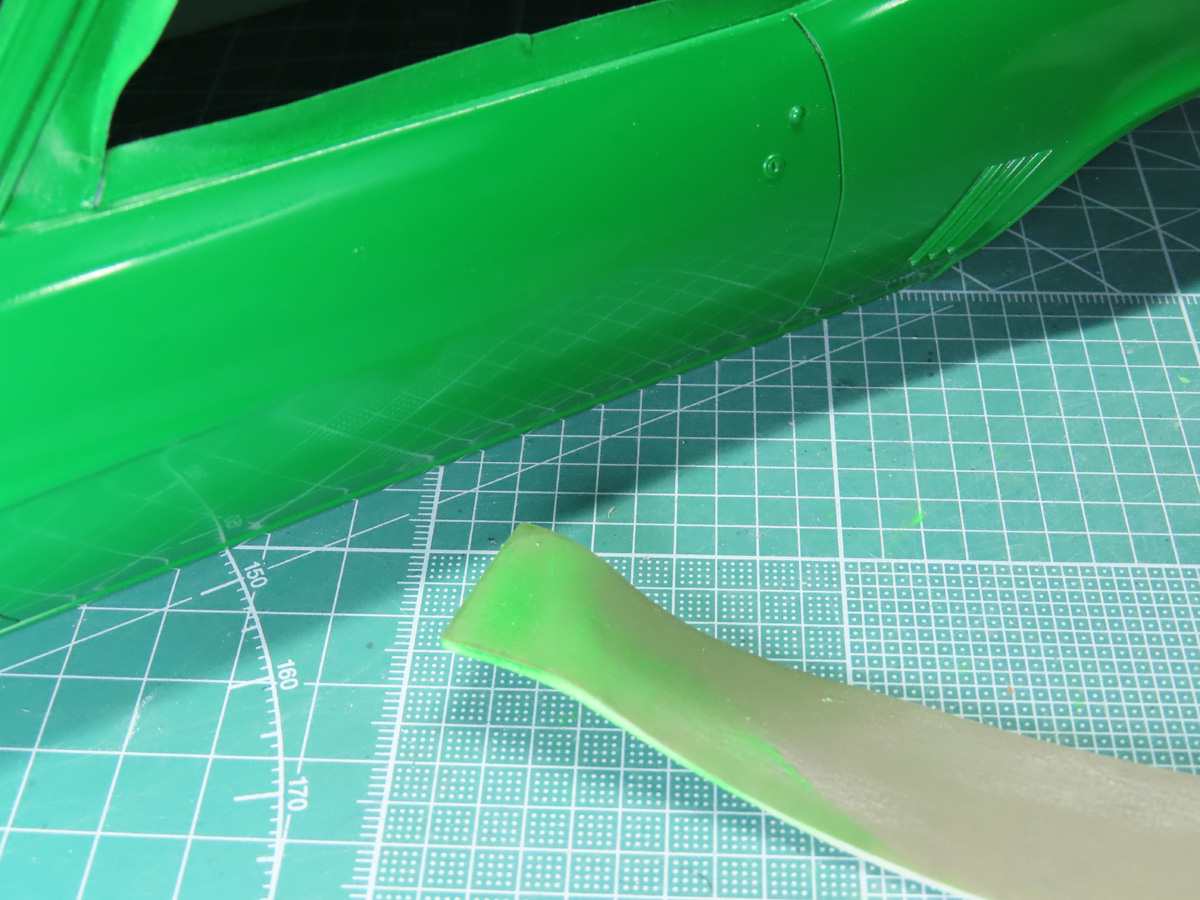
On the back of the edge of the car, I was a little too careless, and I sanded too much, which went all the way back to the gray primer. This will be a quick fix with the airbrush, but it is important to use a lot of care not to damage all of the previous work, and to remember that on edges like this, the paint will be thinnest.
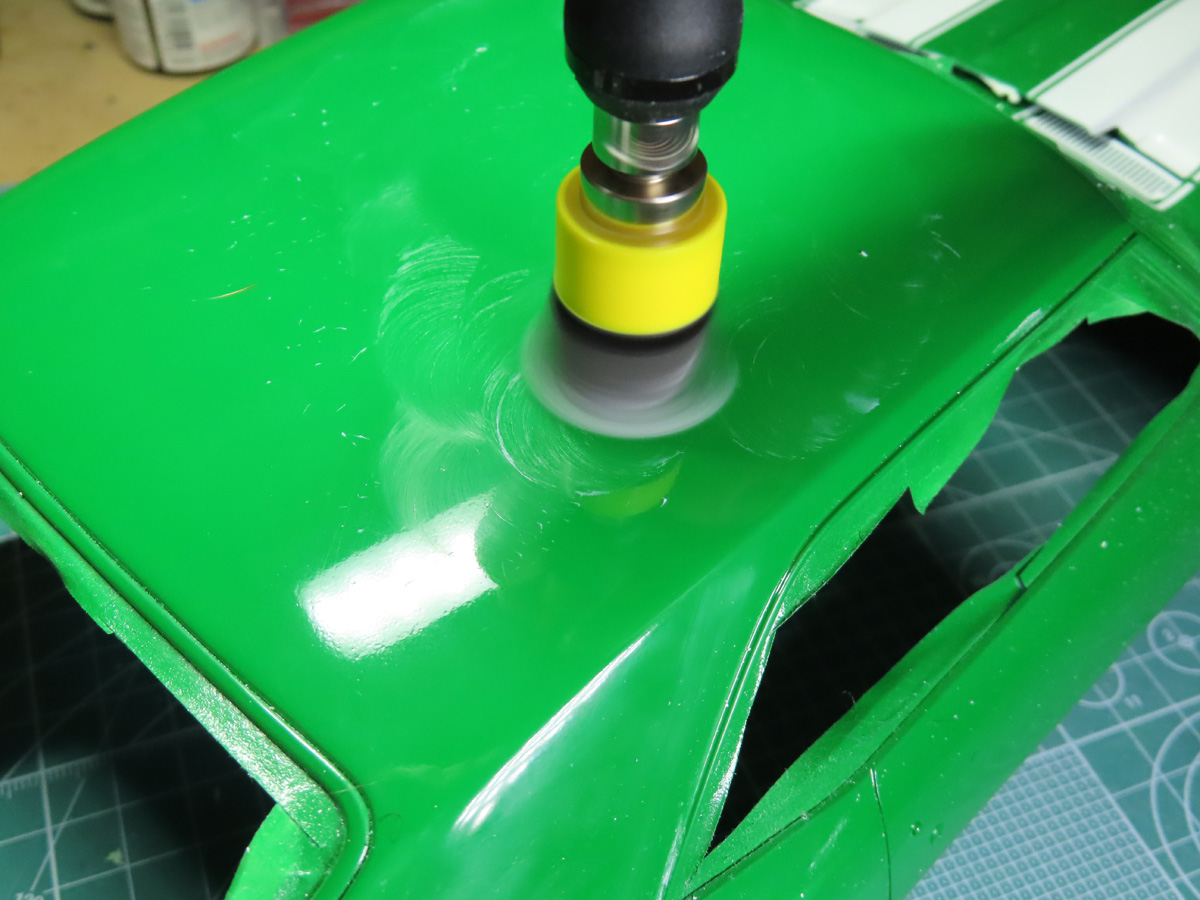
I was very impressed with how well the Coarse compound had smoothed out and brightened up the gloss, so I decided to skip the Fine Compound and focus on a final polish with the Finish compound.
The Finish compound is a thinner paste than the others, so it was a lot easier for me to move it around the model, and quite quickly, I could see a more reflective gloss appear.
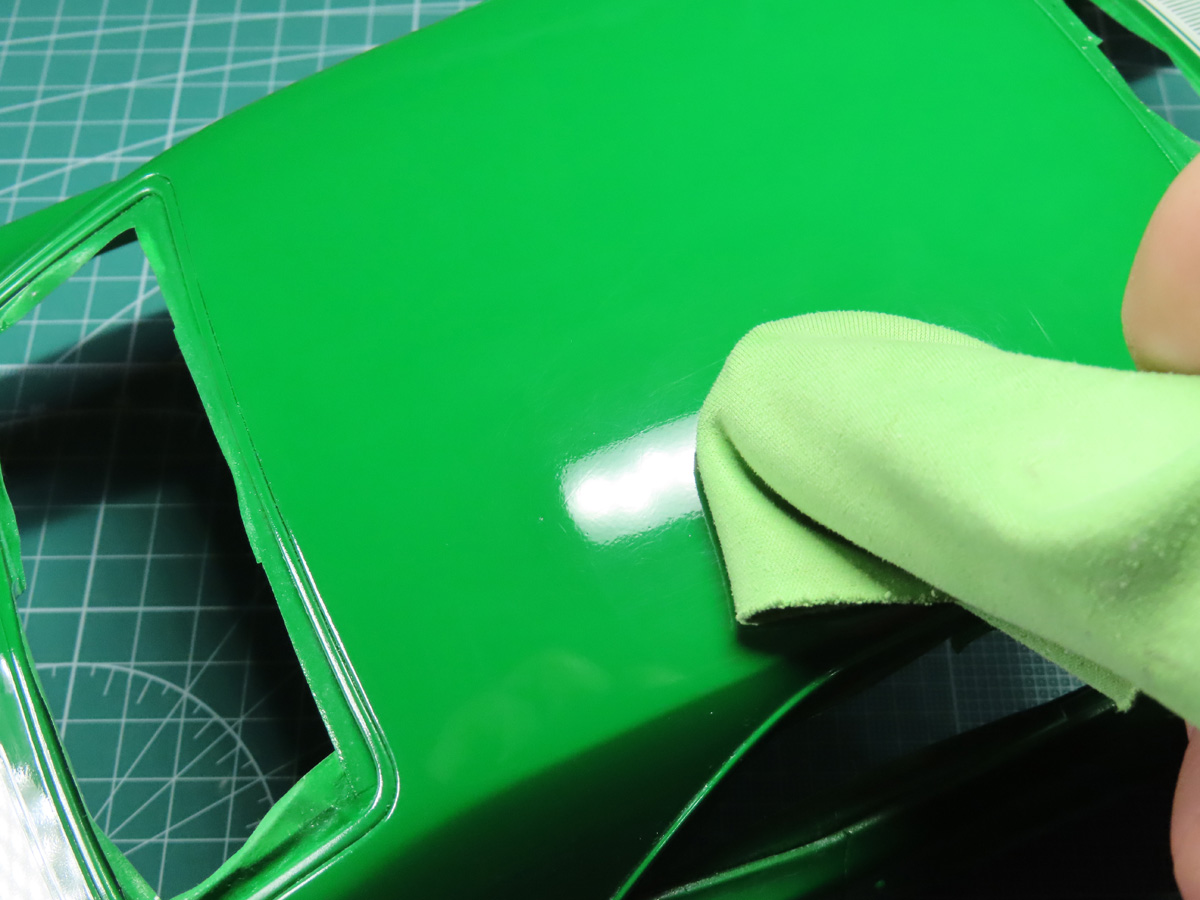
I gently scrubbed the model with warm water and a soft brush to remove any of the compounds that were still in the recessed sections.
After the body was cleaned, I took a soft cloth that came with some glasses, and I slowly began a final polish and cleaning of the gloss.
The 1K gloss provided a very nice reflective finish, but this final polishing really showed the potential of this gloss, and once again, I’m very impressed with this product.

And now I’m going to leave the body alone for a few days to harden up more. I wish that it had been sunny and not such a cloudy day, as it would have been very fun to see what this looks like under direct sunlight. But as it sits here on the table, I’m really pleased with the results.
I would still like to play around with the 1K Super Gloss and see if I can better the results. But as it goes, I think I’m going to be using this product a lot more in the future. It’s very convenient when you need to quickly gloss some parts for weathering or just to protect some paint. And it dries quickly and to a very hard finish. I’m truly impressed with the product, and I think it has a lot more uses beyond glossing a car. Just pour it in, spray 2 quick passes and wait for it to dry, that’s fantastic!
There’s not too much left to do now. And as we wait for the body to dry further from all this polishing, I’ll next be working on painting the chromed parts and finishing up some of the smaller details. I hope to get more done so that this body can be attached to the chassis, and it will be excellent to finally see this car with all 4 wheels added.
To be continued…
About the Author:
Jared Demes is a modeler from southern Alberta. He has been building models since he was 4 years old when his Dad first introduced him to the hobby. He has written for several magazines including, Fine Scale Modeler, Scale Aircraft Modeling, Phoenix Scale Models, and others. He has an interest in all modeling subjects, with a focus on WWII Japanese aircraft and Science Fiction.
Jared has won several IPMS awards for his modeling, and currently operates his YouTube channel rebelsatcloudnine, where he showcases model builds and product demonstrations.