

Engine Block
This is the second part of the Airfix Messerschmitt Bf109G-5/6 1/24 Scale A17003 kit.
The heart of the Messerschmitt Bf 109 was the Daimler-Benz DB 605. This engine was inverted, which at the time was a bit of an oddity. However, it was fast, helping the Me 109K set several speed records, which are still debated amongst historians. It also had a unique feature: a space through the engine banks which allowed a cannon barrel to be fitted through. It also had a fuel injection system, which was a critical component in the early days of WWII, giving Luftwaffe pilots a huge advantage over the Allies.
The engine was also used by Sweden and Italy. Also, when the Axis Pact was formed, the engine was licensed to Kawasaki, which built it as the Ha40. These engines were designed for high-altitude use and were infamously fitted to the Kawasaki Ki-61 Hien fighter.
Possibly its most distinctive feature when equipped on the 109 was the howling noise it made as it flew by. Both a beautiful and eerily menacing sound to behold.
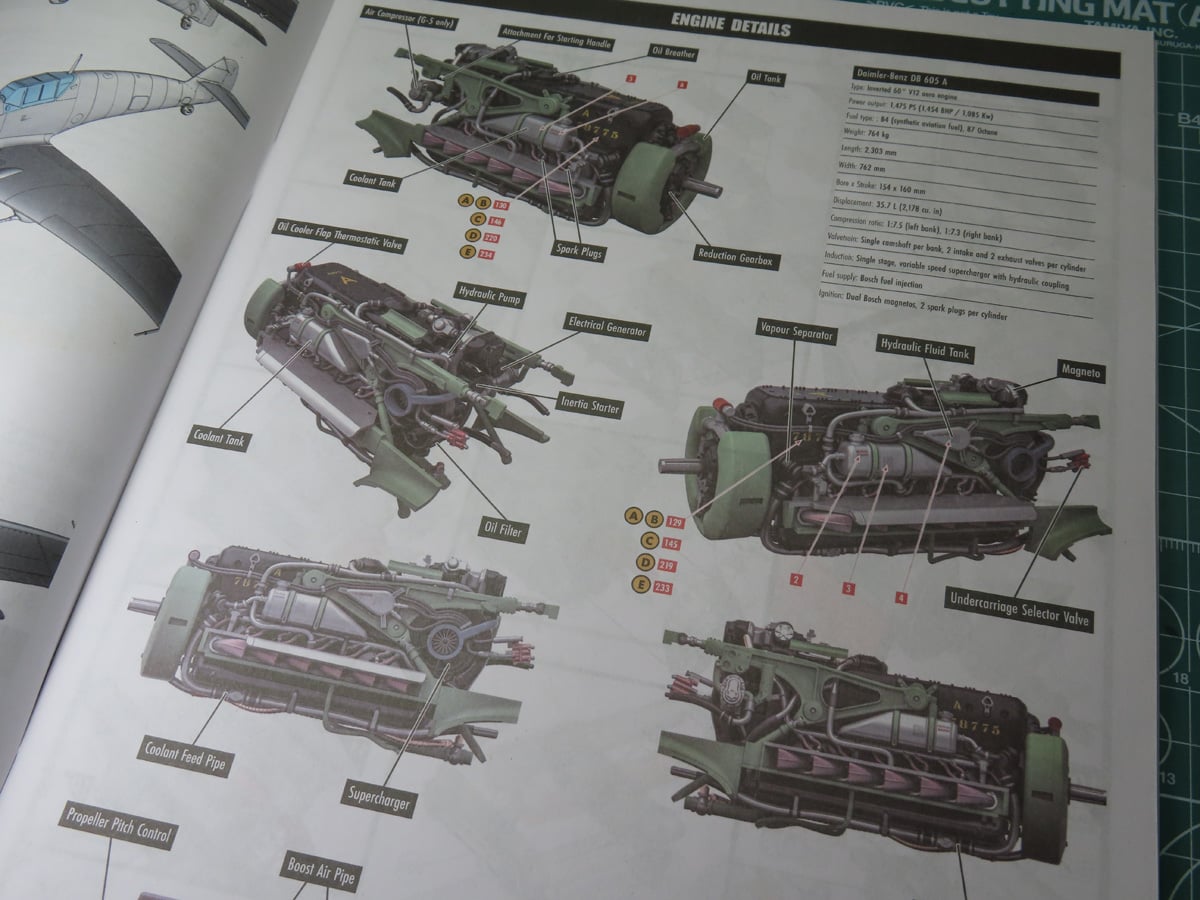
Airfix have included a beautiful full color page on the engine details. This shows the DB 605 from all angles and notes what all of the critical components are. There are also multiple numbers included for the various options, so pay close attention to which decals you will need for your build.
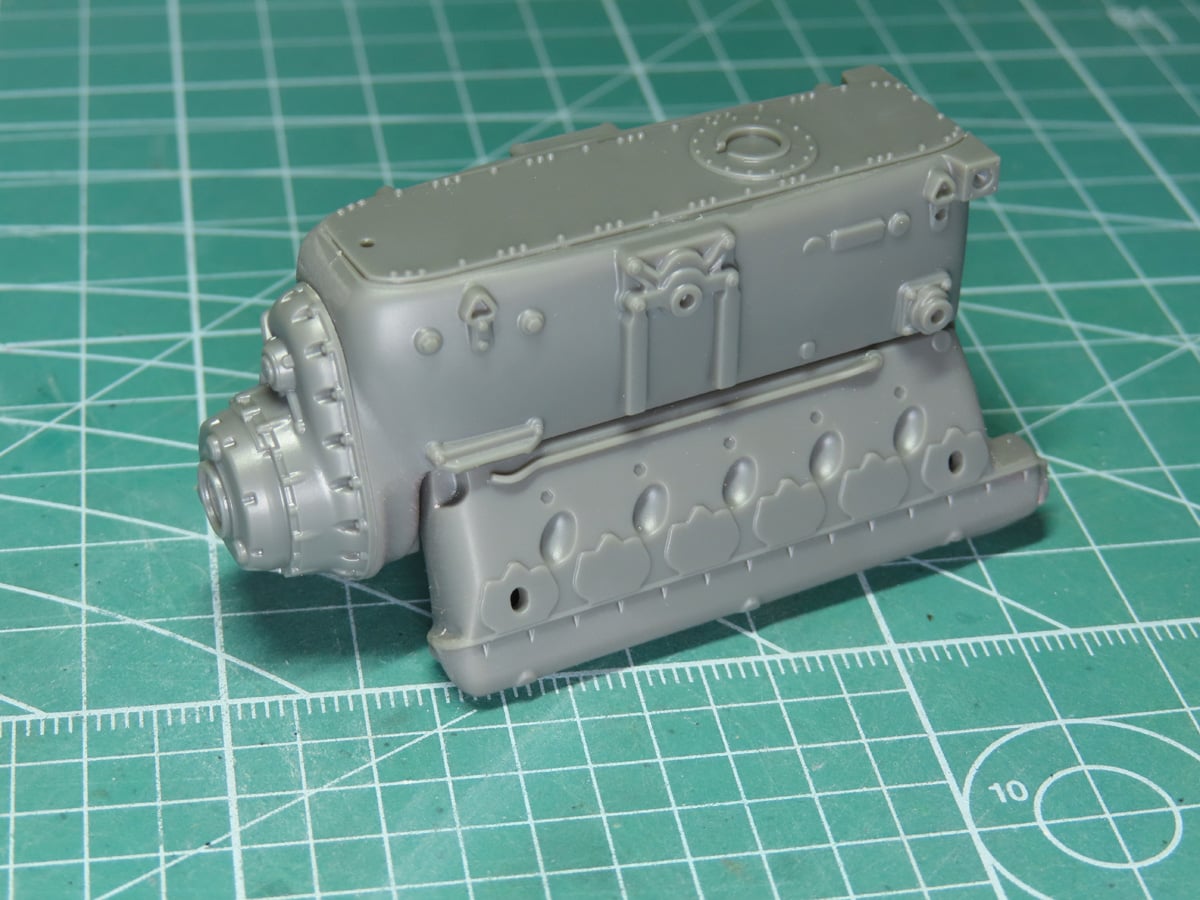
Building the engine block was pretty straightforward and easy to assemble. I’m glad that Airfix have ditched that blue-gray styrene in favour of this darker grey styrene. I found the blue-gray styrene to be on the oily side and required a good bonding primer. It was also quite soft, which made some of the thinner parts more delicate. But this gray styrene is tougher and sturdier, and much nicer to work with. The parts fused together well with Mr Cement Deluxe, and Mr Cement SP.
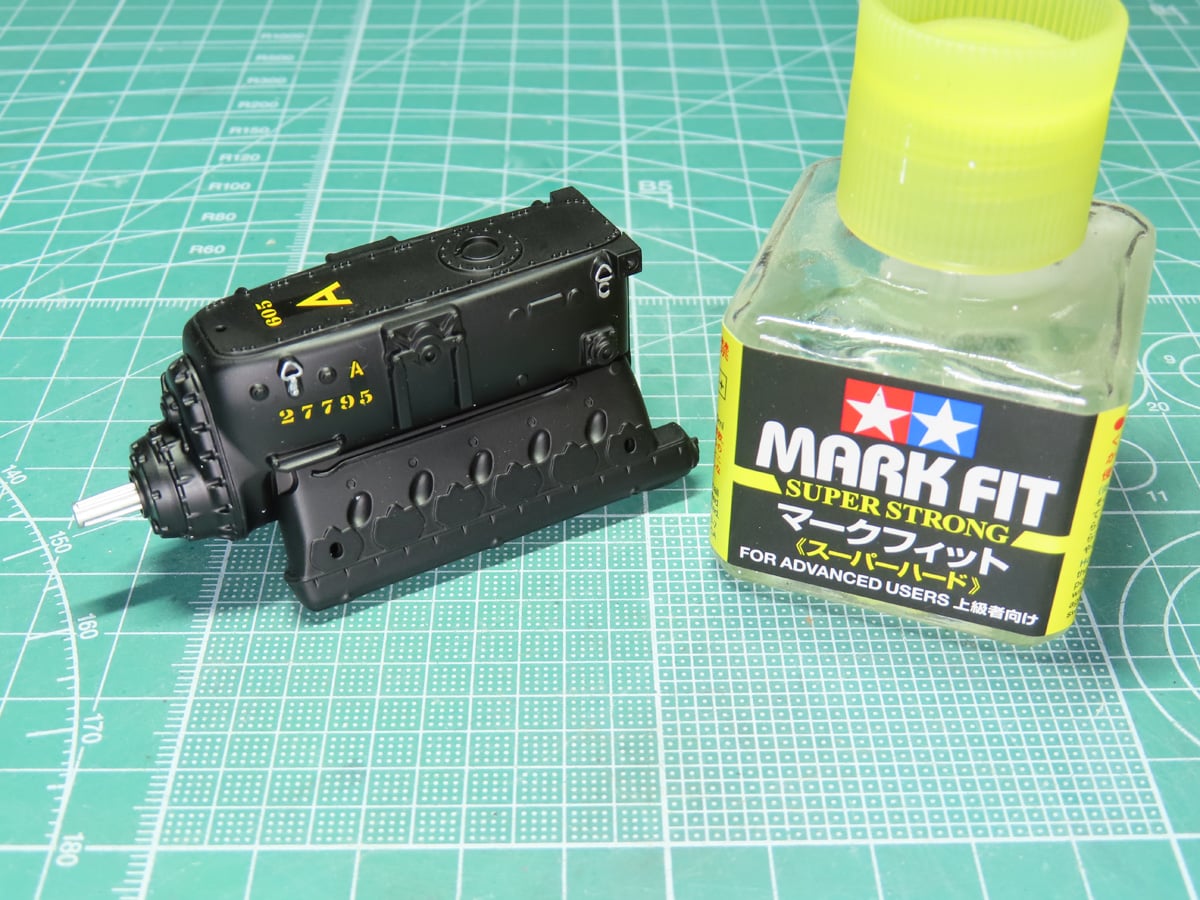
I painted the engine with Tamiya LP-5 Semi-gloss Black. The propeller shaft was painted with LP-63 Titanium Silver; however, I should have used LP-62 Titanium Gold.
The decals printed by Cartograf were very thin and easily laid down onto the surface. I brushed on a bit of Tamiya Mark Fit Super Strong 87205 to ensure they were flush with the surface.
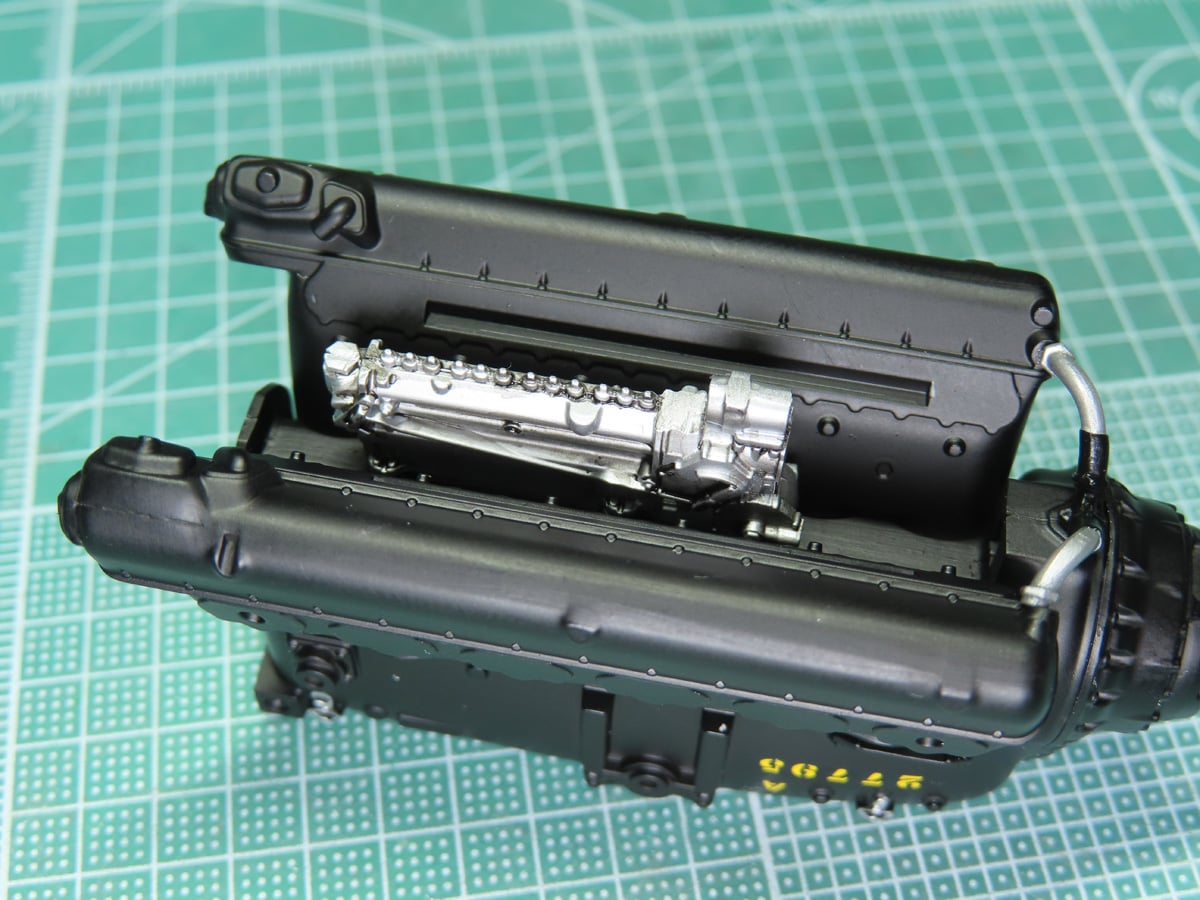
With the bulk of the engine complete, I could start adding the smaller details. I flipped the engine over and added on the fuel ejection pump, which was painted LP-11 Silver.
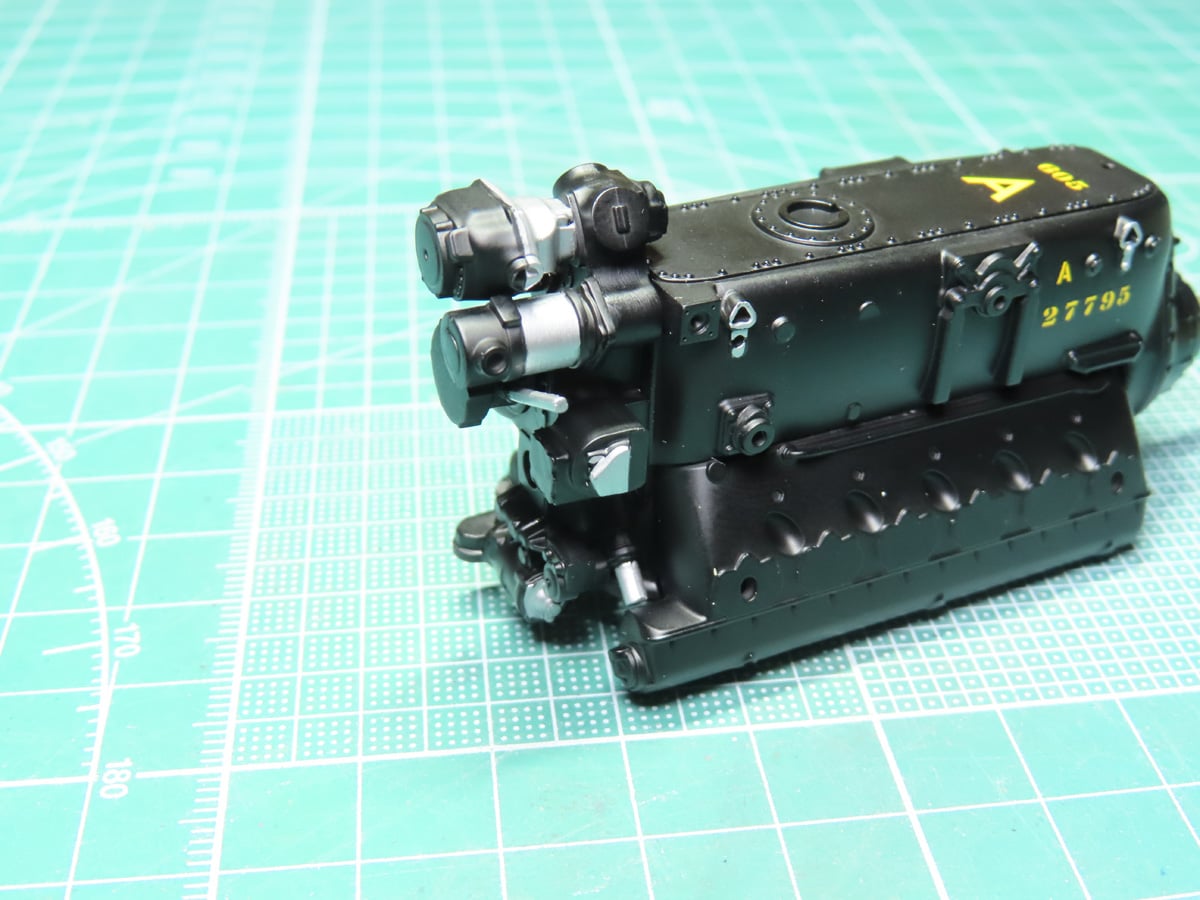
Moving to the back of the engine, I added on the secondary block, including the magneto and hydraulic pump. These were also painted with LP-5 and LP-11. And they fit to the main block of the engine really well.
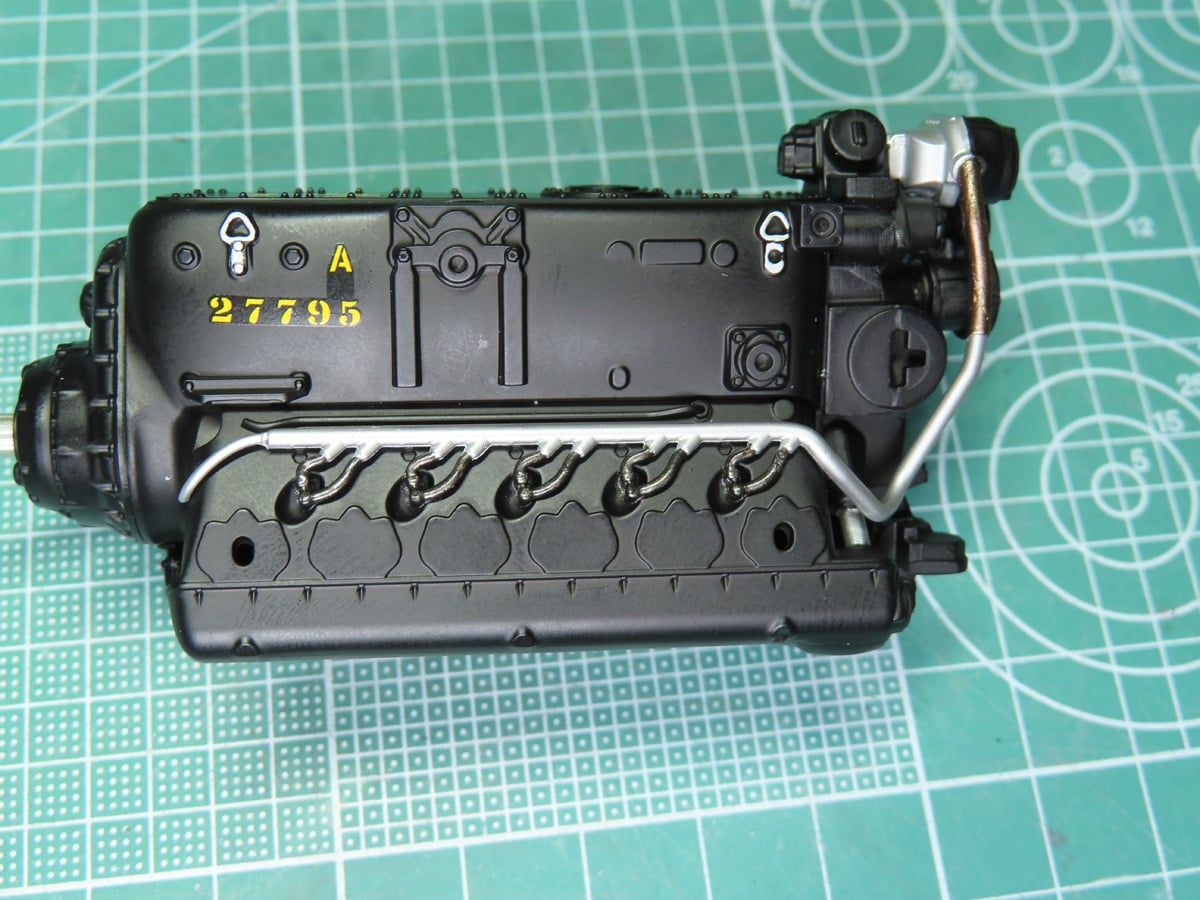
The next parts to add were the ignition wires. The main part of the wire was painted with LP-11 Silver. For the spark plugs, I painted them with Mr Color C28 Steel. I had forgotten I had this paint, and it was the first time I’d used it on a project, though I’d compare it to Tamiya X-10 Gunmetal in tone.
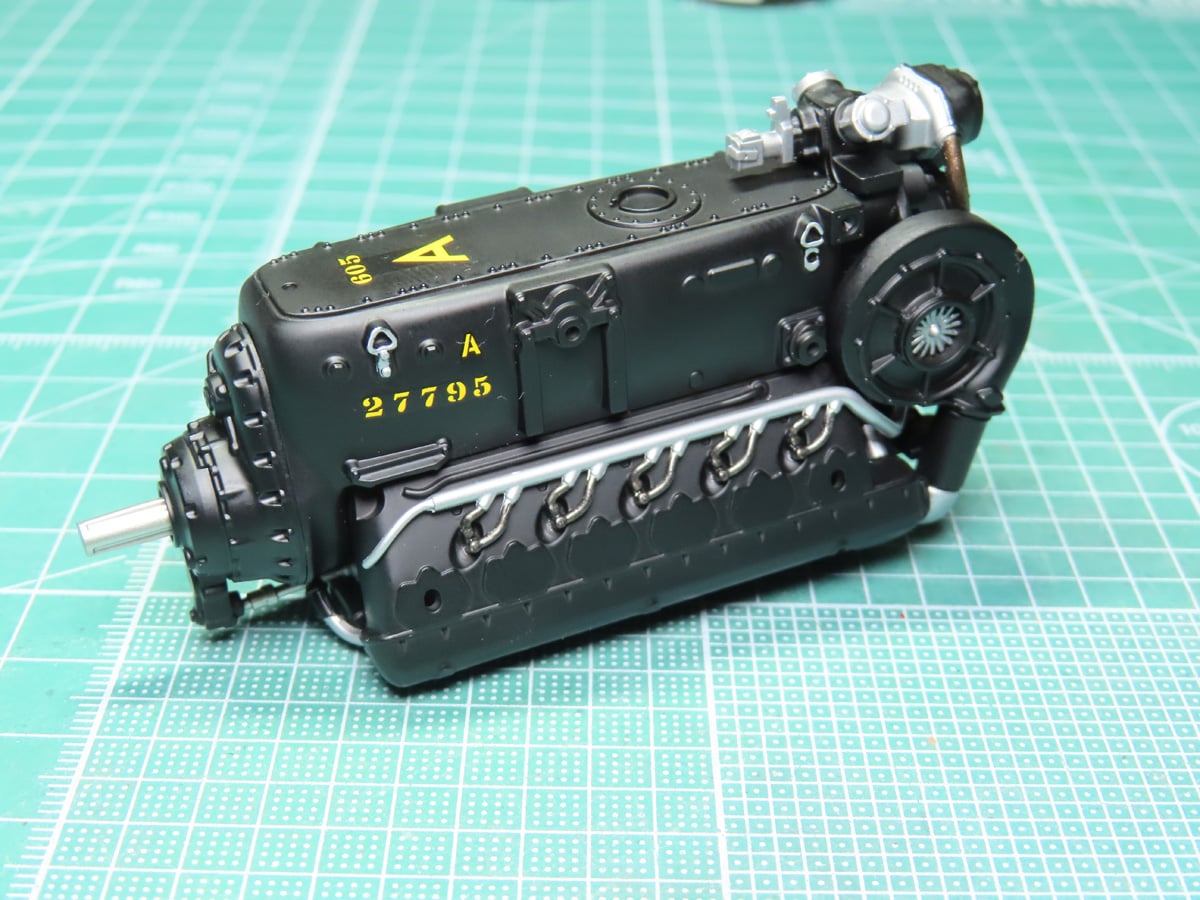
Once the ignition wires were glued in place, I could add on the supercharger. This was painted with LP-5 as well, but in the directions, Airfix suggest painting the inner turbine with Humbrol 25 Blue. I thought this was an odd color and I couldn’t find any references suggesting that this is blue, so I painted it with LP-11 Silver.
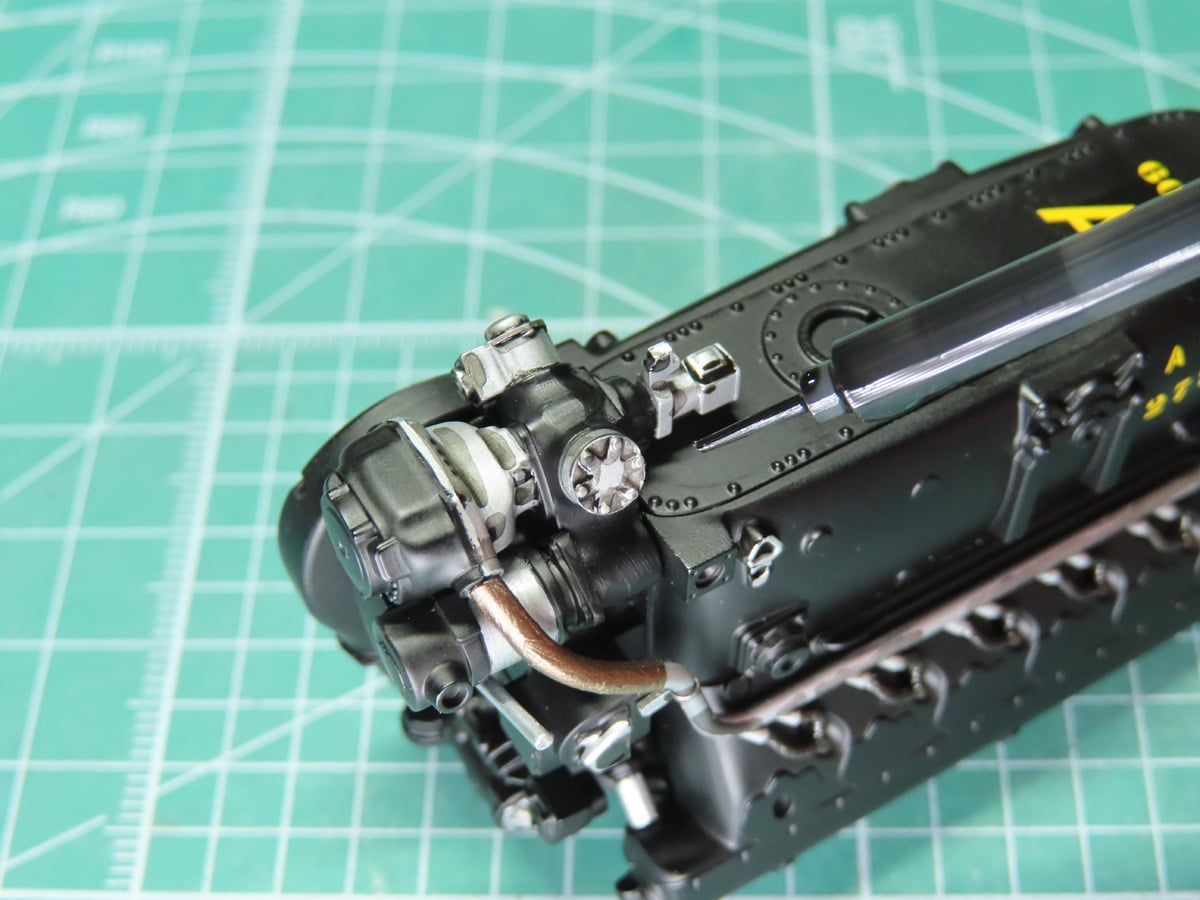
Now I was ready to begin weathering the engine. I started with the silver parts, painting them with Tamiya Panel Line Accent Color Black 87131. This is going to help a lot of the parts to stand out once the engine is mounted to the aircraft and the cowling are put in place. A black wash is excellent on silver surfaces, as it won’t be reflected in the silver and will stand out much better.
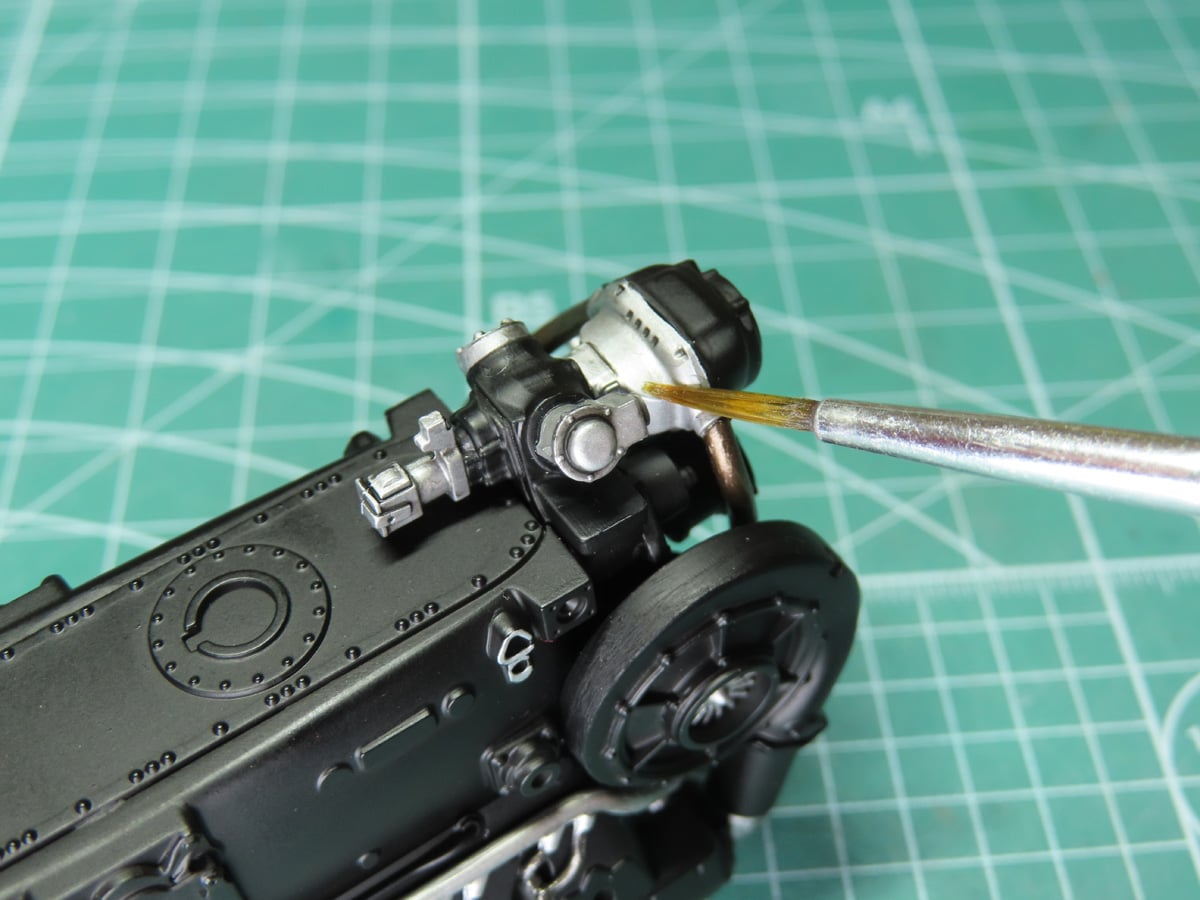
To clean the excess wash, I used a thin brush dipped in Tamiya Enamel Thinner X-20. This allowed me to keep the wash in the recessed sections, as well, I could thin some more of the wash and paint it on as a patina to further weather the parts.
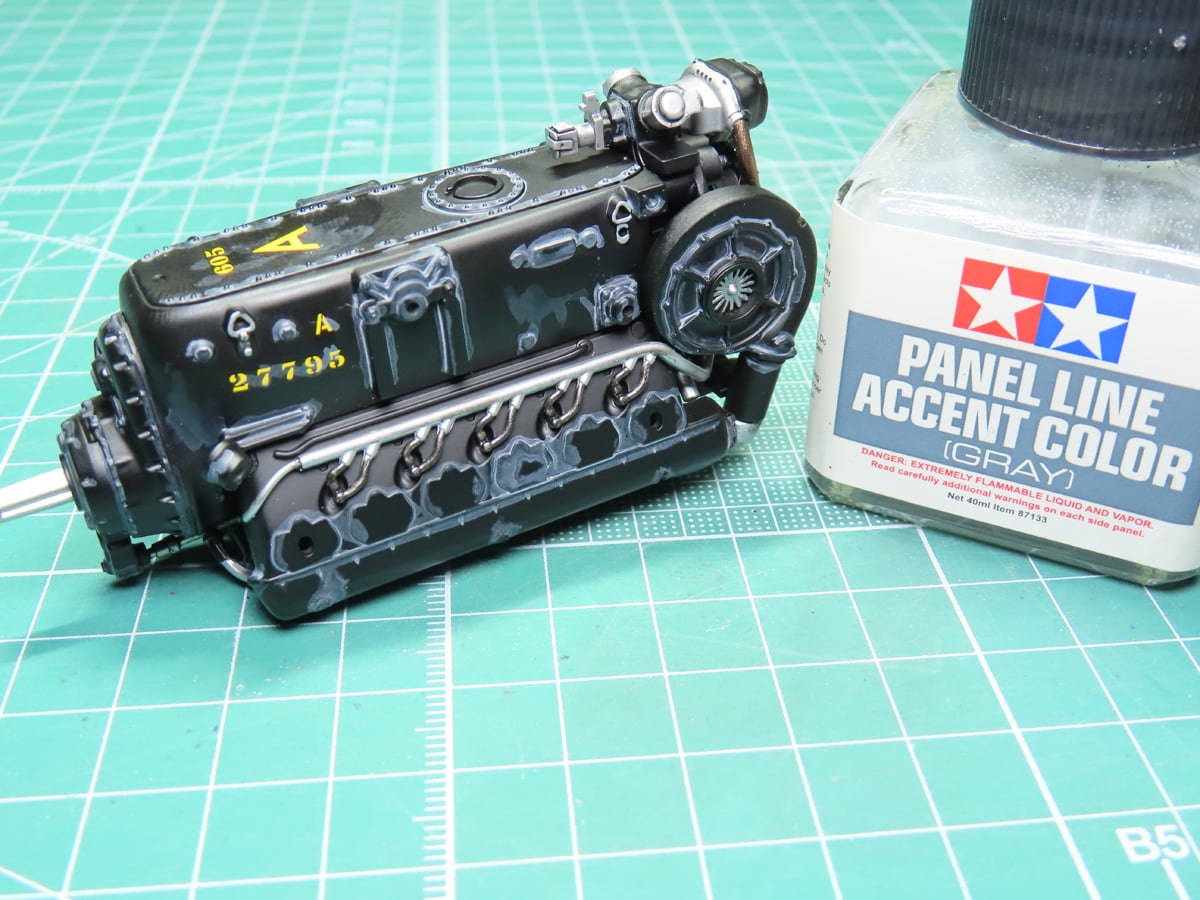
For the rest of the engine, I painted everything with Tamiya Panel Line Accent Color Grey 87133. This looks like quite the mess now, but just as before, once everything dries, I can go back and clean things with the Tamiya Enamel Thinner.
The Grey might seem a bit too bold, but I’ve found that once you add on a protective clear coat, it can greatly reduce the brightness of the color. And if you aren’t careful and spray it on too heavily, it can almost erase the wash completely.
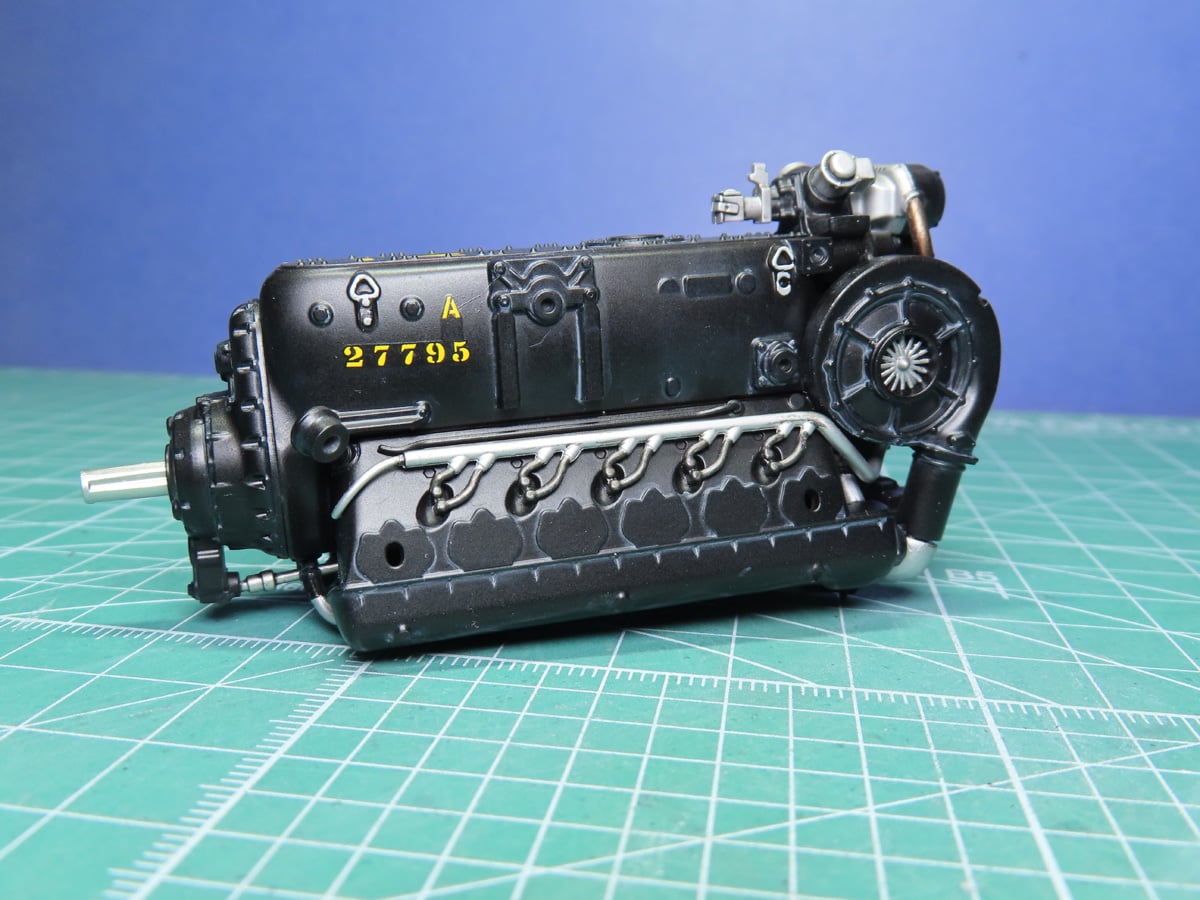
Finally, I added on Mr Color C181 Semi-Gloss Clear. And for now, the engine is complete. In the next post, we’ll get into more of the smaller parts and hopefully get this section completed.
This engine has been a very fun build, and I was beyond impressed by how well everything on it fit together. One section was difficult, but this was my error, as I missed one piece and had to go back several steps to get it in place.
I’m really looking forward to the next stages and seeing more of the parts added, and I’m hoping that they fit together just as easily. To be honest, I think that they will, and it will be very fun to add more color to this section.
To be continued…
About the Author:
Jared Demes is a modeler from southern Alberta. He has been building models since he was 4 years old when his Dad first introduced him to the hobby. He has written for several magazines including, Fine Scale Modeler, Scale Aircraft Modeling, Phoenix Scale Models, and others. He has an interest in all modeling subjects, with a focus on WWII Japanese aircraft and Science Fiction.
Jared has won several IPMS awards for his modeling, and currently operates his YouTube channel rebelsatcloudnine, where he showcases model builds and product demonstrations.
Completed Images Post:
Next Post:
First Post: Part 1