

Final Assembly
This is the fifth and final last part of the AMT Fruehauf FB 40 Foot Reefer Trailer Watkins 1/25 Scale 1421
Continuing from the previous post, I stated that I had run out of time to complete the various model boxes.
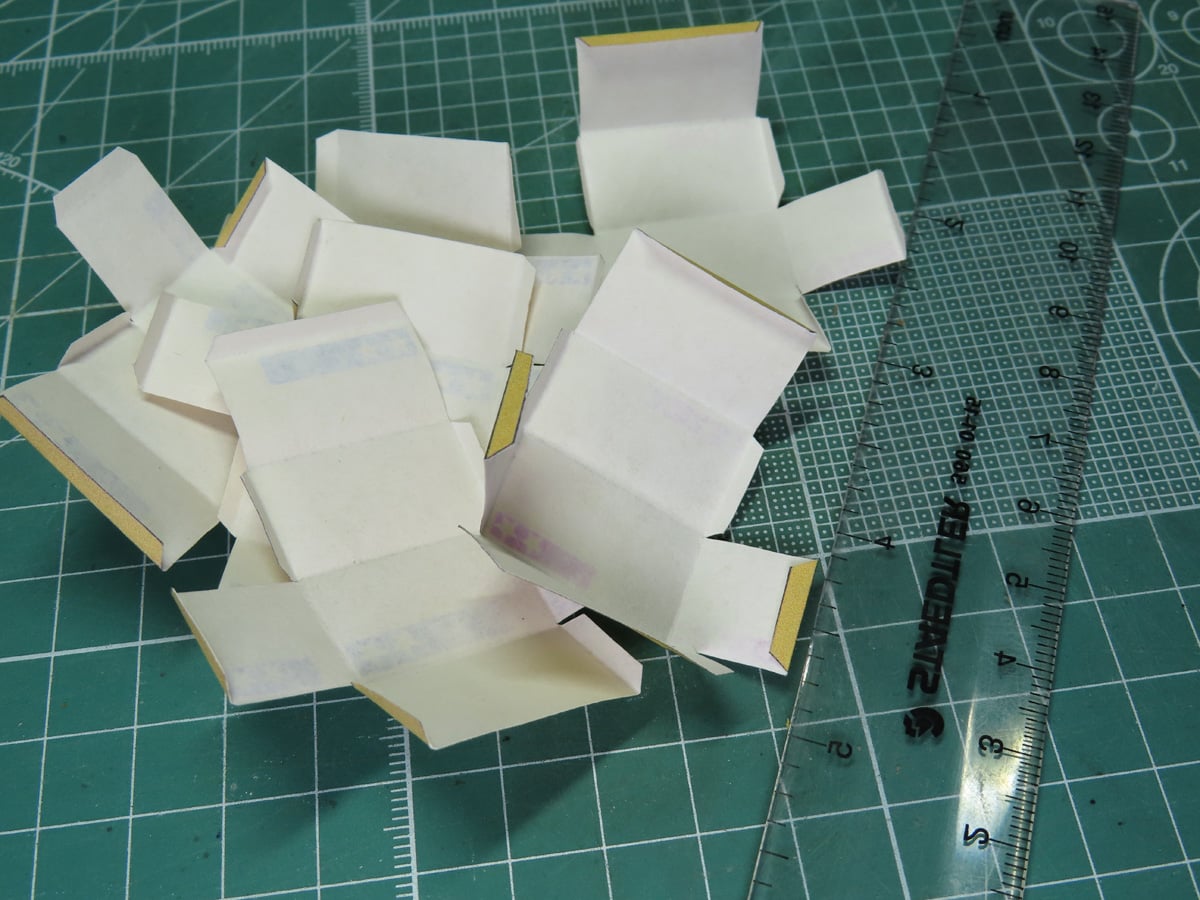
I decided to build these first, and using the edge of a ruler, I was able to carefully fold the edges of each of the boxes in preparation for assembly.
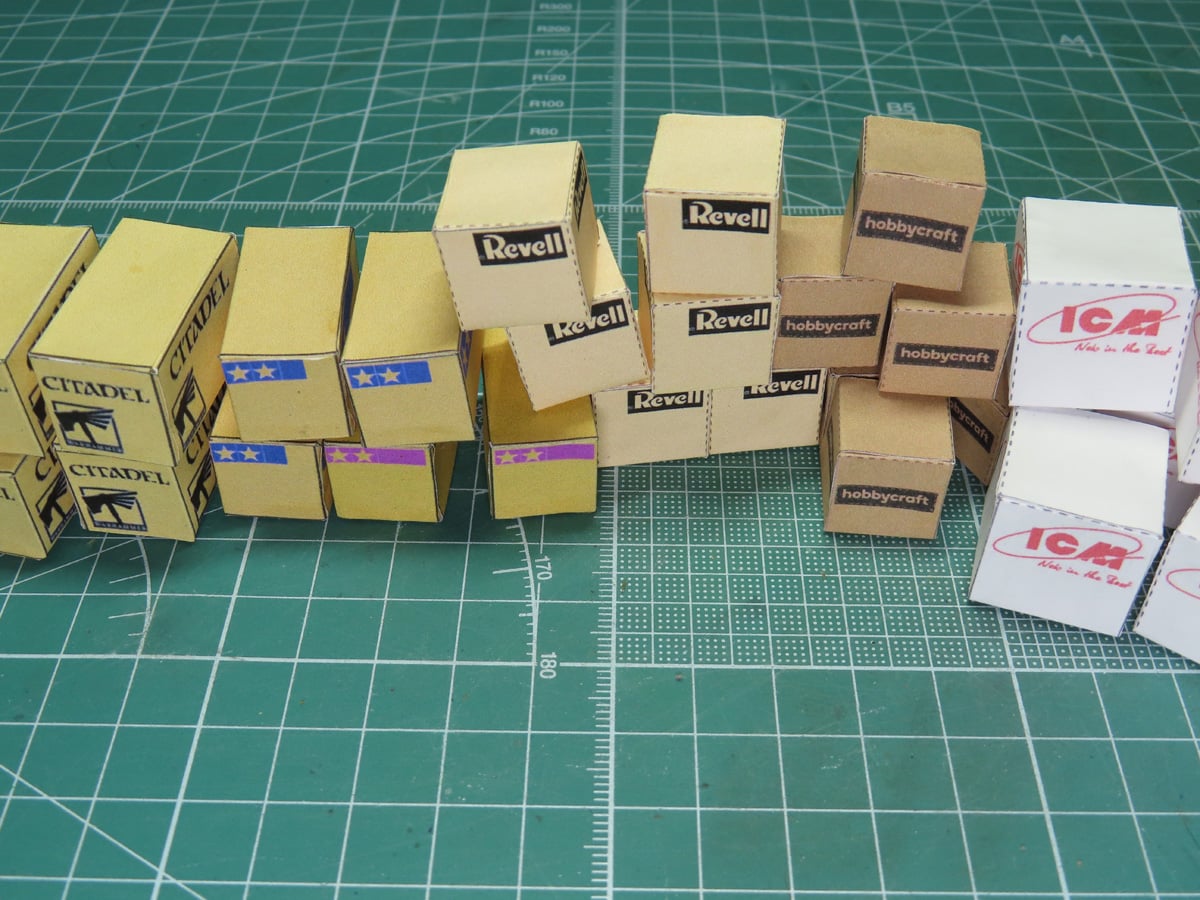
I planned on using Tamiya Craft Bond 87078, a Tamiya brand white glue that had a very nice, firm hold, but unfortunately, my bottle had run dry. Instead, I opted for Tamiya Multipurpose Cement 87188. This glue worked quite well, but it warped the paper a bit as it dried- nothing too noticeable.
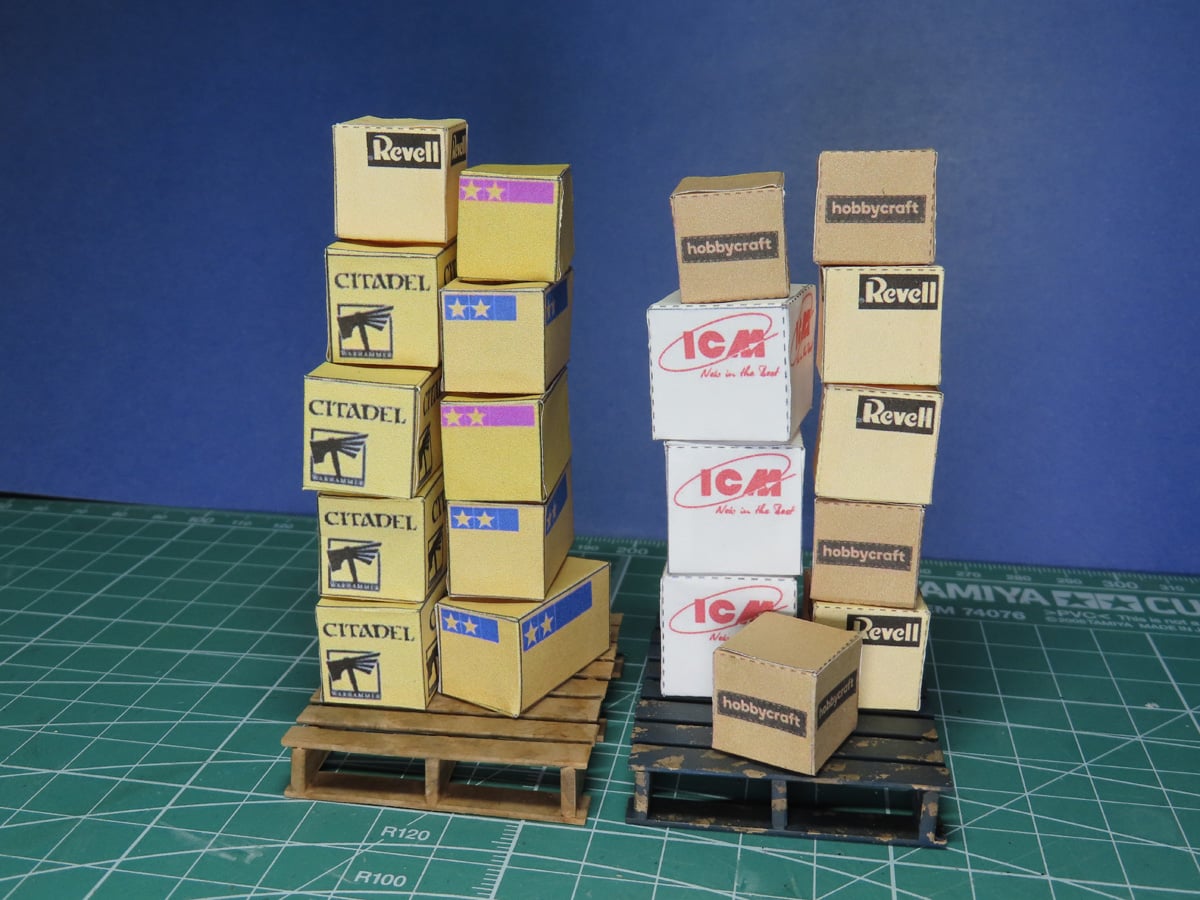
Once the boxes had dried, I stacked them onto the pallets that I built earlier. These boxes were quite a bit of work to cut out, fold and glue together, but they look excellent resting on the pallets, and they will fit in perfectly once the rest of the trailer is completed.
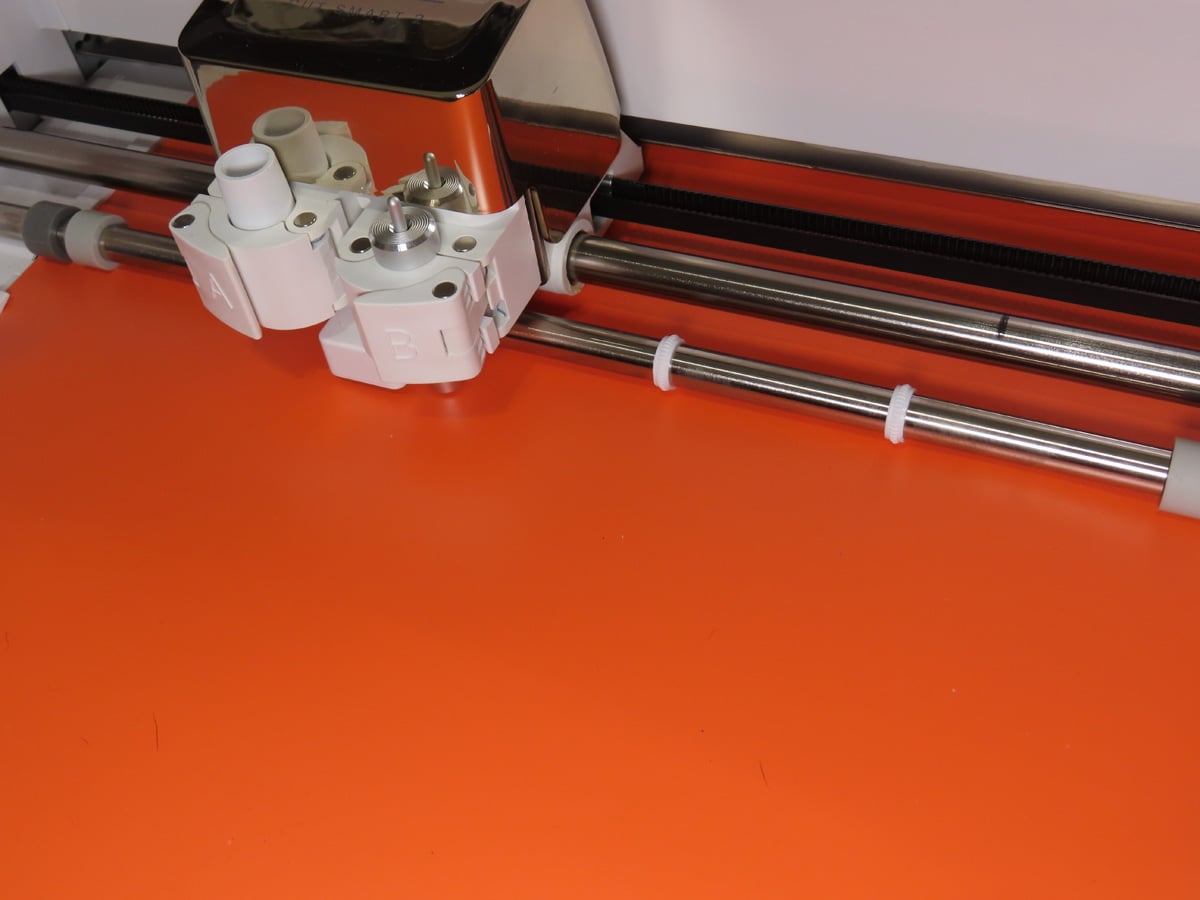
For the lettering on the side of the trailer, I opted to use my brother’s vinyl cutter. I created the images in my editing program, and my brother scaled the images to the correct size. Within minutes, I had clearly cut stencils of “Sunward Hobbies” and the logo that I could add to the trailer.
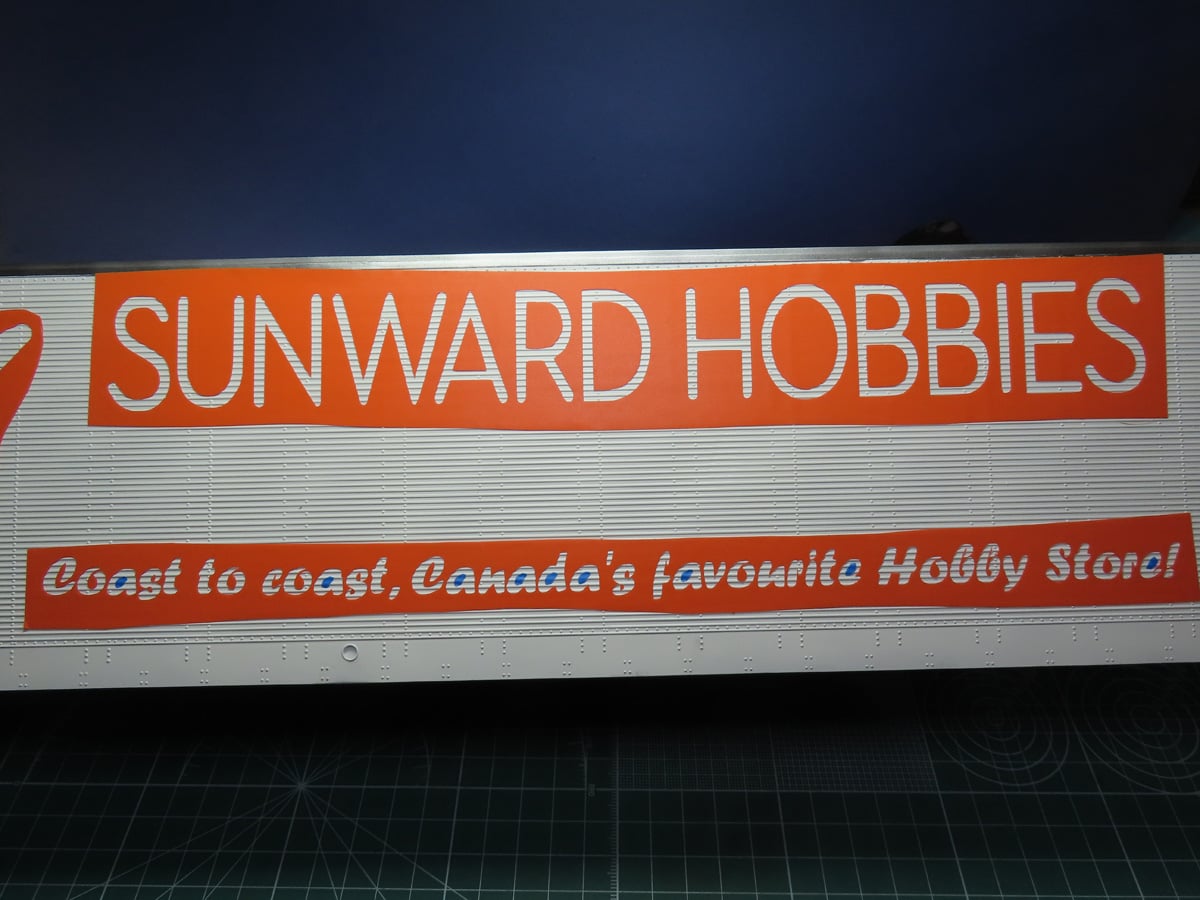
I carefully measured and positioned the stencils onto the side of the trailer, and once I was happy with the placement, I pressed the vinyl as close to the surface as possible.
Something I hadn’t considered is that the vinyl I’m using is rather stiff. As a result, it had a difficult time fitting into the corrugated siding. This will require cleaning up the over spray, so I decided to use enamel paints, as it would be easier for me to remove any excess paint.
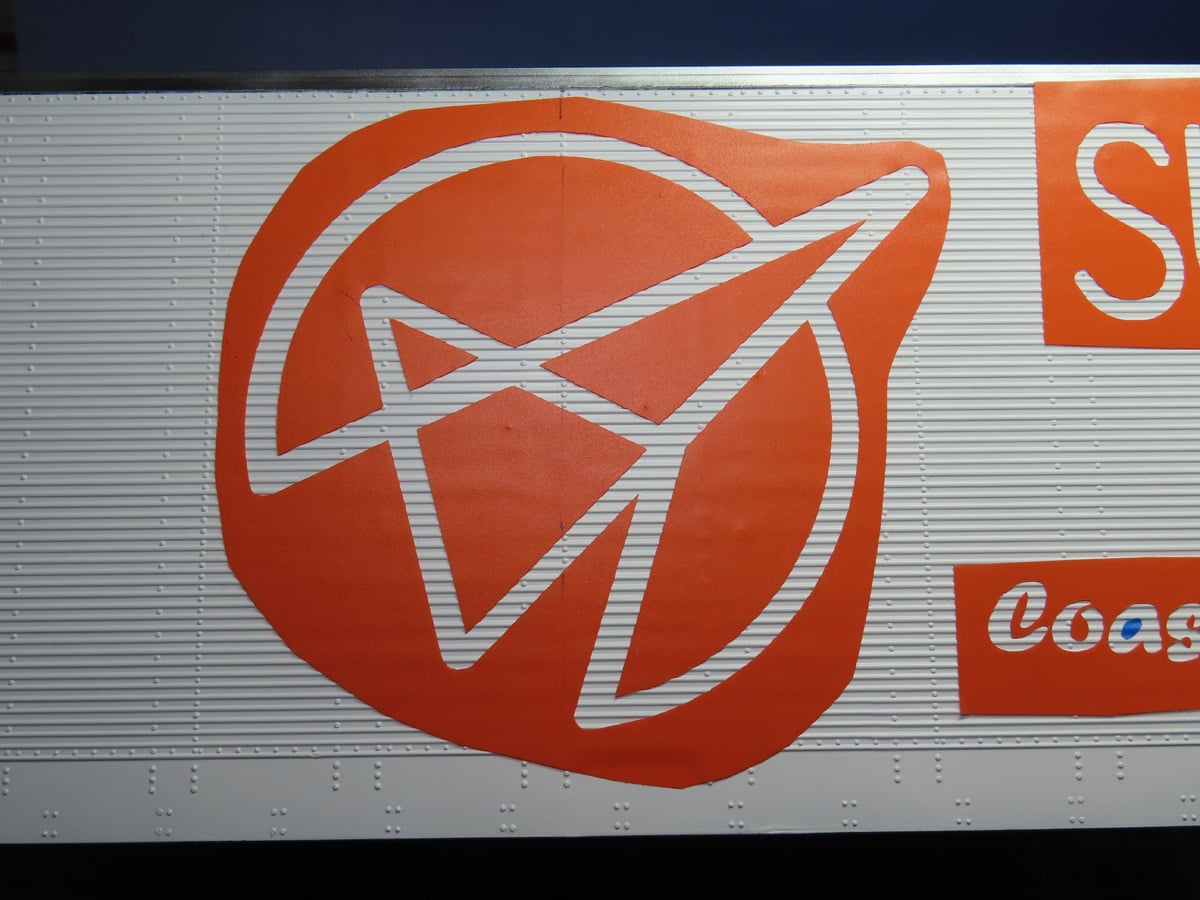
The Sunward Hobbies logo would be positioned towards the back of the trailer and the doors, and I’m very excited to see it painted and finally completed.
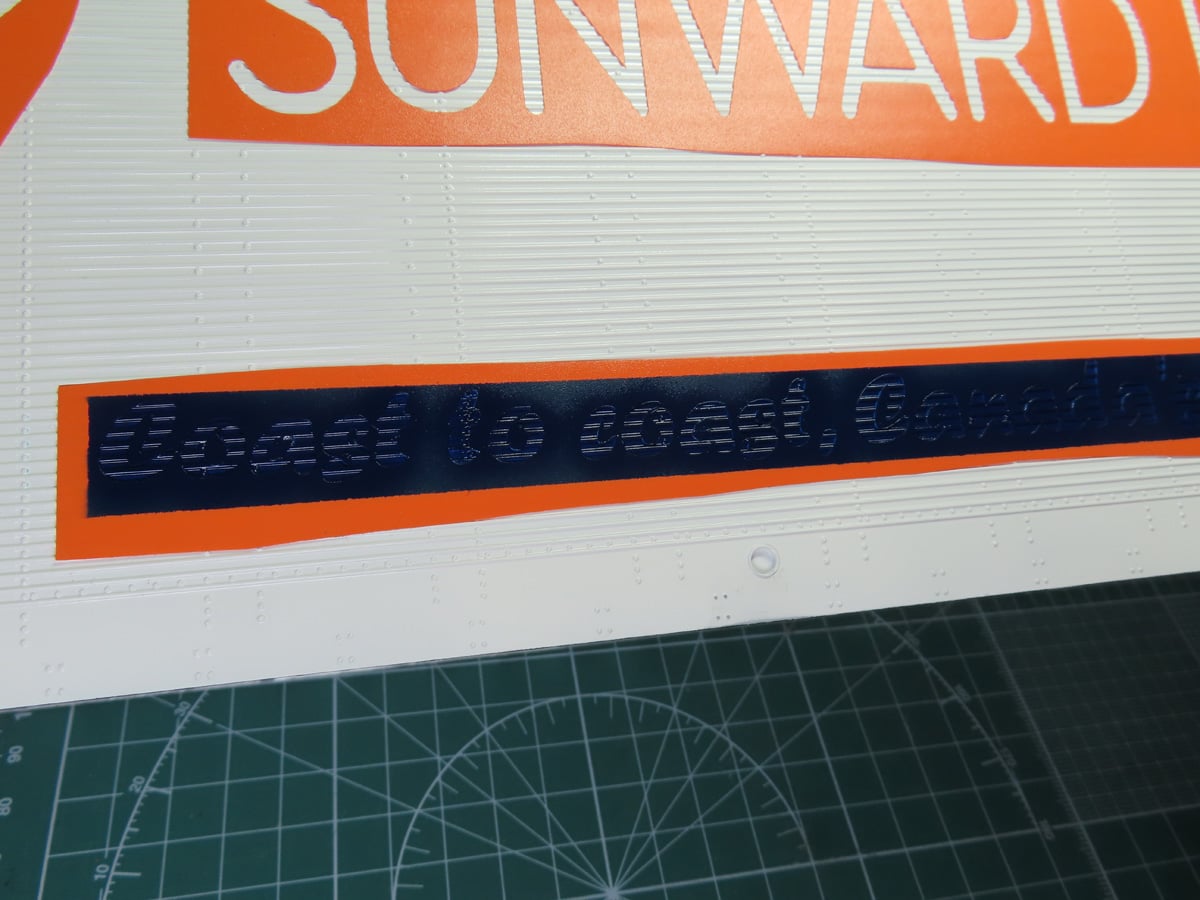
I decided to add a slogan to the lower section, as this would fill in the empty space. The Sunward Hobbies lettering and Logo would be painted in red and black. So I wanted to add another color, and I decided that a darker blue would nicely complement the rest of the colors.
I sprayed Tamiya X-3 Royal Blue, thinned with Tamiya Enamel Thinner. Now Royal Blue is one paint in the acrylic range that I’ve had nothing but issues with. It’s a beautiful color, but of all the Tamiya paints, it’s the one that I simply cannot tame. I thought that the Enamel would be better and easier to use, but I was very wrong. For whatever reason, it, too, was difficult to apply, but it’s a very beautiful color and so far it looks great!
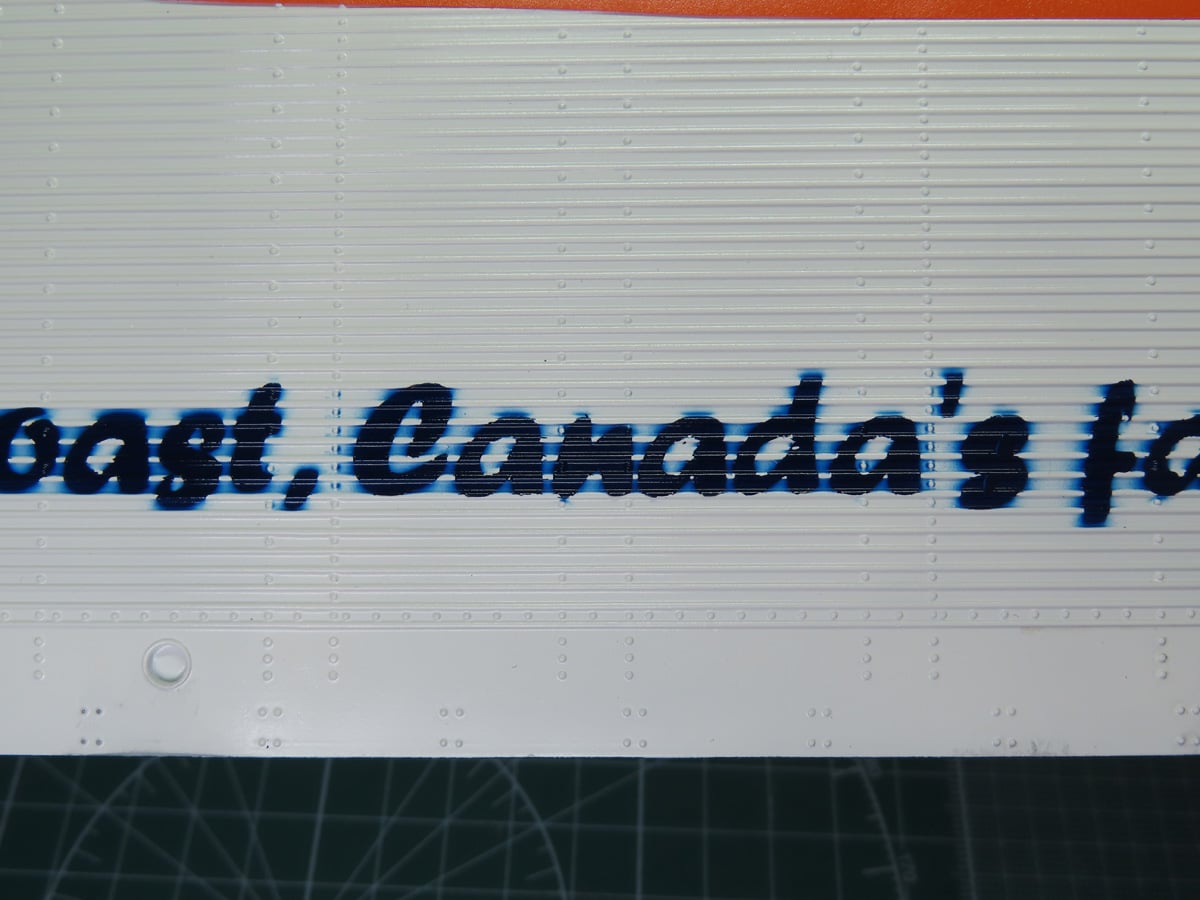
Carefully removing the stencil revealed quite a bit of over spray. This was unfortunate, as I needed to paint on many coats to build up the proper color.
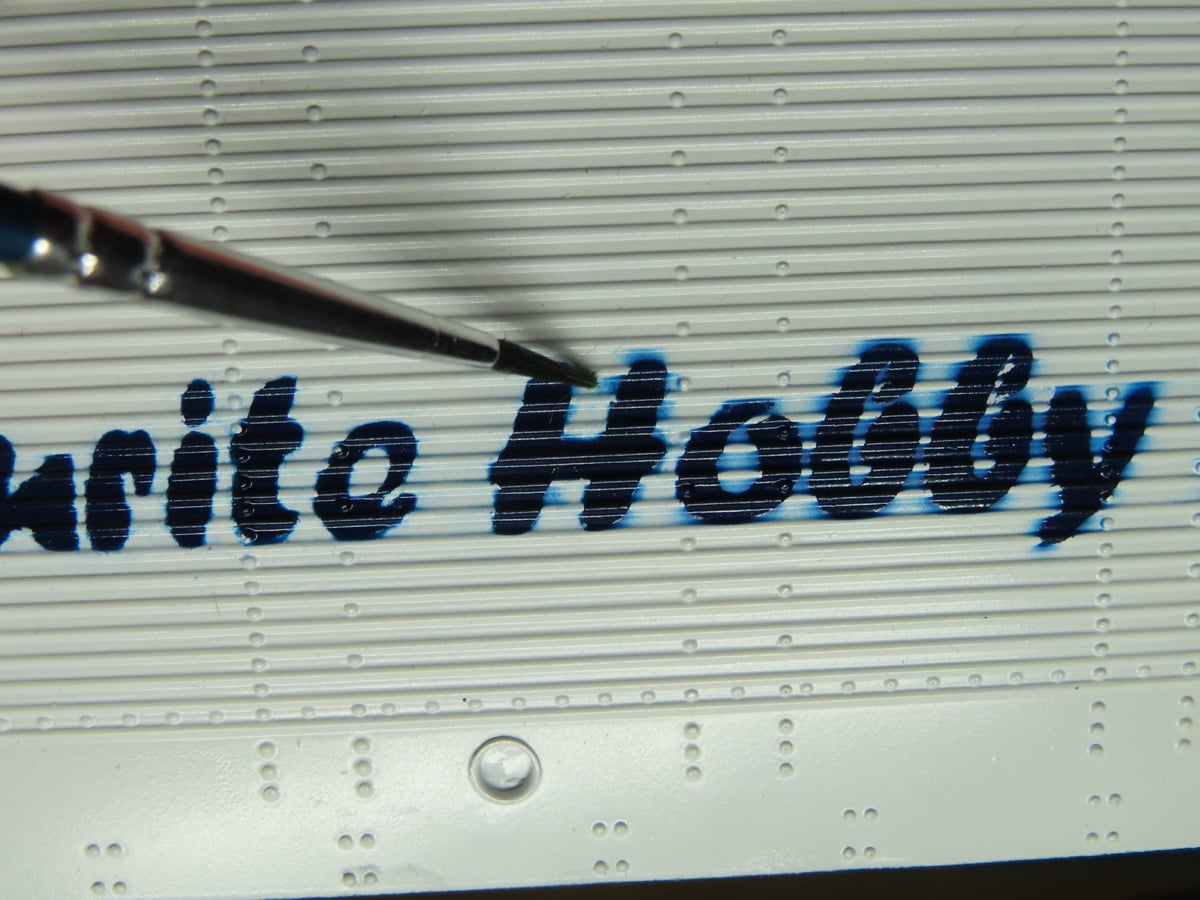
Now I would begin the long process of removing the excess over spray. Using a short brush dipped in Tamiya Enamel thinner, I wiped off the excess thinner, and I very slowly and carefully removed the over spray from around the lettering.
This was a very time-consuming process, and again could have been avoided if I had used a less rigid and more flexible vinyl. That being said, it was very rewarding to see the excess removed and the bright white return around the lettering.
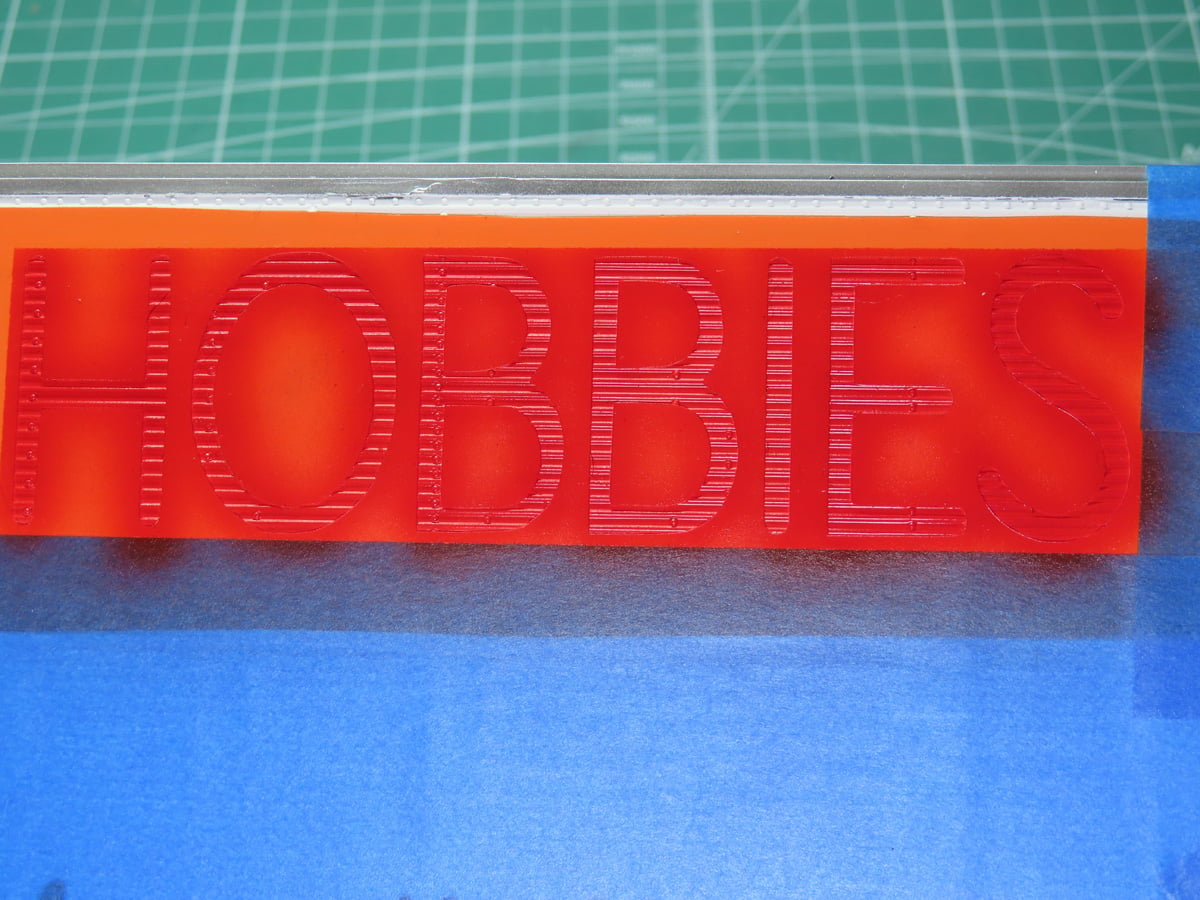
For the red sections, I sprayed Tamiya X-7 Gloss Red, which sprayed easily, just like the lacquer or acrylic paints.
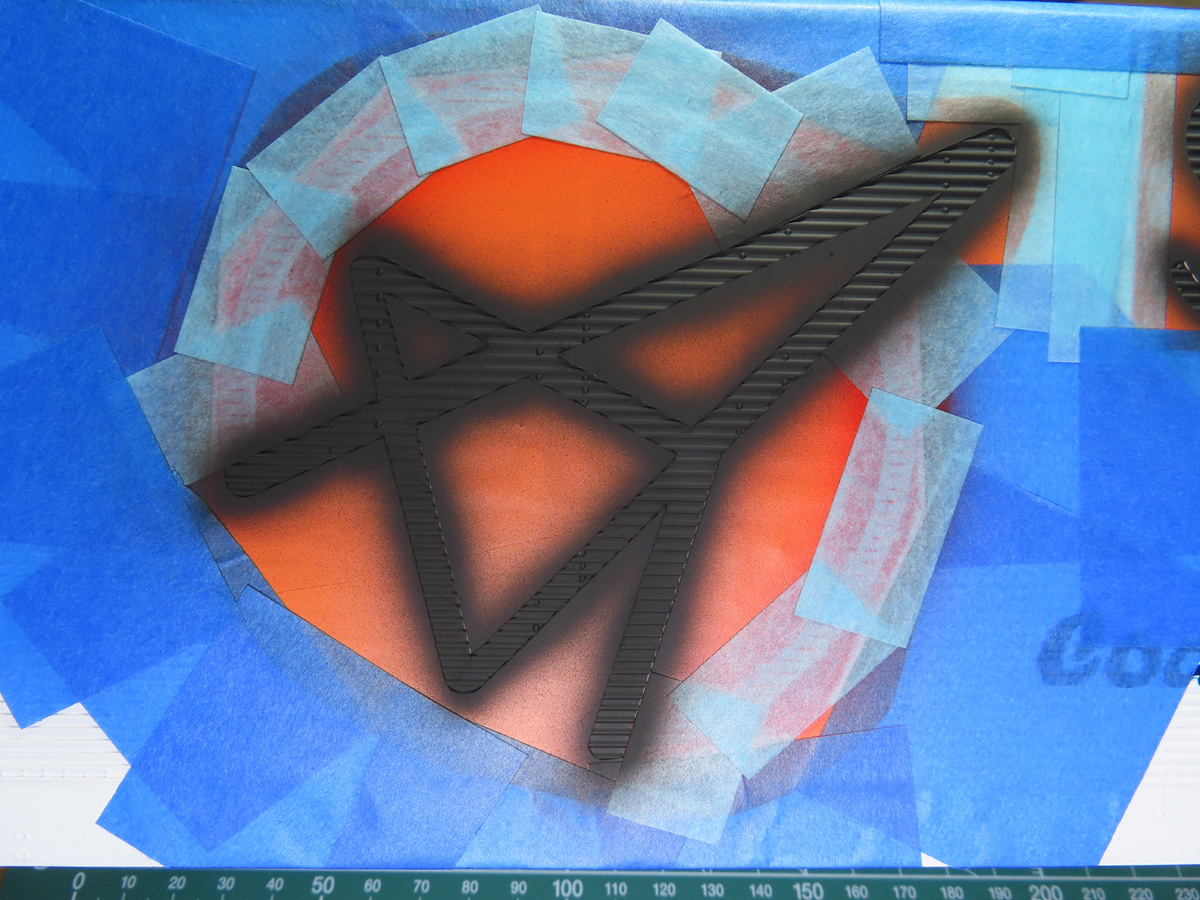
I used XF-1 Black, as I sadly didn’t have a gloss black to use. However, once the excess paint was cleaned up, I sprayed on a protective gloss coat using Mr. Hobby Aqueous H-30 Clear.
But be sure to let the enamels dry completely before adding a protective coating, as the gases from the enamels can get trapped and potentially ruin the model.
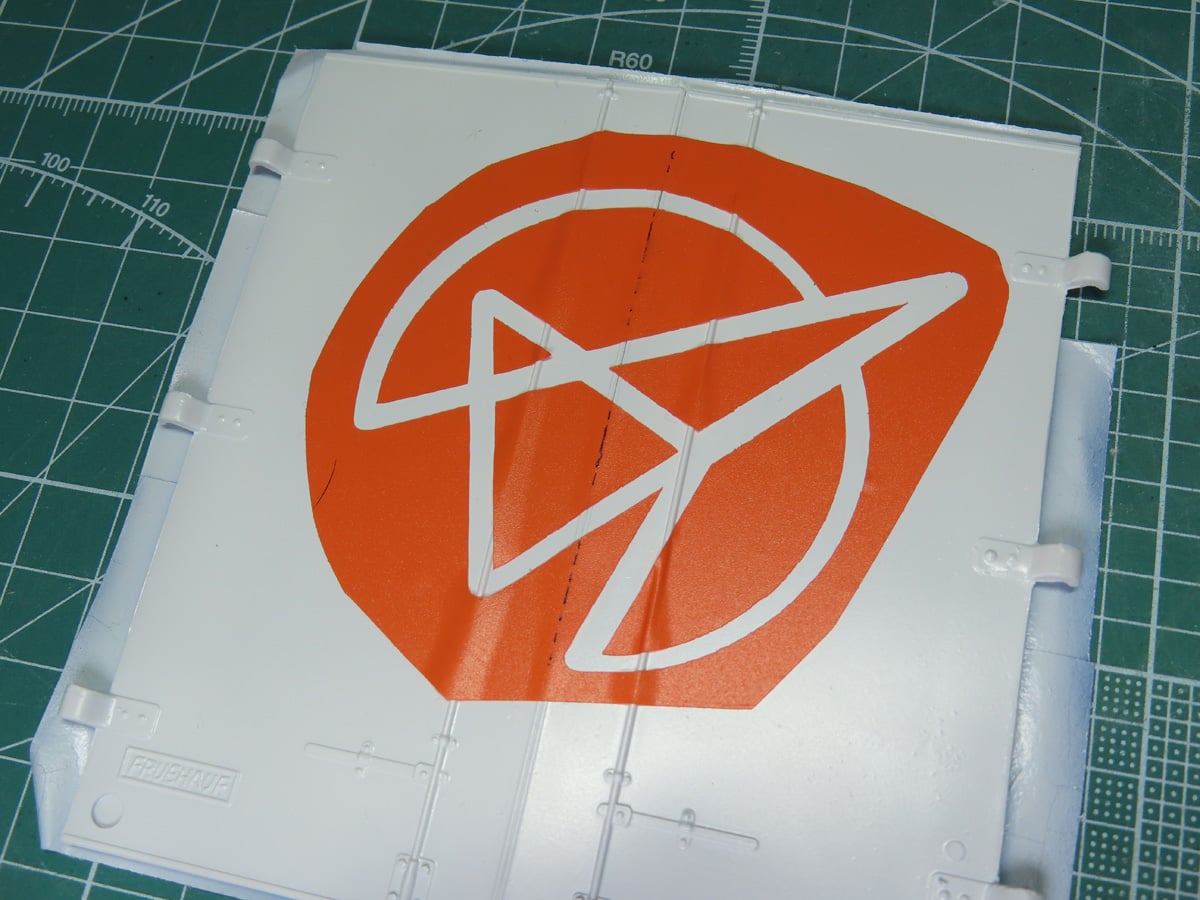
I carefully positioned the logo onto the back doors, and there were only a few small sections where the vinyl would lift. I was just glad that cleaning any excess paint would be easier than on the sides of the trailer.
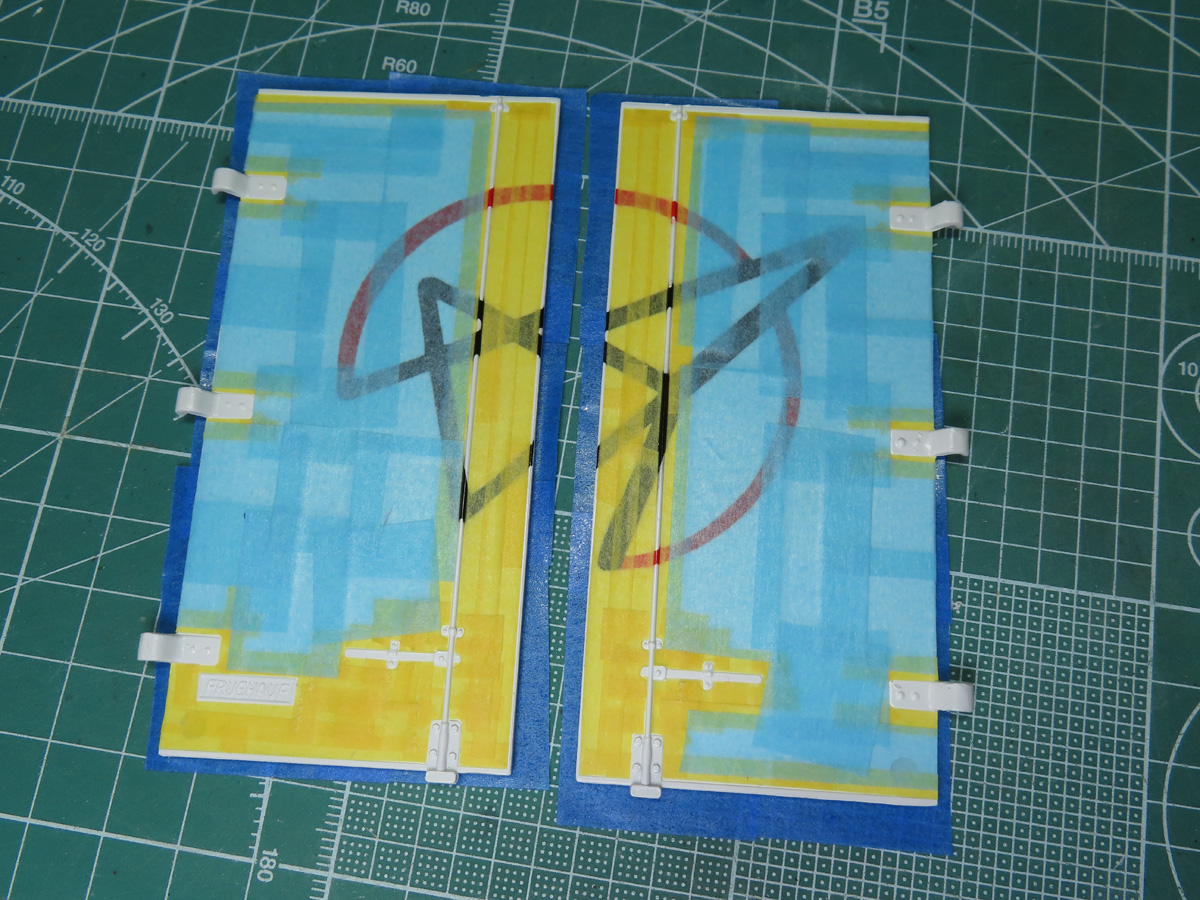
With the logo painted and cleaned, I masked off the doors so that I could paint on the silver metal pieces. Thanks to the thin Tamiya masking tape 87206, 87207, 87208, the entire masking process didn’t take long.
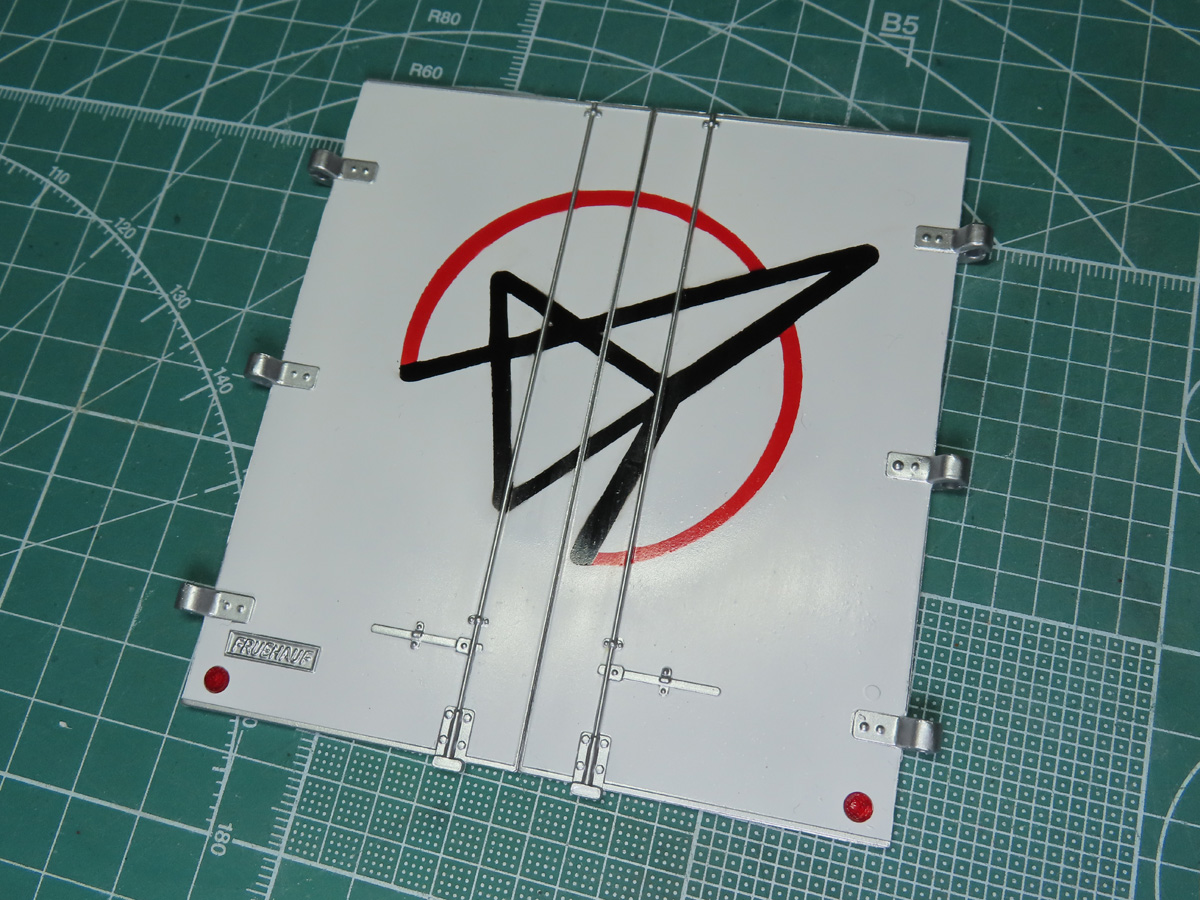
The silver parts were painted with Tamiya LP-72 Mica Silver to match the rest of the trailer. And I’m happy to say that none of the silver bled through, and I really love how that silver frame runs through the logo.
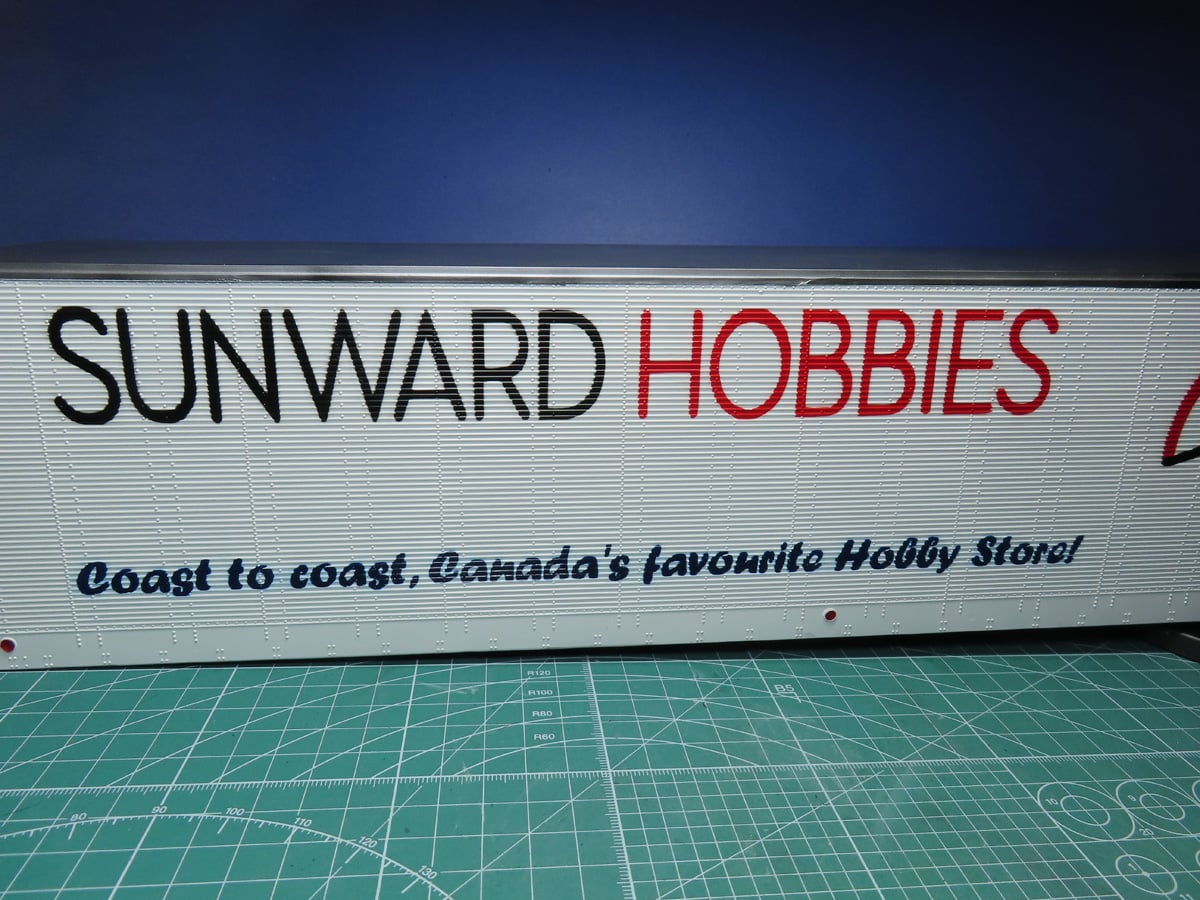
With the Aqueous H30 Gloss added to the lettering, the painting process was finally complete. It took a long time to clean the excess over spray, but it was worth that extra fuss. And now we’re ready to assemble and complete this trailer.
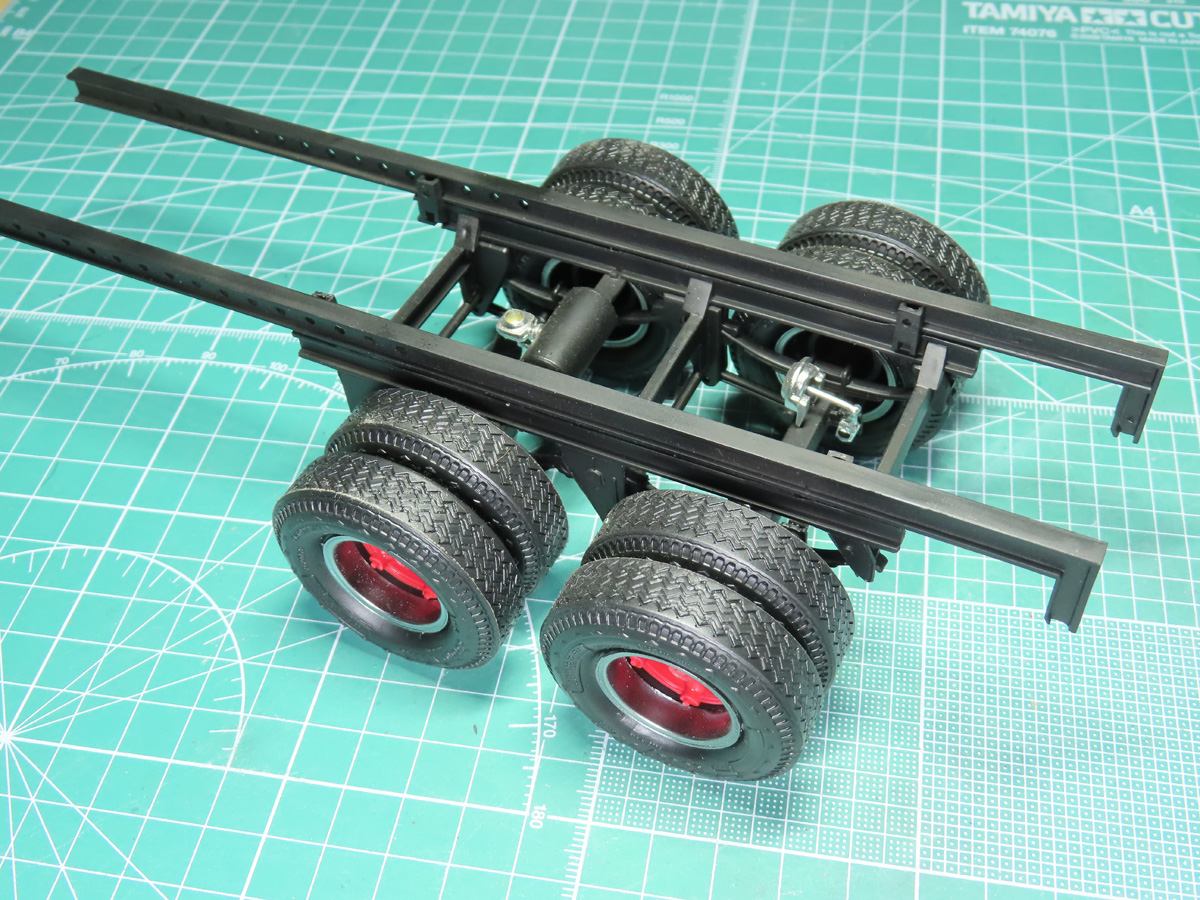
I started with the chassis; these are supposed to move freely along the tracks. But I decided I didn’t want these parts to move, so I glued the tracks directly onto the chassis. This would also make it easier to glue the frame to the underside of the trailer.
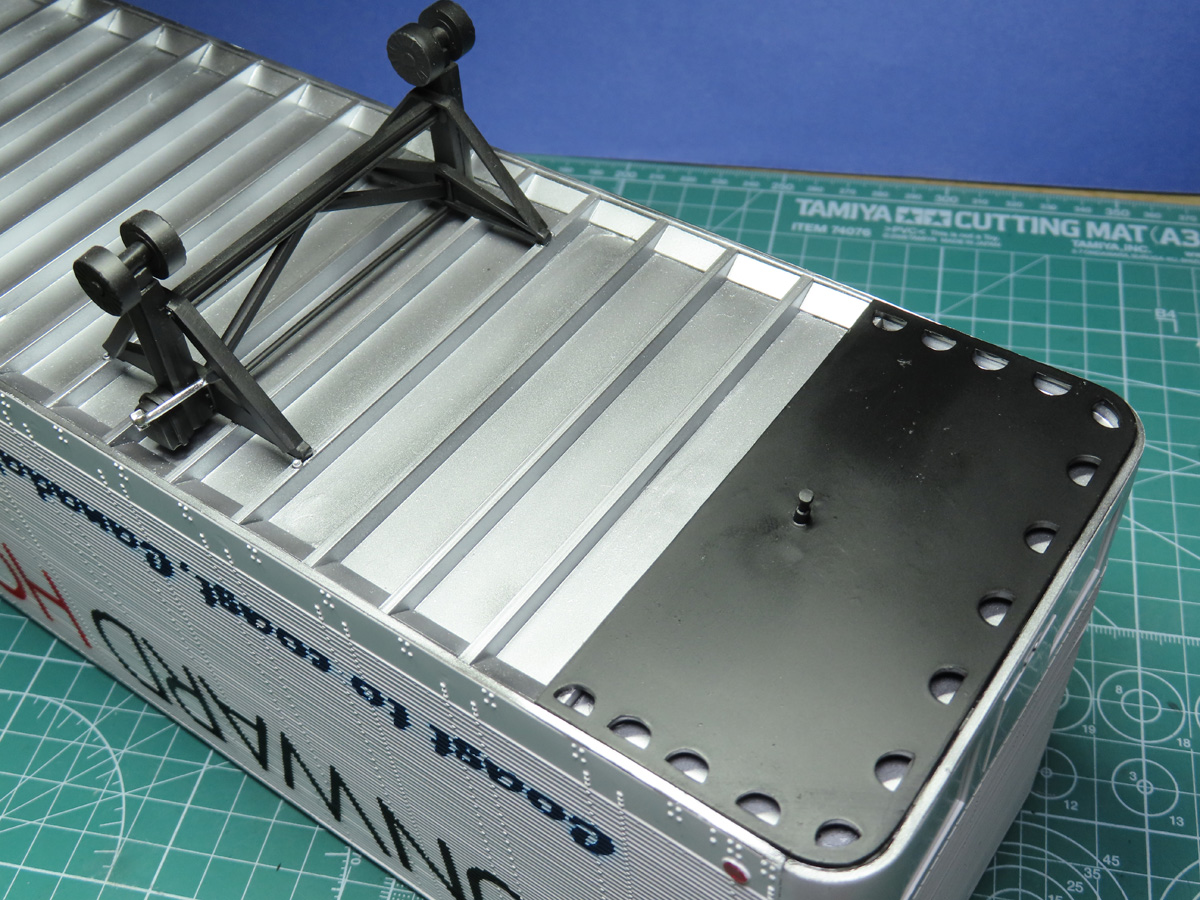
While the chassis was drying, I added the front kingpin and the lowered leg sections. I had a bit of a fit issue with the forward frame, but with some careful sanding, I got the plate to fit properly in place.
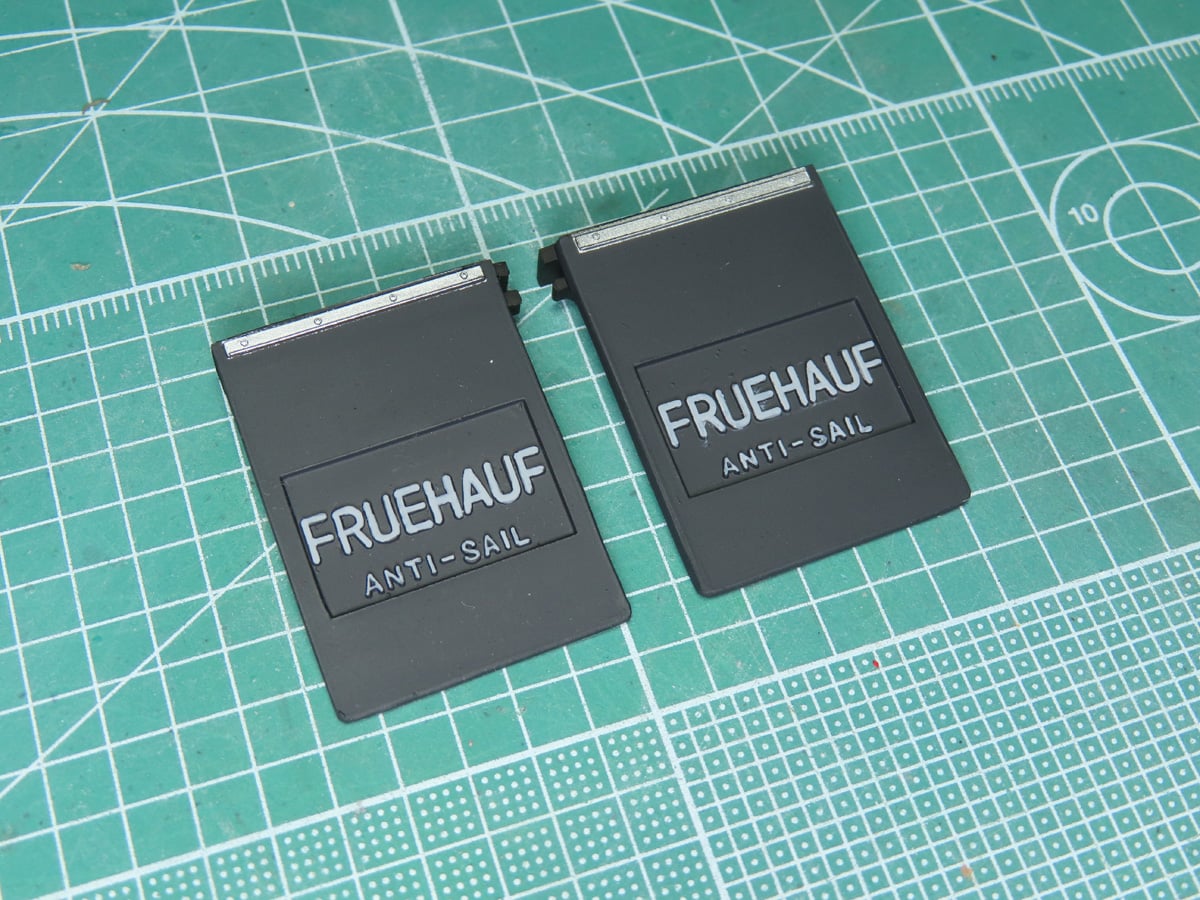
The mud flaps were painted with Tamiya LP-65 Rubber Black. And I was going to paint these more colorfully, but I decided it was too obnoxious and distracting. So I repainted them Rubber Black and painted the raised lettering with Vallejo Light Grey 70990. Though not as elaborate as I originally planned, I think they look much better.
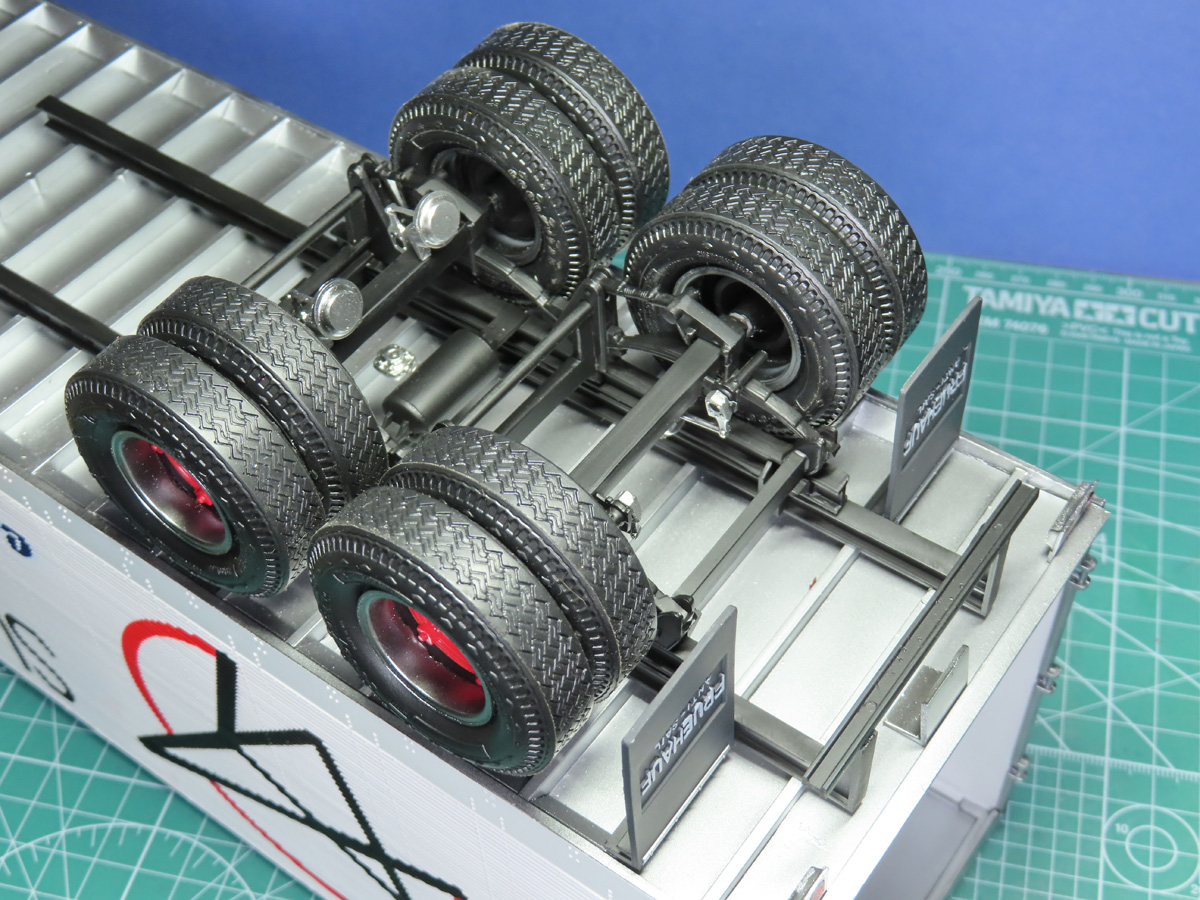
With some carefully applied BSI CA super glue, I was able to position the chassis frame in place, and it’s very secure on the underside. I was a bit concerned with this section, as the chassis is quite heavy, and there isn’t a great fit for the frame.
Future modelers might consider drilling the bottom and adding some pins to help reinforce this section.
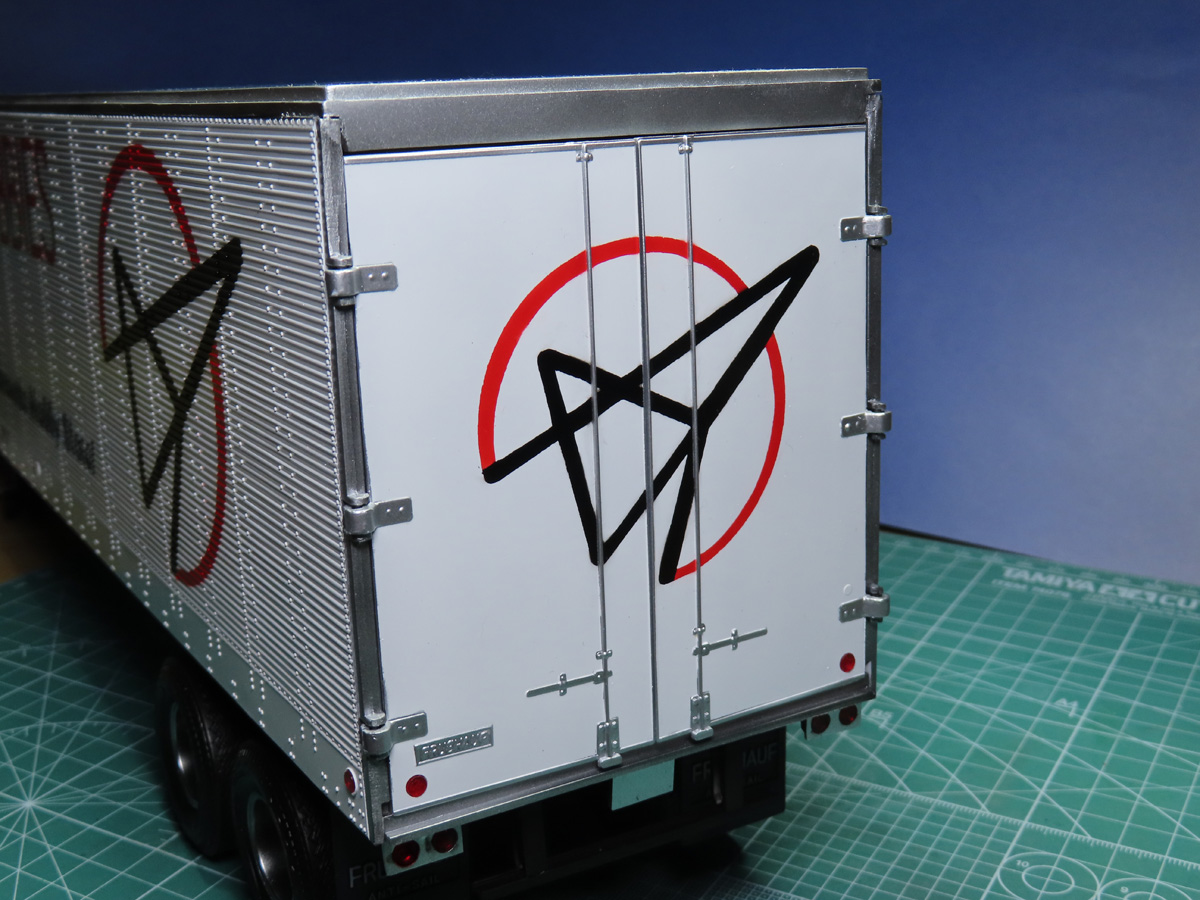
Now that everything has been added to the underside, I flipped the trailer around and pressed the doors into the hinges. It’s a bit of a pressure fit to keep the doors closed, but I think they look so great now that they are added to the model!
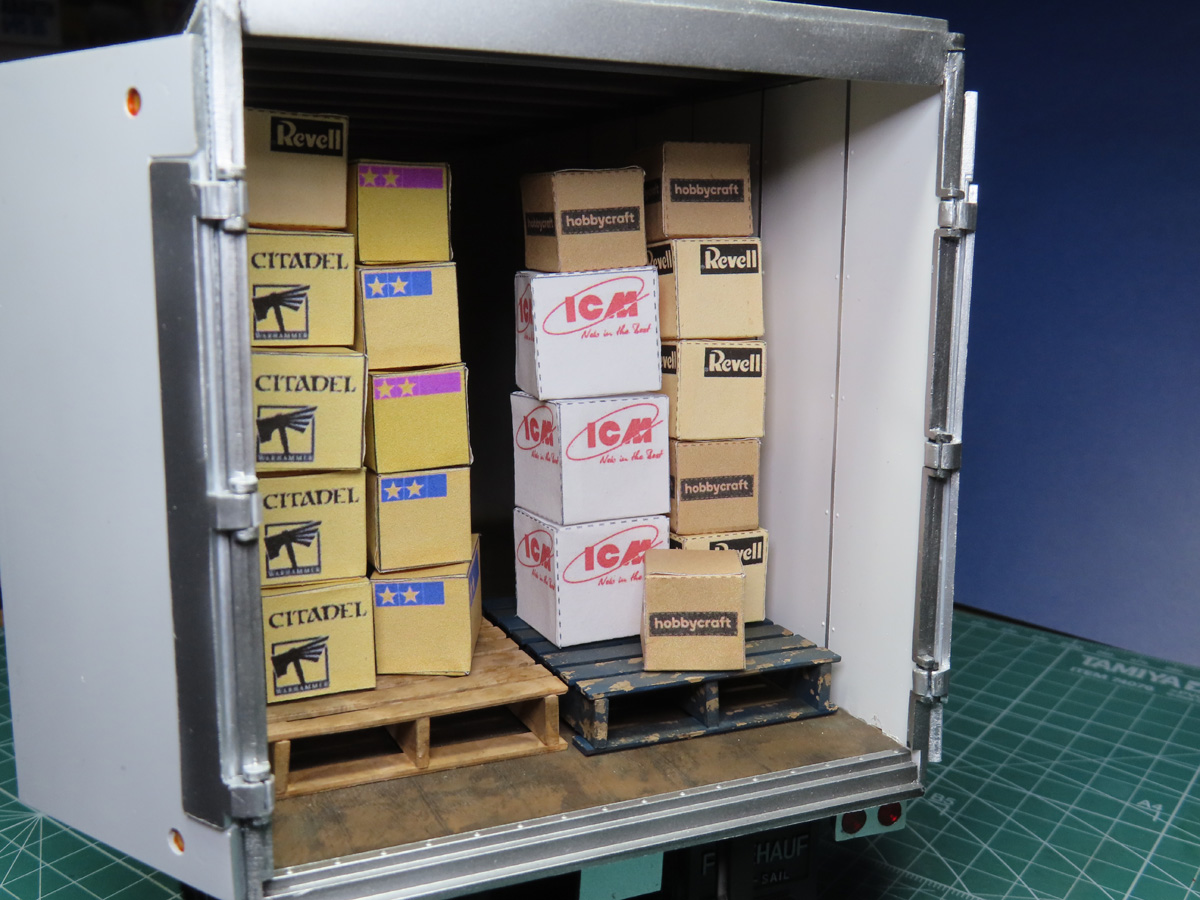
And now for the final step, I’ve super-glued the pallets into the trailer. This has got to be my favourite part of the build. Opening the doors and looking through to see the inside stacked to the top with boxes of model kits.
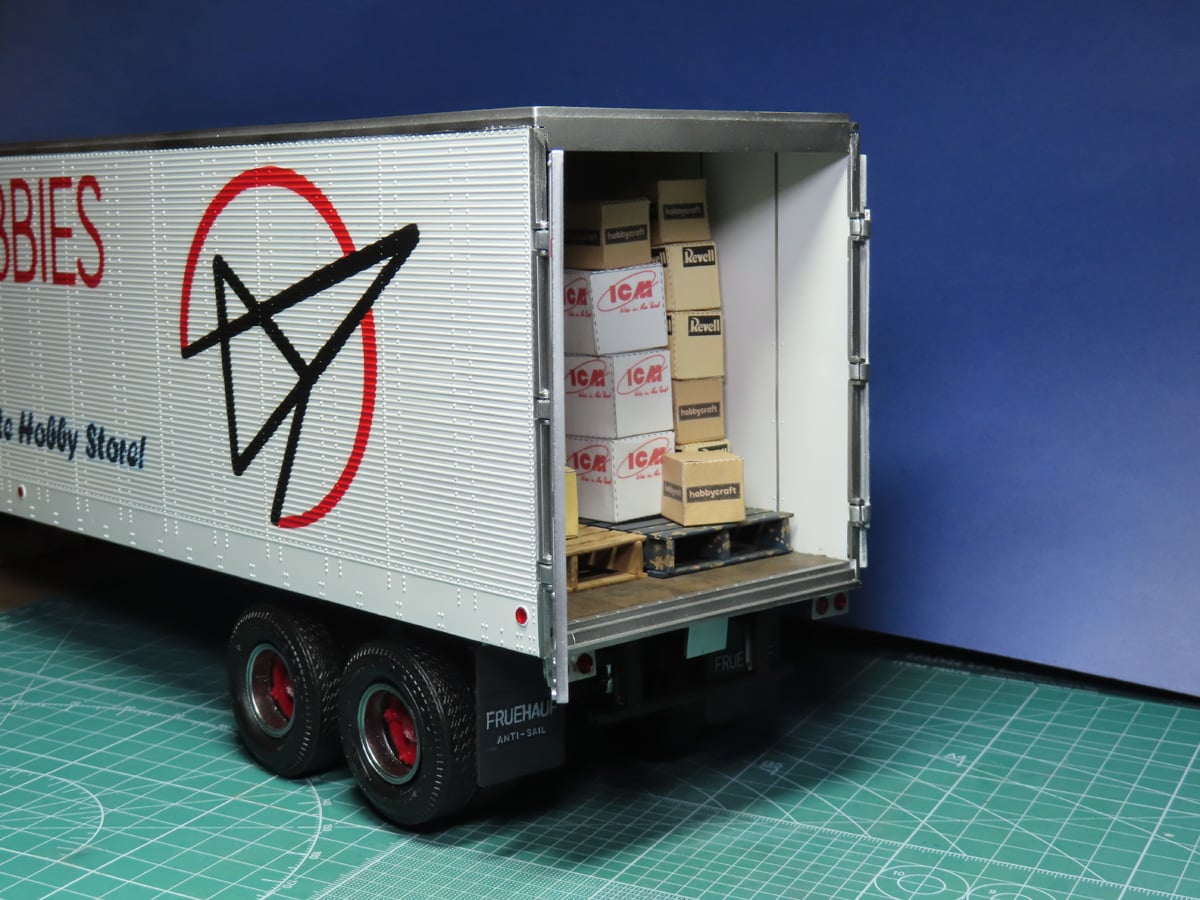
And just like that, this project is completed!
This was a big project to take on, and I learned so much while doing it. And I’ll admit there were a few points during the build where I felt overwhelmed, but it was a good learning experience for future projects.
And I’m really grateful to everyone who voted on this one, as I really, really wanted to build a Sunward Hobbies trailer, and I think that it will look excellent when paired with the Aerodyne truck.
Thank you so much for following along. I hope that this build series has been helpful for you and your projects. Until next time, keep on modeling!
About the Author:
Jared Demes is a modeler from southern Alberta. He has been building models since he was 4 years old when his Dad first introduced him to the hobby. He has written for several magazines including, Fine Scale Modeler, Scale Aircraft Modeling, Phoenix Scale Models, and others. He has an interest in all modeling subjects, with a focus on WWII Japanese aircraft and Science Fiction.
Jared has won several IPMS awards for his modeling, and currently operates his YouTube channel rebelsatcloudnine, where he showcases model builds and product demonstrations.
Completed Images Post: Part 6
Last Post: Part 4
First Post: Part 1