
Tamiya North American F-51D Mustang
This is the ninth part of the Tamiya North American F-51D Mustang Korean War 1/32 Scale 60328 with RCAF Markings.
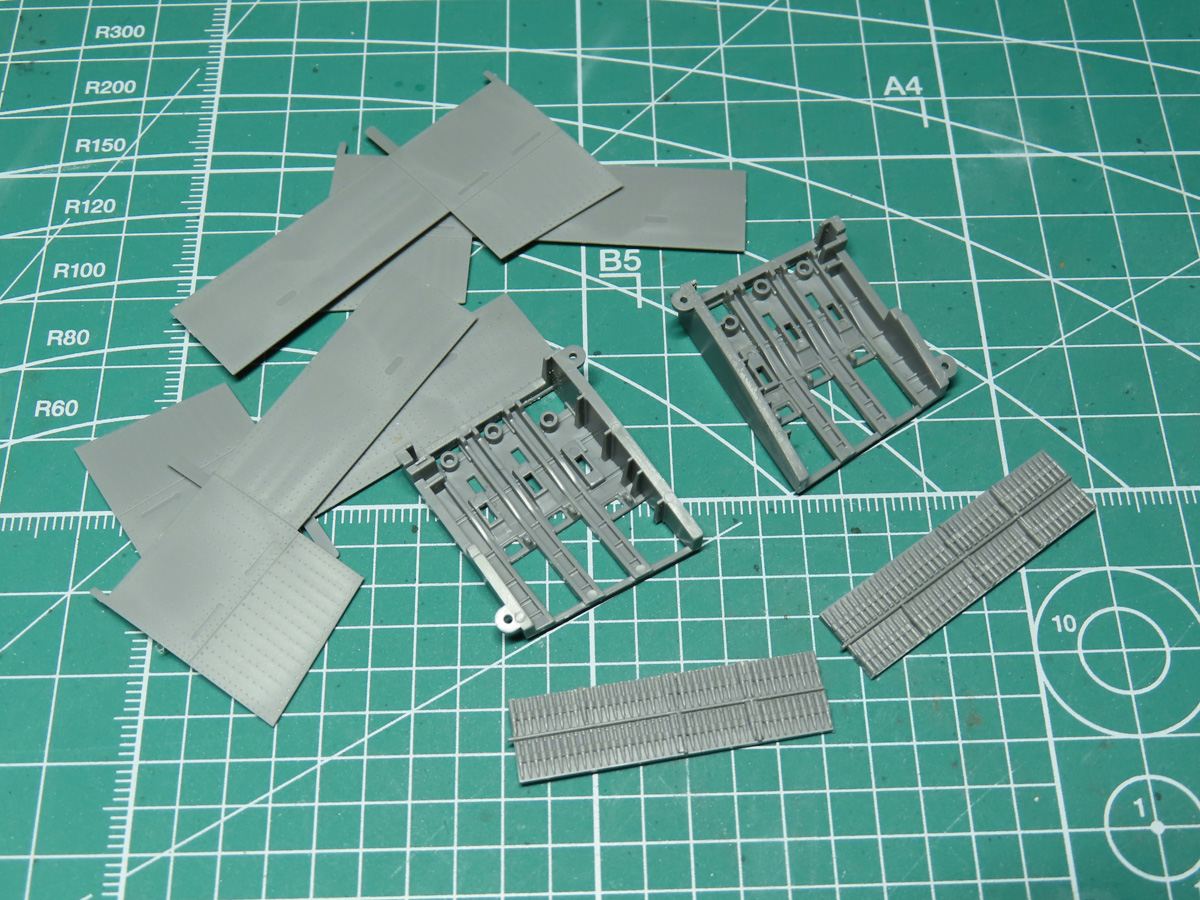
In today’s post, we’ll be working on building and detailing the gun bays. The open gun bays are a very nice little addition to this build, and I’m going to show you how I modified them on my first P-51 kit, so that you won’t lose the wing panels.
I’m very excited to show you this modification, as it’s become very useful when handling the model. This way, when you flip the model around to exchange the landing gear to he raised position, you won’t have the panels suddenly fall off, and potentially damage the parts.
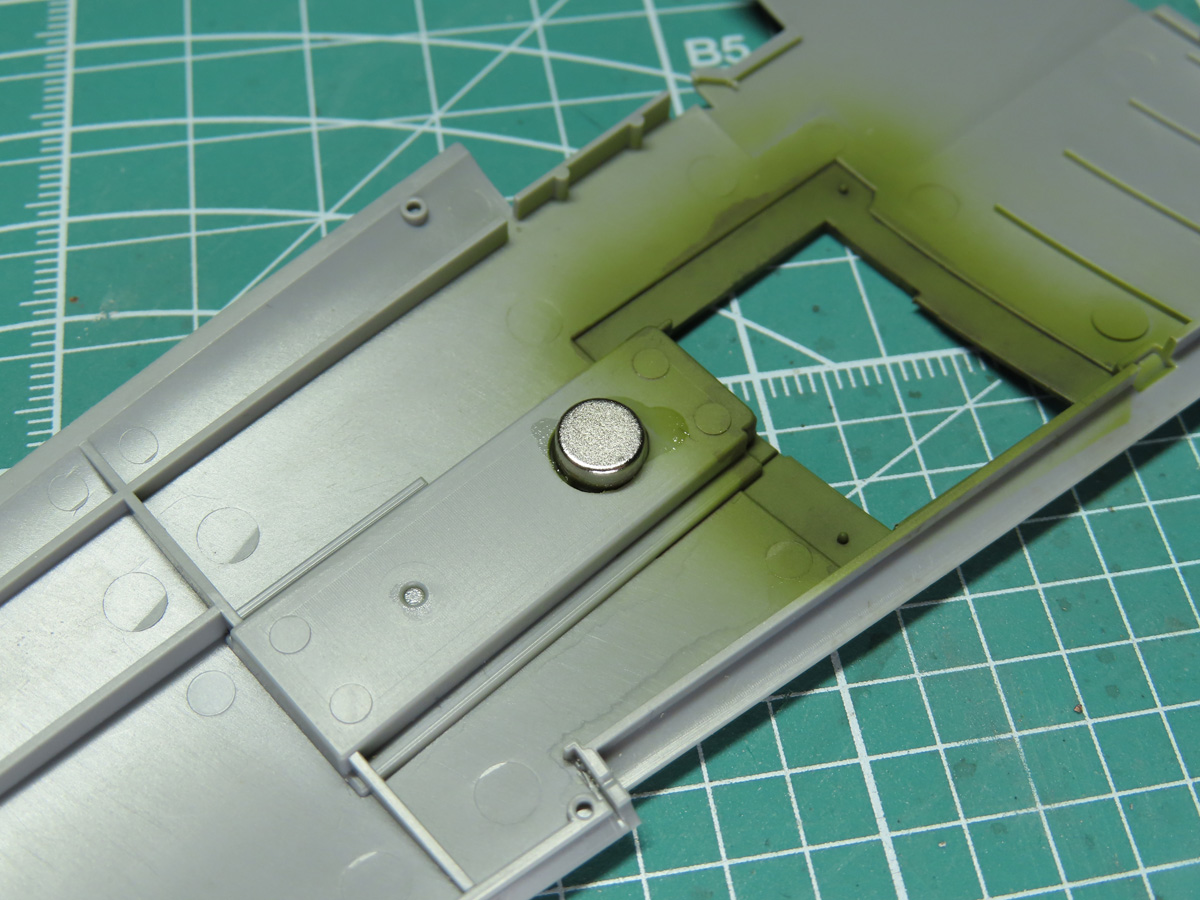
I’m going to magnetize the gun bays, and it will only require a bit of modifying to the kit, as well as some strong earth magnets to use. These you’ll have to find elsewhere as they aren’t included with the kit. But thanks to Miniature gaming, Earth Magnets are easy to find.
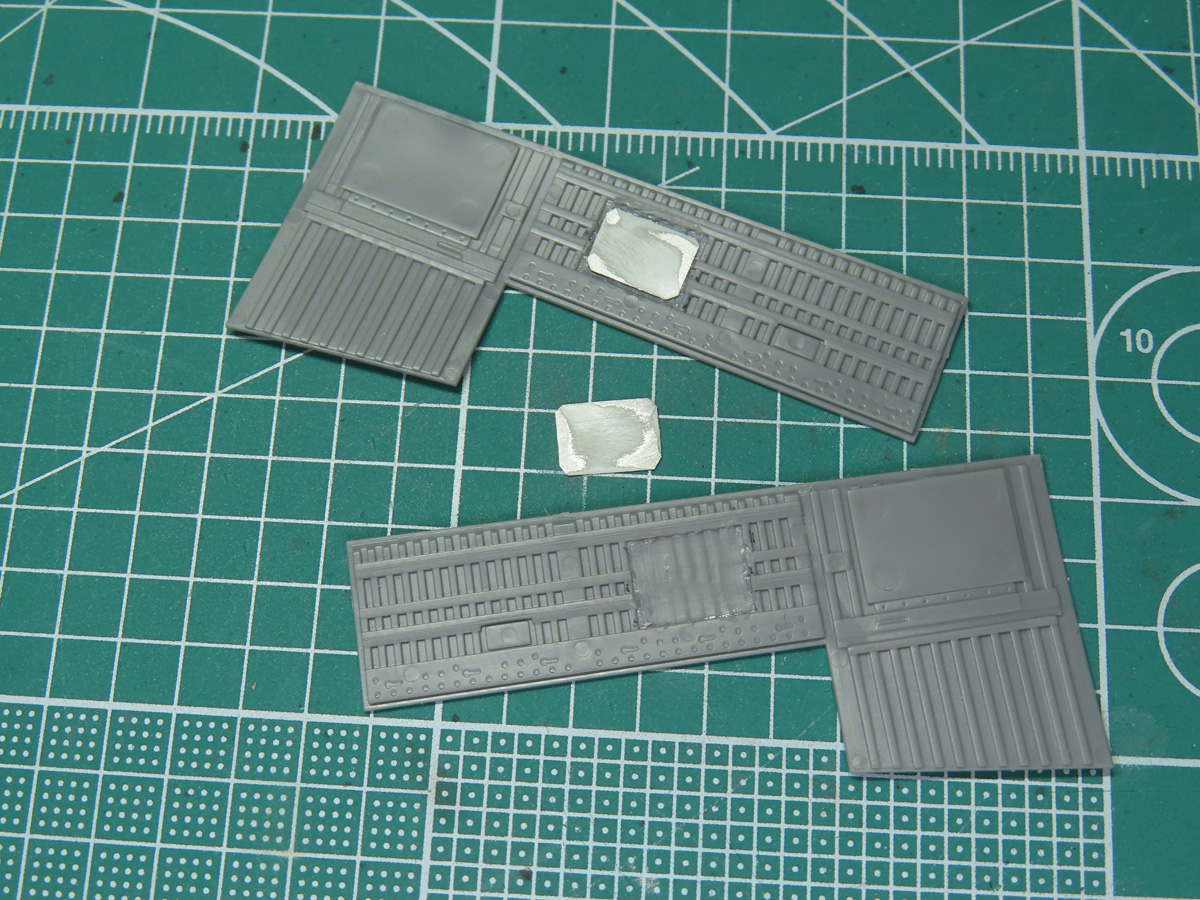
Tamiya includes 2 sets of panels for the gun bay. One is meant to be completely closed, covering the guns. And the other is meant to but cut into sections to show opened like on the real aircraft. I’m using the closed panels, and I’ve carved out the plastic into a small square inside the panel.
Lastly, I found some spare metal from a jar lid. Basically, I looked for anything metal that the magnets were really attracted to, and I cut the metal into small squares. I then used super glue to set the metal into the newly recessed section.

The next step is to drill out a hole in the wing section. This is where the magnet will be placed, and it’s directly under the piece of metal we secured to the panel.
The magnets I’ll be using are quite large in size, but I found that they don’t interfere with the assembly of the wings.
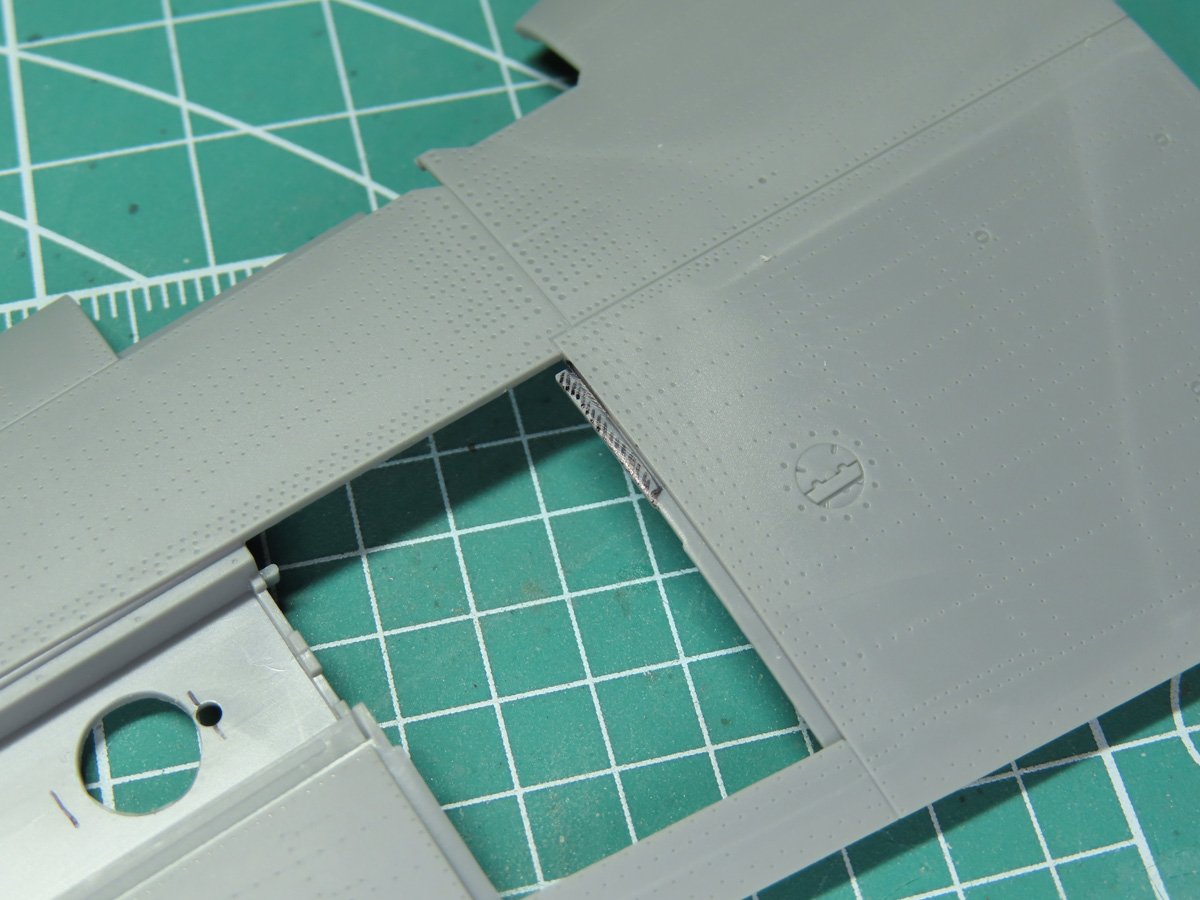
The last modification we need to make is on the edge of the gun bay. I’ve marked off this section in black that will need to be removed. I cut this flush with the edge, and later on in the build, this will be clearer why this little section of plastic needed to be removed.
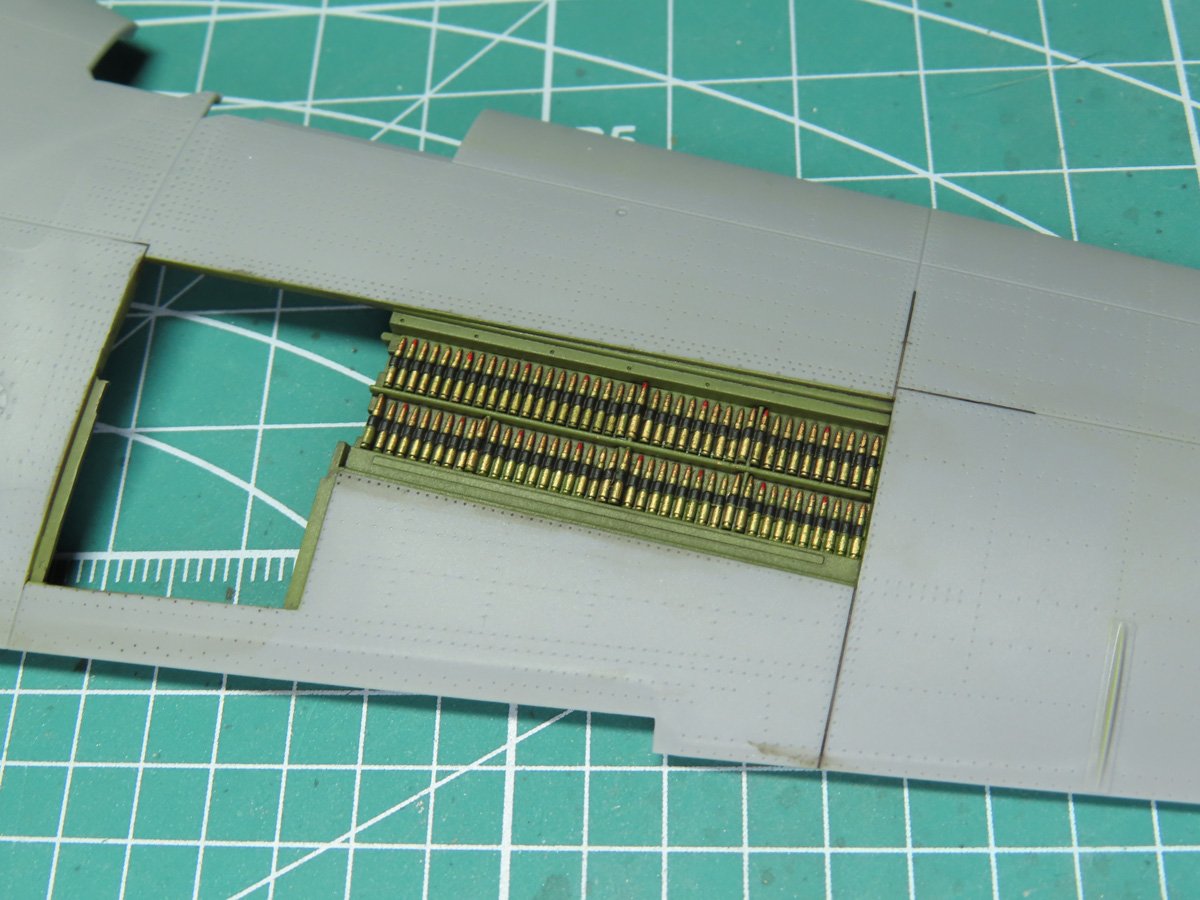
The bullets can be tricky and a bit daunting to paint. This is the method I used, and I found it to be a lot easier.
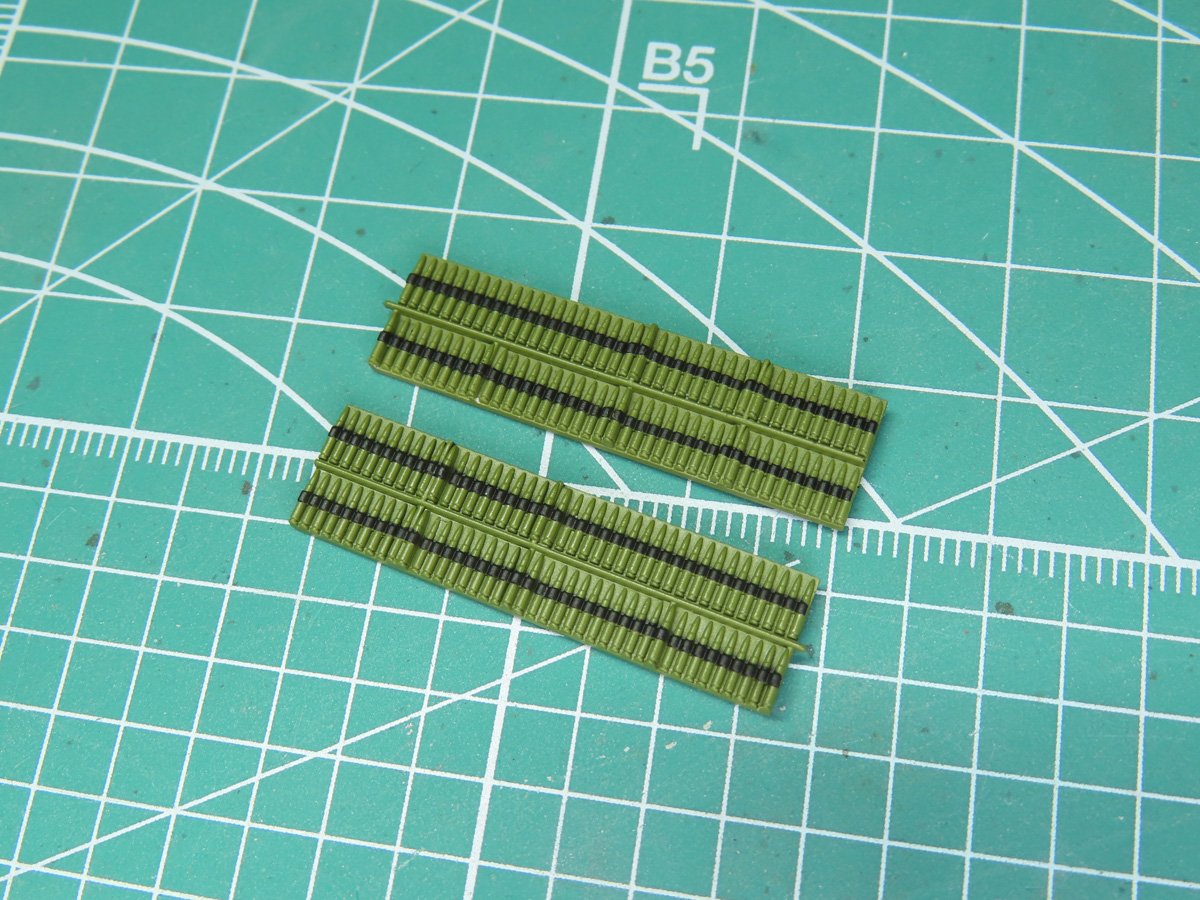
I started by painting the interior with Mr Color 351 Zinc Chromate Green. After it had dried, I wanted to paint the black links that hold the bullets together. I used Tamiya 1mm tape 87206 and carefully laid the tape on either side of the links.
Once the tape was in place, I brushed on Mr Masking Sol Neo to cover any exposed areas. I was then able to paint on Mr Color 33 Flat Black.
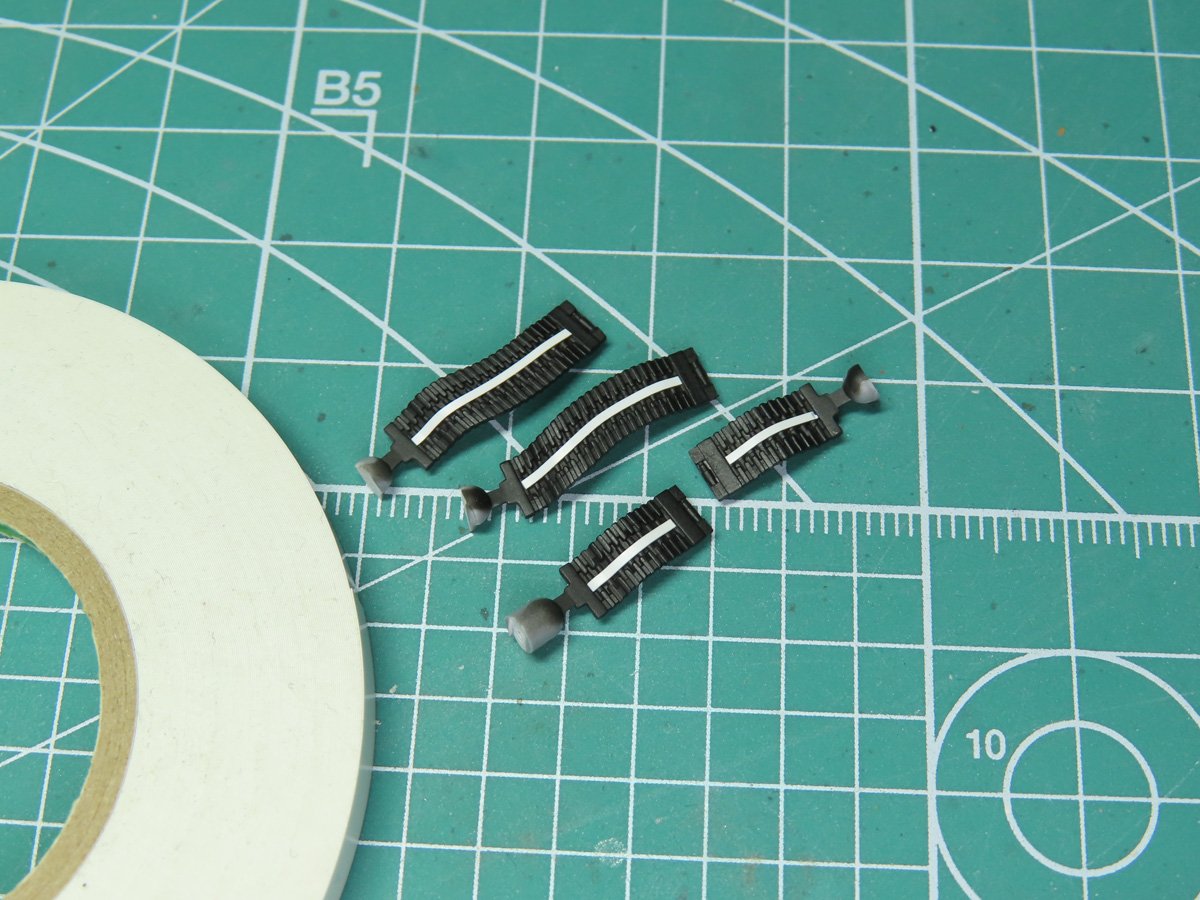
The belts that will be fed into the guns were first primed with Mr Surfacer 1500 Black. At this stage, I decided it would be best to mask the links as well.
To help me get the correct curve I needed, I used Tamiya Masking Tape for Curves 87179. I bought this several years ago for masking the fuselage on aircraft, and I didn’t really like it.
However, I find that it’s still incredibly useful for odd tasks like curved masking here, which aren’t as flexible as regular masking tape. One of those when you need it, you really need it products.
Now that they are masked, I painted the belts with Tamiya LP-11 Silver.
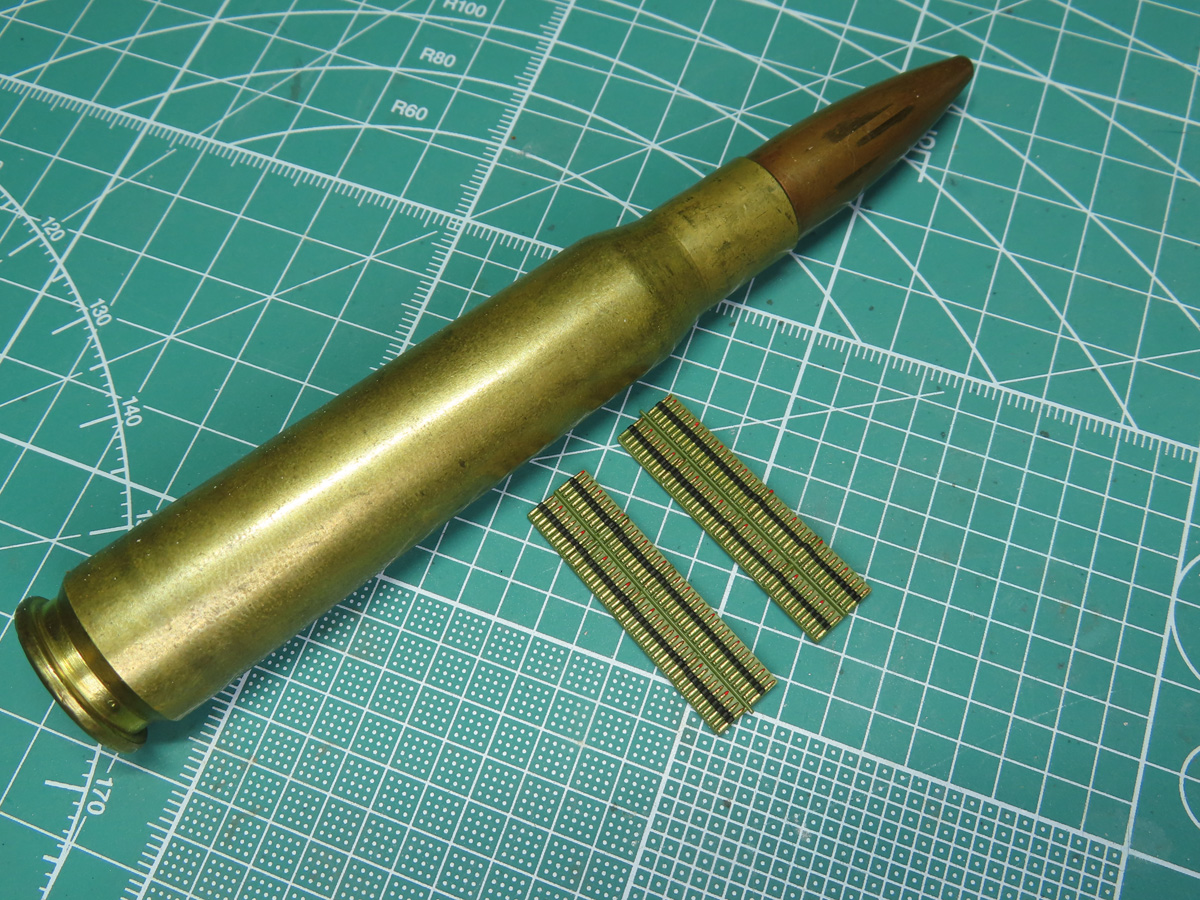
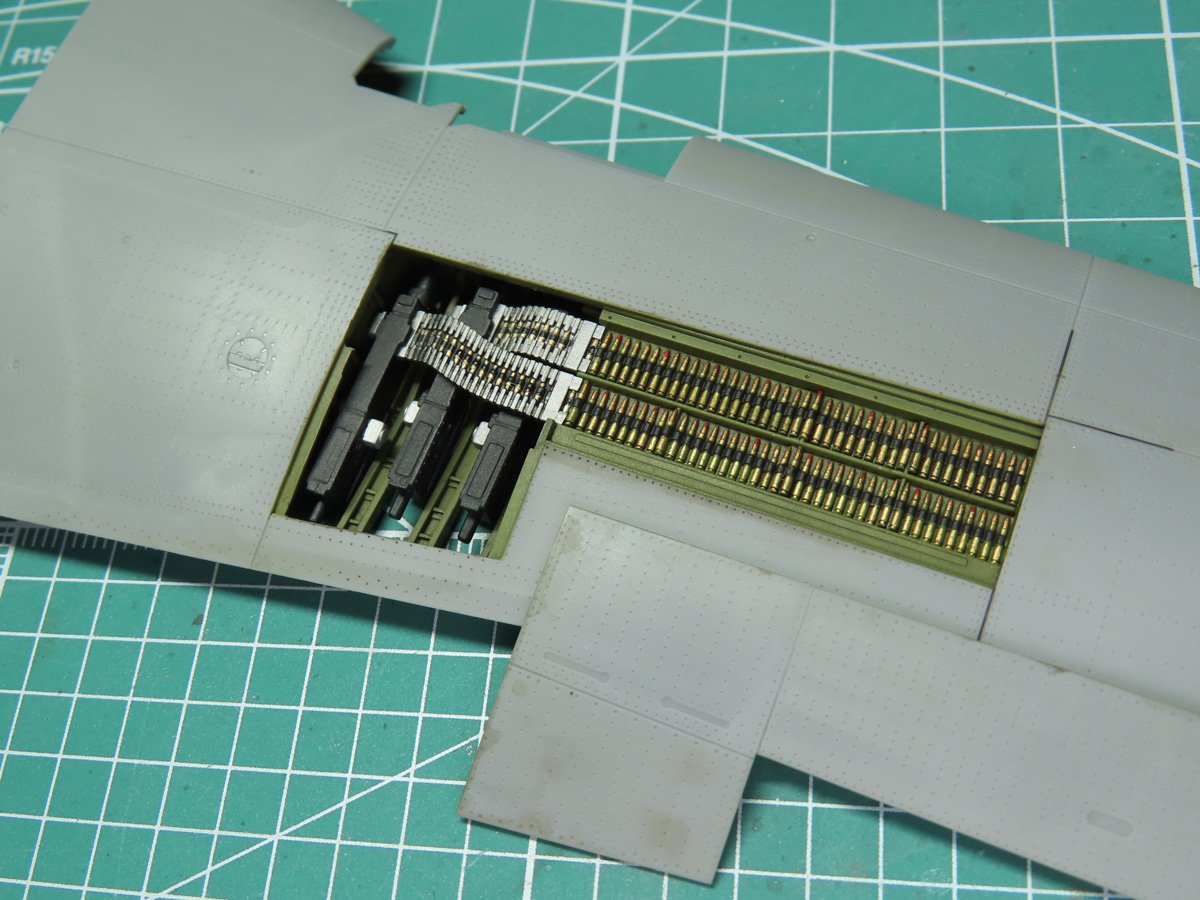
I painted the casings on the bullets with Mr Color 9 Gold. Using a thin brush, I carefully painted the top sides of each bullet. For the bullets, I used Mr Color 10 Copper, and again carefully painted this onto the top sides. I sort of dry brushed the paint on, and I wasn’t too concerned with covering every side of the bullets. This made the painting a lot less stressful.
On American Mustangs, every 5th bullet was red-tipped with phosphorus so the pilots had a visual marker of where the bullets were heading when they were fired.
I couldn’t find if Canadian Mustangs did this as well, but I decided to add a small bit of red to every 5th bullet.
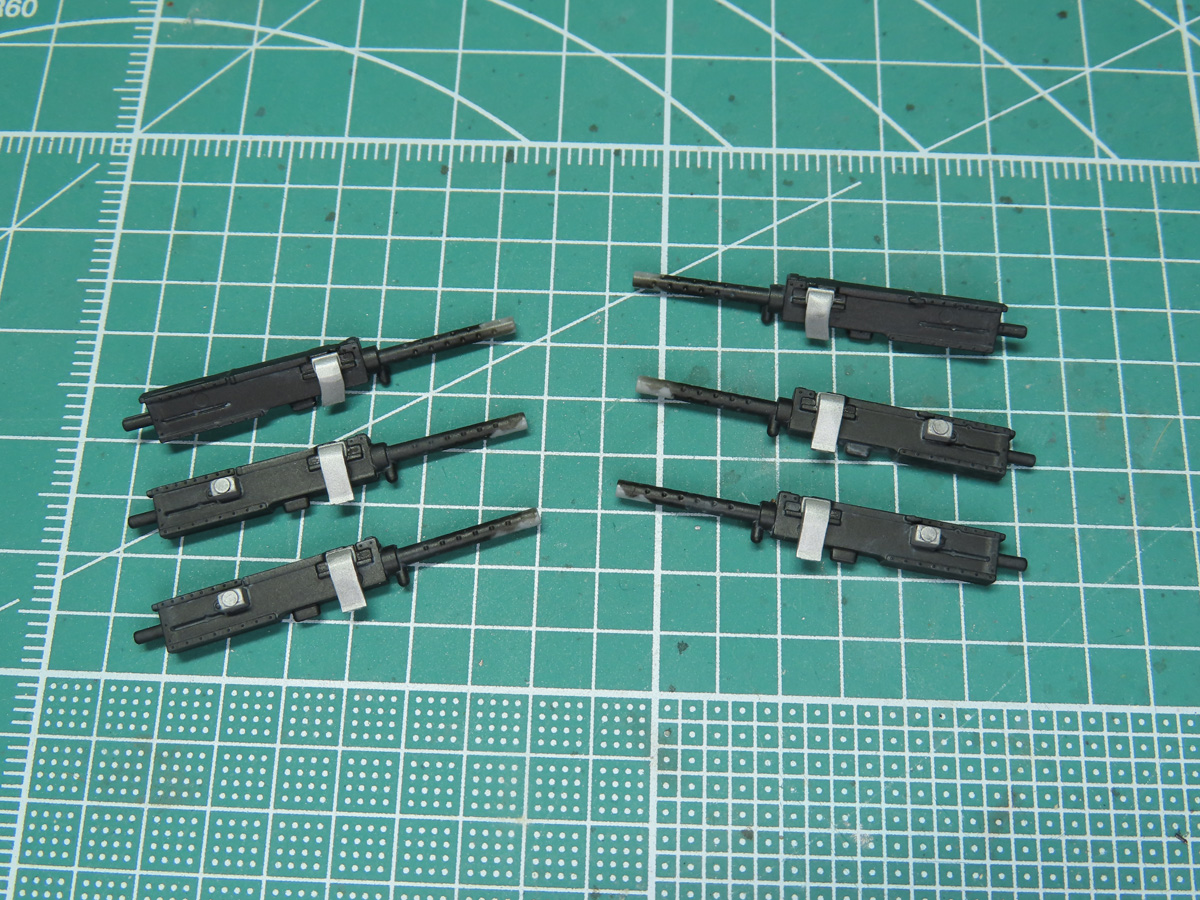
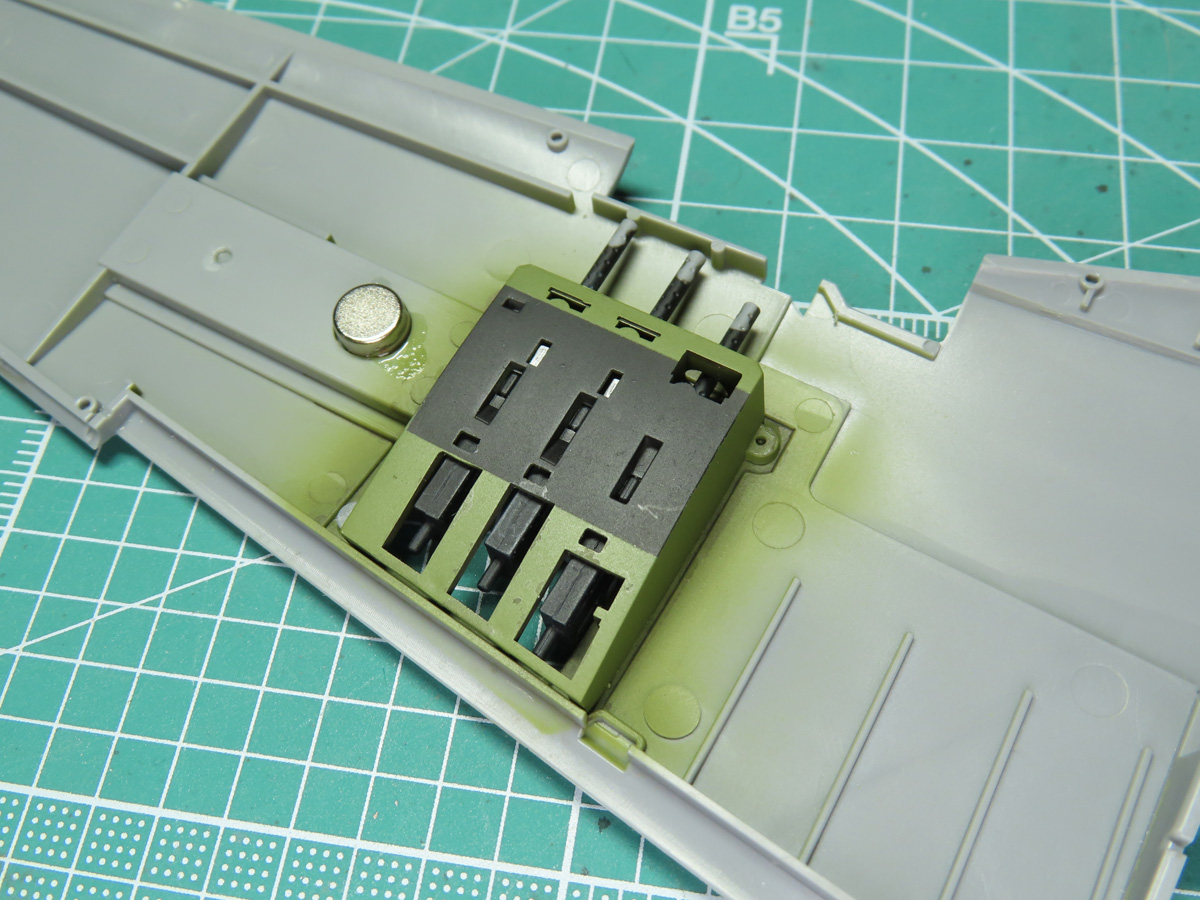
Each of the Brownings was painted with Mr Color 33 Flat Black and Tamiya LP-11 Silver. To highlight the details on each gun, I applied Tamiya Panel Line Accent Color Gray 87133.
The guns will be fitted to the bays in a particular order. So pay close attention to the instructions at this step.
Each of the guns was carefully glued into place with some Mr Cement SP. Once the guns are dried, we’ll be ready to assemble the rest of the gun bay.
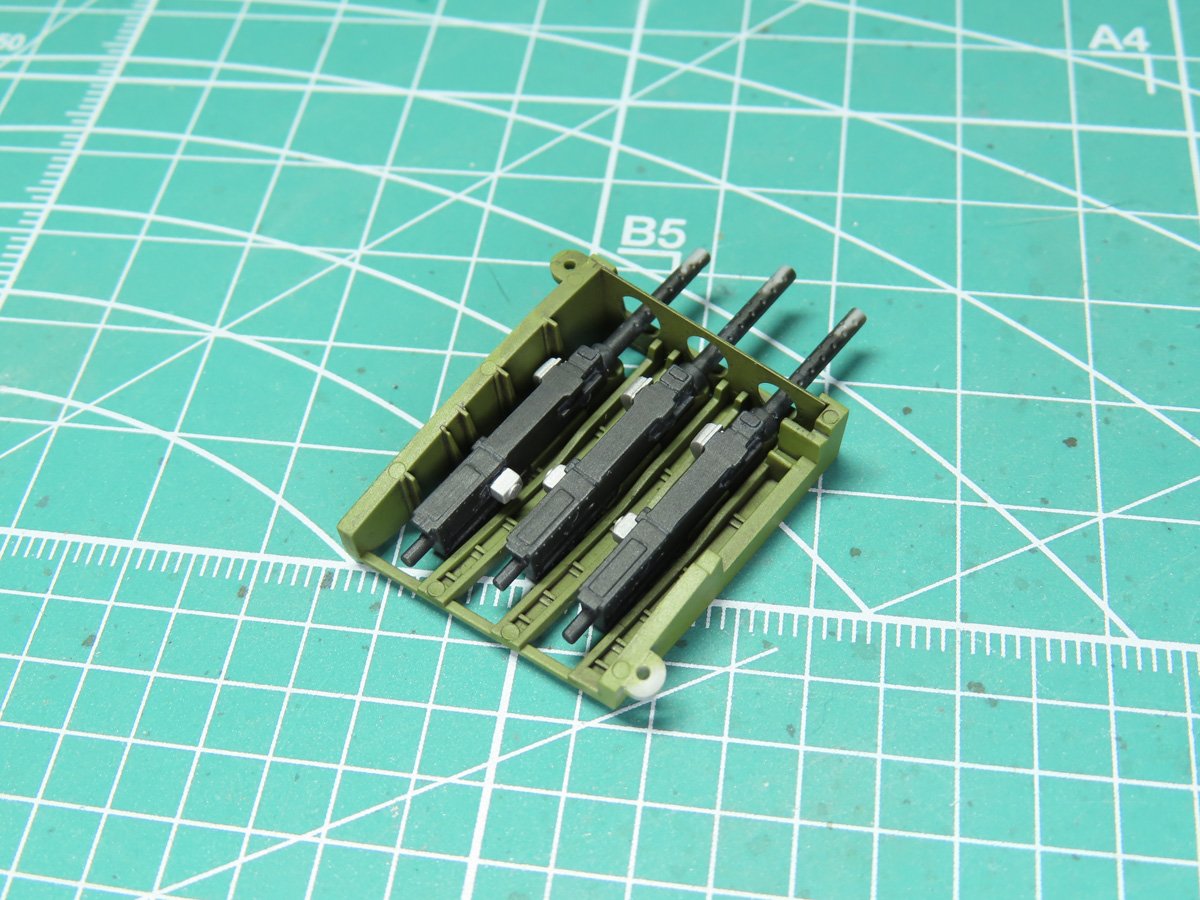
I first glued the bullets into the wing. Add these in carefully to avoid scratching the paint on the sides.
The wing was then flipped around, and I secured the magnet in place with a strong amount of super glue.
Next, the guns were added and liberally glued in place with more Mr Cement SP.
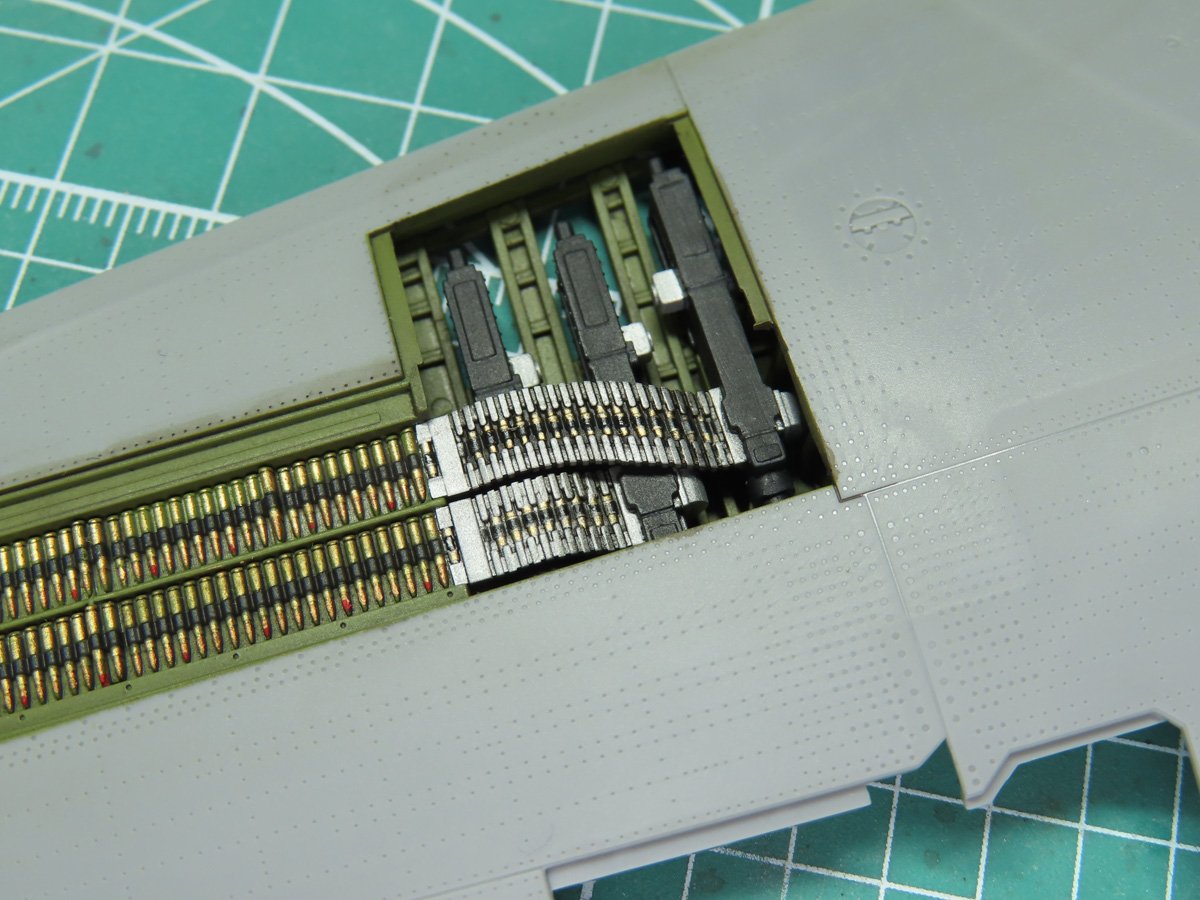
With the gun tray in place, I could now add the ammunition belts that connected to the guns. At first glance, these look like tricky parts to fit in place, but they fit with remarkable precision.
Start with the sorter belt, and connect it to the gun, and once it’s in place, it will simply “click” to the rest of the bullets.
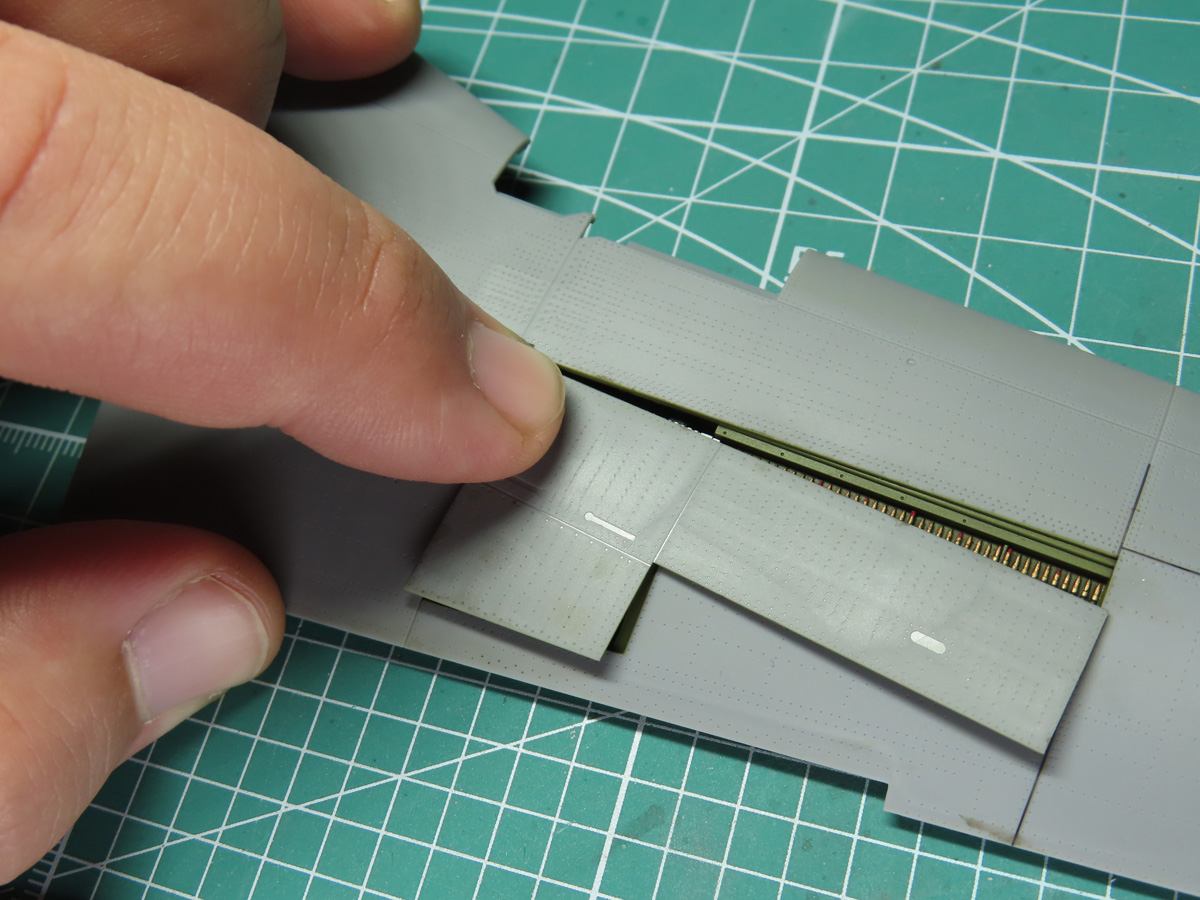
Now that the gun bays are completed, you can add the top panel. With the magnet in place, this panel will easily snap onto the model.
And to remove the panel, and you need to do is press into the top cover where we removed the extra plastic from the edge. This creates a lever effect, allowing you to easily remove the panels without damaging any parts or paint.
And there you have it, magnetized gunbays! I hope that you’ll find this helpful on your P-51 and something you might consider adding.
Personally, I’ve found it to be really useful, like when I was painting the model, or as I previously mentioned, swapping out the parts in the gear bay. It’s also reassuring to not have to worry about the possibility of losing one of these panels. And I really love the open gun bay section, it’s a nice addition that I’m glad Tamiya added, as it adds more realism to this model.
Next, we’ll be assembling the wings and attaching them to the fuselage. I’m currently waiting on some paints and parts for the next steps of the build, but we’re getting very close now to painting this model, and that is very exciting!
To be continued…
About the Author:
Jared Demes is a modeler from southern Alberta. He has been building models since he was 4 years old when his Dad first introduced him to the hobby. He has written for several magazines including, Fine Scale Modeler, Scale Aircraft Modeling, Phoenix Scale Models, and others. He has an interest in all modeling subjects, with a focus on WWII Japanese aircraft and Science Fiction.
Jared has won several IPMS awards for his modeling, and currently operates his YouTube channel rebelsatcloudnine, where he showcases model builds and product demonstrations.
First Post: Part 1
Previous Post: Part 8
Next Post: Part 10