
Artesania Latina Bluenose II Build – Part 5 of a Series
In this Sunward Hobbies tutorial, I’ll be continuing with Artesania Latina’s Bluenose II build with Part 5.
In this Sunward Hobbies tutorial I’ll be covering sections 6, 7 and 8 of the Artesania Latina Bluenose II instruction manual. You’ll get plenty of tips on sanding and measuring plus ways to improve the look.
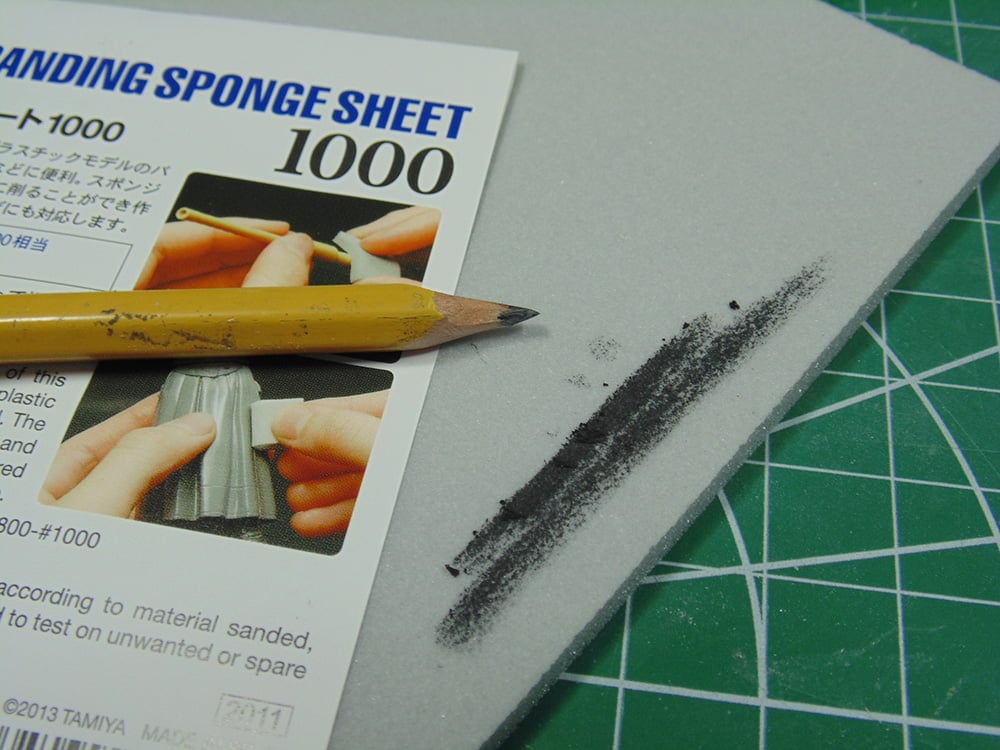
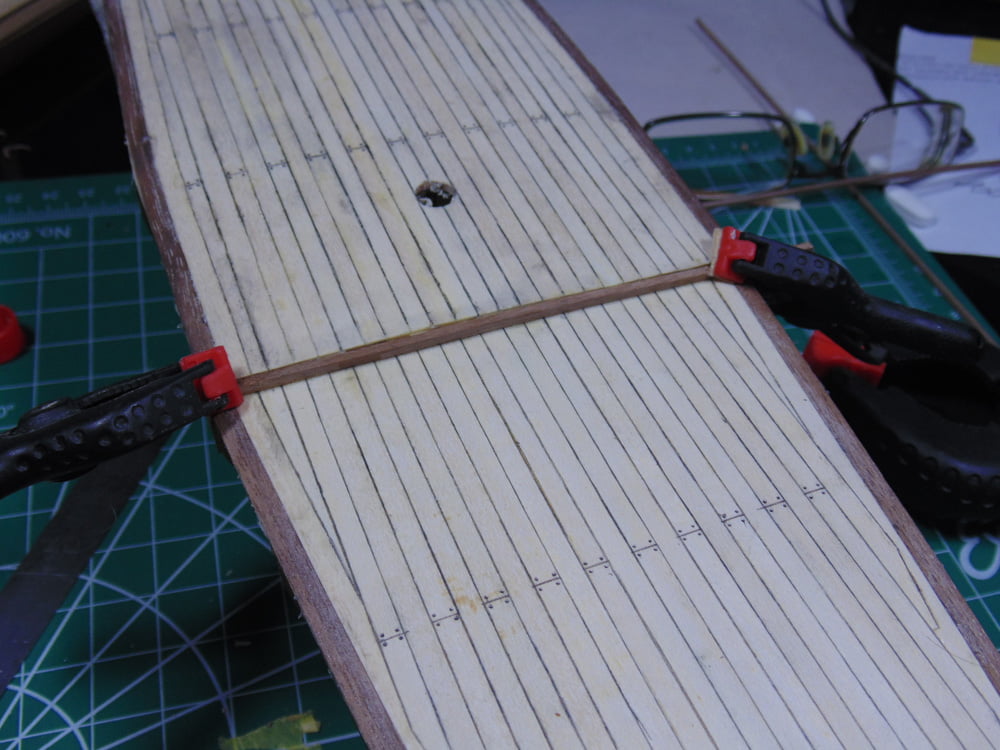
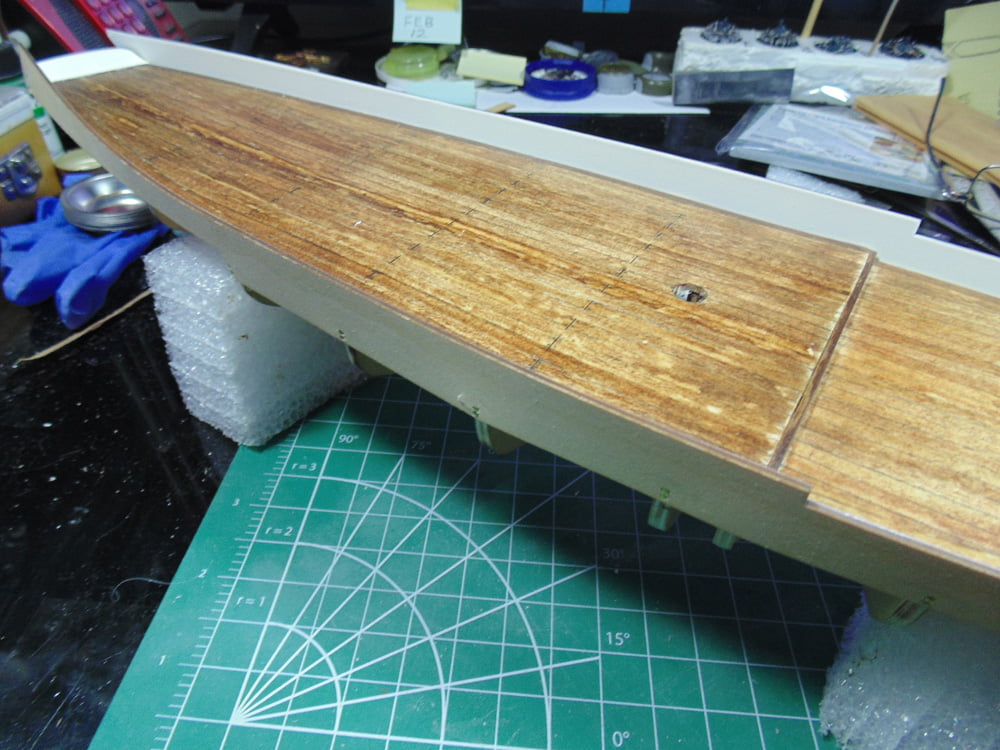
We’ll begin with Section 6. Since you’ve already installed and sanded the deck planking it’s time to bring it to life. On the real-life Bluenose II there is a thin dark line between each deck plank. Using a regular pencil and straight-edge ruler you’re going to simulate this effect. Here are some tips, take a piece of fine sand paper, such as this Tamiya 1000-grit Sanding Sponge and sharpen into a wedge.
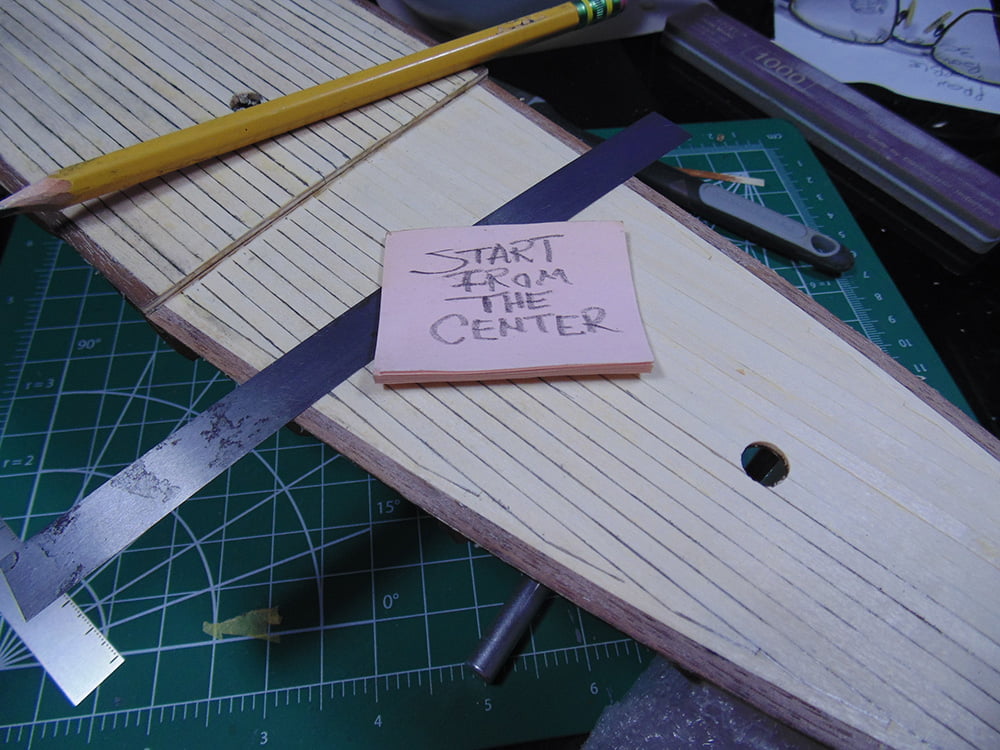
This will allow the tip to fit into a fine groove along with staying on track. Naturally you’ll need to sharpen after one or two lines, but don’t worry about the sandpaper, it’s easily washed off. Here’s another tip, place your pencil in the groove first then butt-up the straight edge to it. Align the ruler to the plank’s edge and make your line.
I recommend starting from the inside and working outward, otherwise you’ll be touching all the previous lines and making one heck of a mess.
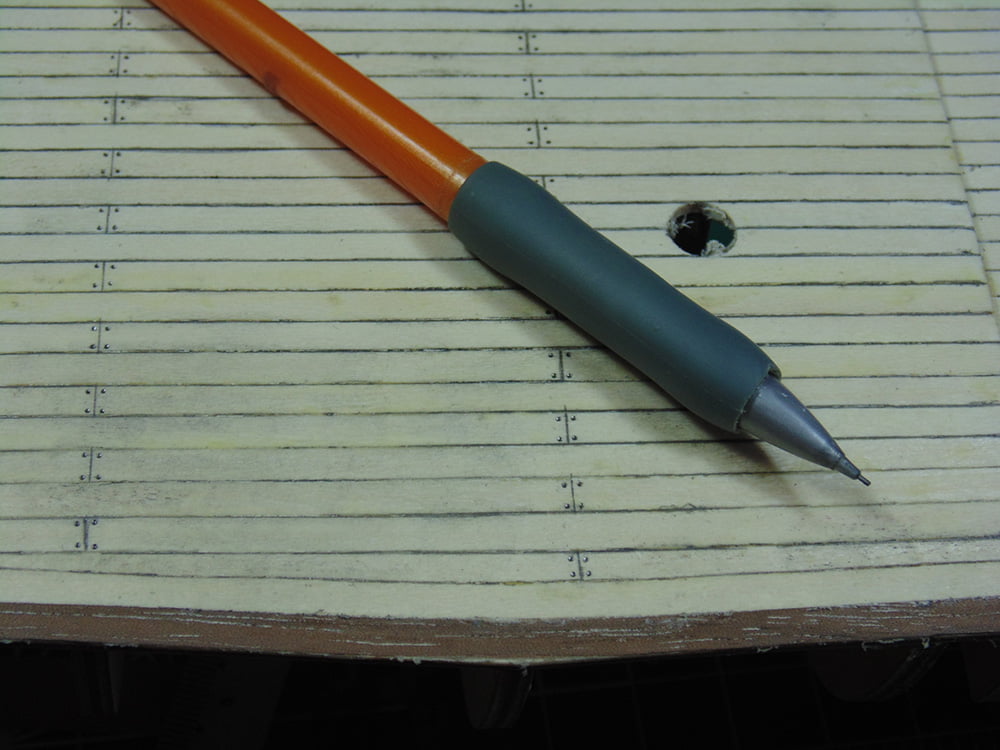
Now you’re going simulate the length of the planks. This really adds a lot of detail and was great fun too. However, the spacing is incorrect. You may opt to look at the real ship’s deck to get a more accurate spacing. There is a virtual tour on the Nova Scotia Department of Tourism website. Regardless, I strongly suggest using a mechanical pencil for these small lines and definitely to replicate the roundness of the wood pegs.
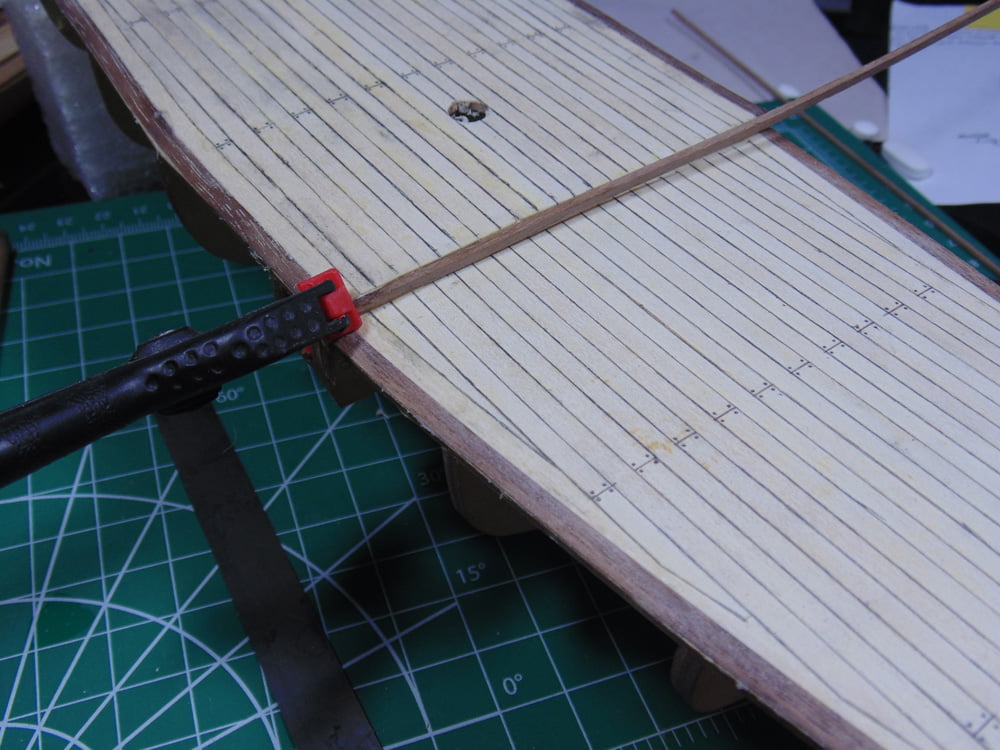
The mid-ship step-down needs a length of walnut batten. The deck has a high point to allow the water to flow off the ship. Glue and with Excel Blade clamp one end and give it an hour to dry. Now you can run a brush of wood glue under the batten and clap the other side, again at least an hour to properly dry.
Now for some artistic licence. The final steps in Section 6 call for dying/staining the outer walnut and using a satin-finish varnish for the deck. And while this looks nice, the real ship has a much richer Tuscan coloured organic appearance.
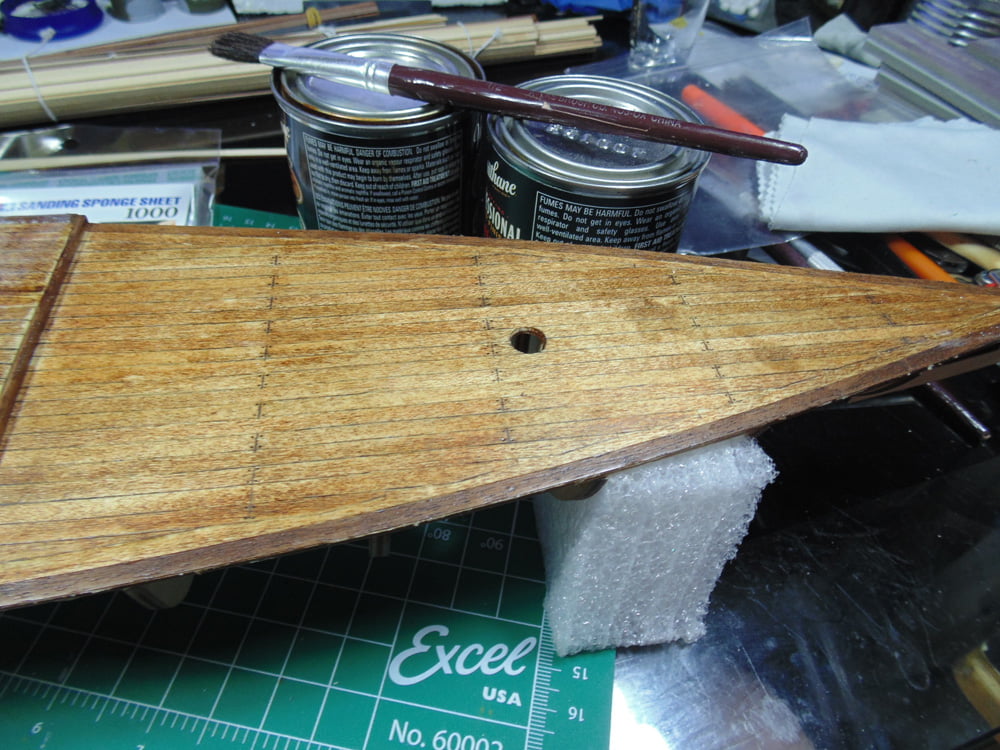
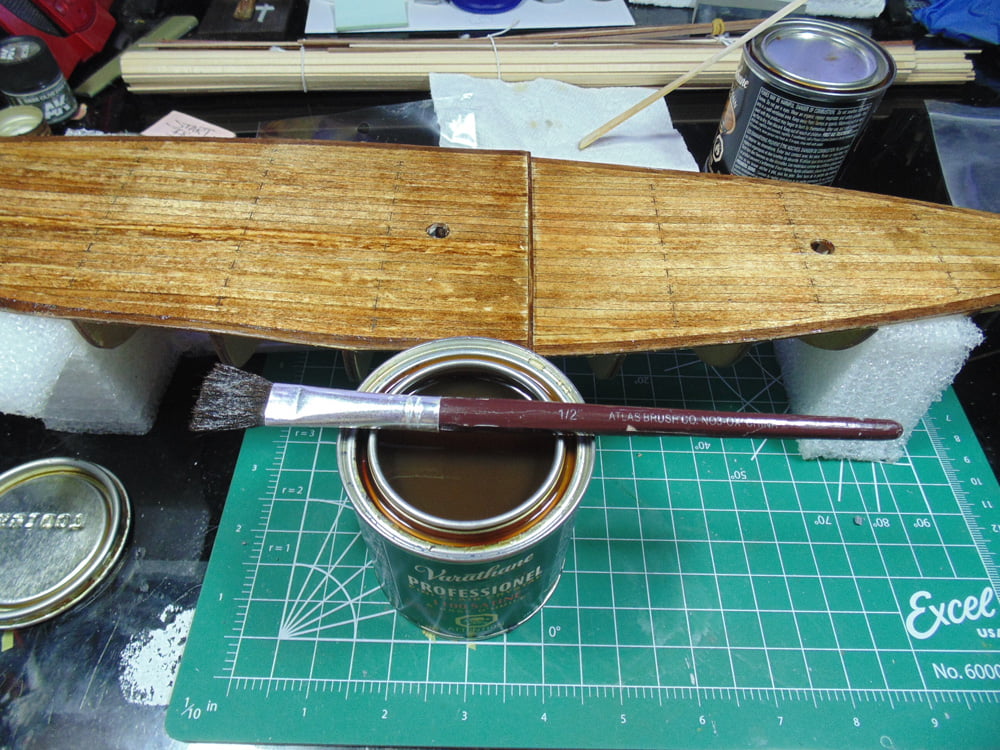
Whether you stain or not you’ll have to clear coat the deck. I recommend two coats and make certain you lightly sand after the first coat has had a minimum of 4 hours (over night is better) to dry. Here I’ve used a Tamiya 1500-grit sanding sponge and was as gentle as possible.

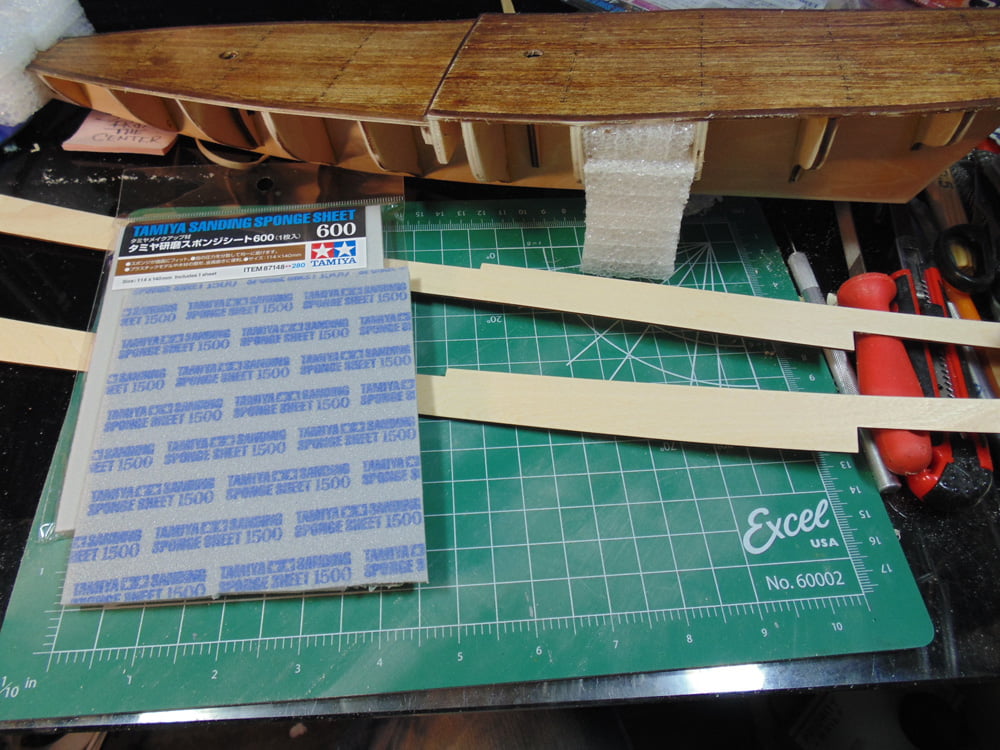
Finish by touching up any pencil lines or marks and add the second coat of satin-finish varnish. Sunward Hobbies have a great selection of wide brushes like this Atlas Brush No.3 OX. Also, note the soft foam stands. These are cut to slip into the support sections and made life so much easier to handle and work on the project.
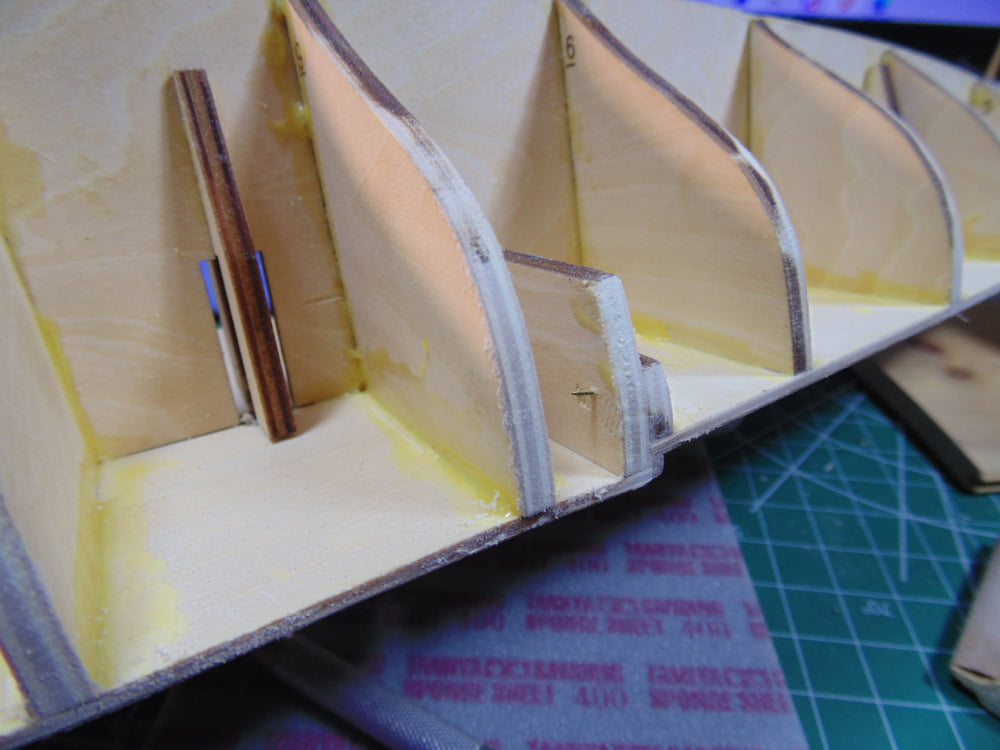
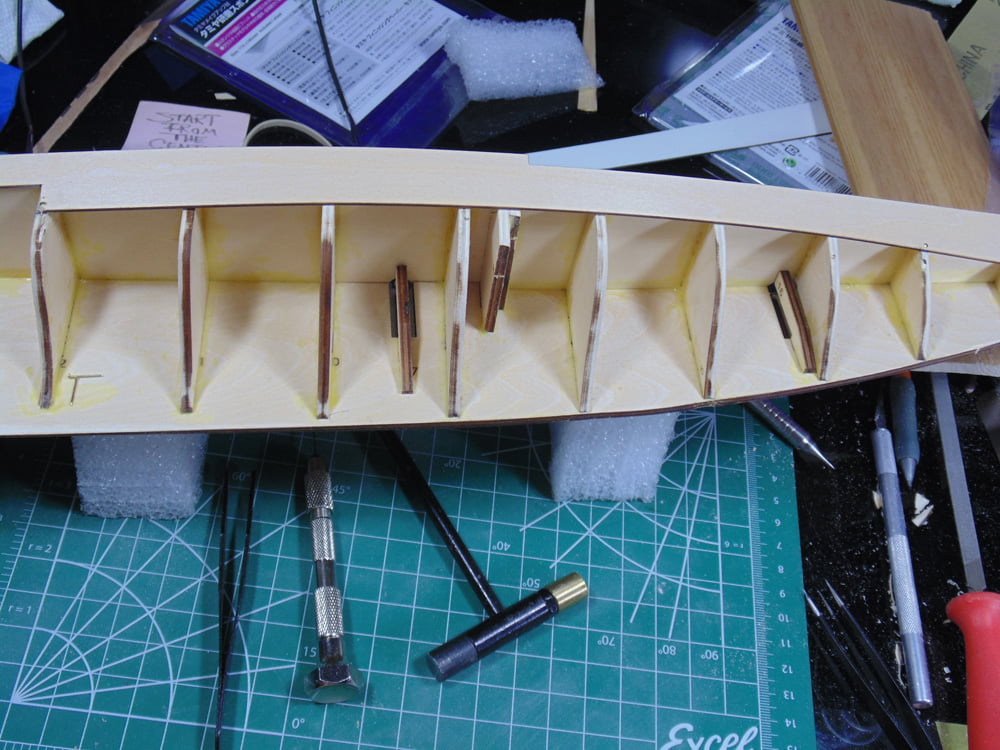
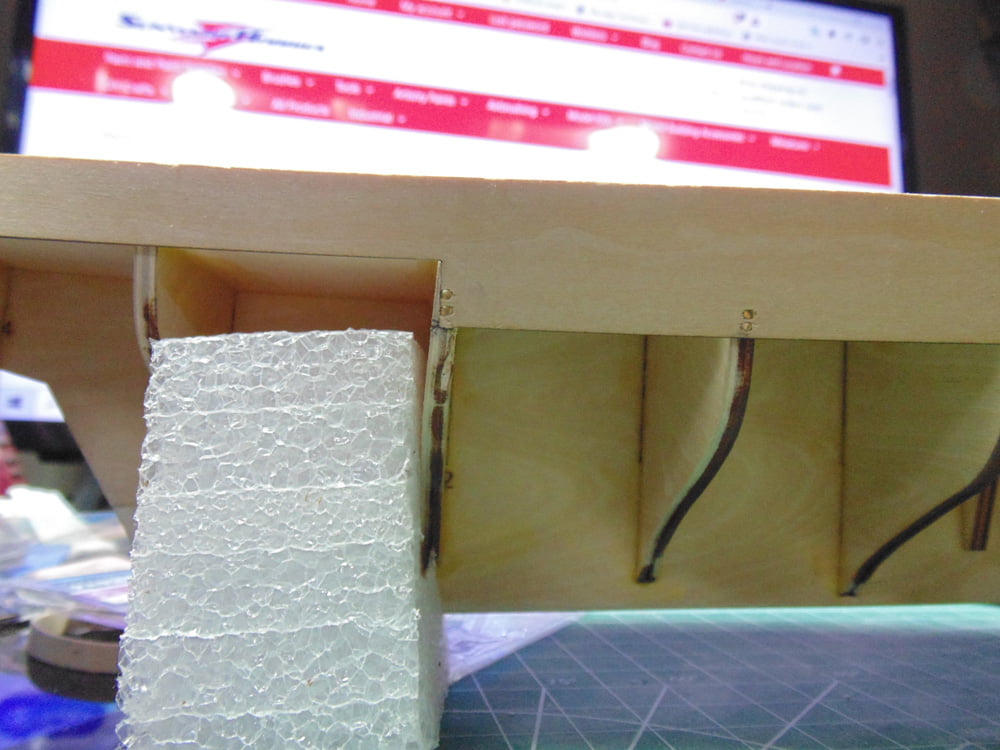
In Section 7 the focus is on forming the supports and sanding details. I began at the Stern with some 400-grit paper and block. “Hog” out the majority then creep up slowly on the finished angle needed with some 1000-grit.
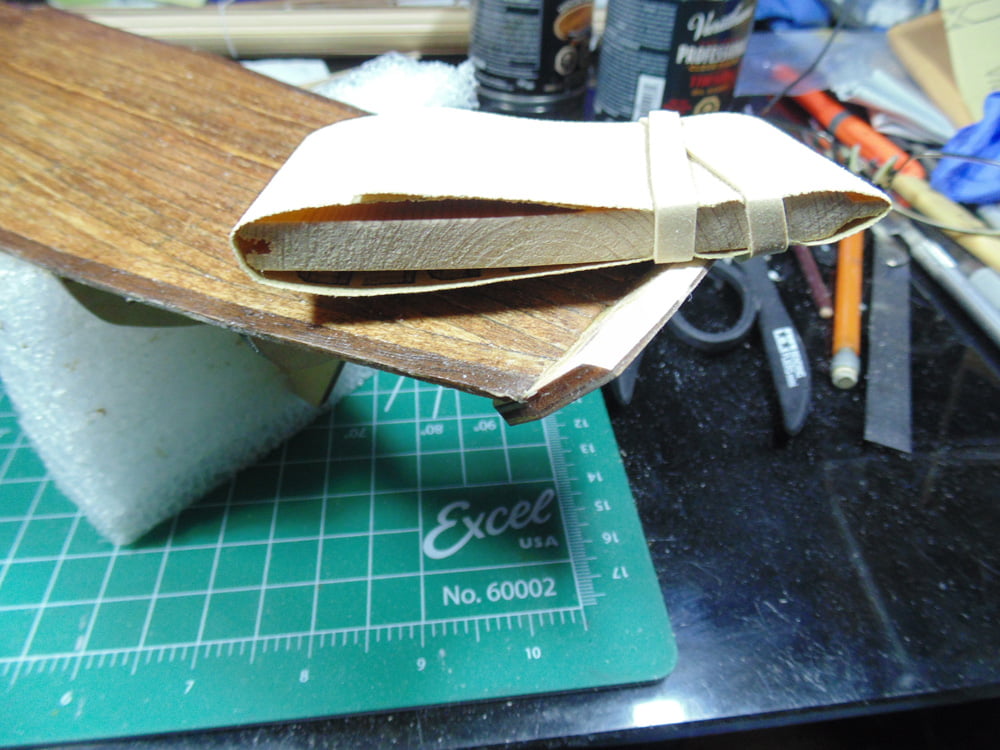
I found it easier to complete forming the bow next, I’ll get to why in a second. There is a lot of material to remove here so use a good Excel blade and carefully slice the majority of it. Since this is a rounded shape, a 400-grit Tamiya sponge is perfect for the gob. This will be covered, of course, so you don’t have to make it super smooth. It simply has to be the right shape, which is determined by the point in the deck and the first support.
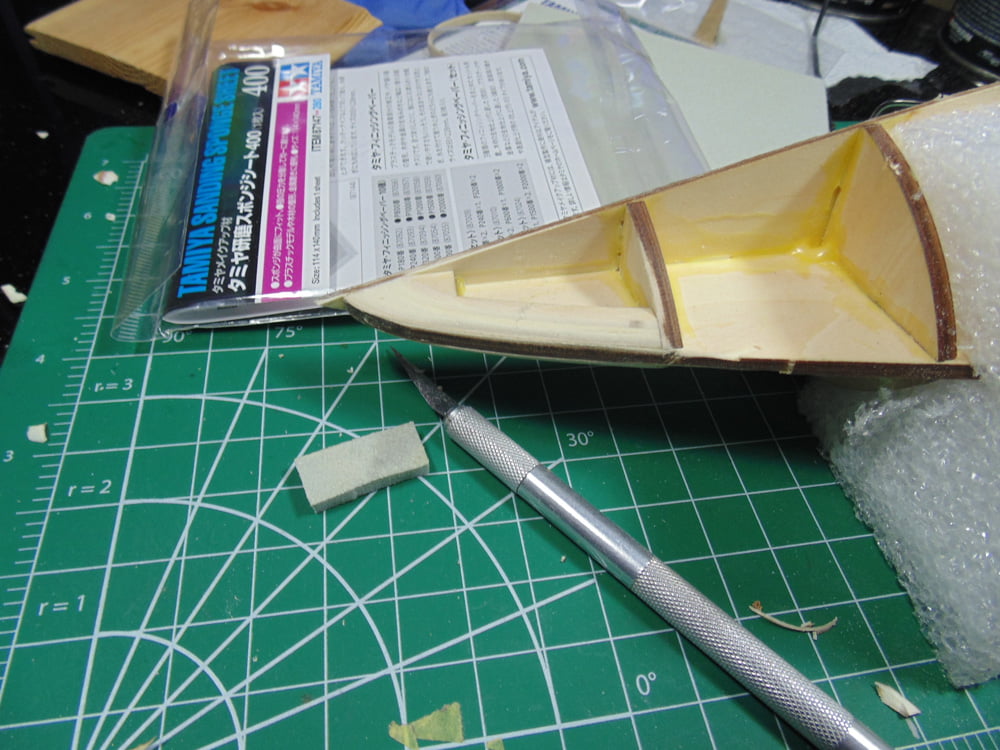
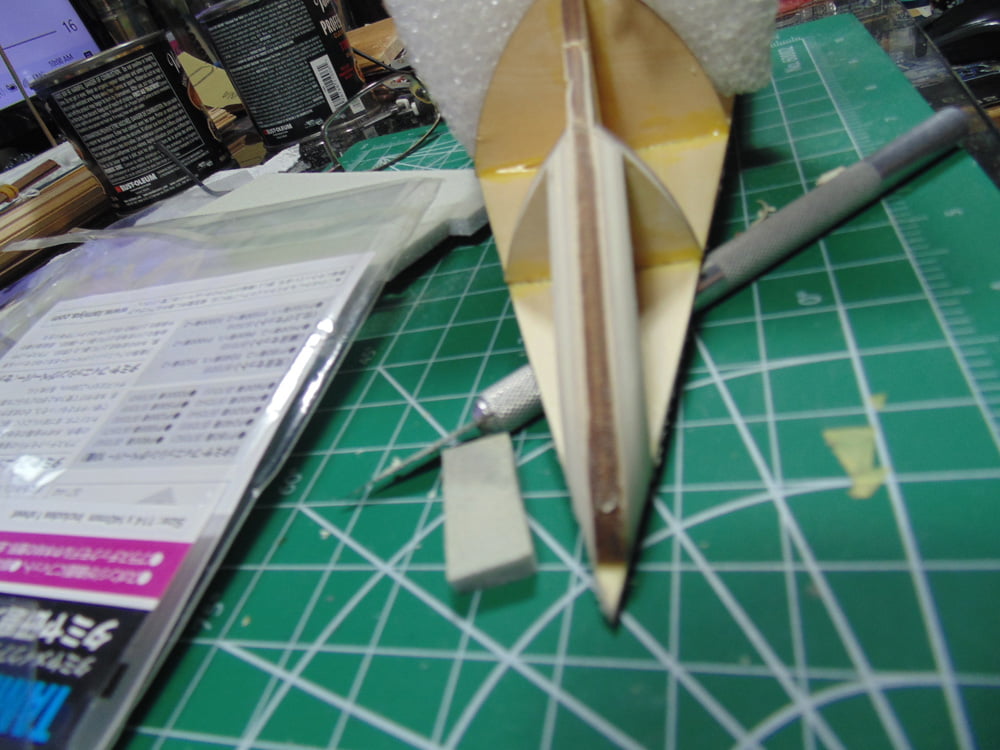
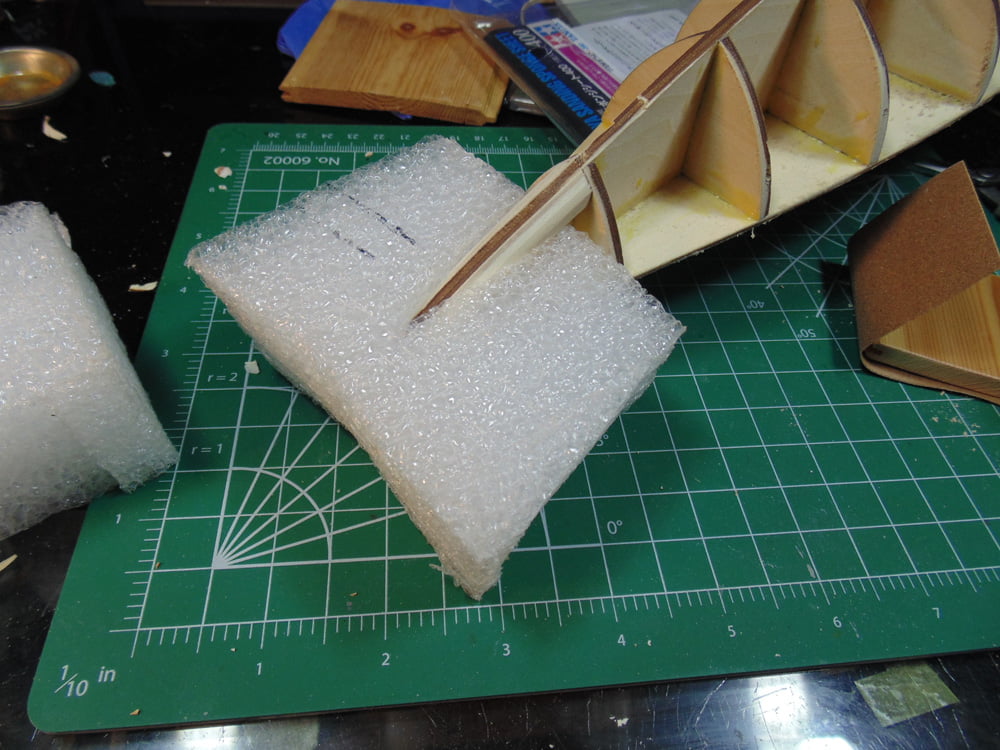
Putting a bit of soft foam on the bow tip will protect it and yourself from harm. Trust me, I’ve got the scar to prove it. You’ll be doing quite a bit of sanding on the supports and this foam acts as terrific little stand.
You’ll need both a Alpha Abrasive sanding block and Tamiya sanding sponge along with a blade to form the stern plate. In the keel support main spine there’s a curved end and that’s where the sponge comes in. This part is critical and took the longest of all the sanded components. Now that both ends are formed you can use them as a guide to help shape the middle strengtheners.
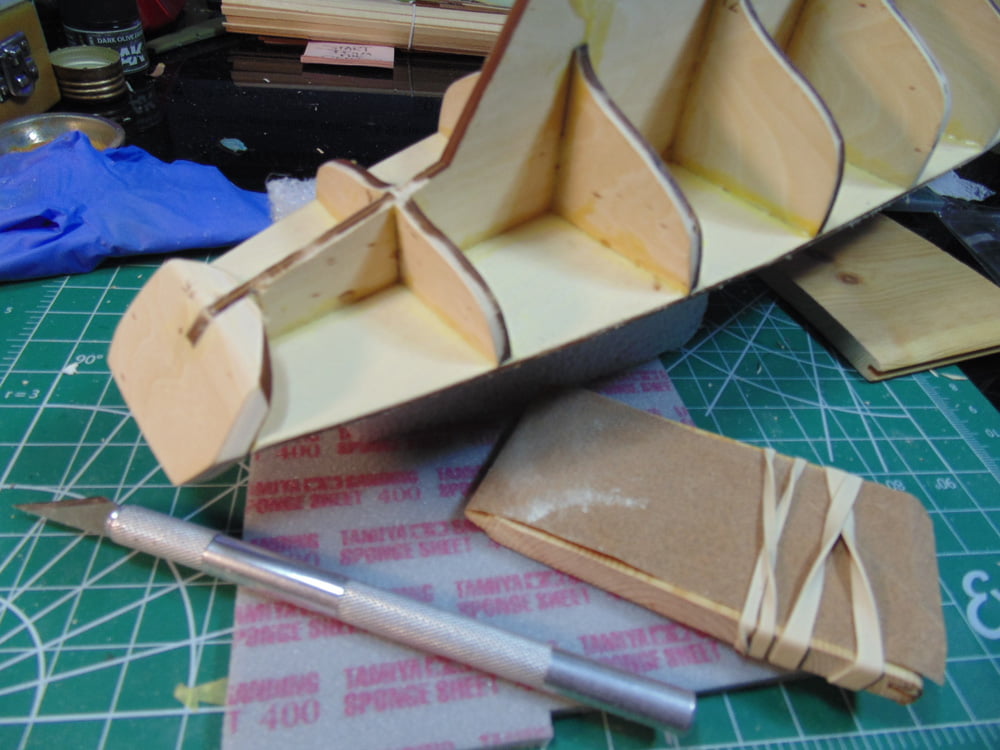
Getting the correct angles for the supports looks like a daunting and complicated task but it wasn’t at all. The trick is to eyeball the angle and do some preliminary sanding first. The instructions show fully sanded angles in the supports, yet I was surprised how well the laser cutting was done and how little sanding was needed. Mind you, I’m sure some fine tuning will be needed later.
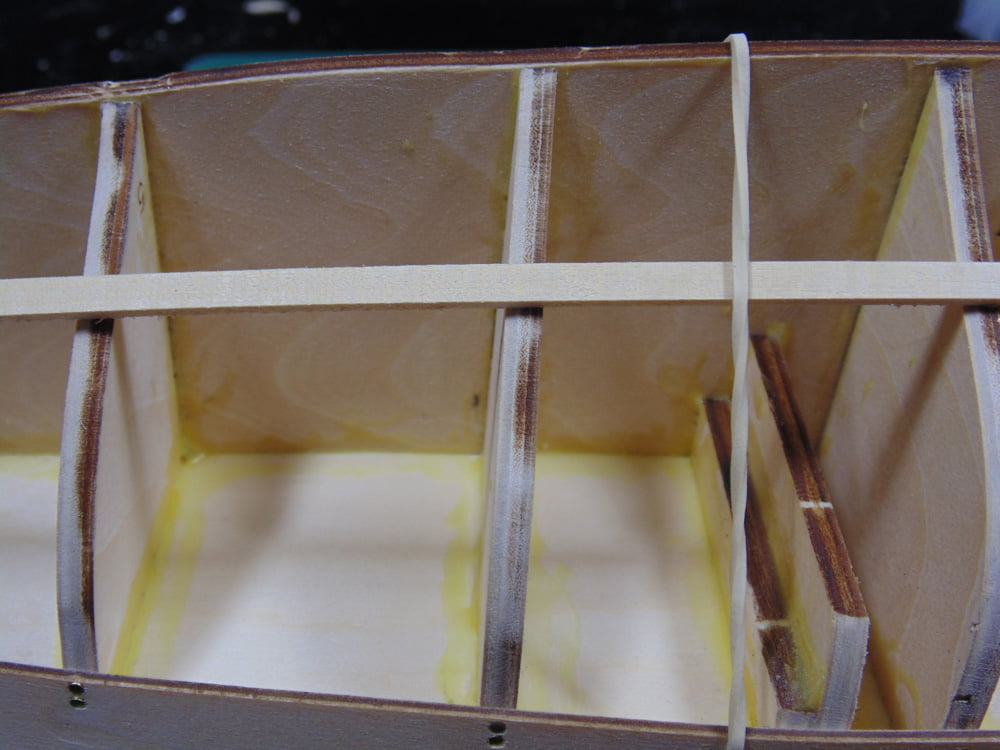
Now that you’re in the general ballpark with the supports you can lay down a length of “lining plate” and examine where your angles need to be fine tuned. Again, I make it sound complicated but it’s super simple to do. Use some rubber bands to keep the “lining plate” in place and conforming to the shape of the hull.
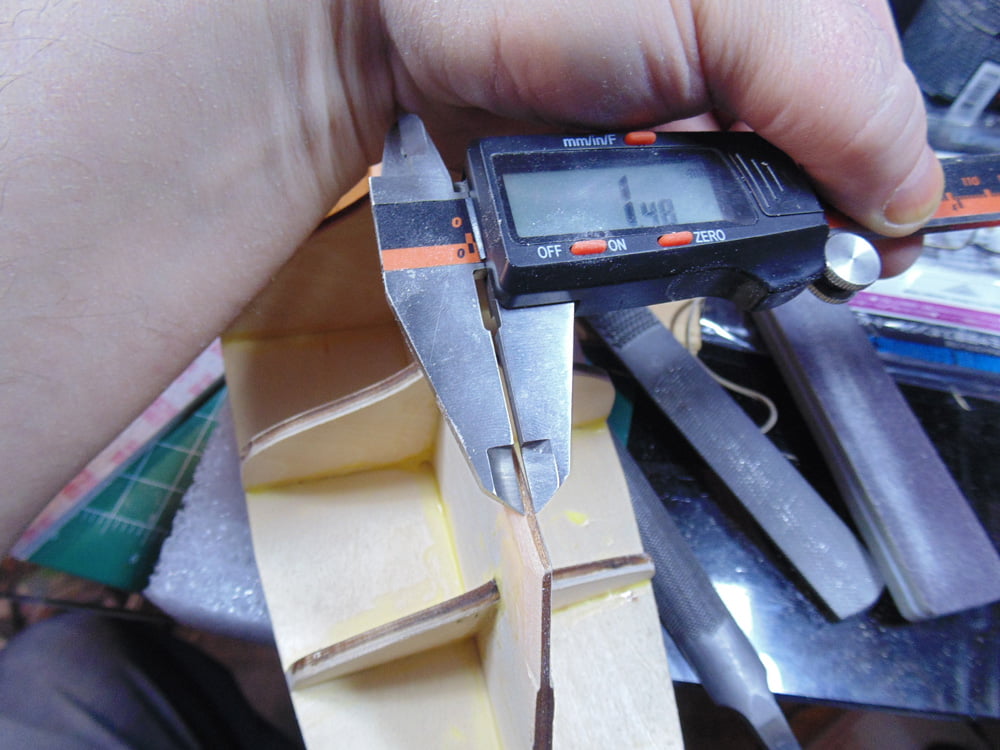
Next, you need to narrow the rudder blade to 1.5mm. Artesania Latina are very exact as to where to start and where to stop, so please follow the instructions. Having a micrometre is very helpful but a good quality ruler will suffice to get the width as close as possible.
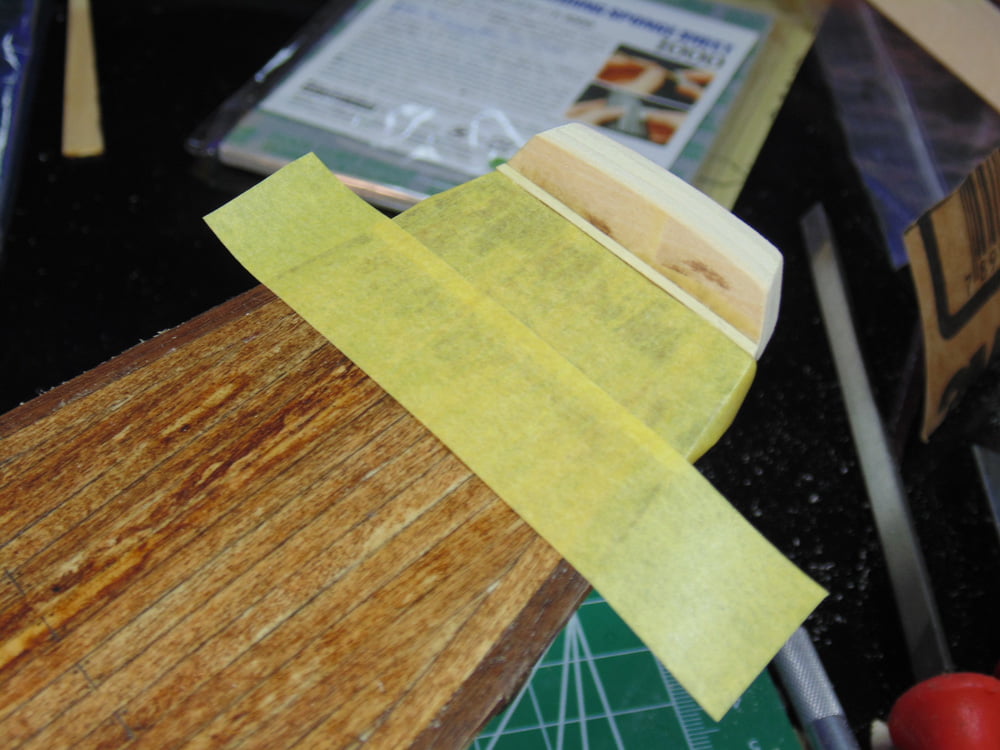
Section 8 of the instructions is fairly short yet needs special attention. The inner side walls and stern have to be painted. Begin by fine sanding them and making sure they are free of dust. Then mask off the stern a couple of inches with low tack modelling masking tape.
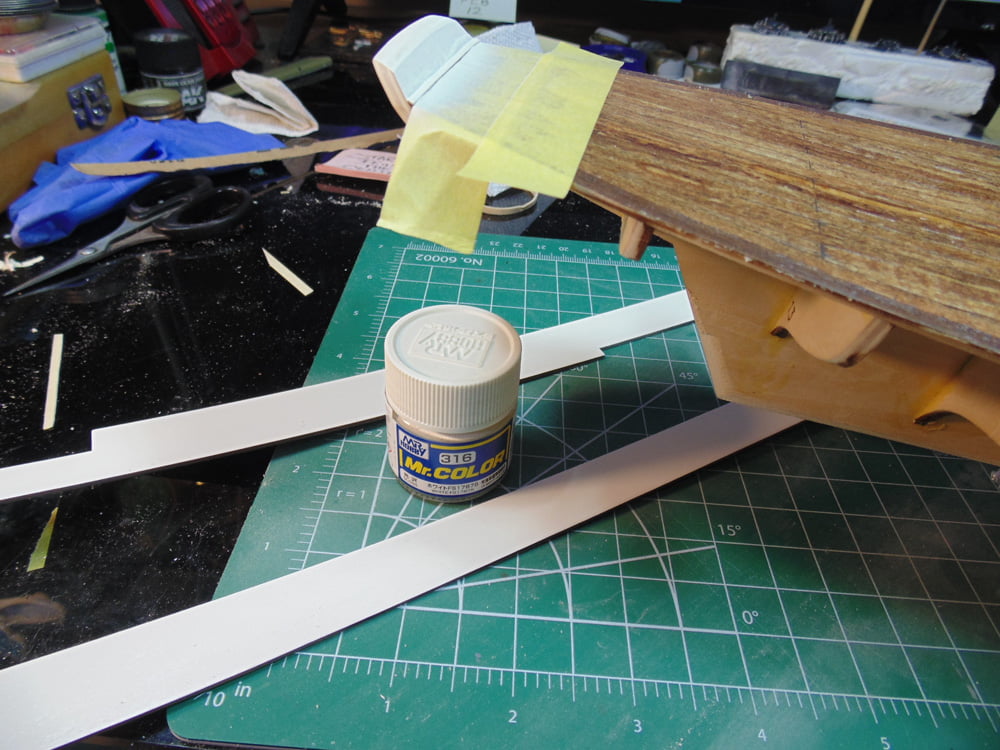
The interior deck of the Bluenose II is bright semi-gloss ivory white, the exact colour as my high school prom tuxedo. Mr Color c316 Gloss White (FS17875) is perfect for this and often used in plastic models. I’ve opted to airbrush these areas, but if you’re hand painting I strongly suggest picking up a bottle of paint retarder from the store. Sunward Hobbies carry paint retarder for all the major brands in both acrylic and lacquer. Remember, the side walls are very long lengths and paint strokes will easily be noticed.
Once painted and left to dry over night you can attach them. Definitely begin at the low point where it’s marked 12mm. I monkeyed around for hours trying to find a better way, yet in the end the toughest spot was the best. These sheets were slightly warped out of the box so you’ll need to anchor them because they have to be twisted to match the hull.
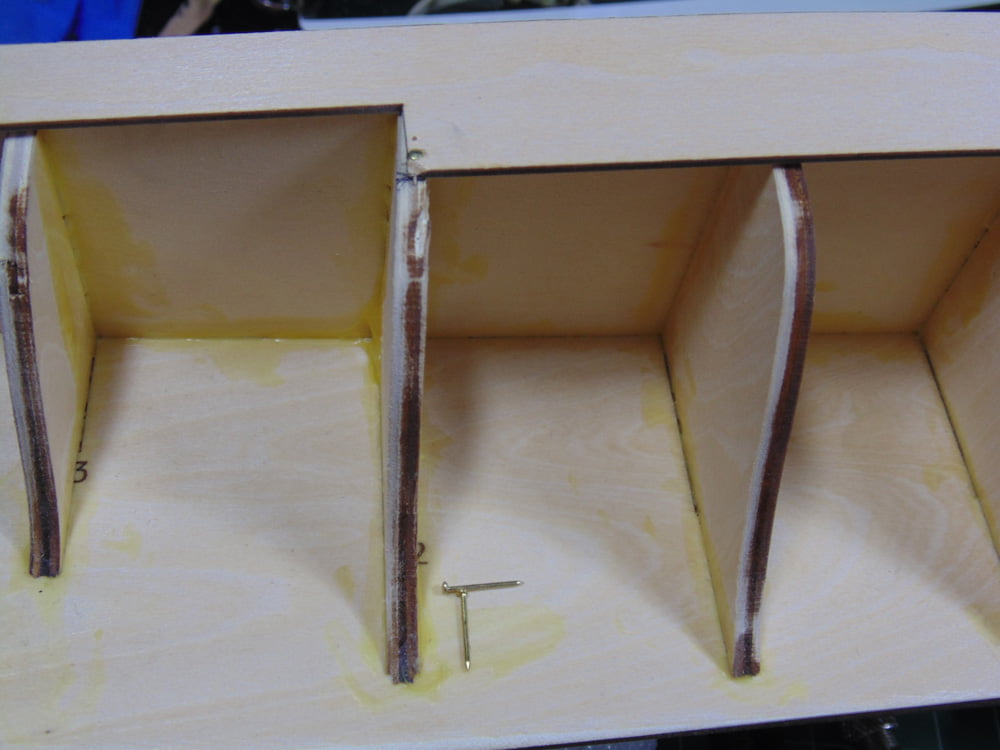
Absolutely pre-drill ALL your holes! You can pick up a pin-vise and drill bits from the store and consider purchasing the Artesian Latina Nailer tool. I’d suggest the next nail to drive in would be where the next twist has to be made. There are 6 twists per side with dramatic ones at the stern and bow.
Once you have one nail in all the strengtheners and are happy with the symmetry get the second ones in as soon as possible. This will prevent the previous nails from wanting to wiggle out from all twisting and general handling of the model.
Thank you for following along with this extended tutorial. If you have any questions about the techniques or products used, please feel free to ask when you place your next Sunward Hobbies order.
About the Author:
H.G. Barnes is a former voice-over artist and retired sales and marketing professional. He’s the author of two large volume science fiction adventure romance novels with many more in the works. For well over 40 years he’s been building scale model replicas and now does commission work for clients in Canada and the USA, plus completes projects for companies in Asia and Europe.
Currently H.G. is involved as an Associate Editor with KitMaker Network’s Online Magazine Channels.