
Large 1/12 Scale Kit
This is the fourth part of the Revell 1969 Camaro Z/28 3in1 1/12 Scale 85-2812.
When I was younger, I used to think getting ill was the greatest thing ever. Stay at home from school, watch TV all day, and take naps in the afternoon. Now, as an adult, it’s far from a luxury of a week doing nothing, and this seasonal flu has greatly slowed down my modeling time, and possibly, in my deranged state, allowed me to think this was a good idea.
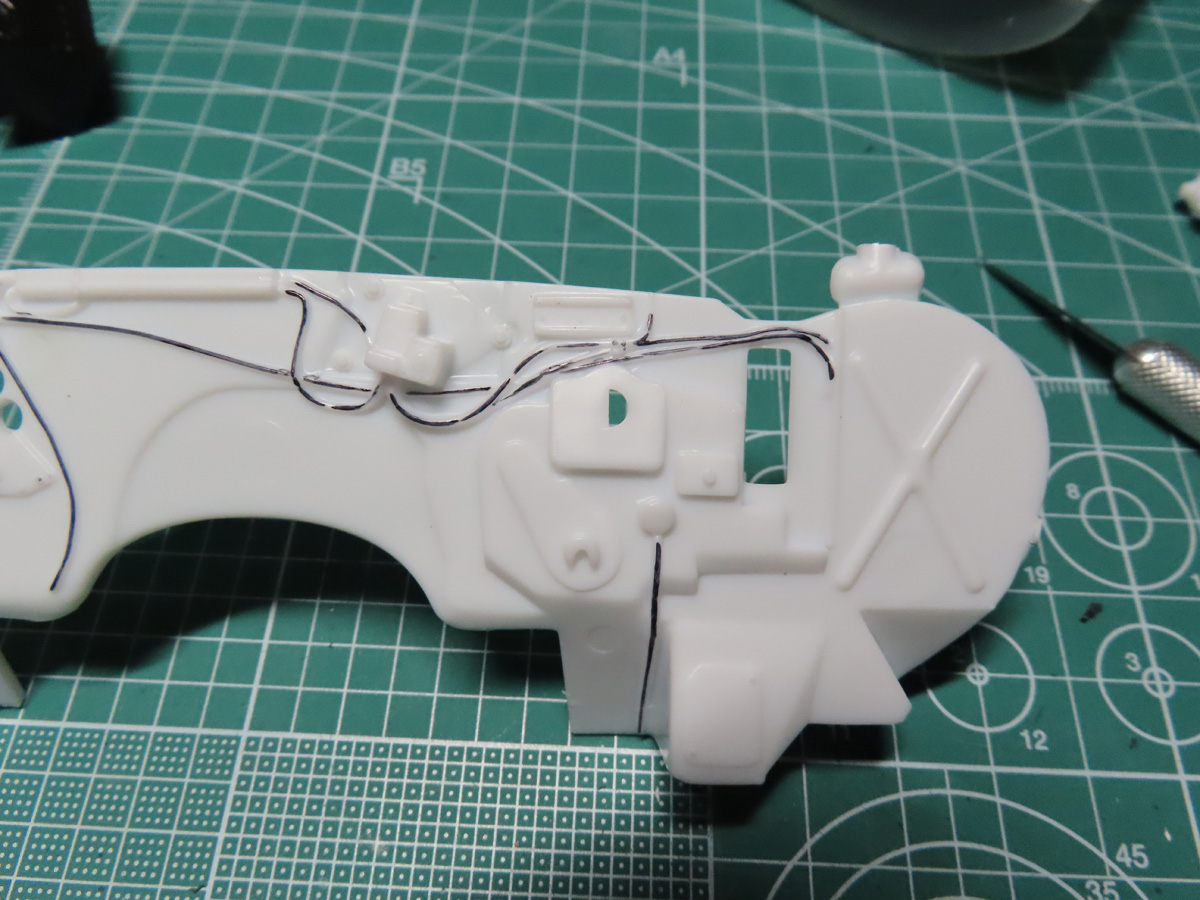
On the firewall, there are several wires molded into the plastic. I highlighted these with a black marker, and I began a long process of sanding them smooth so that I could replace them with real wire for a more accurate look.
It took some time (and sadly, one drill bit was sacrificed), but brass wire was used, and it looks a lot more accurate than before.

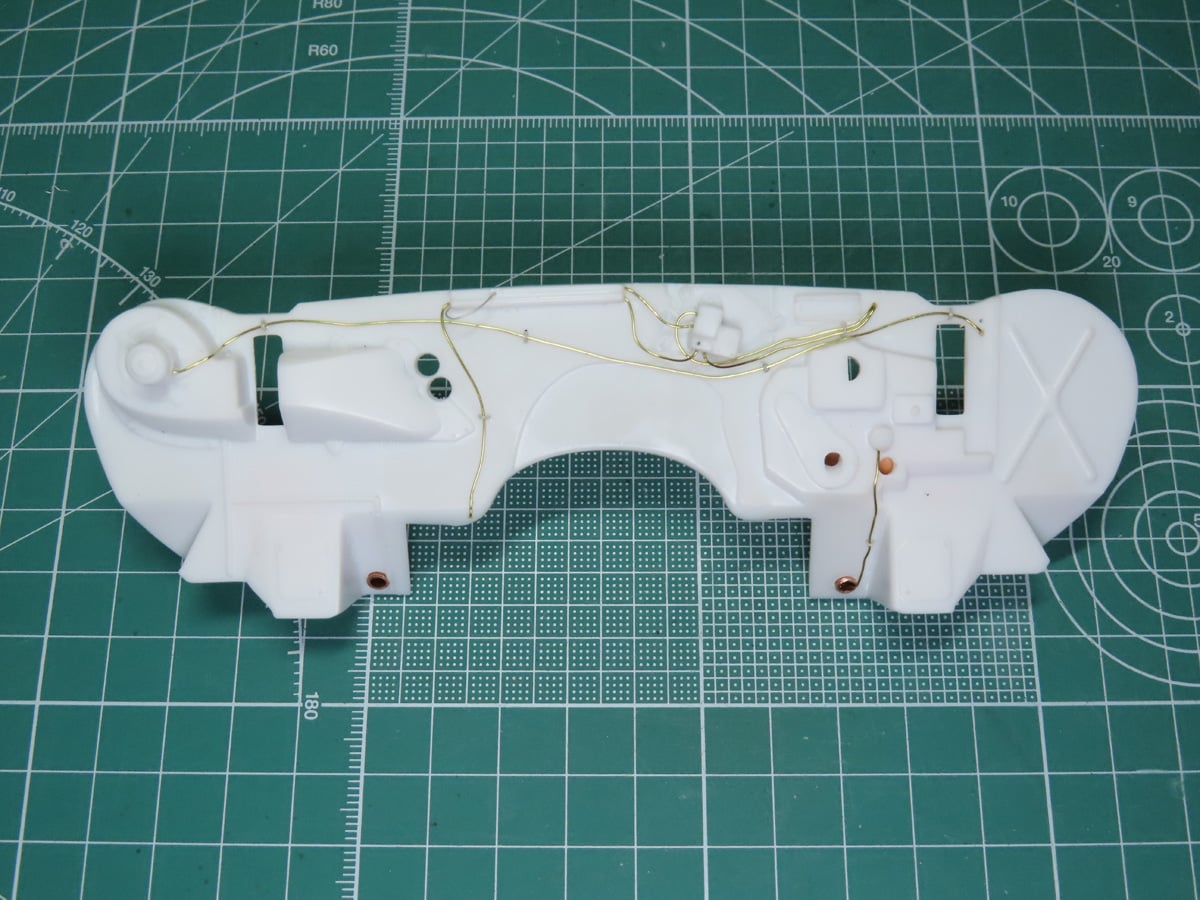
Now painted with Mr Color C92 Semi-Gloss Black, you can really appreciate the details. A bit sad that some of these will be hidden behind other components and the engine.
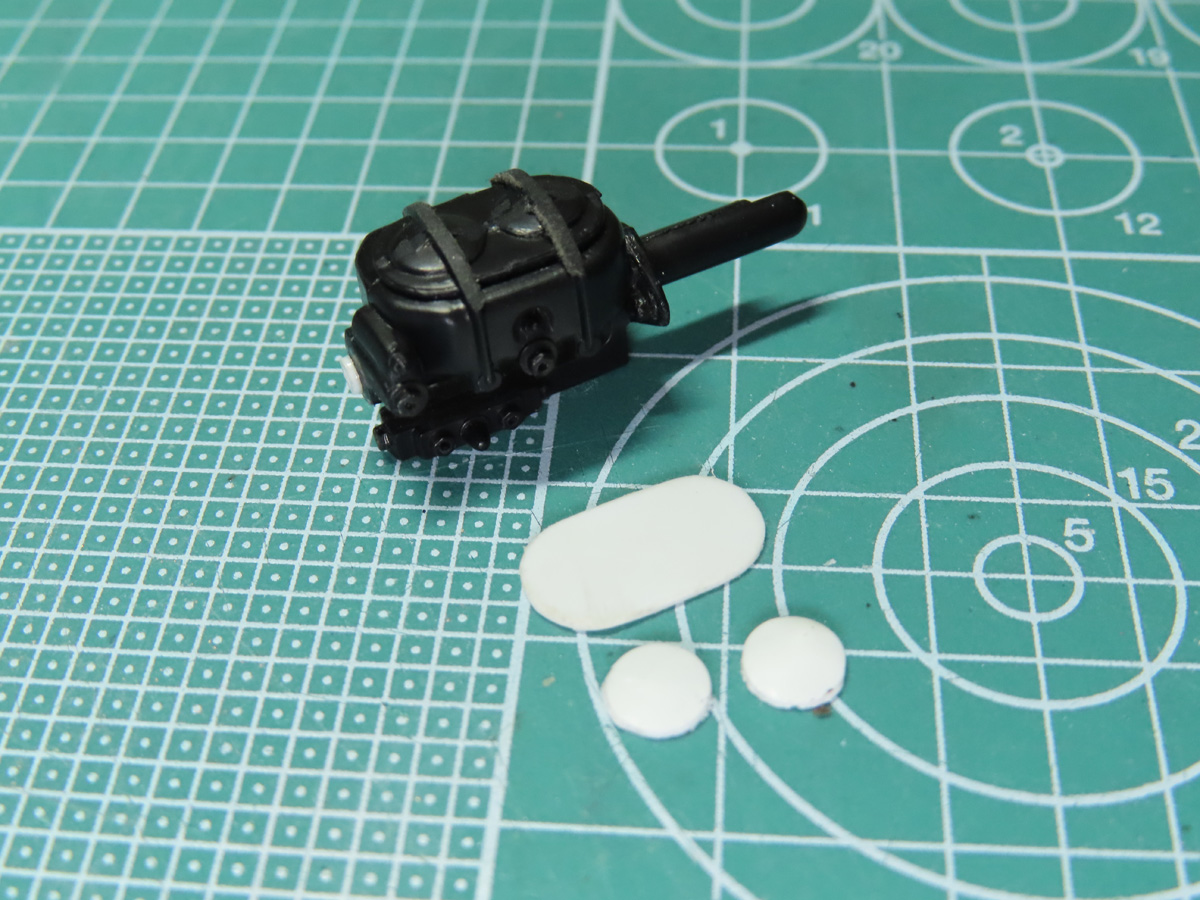
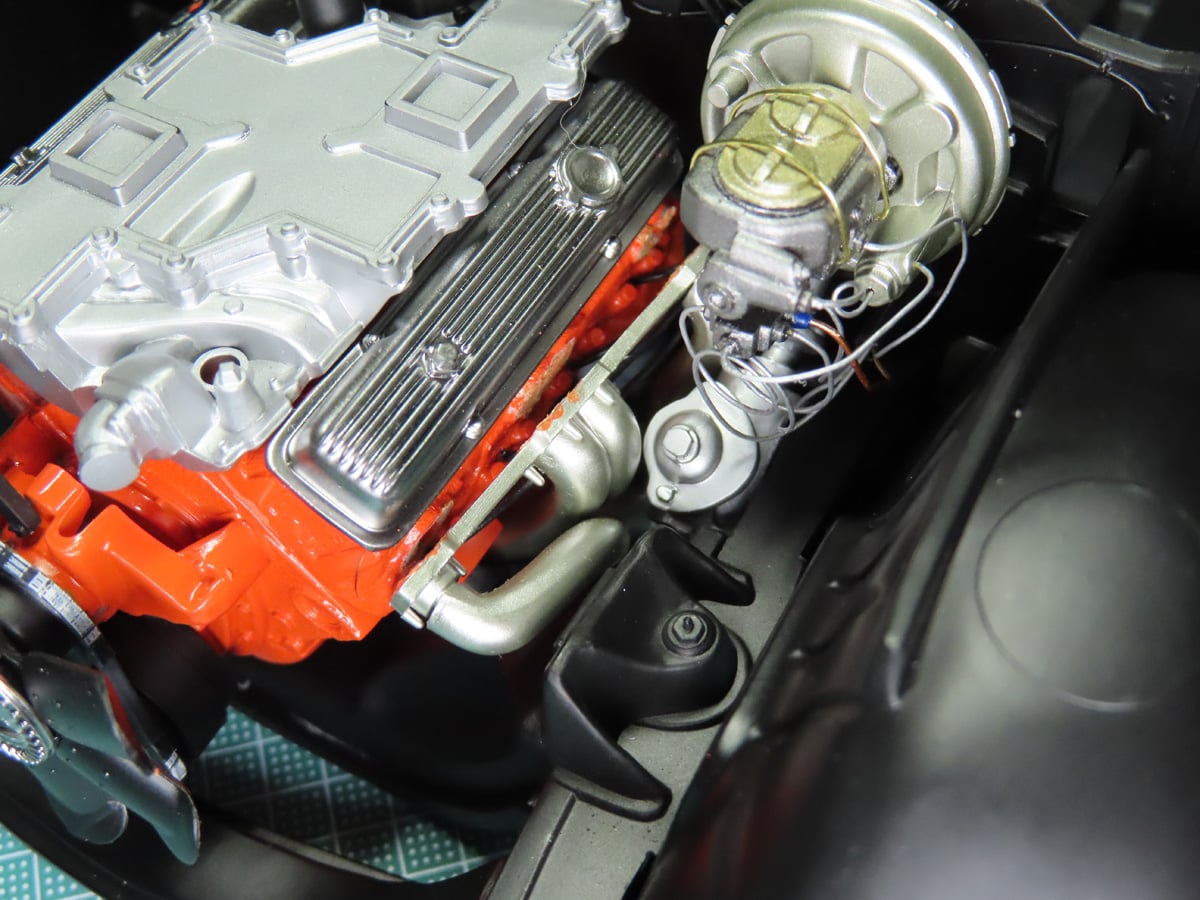
Painting the brake booster was going to be a challenge. And there was a nasty seam line along the top. I decided instead to sand the top smooth, removing the wires on the side, and build a new top out of some styrene.
The top cover of the booster was painted with Tamiya X-32 Titanium Gold, and the rest of it was painted with Tamiya XF-56 Metallic Grey. I then glued the cover to the base and carefully wrapped some thin wire around the unit.
It took a little extra time to add these details, but it’s a big improvement from the original part, and I didn’t have to fuss with cleaning that seam line on the top.
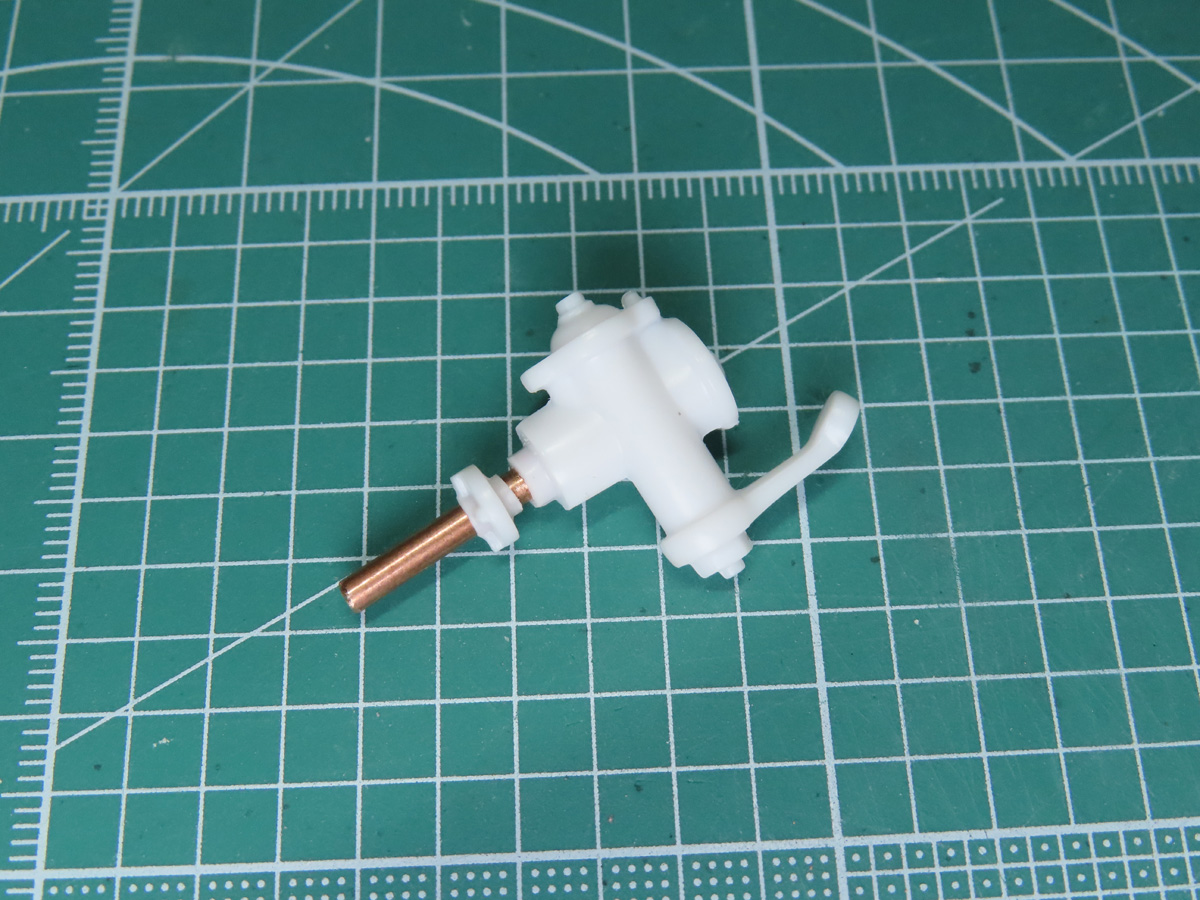
I also decided to modify the steering box, as it was fragile, and had a very large ejector pin mark on the shaft. I drilled a hole through the part and replaced the shaft with a piece of copper rod. To accommodate the rod, I also sanded the opening on the firewall with a rounded file.
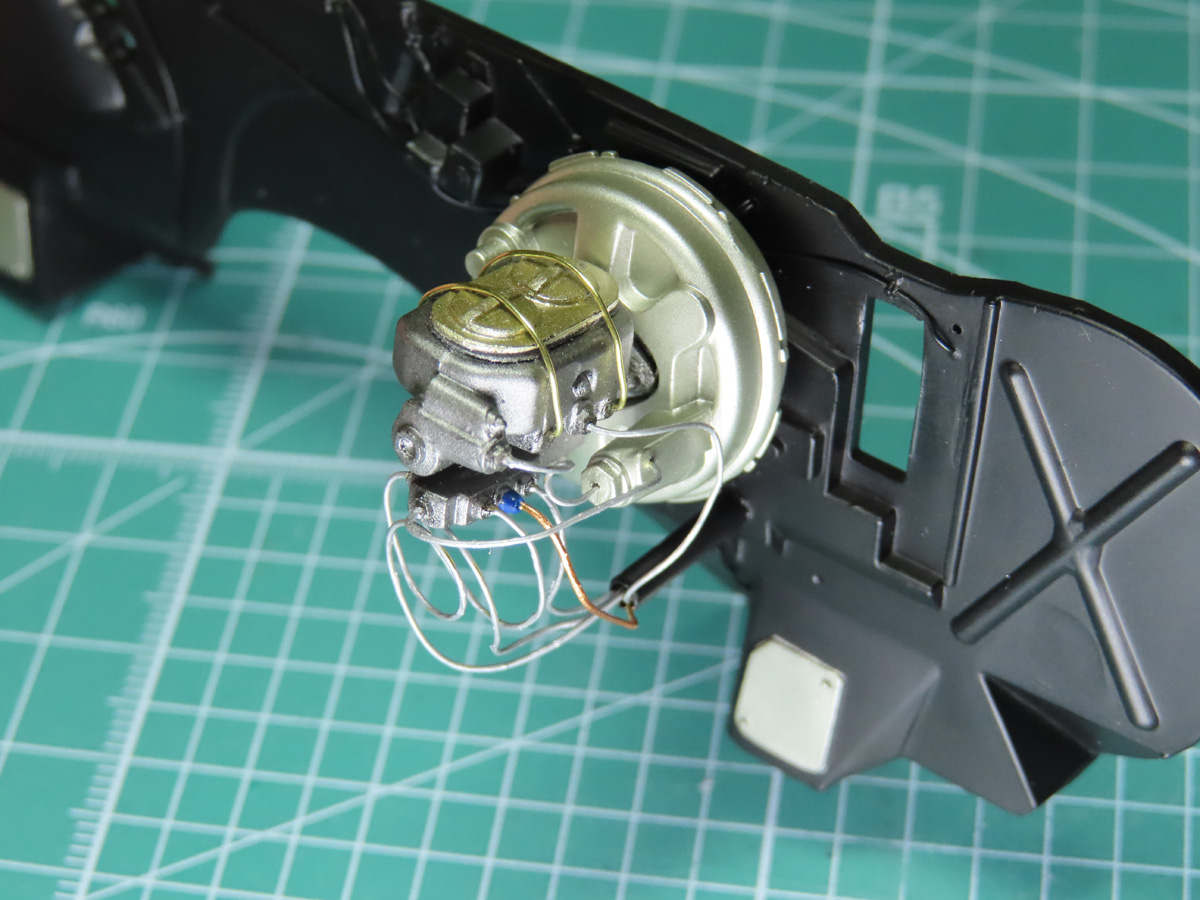
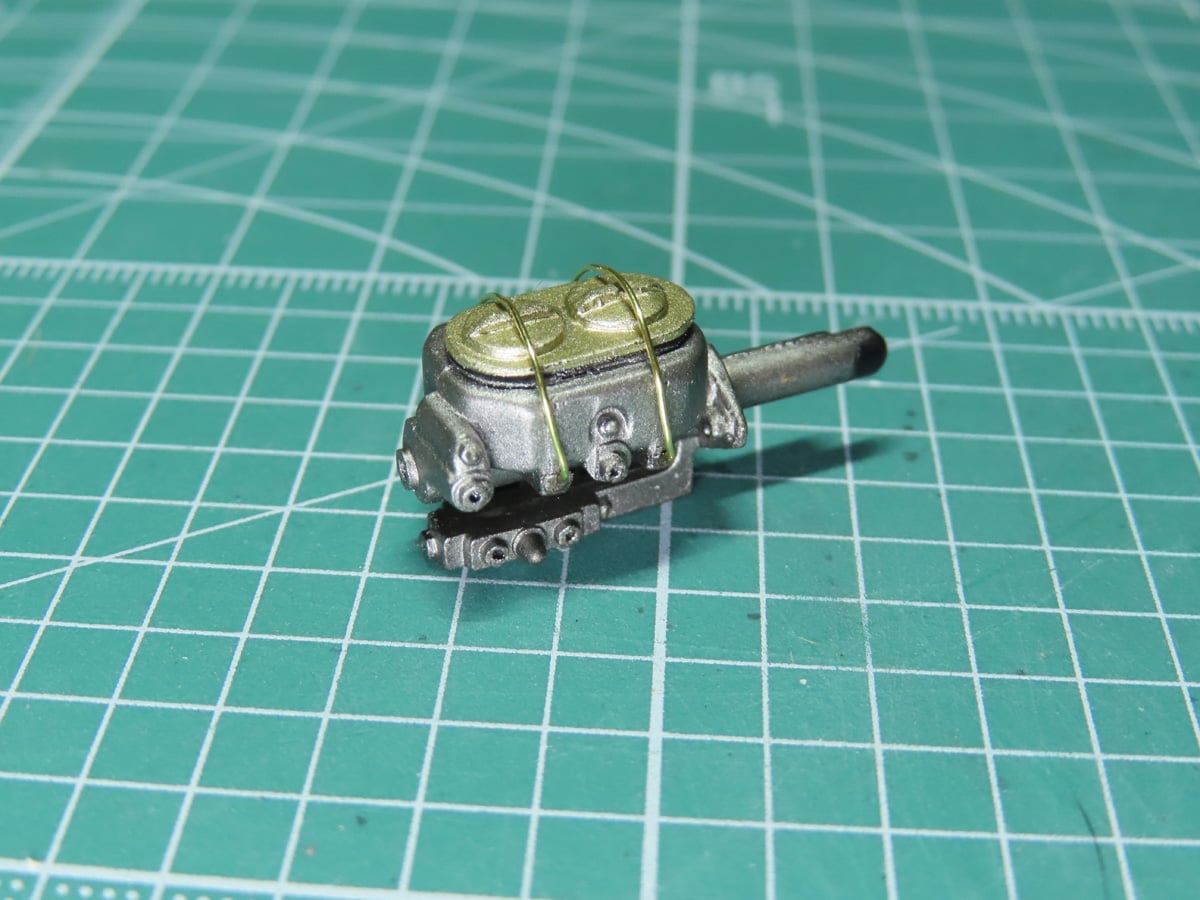
The Brake Booster was attached to the Master Cylinder, painted with Tamiya LP-71 Champagne Gold, and fitted to the firewall. A piece of copper tubing was fitted below to hold the wires. Though this is in the incorrect place, it allowed me to hold all of the wires coming off the Booster. Once the engine is installed, things are going to get very cramped, and dealing with all of the wires would be very difficult.
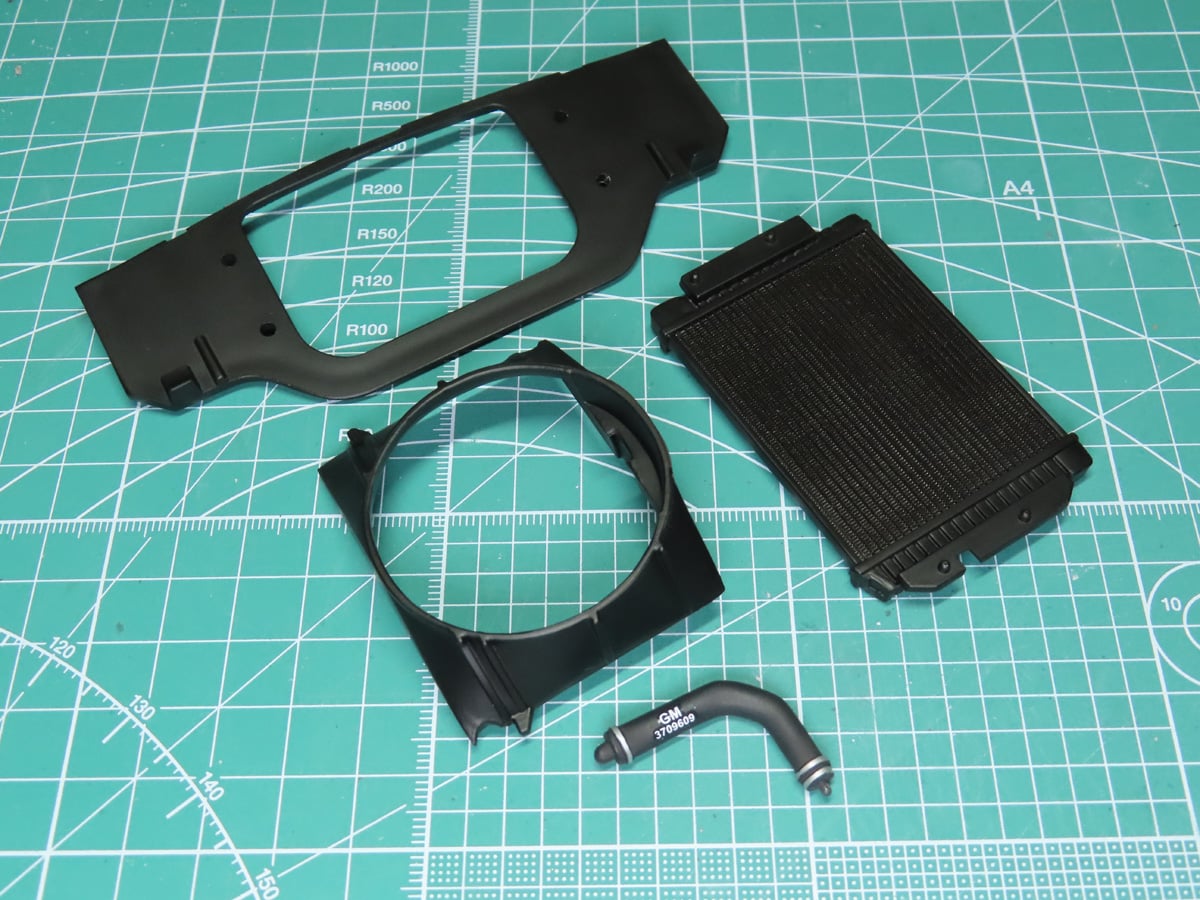
Moving on to the radiator assembly, I began by painting the inner section of the radiator with Mr Color Aqueous H28 Metallic Black. It has a slight brown tone to the color, and I wanted to add a bit of extra color to the Semi-Gloss Black. The connector hose that goes from the radiator to the engine was painted with Tamiya XF-85 Rubber Black, and the fittings were painted with Tamiya LP-11 Silver.
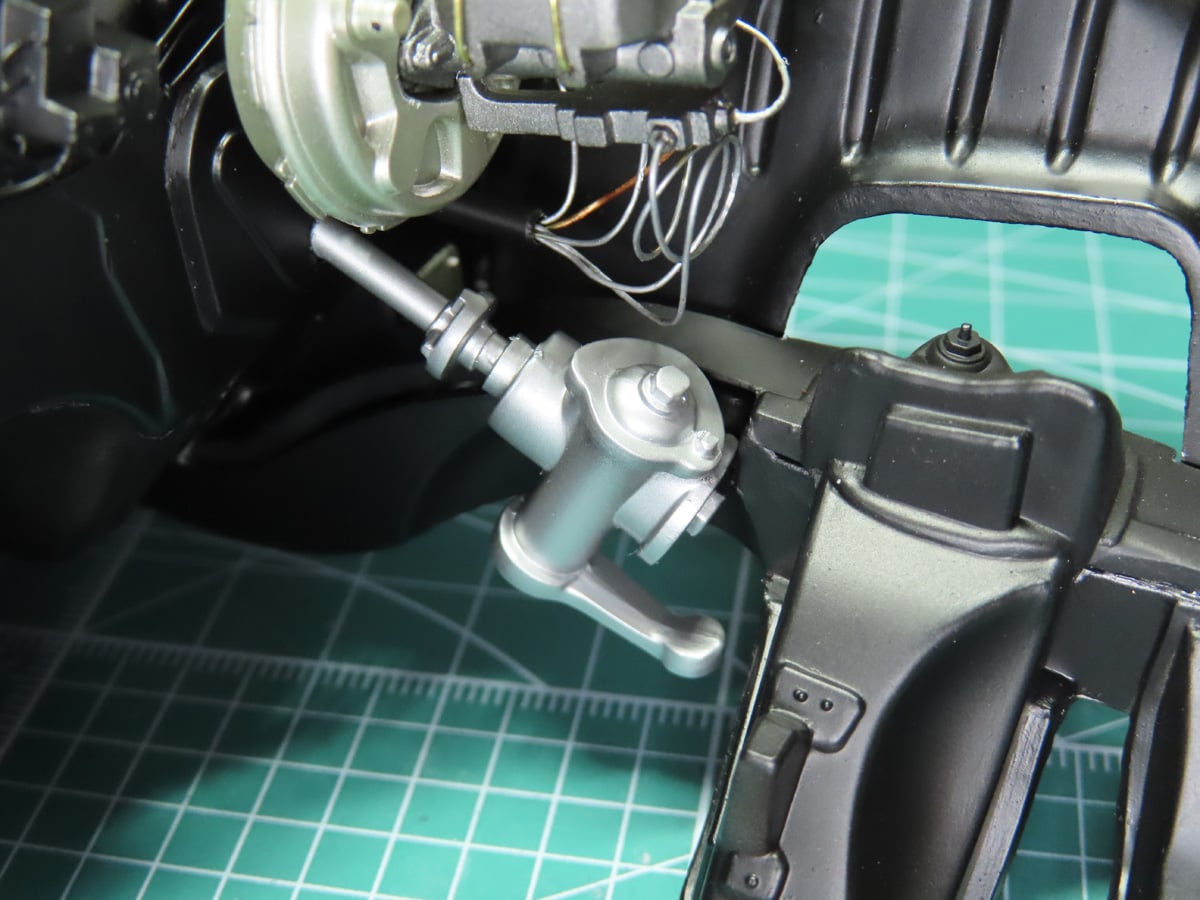
The firewall was glued in place, and then I added the steering box. It fits onto a small peg on the side of the chassis.
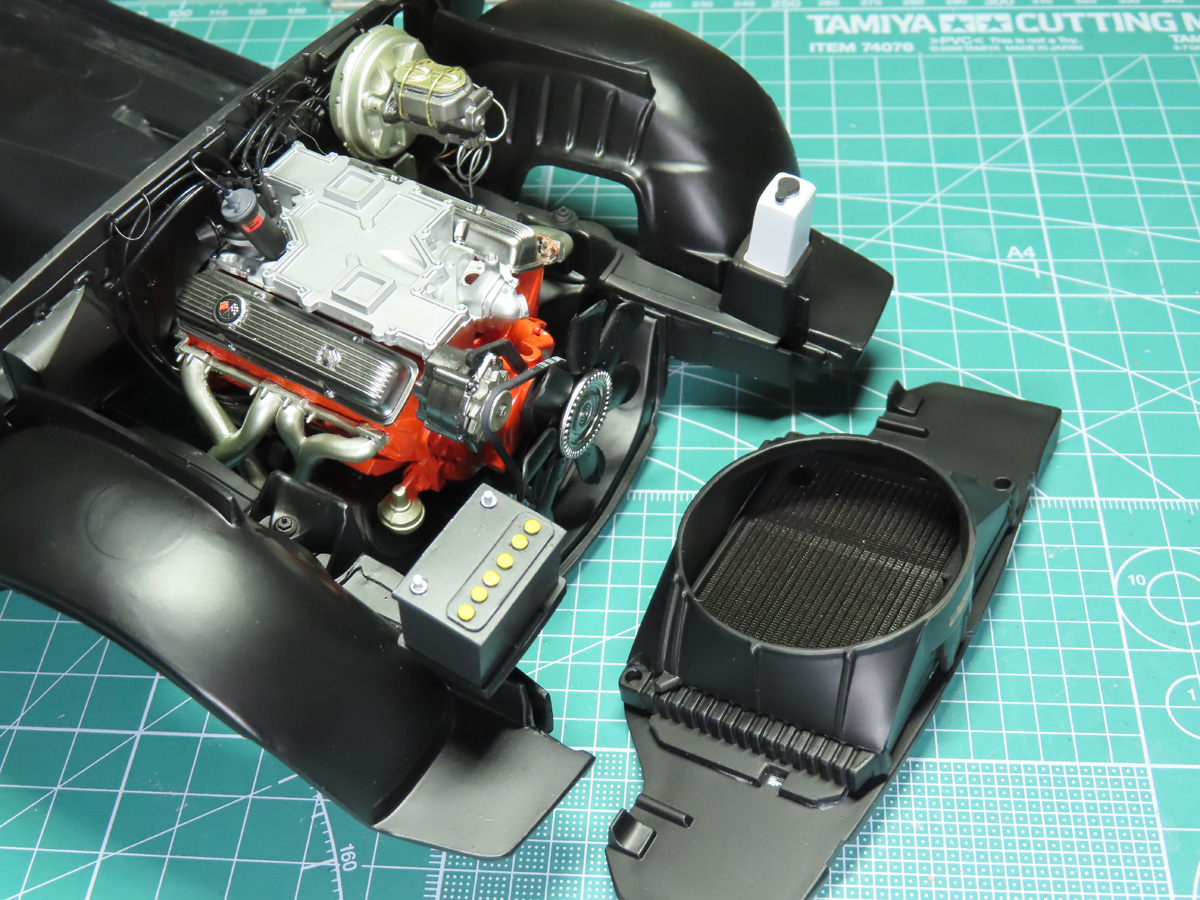
With everything now in place, I was ready to add the engine. And this is where things went very wrong, very quickly.
Despite my previous tests, I couldn’t get the engine in its place. I heard a slight creaking of the exhaust manifold, and with great reluctance, the only way to get it in place was to break it from the engine.
Now that the engine was in its correct place and glued to the mounts, I looked back to see why the exhaust wouldn’t fit. And the culprit was the Steering Box.
The Steering Box is too big to fit, or I’ve glued it too low, and it needs to be raised. I’m going to look into this further in the next post and see if I can figure out what I did wrong.
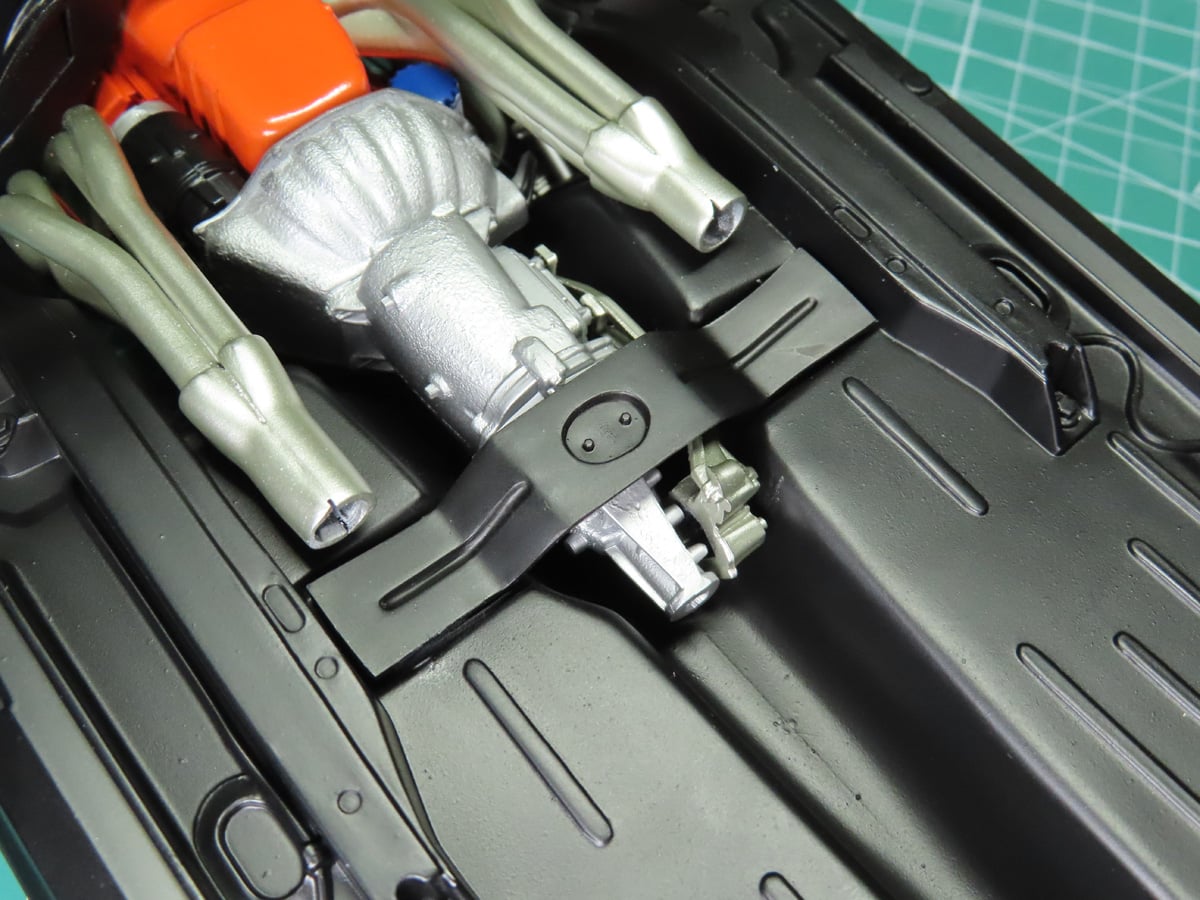
To complete my work this week, I’ve added the plate that will fit on the bottom of the engine, and will be glued to either side of the chassis.
The holes for the pegs were too small, so I used my drill to make the openings wider, and the part fit in place with minimal fuss.
Between the engine not fitting properly and this flu I’m recovering from, I sadly didn’t get as much done as I had hoped. But I have a plan for next week, not only to align the exhaust manifolds, but to also correct the steering box.
Setbacks like this are never fun, they slow everything down and can be very frustrating. The important thing I’ve found is to just take a short break and come back to the model with a clear mind. Evaluate the situation with a calm perspective, and you can usually find a simple and quick solution to the problem.
To be continued…
About the Author:
Jared Demes is a modeler from southern Alberta. He has been building models since he was 4 years old when his Dad first introduced him to the hobby. He has written for several magazines including, Fine Scale Modeler, Scale Aircraft Modeling, Phoenix Scale Models, and others. He has an interest in all modeling subjects, with a focus on WWII Japanese aircraft and Science Fiction.
Jared has won several IPMS awards for his modeling, and currently operates his YouTube channel rebelsatcloudnine, where he showcases model builds and product demonstrations.