
Tamiya North American F-51D Mustang
This is the eleventh part of the Tamiya North American F-51D Mustang Korean War 1/32 Scale 60328 with RCAF Markings.
As I had mentioned in my last post, I was waiting for some parts and supplies to arrive in the mail. Sadly, the supplies I ordered have been delayed slightly from the long weekend. But the parts I ordered, to my surprise, did arrive.
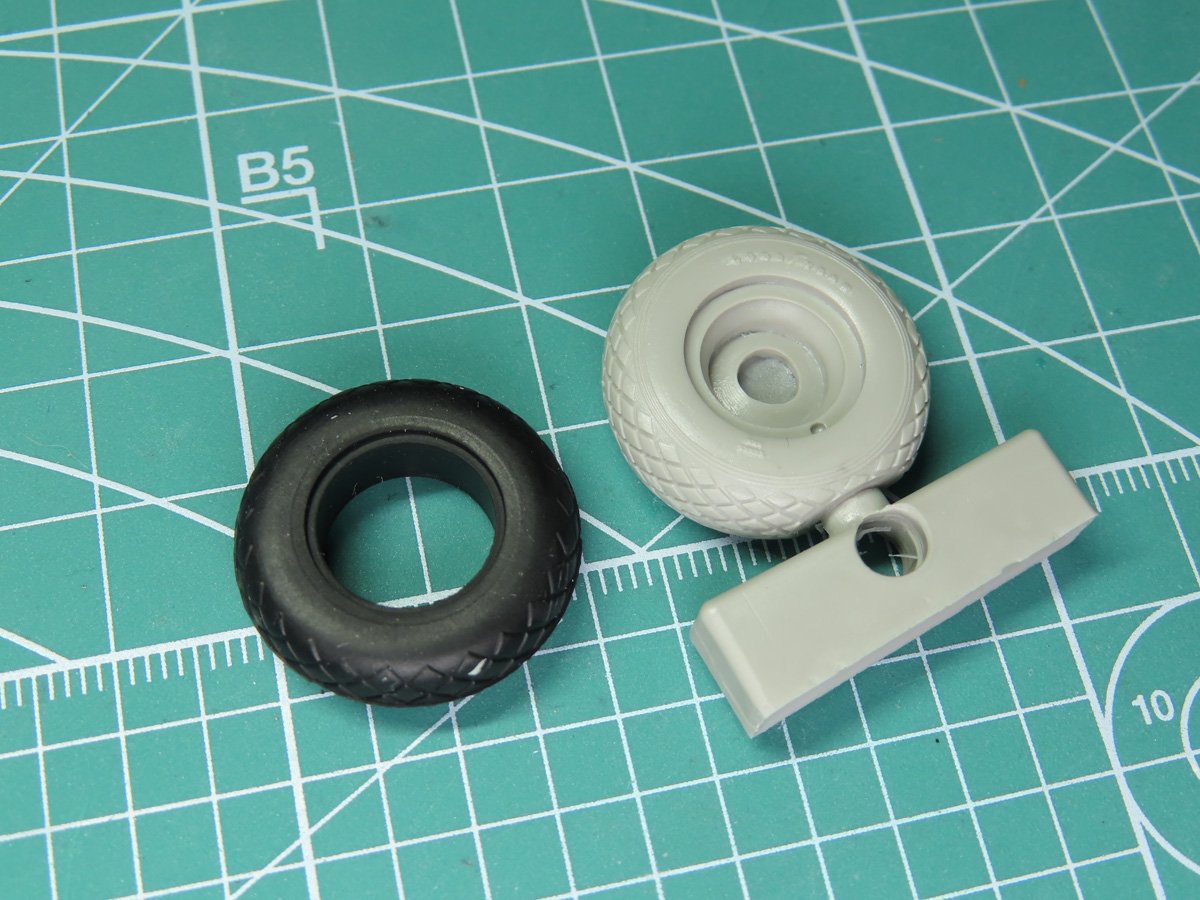
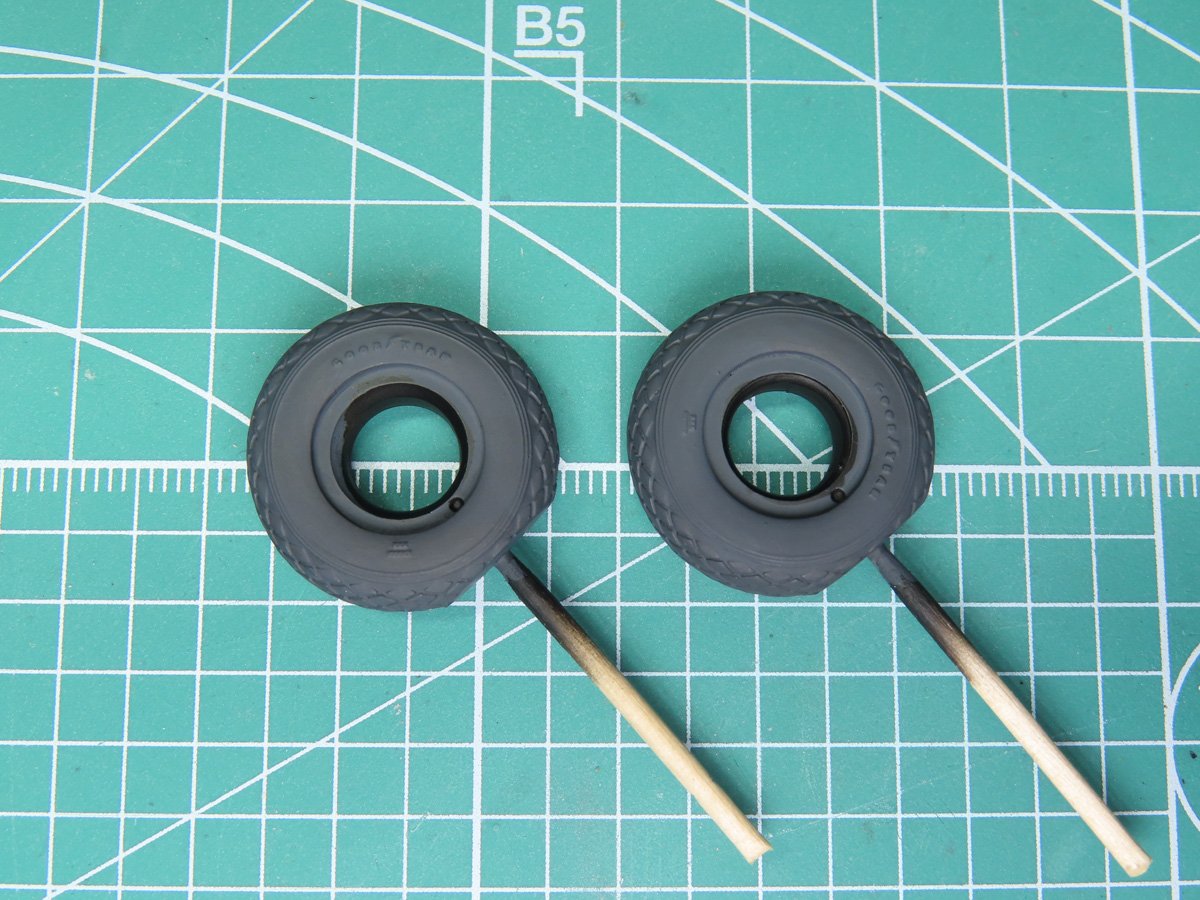
Tamiya included a pair of rubber tires with the model, and this is something they include with most of their 1:32nd aircraft. And I had planned to use everything included with the kit, but when I looked at the tires, I wanted to add a bit more detail to the model, and this would be difficult to do with rubber.
I purchased a set of Eduard 1/32 Scale P-51D wheels, and you can see the Tamiya parts are nice; they are lacking that extra detail.
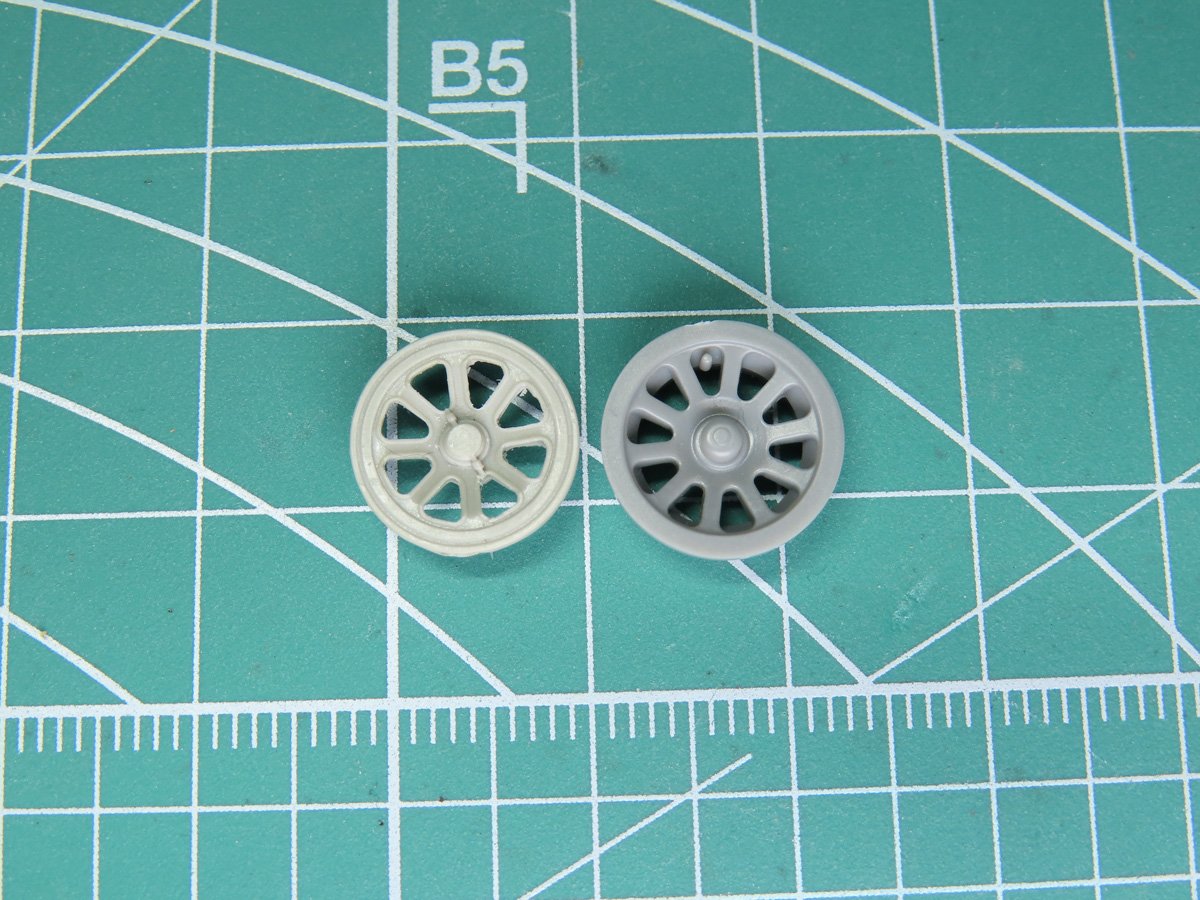
Here you can see the Eduard (left) and Tamiya (right) wheel rims. Again, I think the Tamiya parts work quite well, but the Eduard rims have more smaller details, and the hollowed sections between the spokes are the more correct shape.
When working with resin, it’s important to keep your desk and tools clean, as the resin dust is toxic if you breathe it in. I keep a small hand vacuum next to my desk, and I use this all the time to suck up any bits of plastic while I’m working. And when I’m working with resin, I try to vacuum my workspace and tools often so that the dust doesn’t get around the room.
I know a lot of modelers don’t like painting wheels, and I can’t say as I blame any of them. I’m going to show you the method I use when I’m painting wheels, as I find it makes things easier and achieves a more realistic effect.
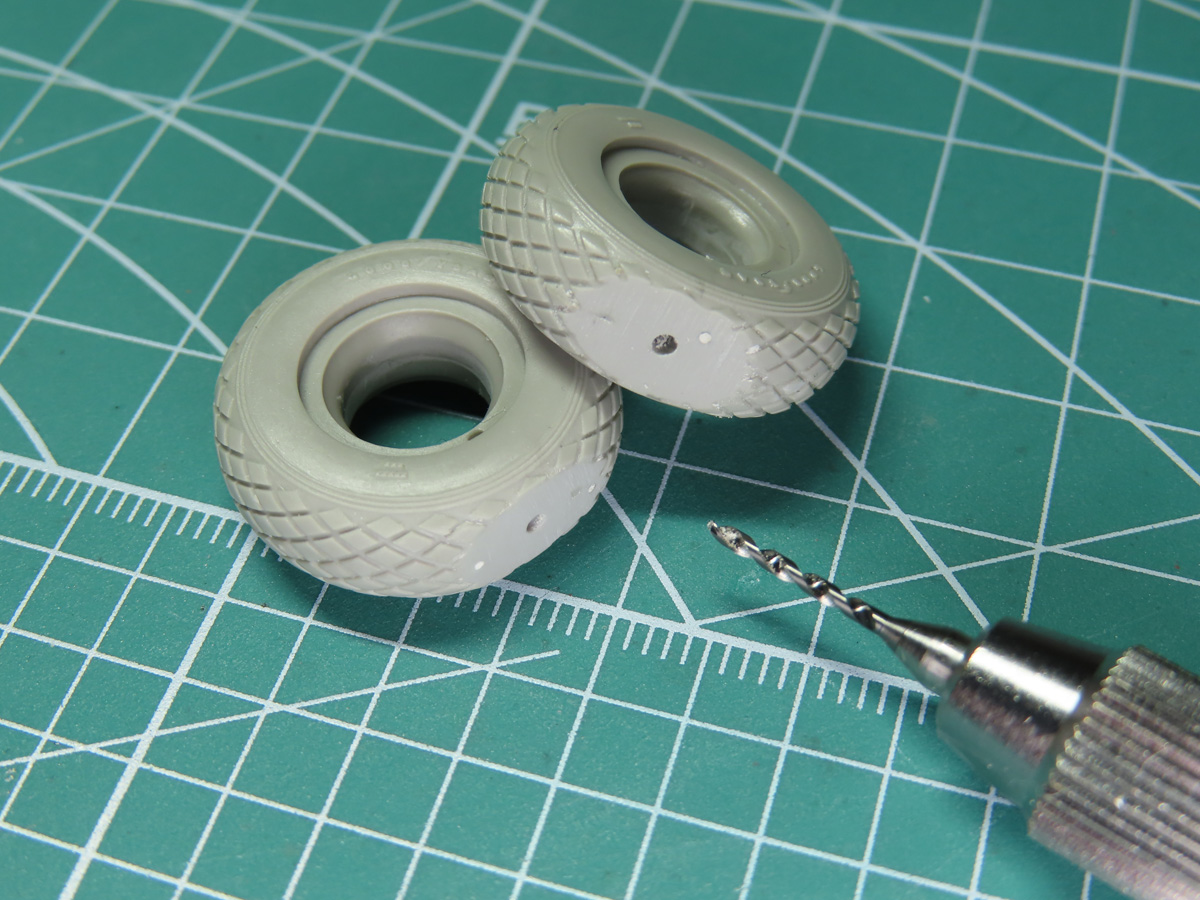
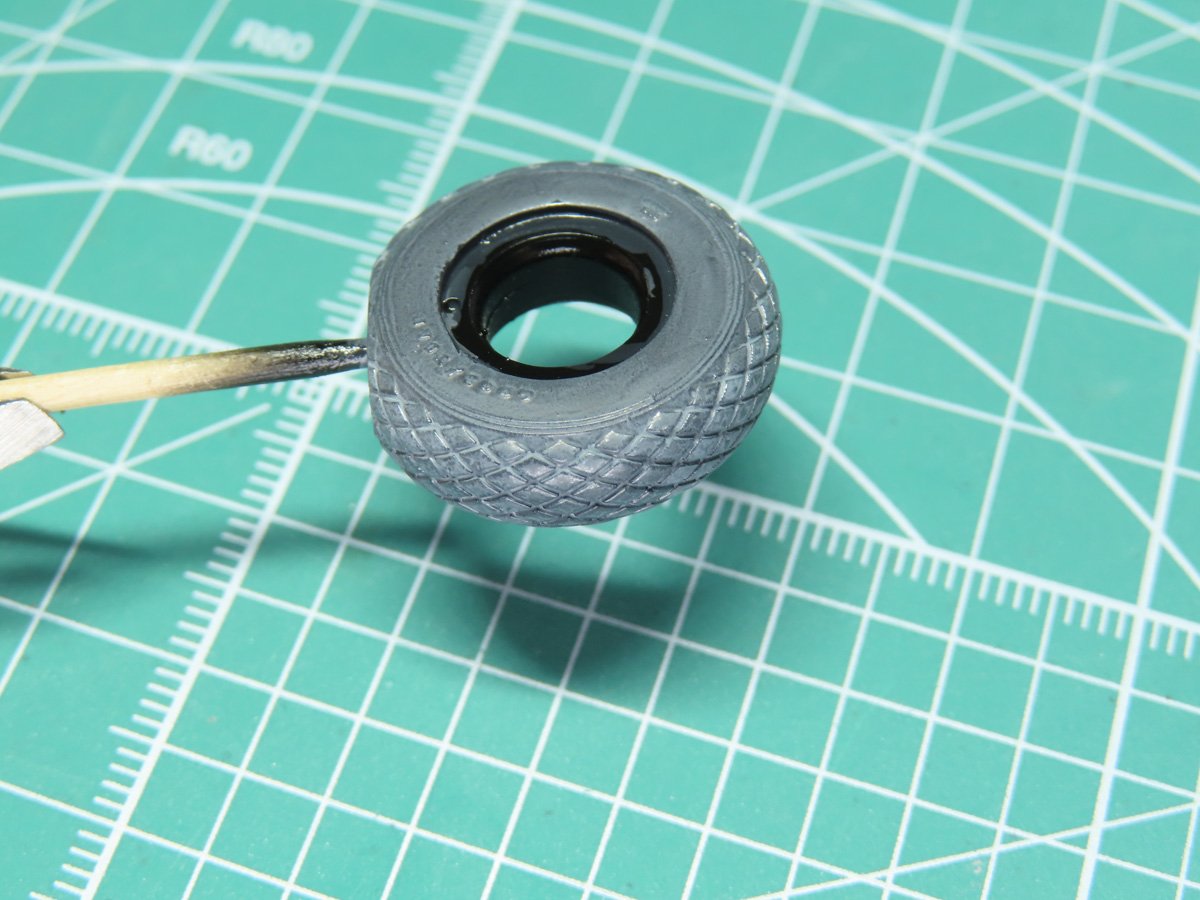
Once I’ve removed the wheels from the resin plugs, I sanded the bottoms smooth. I then took my Tamiya pin vise and drilled a hole into the bottom of each wheel.
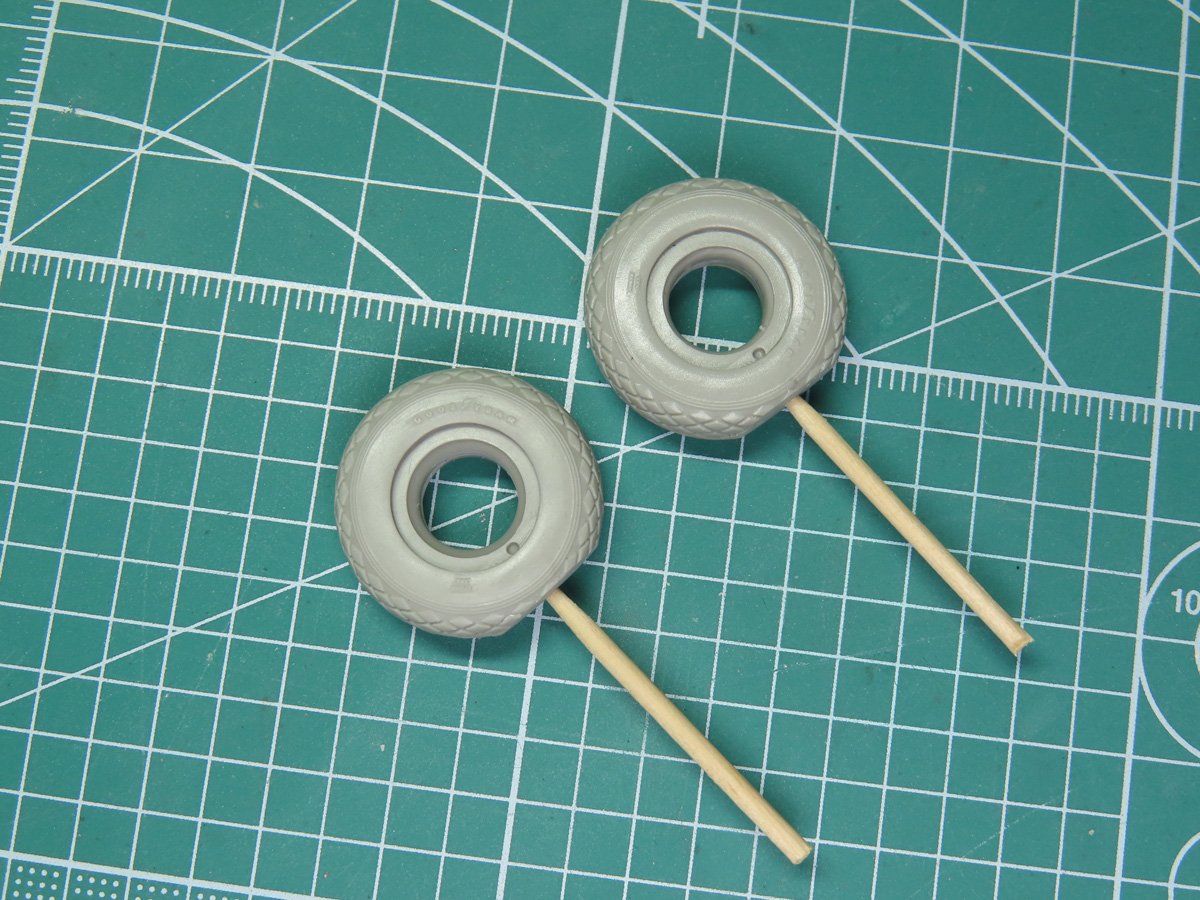
Next, I take a cocktail stick and insert it into the wheels. This will make it easier for me to hold the wheels while I’m working on them. Usually, these are held in with friction, but you can also add a small drop of super glue to really secure them in place.
When the wheels are eventually done, you can easily pop them off the sticks or cut them off.
Before I prime these parts with Mr Surfacer 1500 Black, I washed the resin with a soft toothbrush and some dish soap. Sometimes companies will apply an agent that prevents the resin from sticking to the molds when it’s poured. This agent can interfere with the primers’ adhesion.
My preferred color for painting tires is Vallejo Black Grey 70862. I thin the paint with some water and brush on 2-3 coats. The paint was nice and thin enough that it easily flowed into the diamond treading, and didn’t obscure the Goodyear logo.
I like this color as it has a slightly faded used look that tires often produce over time. I prefer to hand brush this particular paint as I’ve had issues with the Vallejo Air range in the past. Some of them are thinned too much for my liking and I have an easier time just brushing them on by hand.
Once the Black Grey had dried, I sprayed on a layer of Mr Color C46 Clear. This is to protect the Vallejo paint from weathering, as there is a chance it could be damaged by the different paints.
I brushed on a layer of Tamiya Panel Line Accent Color Grey 87133. I made sure that there was a good coating around the treads, as this area will really stand out on the completed model.

I cleaned the excess thinner with Tamiya Enamel Thinner and a cotton bud. This Grey wash was removed from the top of the treads and helps the diamonds stand out a lot more. I removed more from the sides of the tires, and this helped create the illusion of dirt around the tires.
To seal everything together, I sprayed on Mr Color C182 Flat Clear.
I like this method, and you don’t have to add on Grey as I’ve done. Since most of these P-51s were taken off from a concrete runway, I don’t imagine they were as dirty as others in wartime service. You can use any type of Enamel paint thinned with Enamel Thinner, like Tamiya XF-59 Desert Yellow, to create sandy tires. Or Tamiya XF-52 Flat Earth to replicate mud.
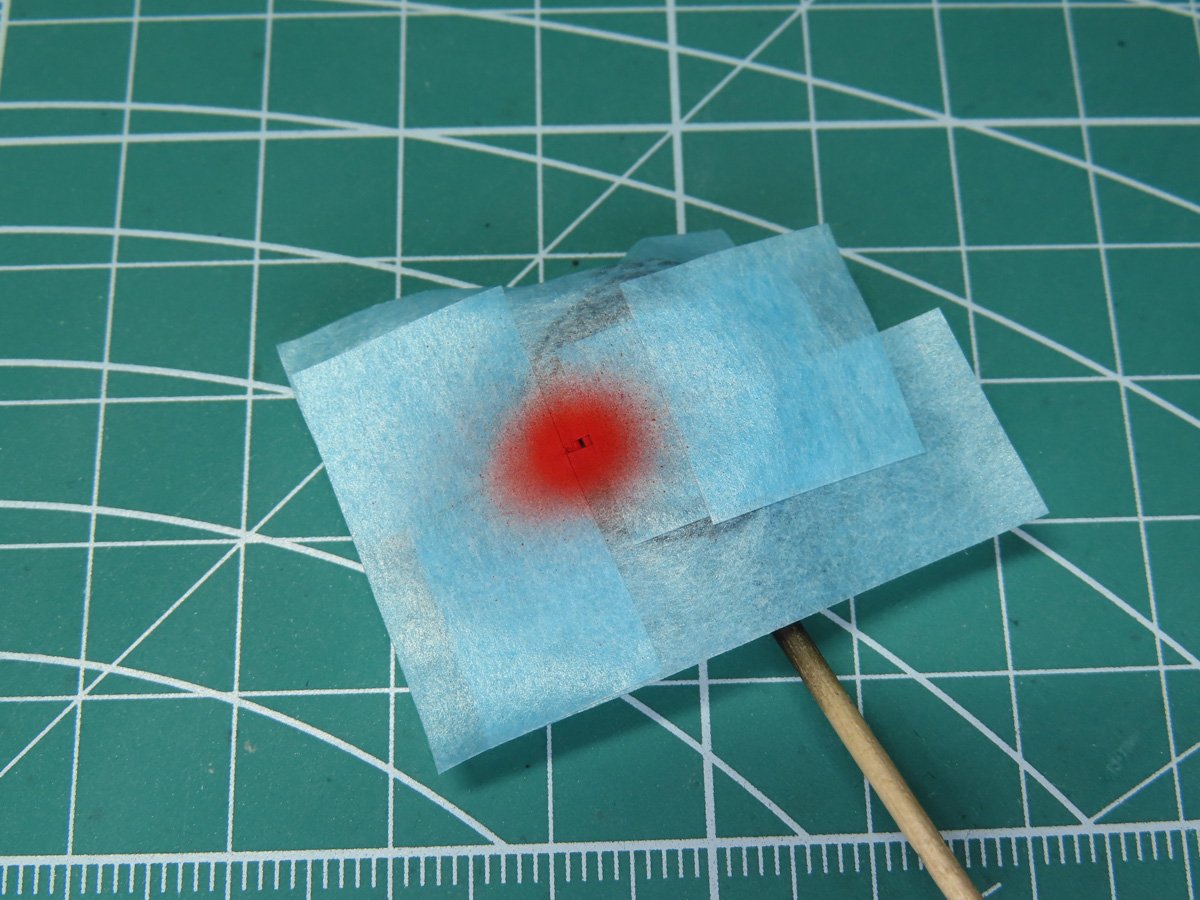
Tamiya includes 2 small decals for the tire alignment markers. But I decided it would be easier, and look nicer, if I painted these on myself. These areas were small, and once everything was set in place, I sprayed on a light coat of Tamiya XF-2 Flat White. Next, I sprayed on Tamiya XF-7 Flat Red.
The White base coat will help the Red stand out more and be brighter. Just 2 or 3 light passes of the White is enough to have a greater effect on the Red paint.
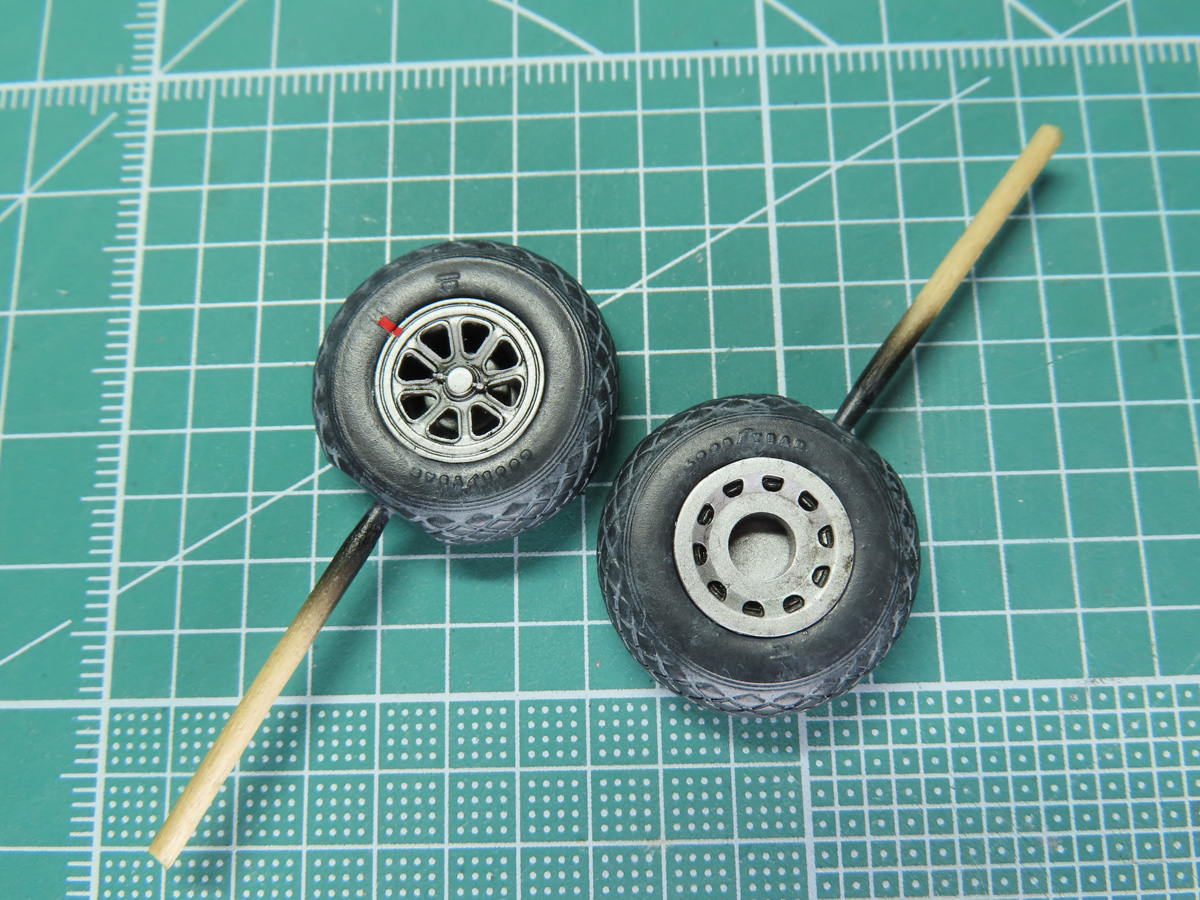
The rims were painted with Tamiya LP-11 Silver, and Tamiya Panel Line Accent Color Black 87131 was painted to highlight the details.
A thin bit of super glue was used to glue the rims in place, and I was impressed by how well these parts all fit together. Sometimes, usually with bigger or thinner pieces like these rims, warping can occur in the resin.
Warped parts can be fixed by carefully dipping them in hot water to soften the parts. Once the parts are set in the correct position, you can set them with cold water.
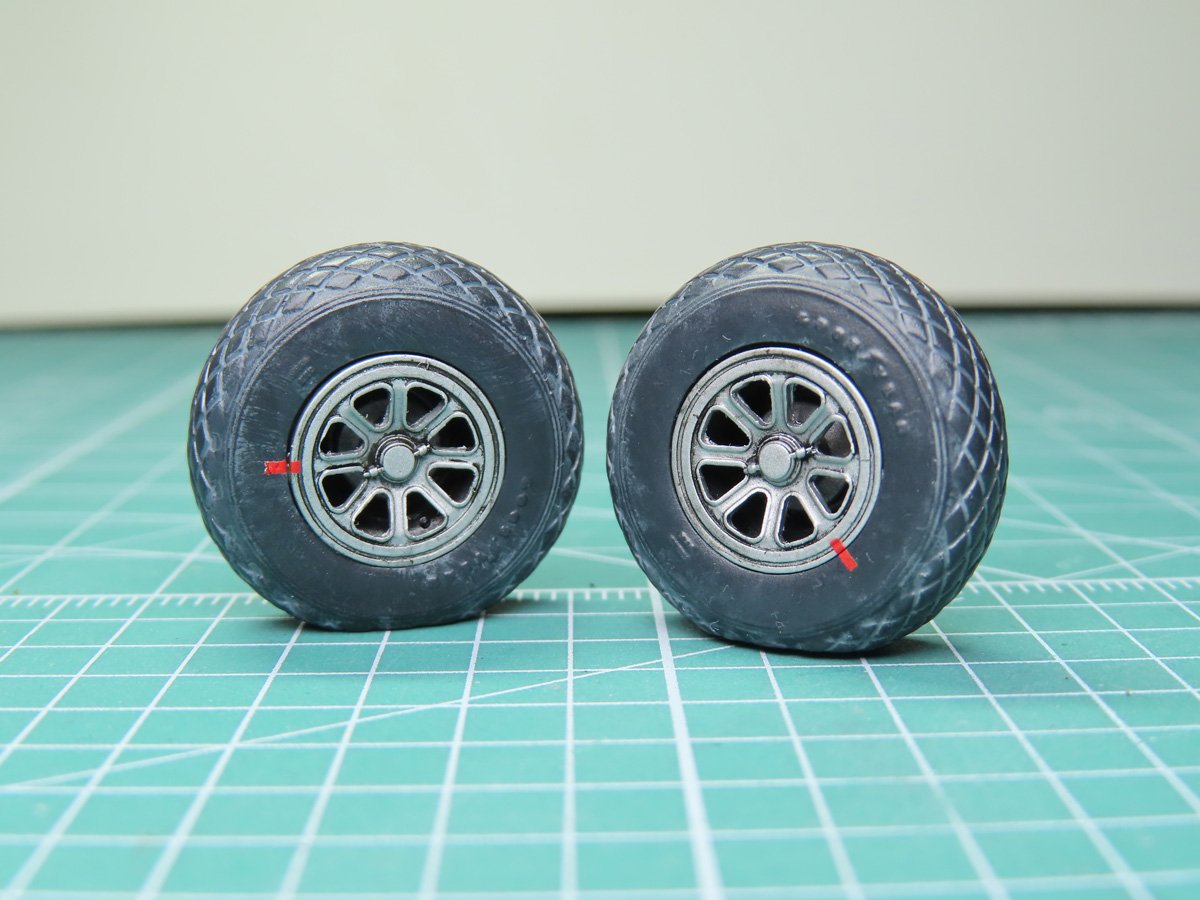
And here are the completed wheels! I really love the color combination of the Vallejo Black Grey and the Tamiya Grew wash. And the red alignment markers are going to be a great extra detail to see once these are glued to the rest of the landing gear.
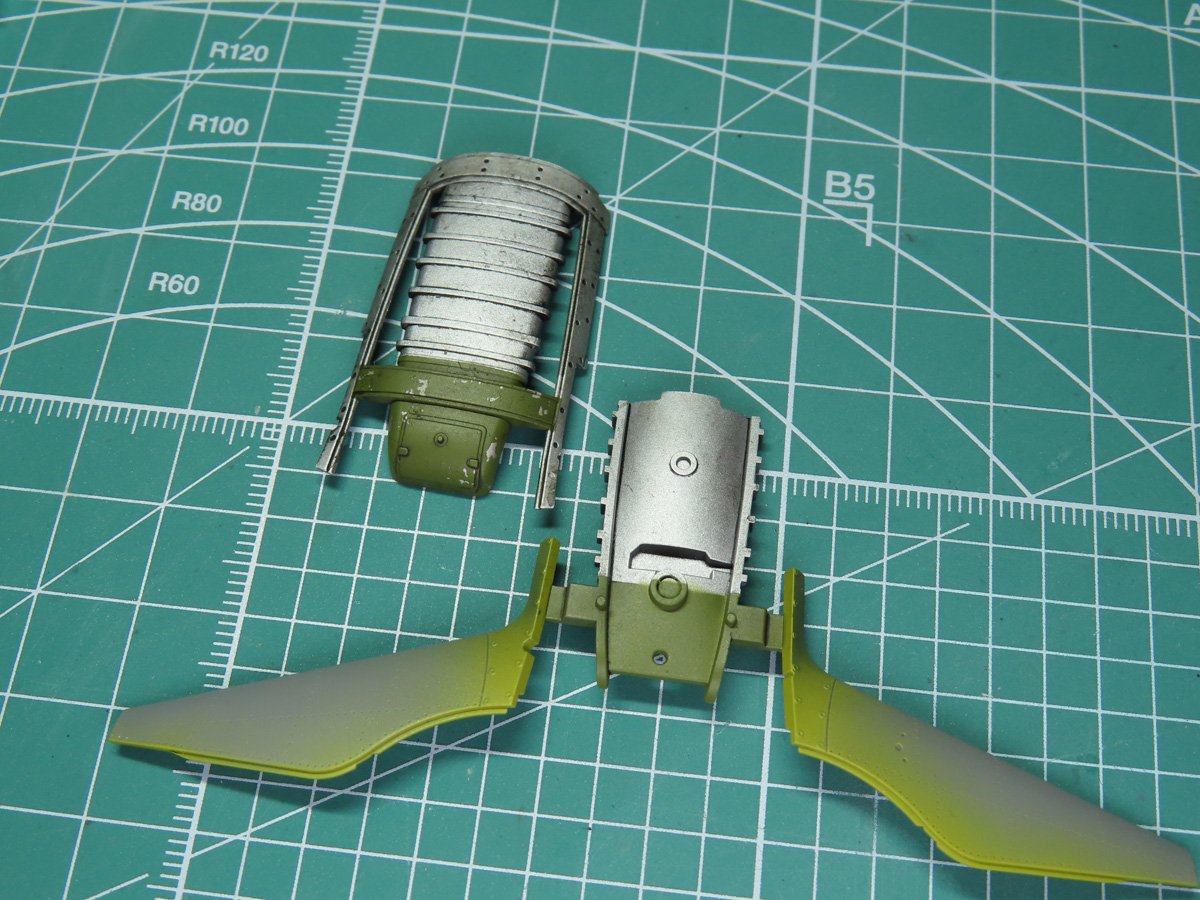
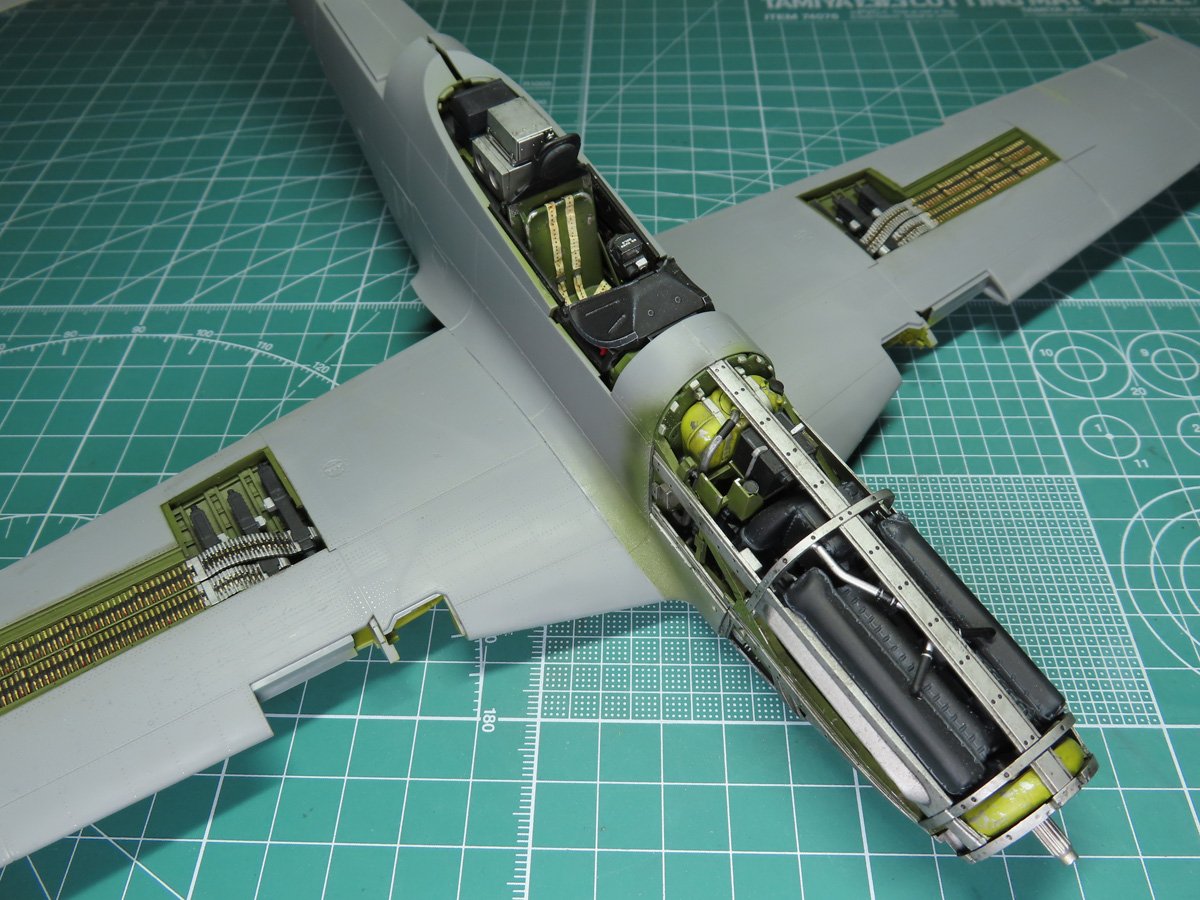
Before I glued the wings to the fuselage, I needed to paint the lower wing edge, which is also the forward section of the landing gear bay. I also painted the removable section of the carburetor intake, which is attached when the lower cowling section is removed.
I painted the carburetor with Tamiya LP-72 Mica Silver, and the frame was painted with AS-12 Bare Metal Silver, followed by Mr Color C351 Zinc Chromate Green.
These colors were also used on the wing edge, with Tamiya XF-4 Yellow Green painted on the inside of the gear bay to match the rest of the aircraft.
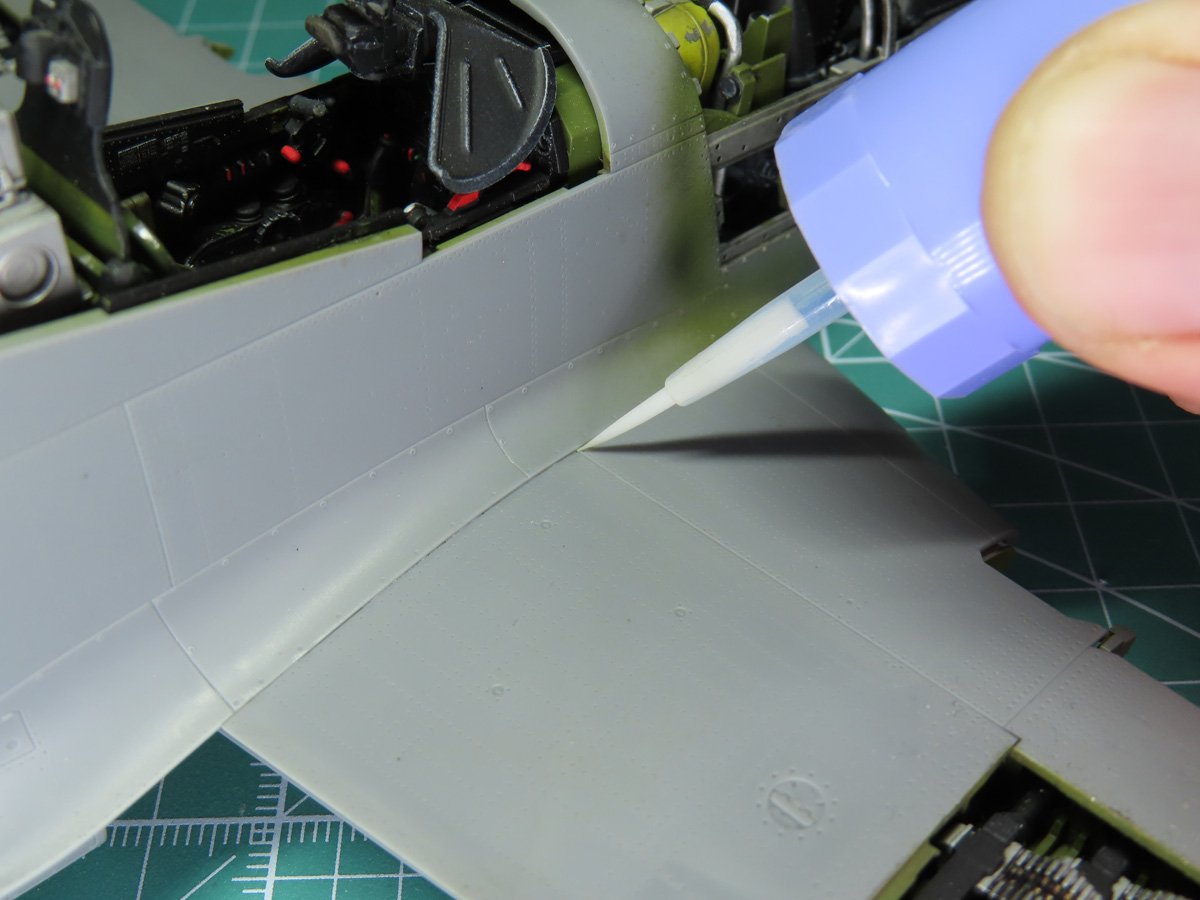
The wings and fuselage fit together with amazing precision. All of those parts and pieces within each section, and all that was needed was some Mr Cement SP along the wing root to seal everything together tightly.

With the wings now connected, I could add on the forward wing section. Tamiya suggests adding this to the main wing beforehand, but I find adding it later to be easier, and it allowed me to ensure a tighter join of the parts.
I carefully added drops of Mr Cement along the edge, and I pressed the parts together, holding them in place while they dried. I’ll have to go back and sand the edges smooth, but everything here is well secured, and cleanup will be minimal.
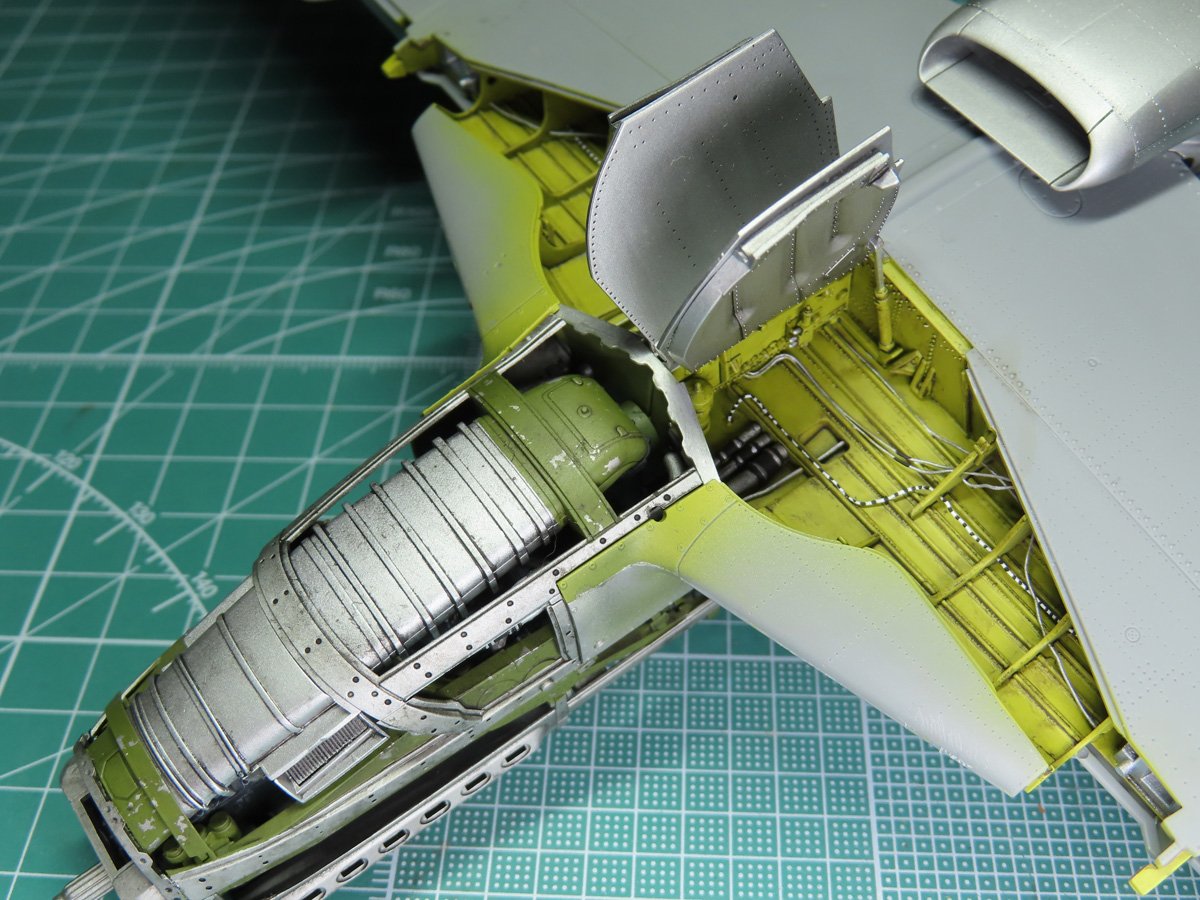
I’ve attached the lower carburetor section and the gear doors to give you an idea of what it will all look like on the completed model. The carburetor is held in place with magnets and photoetch tabs, and it covers up the opened holes in the supercharger.
On my first build of this kit, I used the rubber tires, and I think that they look the part and fit nicely with the model. However, they are a bit of a dust magnet, as they are difficult to clean (but I suppose this could be seen as a sort of realistic weathering). And though I wanted to use only the parts included with this kit, I’m glad that I got the aftermarket parts, as they were a lot easier to weather and are going to look really great once the landing gear is completed.
Hopefully, the supplies I ordered will arrive this week, and I can get to work building the landing gear and get this Mustang standing on her own. After that, we’ll be working on the cowling sections and the propeller, and that will be very fun to work on and add some minimal weathering.
I hope that the tire painting demonstration is useful to you on your projects, as I’ve found it very useful in my work. What I really like is that it isn’t more Flat Black, that’s already all over the model, like the engine, cockpit, and guns. So it adds a bit more color to the model, and that can be very useful with military subjects to break up the tedium.
To be continued…
About the Author:
Jared Demes is a modeler from southern Alberta. He has been building models since he was 4 years old when his Dad first introduced him to the hobby. He has written for several magazines including, Fine Scale Modeler, Scale Aircraft Modeling, Phoenix Scale Models, and others. He has an interest in all modeling subjects, with a focus on WWII Japanese aircraft and Science Fiction.
Jared has won several IPMS awards for his modeling, and currently operates his YouTube channel rebelsatcloudnine, where he showcases model builds and product demonstrations.
First Post: Part 1
Previous Post: Part 10
Next Post: Part 12