
Artesania Latina Bluenose II Build – Part 22 of a Series
In this Sunward Hobbies tutorial, I’ll be finishing with Artesania Latina’s Bluenose II build with Part 22. Previous Part 21
In this Sunward Hobbies tutorial I’ll be wrapping up the build of the Artesania Latina 1/72 Bluenose II fishing schooner. You’ll see tips on securing parts along with hints on problem solving.
This will be the Finale of what was, at many times, a joy and very rewarding project. In the near future you will be able to see the Bluenose II on Display at the Sunward Hobbies Store. I am honoured to have my work showcased, yet even more delighted that you may use it, and these tutorials, as a reference in your own wooden ship build projects. Also, this would make an excellent Christmas gift idea.
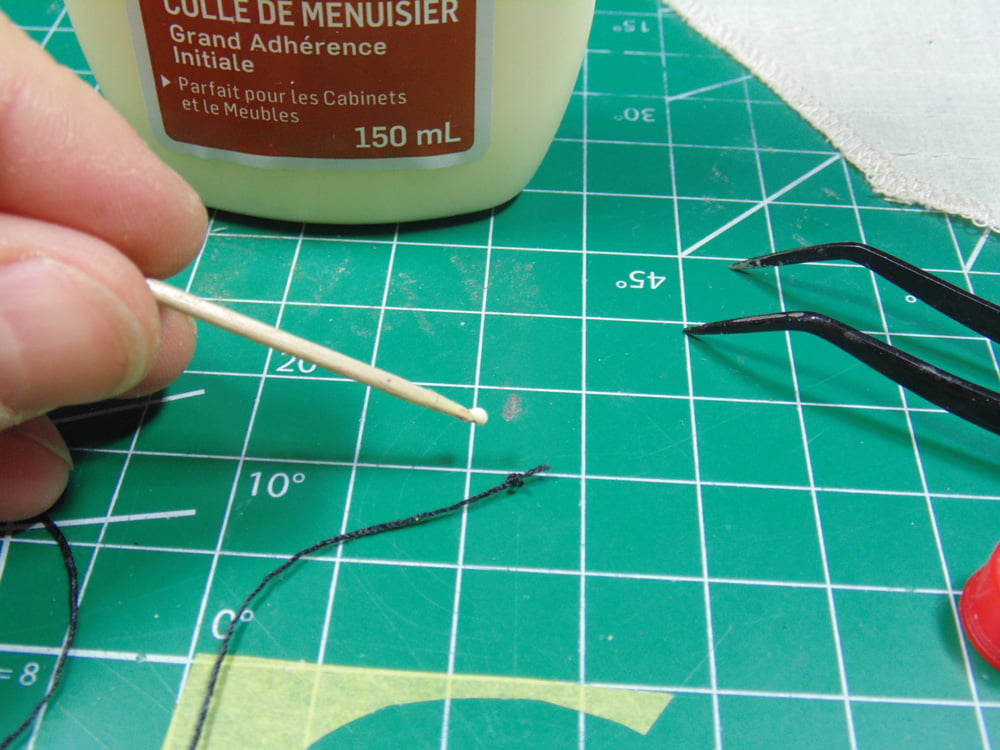
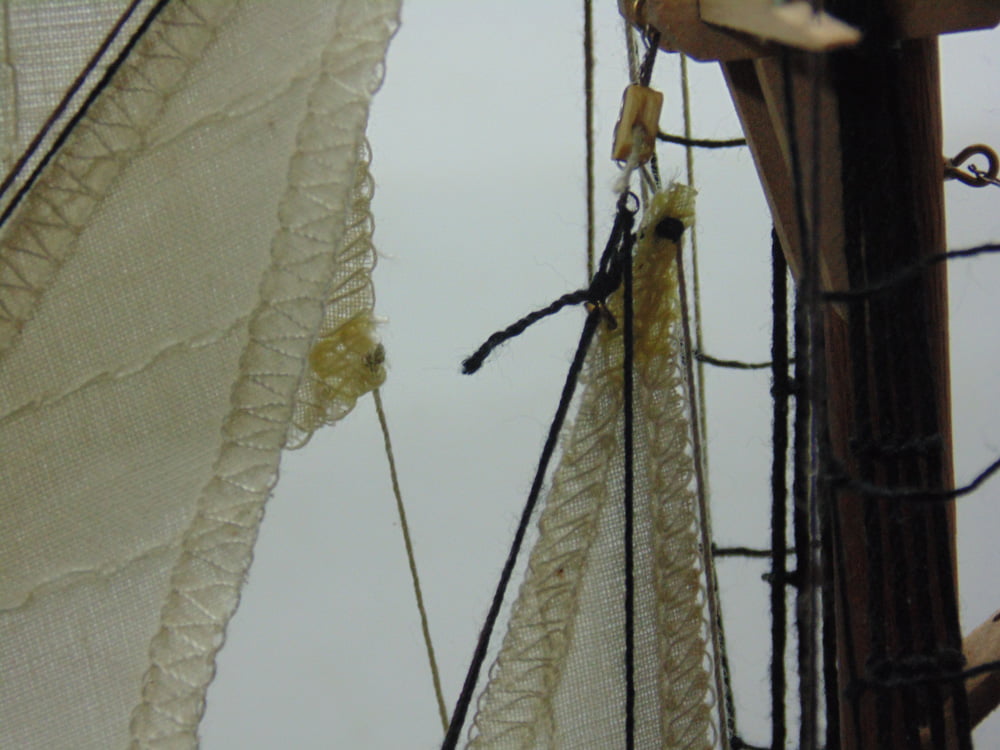
We’ll begin with Step 54 where the aft “Storm Sail” is rigged. As with all the other sails, you’ll need to prep the rigged corners. As you can see, I’ve left the loose threads on and simply added a dab of glue then waited 15 minutes for it to set enough to flip over to glue the other side. It is critical to let this fully harden.

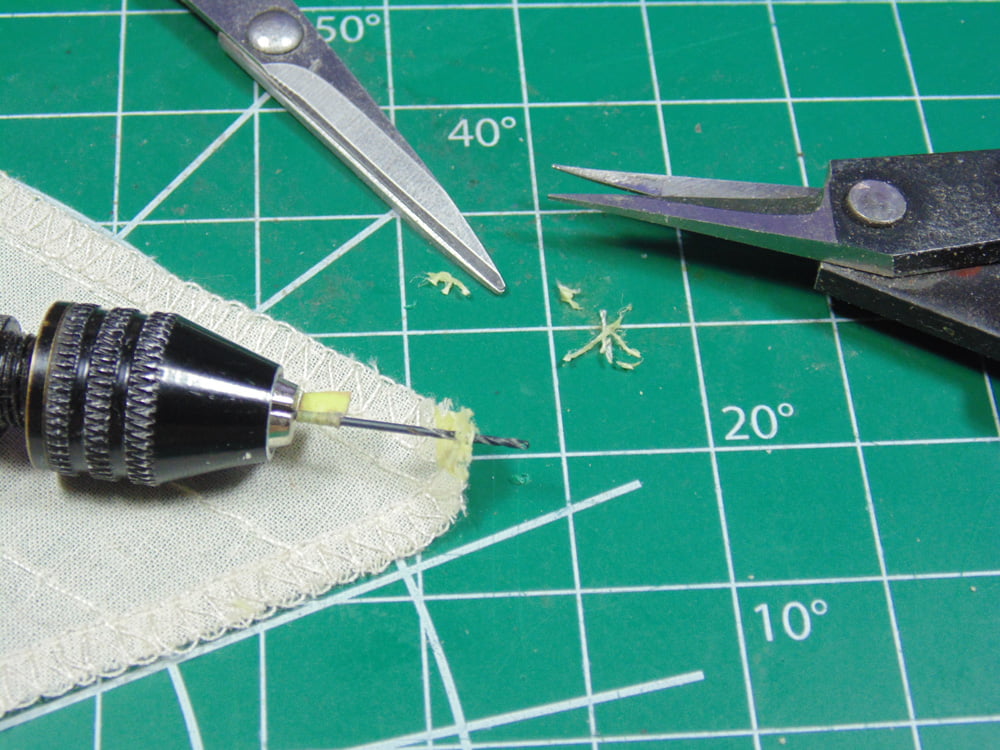
While your glue is setting up you can bore out the holes in the two required blocks. Even if you add glue to the tips of the line, making it like a needle, to stiffen them the holes still need to be slightly widened to 0.8mm. Sunward Hobbies will help you find the right size drill bit for this task.
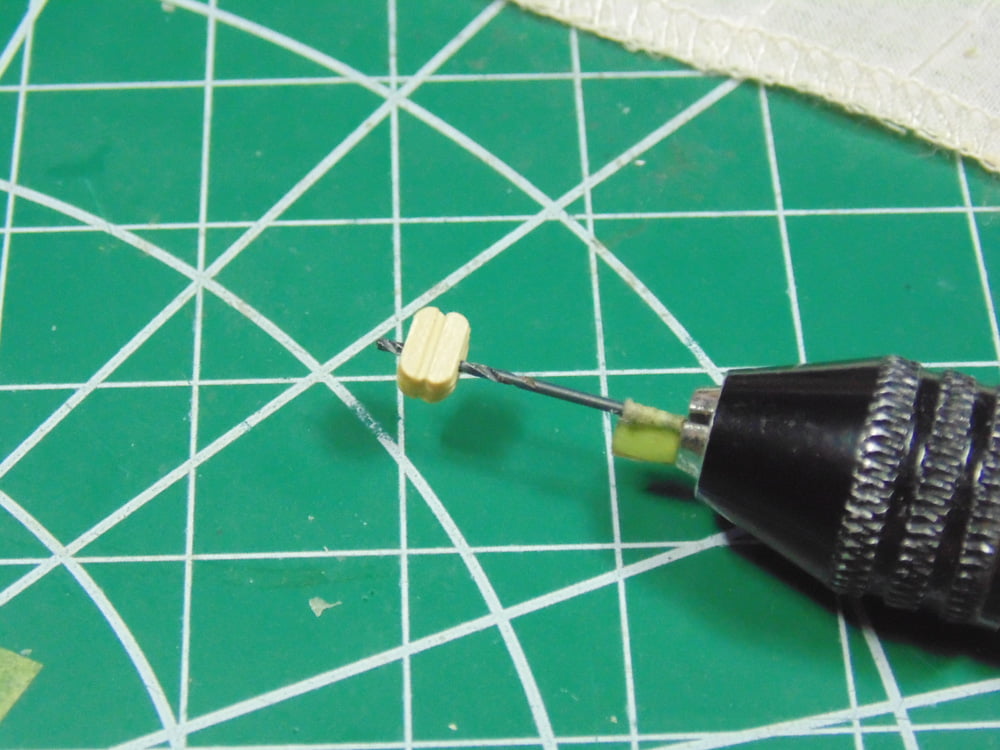
There wasn’t a sufficient number of single blocks, yet there’s an abundance of doubles. No one will notice, being they are so tiny. Use an oversized rod for the loop and twist a couple of times. Keep the block as close to the loop as possible for the best look.
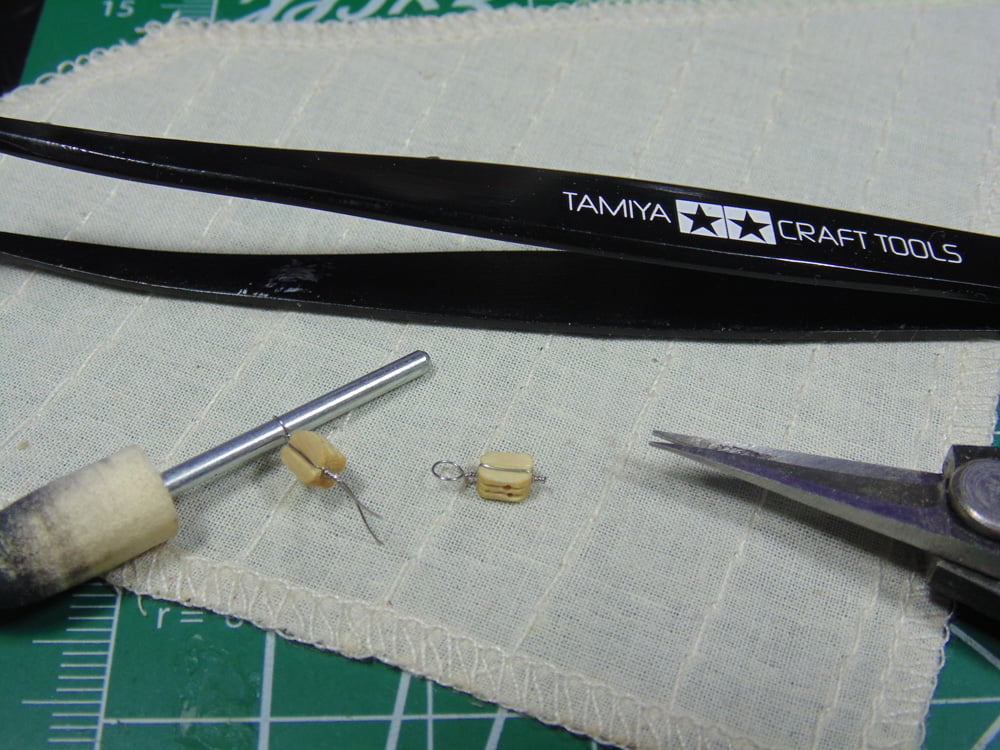
Tighten the steel wire so it ever so slightly digs into the soft wood when twisting the other ends. Now, you can snip off the excess wire and snip the loops open. Later you will be collapsing the loops around other metal parts.
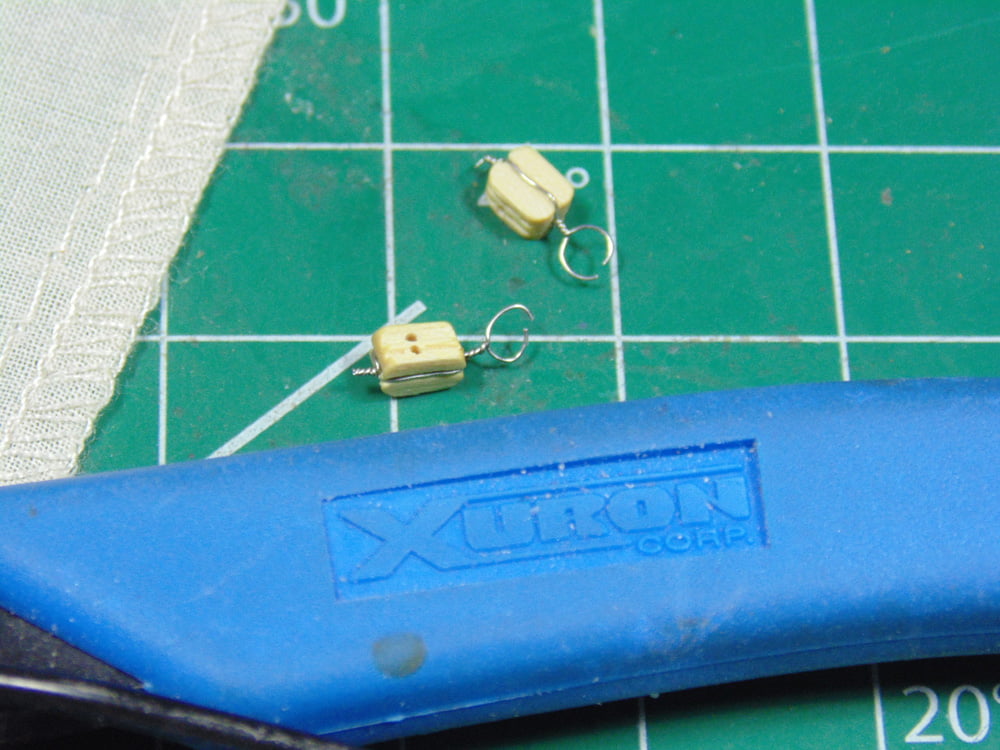
Once the wood glue has properly hardened, you can drill out the 0.8mm holes for the static rigging connection points. This is also the best time to snip the glued loose threads since you can be very precise with how close to the edge you can get. Obviously, making for a cleaner look.
Now add your dab of glue to the double tied thread line knots. Again, make certain this has fully dried before installing in the sail.
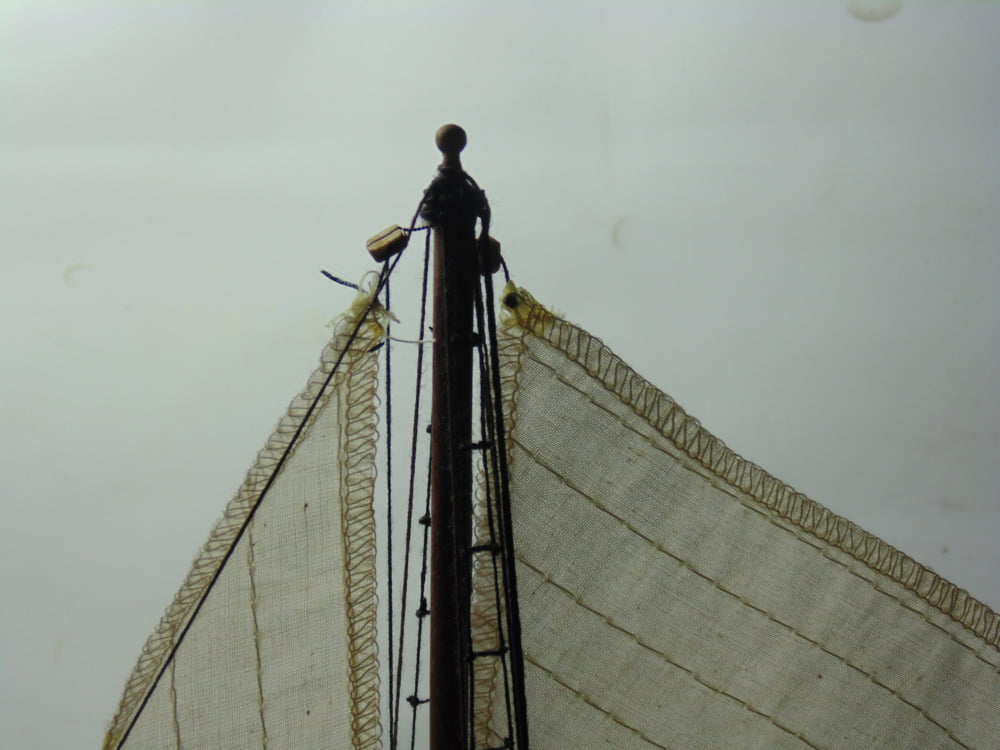
For the best look, try to get the top corner as high as possible to the block. Remember, these sails are larger than illustrated in the PDF online instruction manual. You can, also, bend up the wire on the block later to further tighten and smooth out this sail.
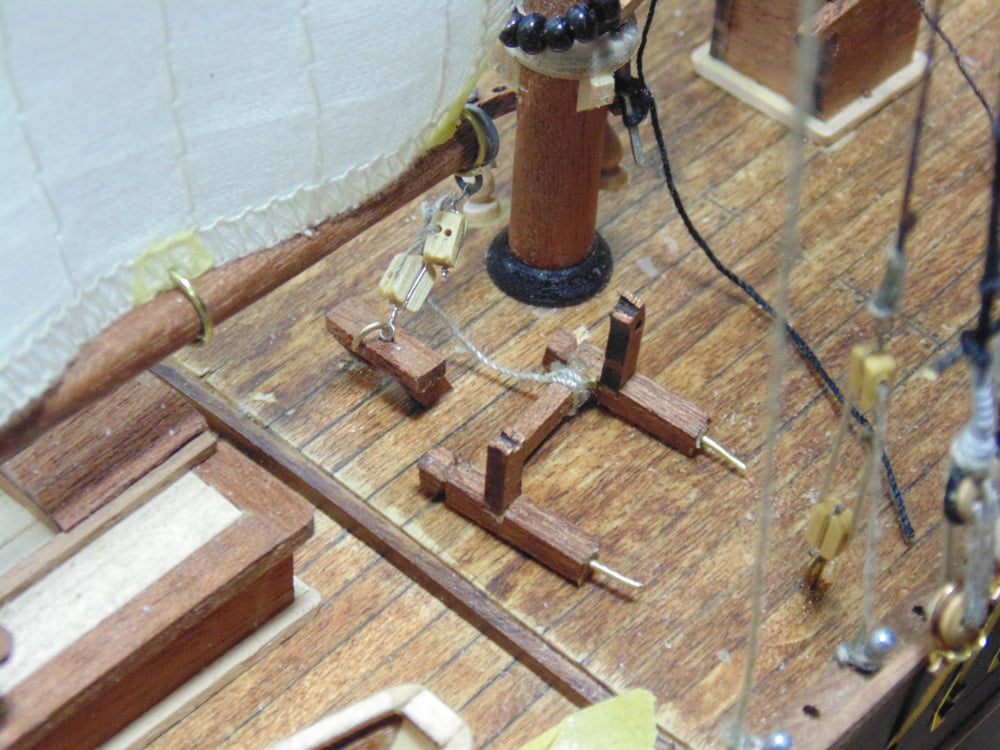
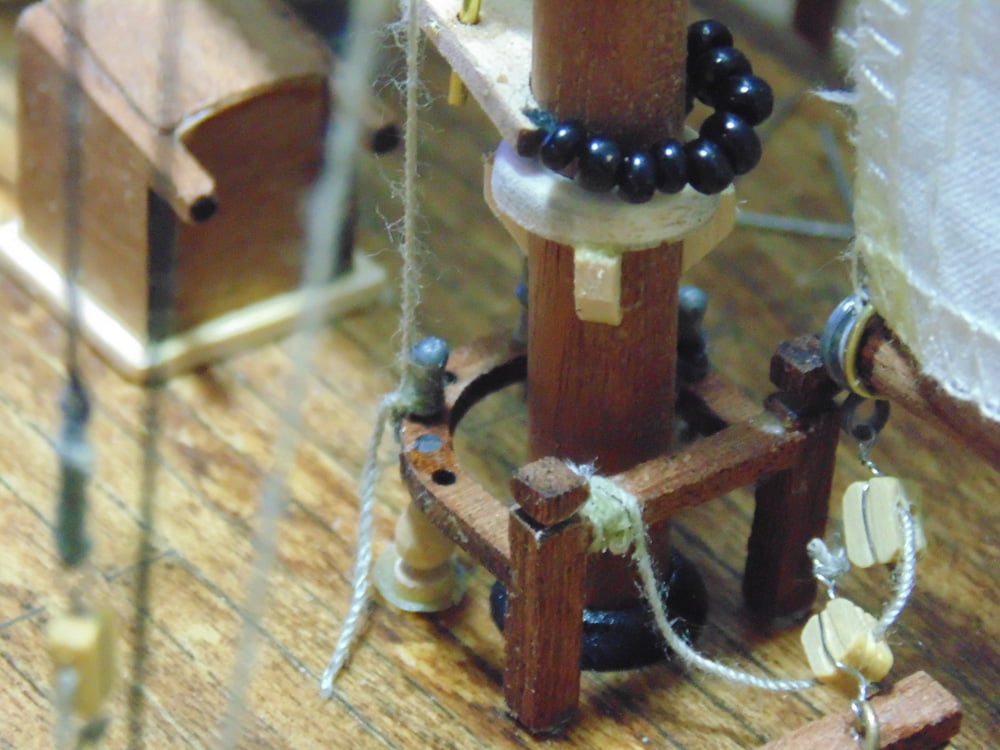
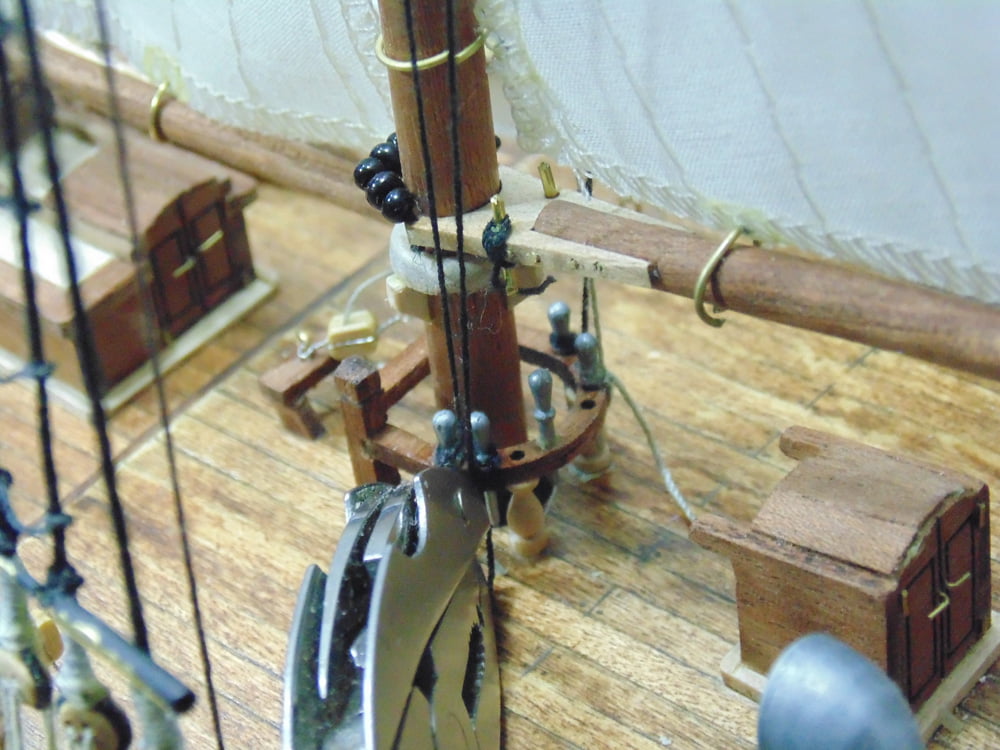
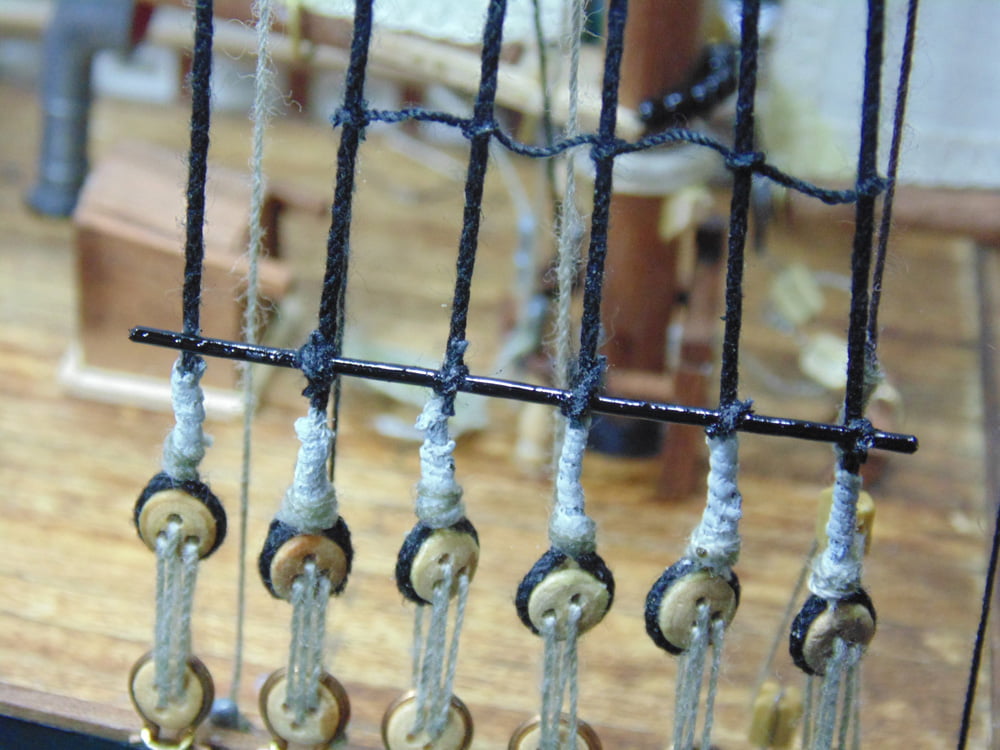
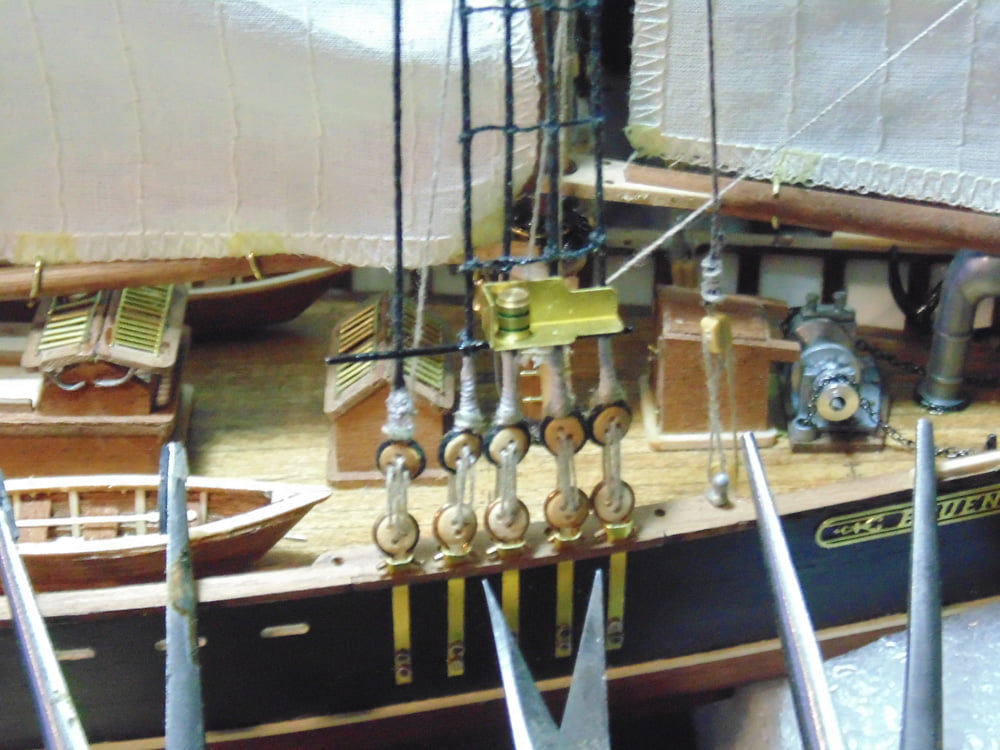
I can’t stress enough how delicate the rigging handle collar is, at the base of the main mast. You’ll find out why in a few shots. Note the handle not going all the way down. Leave it alone and move on.

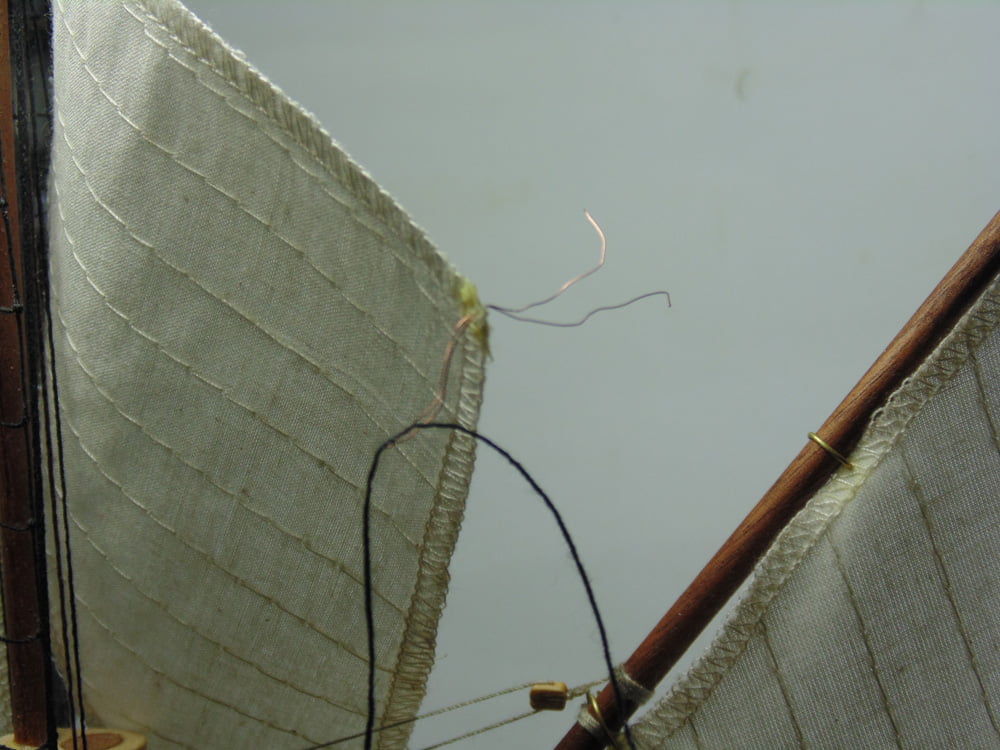
Use the thin copper, or anything super thin and flexible like a human hair follicle, to insert in the 0.8mm hole and make the loop to slip in the free end of the line, then pull it easily through the hole. With the glued double knot being slightly over the 0.8mm width the line should stop at this point.
Once you have done your figure 8 winding of the line around the handles add a touch of glue to ensure the line stays put and retains its tension, once again, for the best look. Also, you don’t need it to be overly tight. The supplied line needs only a modest amount of pull to get and keep the straight effect.
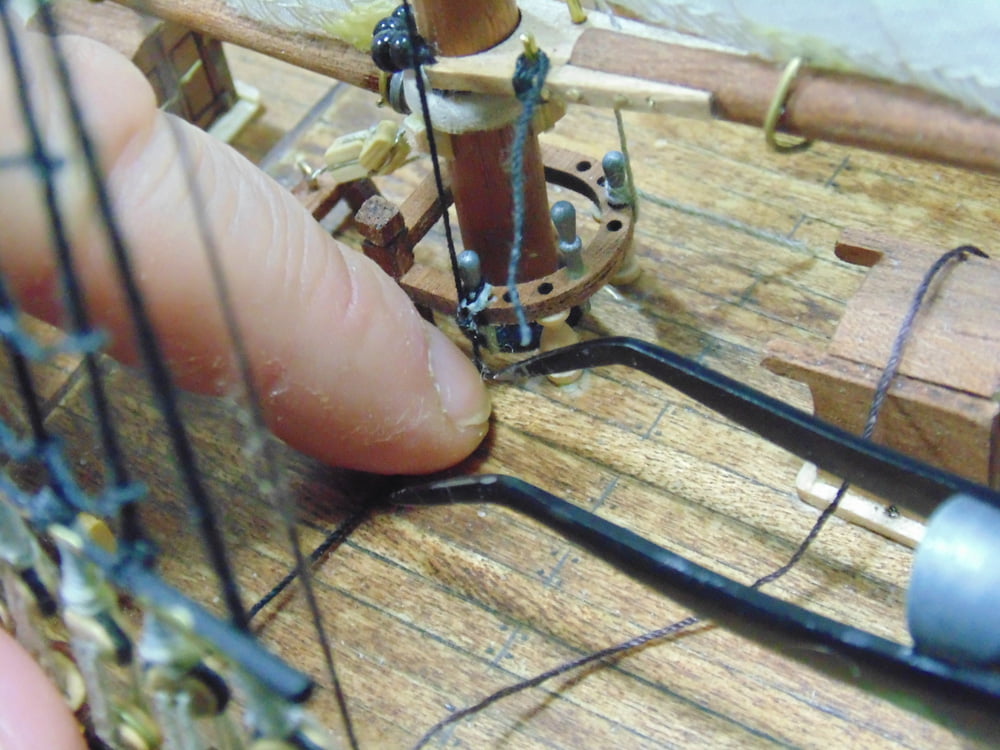
And then this happened. My foolish attempt to remove the oversized handle caused the collar to break in two places, but not the one I previously repaired. I took this as an opportunity to pin it to the deck for much better security. Use contact cement after you have roughed up the metal surface with a 200 or 400 grit sanding product. Sunward Hobbies offer UHU extra all-purpose adhesive. It’s basically an extremely strong contact cement and gives the best bond with wood to metal.
And here’s the result after the 4-hour repair. You can save yourself the grief by pinning down everything on the deck. The setback out of the way, wait a good 8 hours for the cement to fully cure.
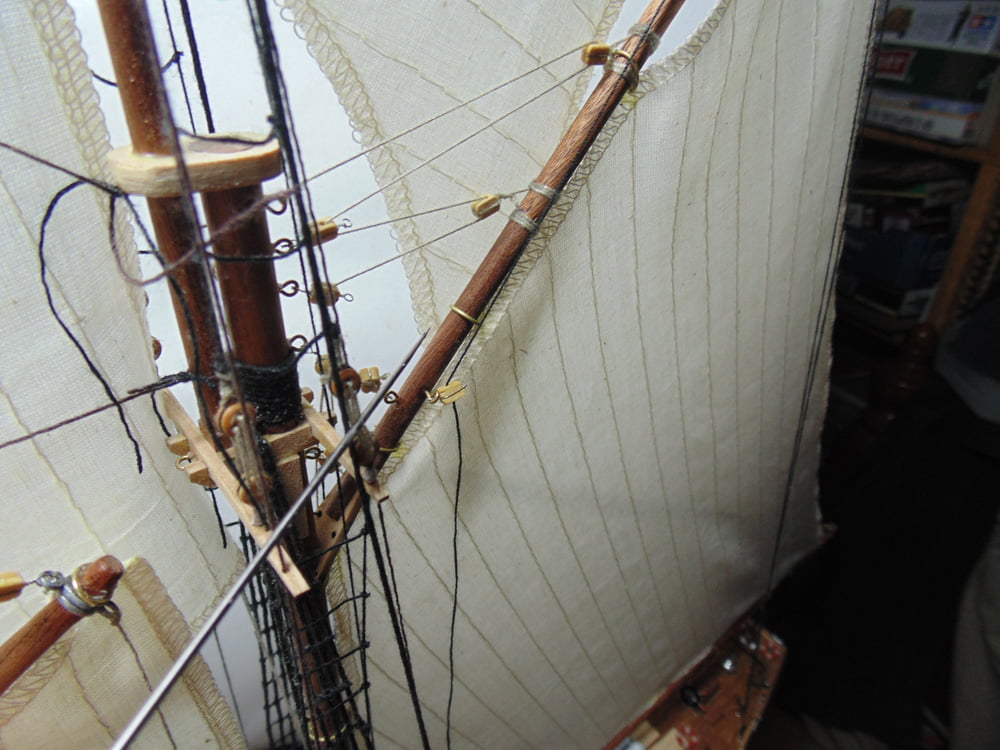
I opted to flip the lower corner of the storm sail to starboard. It’s certainly your choice. My thinking was to showcase more of the rigging on the portside since that side will hold the Maple Leaf flag. Again, I used the wire and loop method.
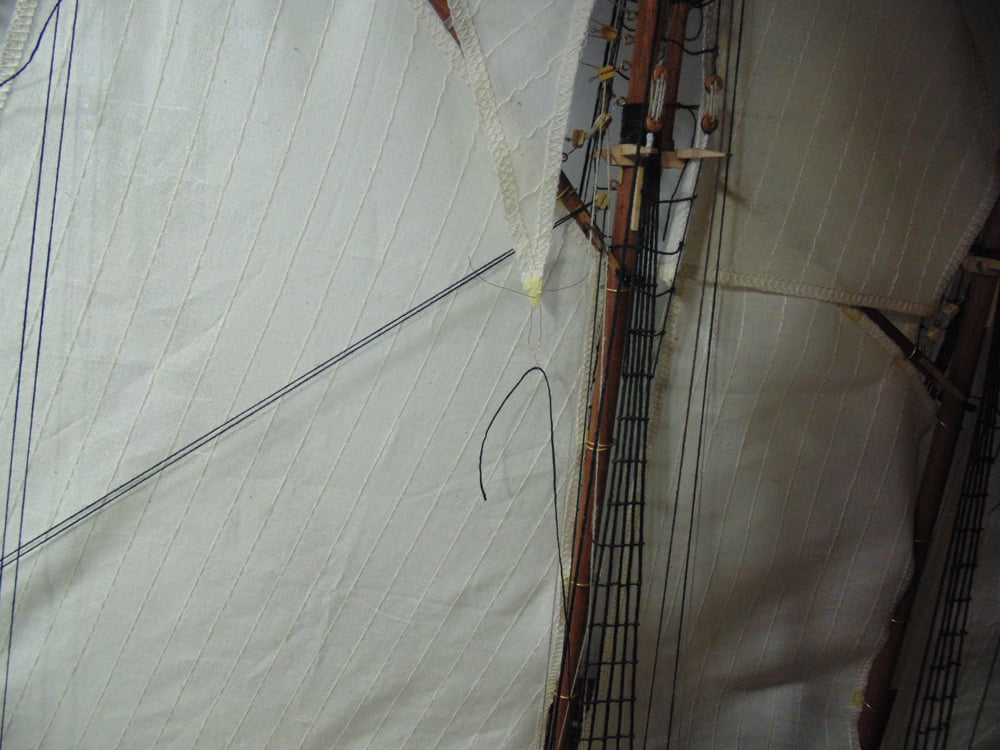
Unfortunately, the supplied amount of tan rigging line was insufficient and I had to use the abundant black string. Please keep your waste lengths to a minimum and you will be able to do more lengths. There still will not be enough, but the more tan lines the better.

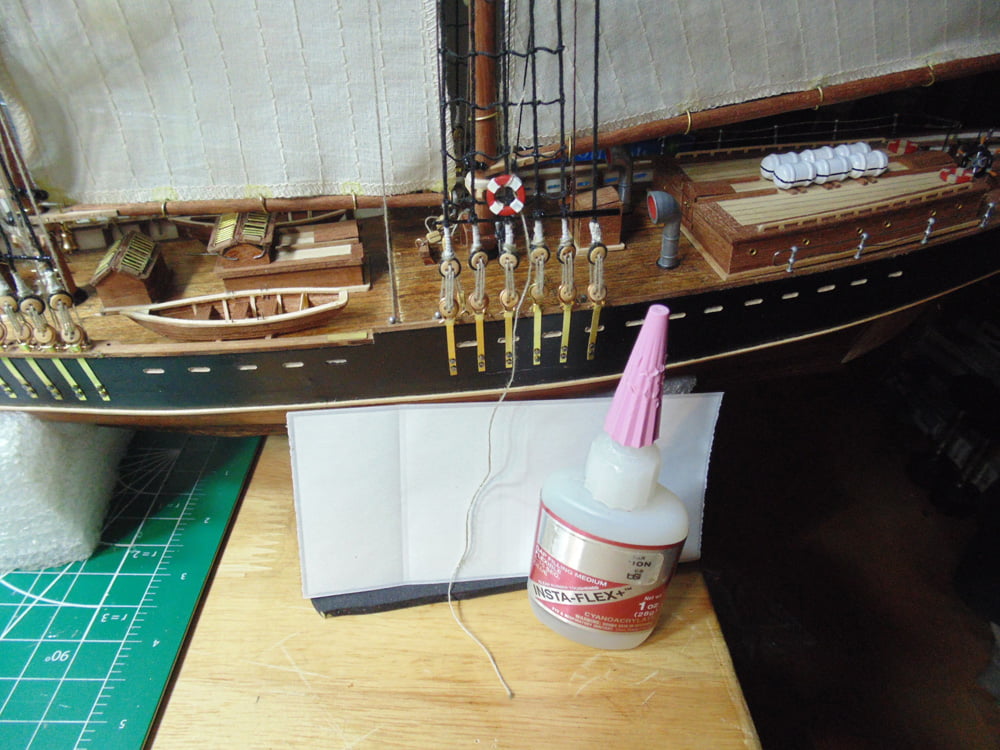
Once rigged to the collar you can add a droplet of BSI Cyanoacrylate glue to the handle post. This will secure the string to the metal and metal to the wood. Using CA for this is ideal because of being so fluid It will seep into any tiny gaps.
It’s also wise to add some BSI Cyanoacrylate CA glue to the block as well. This sail will move with the upper boom and may cause issues if and when you relocate the replica. Be it a change of interior room layout or simple dusting, you don’t want any extra stress on the line, plus it looks tighter and cleaner.
Wind your figure 8 of line around the handle post and then add a touch of glue. Use a weight to hold the excess so it points down. On a sailing ship, there is always extra rope for the deck-hand to latch onto when switching the sail’s location to match the wind.
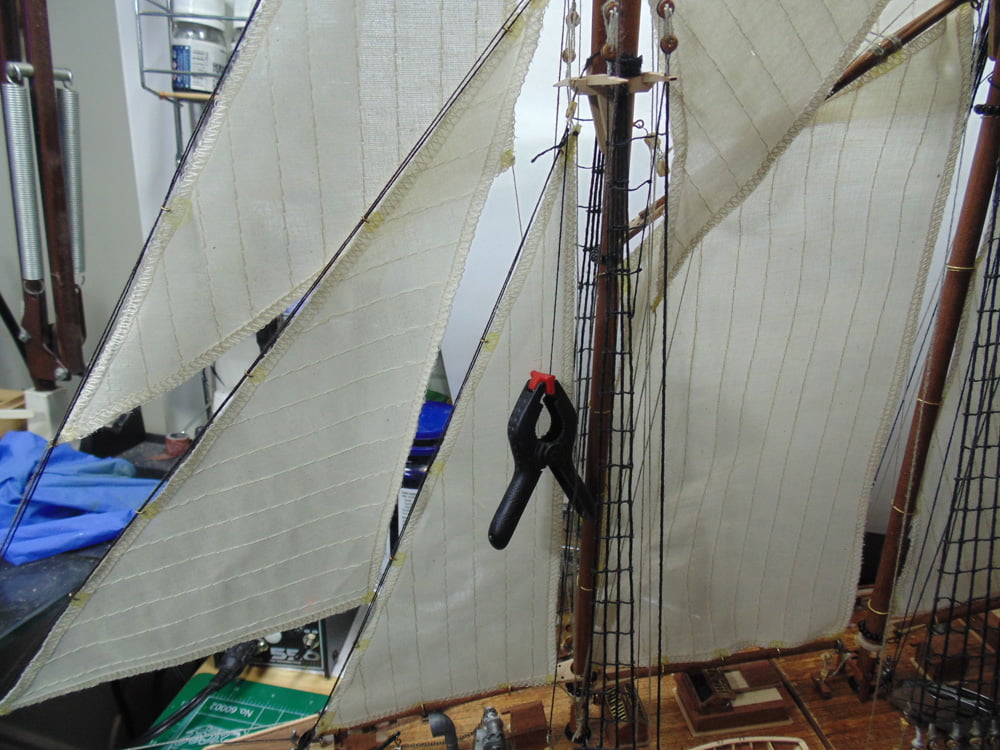
At this point it was time to shore up any loose line and smooth out some drooping sails. With the lower tri-sail, for example, a simple bit of line was tied to the brass ring to pull it up and then tied to an eyelet, solving the issue. You can also tie a knot to the line with some waste material and then tie that to a handle post or eyelet if there are other sails needing to have a tighter look.
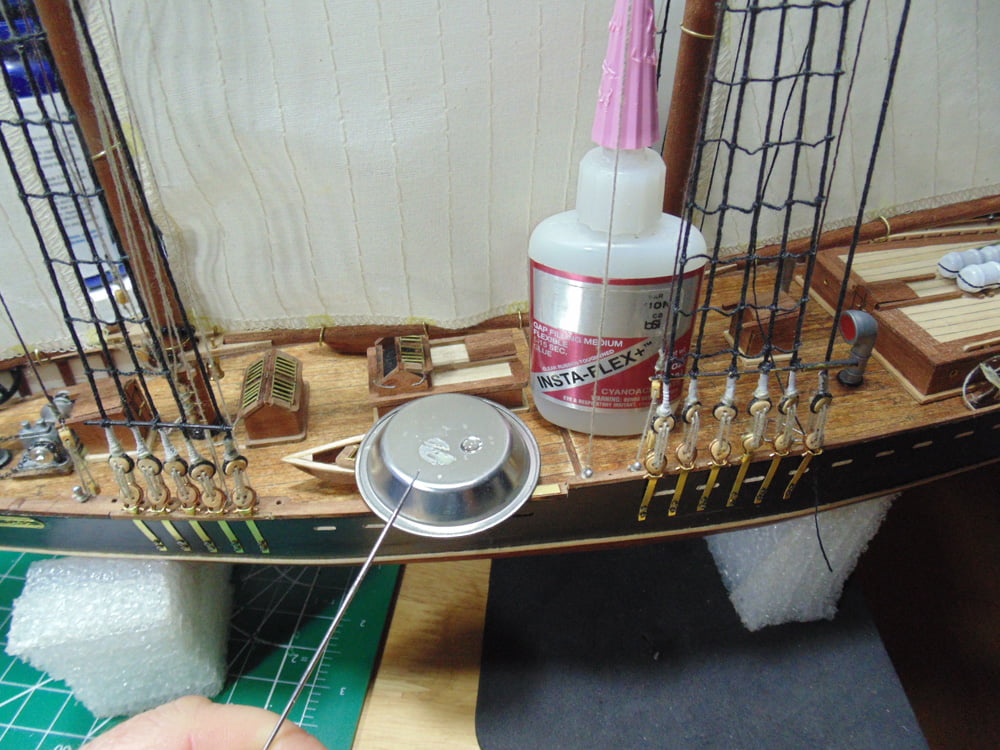
Now we move to Step 55 and the final step of the instructions. I did some touch-up painting on the hull and metal bars of the rat-lines and while it did its thing I moved on.
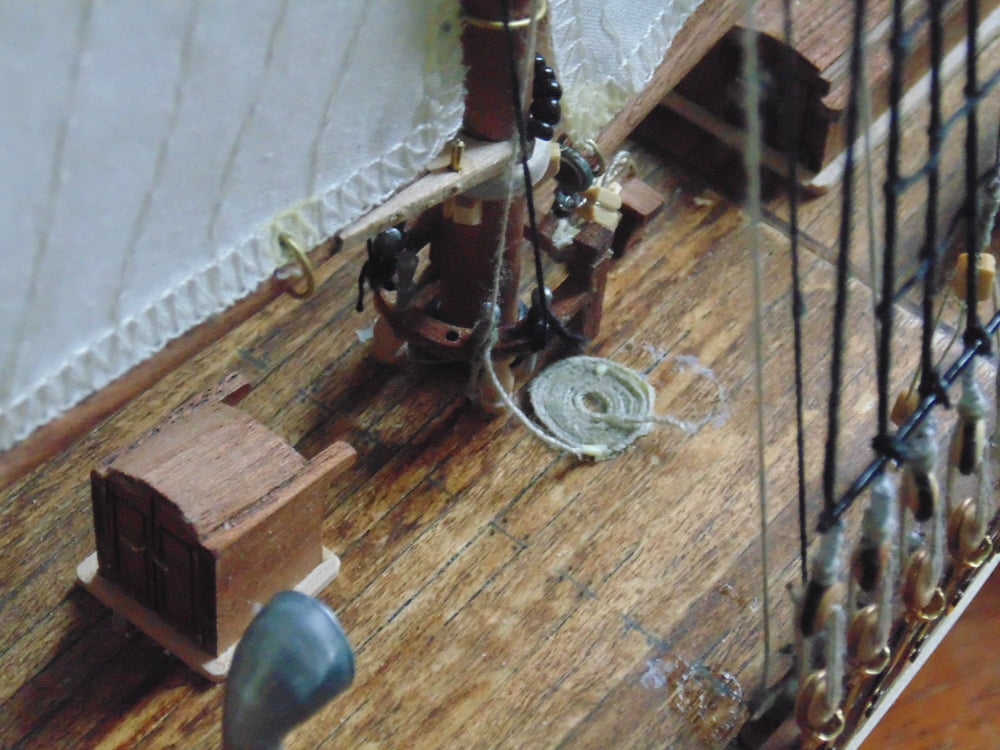
The storm sail drops down when not in use. That’s what spiral of rope is for. It was secured with wood glue, but you can use CA or contact cement. Make sure to attach the excess from the handle post at the collar.
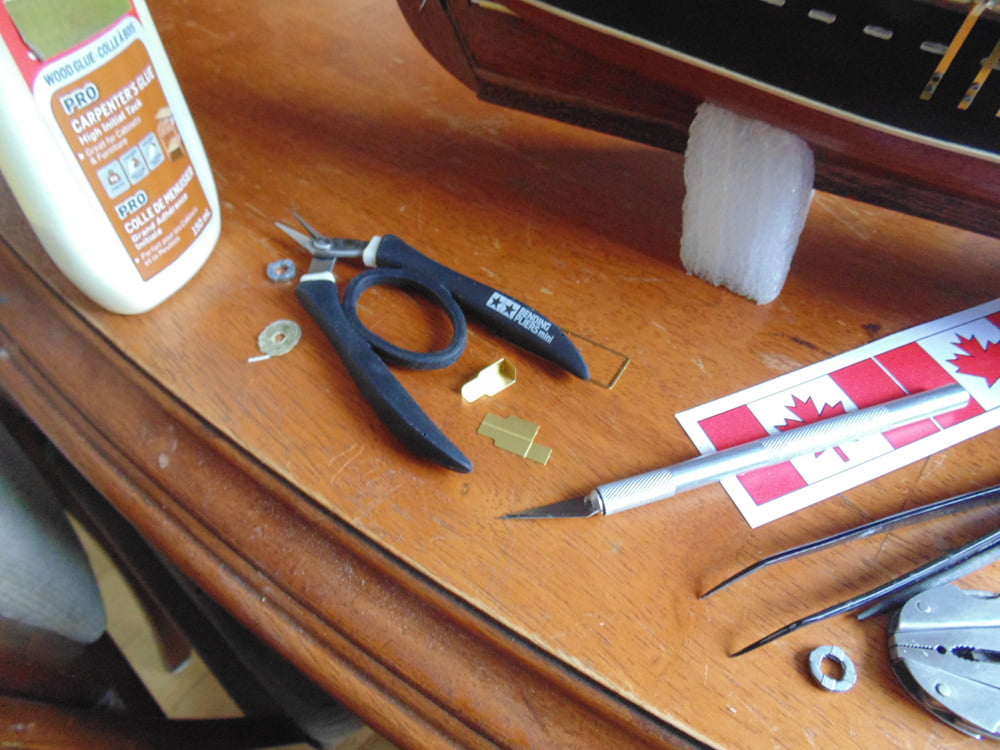
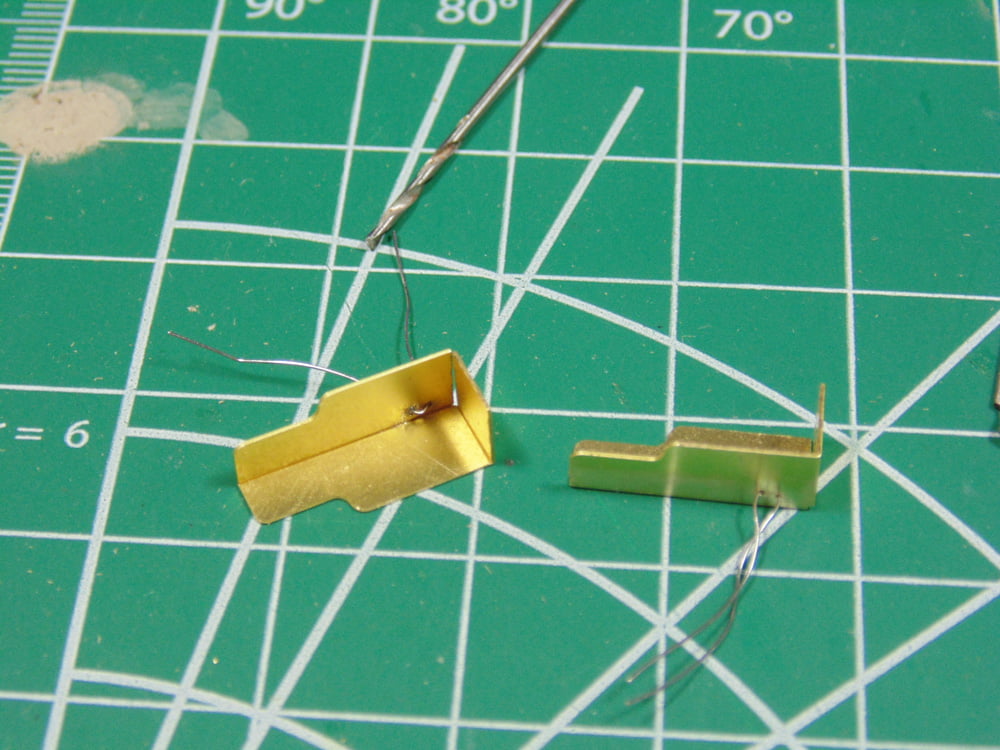
Once the paint had dried on the black rods, I could begin to bend the photo-etched brass parts for the location lights. Do yourself a huge favor and pick up a “PE” bending tool, such as this short nose Tamiya product. You can bend small to medium parts quickly and with fantastic accuracy. I’m constantly using it to grip items as well.
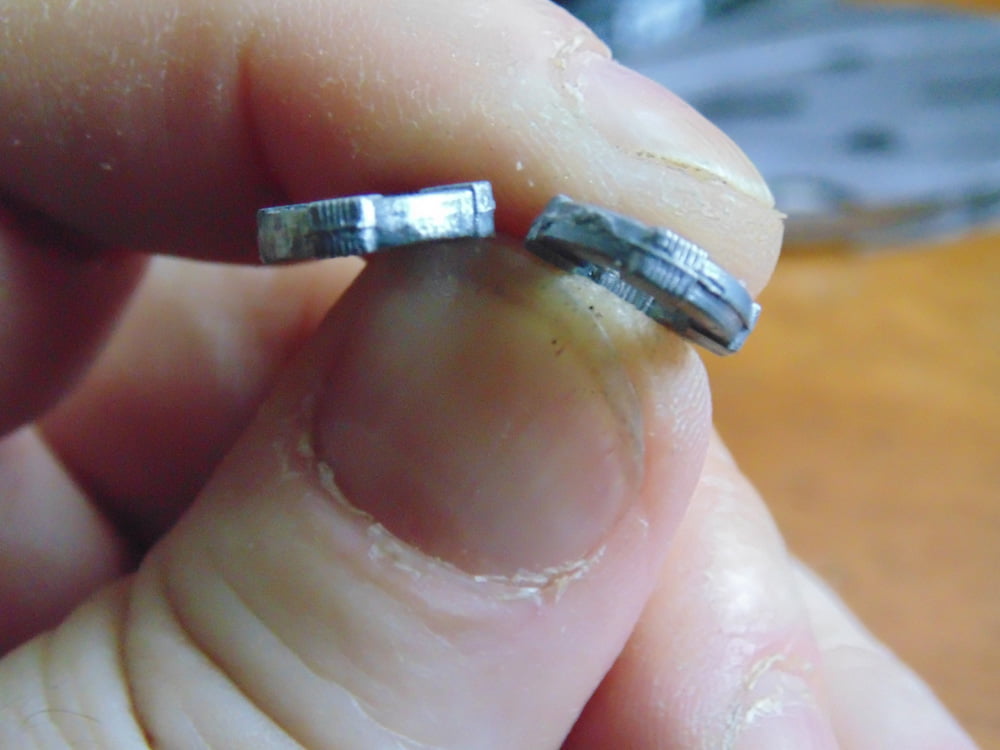
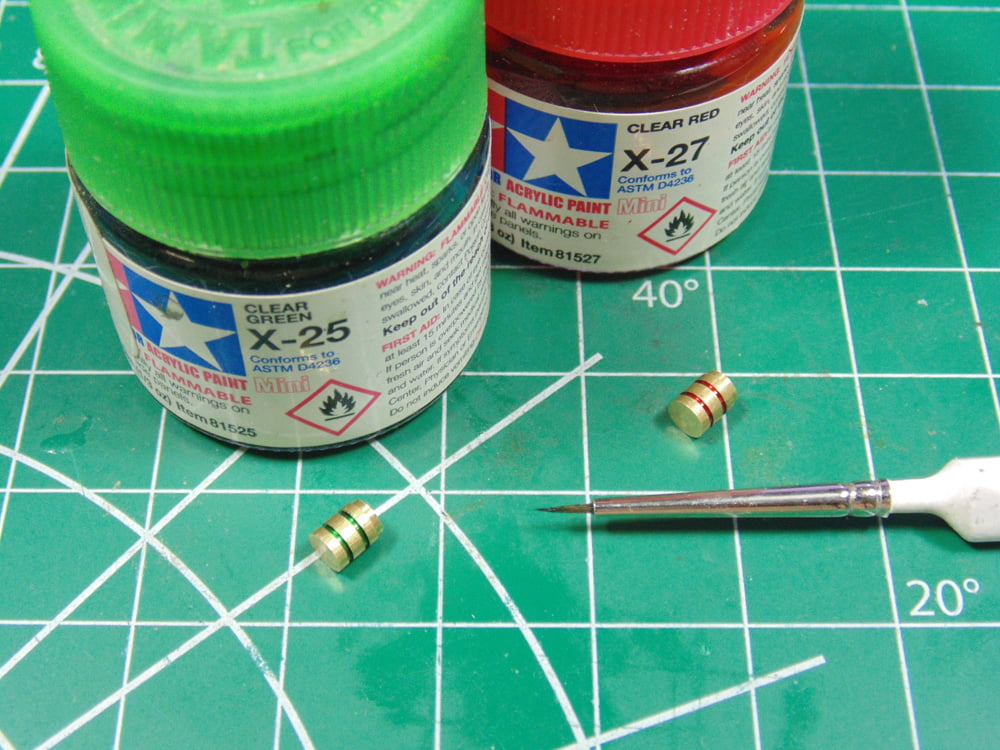
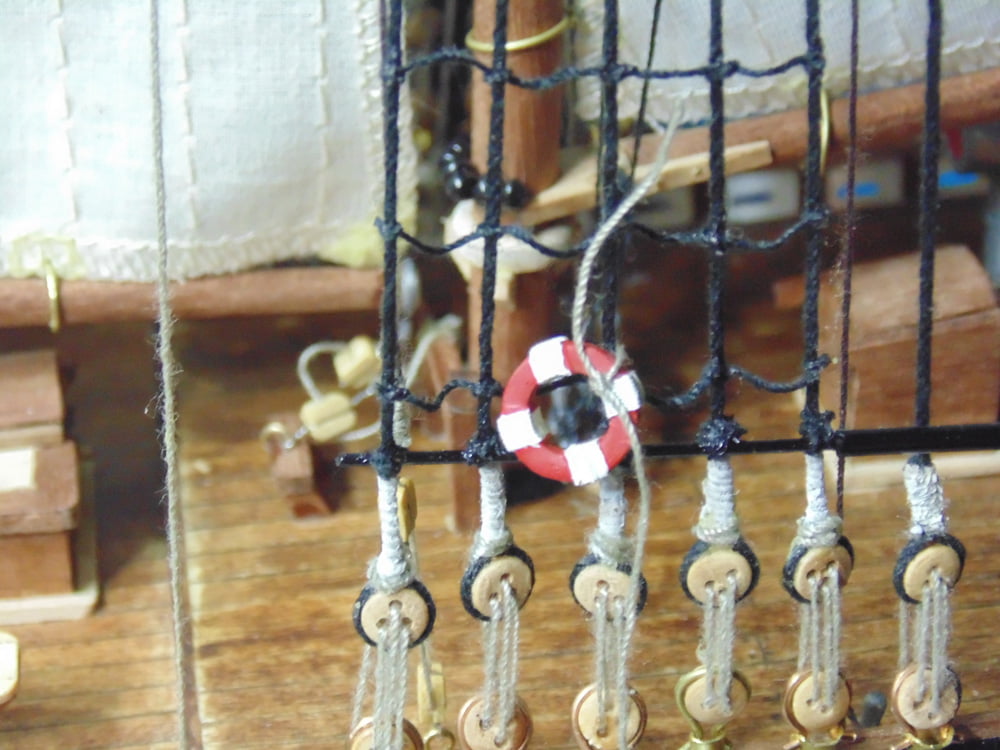
Here you can see the difference between a life-preserver with and without the metal “flash” removed. Use either Tamiya or Vallejo mini files to get in those hard-to-reach spots if you intend to remove this ugly material. But the picture shows if you want to do this or not. By leaving the metal scuffed up it will allow the paint to adhere much better.
As you can see in the picture, the location lights or lamps need some fine painting. I used a fine The Army Painter brush I bought from Sunward Hobbies some months ago. However, if you stray and accidentally get some paint on the outer rings, simply wipe it away with your finger. Or, if it has dried, use a fine sanding material to remove the mishap.
For acrylic paint I always use IPA to clean my brushes. Here’s a few tips to keep the bristles in good shape. When the brush is first dipped in the alcohol, move the bristles in an inward spiral and repeat until the towel shows no paint. Next, moisten the tip with your upper lip and tongue. The fluid in your mouth will keep the strands together and keep them that way when they have fully dried.

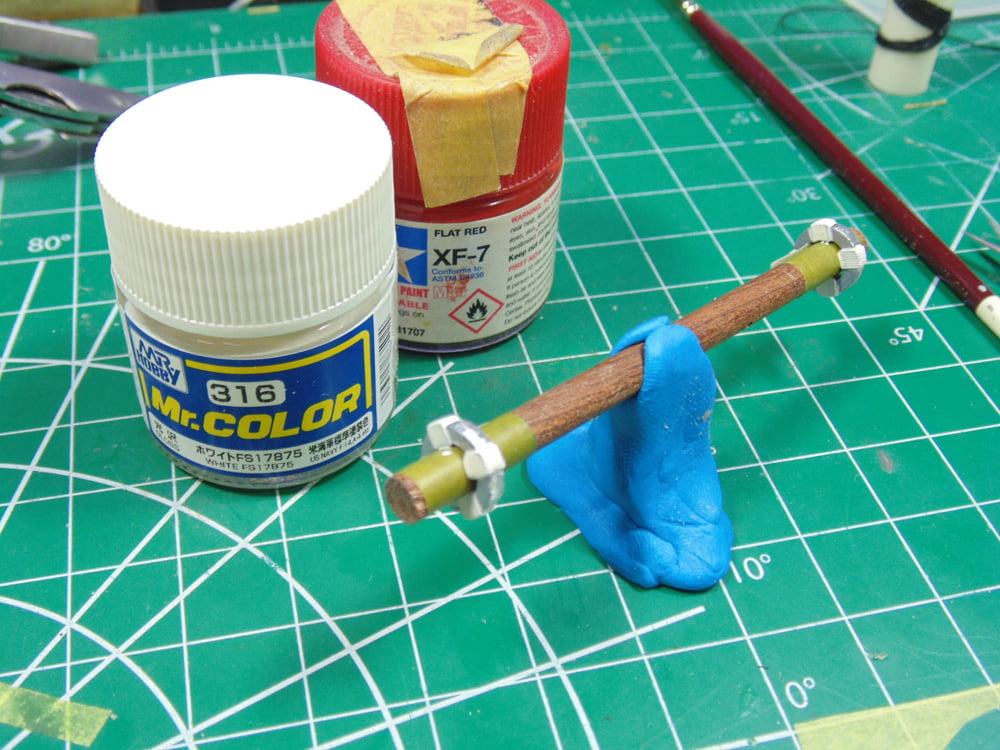
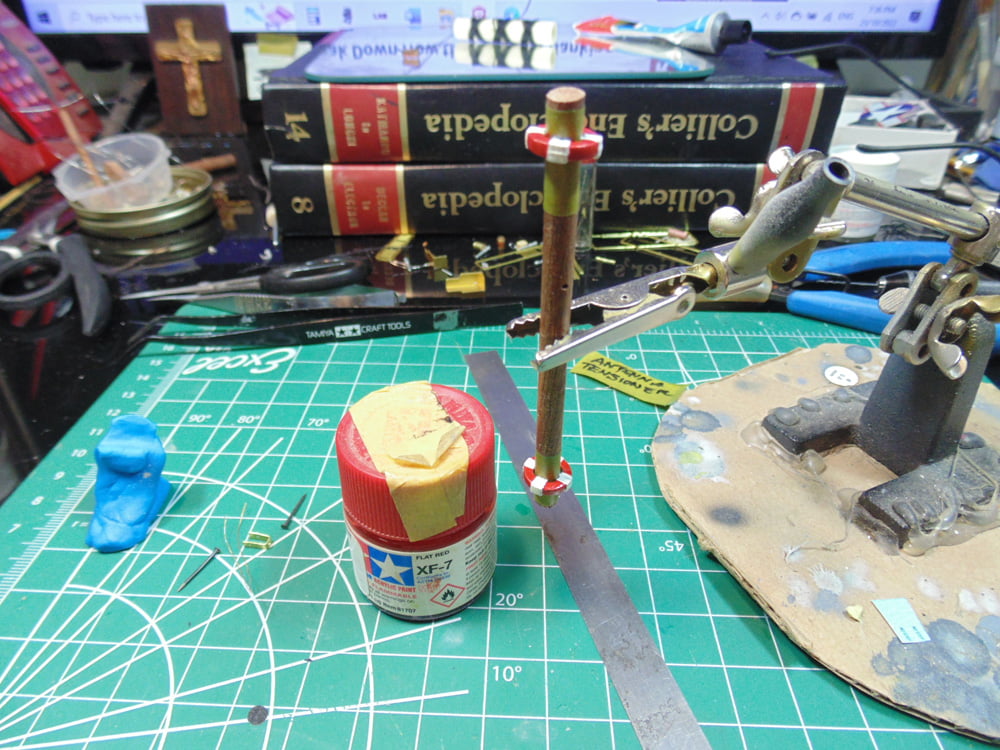
To get a more authentic look, use an off-white color instead of pure white, which sticks out like the sun on a clear day. Here, I’m using Mr. Color off white that has a warmer look. A scrap length of dowel with a layer of masking tape is the perfect diameter to hold the life-preservers for detail painting. You can use whatever is on hand to then hold up the dowel. The blue stuff is poster-tack.
Knowing full well this replica will be shipped I’m extremely paranoid of parts coming loose. There isn’t a single adhesive in the world that can’t trump a solid physical connection. Press some indents in the metal, then use a 0.3mm drill bit to make the holes.
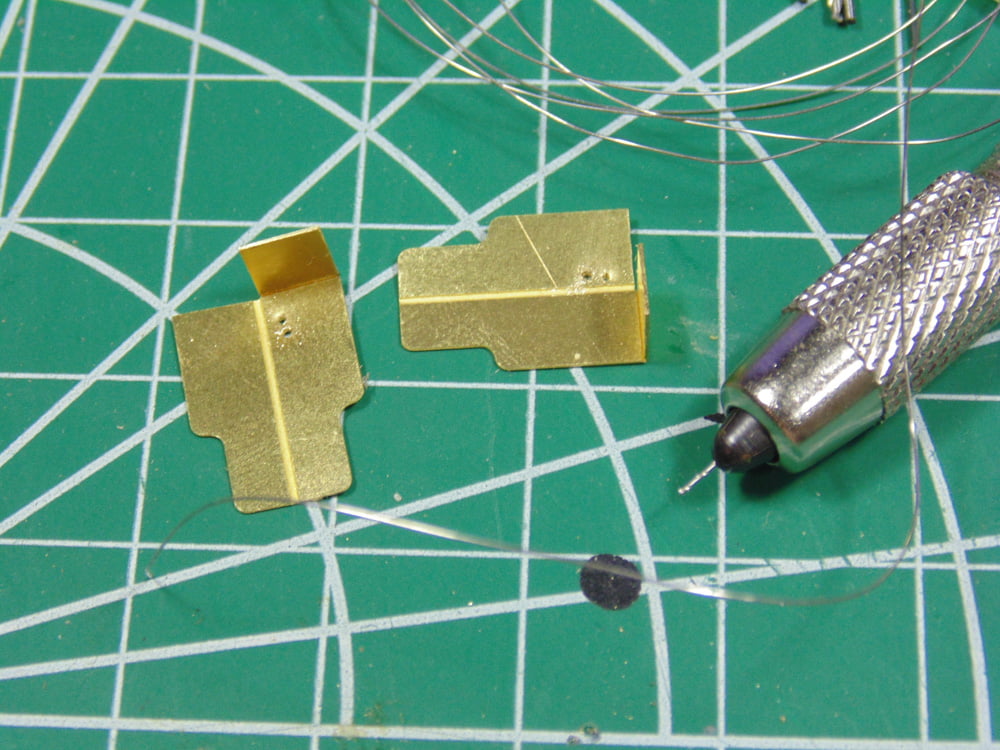
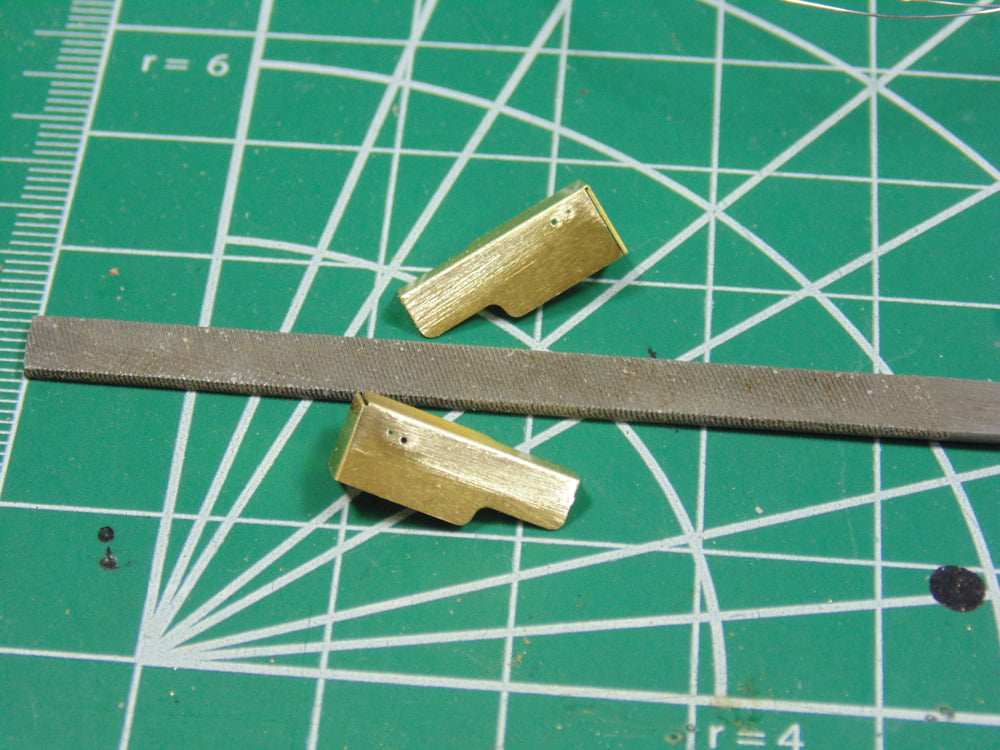
Don’t get me wrong, I’m still going to use contact cement on the mating surfaces, but the wire will add that needed support to keep the parts in place for many years to come. Use your mini file to level out the rise from the punch marks and to scuff up the surface for an even stronger bond.
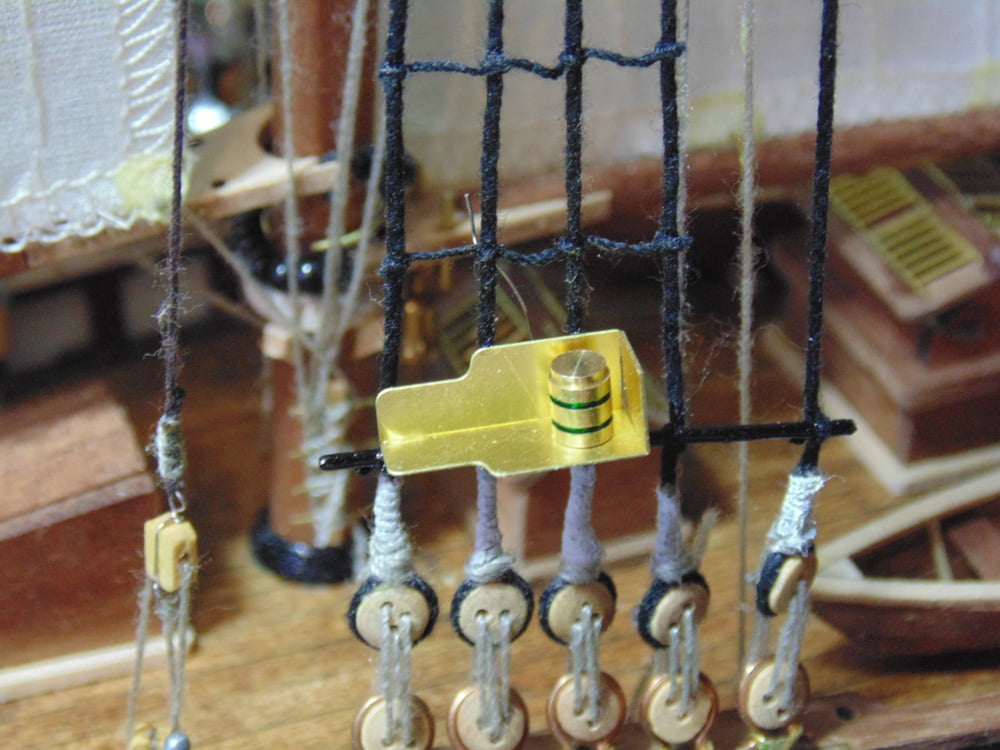
Now you can thread the spare steel wire lengths which will tie around the main thick ropes of the forward rat line. Don’t worry about the off look, the location lamps will completely hide this. Make sure you use a good length of wire because the room to maneuver is really tight and will take some time to pull tight.
I switched to my Excel Blades Extra Hands tool to steady my painting hand with the other. Now I can easily spin and then flip the dowel over for a more precise paint job. Sunward Hobbies have a terrific selection of these tools, which are a must for projects like this. I added a wider base to mine.
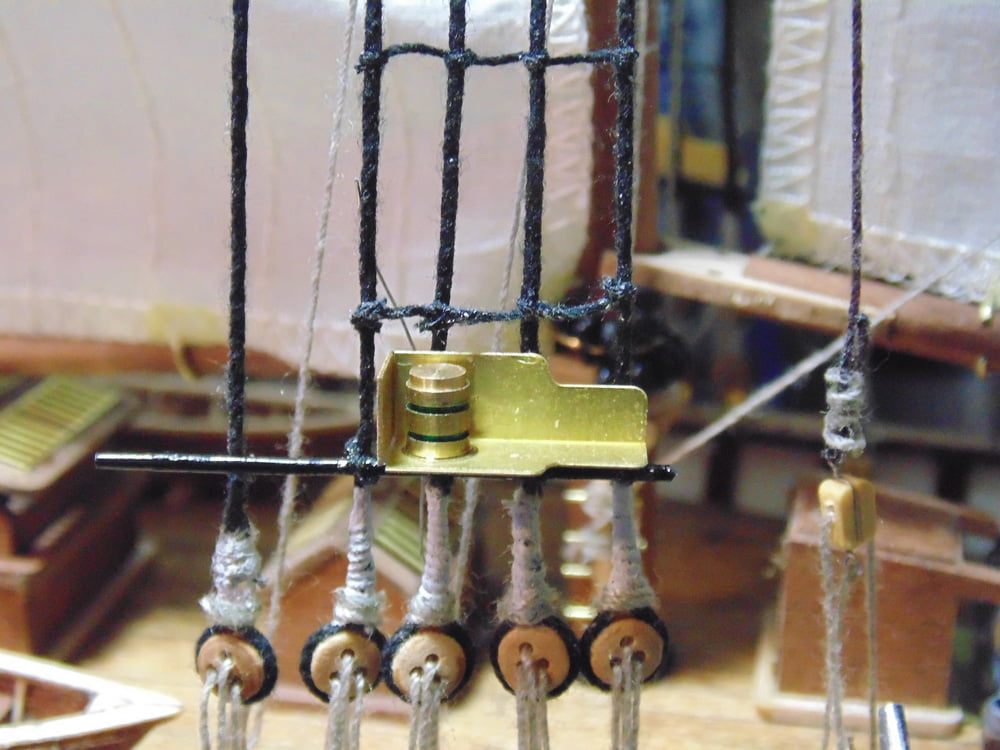
With the lamp holders in place, wired and cemented, on went the lamps. Make sure the cement on the holder has fully dried though, or you risk bumping out of place the holder. Again, scuff up the mating surfaces for a better bond. This drying period will give you time to add other parts.
Use some scrap lengths of tan string to tie the life-preservers to the rat lines. Tie the string in front of you then add just a touch of CA glue, but not so much as to bond the string to the painted part. You can then snip off the excess and roll the tan string so the knot faces inward and the string then blends with the rope detail on the part. Now you can add glue to the mating surfaces of the part to the rat line, making for a solid connection.
Now that your glue has hardened you can snip the excess wire with comfort in the fact that the part will stay put.
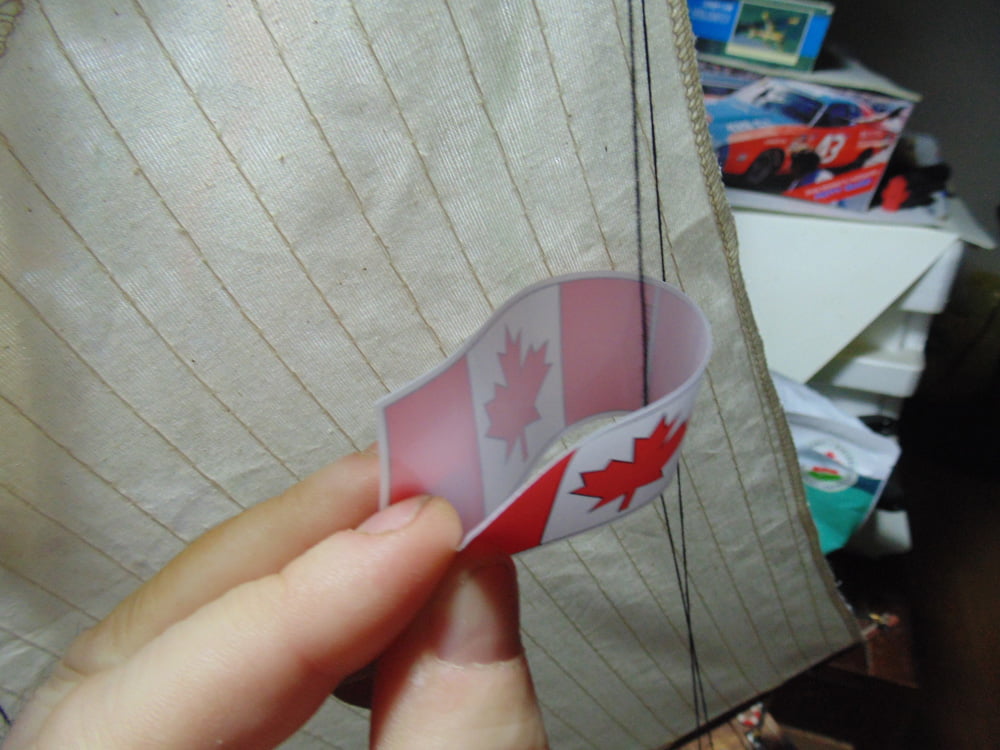
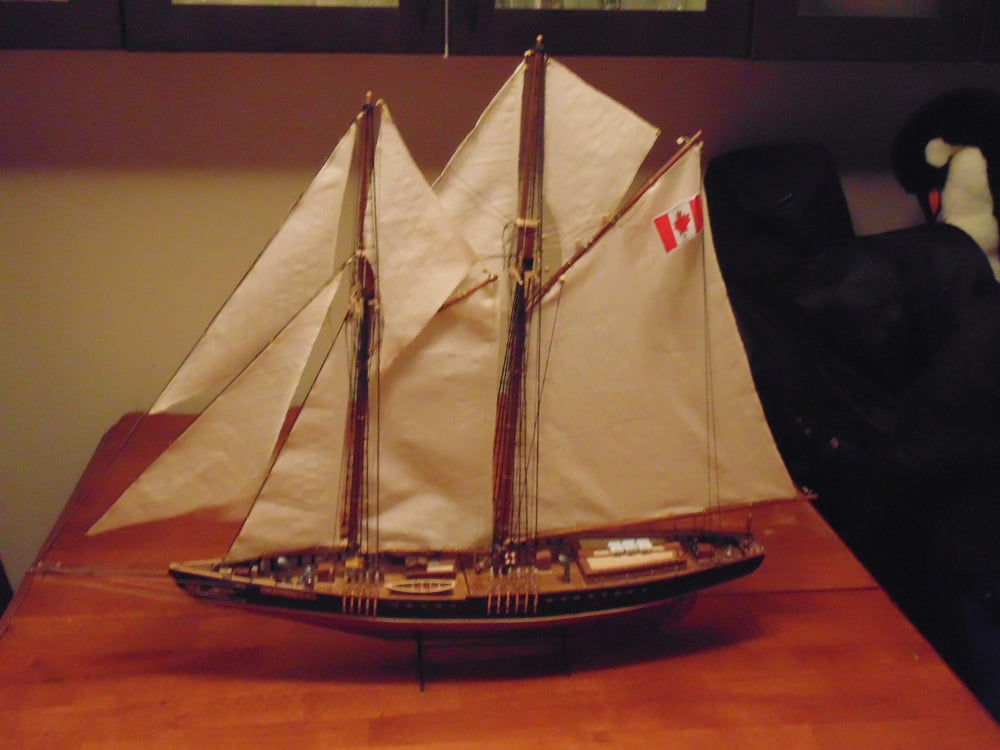
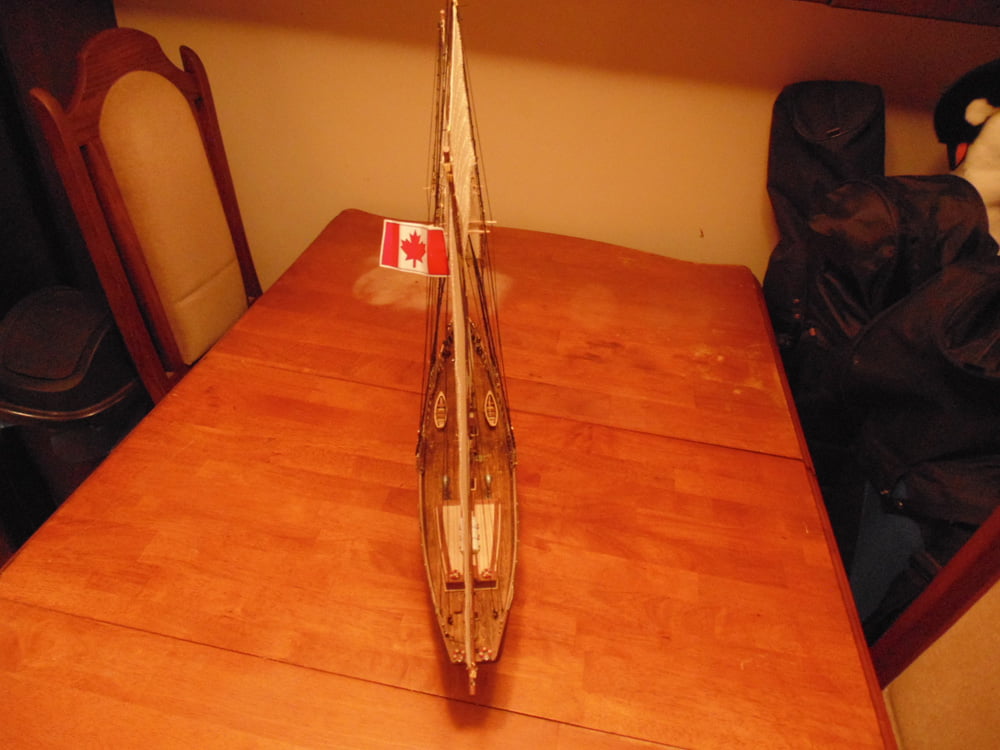
The flag is a synthetic fabric material over a tackey base. Pay special attention to how the fit begins at the black line compared to the front corners. My plan is to have a proper one made for Sunward Hobbies because in our nation’s flag there is no black border surrounding every line and detail of the maple leaf. However, for an added touch I curved this flag in several places to look like a breeze was blowing past it and wafting in the wind.
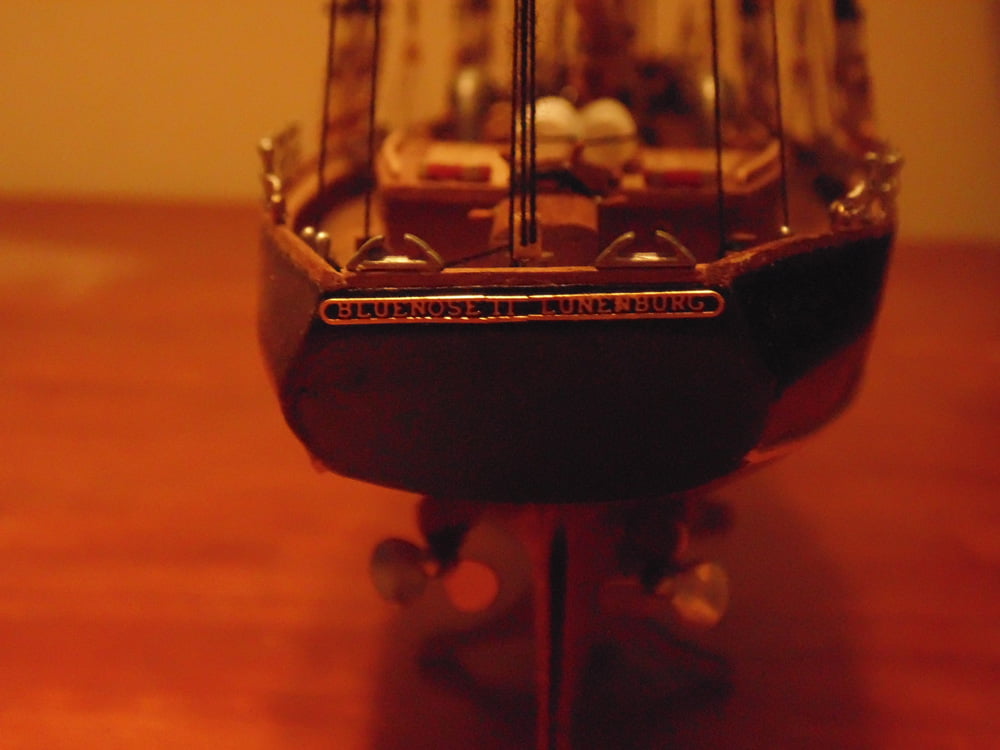
The last step was to add the stern nameplate. This part was over 3mm too wide and would have definitely pinged off, never to be seen again. Hence why it was the last item. Carefully score 1.5mm widths on either side of the II roman numeral. Then you can glue the Bluenose name, next the II and finally the Lunenburg title. Use a slow drying CA glue for this to allow you plenty of time to make adjustments. In the photo my camera angle is off a bit, but if you look at the space above the lettering the width is the same.
And now for some shots of the finished project. Please excuse me, I’m not a photographer. I want to thank those who have followed along now and in the future.
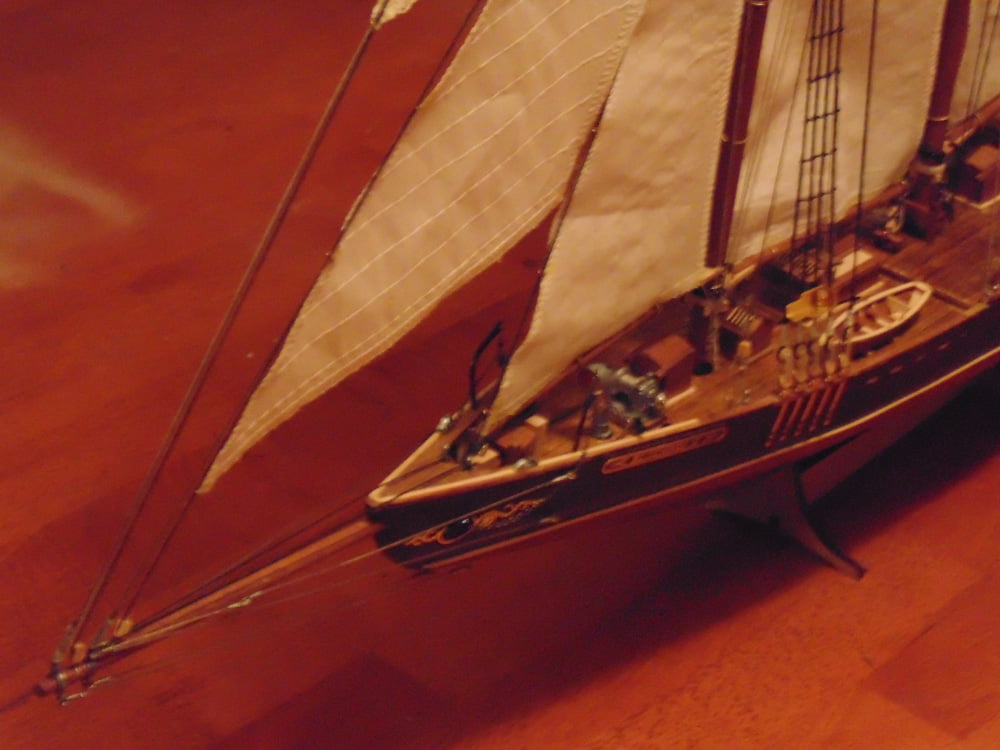
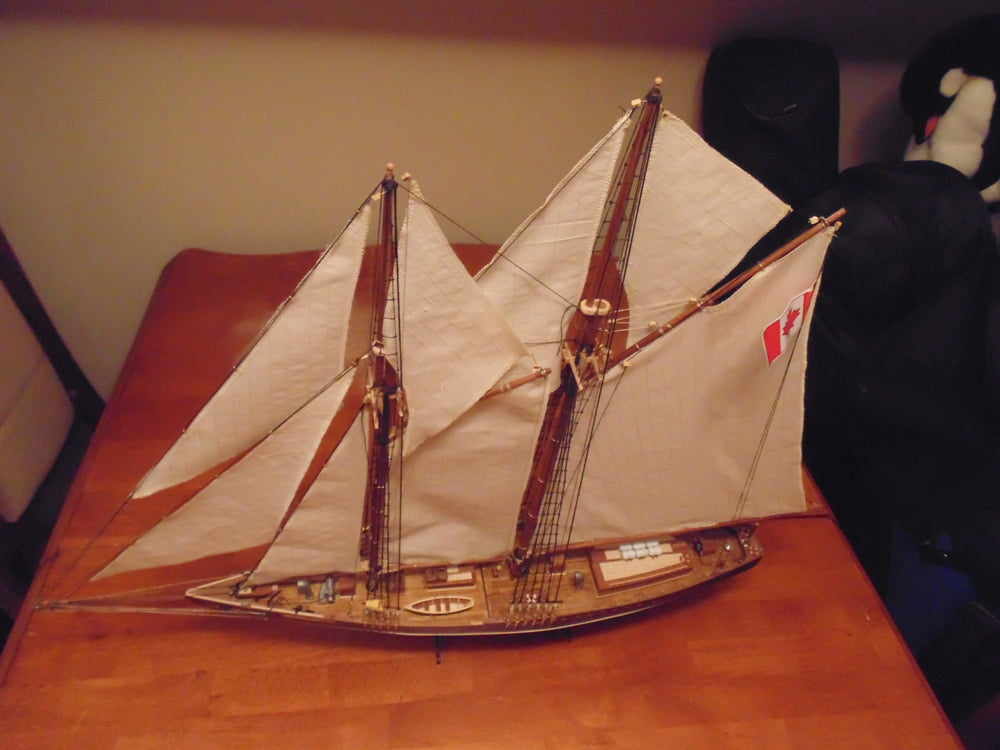
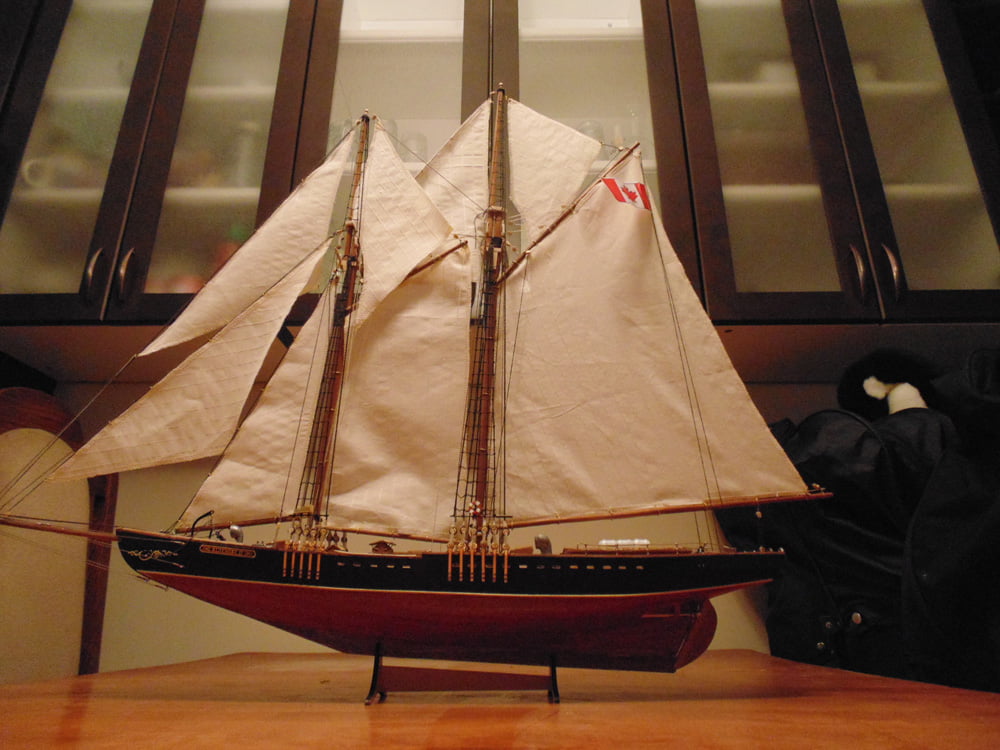
It was my privilege and pleasure to bring this replica to life for you. If you have any questions about the product or methods used, by all means ask one of the friendly team when you pick up or place your next Sunward Hobbies order.
Thanks again for taking the time to follow the build. If you have any questions about Artesania Latina products or the techniques used please feel free to ask when you pick-up or place your next Sunward Hobbies order
If you have any questions about the products used or the methods in this article, please feel free to ask the staff when you pick up or place your next order from Sunward Hobbies.
About the Author:
H.G. Barnes is a former voice-over artist and retired sales and marketing professional. He’s the author of two large volume science fiction adventure romance novels with many more in the works. For well over 40 years he’s been building scale model replicas and now does commission work for clients in Canada and the USA, plus completes projects for companies in Asia and Europe.
Currently H.G. is involved as an Associate Editor with KitMaker Network’s Online Magazine Channels.