
MPC A New Hope Hans Solo Edition
This is the third part of the MPC Star Wars A New Hope Hans Solo Millenium Falcon 1/72 Scale MPC953 build and review.
Work was a bit slower than I had expected this week, I keep forgetting that this is an older kit without a lot of the modern conveniences we have today. Again most of my time was consumed with sanding the excess plastic on the parts, that being said this continues to be a fun kit to build and I’m closer now to having it all assembled so that I can finally get a coat of primer on this model.
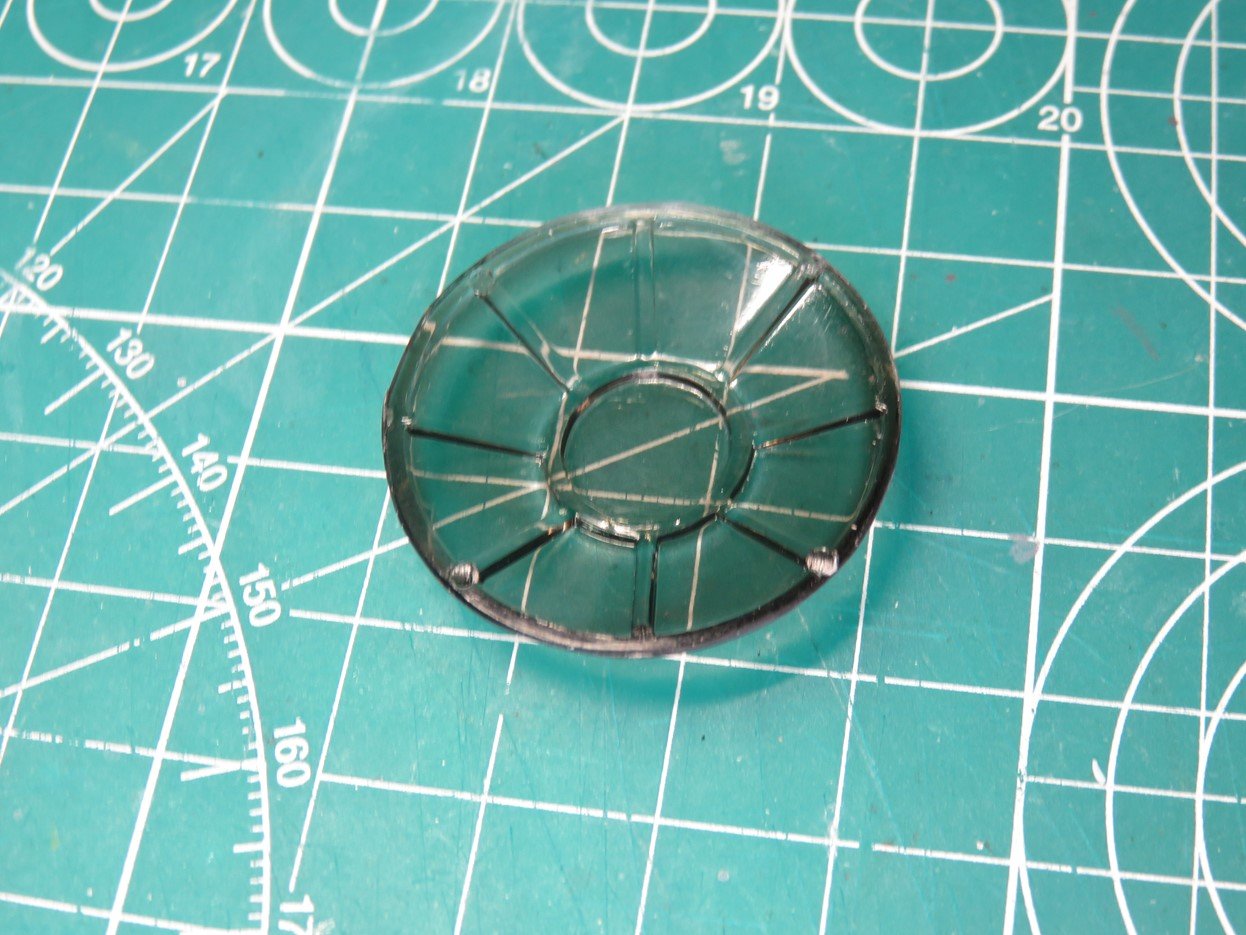
I wanted to try and limit what you could see through the gunner positions. There isn’t a lot of detail to these sections and you can see all the way through the inside. I decided that I’d spray a few coats of Tamiya Acrylic Paint X-19 Smoke on the inside of the turret window. This worked to an extent, but it’s still not as dark as I’d like it to be.
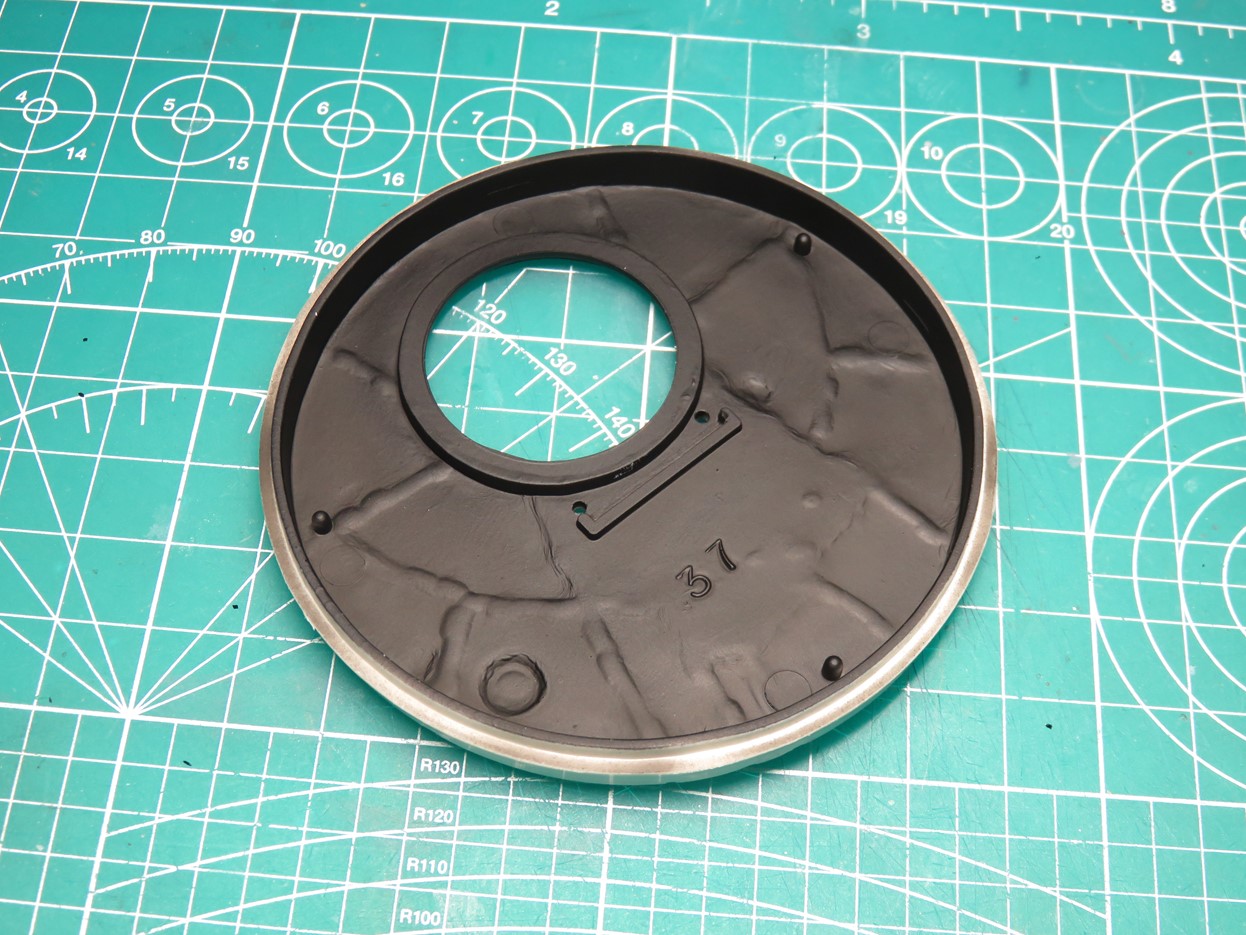
I painted the inside of the turret section with Mr Hobby Aqueous H12 Flat Black to further help hide the details when you look down the turret window. You will notice the 3 little pegs on this side of the part. These are connected to pins that would allow the turret to rotate freely around the model. This is a fun playable feature of the model, but I’m going to glue this directly to the hull section.
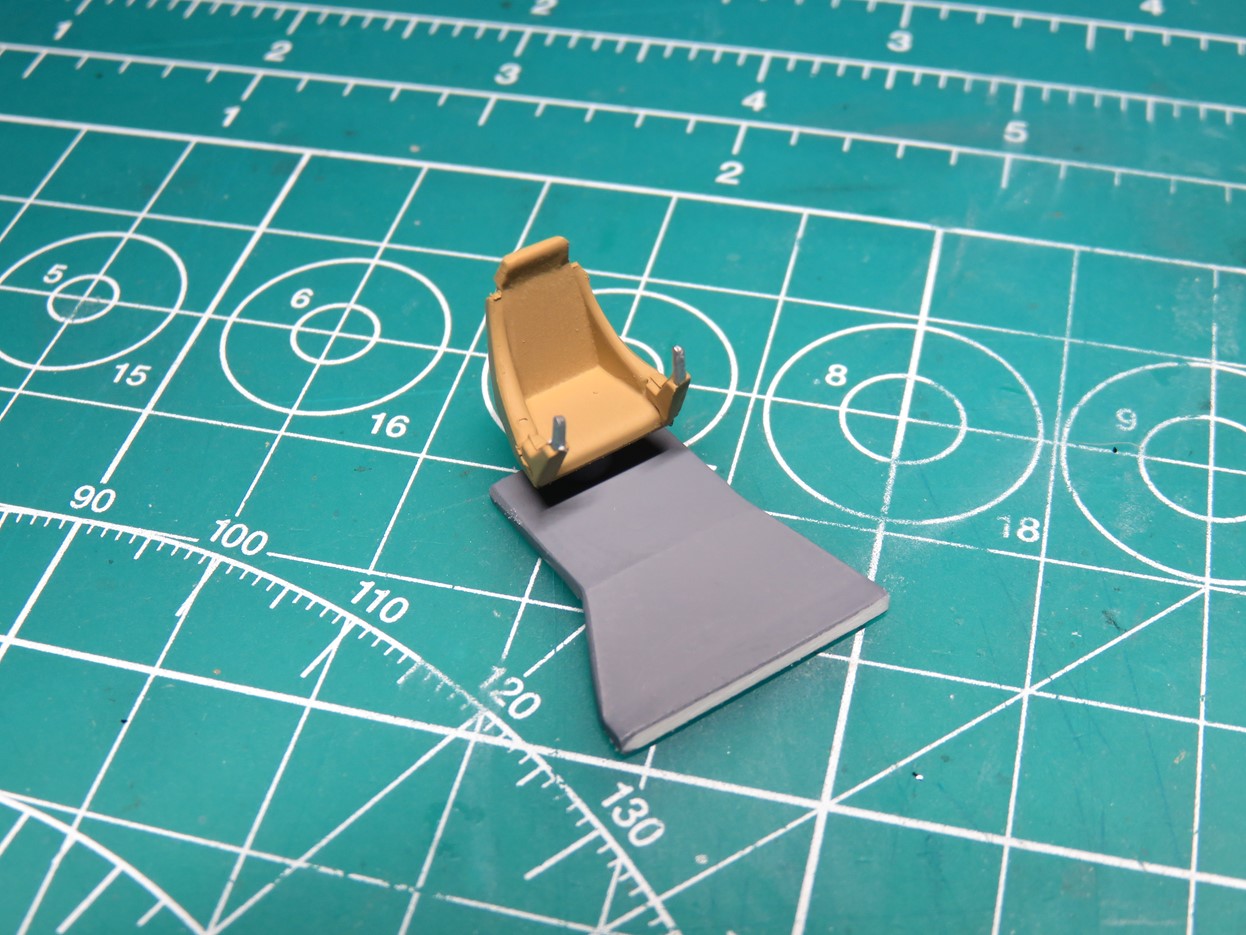
Just like I did with the cockpit, I’ve painted the seat with Tamiya XF-60 Dark Yellow, and XF-53 Neutral Grey for the platform. These gunner seats have small controls on the end of the chair arms, I painted these silver.
These seats are in no way accurate to the Millennium Falcon, but I really love the look of these parts, and I think they are perfect for the Stellar Envoy! (Although it does remind me of the captains chair on the Enterprise D)
In the words of the internet, “an attempt was made”. That’s really all I can say to describe the Quad Laser Cannons. Sadly this looks more like an egg beater than a defensive weapon, so why not try and build something that will be unique to the Stellar Envoy.
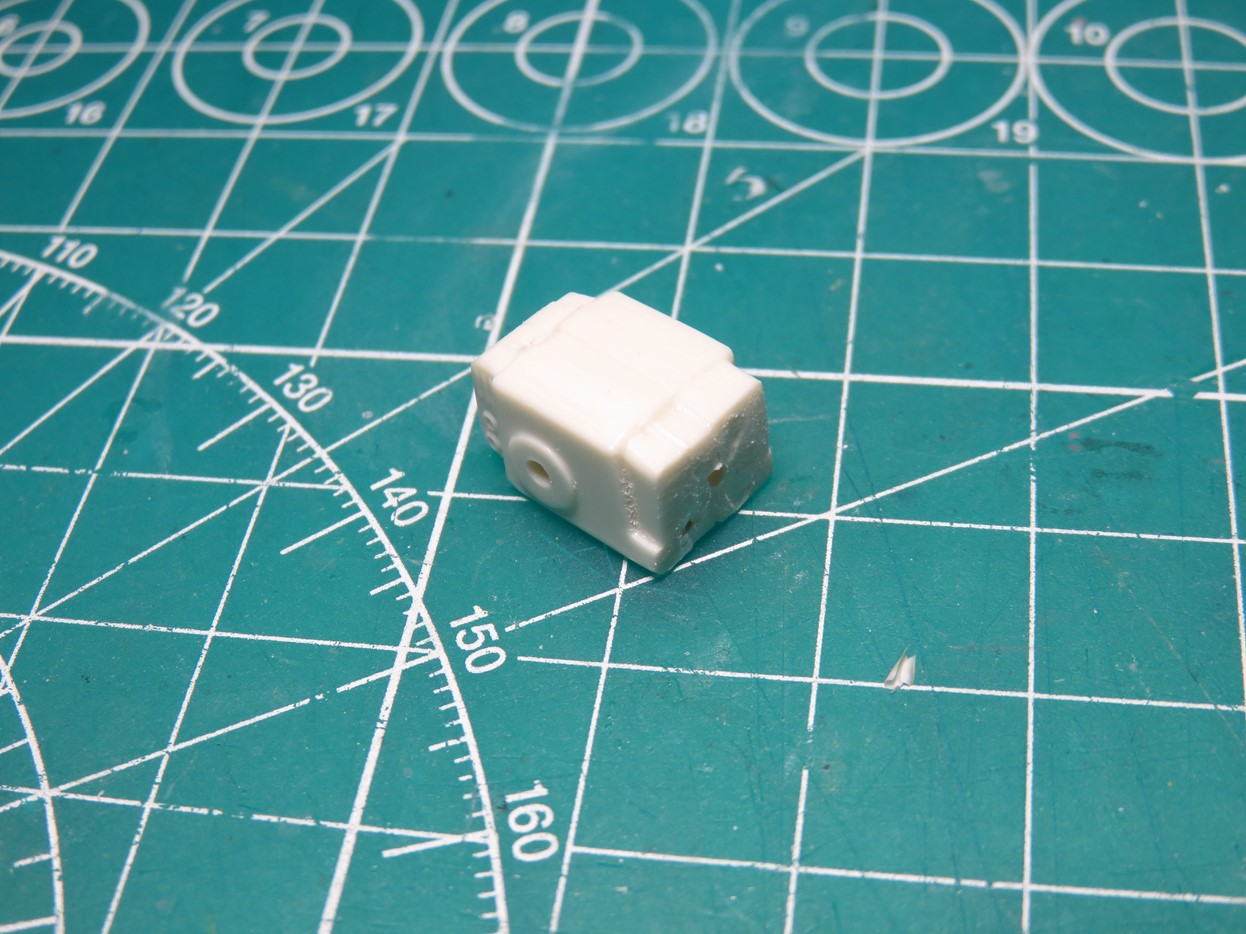
I glued the 2 halves of the cannon together. After the glue had dried I took my Tamiya Sprue Cutters, I snipped off the cannon barrels, and then sanded down the side edges.
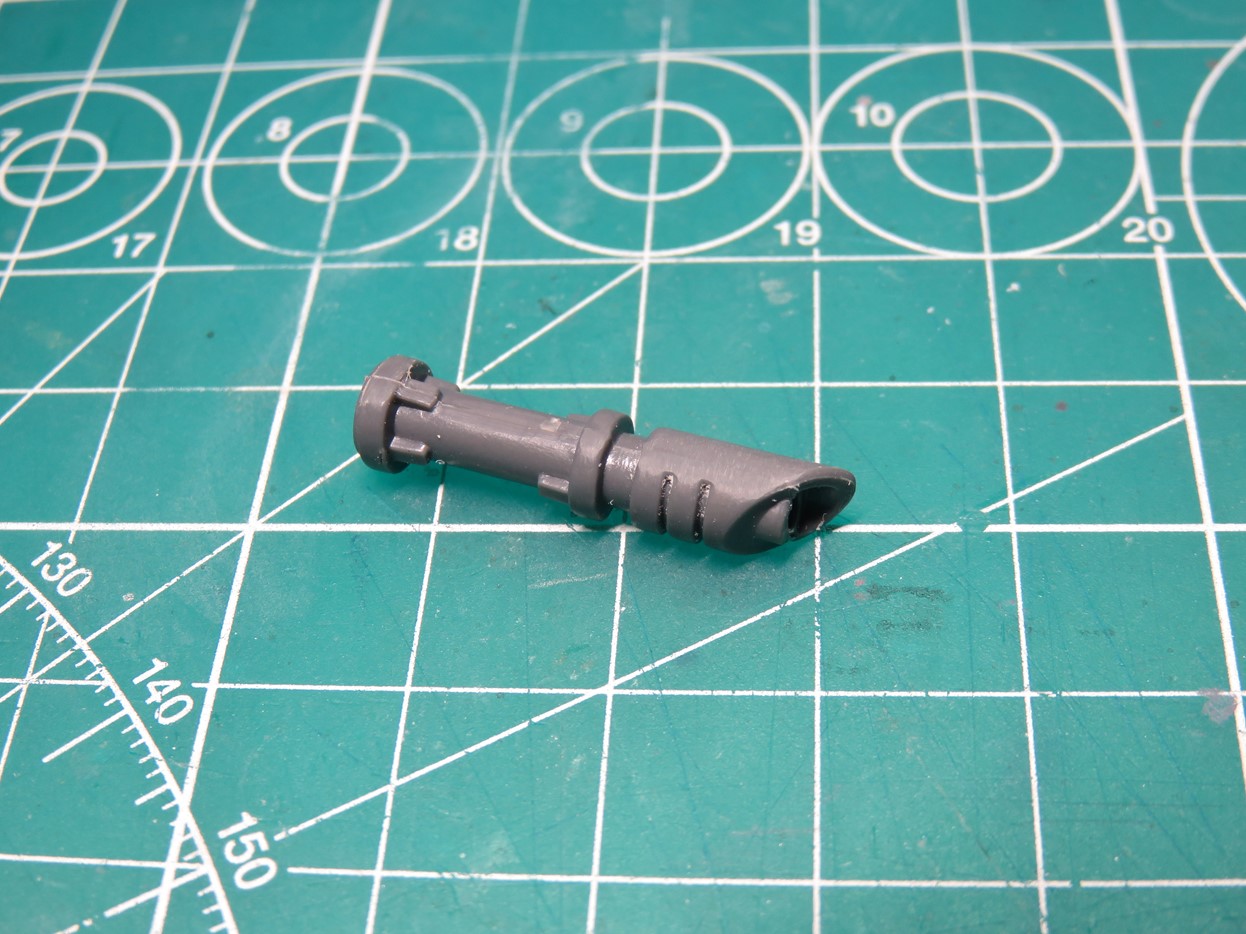
I rummaged through my spare parts box looking for anything I could use to create a gun barrel, which was more difficult because I needed 2, for the top and bottom. I wasn’t having much luck when I remembered that my brother has a lot of Warhammer 40,000 models and that he might have something I could use.
And did he ever, he had so many parts that I honestly had a hard time choosing. But we both had a really fun time looking at the parts and inventing different guns. In the end, I chose this barrel, as I really liked the angled edge to the front and thought this would look the most dramatic on the completed model.

I found these panels in my spares, they are from the Tamiya 1/35 Male Mk IV tank. I really liked the bolt details on these parts, and I thought it added some nice detail to the bulk of the turret.
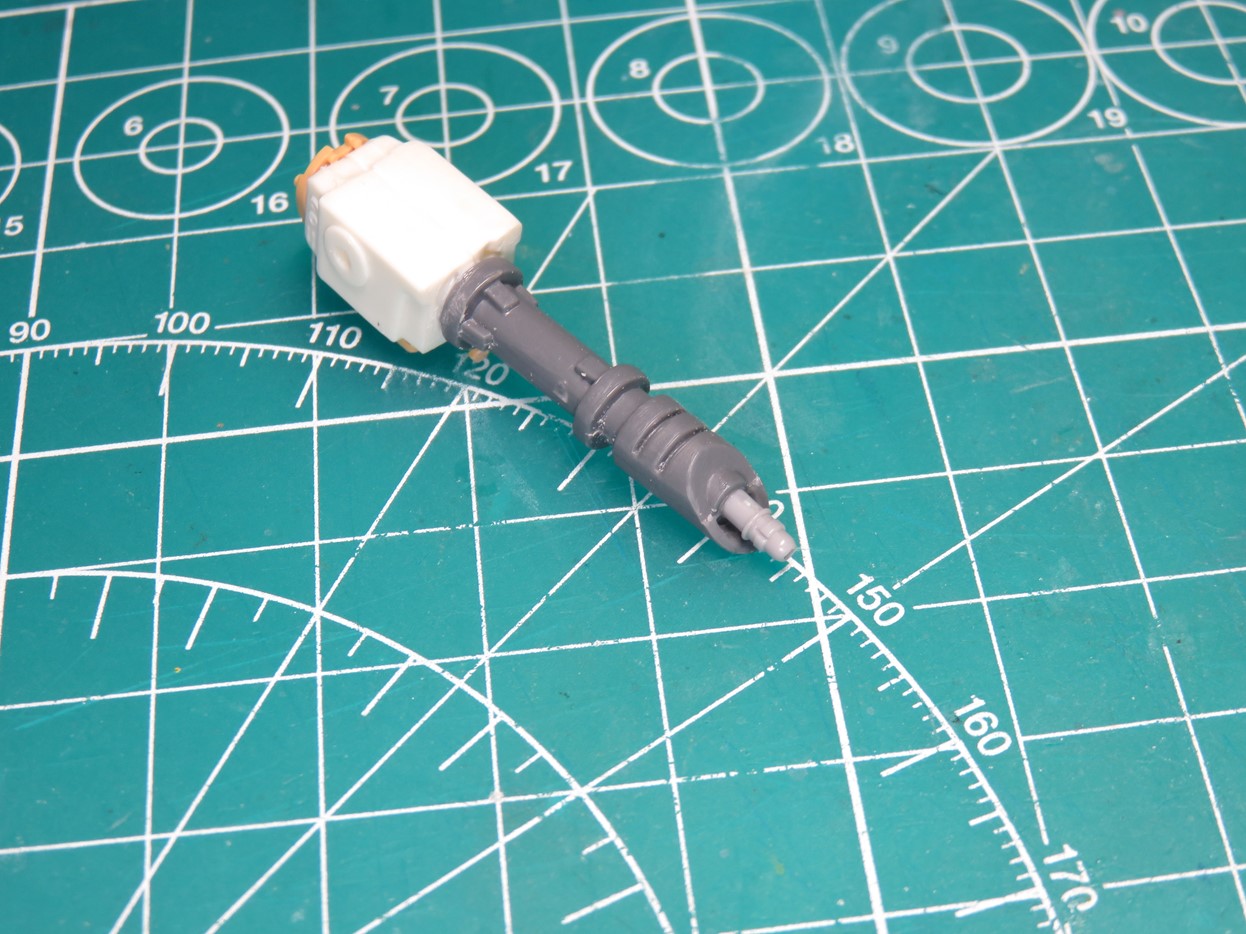
Lastly, I found some cannon barrels from a Bandai 1/72 Tie Fighter, and I thought these looked great inserted into the end of the barrel. For now, I think that these cannons are done, but I might later on add some extra details. This was really fun getting to scratch build these turrets.

And here is a test fit of the new cannon added to the turret. I think it looks pretty good right now, and it’s going to look a lot better once it’s painted up.
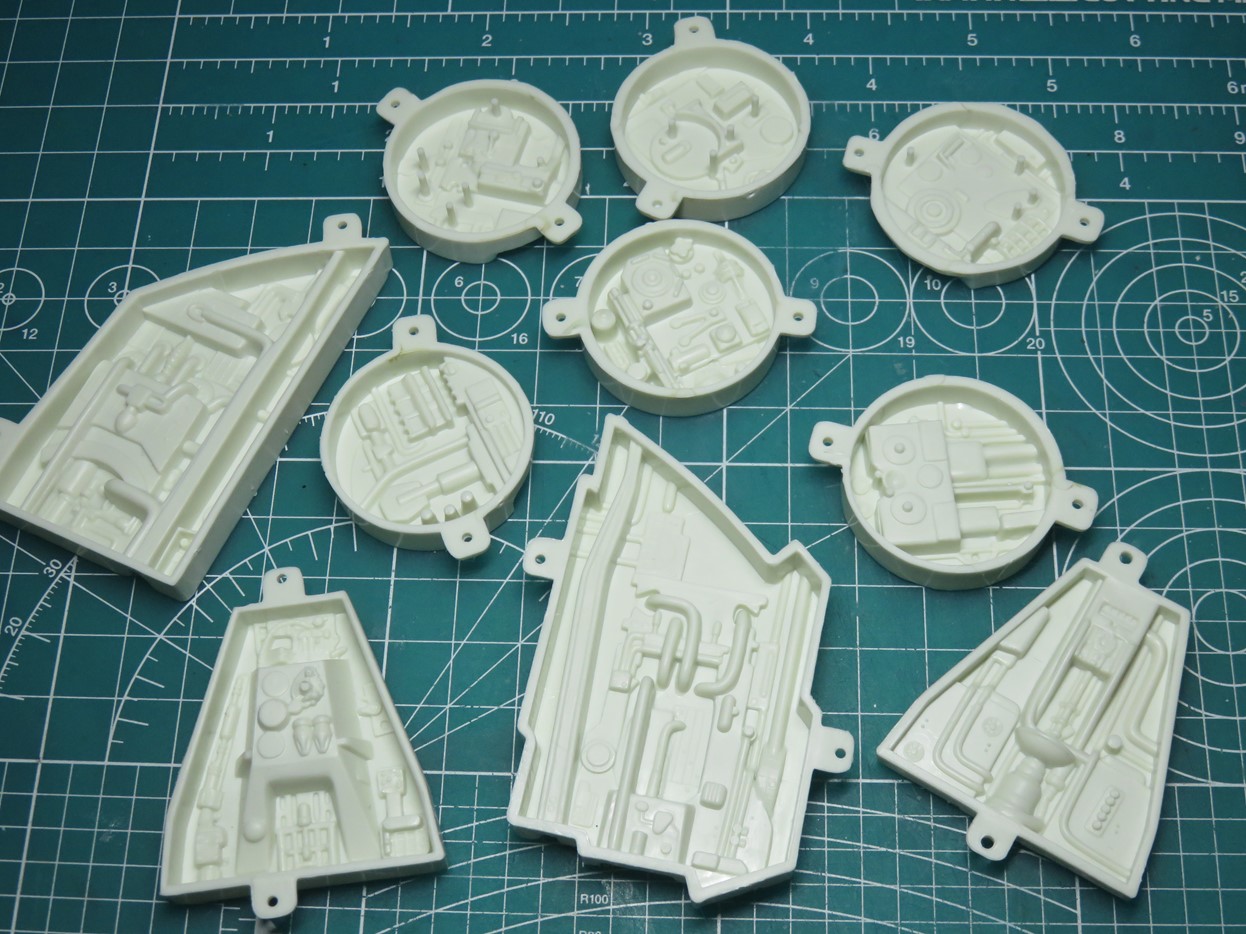
Here are some of the exposed opened sections of the kit. I had wondered if I should glue these to the model now, or paint and weather them, then glue them to the model. But I think it will be easier for me to glue them all to the model rather than deal with cleaning up paint on the edges. Also, there is quite a bit on these edges that needs to be cleaned and sanded to ensure a proper and tight fit with the inside of the hull section.
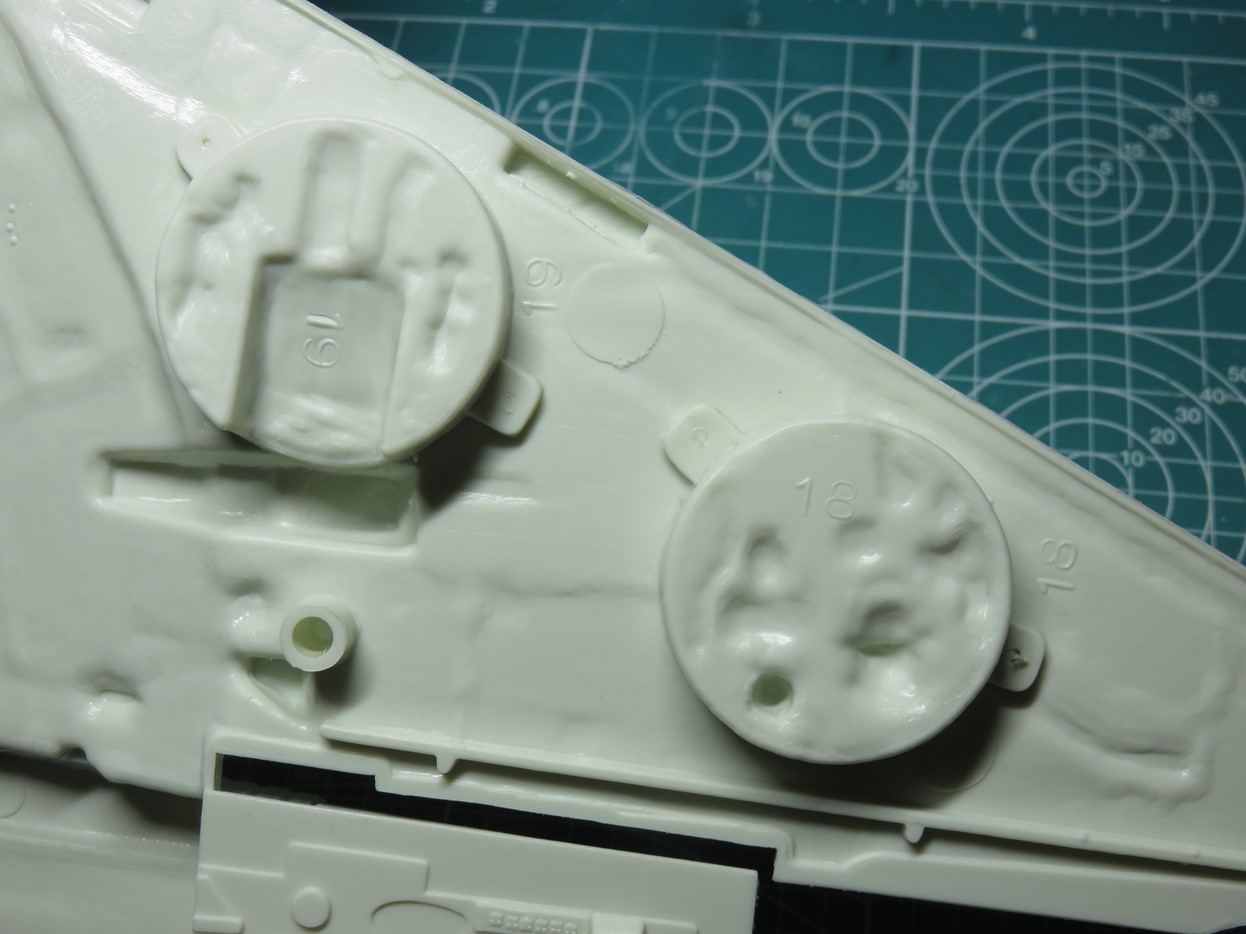
I love that MPC added numbers on the back of the parts and on the hull where they are supposed to be glued. This saves a lot of confusion, however, as you might notice there are a lot of bumpy areas to the inside of the hull. This didn’t help when I was gluing these sections in place as it left slight gaps.
I used Mr Cement SP to glue these parts in place, and the aggressive nature of the SP made it easier to fuse the plastic together. I had to work slowly to glue these in one by one, but because of the SP, they are really secured to the hull.
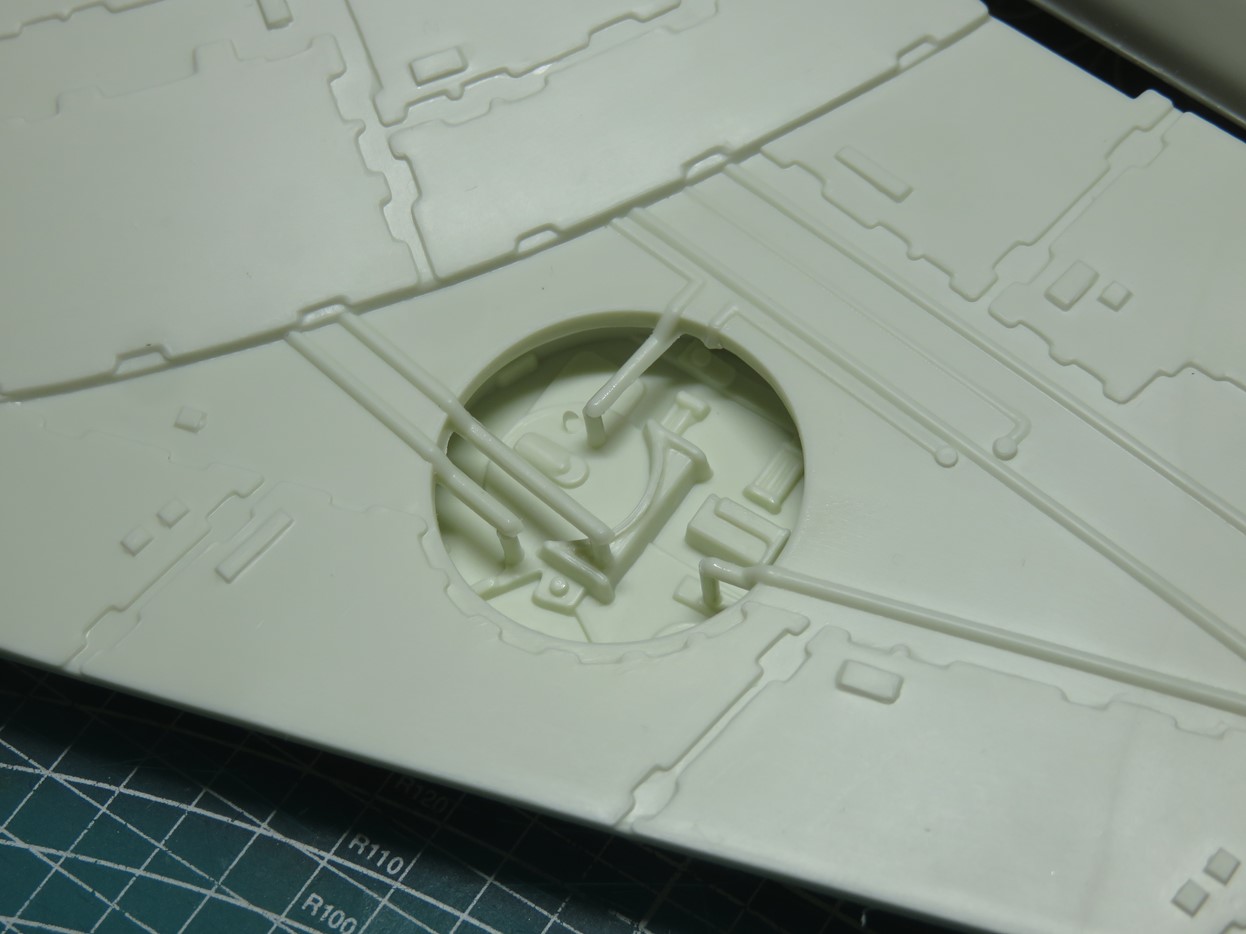
This was really cool, all of the wires that I sanded and thinned down earlier connected with rods inside the openings. This is a fun detail, and should the modeler desire, you could even go one step further and add in more detail using wire or Evergreen styrene rod.
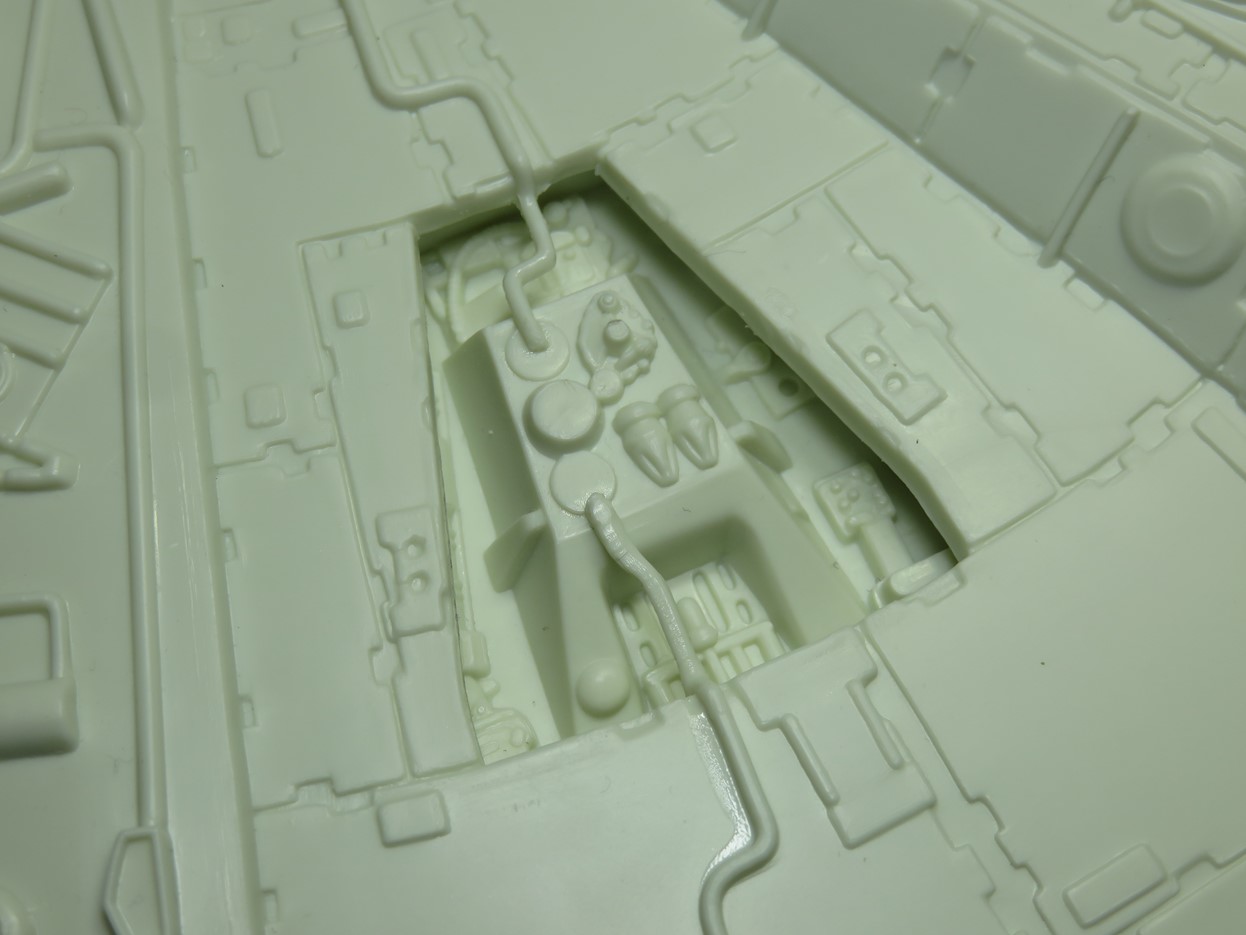
Probably my favorite part of the exposed details on the Falcon is this, the hull from a Jagdpanther. It’s one of those details that once I saw it I could never unsee it. MPC even molded in the small circular section that’s the machine gun turret on the lower left side.

With all of the opened parts now glued in place, I decided I would glue the side wall details to the lower hull section. As I mentioned before the inside of the hull is bumpy so that makes gluing each of these sections a slow process.
This is as far as I was able to get this week. And I think I’m going to have to come up with a better strategy for gluing these as flush as I can with the lower. I have an idea in mind, but you’ll have to wait until next time to see if I’m successful.
To be continued…
Jared Demes is a modeler from southern Alberta. He has been building models since he was 4 years old when his Dad first introduced him to the hobby. He has written for several magazines including, Fine Scale Modeler, Scale Aircraft Modeling, Phoenix Scale Models, and others. He has an interest in all modeling subjects, with a focus on WWII Japanese aircraft and Science Fiction.
Jared has won several IPMS awards for his modeling, and currently operates his YouTube channel rebelsatcloudnine, where he showcases model builds and product demonstrations.