
Large 1/12 Scale Kit
This is the third part of the Revell 1969 Camaro Z/28 3in1 1/12 Scale 85-2812.
With the holidays upon us, this can limit time for modeling. However, I’ve started by adding a few decals to the engine. The oil filter was painted with AK Interactive Imperial Blue AK 11180, and the label decal was placed on top.

The oil filter is slightly narrowed towards the bottom, and the decal is completely straight, so this makes aligning the parts a bit tricky. The solution was to cut the sides of the decal, allowing it to wrap around the part. I used Tamiya Mark Fit Super Strong decal solvent, which reacted very well with the decals.
This is one of the times when I wish there were more parts to this model. As a separate oil filter would have been easier to paint and decal.
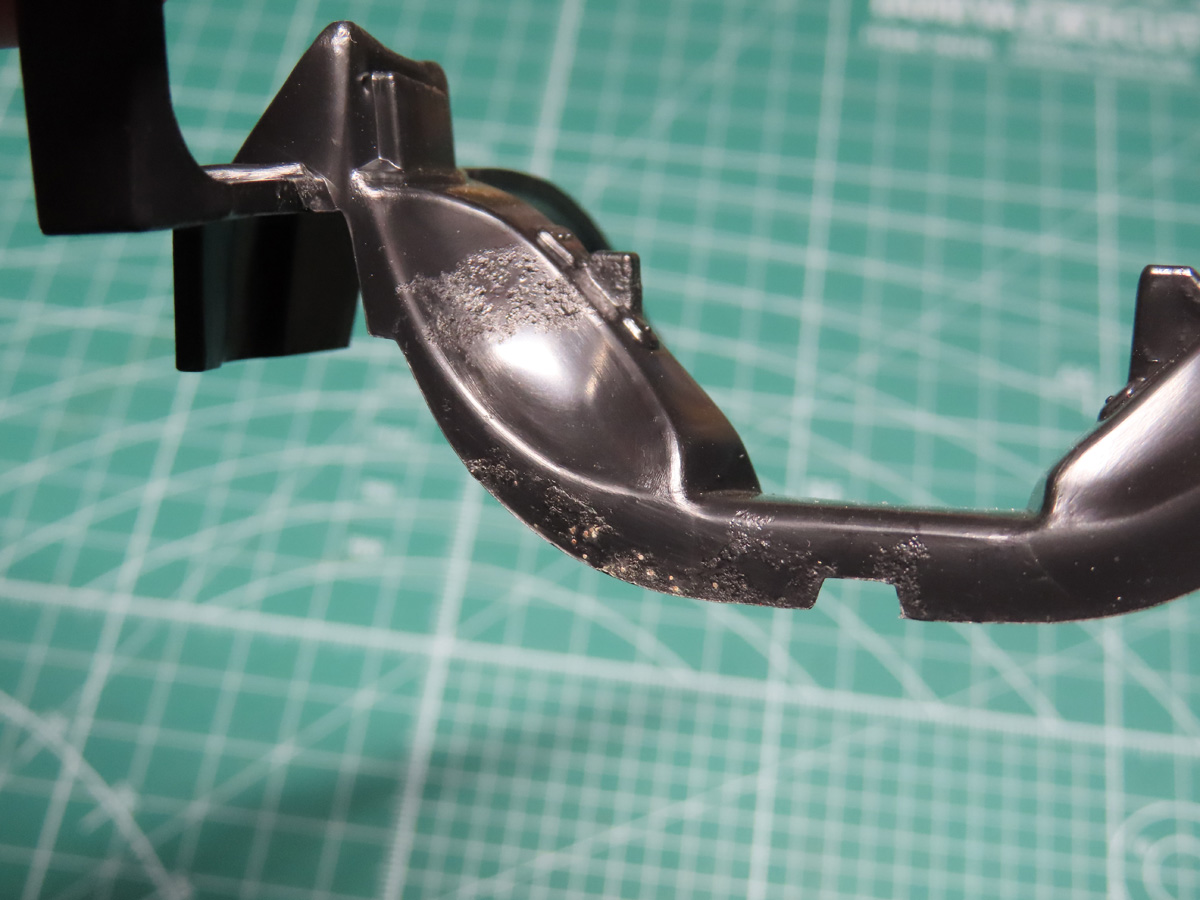
Most of my time this past week was spent sanding and cleaning the parts for the engine and chassis. There is a lot of flash hidden around the parts, and even after careful cleaning, once the chassis was primed, I still found a few spots of hidden flash.
Possibly oddest of all was on Part D11, at first glance, I thought that it was just flash from an old mold that needed to be sanded smooth. But on further inspection, it looked like food of some kind had gotten onto the part. I scraped most of it off, and later I washed the part and properly sanded everything smooth. Still, I’ve never come across something like this with my modeling.
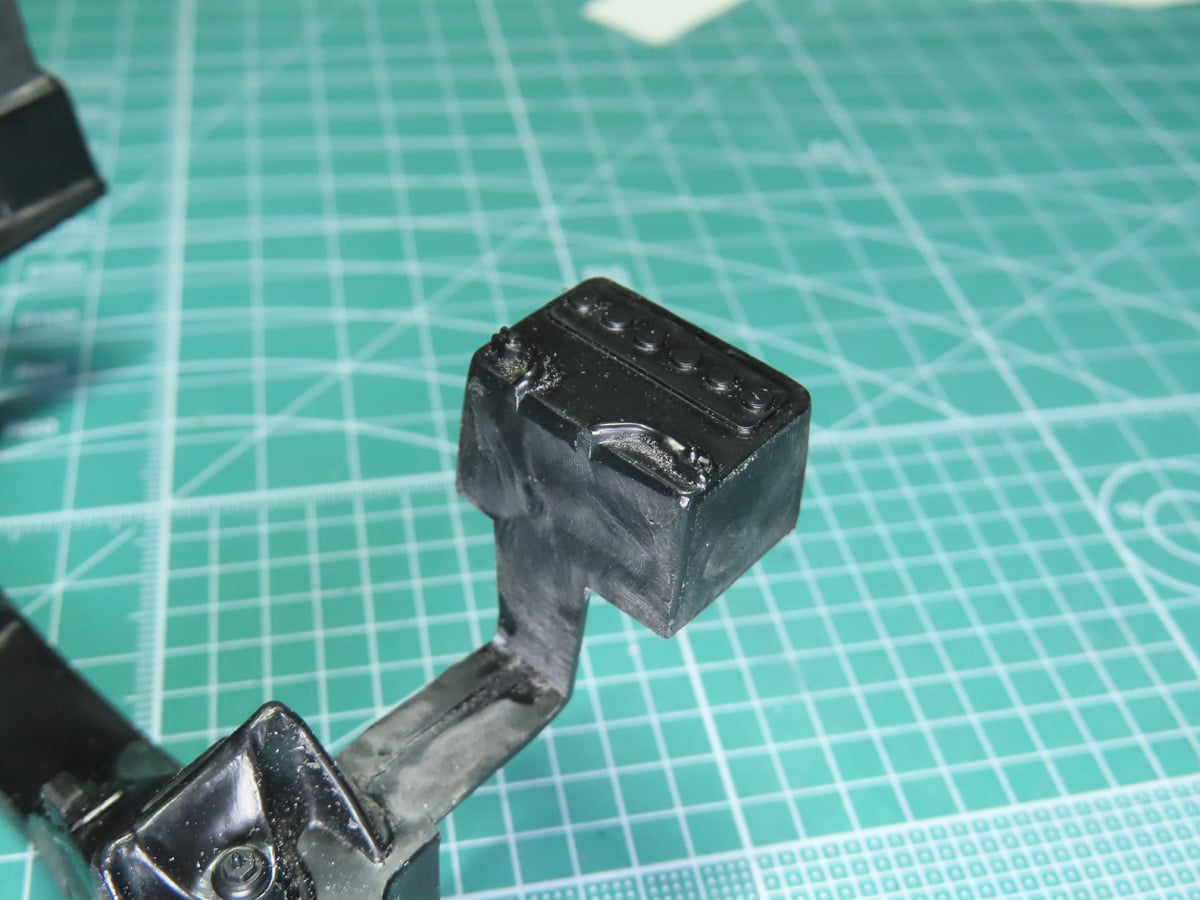
I wasn’t as thrilled with the battery, as the box is slightly tapered to allow the part to fall out of the molding more easily when it’s ejected. I also wanted to remove the cables, as they would look more realistic if replaced with round wire.
I tried sanding the edges of the battery to make them narrower, but this was taking a lot of time, and so I sanded off the molded wires and prepared to build my own battery.
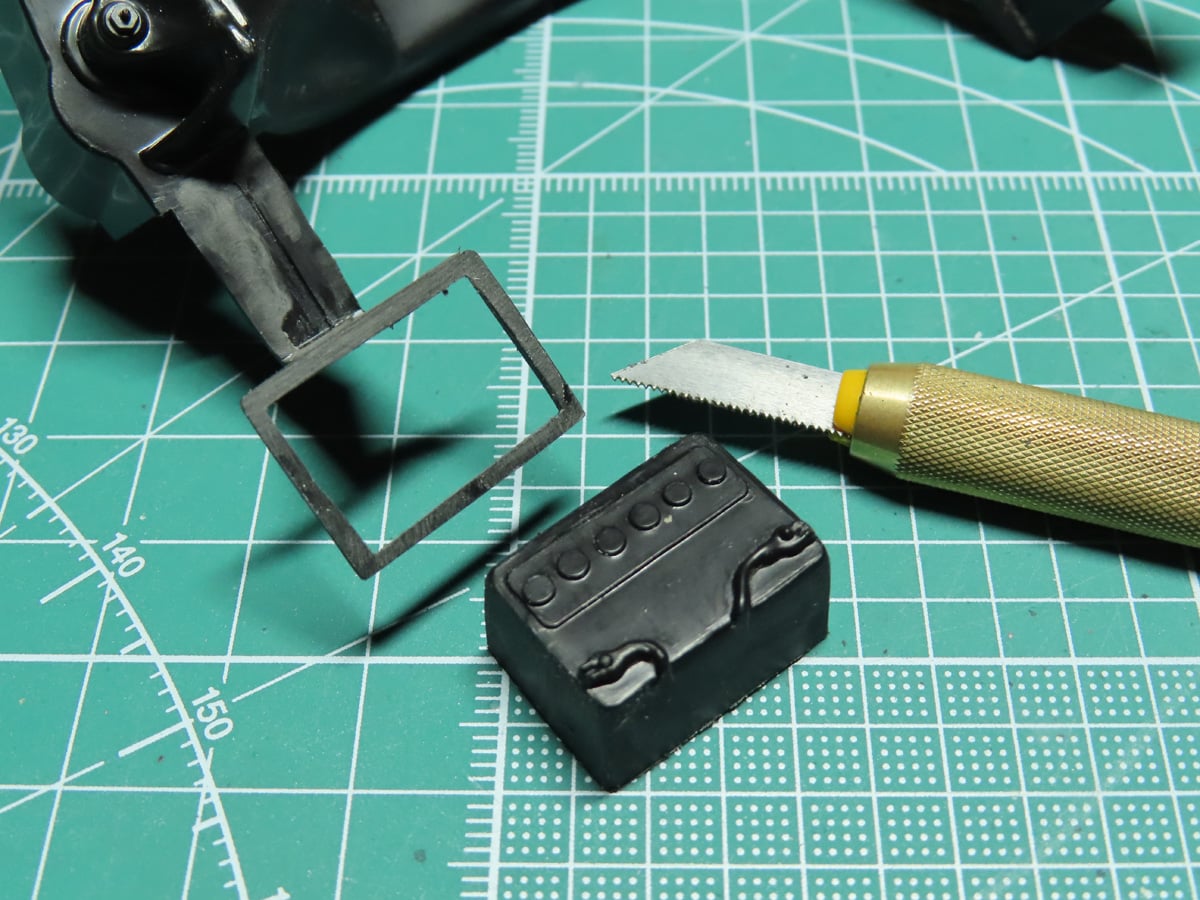
I used an Excel Saw Blade #13 to carefully cut off the battery, just leaving behind a small portion. This would later have a sheet of styrene placed on top to act as the platform for the new battery.
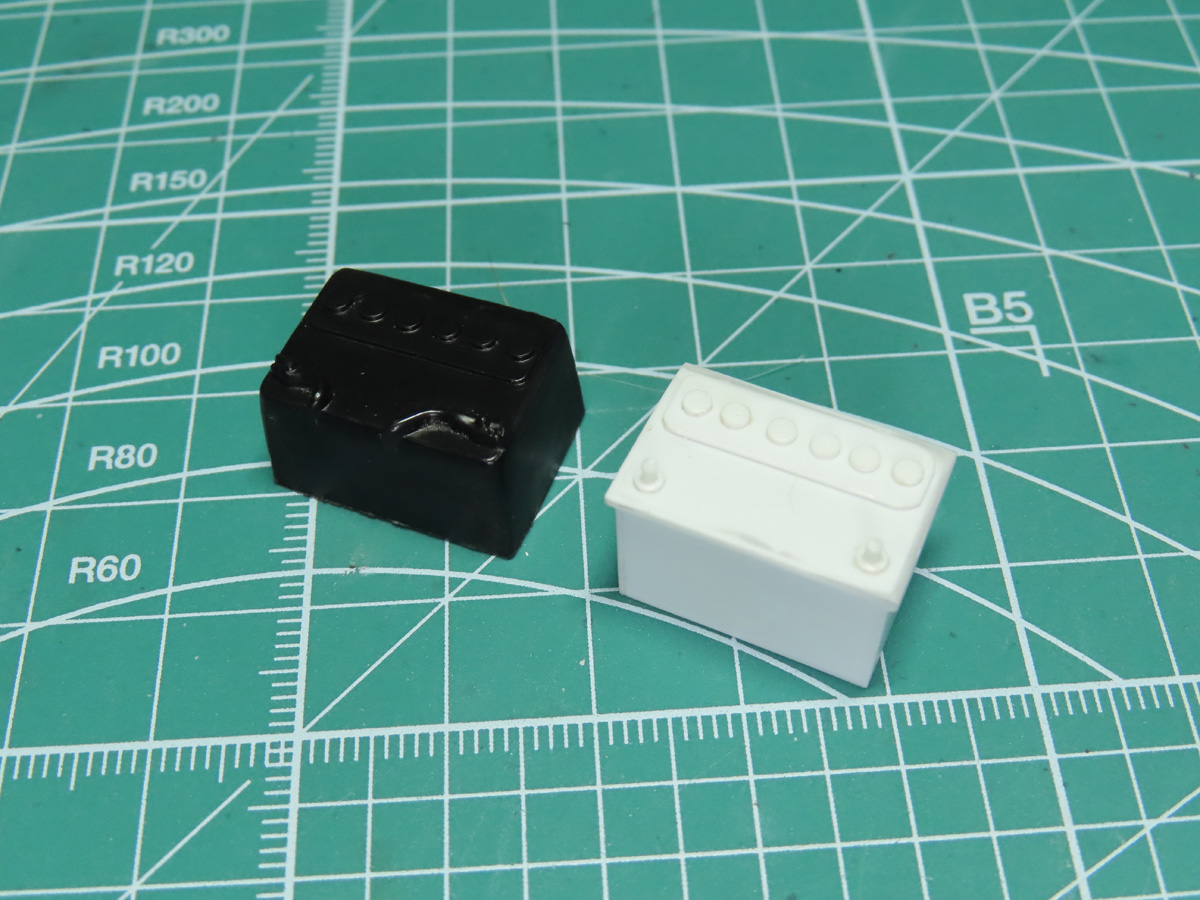
Using various bits of Evergreen Styrene, I constructed a new battery. I’m a lot happier with this design, and you can see just how narrow the kit battery is.
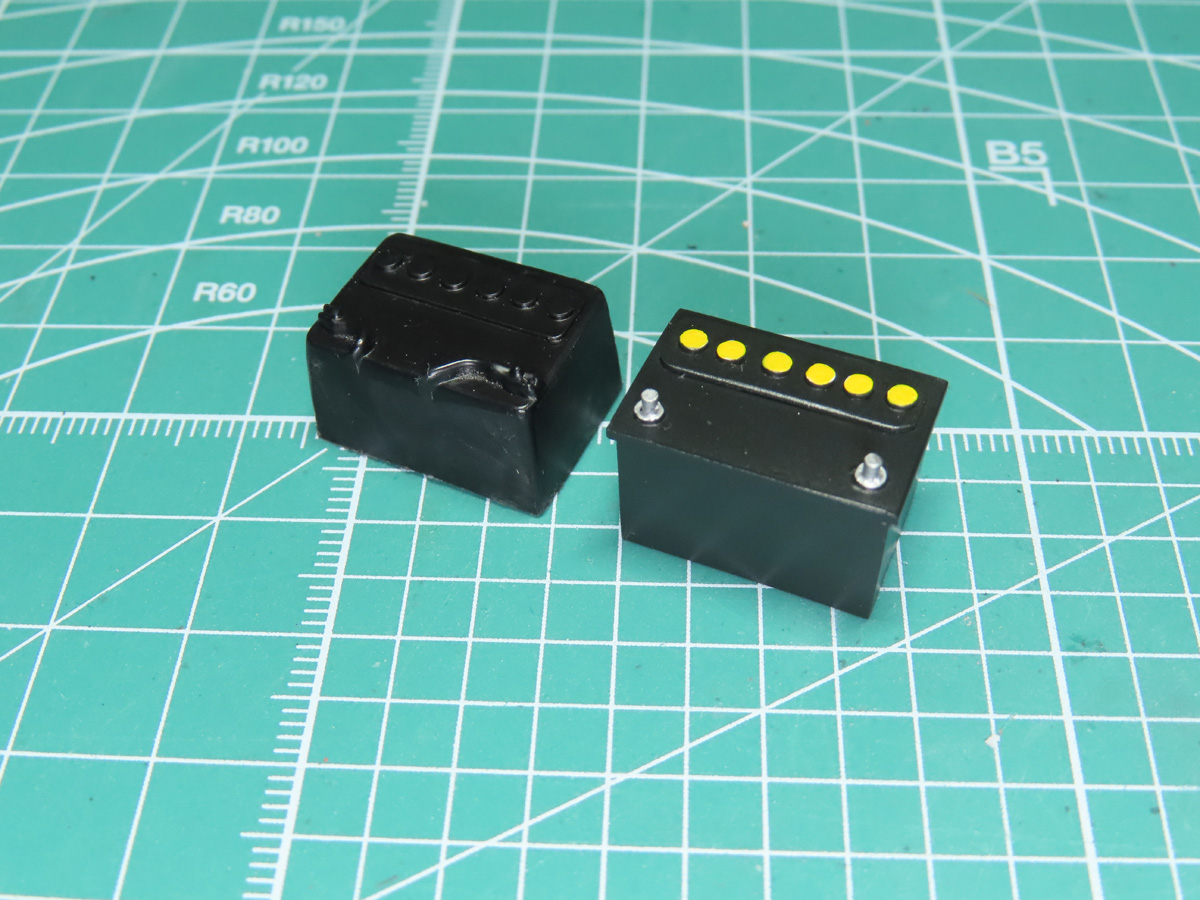
I primed the battery with Tamiya Liquid Surface Primer Gray, and then painted a base coat of Tamiya XF-69 NATO Black. I chose this color so that the batter wouldn’t completely blend in with the rest of the black engine bay.
The terminals were painted with LP-11 Silver, and the rest was painted with AK Radiant Yellow AK 11046.
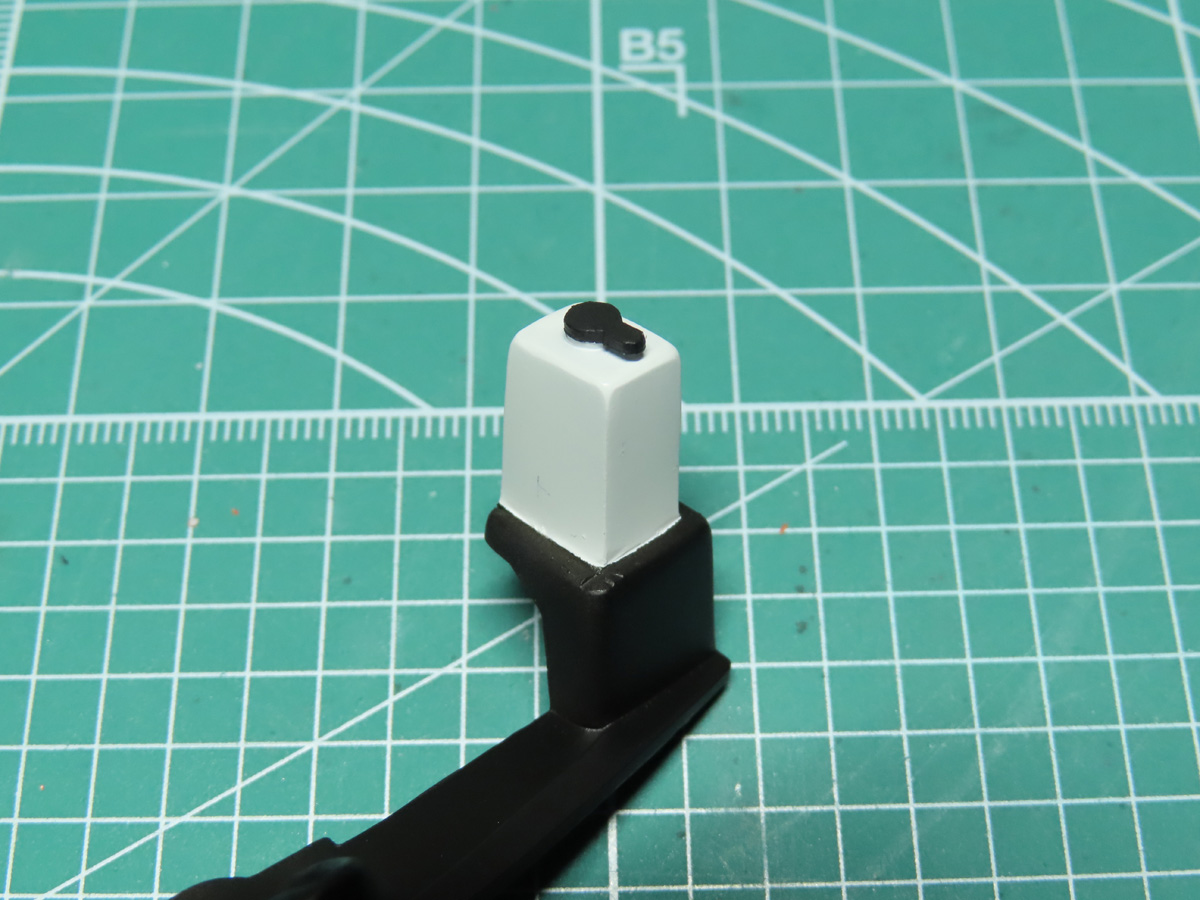
I sanded and straightened the windshield washer tank. Once this was completed, I noticed that the cap on top was pointed in the wrong direction, so I sanded it off, and with some thicker styrene sheeting, I carved out a new cap. Now it’s in the correct position, and I can later on add the hose to the top.
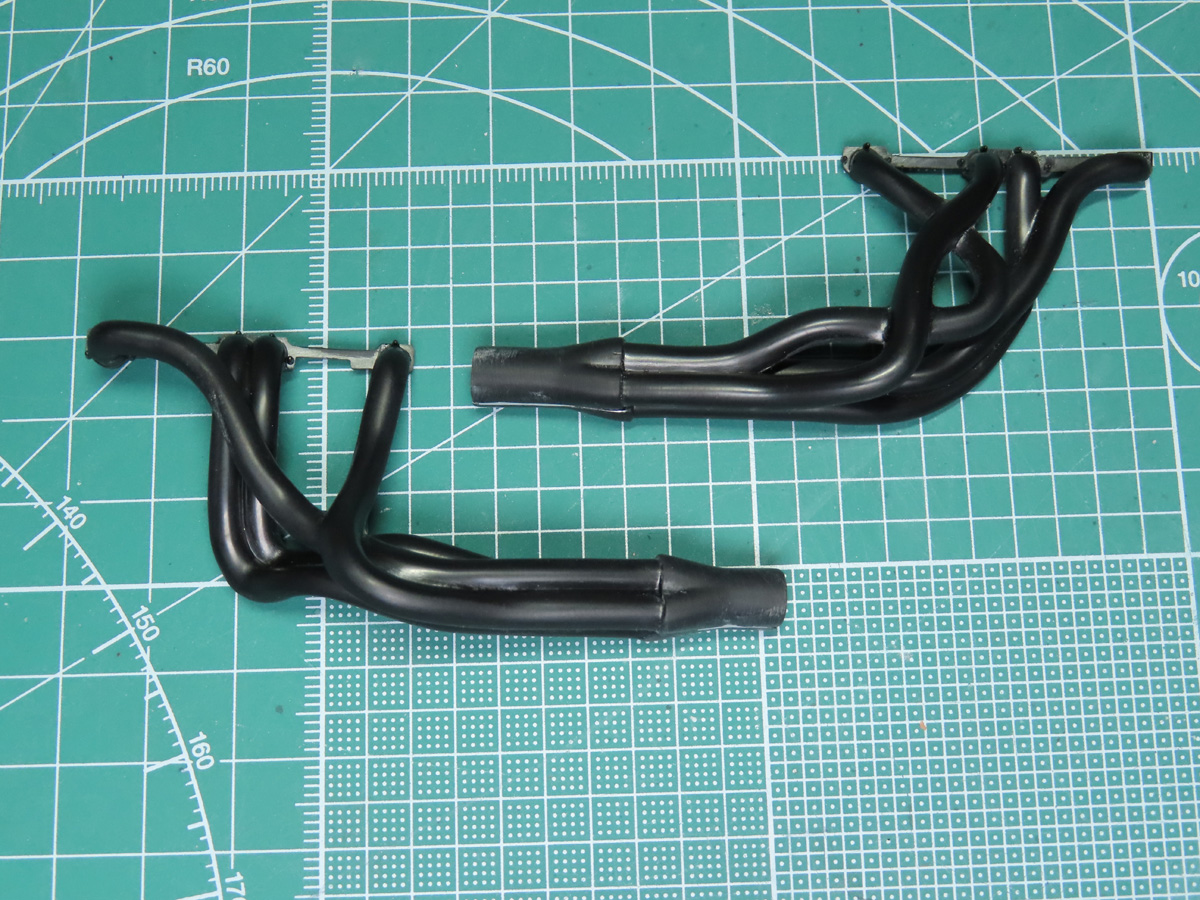
The exhaust manifolds took up a lot of my time as they have very pronounced seam lines running along the sides. This black styrene is also very particular, as it behaves a lot like old styrene I’d find on vintage model kits. Sort of dry and crumbly, also a tad brittle. So I had to use various grits of sandpaper to remove the seam lines, and then finer grits to gradually remove the scratches.
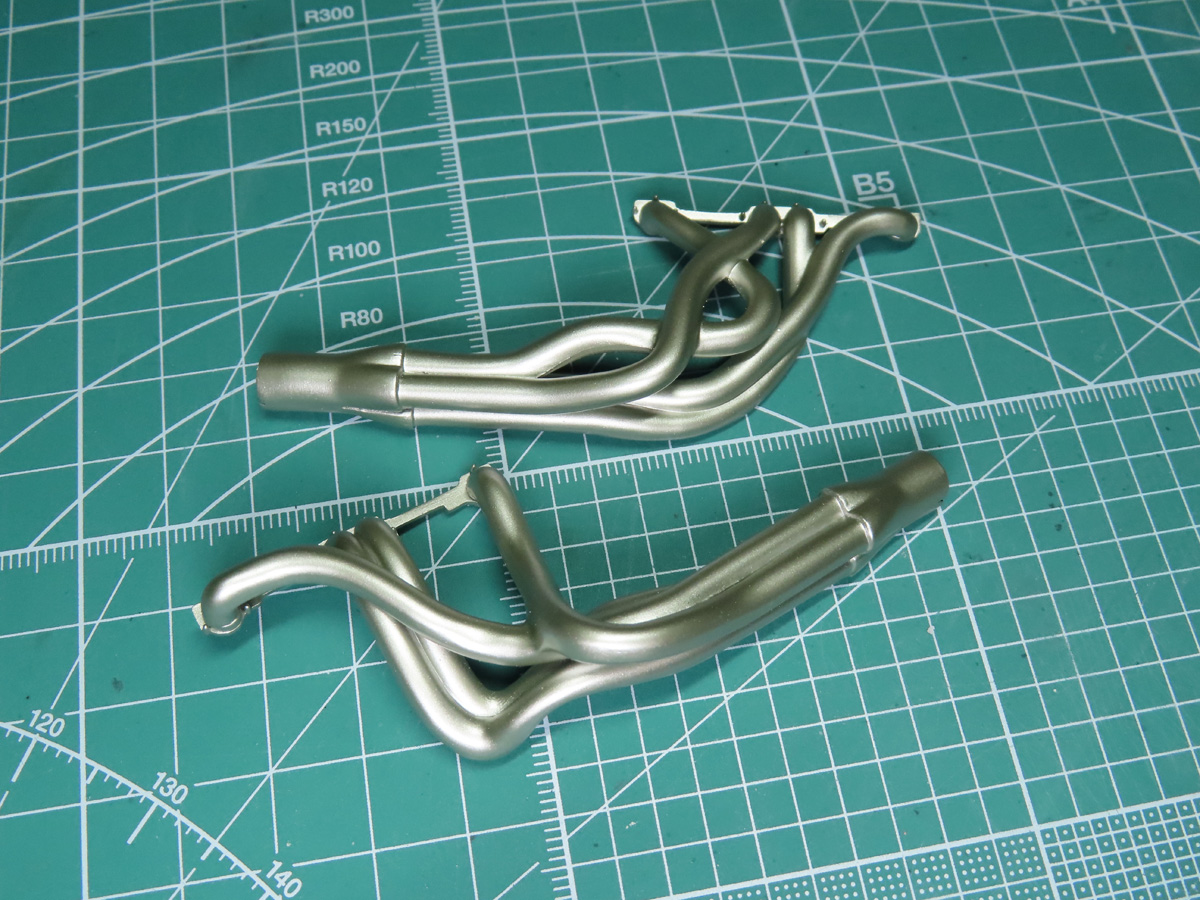
I primed the manifolds with Mr Surfacer 1500 Black, and then I painted them with Tamiya LP-63 Titanium Silver.
I’ve used the Tamiya Acrylic Titanium Silver X-32 for a few years now, and eventually, the paint goes gummy. It’s happened several times now, so I decided to try the Lacquer version, and when thinned with Mr Rapid Thinner, it produces a fantastic lustre and color. I also found the LP version to be a lot easier to airbrush.
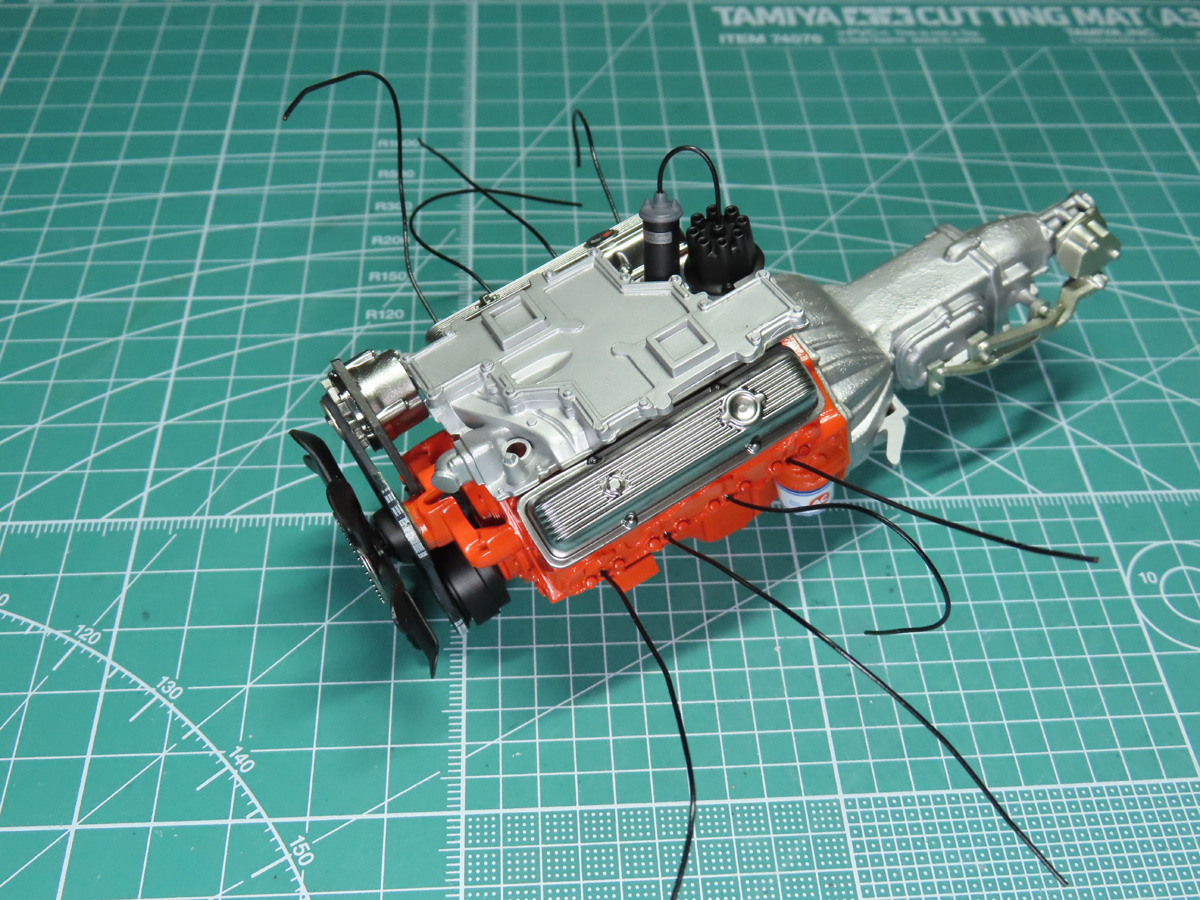
Moving back to the engine I cut the supplied cables for the spark plug wires. There is just enough wire included to complete the engine, and the instructions provide a great and easy to read diagram on where they all go.
I first glued the wires to the block with some super glue, and I let it cure completely before I bent them around.
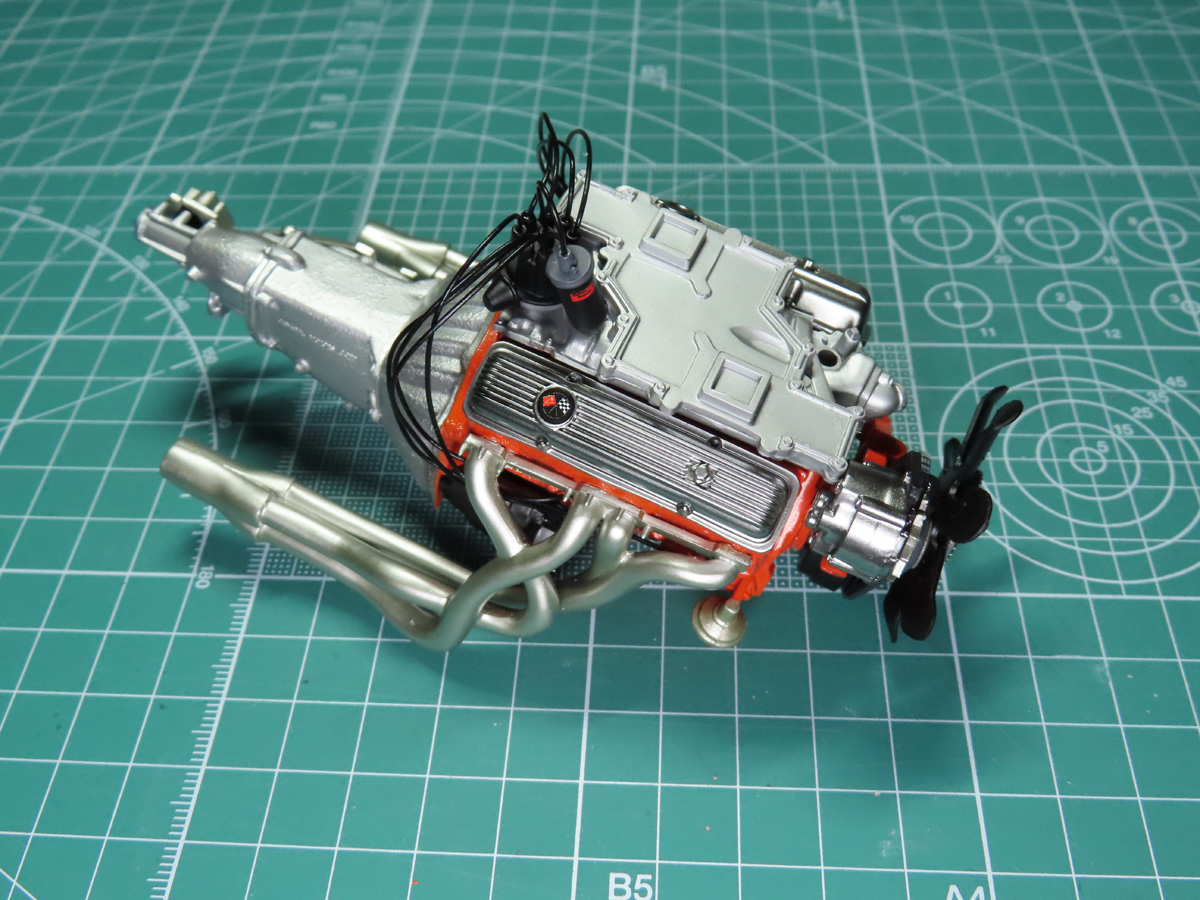
I glued the rest of the wires into the distributor, and then it was time to add the exhaust manifolds to the engine.
This was a very tricky step as the manifolds don’t really fit in that well with the block. I wish that this were designed better, as the angle is difficult to guess, and to make things more challenging, the plastic around the wire cables is very springy. So the wires will push against the manifolds as they are drying.
It took some time and careful gluing, but I eventually managed to get everything set in place.
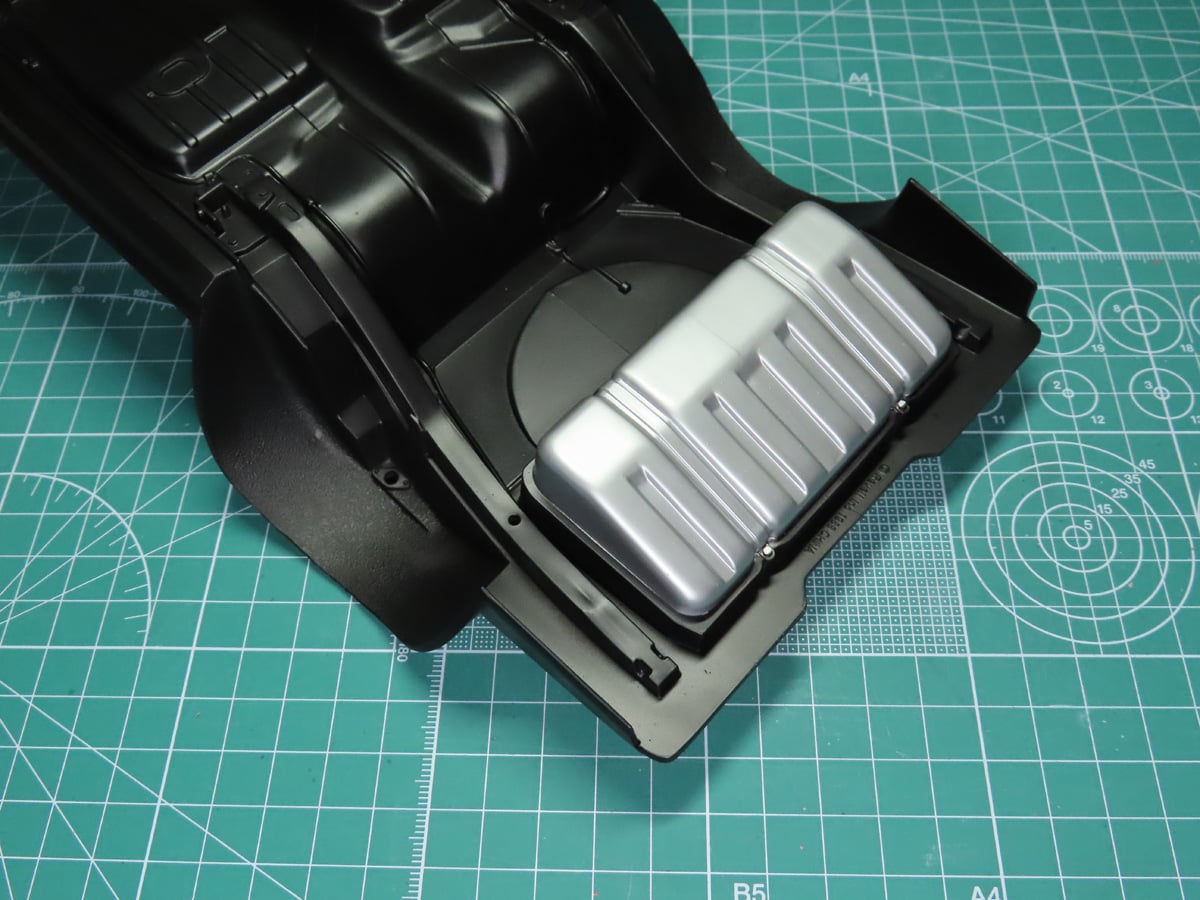
After a lot of sanding, I was ready to prime the chassis. I started with Tamiya Liquid Surface Primer Gray. The gray was very helpful in allowing me to properly see any imperfections that I missed.
The primer revealed a few places that I had missed, and once they were corrected, I painted the fuel tank with Tamiya LP-11 Silver.
The fuel tank was masked off, and the rest of the chassis was then painted with Mr. Color 92 Semi Gloss Black.
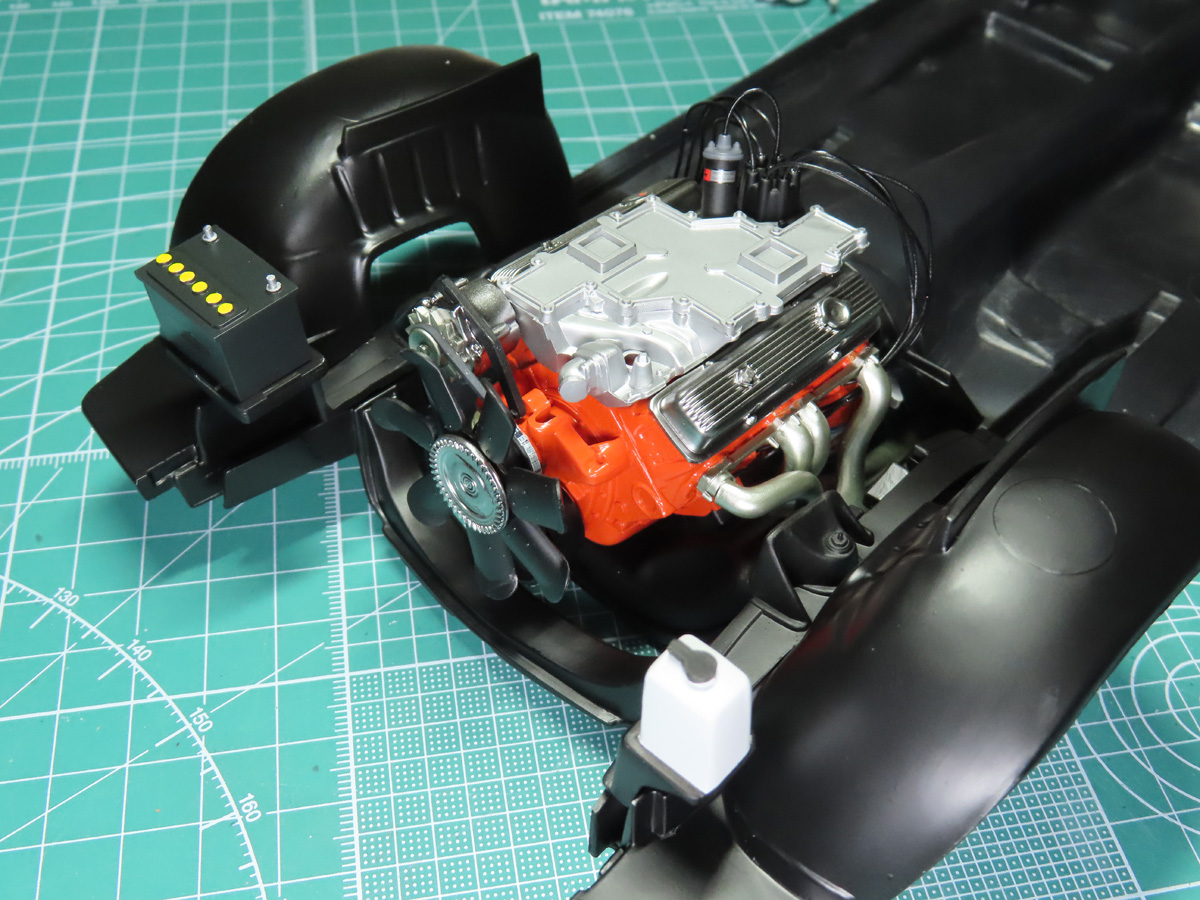
Moving to the front of the car, I placed part D11 in the center section. Once things were in place, I glued the battery to its base, and I very carefully slid the engine onto its mount. It’s a tight fit, and you need to be careful to not damage any of the paint, but the engine will sit properly on its mount.
This is a very fun project, but it will require quite a bit of sanding, and this is just due to the age of the model. I’ve surprised myself several times with how much I’m enjoying everything, and wishing that I could build it faster. I don’t think I’ve been this impatient with wanting to complete a model since I was a young teenager. But that just goes to show you how much fun this kit is.
I’m taking my time as I want to add more details and correct some of the parts. In the next post, I’m going to be adding on more wiring around the engine. Hopefully, this will successfully add to the realism of the model.
To be continued…
About the Author:
Jared Demes is a modeler from southern Alberta. He has been building models since he was 4 years old when his Dad first introduced him to the hobby. He has written for several magazines including, Fine Scale Modeler, Scale Aircraft Modeling, Phoenix Scale Models, and others. He has an interest in all modeling subjects, with a focus on WWII Japanese aircraft and Science Fiction.
Jared has won several IPMS awards for his modeling, and currently operates his YouTube channel rebelsatcloudnine, where he showcases model builds and product demonstrations.