
WWII Bomber 1/72 Scale with Display Images at Nanton
This is the second part of the Revell Avro Lancaster Mk.I/III 1/72 Scale 04300
Early Lancaster had small, rounded windows running along the fuselage, and these were removed on later variants. I couldn’t find out exactly when this Lancaster was built, but since it was used at the very end of the war, I made the assumption that the windows would be solid metal with the fuselage.
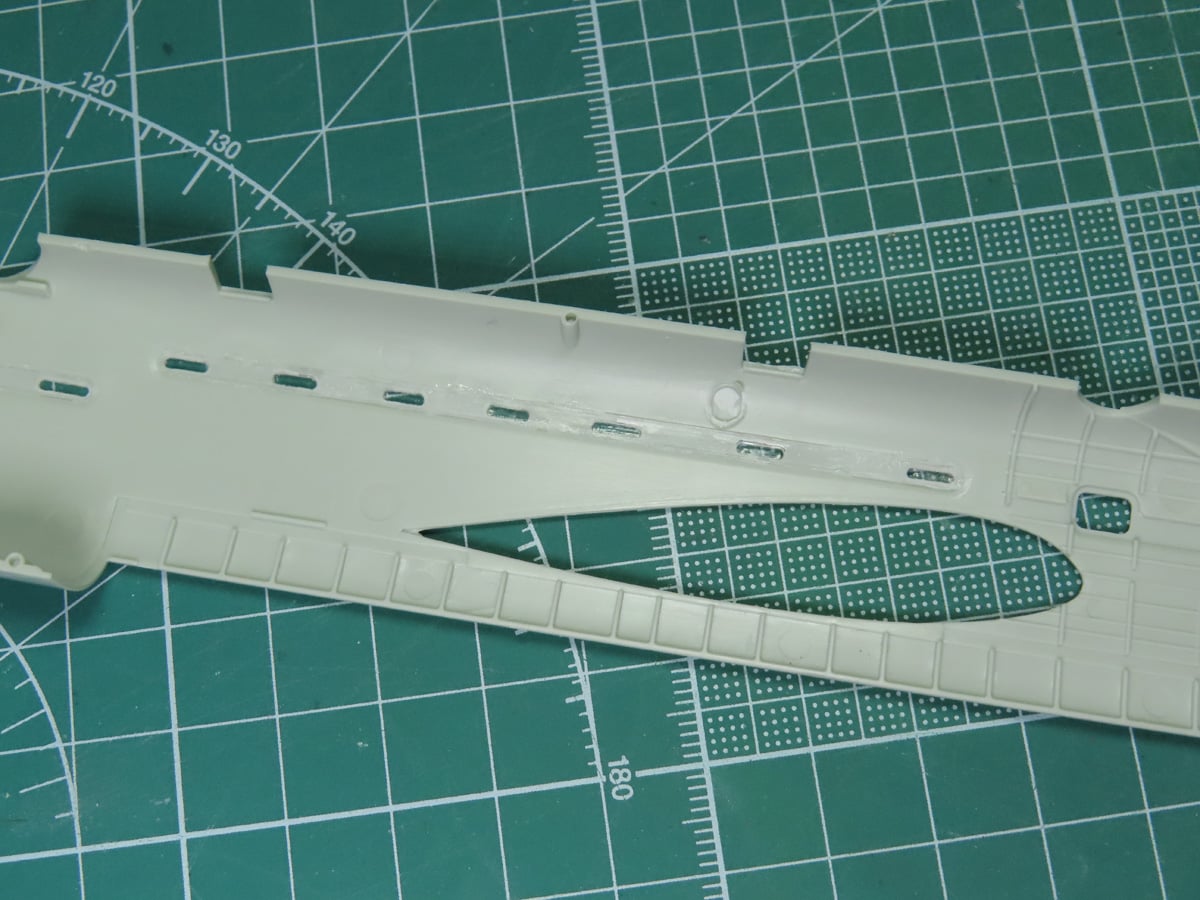
So I began by gluing in all of the window sections with Mr Cement S, and I pushed the windows as flush with the fuselage as possible.
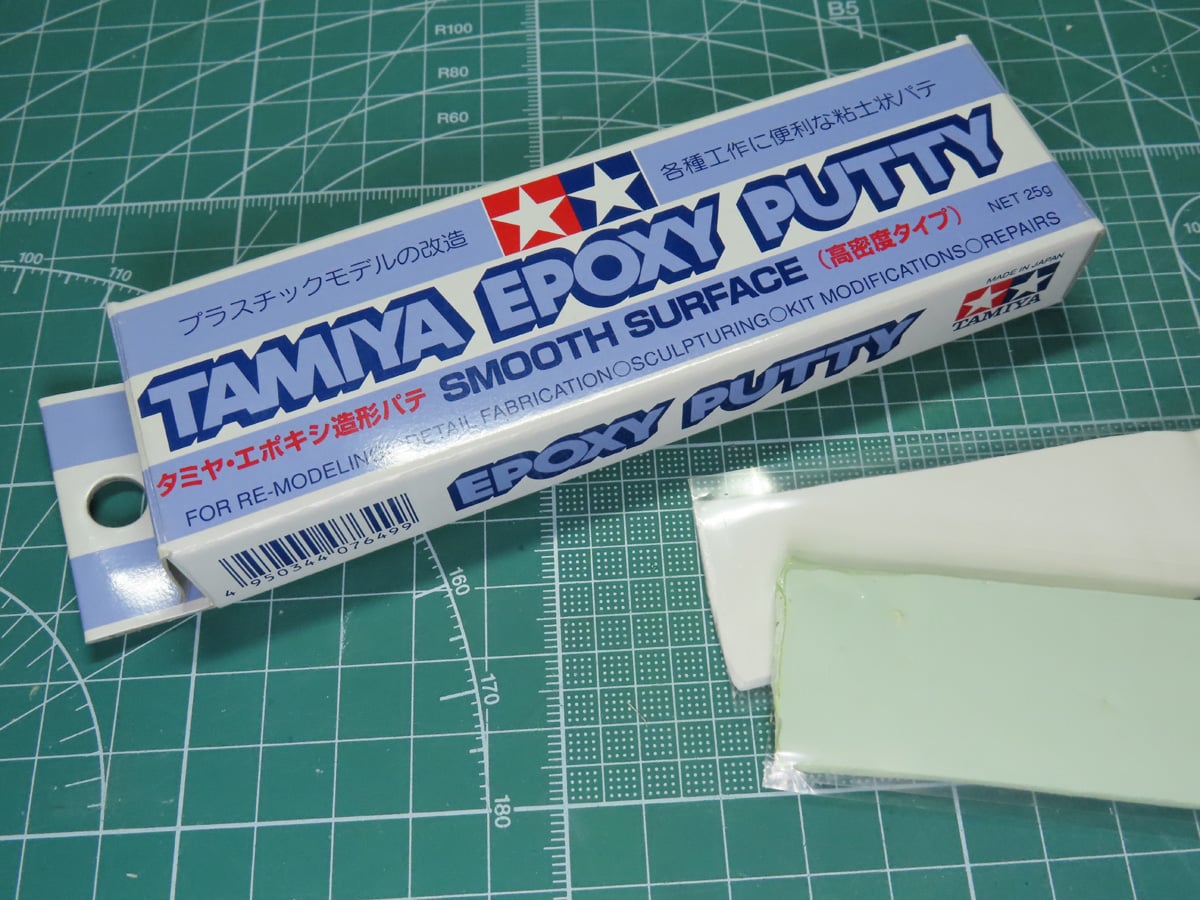
I wanted to fill in the windows from the outside, and instead of using the trusty Milliput, I decided to give Tamiya Epoxy Putty Smooth Surface 87052 a try.
There is a large leaflet inside with mixing instructions. The Tamiya Epoxy Putty is very similar to Milliput. But I actually found the Tamiya to be easier to mix together, and wasn’t sticky like the Milliput.
I rolled out little beads of putty and pressed them into each of the windows. It stuck quite well to the plastic, and this process was a lot easier than I had initially expected.
The one downside is that the Tamiya Epoxy Putty takes much longer to dry than the Milliput. I used a 50-50 mixture as per the directions. But I think in future projects I’ll add more hardener to speed up the process.
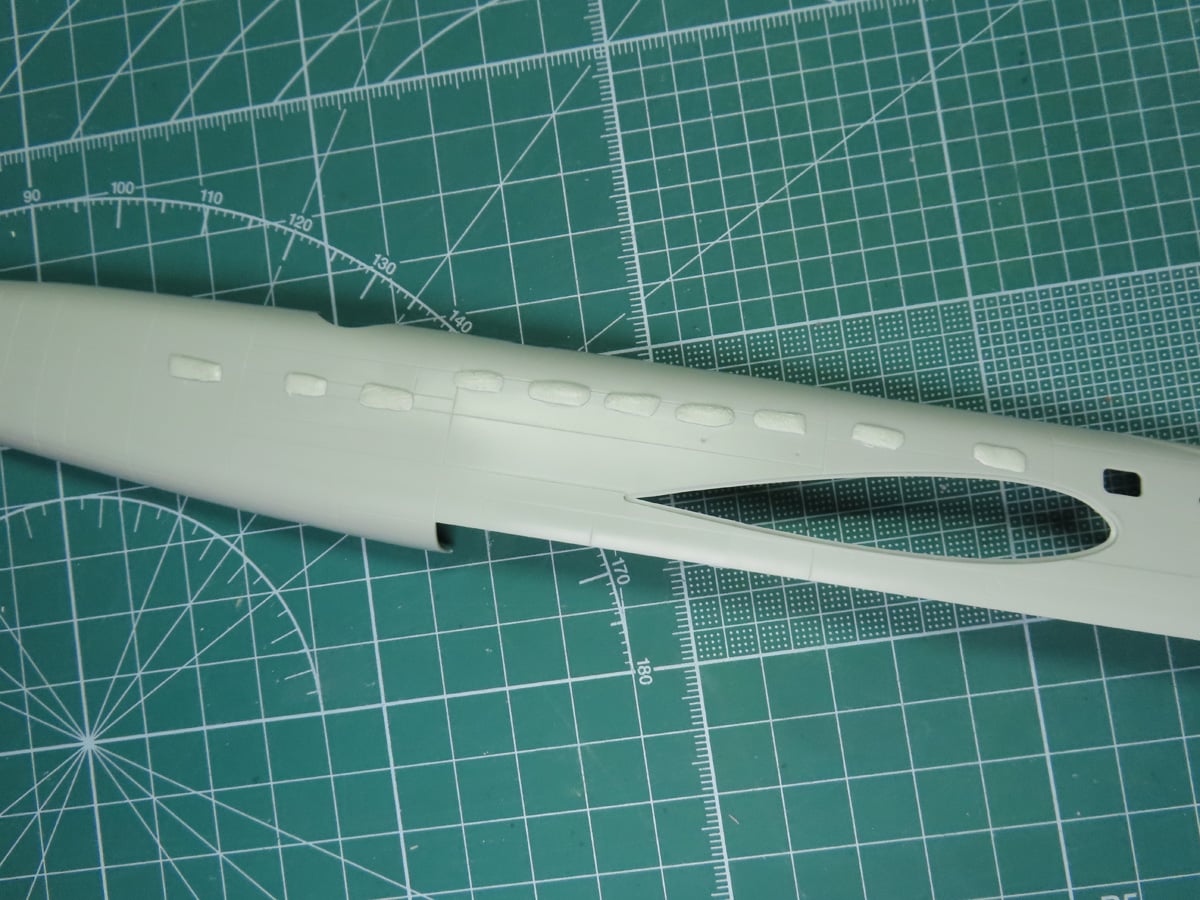
I’ll leave this alone to dry for a good while before I attempt to sand it down.
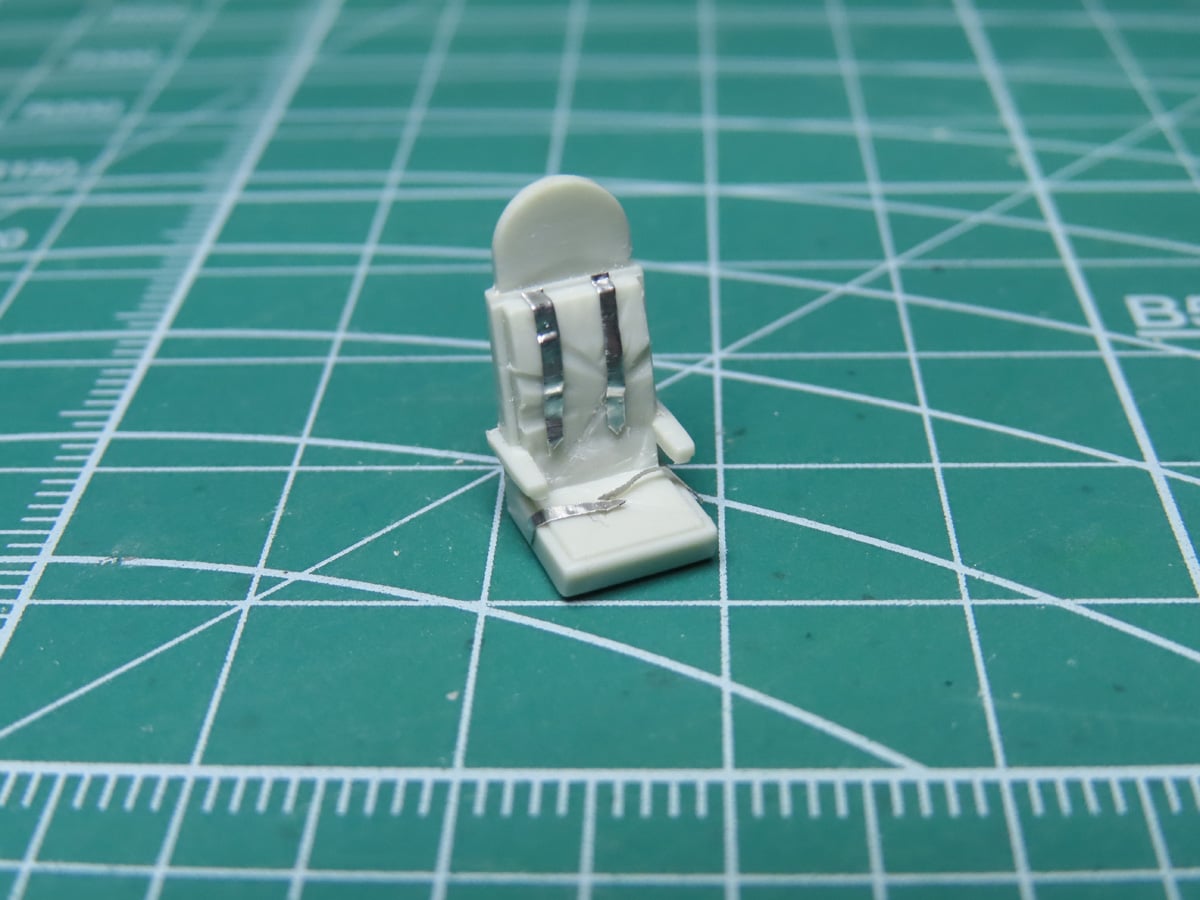
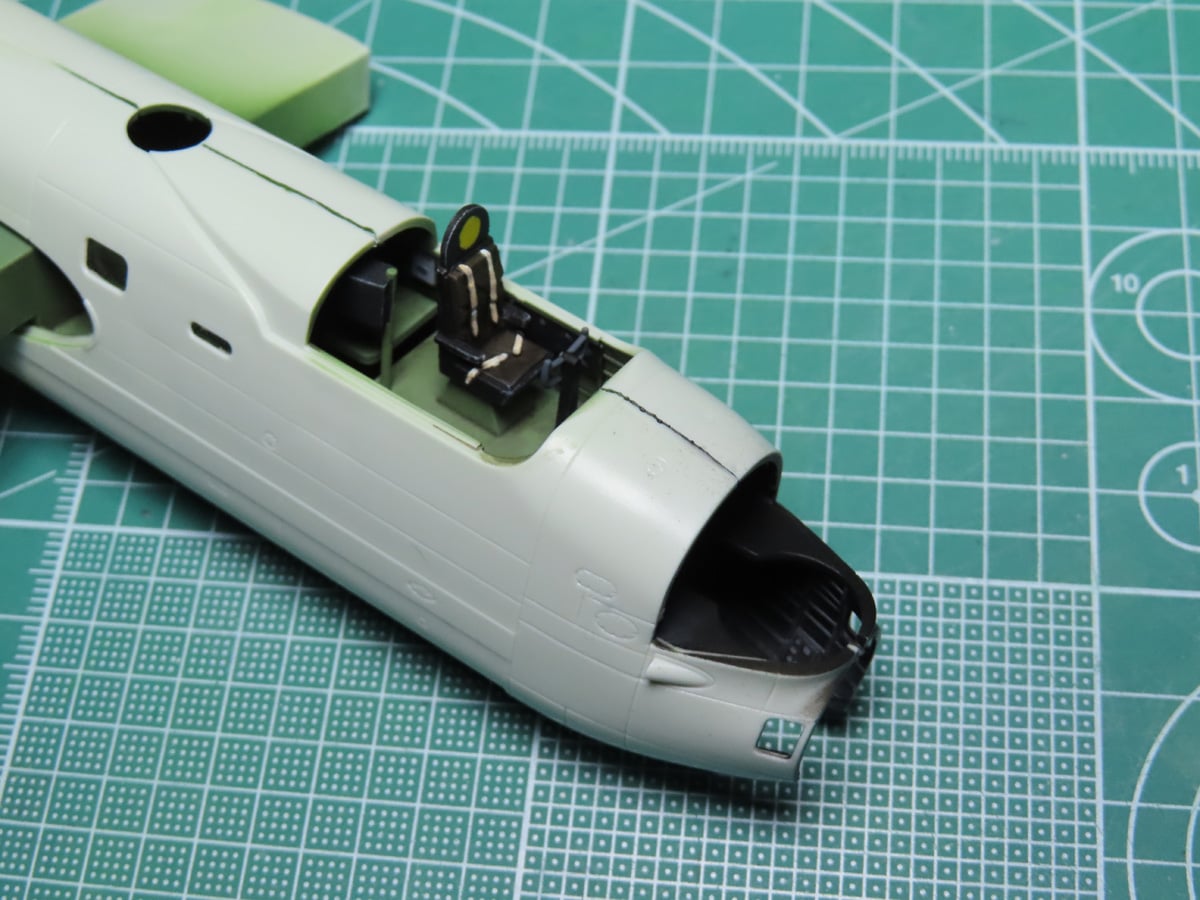
For the pilot’s chair, I scraped off the molded on seat belts and replaced them with ones I made myself. To make the seat belts, I used small strips of Aluminium Tape. This is a tape usually used for sealing ducting, but it’s also an easy way to add seat belts to a model.
The tape is nice and rigid, so it holds its shape and has a nice effect on the completed cockpit. It’s also a much cheaper alternative to photo-etched parts, and I like to use it for all scales of modeling.
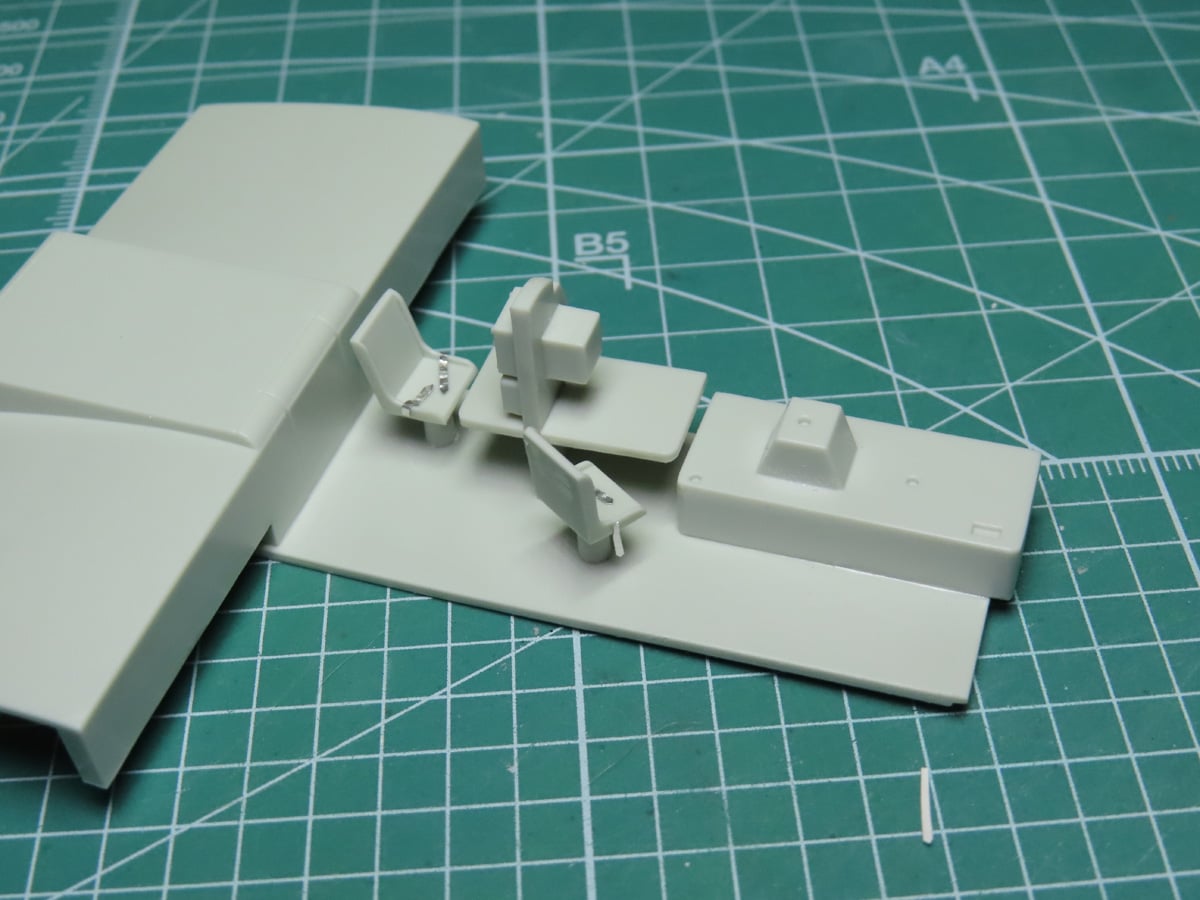
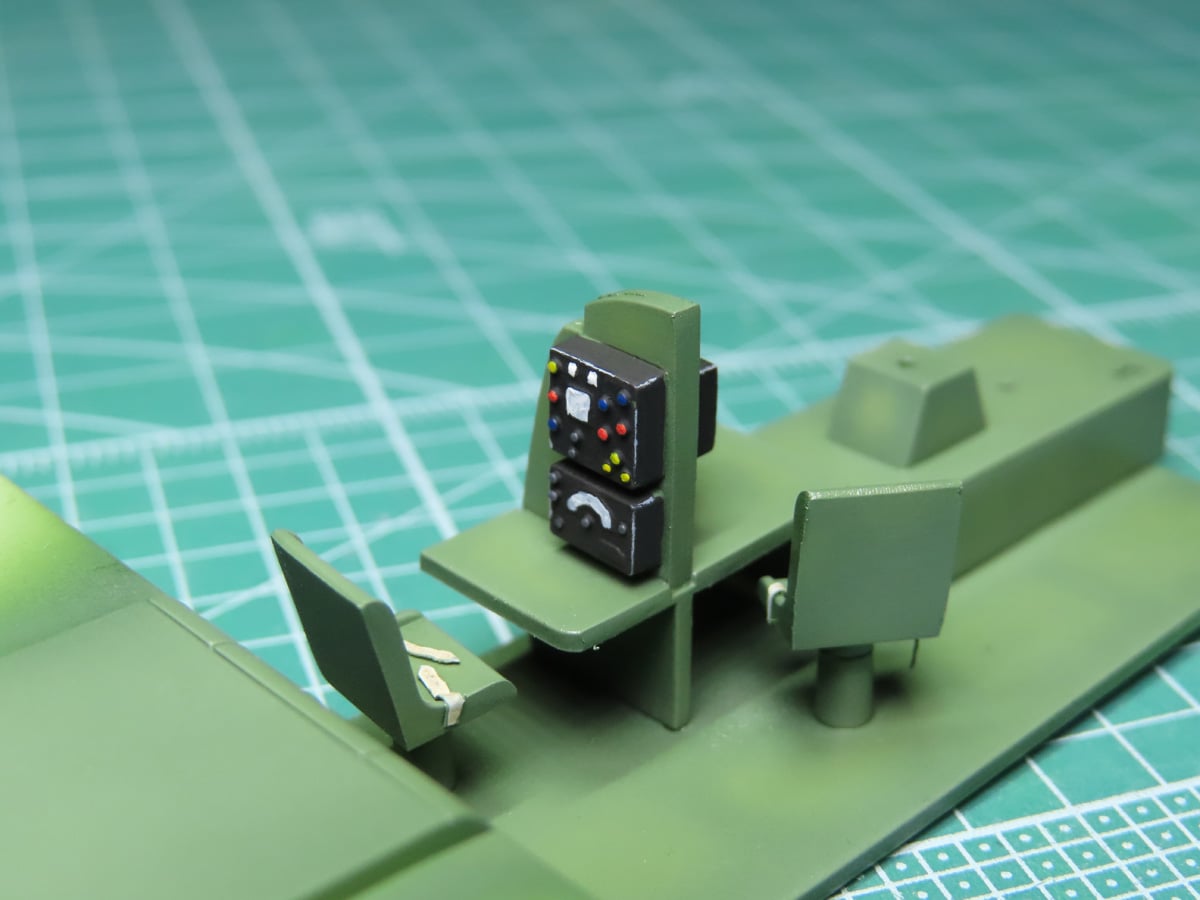
Next, I glued in many of the cockpit sections. The front platform is for the pilot, with the navigator and radio operator seated behind him. Here, I’ve also added more aluminum tape to the seats.
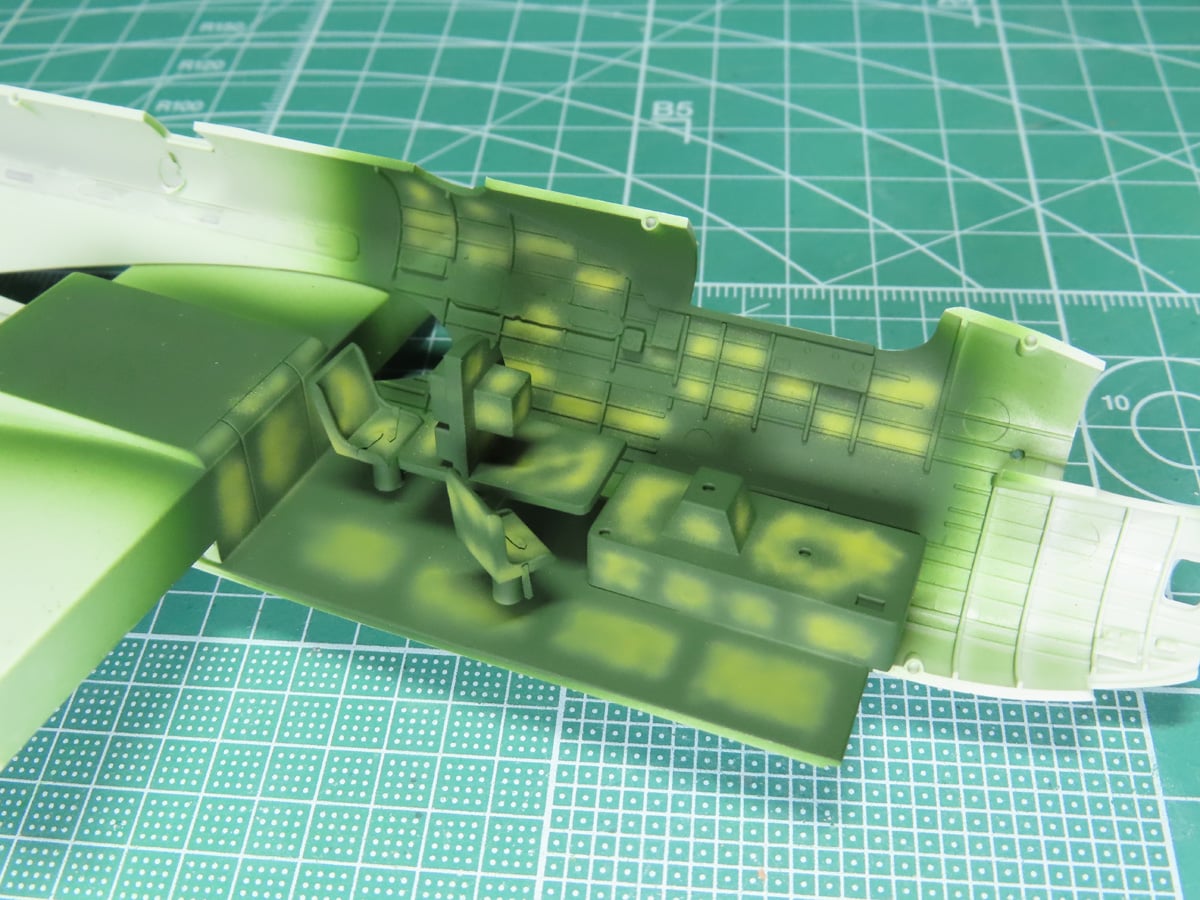
I wanted to add a faded effect to the cockpit, so I painted a base layer of Tamiya XF-5 Flat Green, and then I highlighted sections with Tamiya XF-4 Yellow Green.

Tamiya suggests XF-71 Cockpit Green straight from the bottle as an appropriate color for RAF interiors. I like this paint a lot, and it does match a lot of RAF subjects I’ve seen. However, due to the size of the cockpit and how dark the XF-5 Flat Green is, I decided to do a 50-50 mix of Tamiya XF-2 Flat White with the XF-71 Cockpit Green.
This was very lightly layered over the base colors, and it created a nice, uneven green tone. Sadly, this picture doesn’t properly reflect that, as the light I used to take the picture has washed out a lot of this detail.
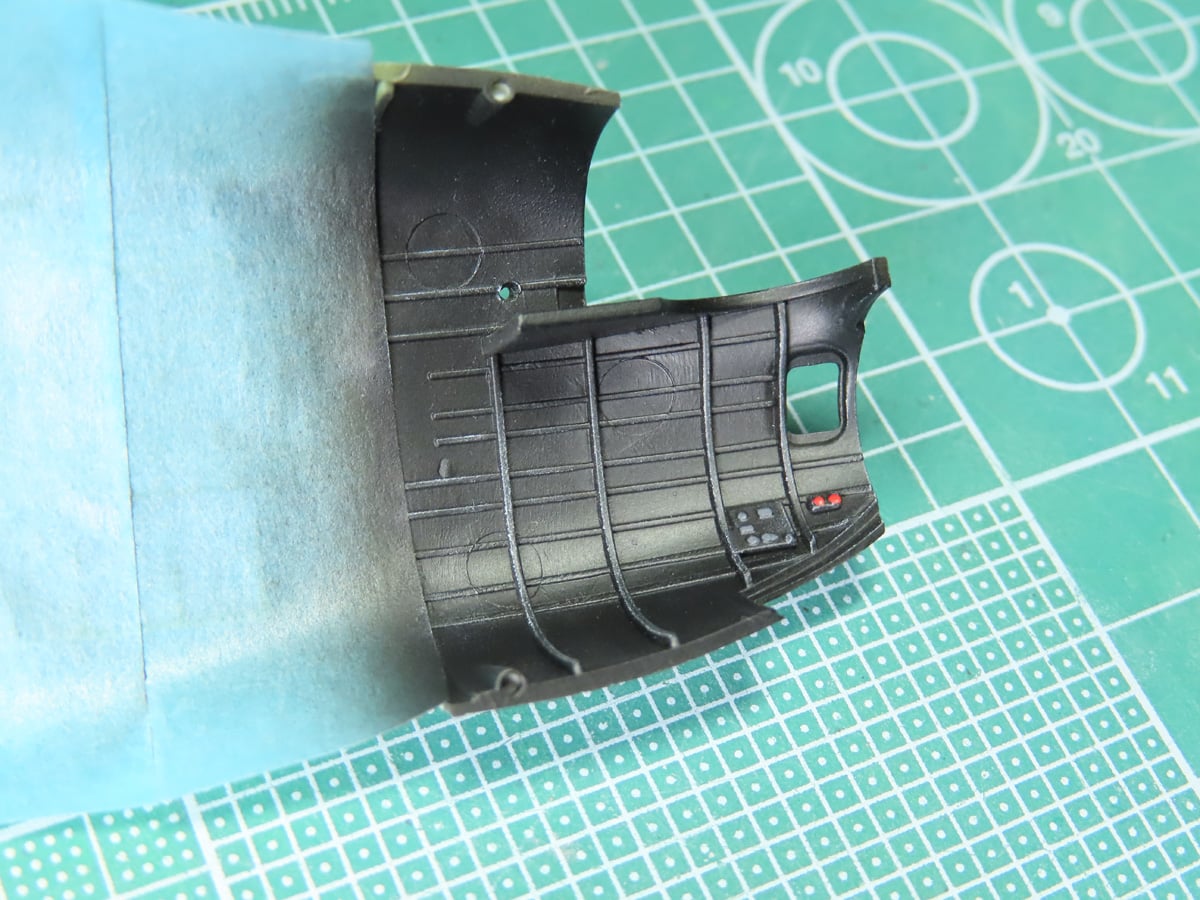
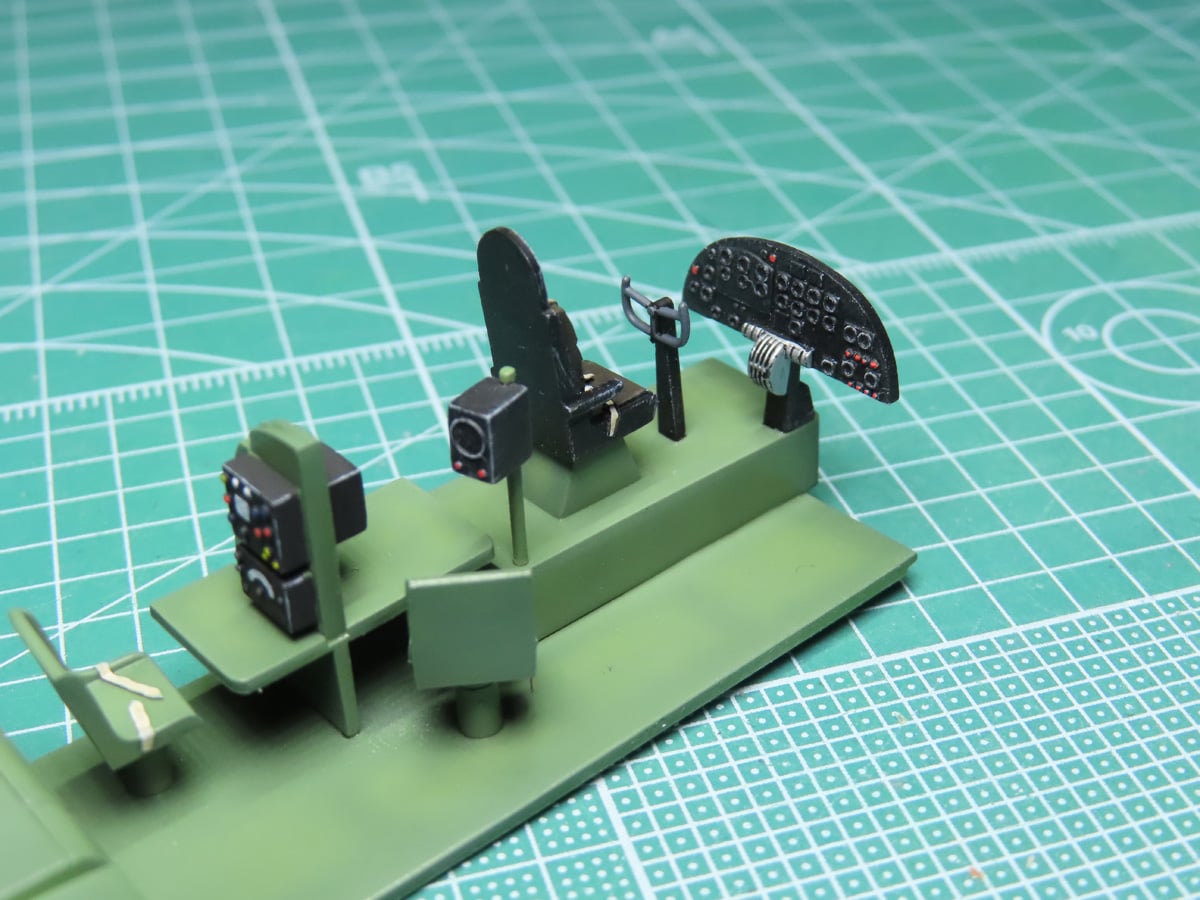
The front section of the nose was painted with Mr Color C92 Semi-Gloss Black. And I dry-brushed a light grey over the rib sections to highlight these details.
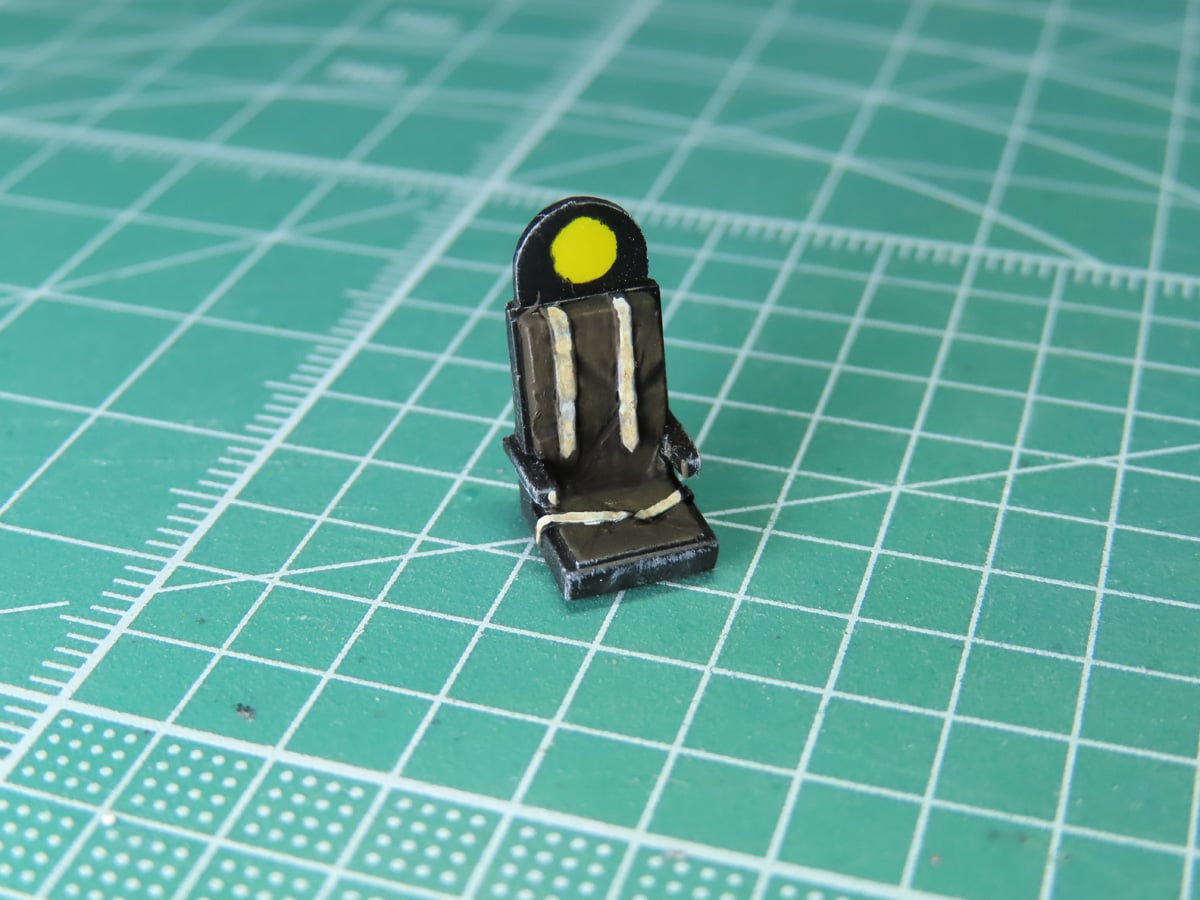
The pilot’s seat was also painted black and dry brushed with light gray. The yellow circle was painted on using Tamiya XF-3 Flat Yellow, and for the cushions, I used AK Interactive Burnt Umber AK11111, and lastly, I applied a wash of Citadel Agrax Earthshade.
For the seat belts, I used Vallejo Game Color Elfic Flesh. This is a nice color, but it needs to be toned down a bit, so I lightly applied some Tamiya Panel Line Accent Color Brown, and the seat is completed.
I painted the radio in the back, which sadly won’t be easily seen on the completed model. It was a lot of fun to paint, and Revell do include decals for this station.
I added the rest of the details to the cockpit, and the interior was now ready for some weathering.
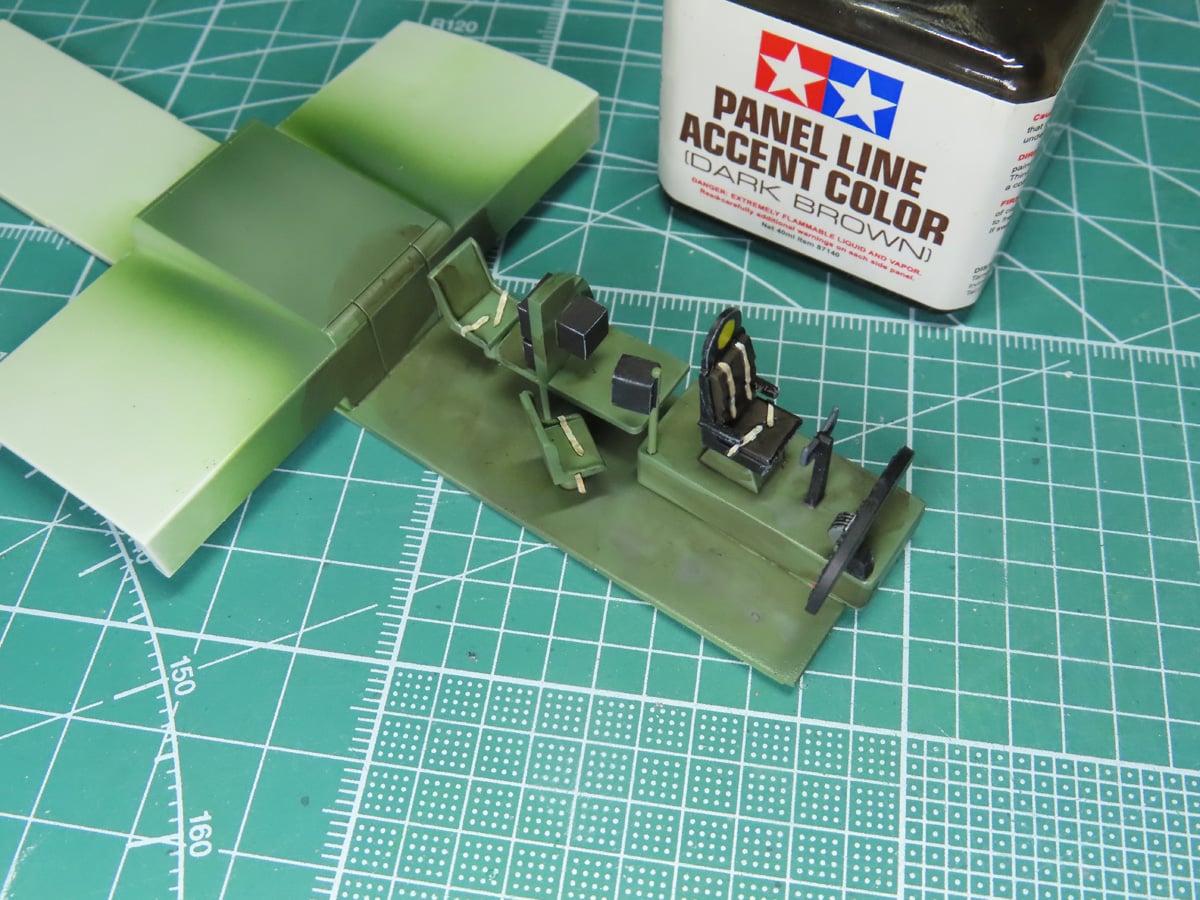
I covered the Interior Green parts with Tamiya Panel Line Accent Color Dark Brown and Gray for the black sections in the nose.
Once the wash had dried, I took a brush and dipped it in Tamiya Enamel Thinner. I removed a lot of the excess wash from around each of the rib sections. With the faded painting we added earlier, this wash really helps the model look well-used.
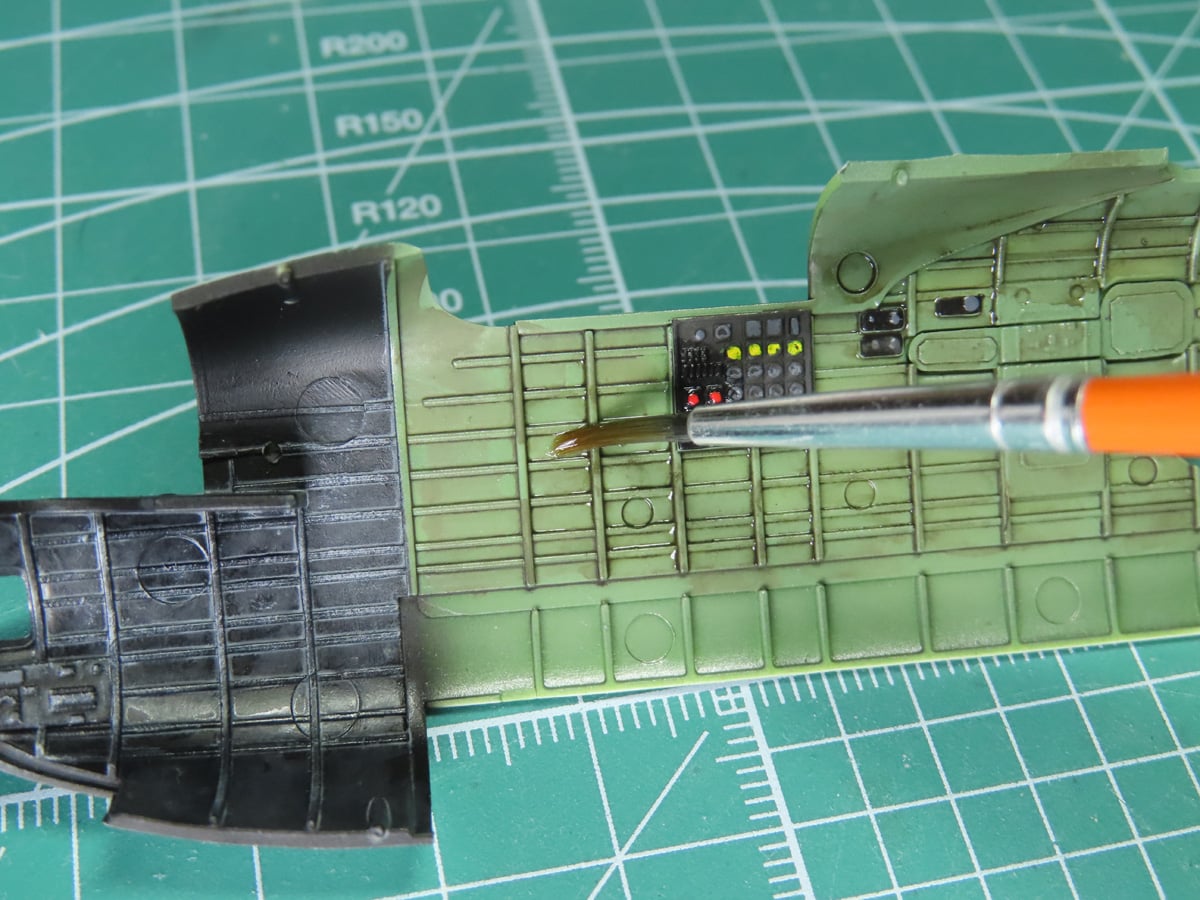
After the wash had dried again, I sprayed over everything in the cockpit with Mr Color C182 Flat Clear, and I was ready to glue the fuselage together.

Carefully glued on one side first, with Mr Cement SP. This is a faster-acting cement, and it fused the Revell styrene together quickly.
A lot of these details will never be seen again, and I admit I find that a bit frustrating. Some might see this as a waste of time, especially on a smaller scale model. But for me, I find it very fun and quite a relaxing process.
The other half of the fuselage went together quite well until I got to the tail section. You might recall that one side was warped, so I’m going to let the glue dry completely before I fix this section.
So far, I’m quite impressed with this model. There have been a few very minor setbacks with this build, but nothing that can’t easily be overcome, and the interior details look really great, especially for this scale.
I decided to purchase some window masks for this model. Given how thin the frames are on the clear parts, I figured it would be easier than trying to cut them out myself. I’ve already done that one 2 other Lancasters, and it’s a lot of work. Hopefully, those will arrive soon, and next time we can get to work on the wing sections.
The following pictures are from Lancaster FM 159 in Nanton Alberta.
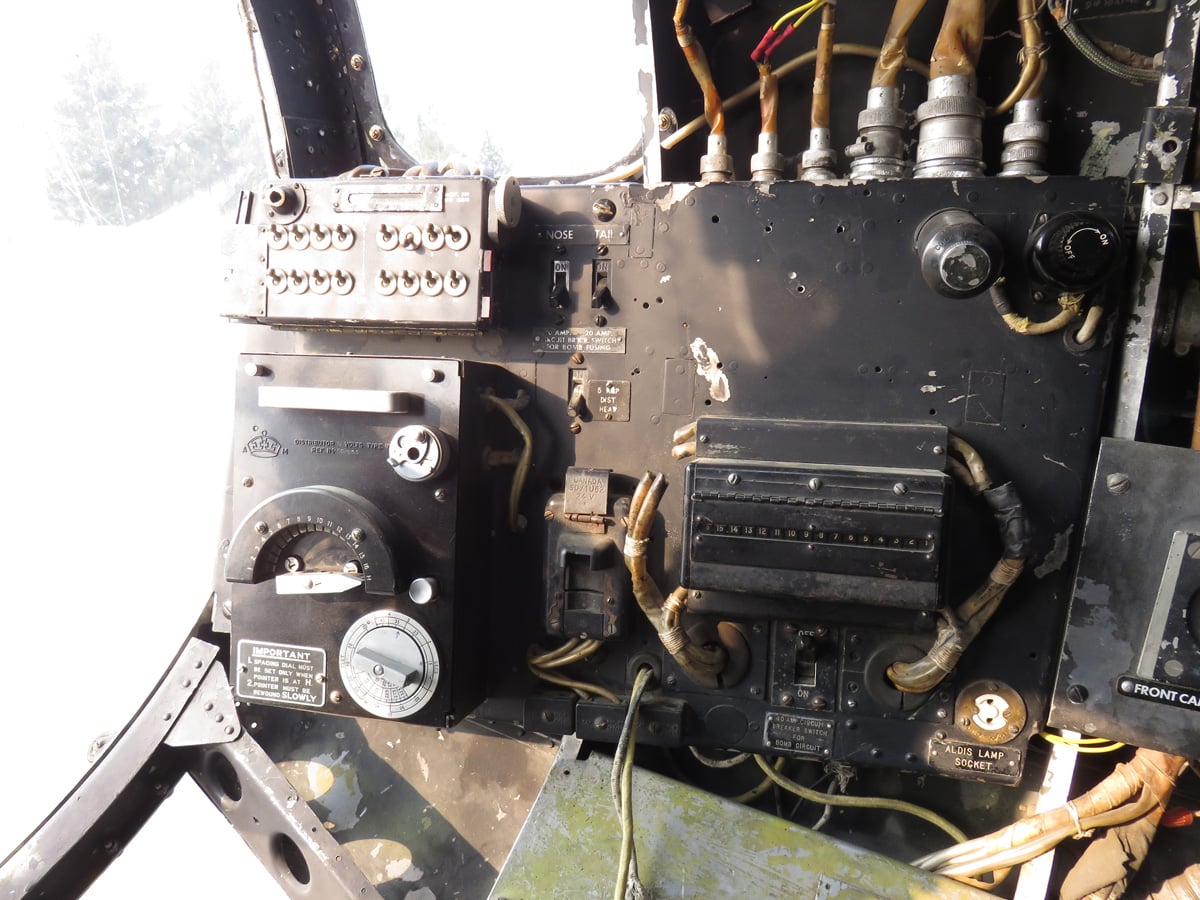
Starboard side of the Bomb Aimer’s section, with bomb controls.
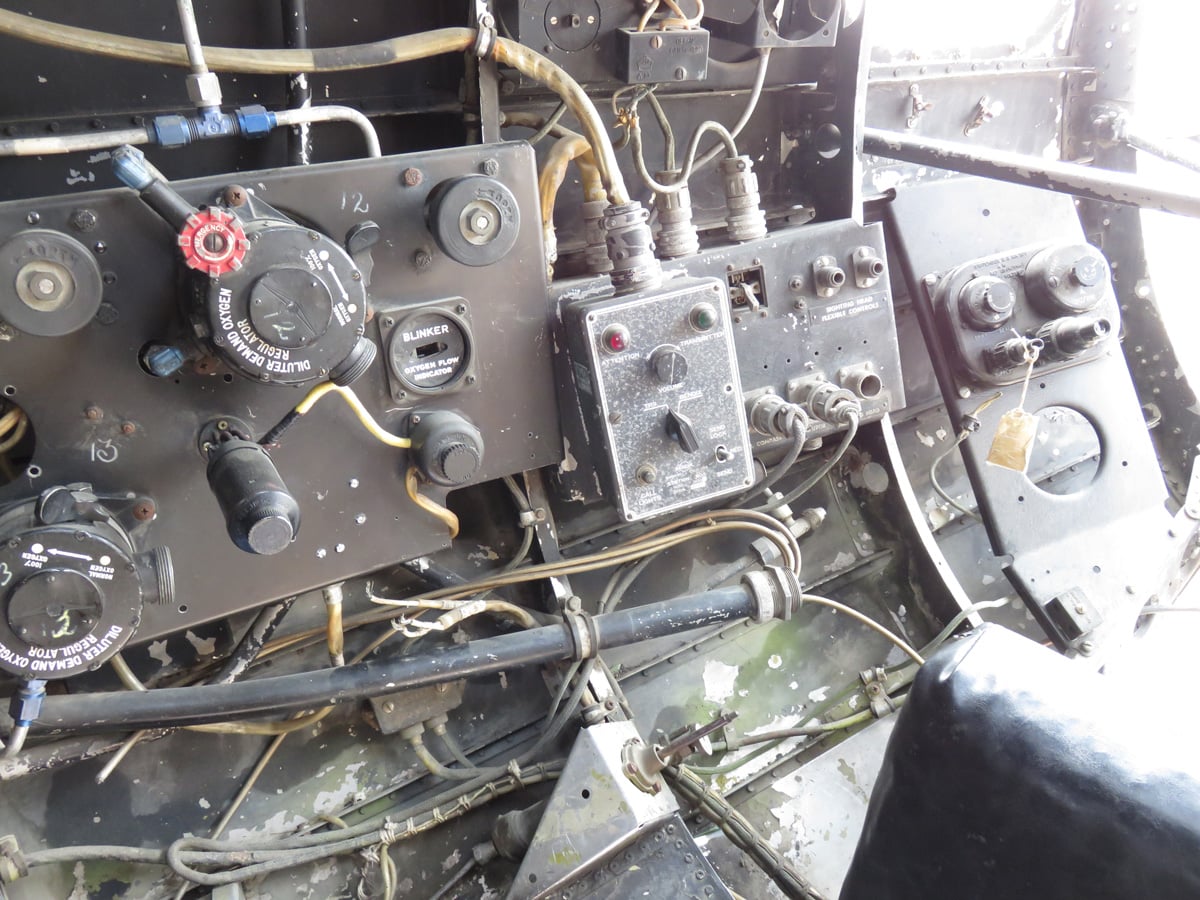
Starboard side with Radio and Oxygen controls.
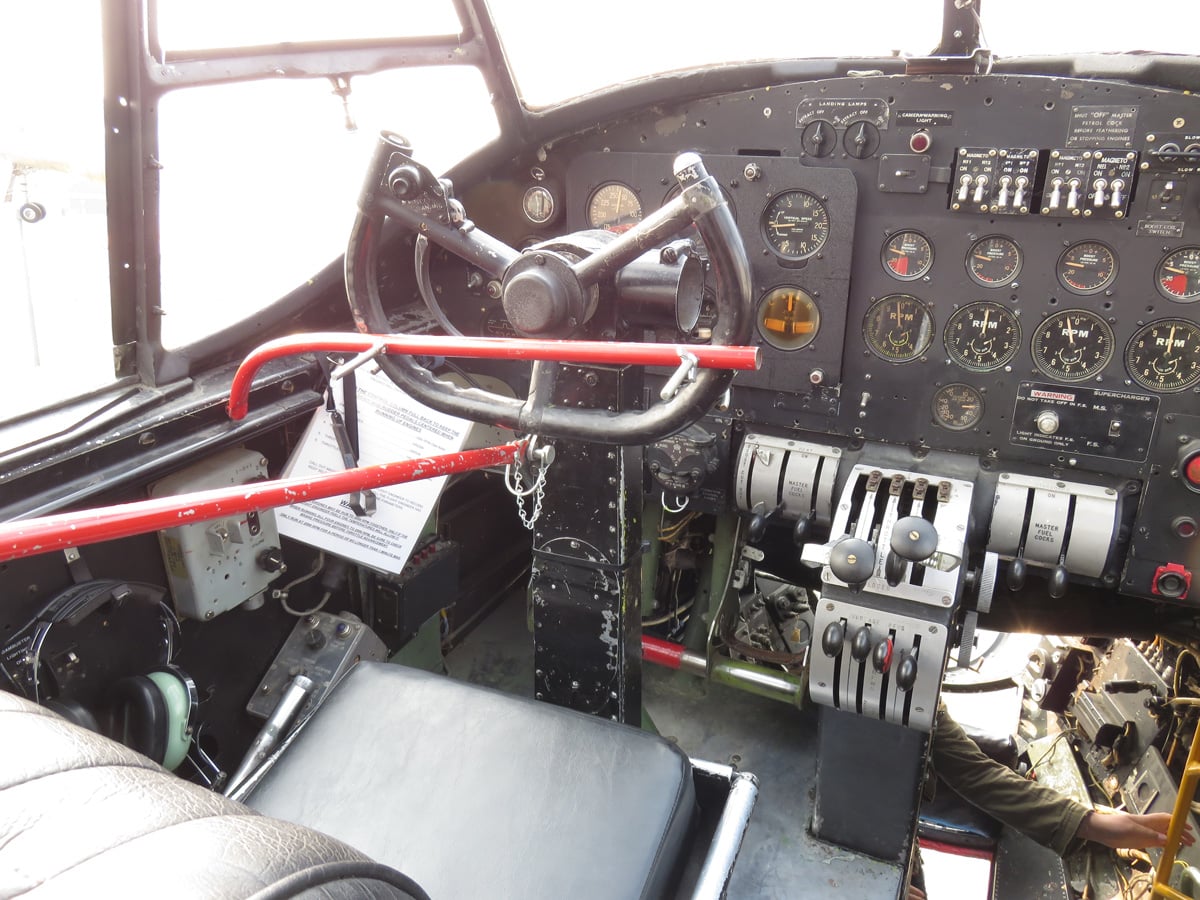
View from the pilot’s seat and instrument panel.
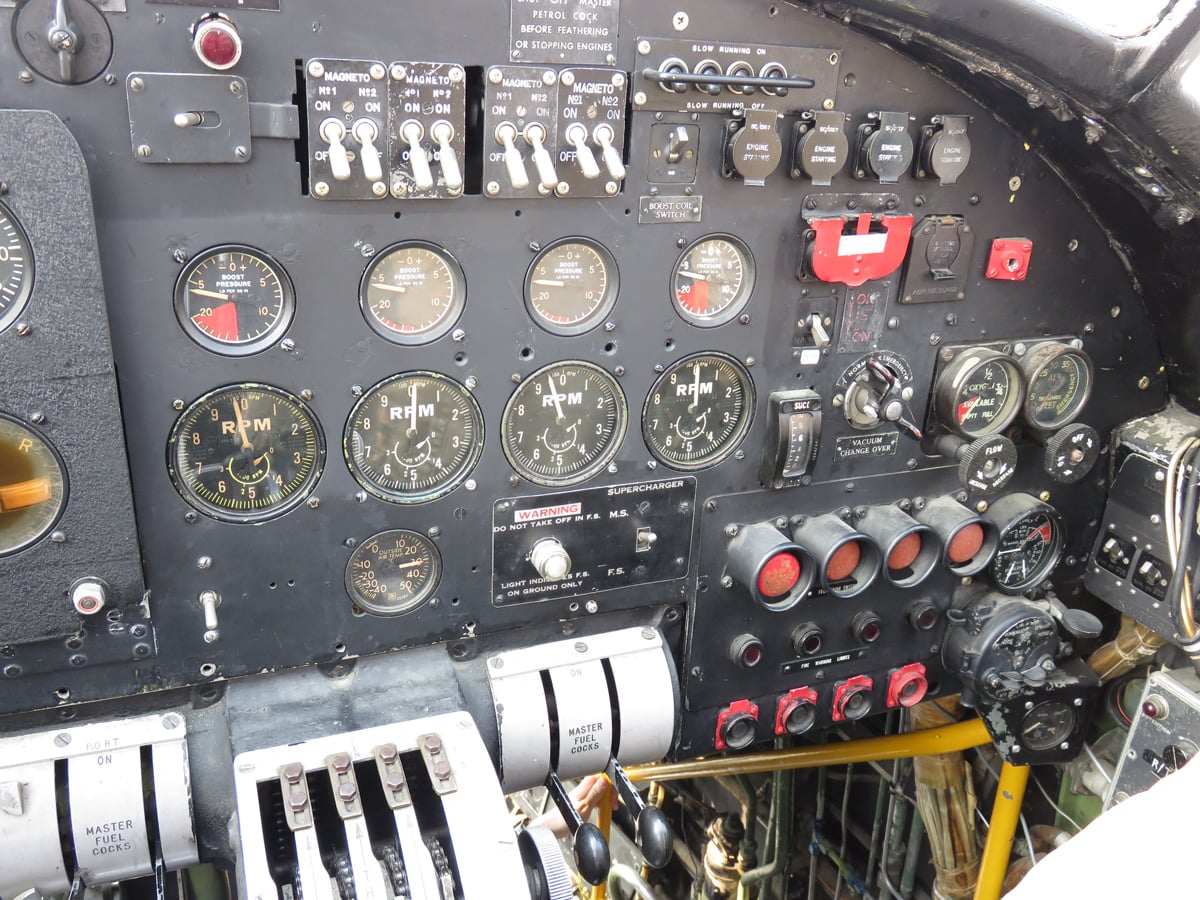
More details of the instrument panel.
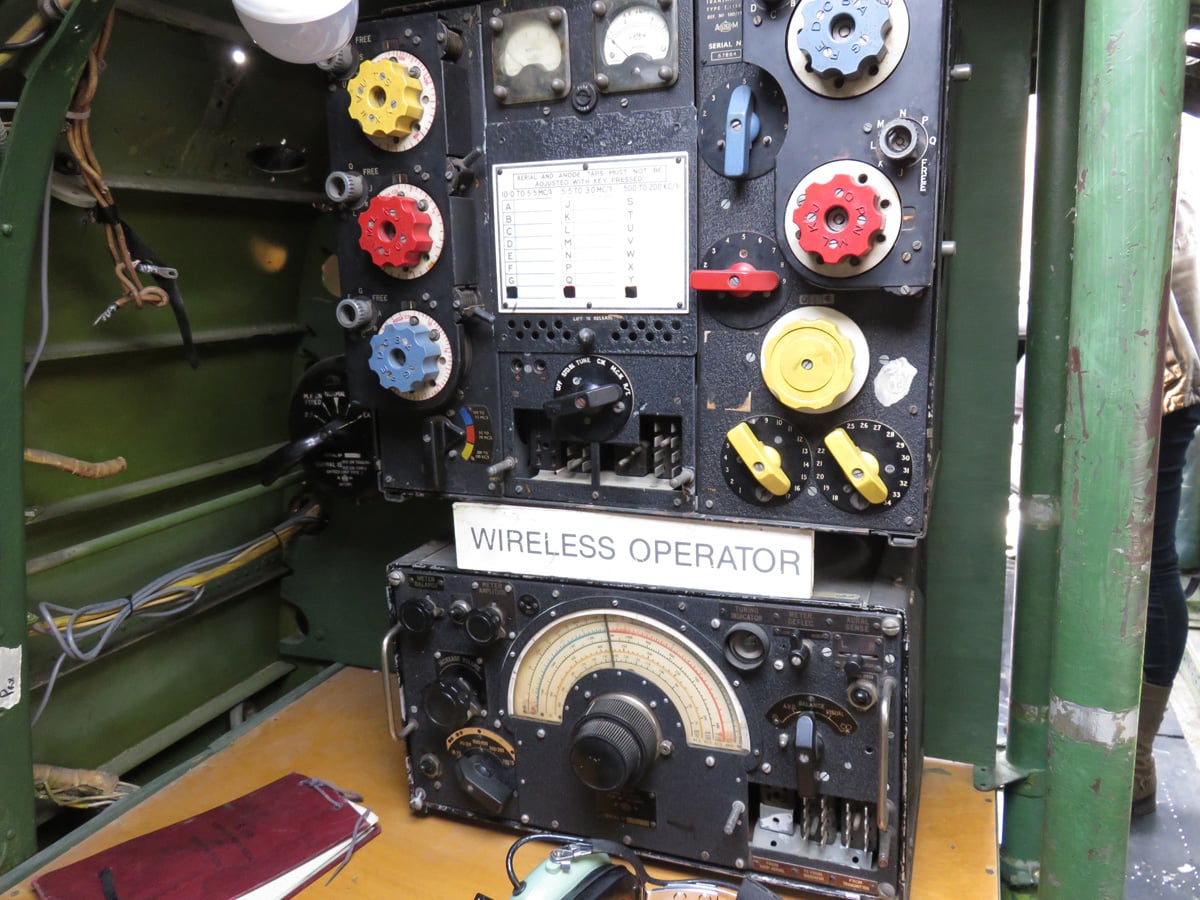
Forward view for the radio operator.
To be continued…
About the Author:
Jared Demes is a modeler from southern Alberta. He has been building models since he was 4 years old when his Dad first introduced him to the hobby. He has written for several magazines including, Fine Scale Modeler, Scale Aircraft Modeling, Phoenix Scale Models, and others. He has an interest in all modeling subjects, with a focus on WWII Japanese aircraft and Science Fiction.
Jared has won several IPMS awards for his modeling, and currently operates his YouTube channel rebelsatcloudnine, where he showcases model builds and product demonstrations.
Next Post:
Last Post: Part 1
Completed Images: