
WWII Bomber 1/72 Scale
This is the fifth part of the Revell Avro Lancaster Mk.I/III 1/72 Scale 04300
Well, the Eduard masks I’ve been waiting for have arrived (as well as a lovely Eduard 1/48 A6M Zero). And I immediately added these to the clear parts. The window frames Revell produced are very thin, and it was going to be difficult to mask these myself.
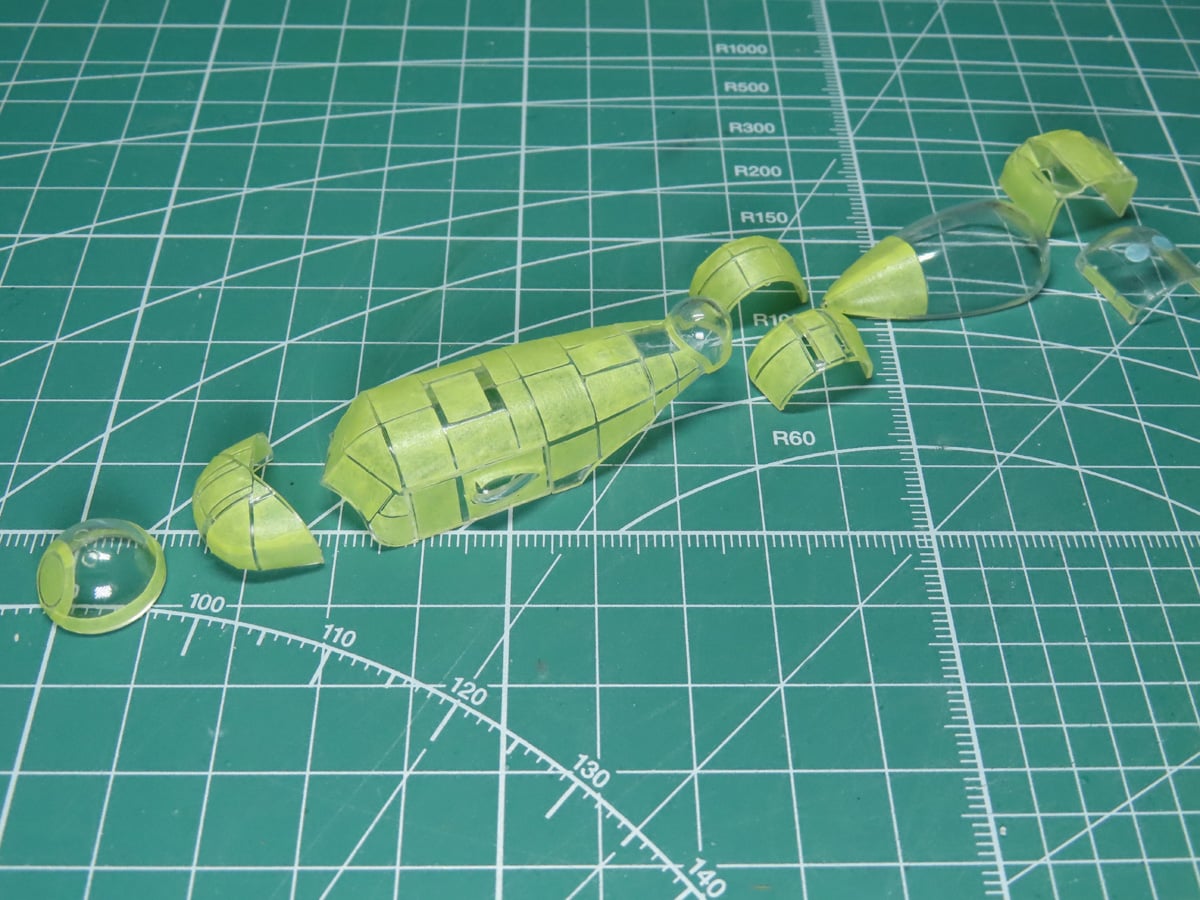
For the most part, the maskings fit quite well, and a few places would be covered further with some Mr Masking Sol Neo.
I added on several of the clear parts to the model, and I sprayed the window frames with a thin coating of Tamiya XF-1 Flat Black. This was sprayed in 3 light layers to avoid paint build up, and any thin paint running under the maskings.
Now that the clear parts have been painted, I can properly see just how thin those window frames are.
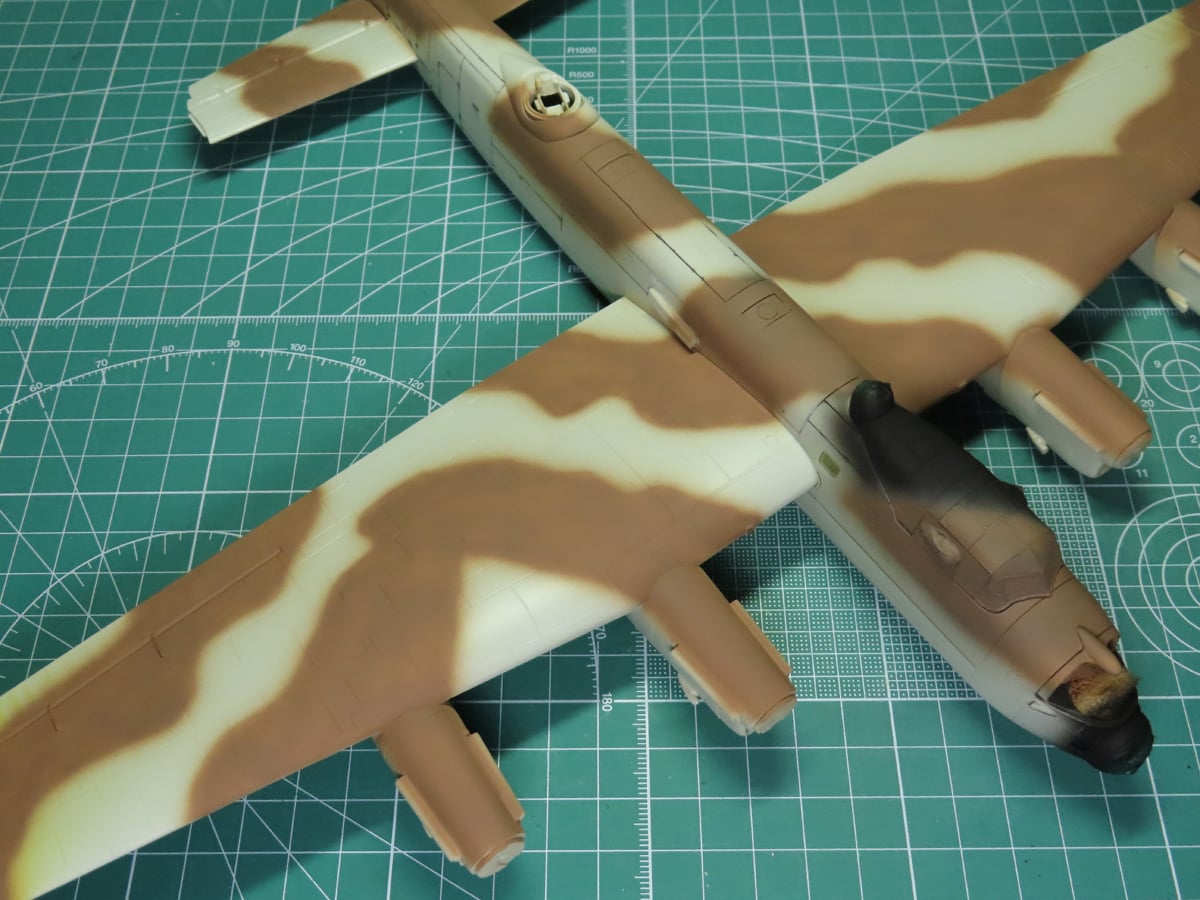
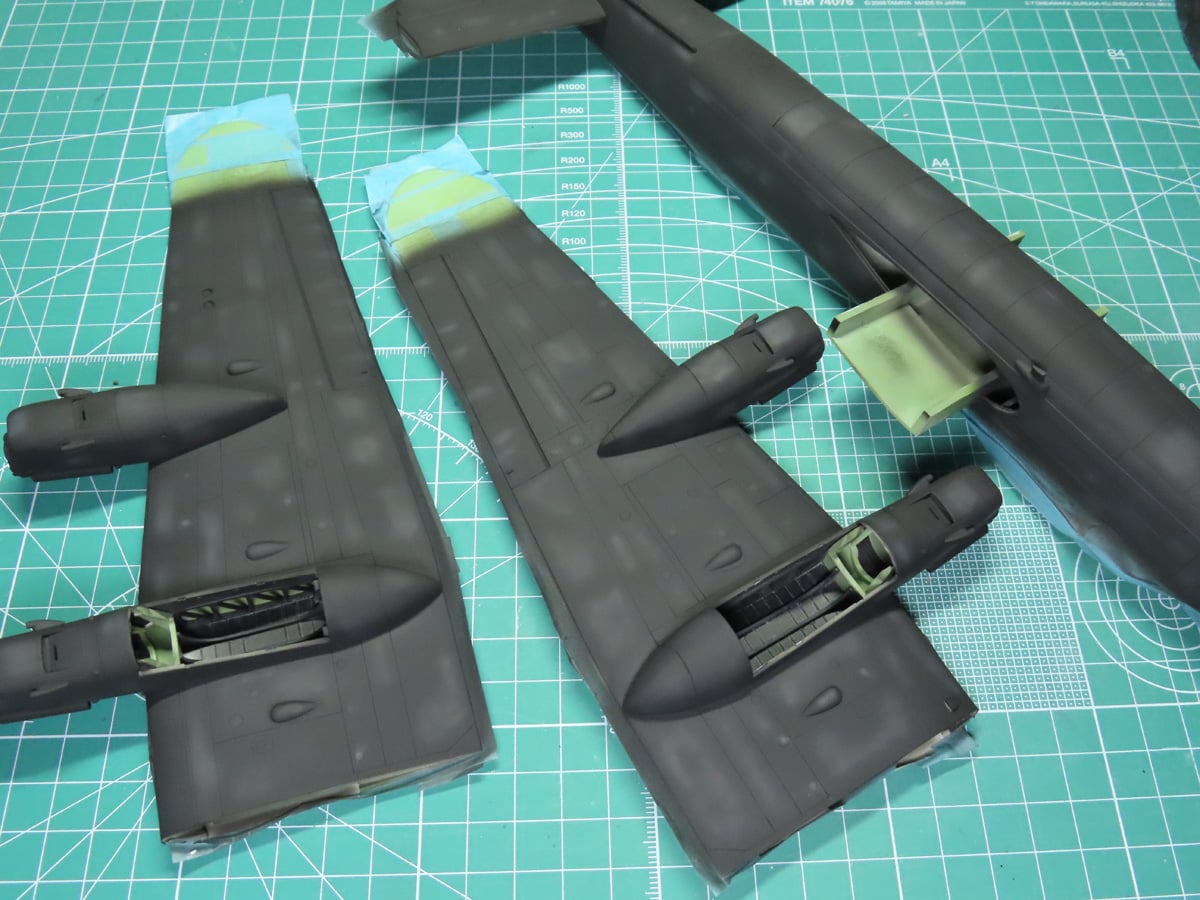
For this Lancaster, I wanted to layer on colors and create faded tones in the paint. To start off the Dark Earth, I first sprayed on a coating of Tamiya XF-52 Flat Earth.
Next, I sprayed random splotches of Tamiya XF-59 Desert Yellow, and XF-88 Dark Yellow 2. I chose colors that were lighter than the Flat Earth, as this would help create the faded effect.
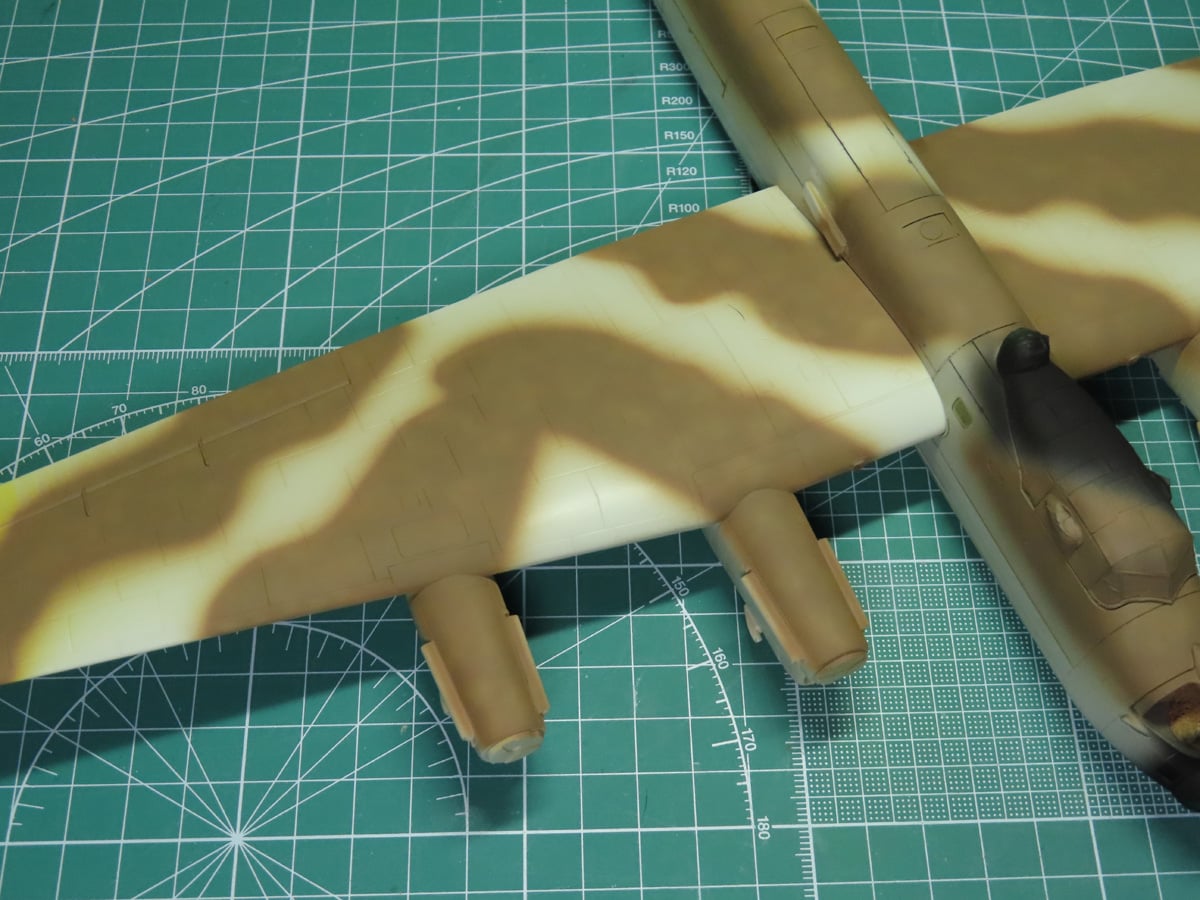
The Dark Earth I’m using is a custom paint that I made a few years ago, coincidentally it was for the last Lancaster that I built.
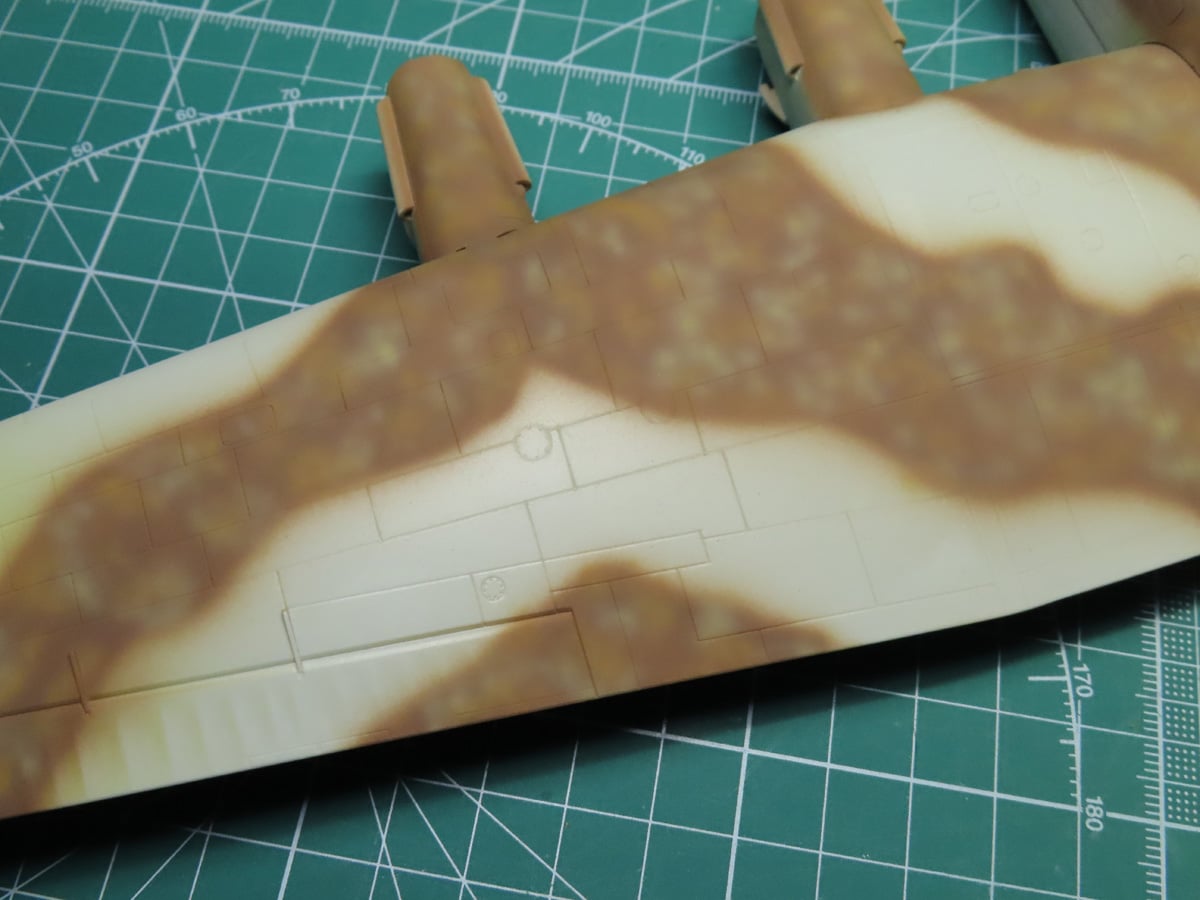
The paint is a combination of XF-49 Khaki and XF-72 Brown (JGSDF) at a ratio of 4-1. This Dark Earth was thinned quite a bit, and it was lightly layered onto the previous paints.
At this stage, it’s really easy to overdo it and paint on too thick a layer. It’s important to remember that the paint will go on thin, but as it dries, it will darken and provide the desired effect.
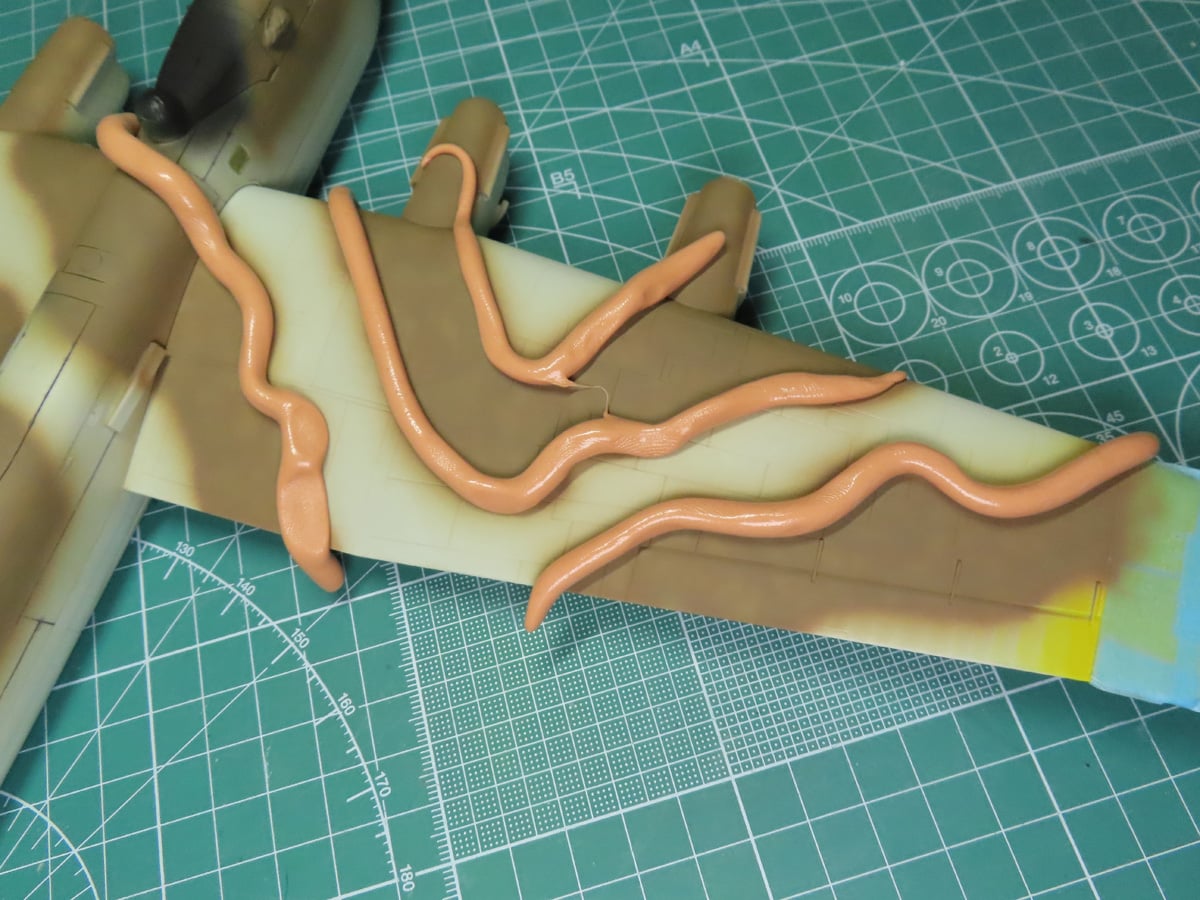
I’m going to be free handing the green, but this can be tricky. One method I’ve used is to use Silly Putty. This will create a nice barrier around the paint and help prevent over spray. Another nice thing about the Silly Putty is that it sticks well to the model and won’t lift up the paint or leave behind any oils. And you can reuse it many times.
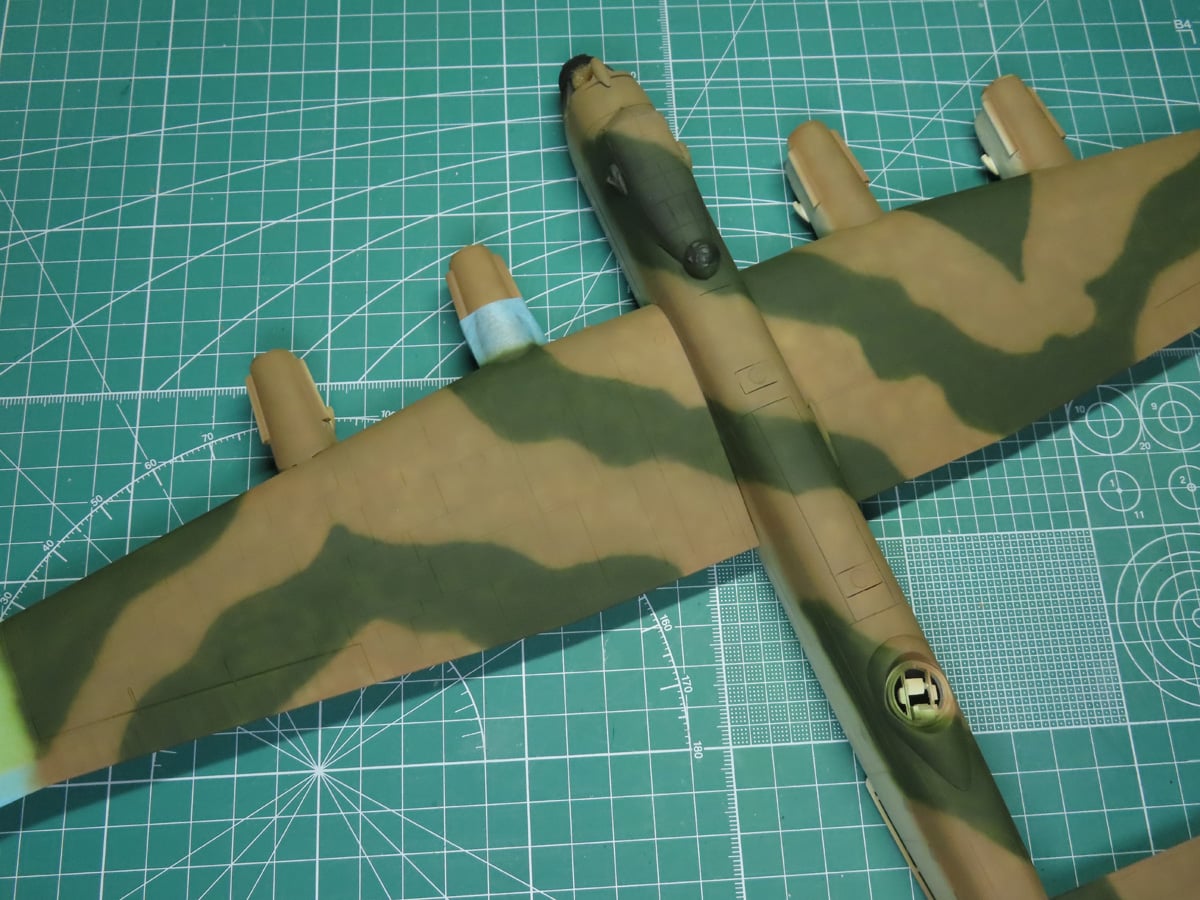
Just as before, I’m starting with a dark base layer; this time, I’m using XF-13 J.A. Green. The paint was thinned about 60-70% and sprayed at about 20 PSI. It took a bit of time to get everything covered, but I did find everything to be quite relaxing.

For the splotches, I decided to use XF-5 Flat Green and XF-4 Yellow Green for the faded sections. Unfortunately, this picture washes out the effect of the Flat Green, but it did help in creating the desired effect.
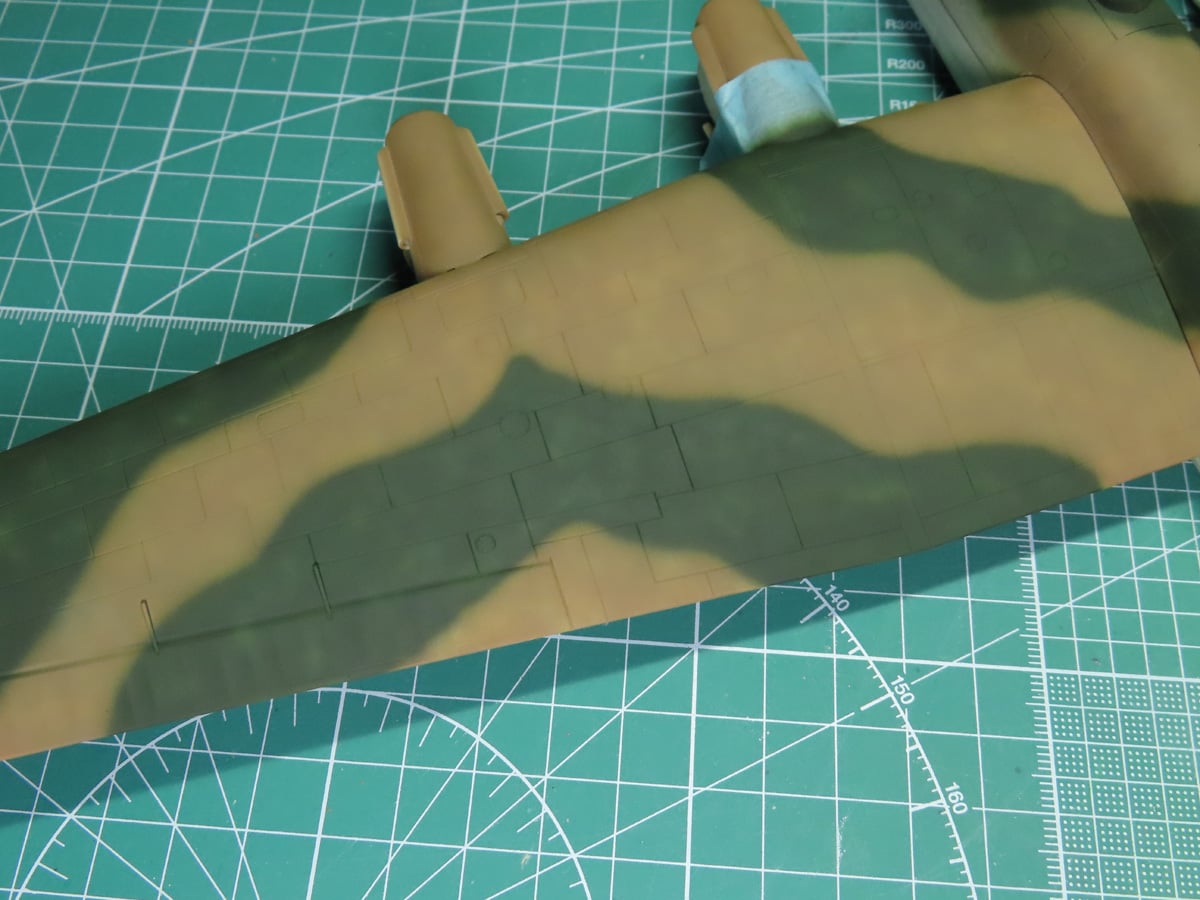
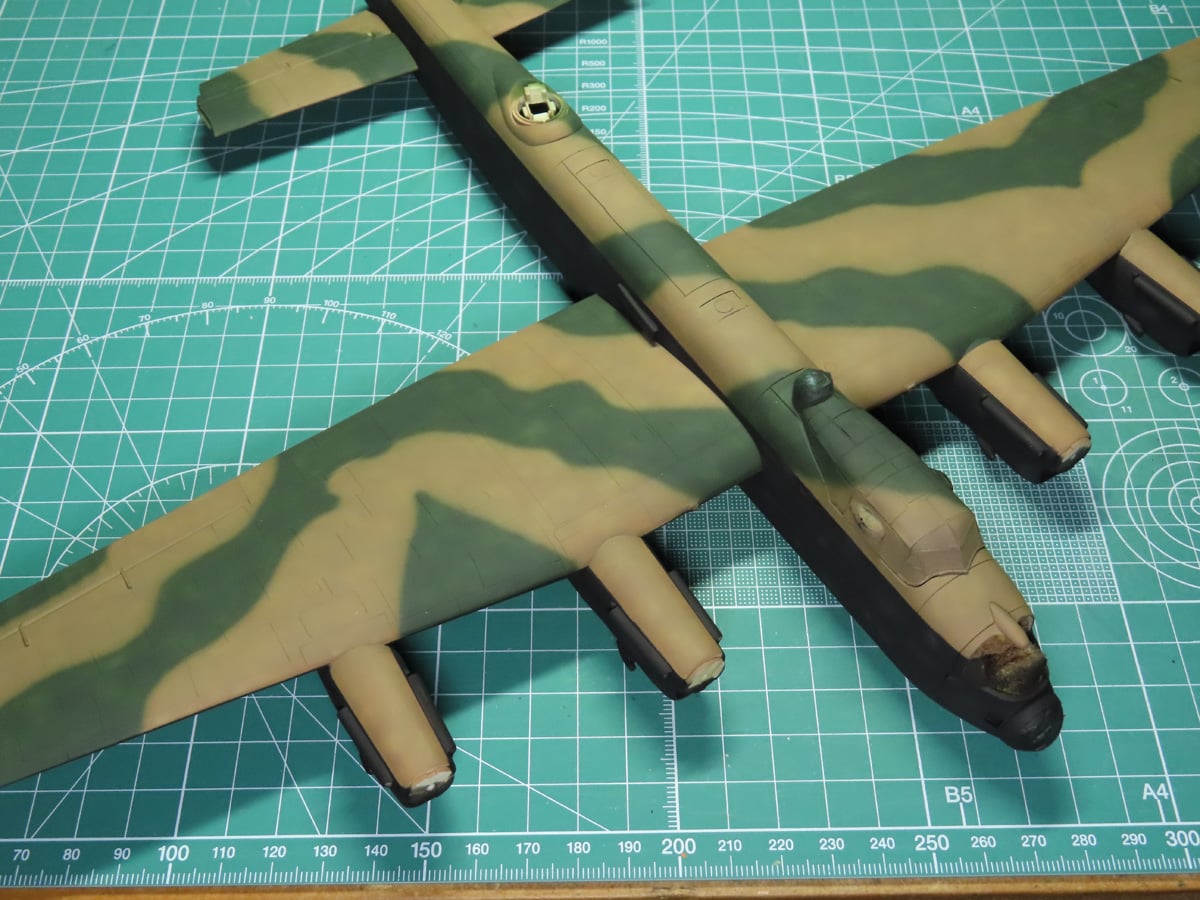
My RAF Dark Green is a mixture of XF-27 Black Green and XF- 26 Deep Green, at a ratio of 4-1. However, you could try a 50-50 mixture of these paints if you find my mixture to be too dark.
Just as before with the Dark Earth, I’ve thinned the paint quite a bit and slowly layered it onto the green surfaces. Taking extra care now to get any onto the Dark Earth. And you can see how nice the marbled tones are with all of these colors.
“But wait, Tamiya already makes a Dark Green XF-81, why didn’t you just use that paint?”
And you are absolutely correct, but I personally find that color to be a bit too dark and olive when painted next to the Dark Earth. Tamiya designed that paint with the release of their 1/32 Spitfire MK IXc, and I think it complements the XF-82 wonderfully. It’s just a matter of personal preference, and in this case, I wanted a brighter green for this Lancaster.
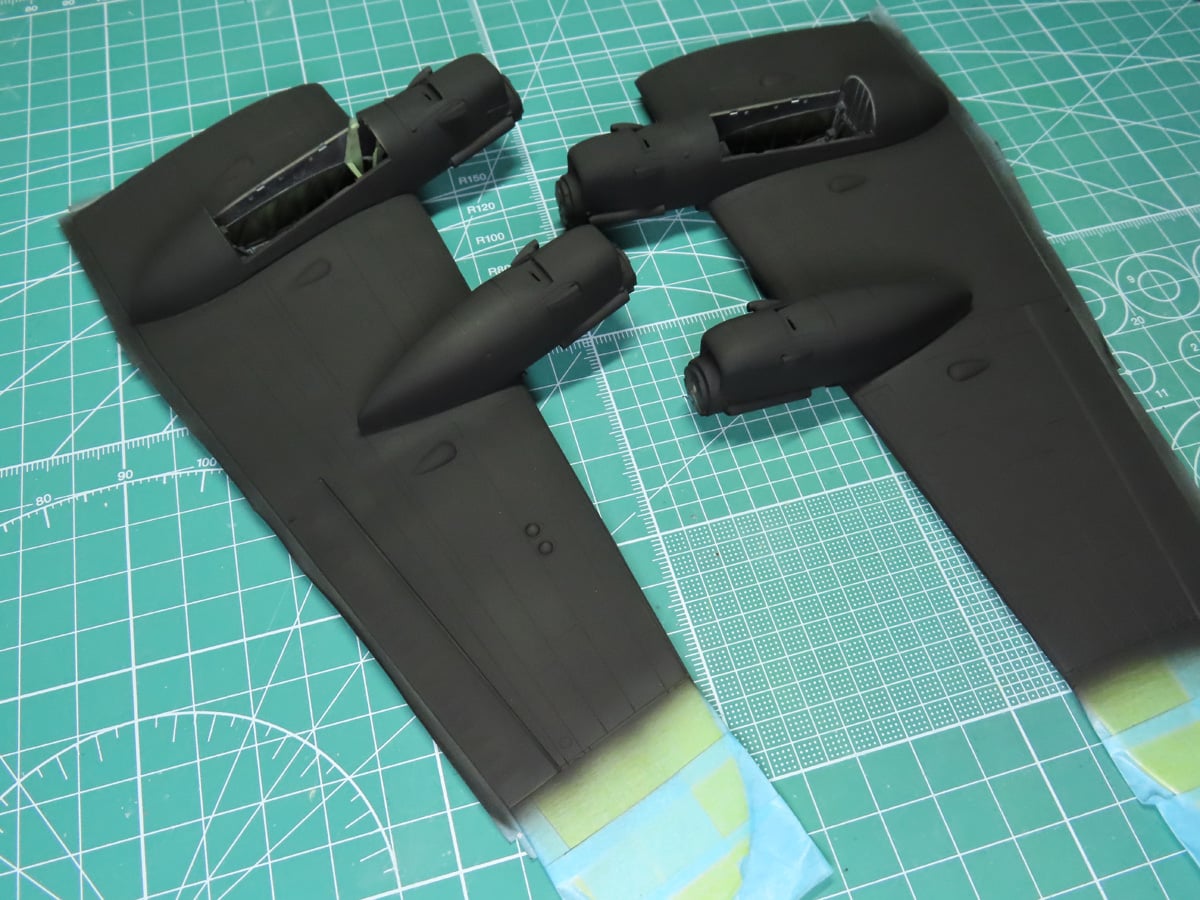
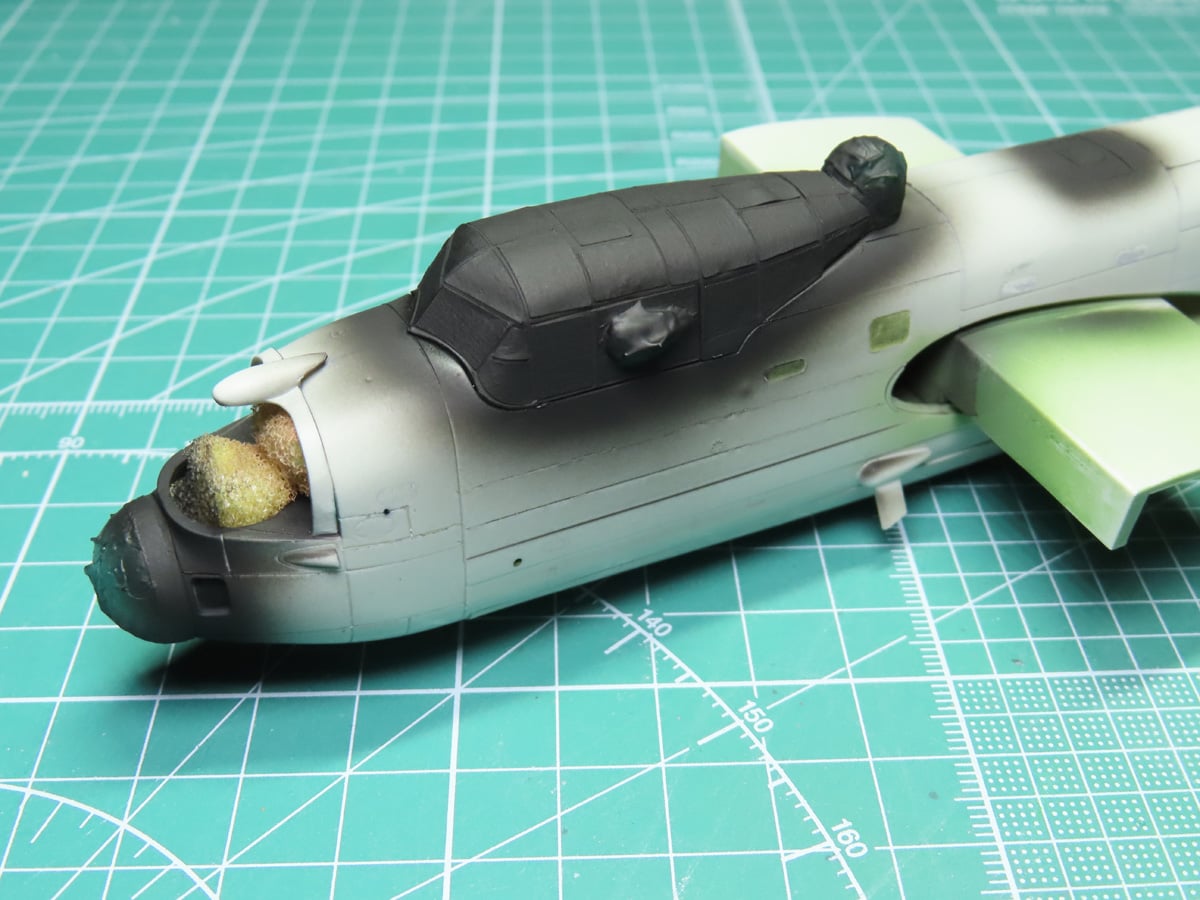
Fading the black was going to be a unique challenge. I started off by masking the brown and green, and then spraying a base coating of XF-1 Flat Black.
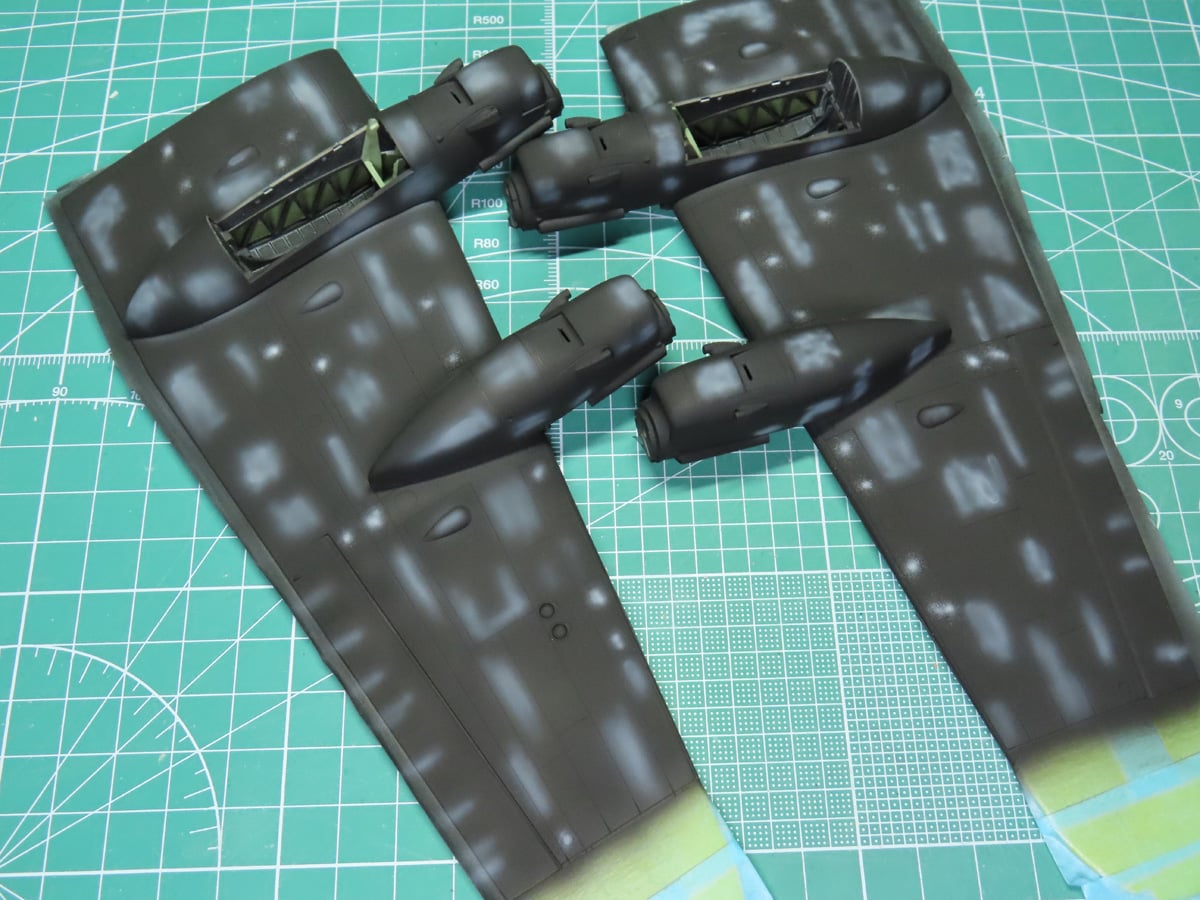
I used XF-53 Neutral Gray for the larger faded patches. And for the smaller sections, I sprayed small dots of XF-19 Sky Grey.
To create a faded black, I tested out a few paint mixtures, and I decided to mix XF-1 Flat Black with XF-63 German Gray at a 2-1 ratio.
The paint was thinned heavily and again lightly painted on, and I’m very pleased with this effect as it has the faded tone I wanted, and it’s not a stark and bold black.
The fading here is minimal compared to the brown and green sections, and this is because the black will be weathered further after the decals have been added.
Painting on all of these colors was something I was really looking forward to. When you get the paint thinned and the pressure just right, painting becomes a relaxing process.
These Lancasters spent a lot of time in the sun waiting for their nighttime missions, so it’s not uncommon to see faded aircraft. As a result, this can really distort the paint and how we perceive it.
There was a time when I wanted my models to have the exact RAF color, or RLM. I wanted all of my subjects to be color correct. But over the years, I’ve learned and seen how paint can fade and become distorted over time, and so these days I try to find colors that are just close. If you need an example, just search for Olive Drab aircraft. Sometimes it’s black, sometimes it’s very green, and depending on the location, it can bleach to a very pale color. It’s such an inconsistent colour that matching it can be incredibly frustrating.
I provided a list of the colors that I used, and if you’d like to try them out, that’s great. Or if you have your own mixture or preferred colors that’s great too. These days, I try not to stress myself out too much with colors, and just get something close that I really like.
To be continued…
About the Author:
Jared Demes is a modeler from southern Alberta. He has been building models since he was 4 years old when his Dad first introduced him to the hobby. He has written for several magazines including, Fine Scale Modeler, Scale Aircraft Modeling, Phoenix Scale Models, and others. He has an interest in all modeling subjects, with a focus on WWII Japanese aircraft and Science Fiction.
Jared has won several IPMS awards for his modeling, and currently operates his YouTube channel rebelsatcloudnine, where he showcases model builds and product demonstrations.