
WWII Bomber 1/72 Scale – Decals
This is the sixth part of the Revell Avro Lancaster Mk.I/III 1/72 Scale 04300
One of my favorite stages in modeling is adding the decals. I know that I’m in a minority with this opinion, but I find placing the decals onto the model to be a very relaxing and satisfying process. And it’s where the model really comes together.
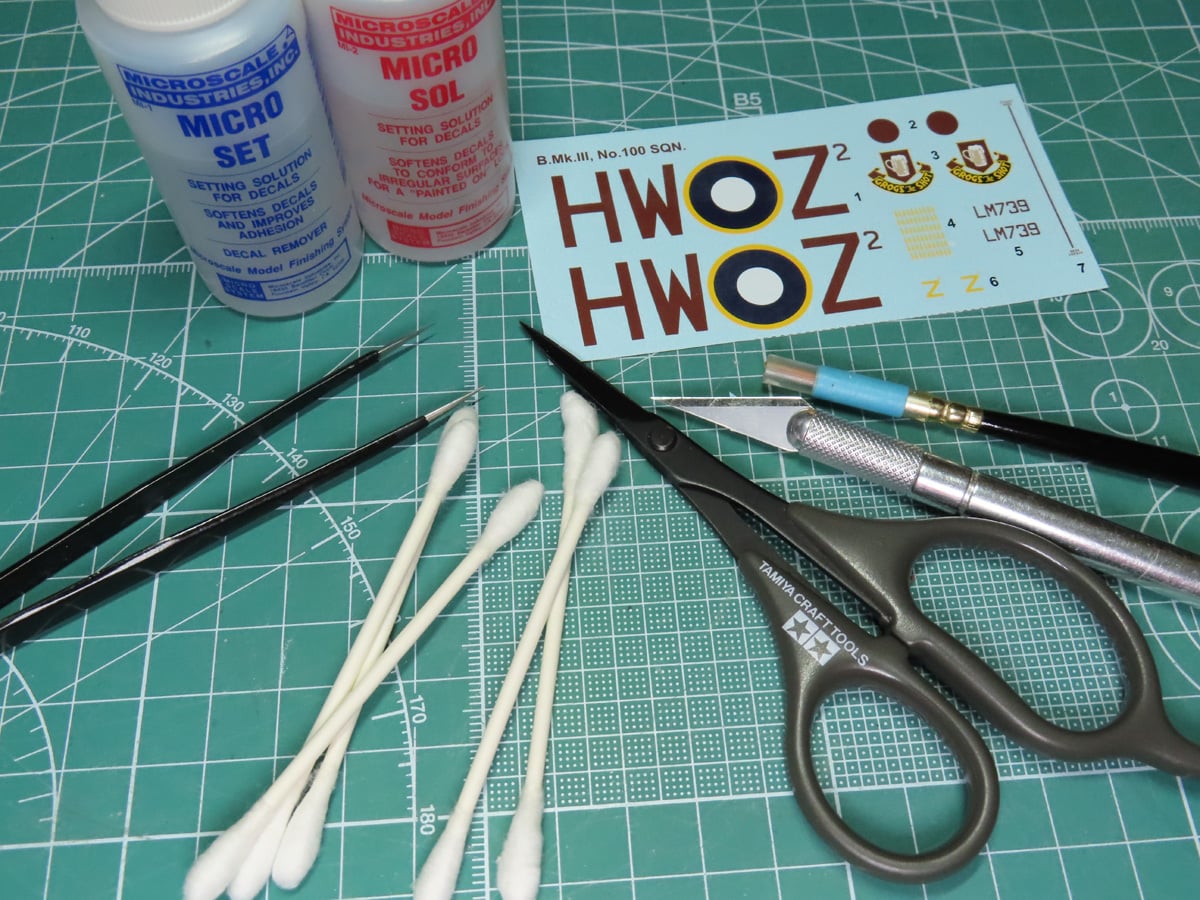
I want to go through some of the issues I had while decaling this Lancaster, as well as show you how I fixed them. I started by grabbing my decal solvents, some cotton swabs, and my pointed tweezers. I also grabbed my Tamiya Decal Scissors 74031. These scissors make cutting around and trimming close to the decals a lot easier than using my hobby knife.
Lastly, I grabbed my dedicated decal brush. It’s just the brush that came with an Airfix Zero starter set from a few years ago. But I only use it for decal solvents and clean water.

I first sprayed the entire Lancaster with a good, clear coat. I used Mr Color C46 Clear as this gloss is lacquer and will dry fast and very smooth.
The gloss coat will help with the decals’ adhesion to the surface, and it should help prevent any silvering that might occur.
I’m going to be placing the large roundels on the top of the wings. I’ve soaked the decals in water for about 10 seconds, and then I placed them onto a tissue to rest until the decal has separated from the paper backing.
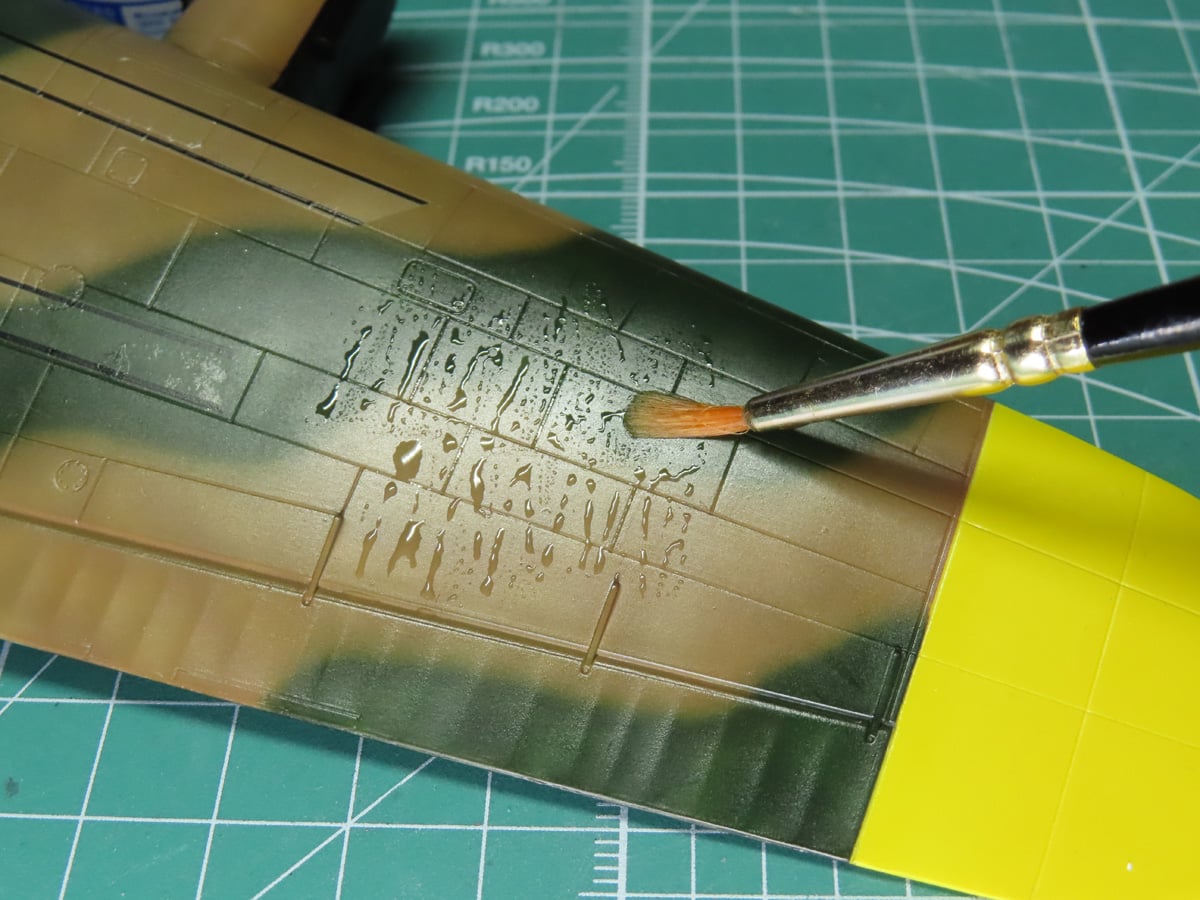
I brushed a generous amount of Micro Set MI-1 onto the model where I wanted the decal to be placed. The Micro set will help the decal adhere much better to the model’s surface. It will also soften the decal slightly, allowing it to conform more to the surface details. This is especially helpful with the raised panel sections that run along the fuselage.
I slid the decal from the backing onto the wing. The Micro Set acts like glue, so it can immediately limit the decal’s movement and placement. If this happens, just dip your brush in some water and spread it around the edges, and if you can, underneath the decal. This will help loosen the Micro Set, allowing you to move the decal in the correct position.
Once the decal is in place, you can add some more Micro Set, especially around the edges of the decal.
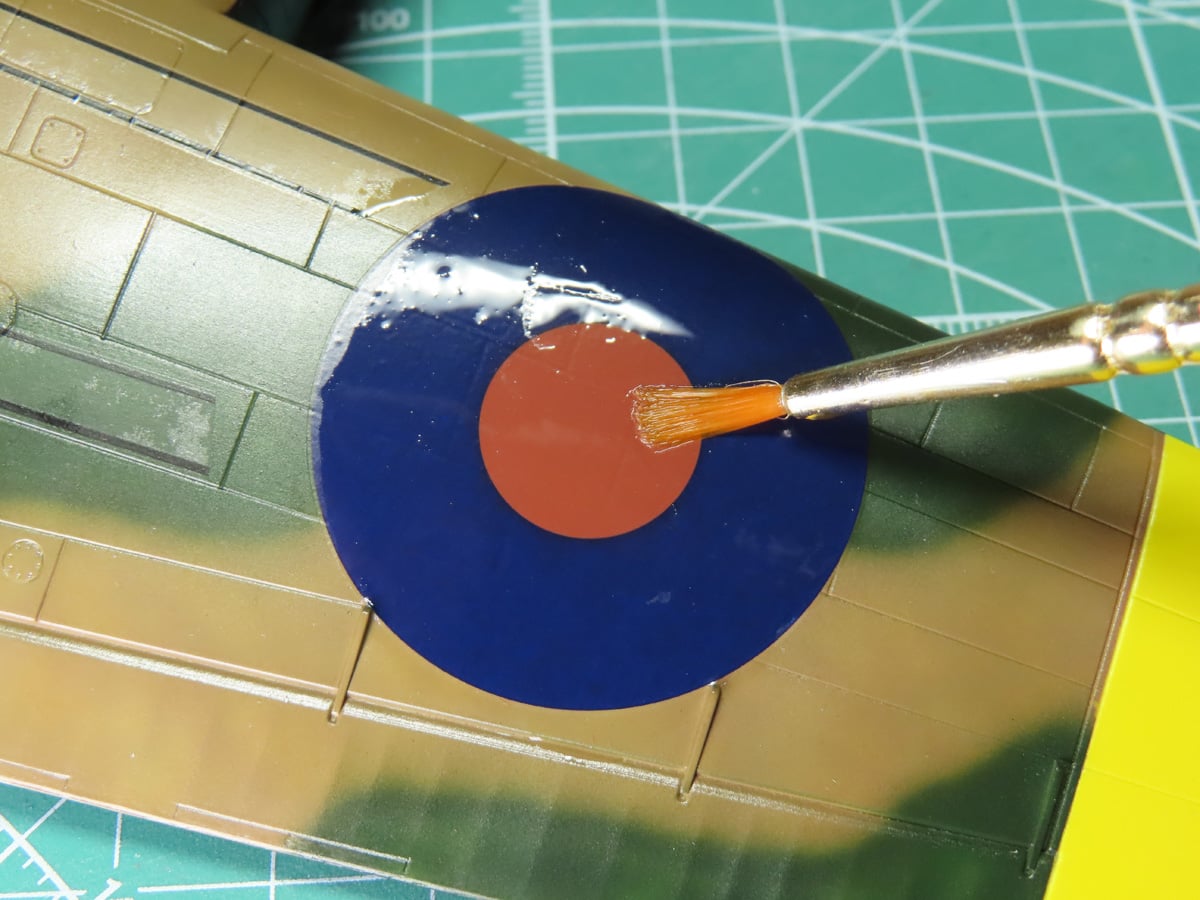
In this picture, I’ve left the decal to react to the Micro Set for about 5-10 minutes. I’ve taken its companion product, Micro Sol MI-2, the red bottle and applied a very generous coating around the decal.
Micro Sol is an aggressive product that will soften and melt the decal. As it dries, it will conform to the surface, giving the decal a more painted-on effect. It’s very important at this stage to be careful not to touch the decal, as in its softened state it will be delicate and easily ruined.
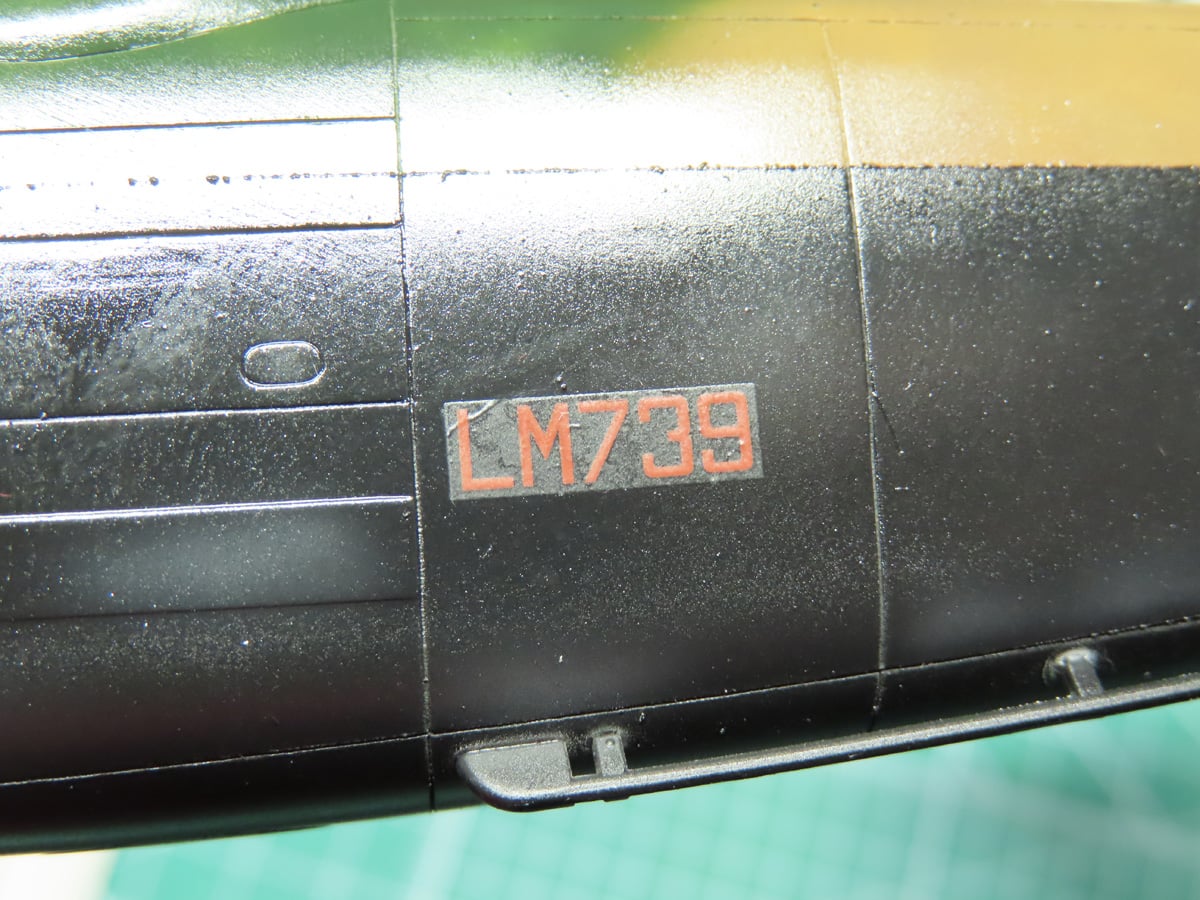
Here on the side of the fuselage, you can see a decal that has silvered. Silvering is when air gets trapped inside the decal film and becomes visible. This is a very frustrating thing to have happen, as it will become more obvious when a final flat coat is sprayed over the model.
But doesn’t the gloss coat prevent silvering?
Yes, it can help prevent a lot of silvering, but silvering can also happen simply because of the brand of decals. Decals can be very inconsistent; one day they work perfectly, and other times you’ll have a hard time getting the solvents to do anything at all. A lot of it comes down to the manufacturer, but it never hurts to do all you can to make the process easier on yourself.
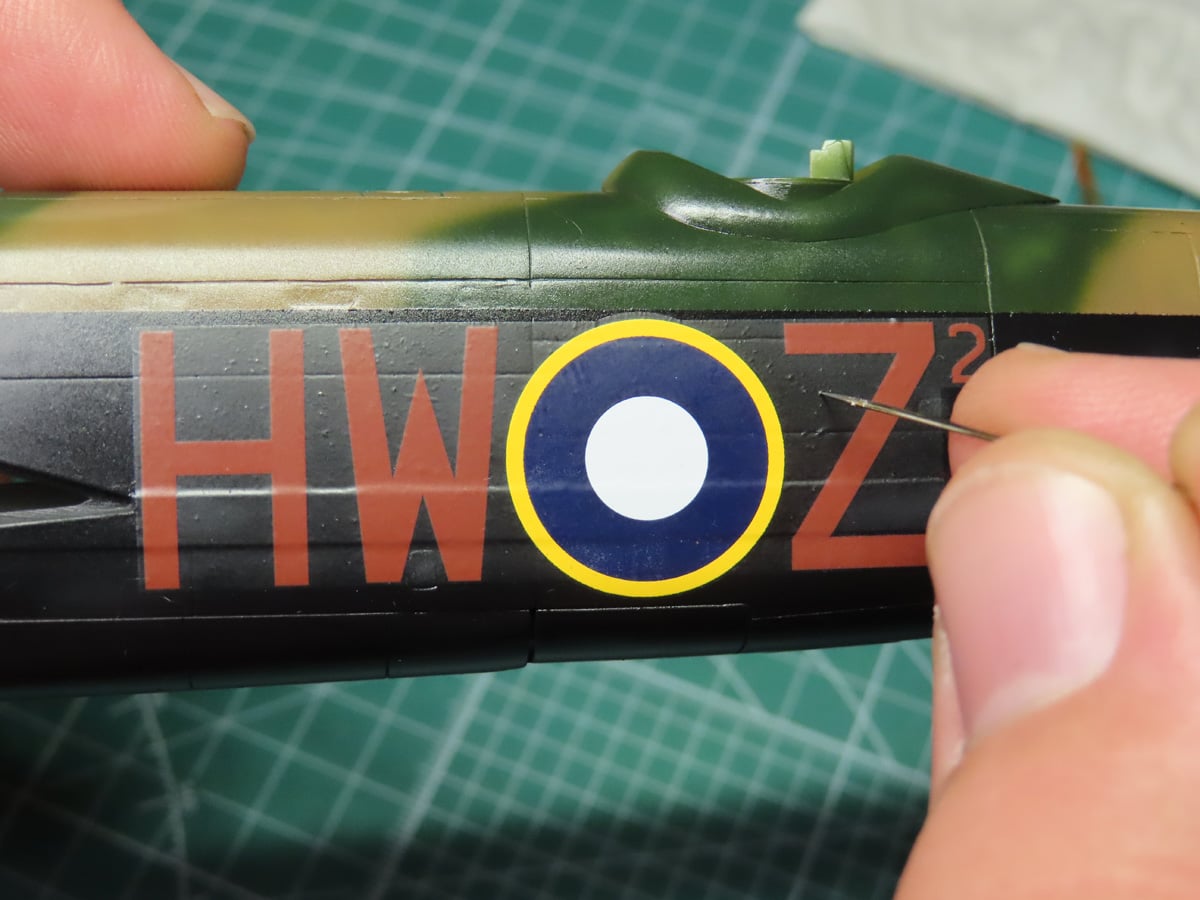
The silvering along the fuselage is a bit more obvious against the black sections. To solve this issue, I’m going to add another generous coating of Micro Sol. But first, I’m taking a shape sewing needle, and I’m carefully stabbing the clear sections of the decal.
You don’t need to press hard, as the decal film isn’t that thick. But these holes will allow the trapped air to escape, and the Micro Sol to fill underneath the decal.
I’ve added a second coating of the Micro Sol, and you can see how quickly the solution is getting into the decal. You can also see how the decal has become wrinkled, and believe it or not, this is a normal part of the process.
Micro Sol can usually cause decals to wrinkle as it melts the decal. Don’t panic, and DON’T add on more Micro Sol. As the solvent dries, it will gently level out the decal and return it to its former glory.
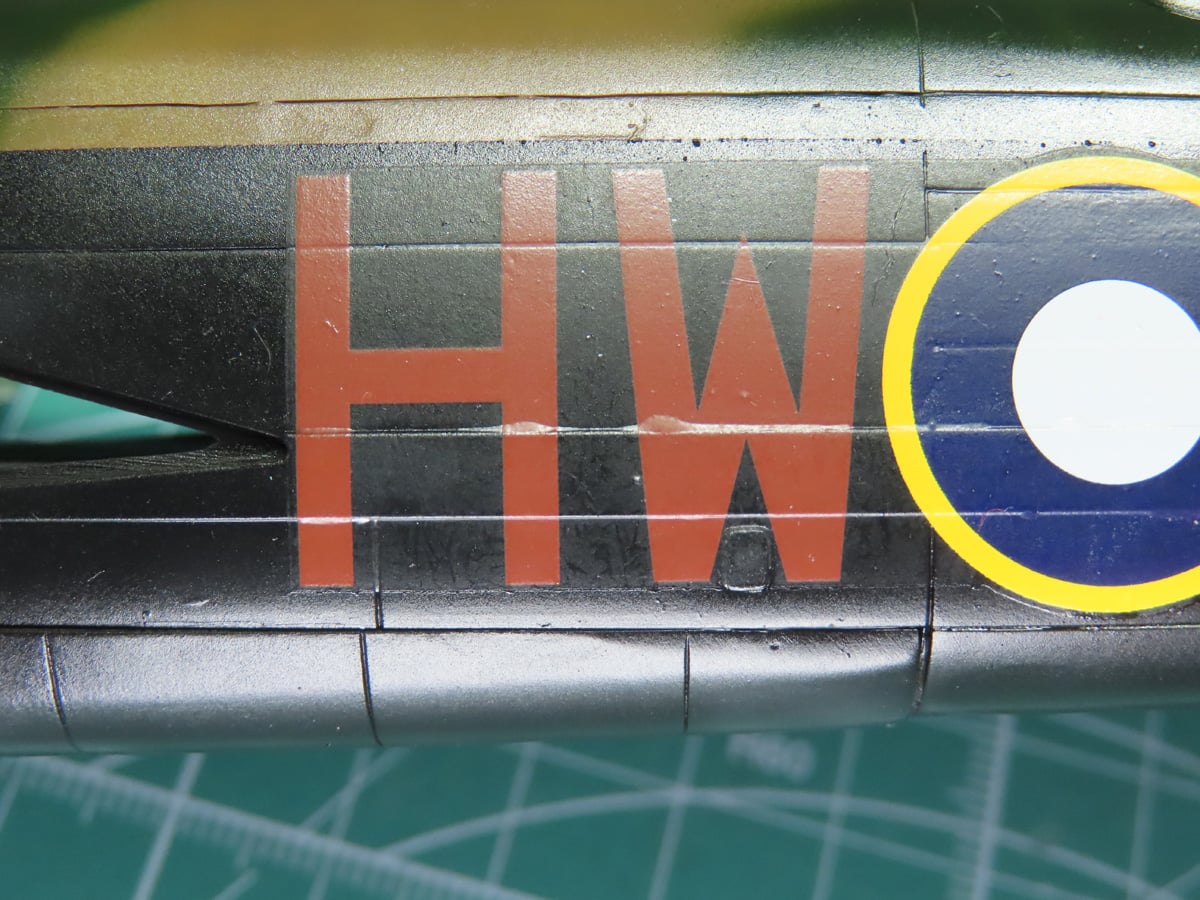
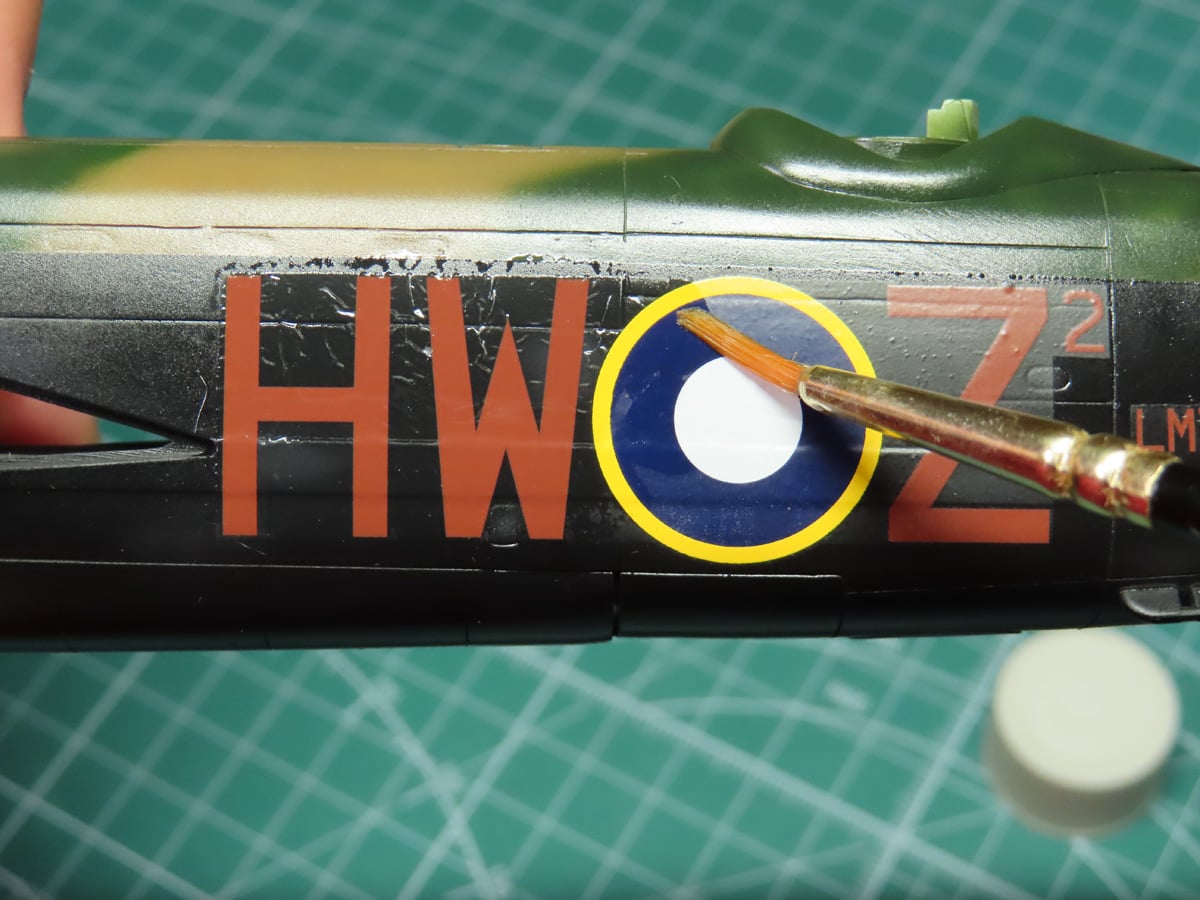
As the decals are drying, you can see how well they are conforming to the surface and the recessed panel lines. However, on the H and W, there is some trapped air that has caused bubbles to form.
Just as before with the silvering, I’m going to use my sewing needle and poke holes into these bubbles. Then I’ll add on a bit more of the Micro Set, but only on the bubbles, as the rest of the decal doesn’t need to be recoated.
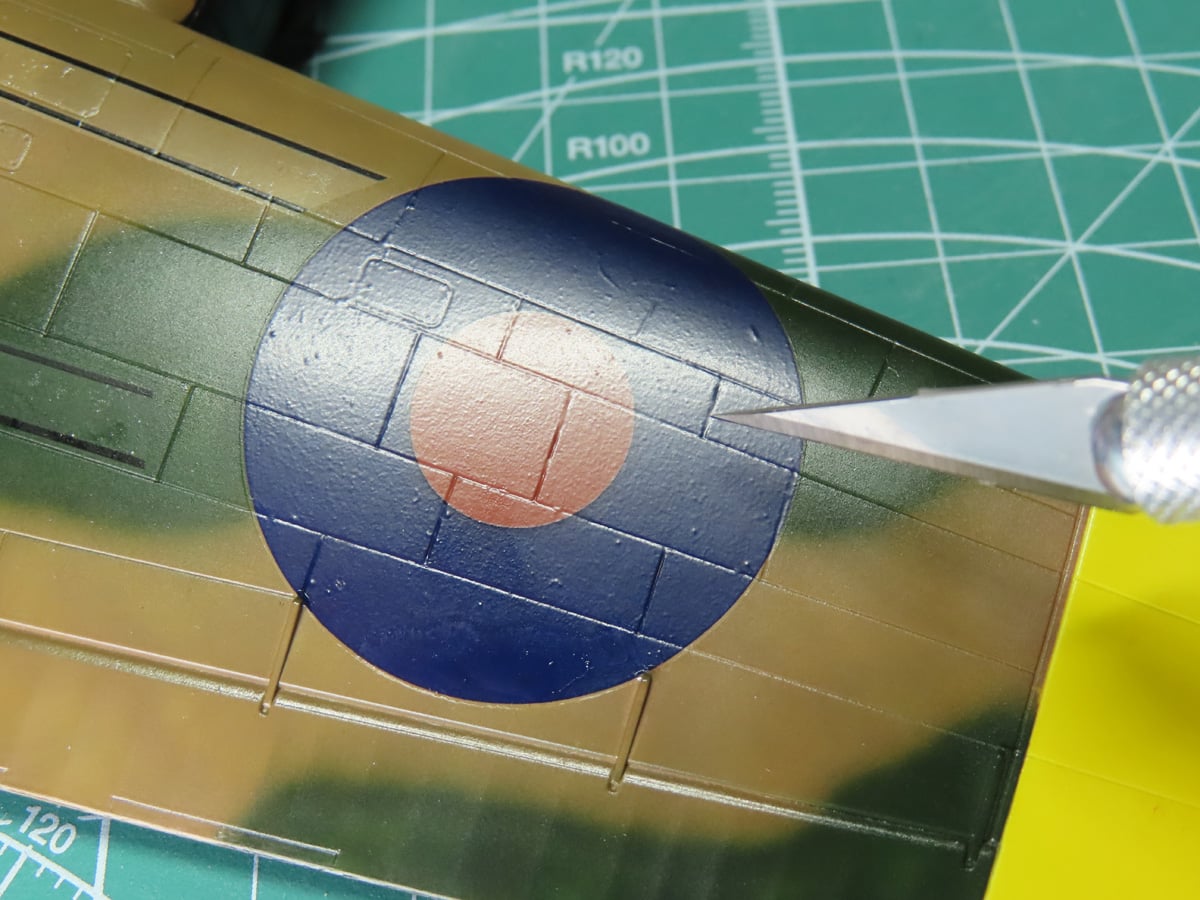
If you are feeling ambitious and want to add to the effect of the decals, you can take a new and very sharp hobby knife. In this case, I’m using an Excel #11 Blade. And following along the panel line, I gently score into the decal while they are softened and drying.
Because the blade is very sharp not much pressure, or any, needs to be applied. I just kept a steady hand along the panel line. This will help out later on when a panel wash is added to the model. Once I have all the panel lines cut out, I’ll add on another coat of Micro Sol, which will help the decal edges conform around the panel lines.

When the Micro Set has dried completely, I’ll seal in the decals with an acrylic gloss coat like Tamiya X-22. I prefer to use Acrylic glosses over decals, as some Lacquers can be too aggressive and melt the decals, and ruin them.
One issue I ran into was on the wings. The black walkway lines that run down the wings aren’t long enough to reach the roundels. And the roundels are too big; they barely fit into place and should be quite a bit smaller. But I was very impressed with how well they reacted to the Micro Set and Micro Sol.
There are many other solvents on the market, like Mr Mark Setter & Mr Mark Softer. Or my favourite Tamiya Mark Fit Super Strong, which is very good for thicker and stubborn decals. But many modelers swear by Micro Set & Sol, so if you see it in stock, it’s a good idea to grab it quickly before someone else does.
I’ve got a few smaller parts remaining that need to be painted, but I’m getting pretty close to finishing this project. I really love how these decals have turned out, and it’s going to be great to see this bomber finally standing on its own.
To be continued…
About the Author:
Jared Demes is a modeler from southern Alberta. He has been building models since he was 4 years old when his Dad first introduced him to the hobby. He has written for several magazines including, Fine Scale Modeler, Scale Aircraft Modeling, Phoenix Scale Models, and others. He has an interest in all modeling subjects, with a focus on WWII Japanese aircraft and Science Fiction.
Jared has won several IPMS awards for his modeling, and currently operates his YouTube channel rebelsatcloudnine, where he showcases model builds and product demonstrations.