
Basic Chipping and Scratches Techniques for Plastic Model Kits
In this Sunward Hobbies Tutorial I’ll be showing you how to wear the look of your model with chipping and making scratches plus a worn paint effect. You’ll see how easy and rewarding these weathering techniques can be.
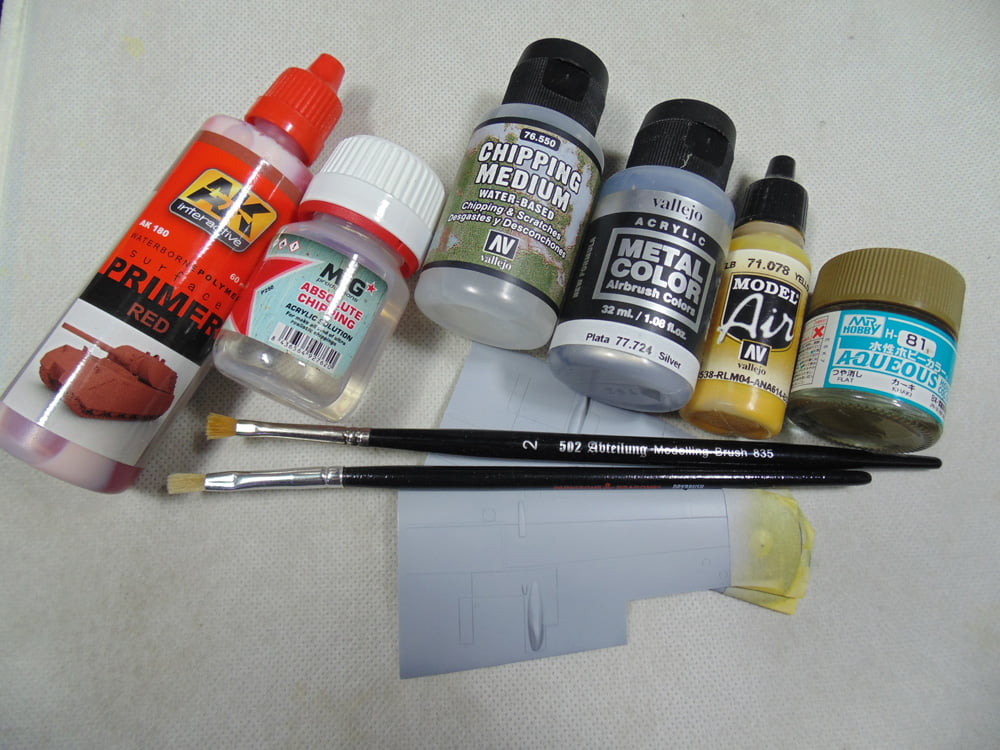
As always, all the materials used in this article came from Sunward Hobbies. The methods used can easily be replicated by most people with little experience.
While I know there are many different ways to achieve a worn effect on a model, what we’ll be focusing on are some basics to get you started and fast. Later, I will show more effects, but for now let’s grab some items from the store and your kitchen and have some fun.
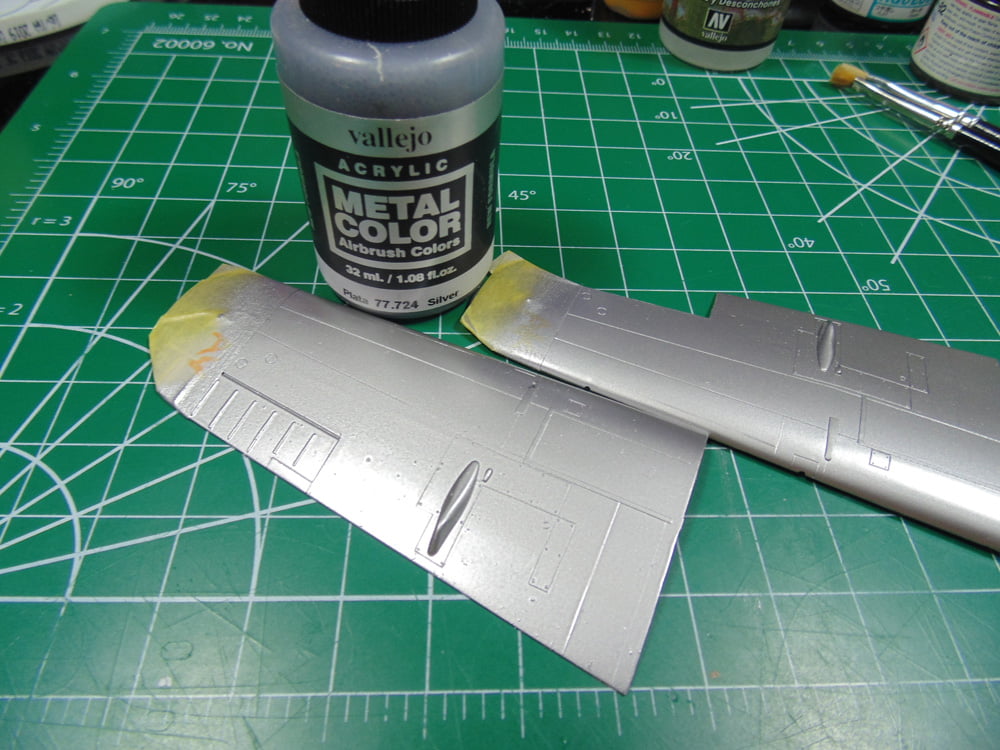
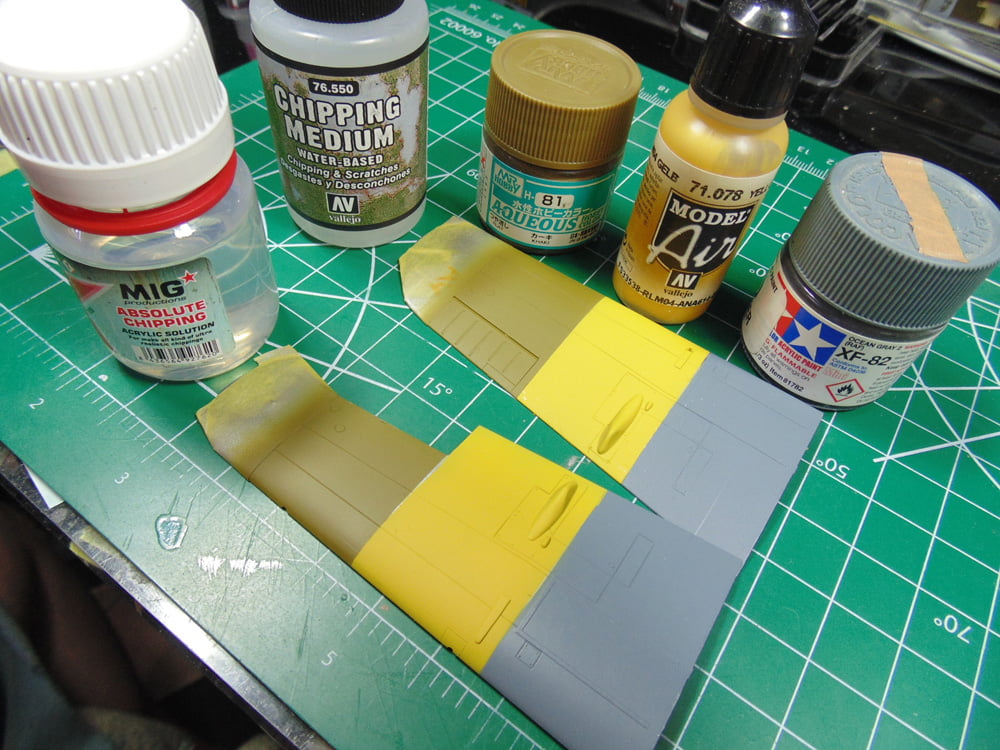
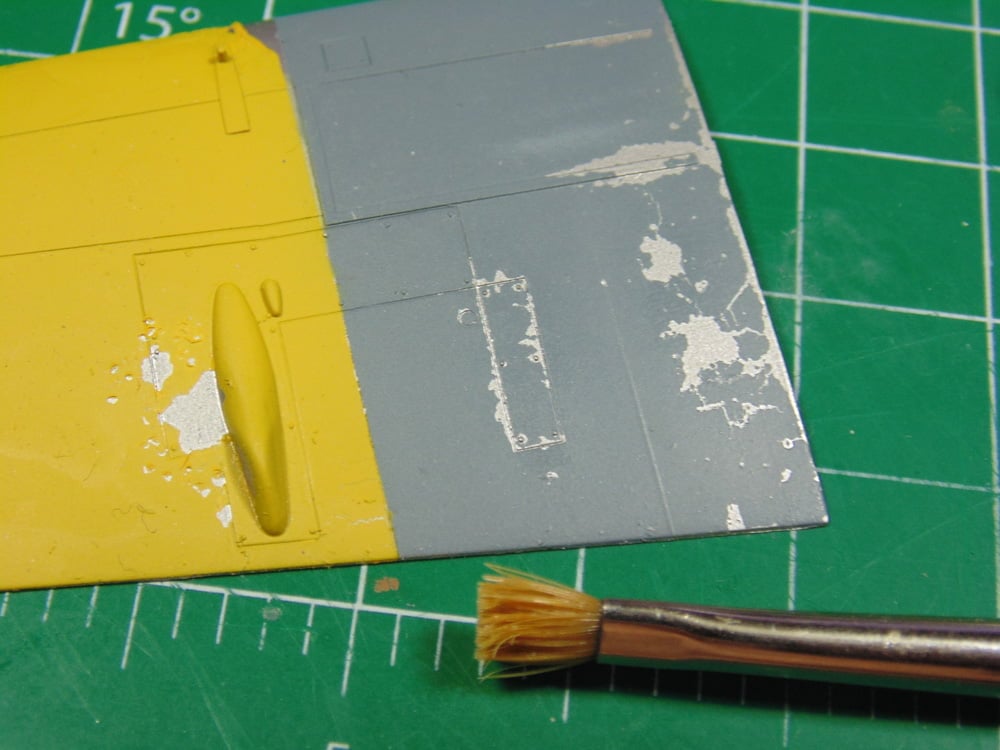
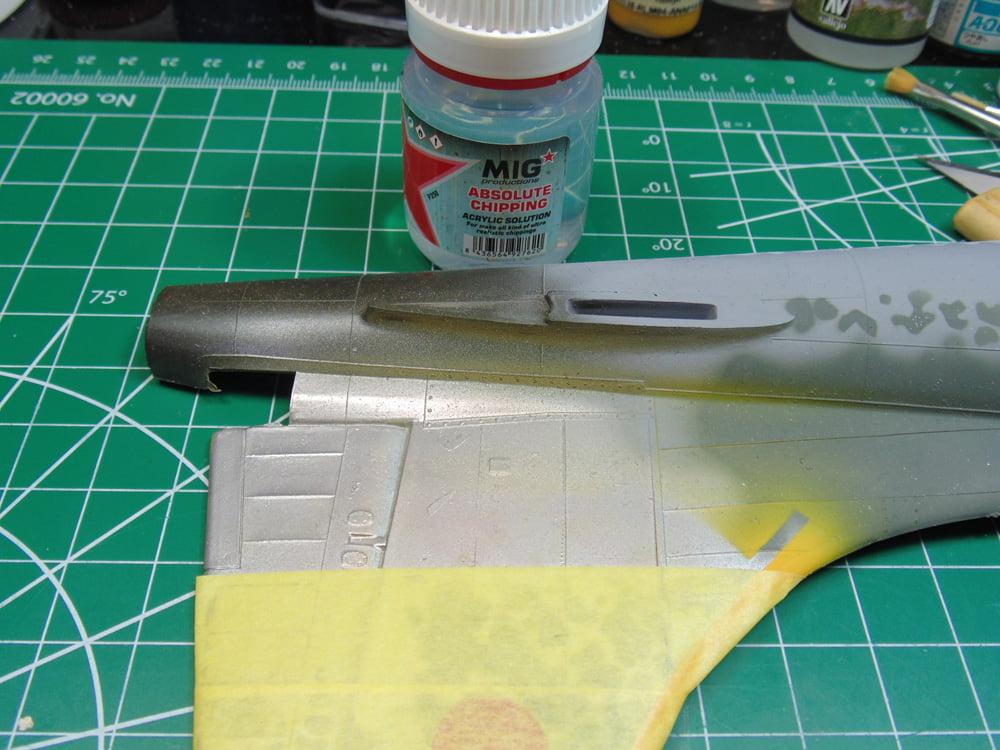
First, we’ll do some chipping effects on the wing top parts of a Tamiya 1/48 Brewster Buffalo. I’ve selected a basic silver color for the shine so it shows up better in the demonstration. Vallejo Metal Color is a great product and just like any acrylic undercoat they all need a solid week to dry so they don’t get infused with what you’ll be painting or spraying next.
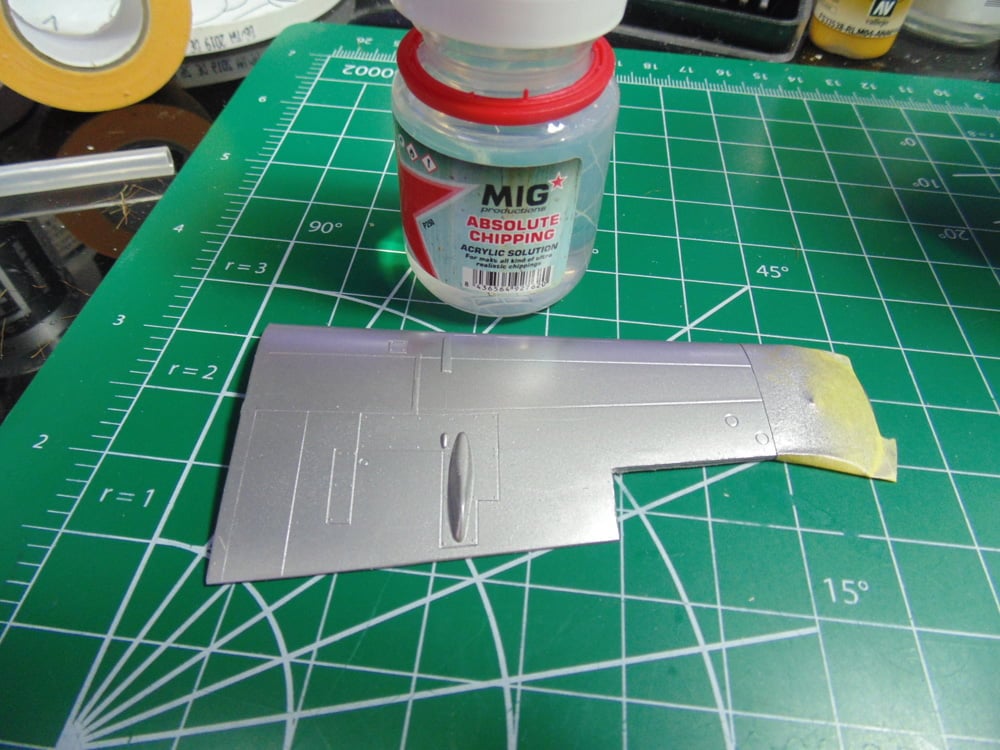
Next, we’ll apply Vallejo Chipping Medium 76550 with a wide Abteilung 502 filbert brush #4 to one wing top. Make the bristles wet but not dripping then quickly brush horizontally and vertically in sections. Move to the next section and so on. When this is dry to the touch apply another coat. Wash your brush immediately after the first coat and thoroughly, with warm soapy water, once you’re finished. I’ll explain how to airbrush the product later.

On the other wing half, we will airbrush MIG Productions Absolute Chipping P250. This is a very thin fluid so dial your pressure down a little as you would a highly thinned varnish/clear coat.
For this demonstration acrylics will be used. Lacquer and enamel paint use a different method and would make this article too lengthy, thus I’ll cover that in an advanced tutorial.
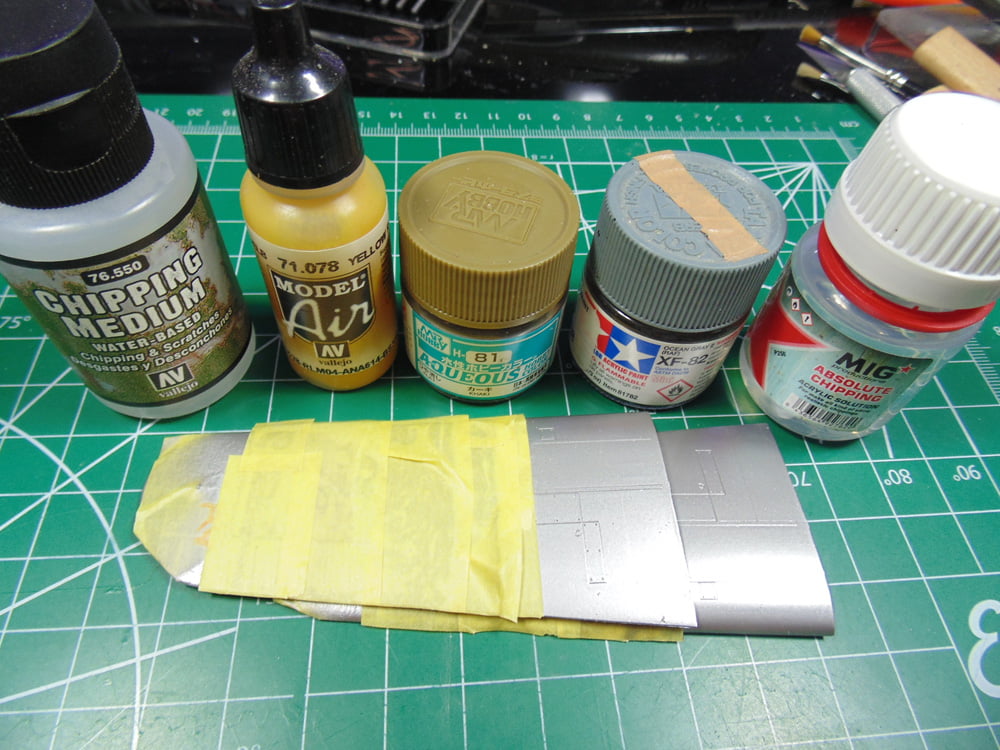
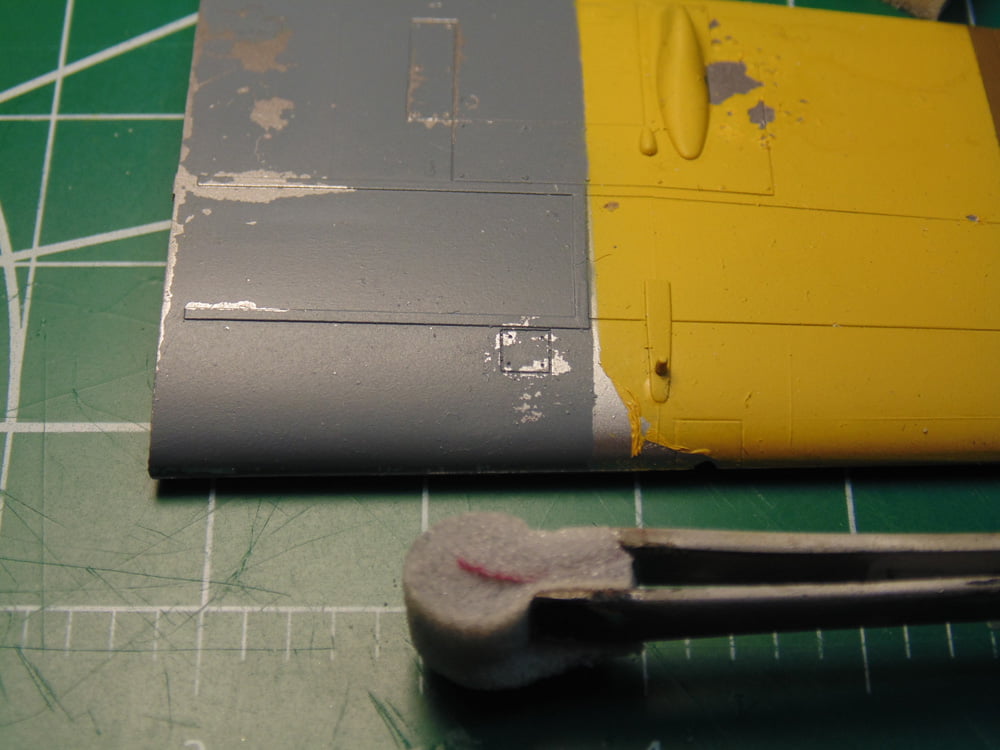
In this example the wing top will be split up in three sections. Thin your paint as you normally would. It’s important to let each painted section have 24 hours to dry before masking it off for the next. The chipping mediums need the same time to dry. Remember to de-tack your tape.
I’ve taken the time to show you these three manufacturers because they are common brands and react differently to the chipping fluid. We’ll go with Vallejo first.
Here’s a tip, if you want to cut the 24-hour dry time in half, place the parts in front of a fan on medium speed for 12 hours.
Now let’s wet down the area to be chipped with clean room temperature water. I’ve sprayed down the undercoat color over the entire part to show different techniques, but you only need to paint the areas with undercoat that you want to show through, such as a walkway or access hatch.
Here’s another tip, if your water beads up you can break the surface tension easily by adding 4 or 5 drops of regular dish soap.
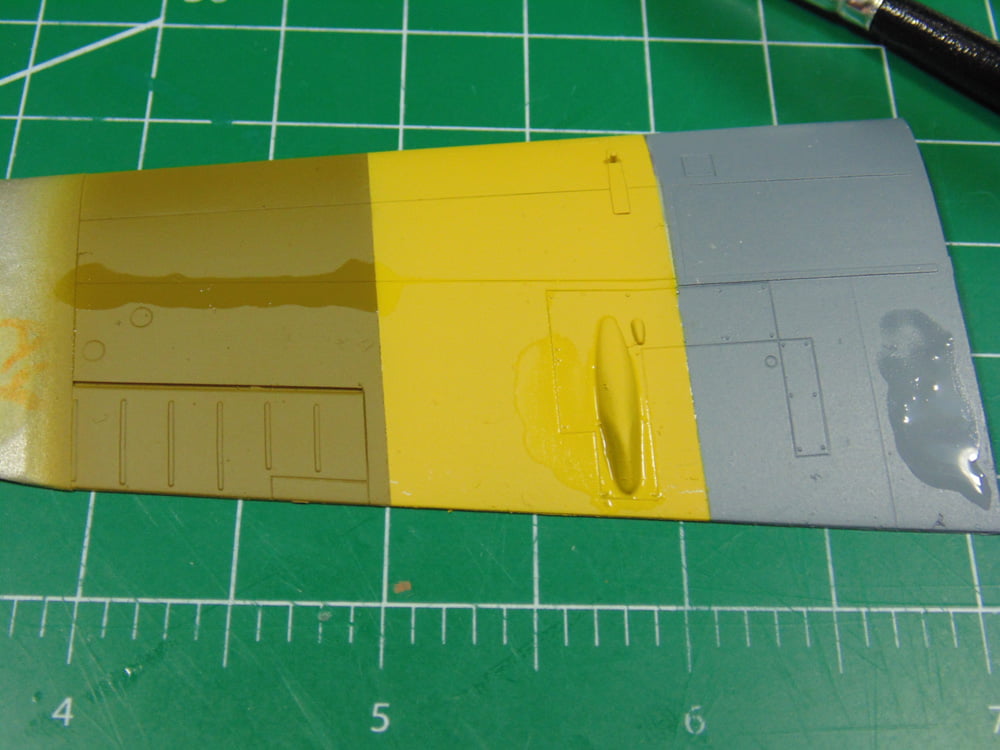
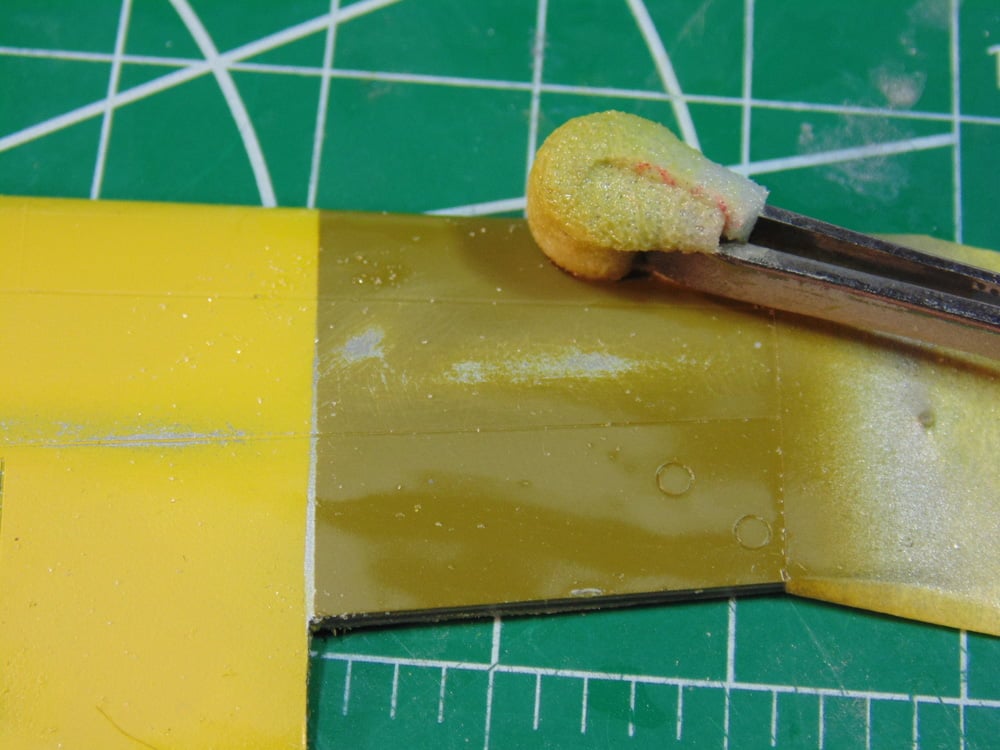
We’ll go with Vallejo Model Air 71078 Gold first while the others are soaking up water. Vallejo Model Air and Model Color are water-based acrylics, whereas the others are solvent plus water based. Hence, when brushing on your water on the Vallejo you need only to dampen the surface and wait a few minutes for the paint to re-hydrate. I’ll show you later what happens when the Vallejo paint is too wet.
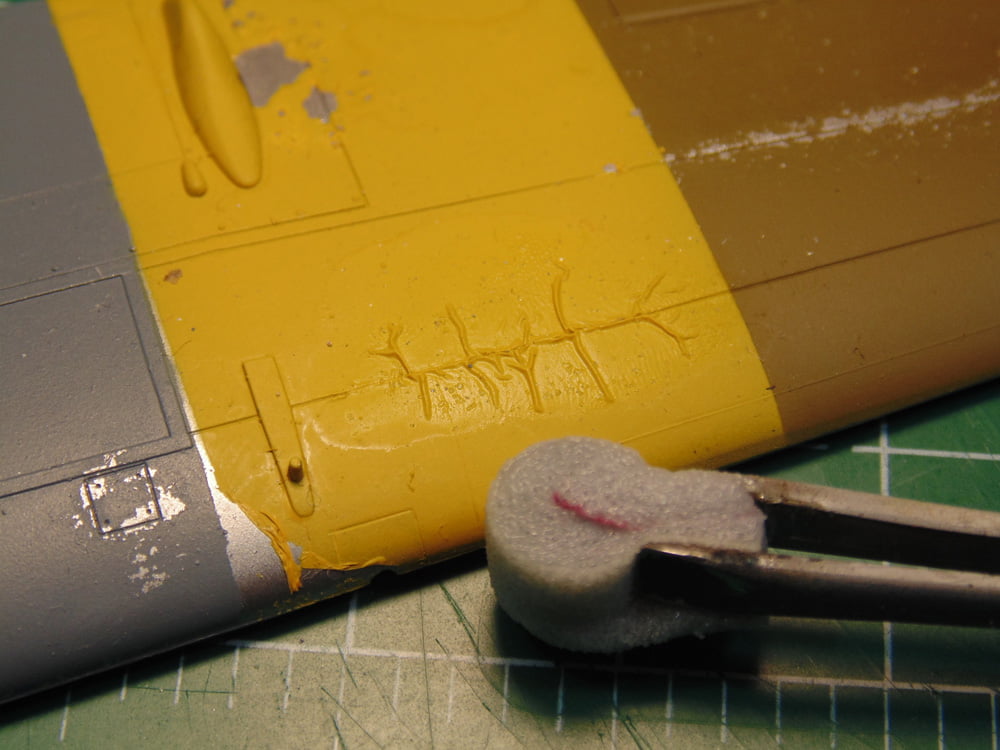
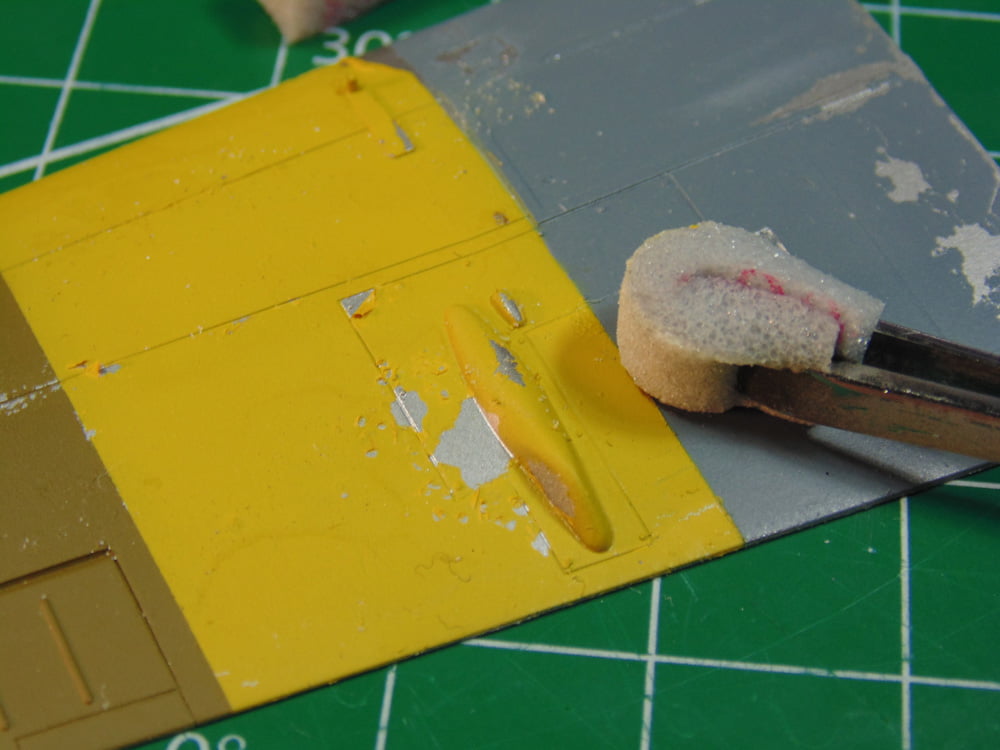
Use a toothpick for this product. The more aggressive you get the larger your chips will be. Don’t fret, they won’t all become as massive as this picture shows, as you’ll see later. The point is you don’t have to put a lot of effort into it.
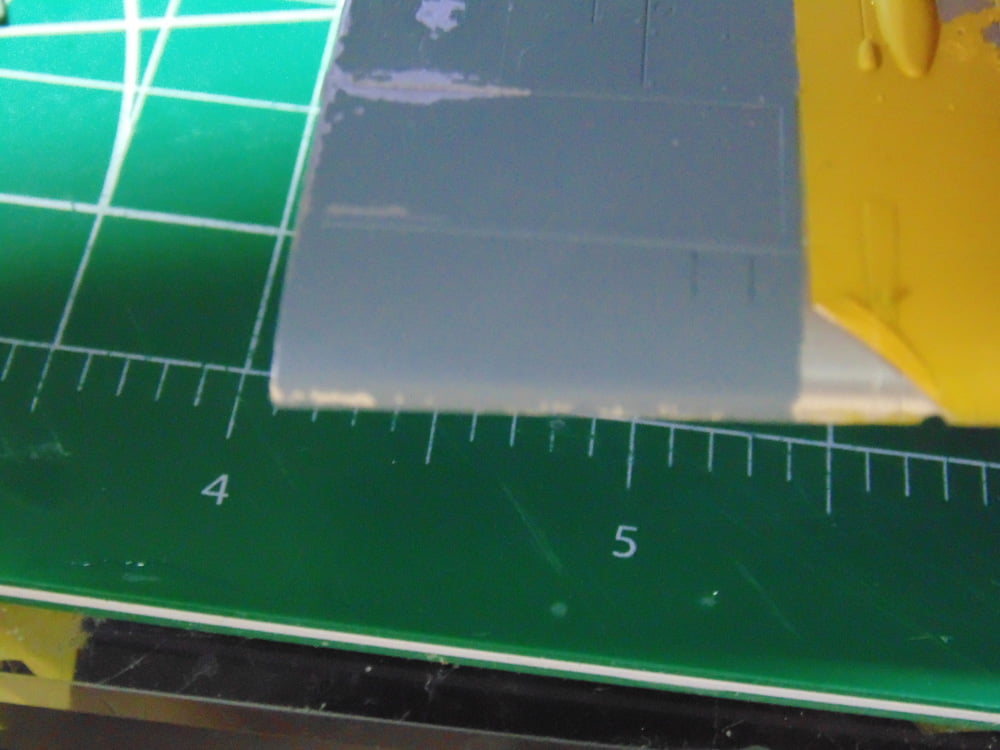
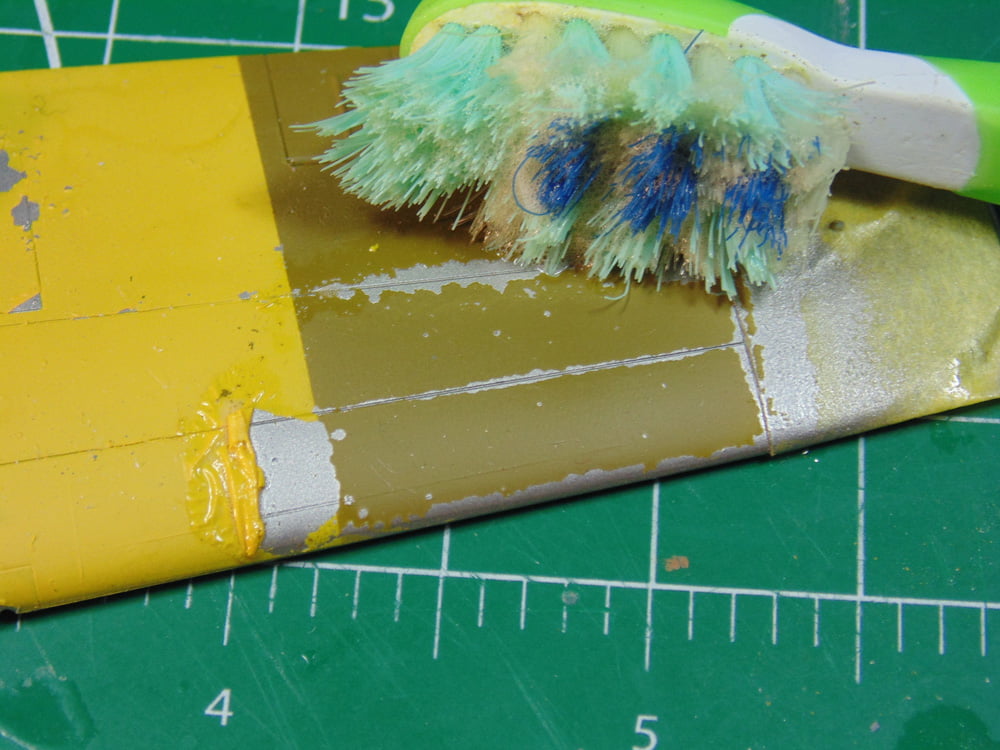
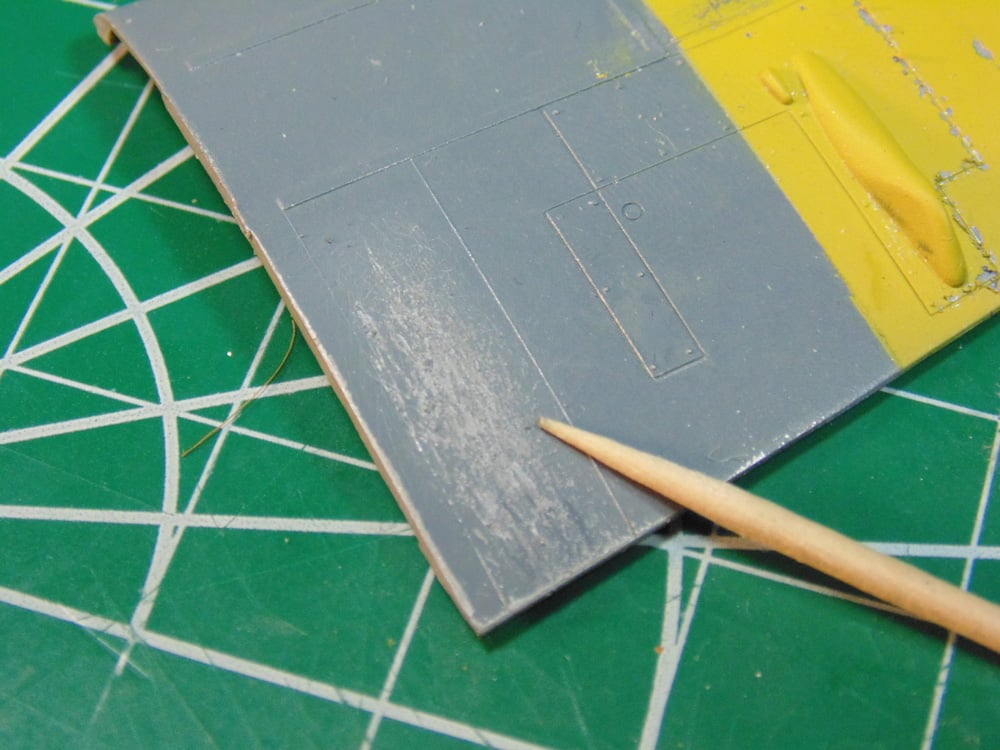
The thinned Tamiya XF-82 Ocean Grey color has sat wet for 5 minutes and is ready for a more aggressive approach due to the nature of its chemical makeup. Use a semi stiff old toothbrush and begin scrubbing. There will be lots of spray, so protect your eyes from the soapy water. Otherwise, you’ll get flicked and be sad, or worse upset and like me less.
This may take a few minutes, but do not take your eyes off it! Once the first tiny chip shows through the process can get out of hand and in a hurry. Back off the scrubbing and select the areas you want exposed.
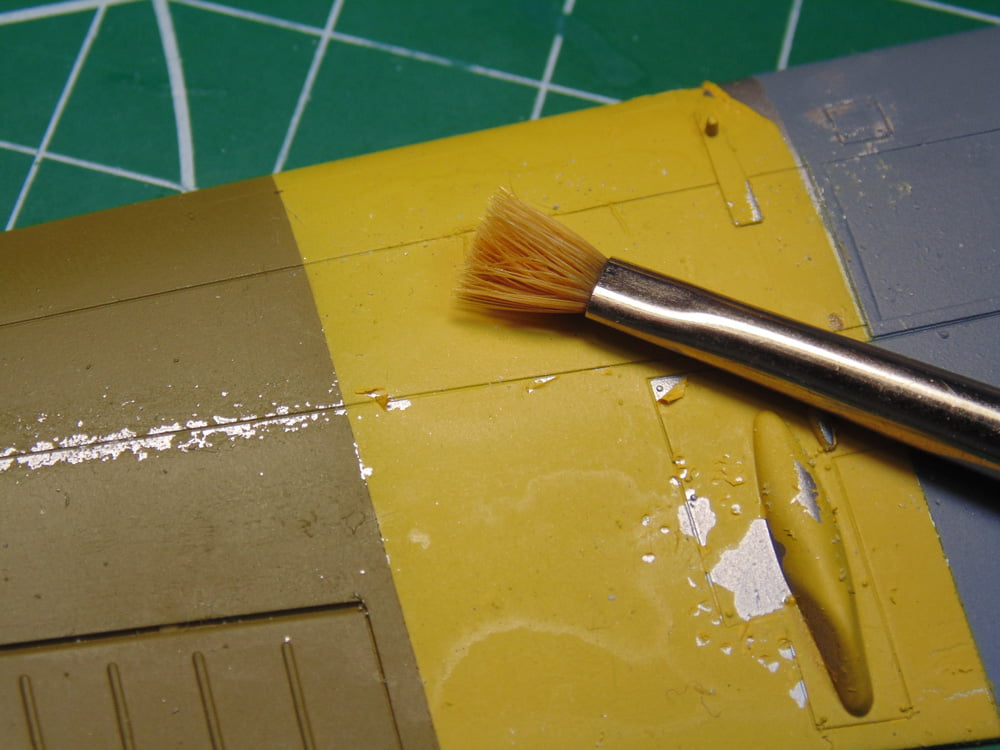
You’ll quickly get a feel for how much pressure to use and where, as seen in the leading edge of the wing… sorry about the focus.
Again, this is for demonstration. You choose the look you want. I’ve seen some seriously chipped and weathered operational combat ready aircraft pictures in my day. Or look no further than a forklift and even a plank of fence wood.
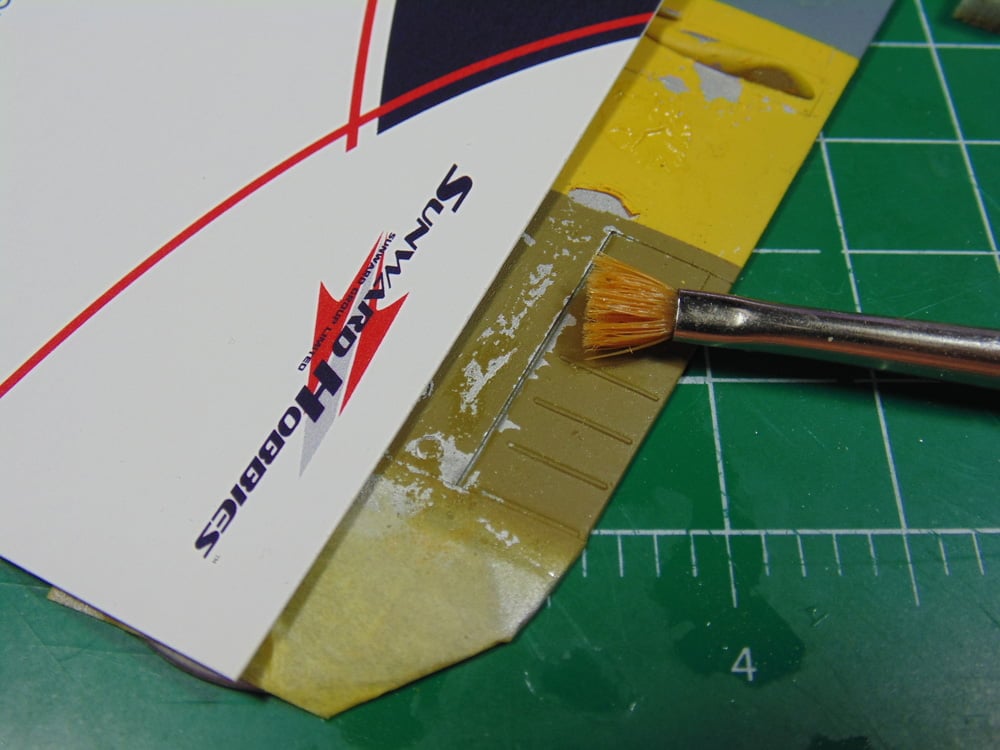
Next, we’ll have a go at Mr. Hobby Aqueous H81 Flat Khaki with the sandpaper technique. The key to this is making sure you see the area. I’ve cut up a small bit of sanding sponge and plan on using only the corner. Keep the part and sponge wet at all times and very lightly randomly scuff the area.
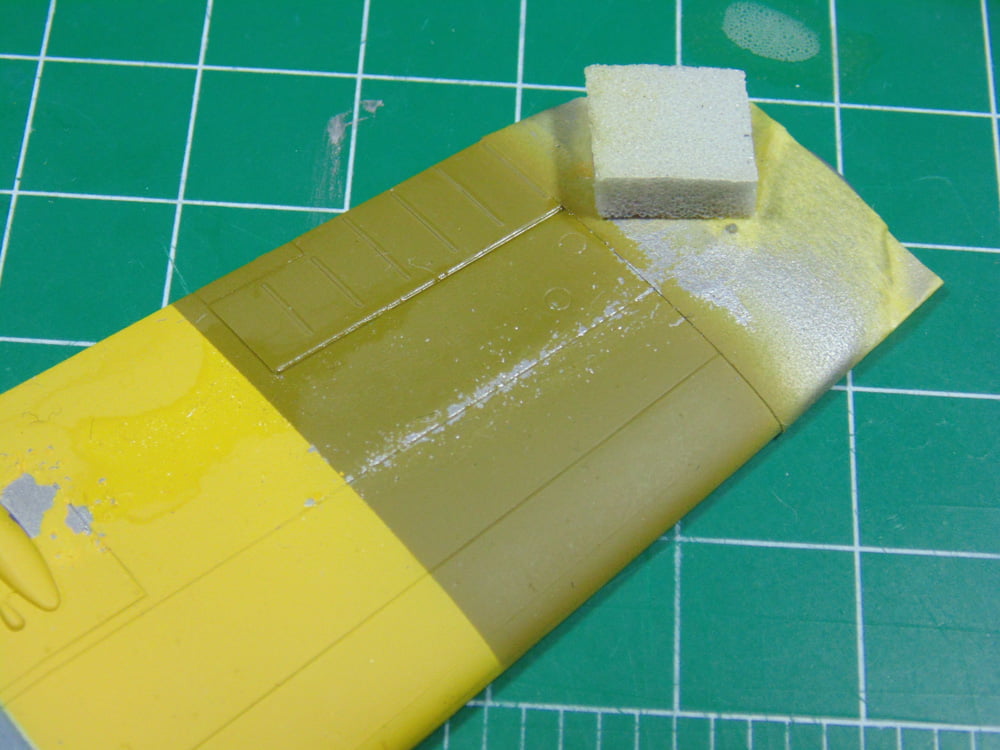
Here’s a tip, pick up a set of reverse Excel Hobby tweezers from the store and then cut a rectangular strip of Tamiya sanding sponge (in the case 400-grit). The smaller the sponge the more control you’ll have over the area and look.
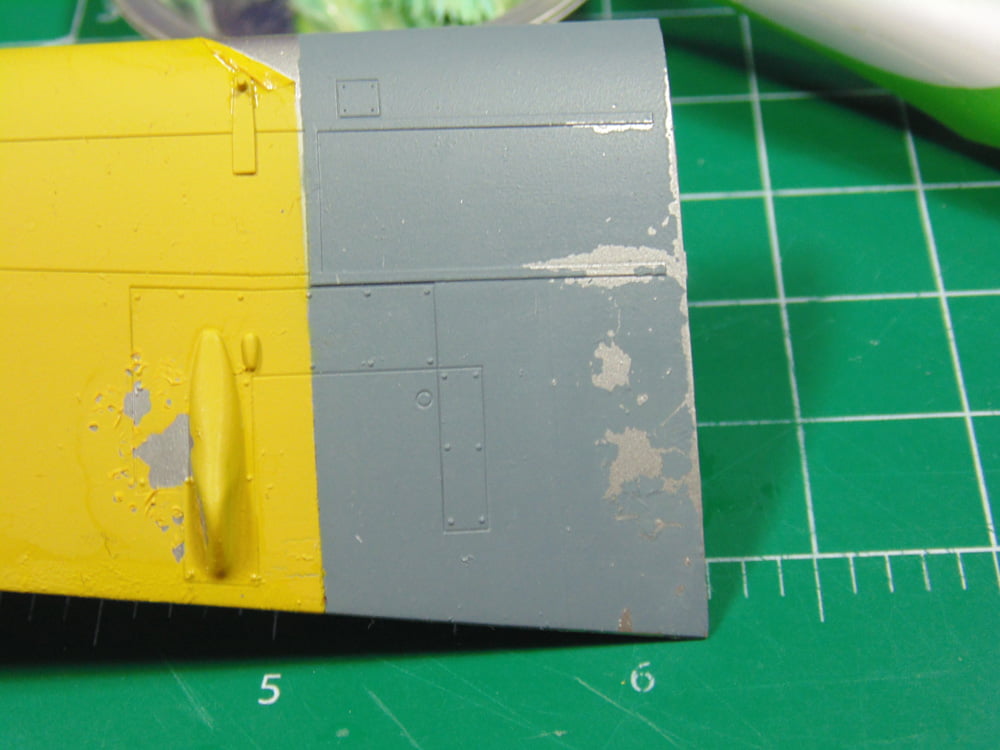
Now we’ll use a stiff bristled brush which I’ve cut the ends off. Here’s another tip, don’t throw out your well used brushes. They come in handy for tasks like this, adding pigments, creating texture effects with filler or blending oil colors (but those topics are for another day).
Aggressively stipple with the side of the brush hairs, as in this access panel, until paint wears away to your liking. Be advised though, this technique takes a lot longer, so be patient, it’s a different look.
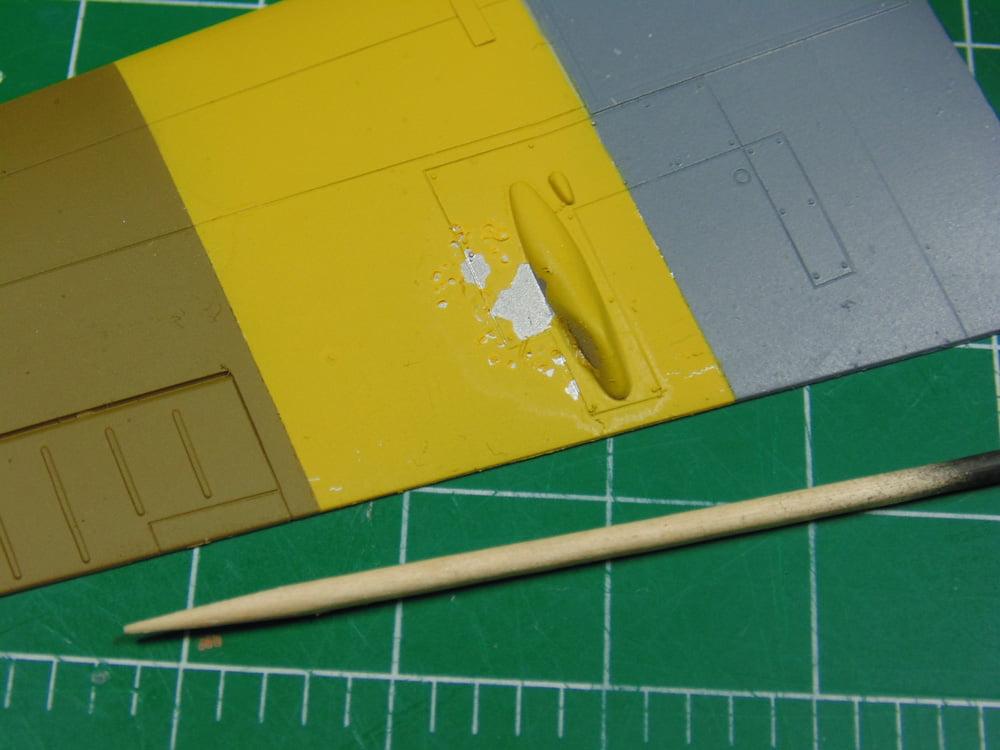
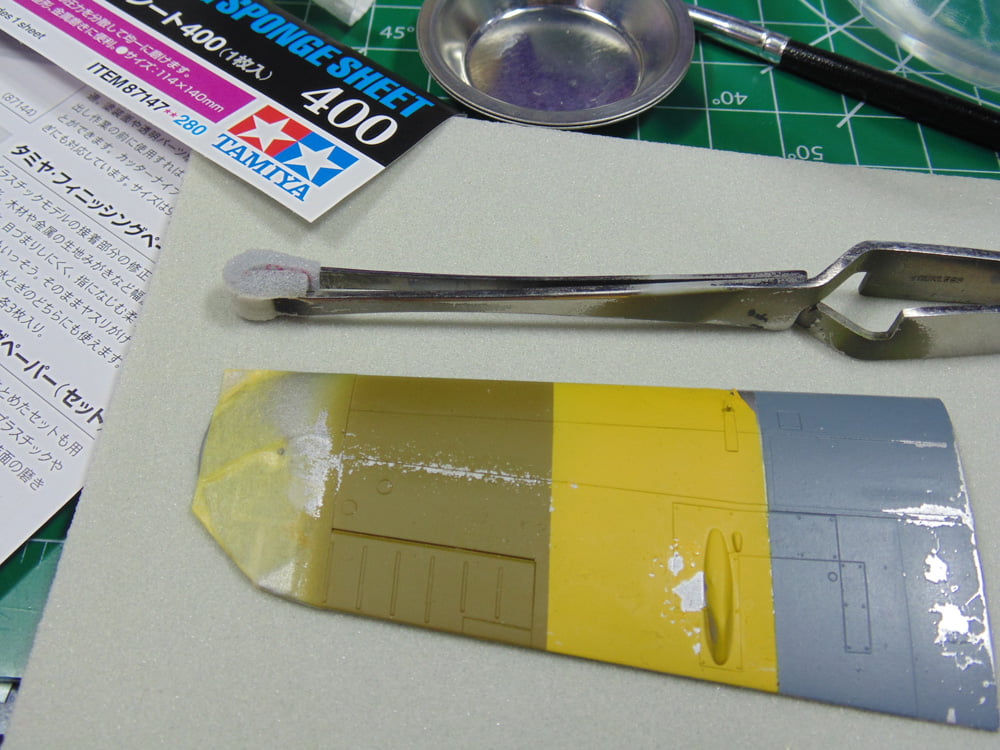
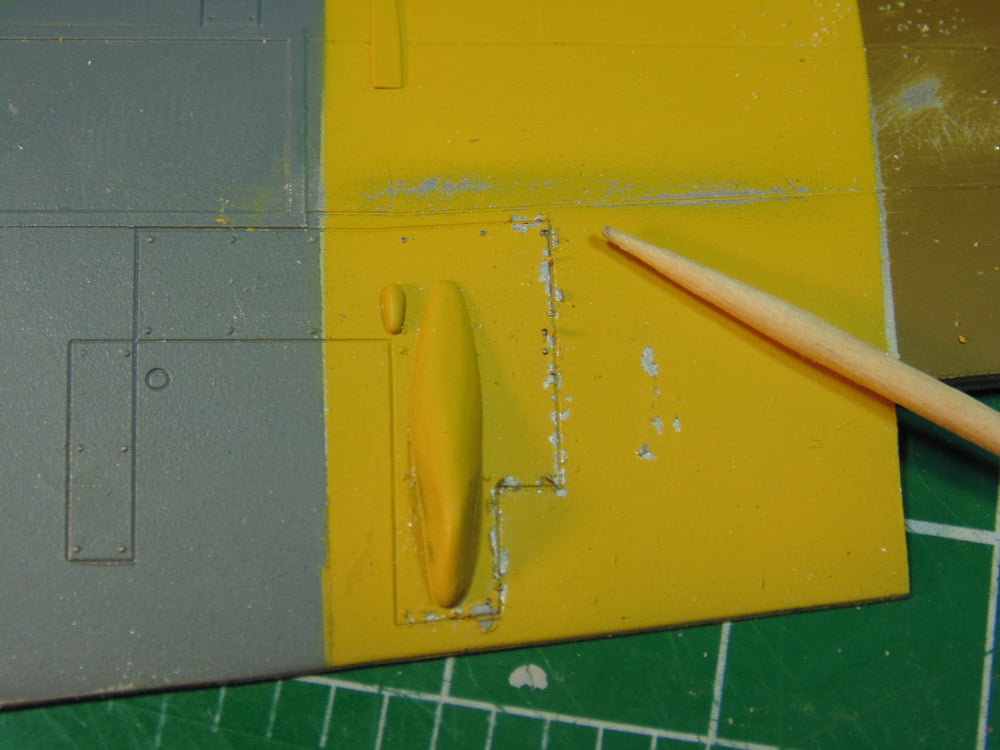
With the small piece of sponge, that was made earlier, fitted securely in the tweezers I’ll very precisely chip the paint away from this small access panel. Please ignore the removed yellow paint, my bad.
The heavier the grit the larger the chip because the particle digs in and grabs onto its own size of paint and tears it away from the surface.
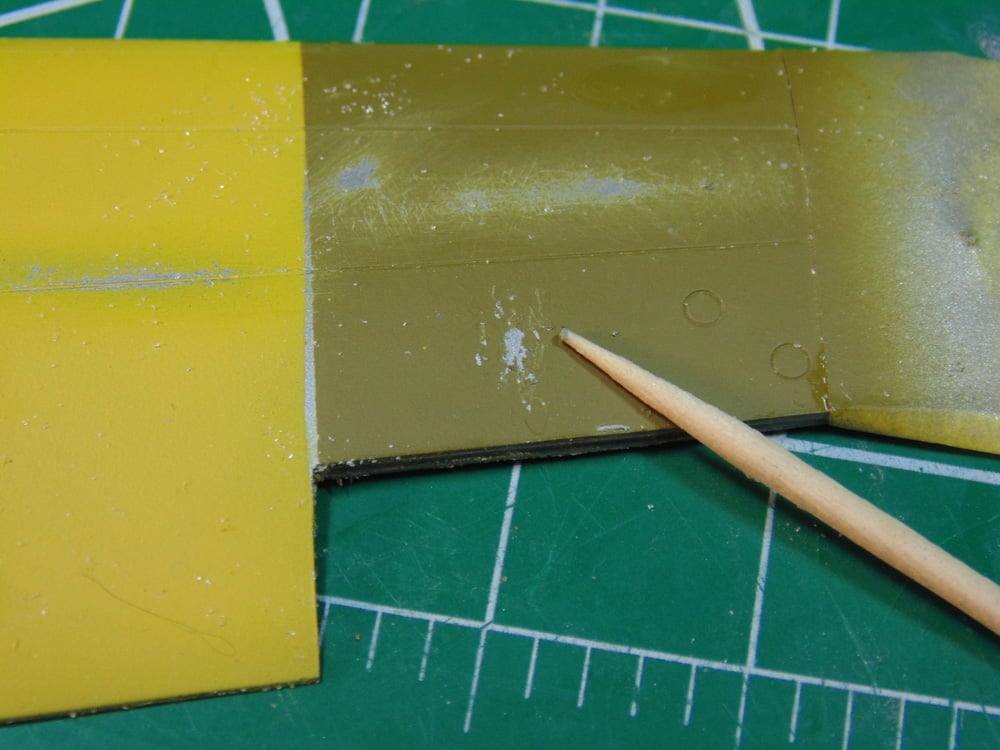
As mentioned above, here’s what happens when you over-hydrate Vallejo paint. Not all is lost here though, you wait for it to dry and begin again, just with a different effect.
Here I’ve stippled a bunch of areas on the Vallejo yellow. Sunward Hobbies offer several types of much stiffer stippling brushes, including AK Interactive glass fibre. These will make the job go quicker but require more practice.
And here is the almost dry Vallejo paint when chipped with the 400-grit Tamiya sanding sponge. It makes a great effect and you can now let it dry and wipe away the loose bits.
On the Mr. Hobby Aqueous I went at it with the toothbrush to show the effect. This as well took a bit of time to get the effect. A new toothbrush would help here.
In this picture the Tamiya khaki paint was scuffed with the sanding sponge, scrubbed with the toothbrush and then stippled for a solid 5 minutes. Some crazy random organic effects came through. The more random the more realistic it looks.
As promised, I’m going to show you how I managed to get Vallejo Chipping Medium to airbrush. The formula, after some experimenting, is 10 drops medium to 4 drops water to 1 drop Vallejo airbrush thinner. Then I hosed down 2 coats.
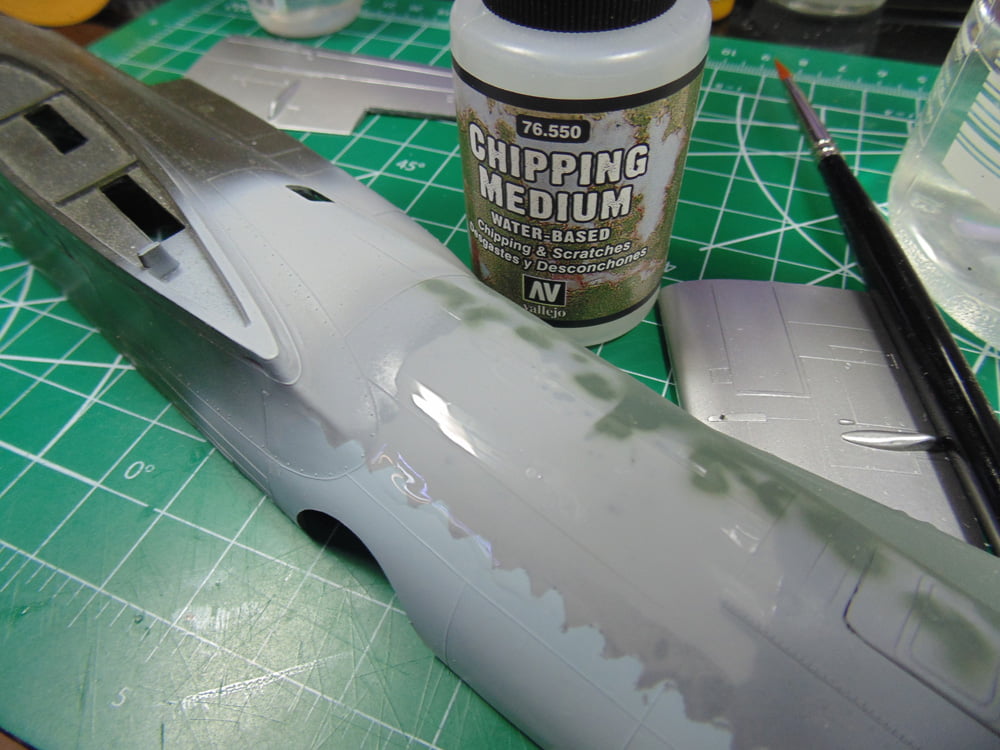
After the chipping medium had completely dried it was scrubbed with a toothbrush. The result was excellent! In less than 30 seconds the grey color began to show through.
At that point I stopped, dabbed off all the remaining water and got out the stippling brush. In seconds the chips were flaking away with that organic look you’re after, or the toothpick could have easily been used for a deliberate scar.
Being able to airbrush will always trump hand painting, but either method will give you a nice look and add another dimension to your project. You’re going to see another dimension right now.
MIG Productions Absolute Chipping is a completely different animal than the Vallejo and assists in a totally different effect.
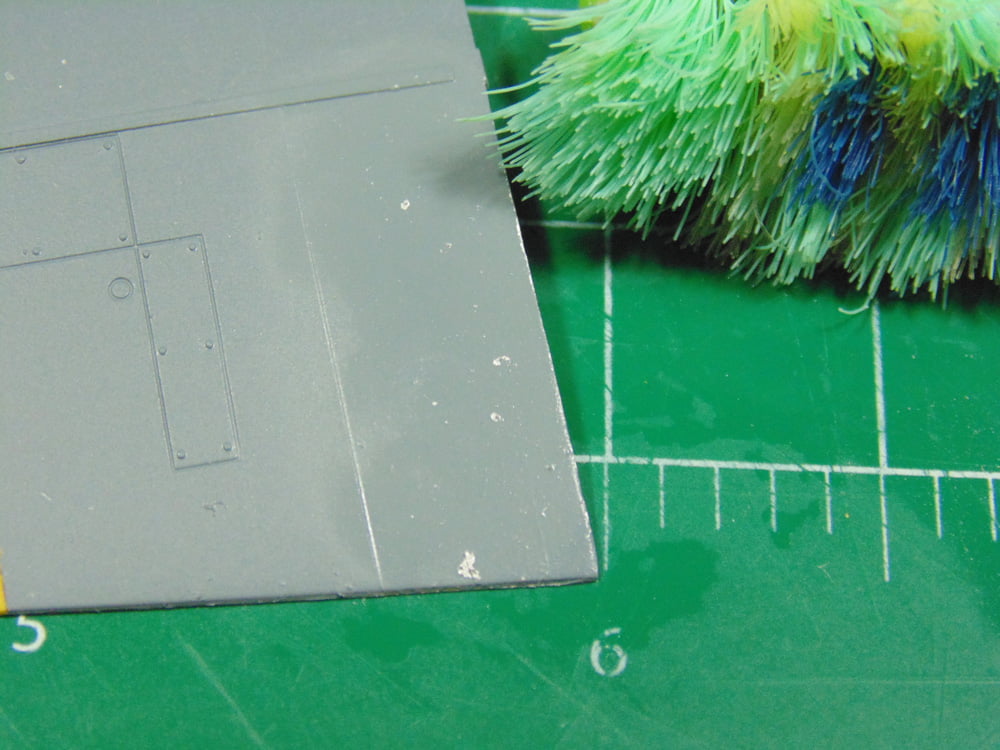
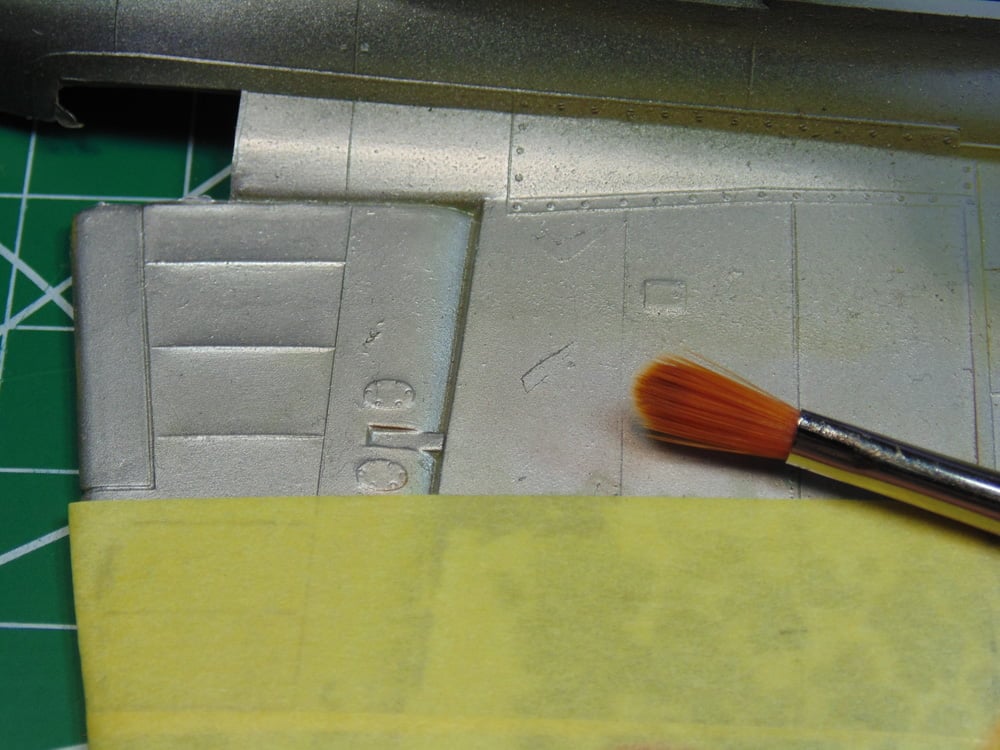
In this example my sanding sponge went for a worn look on the Vallejo Model Air. Very realistic looking because the effect is so slight.
On the Mr. Hobby Aqueous the effect I want to show was heavier scratching. Obviously, be mindful of how vigorous you’re being, but you get the point by the look.
For heavier scratches hold a toothpick, or other mild burnishing implement, at an extreme angle and see what you get. Remember, this is very damp paint and re-hydrated MIG chipping fluid so it won’t take much effort.
A toothbrush and stippling brush would not make a dent in the 3 layers of Tamiya paint and 2 coats of the MIG fluid to chip it. I resorted to sanding it then using a toothpick to make the look needed to show you.
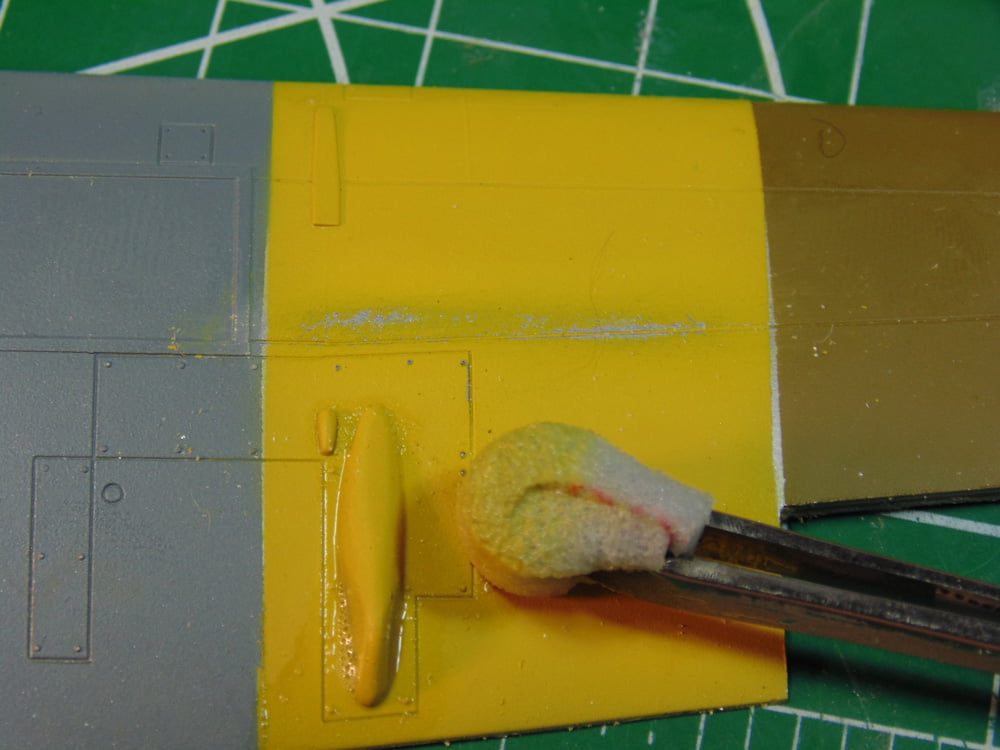
And with the Vallejo paint the scratches were easily made. This access panel could have a blend of the three different effects you see on the yellow.
Lastly, I’m going to show something you can easily do which looks amazing and that even a casual modeler can pull this off the first time.
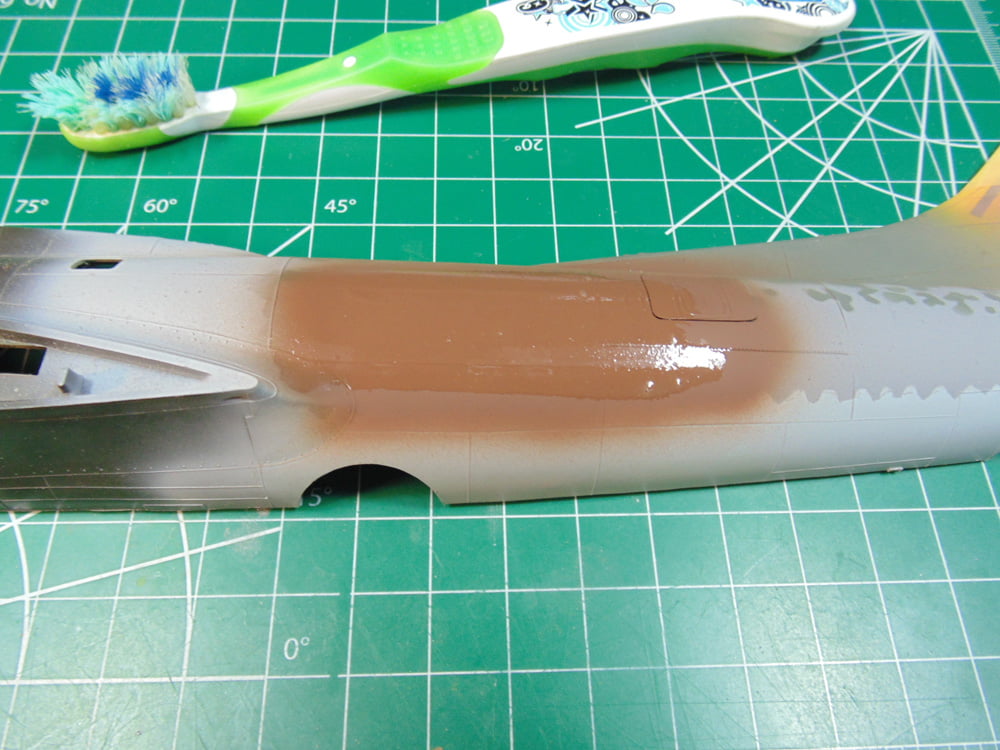
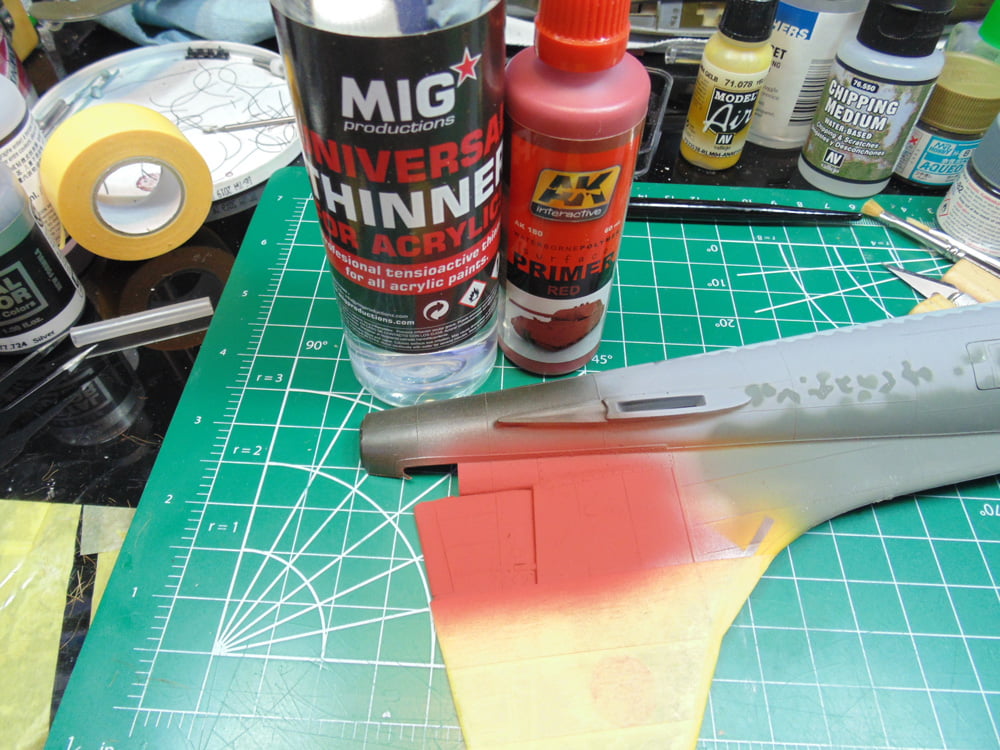
Here’s our subject, a Revell 1/48 B-17 that’s been sprayed with AK Interactive Xtreme metal aluminum 488. I’m going to use the MIG Productions Chipping product to get the effect.
Hand paint three coats over the area, don’t worry about time for each coat dries in minutes, so use a decent sized brush.
Next, spray on 3 coats of red oxide primer. In this case it’s the AK Interactive Red acrylic primer, which I highly recommend. Thin it 50/50 with MIG Productions Universal Acrylic Thinner for best results. Let this section dry for 24 hours. Then paint on more MIG chipping fluid. The final paint layer is Tamiya XF-59 Desert Yellow.
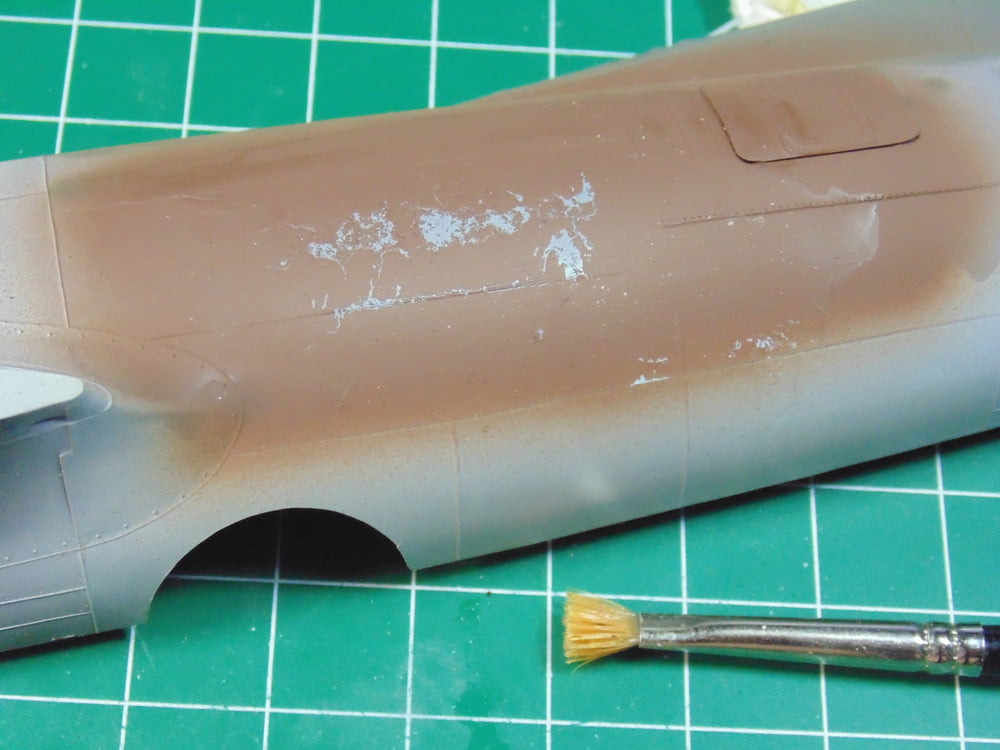
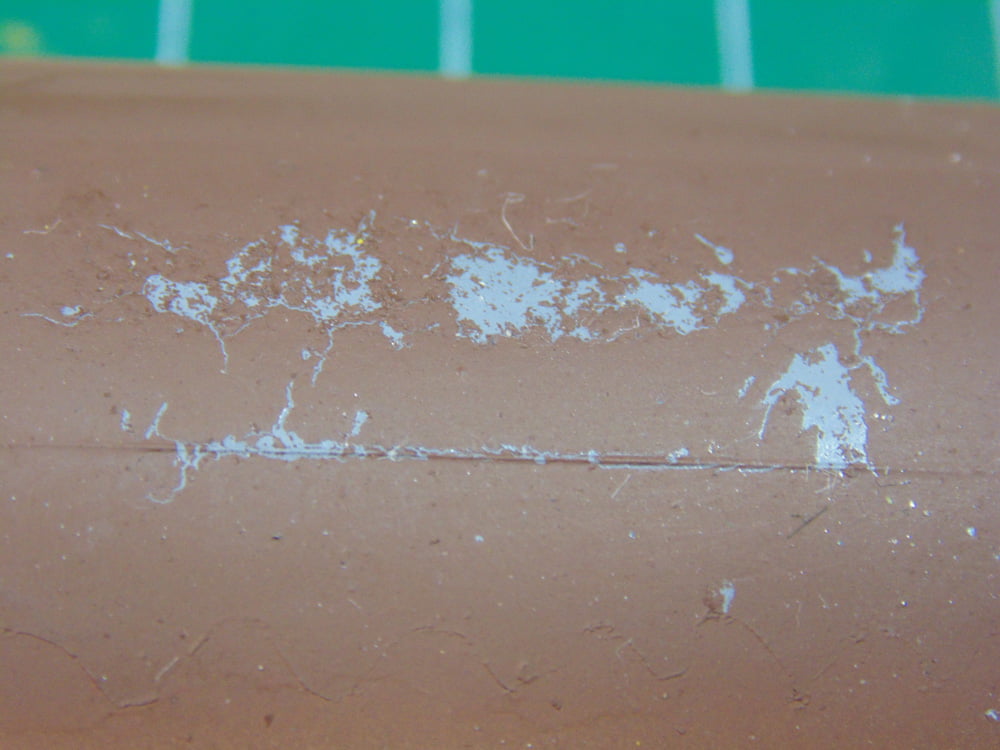
Tanks, Automobiles, Heavy Equipment and many others use red oxide as a primer, so this demonstration has broad uses. Wet the area and begin to very gently sand with no less than 1500-grit paper or sponge. Sand over a much wider area than you expect to uncover the red primer.
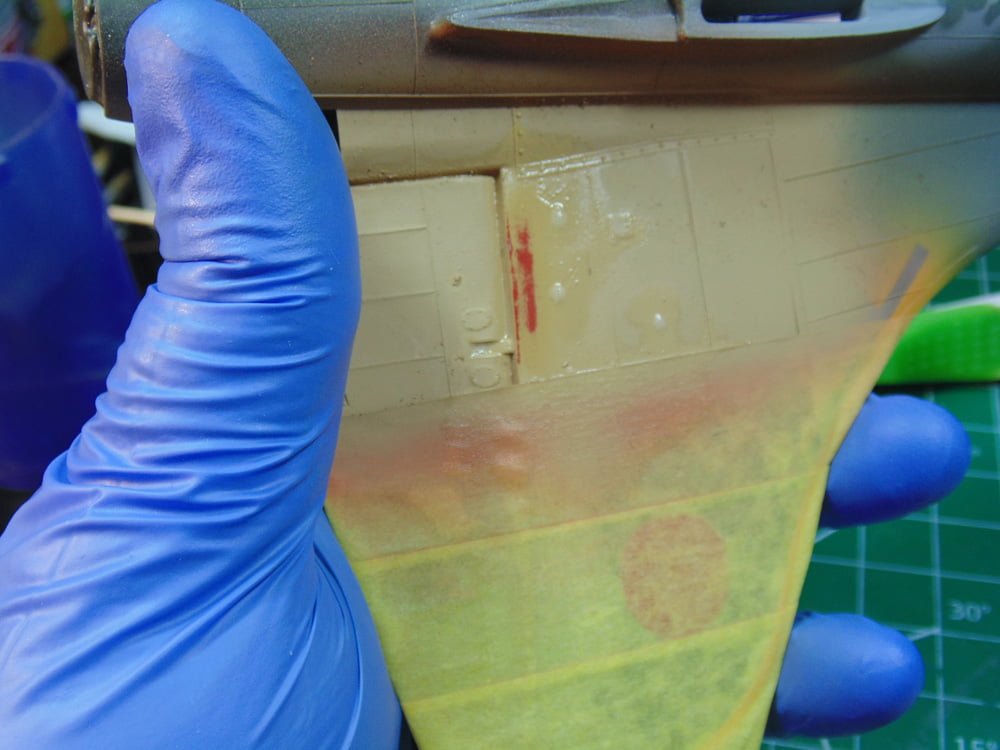
Just let the sander rest on the surface and let the grit slowly do its job. Now you can see the aluminum show through for a very interesting and 3D effect This is extremely difficult to reproduce by hand painting, unless you’ve had many years of experience.
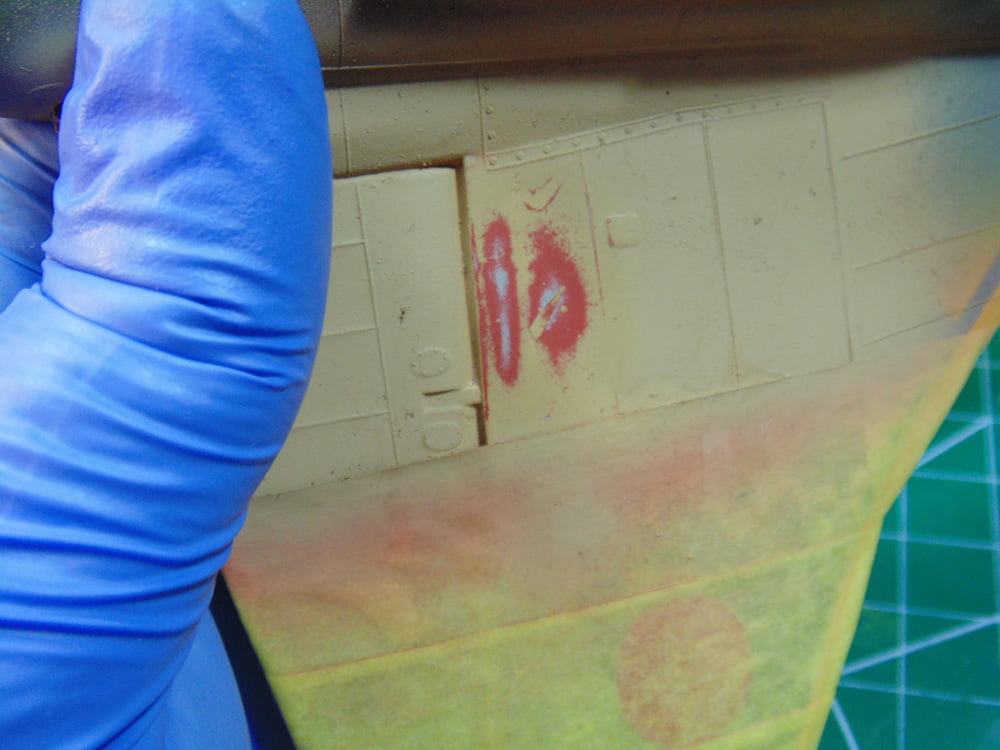
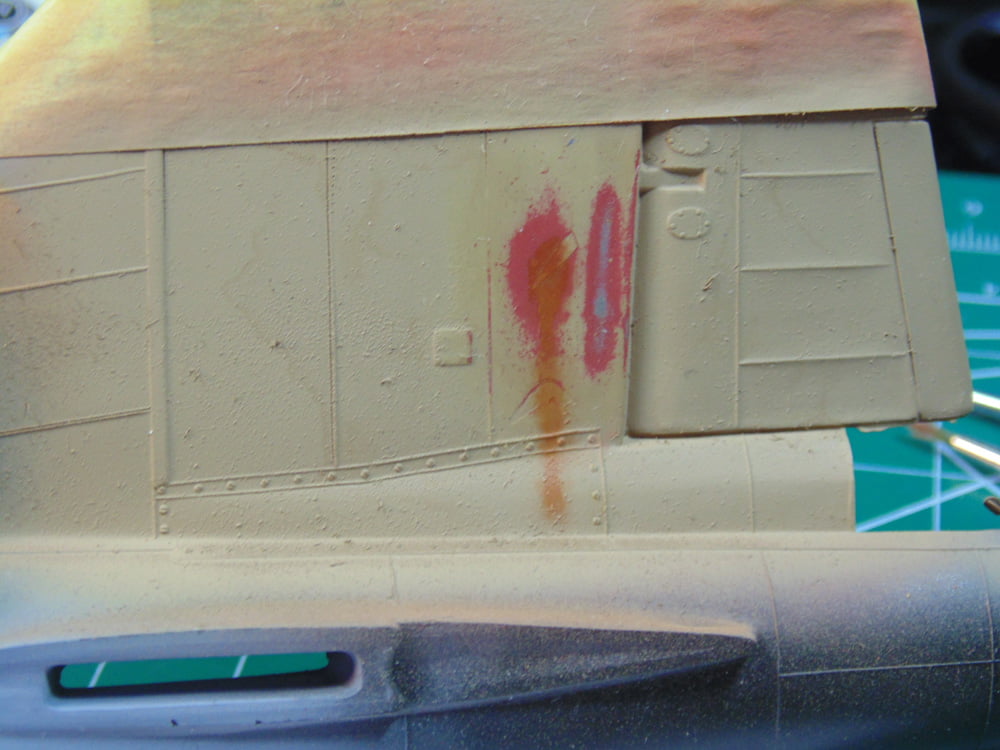
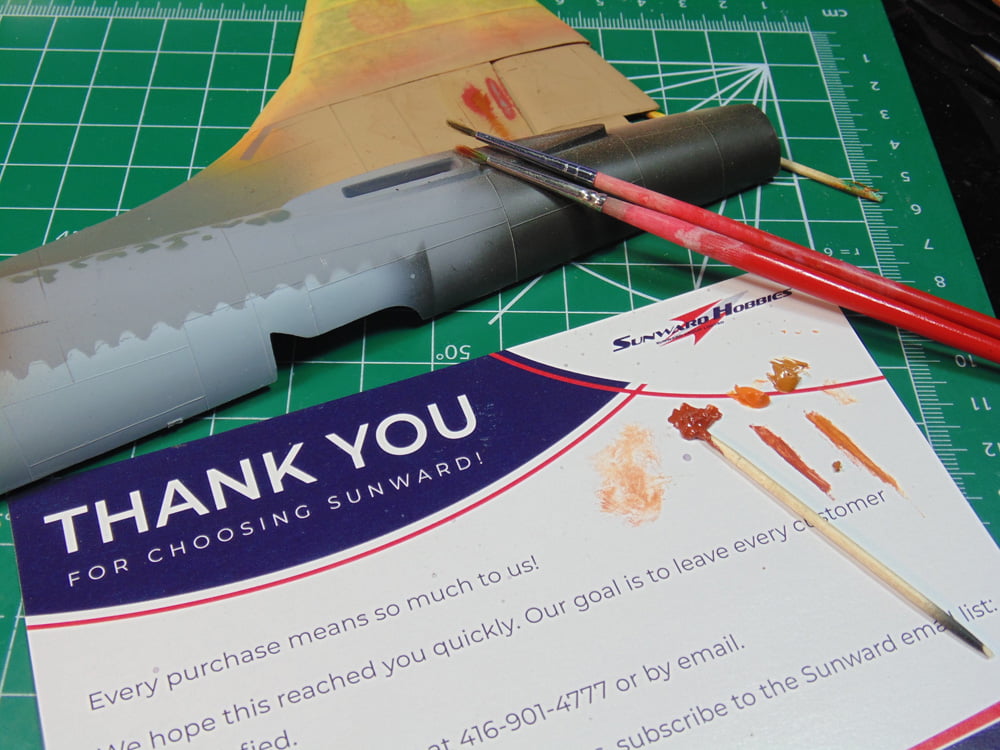
I took the time to add an effect using Abteilung 502 oil paint. We’re going to add some streaking rust stains.
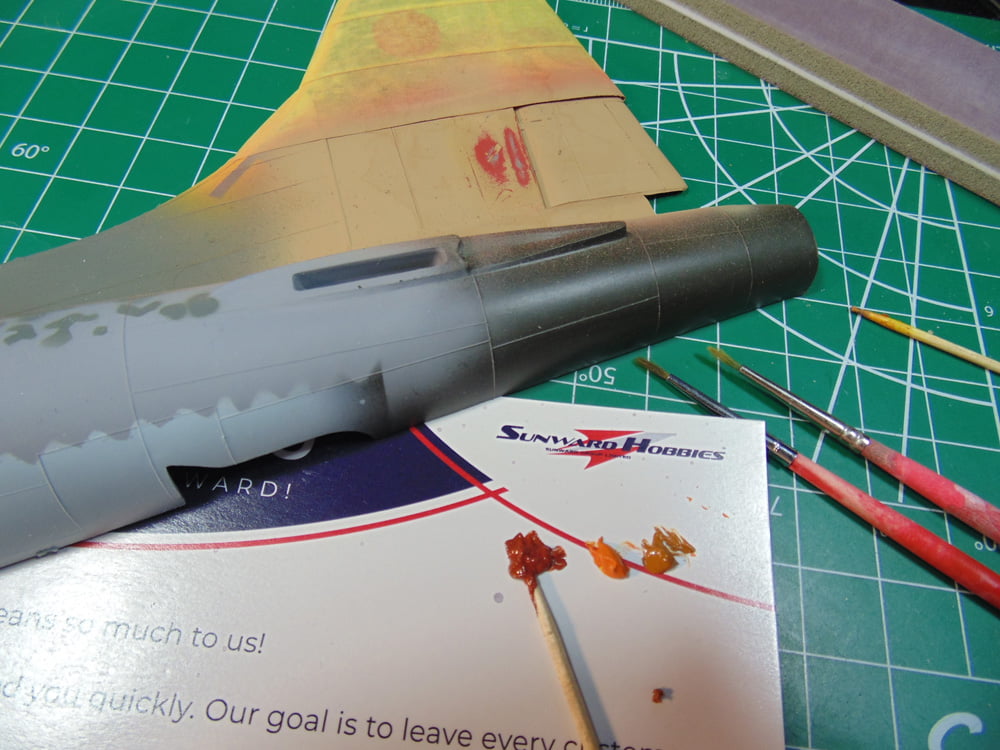
I know using oil colors is an advanced area of modeling, yet even that subject is not complicated nor does it require any great skill or artistic training. I’m doing it for you because it looks really cool.
There are many other ways of getting a chipped, scratched and worn effect. Some will paint or add decals while others will dab paint with a sponge applicator. Those work, but an actual chip is a chip and a real scratch a scratch. You now have the means to easily recreate that level of realism.
Thank you for following along and if you have any questions about the products or the methods used, please ask anyone at Sunward Hobbies when you place or pick up your next order of Chipping and Scratch Effects supplies.
About the Author:
H.G. Barnes is a former voice-over artist and retired sales and marketing professional. He’s the author of two large volume science fiction adventure romance novels with many more in the works. For well over 40 years he’s been building scale model replicas and now does commission work for clients in Canada and the USA, plus completes projects for companies in Asia and Europe.
Currently H.G. is involved as an Associate Editor with KitMaker Network’s Online Magazine Channels.