
Artesania Latina Bluenose II Build – Part 8 of a Series
In this Sunward Hobbies tutorial, I’ll be continuing with Artesania Latina’s Bluenose II build with Part 8.
In this Sunward Hobbies tutorial I’ll be covering sections 17, 18 and 19 of the Artesania Latina’s Bluenose II fishing schooner. You’ll get plenty of tips and advice on placing parts and problem solving. Also, you’ll find out why it’s important to keep things organized.
Naturally, we’ll begin with section 17 which covers the bulwark stanchions. On the actual Bluenose II the stanchions are now painted white, yet I love the look of the stained wood on cream.
The type of wood though has three different tones. I’ve selected the two which are the closest matching, but my advice is to keep the same tone in one area.
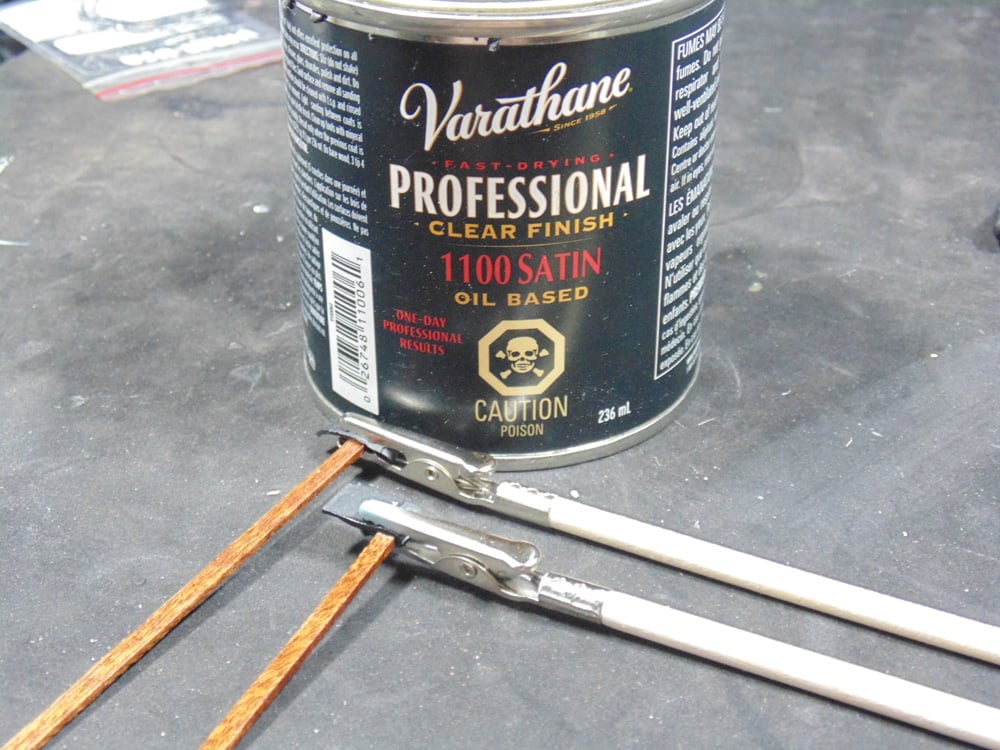
After the wood has been lightly sanded on its face, they were given three coats of clear. Here’s a tip, to get the stanchions to glue solidly to the bulwark just clear coat the face and sides. Bare wood adheres much better to each other. Also, these Mr. Hobby Parts Holders let you hang the wood to dry.
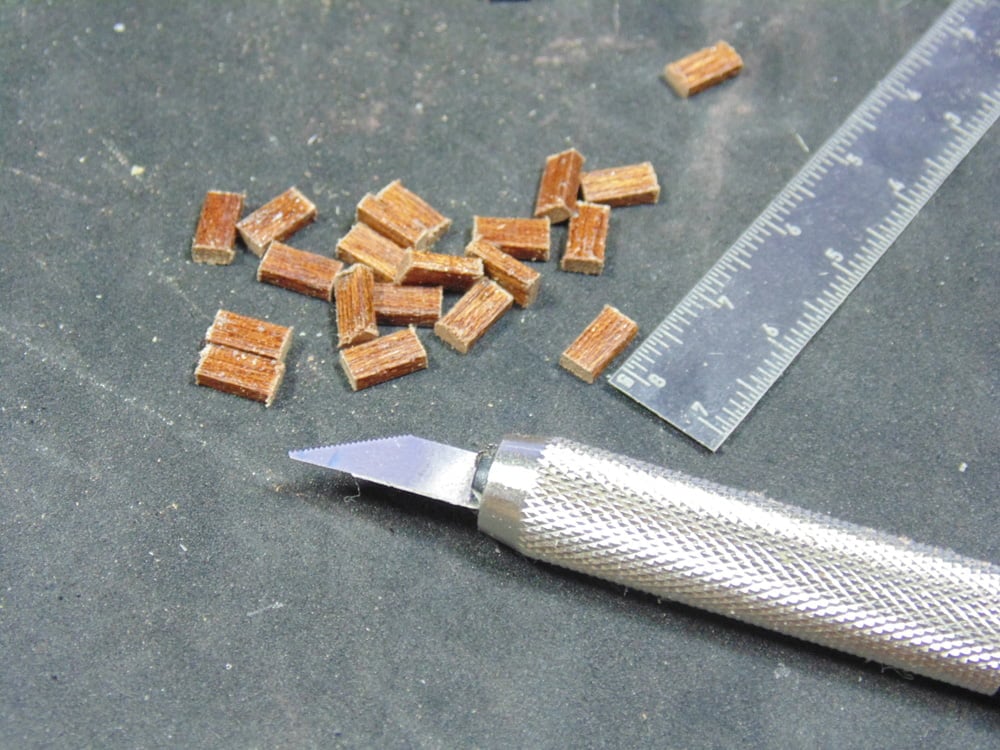
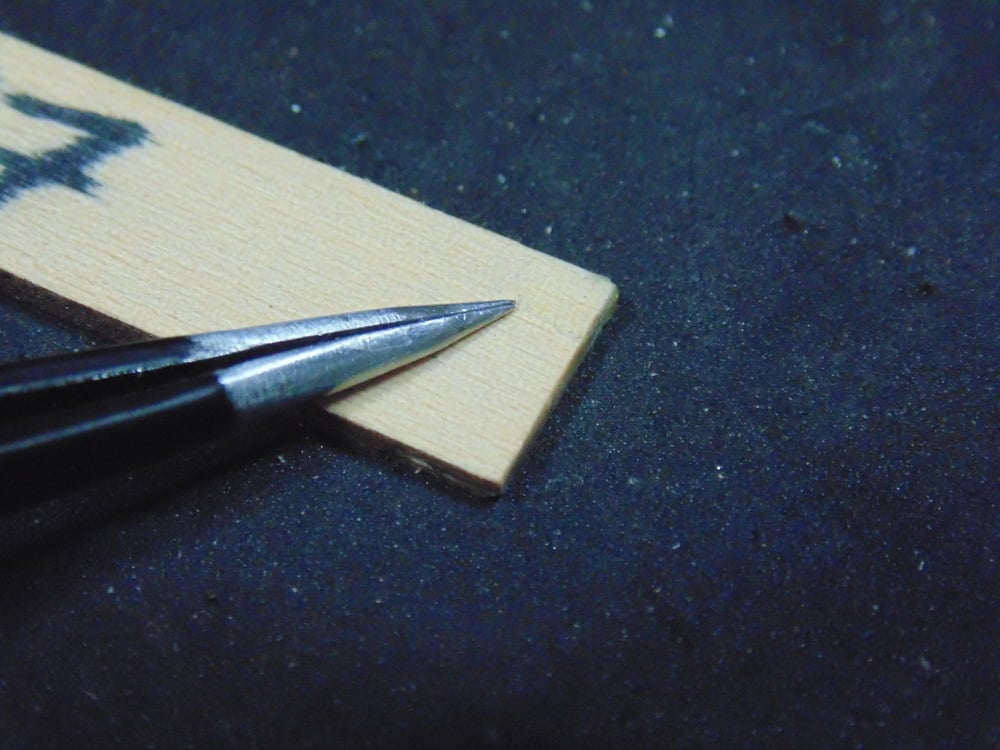
I will not sugar coat things for you. There are 44 times 6mm parts to be cut for the mid to aft section, so you’ll be investing many hours. Having a solid ruler will allow you to mark the cut, then you can finish the cut on a scrap piece of wood from the kit.
Sunward Hobbies have a great selection of razor saws from many high quality brand names.
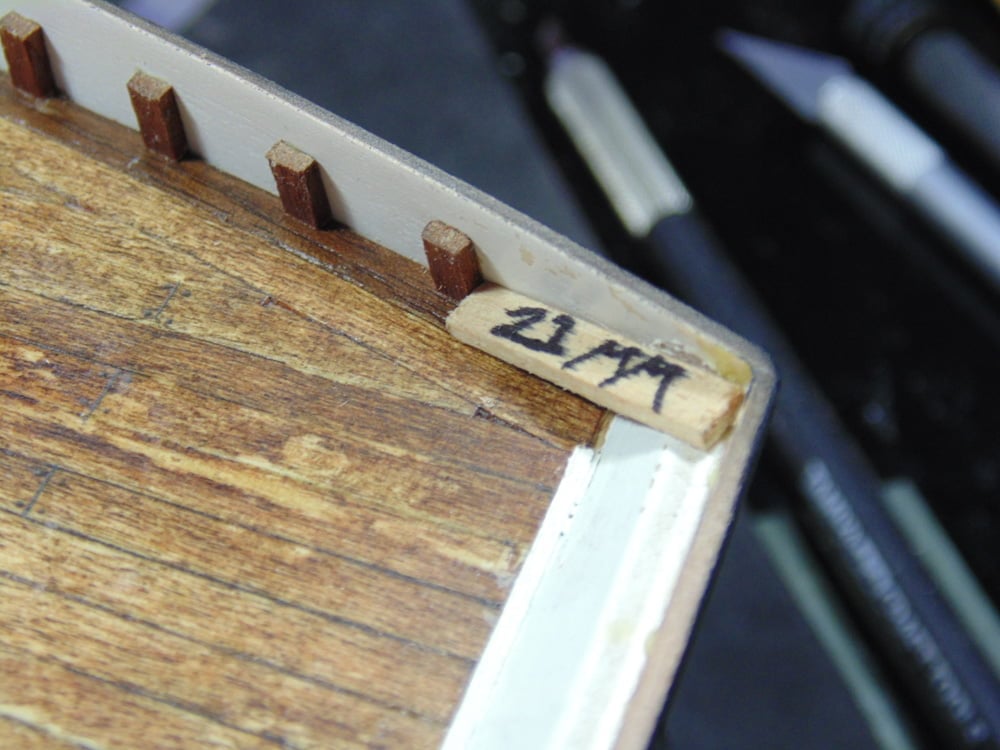
The instructions call out for a 21mm length from the stern plate to where the first stanchion begins. Here’s a tip to make your life easier, cut a length to size and mark it. You’ll be using this twice, obviously, but the big time saver is being able to have something solid to butt your part up to and not having to fiddle around with the proper distance.
When adding glue be as minimal as possible. Here you can see I’ve added a tiny dab on the bottom, yet even this was excessive and needed the sides to be cleaned. A translucent layer will work just fine.
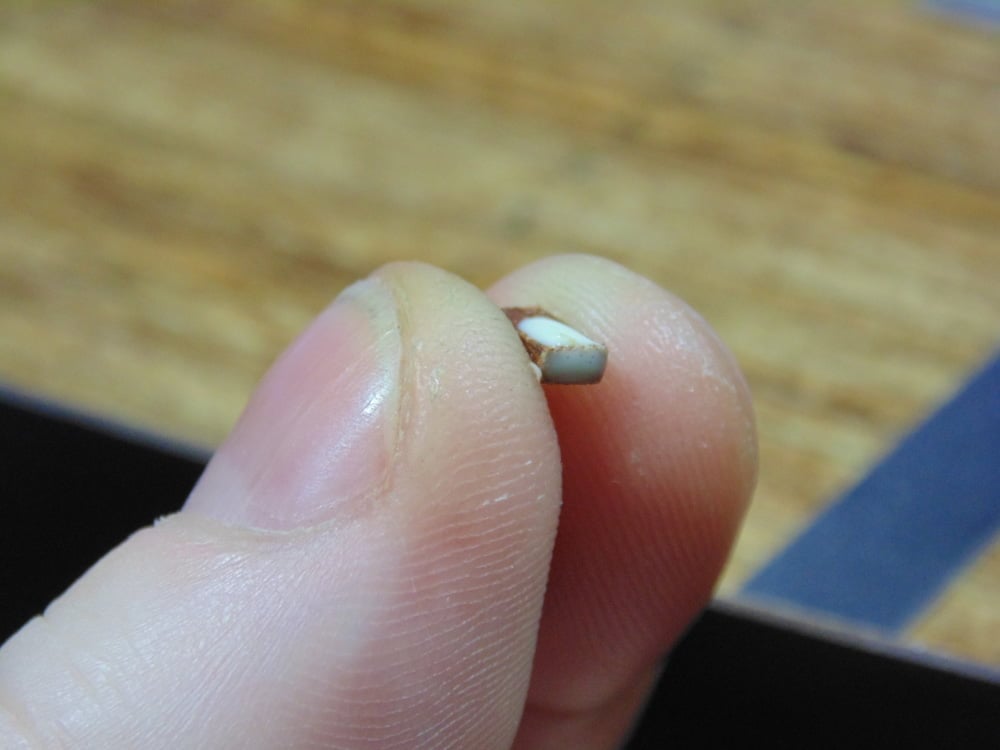
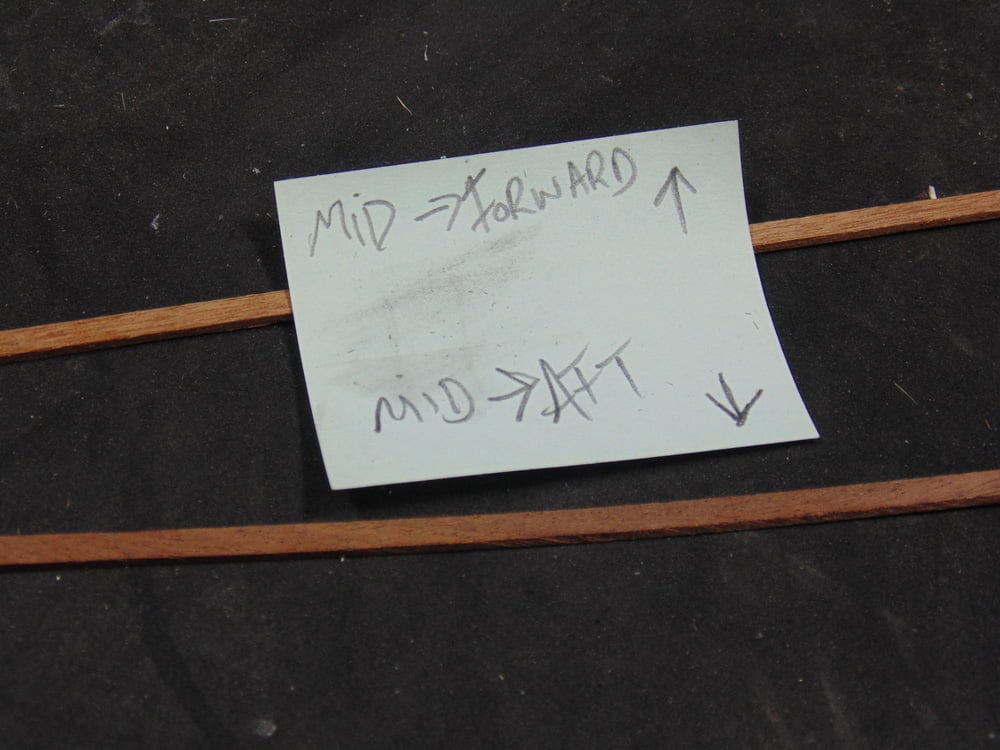
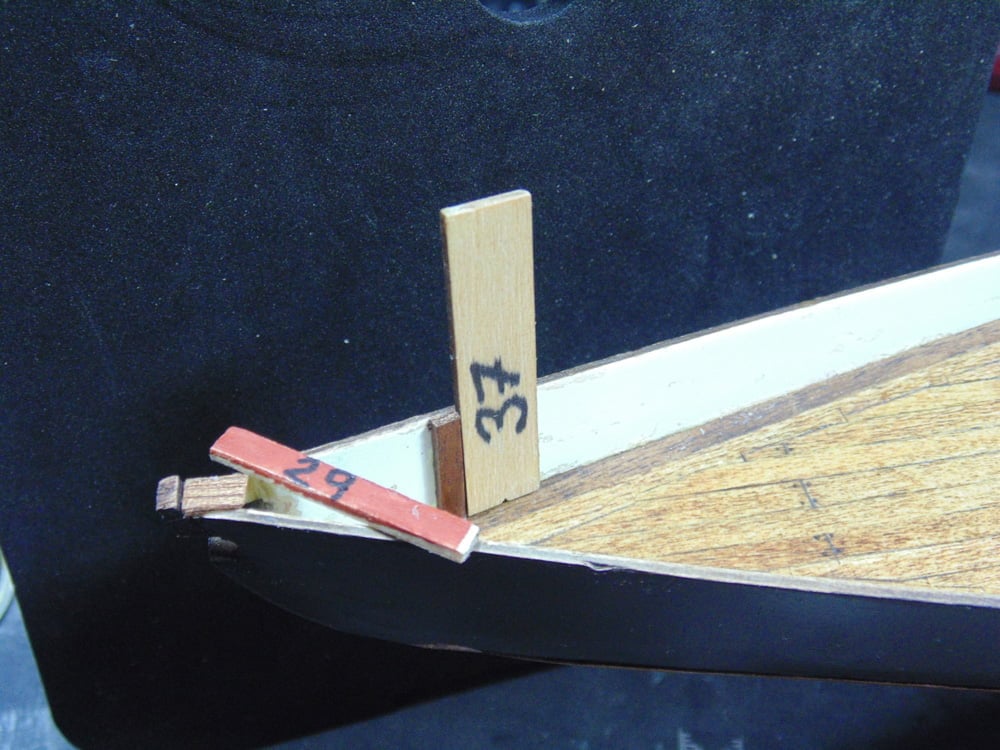
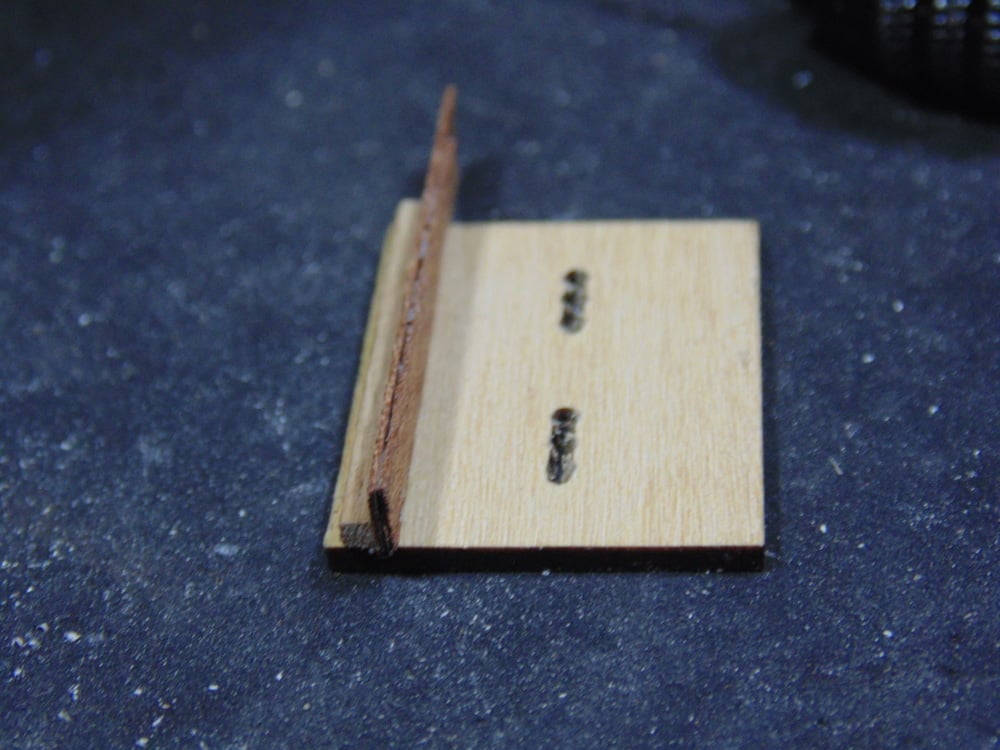
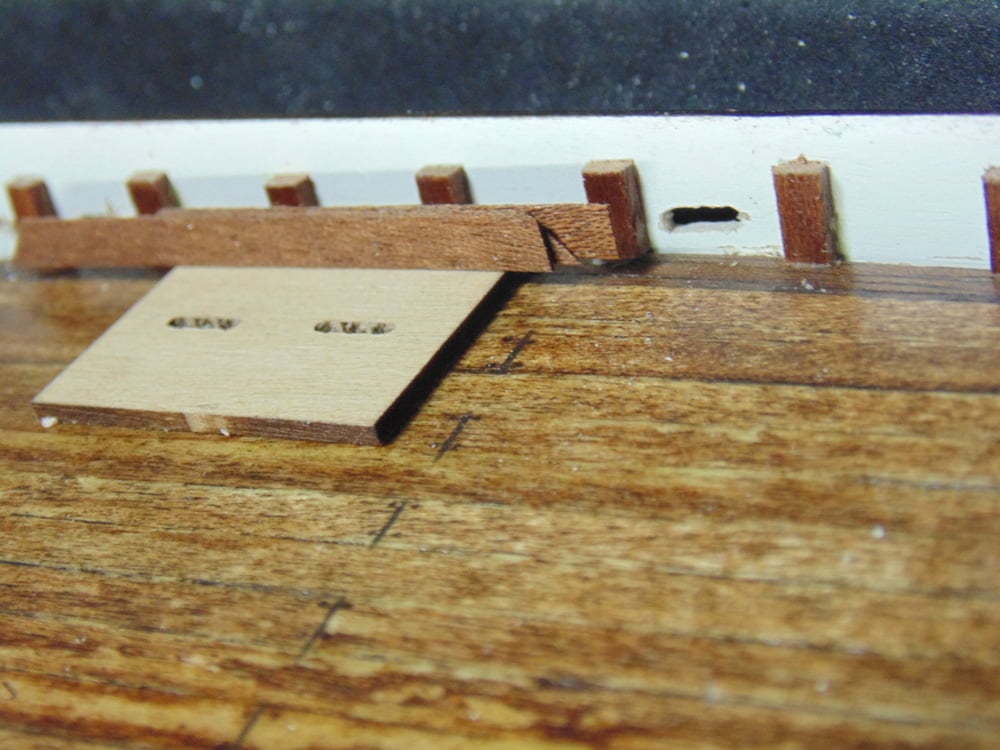
Laser cut part number 37 is the spacer you’ll be using for the entire section, both fore and aft. However, mine had a flaw at one end. It was not perfectly square. Later you’ll see I’ve marked an arrow on it to speed things up with a quick glance. I strongly advise scraping some of the cream paint off to ensure the parts stay put.
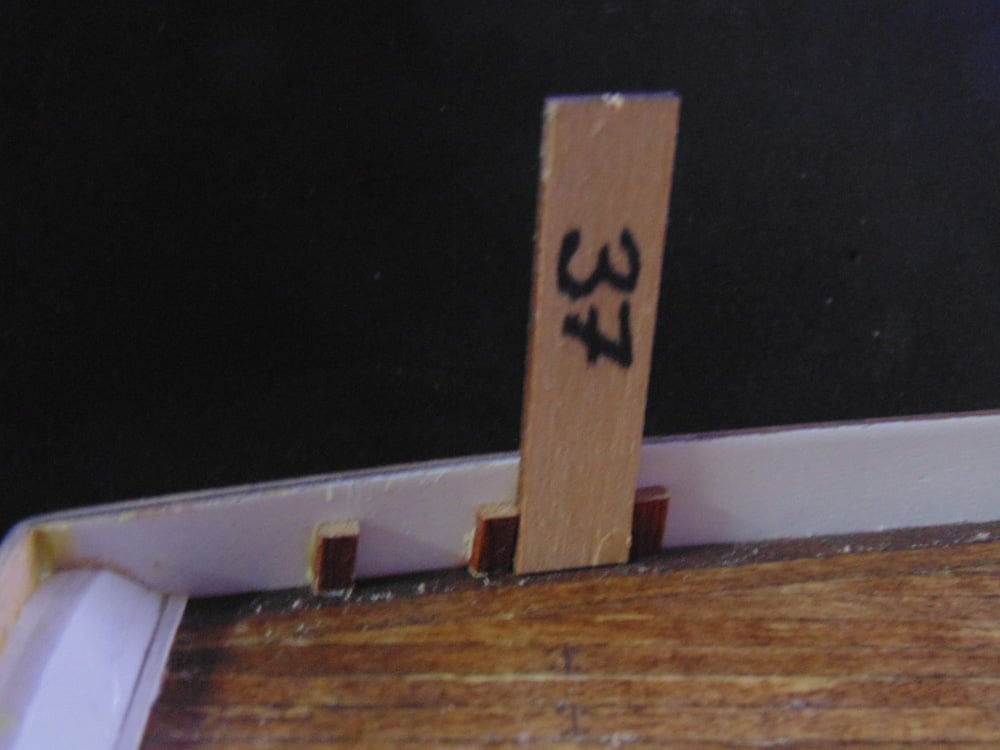
Lay 37 flat, gently place your part and then pull up 37 to do the final positioning. Here’s a great tip, start one side to give it enough time to dry while you’re working on the other. If the glue is at all wet the previous part will move and you’ll need to re-space it.
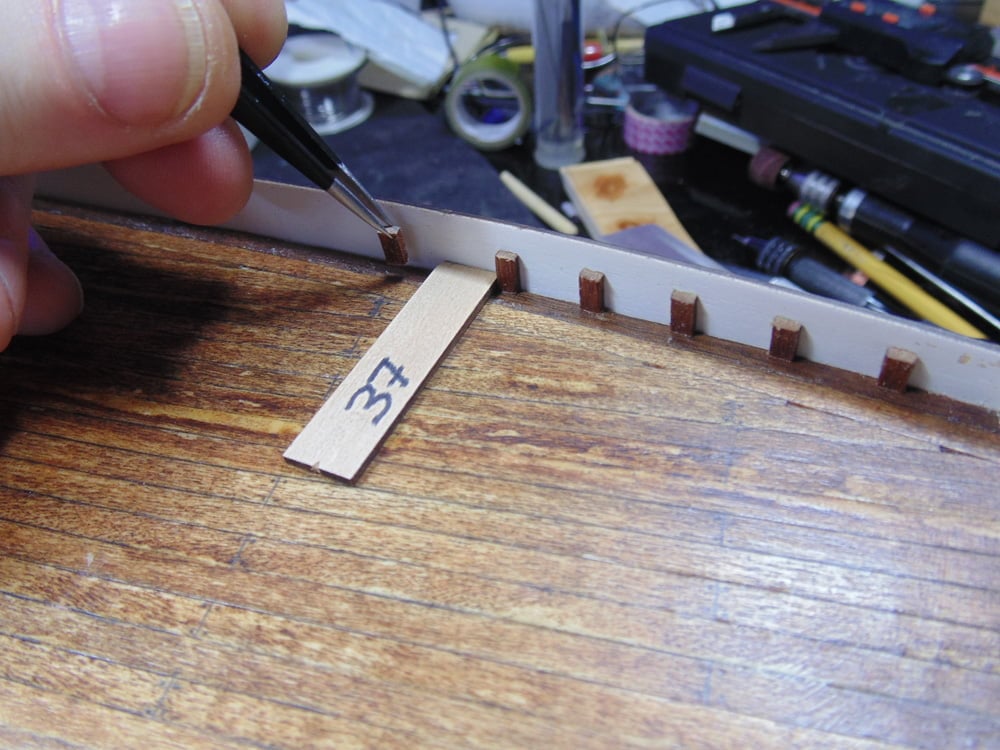
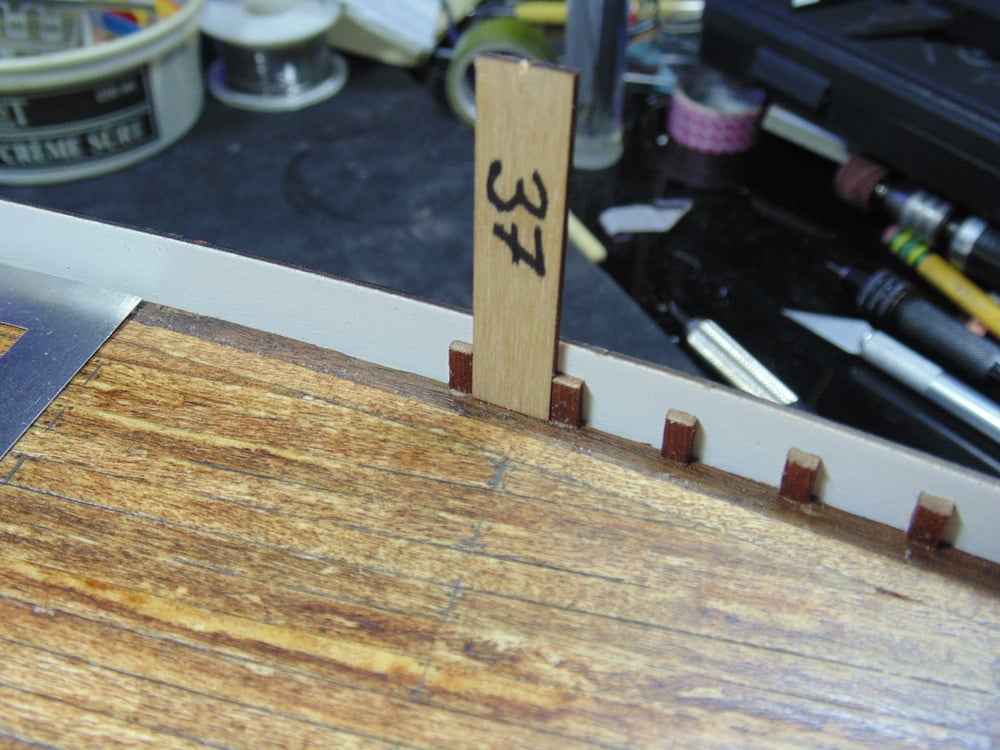
I quickly discovered that any excess glue will bind part 37 to the stanchions. Trust me, even with best practices I had to refit more than once. Make your life easier by cleaning both the spacer 37, the replica and your Excel Hobby tweezers.
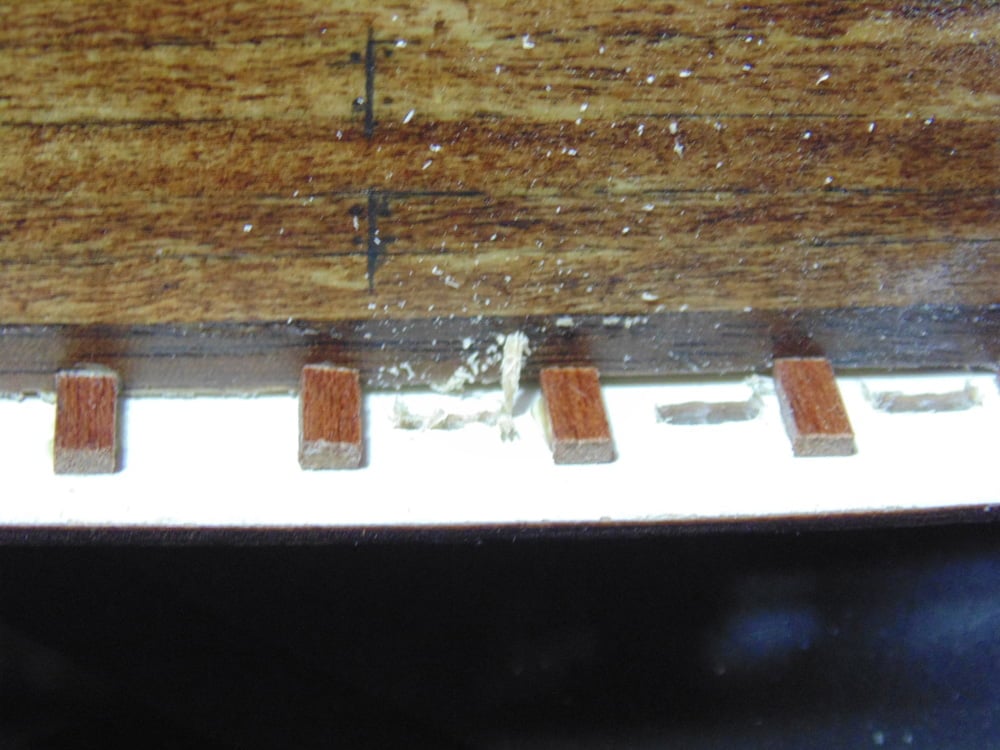
Now on to the prow moving a midship. Again, cut a length of scrap to the suggested 29mm. Take your time here to get the first stanchion correct. Remember to scrape the paint from the deck up on the bulwark. You’ll be doing some sanding to the tops so the chance of the parts coming free is much greater.
Move from side to side, but if you have a good measuring tool try to get the length for each one. It’s far quicker to measure than it is to slowly sand each top. The instructions ask you to take two lengths of 3mm X 1.5mm Sapelly for the entire Step, yet this was not nearly enough.
Despite measuring twice and rechecking distance my final stanchions were off. Not a huge deal if you run into this, just make sure there isn’t a big gap at the midship riser.
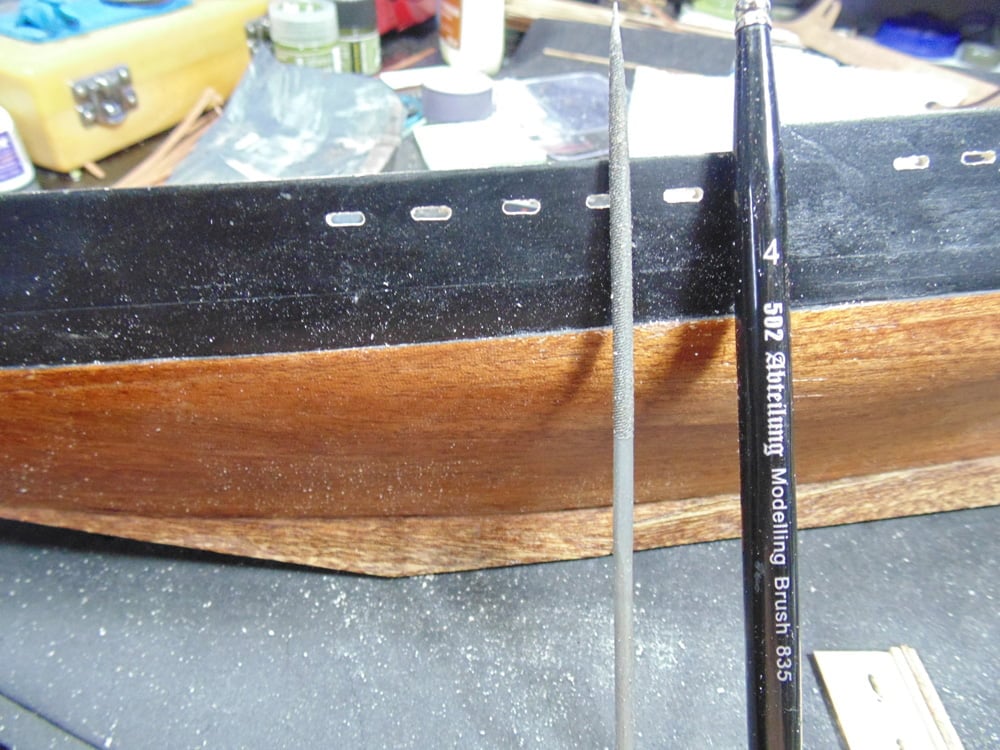
Use a hard flat sanding stick or fine cut file to make the forward section stanchions flush with the top of the bulwark. No need to rush this task and you can eyeball the two tops to ensure they are flush. Luckily, this wood is very soft and easy to sand.
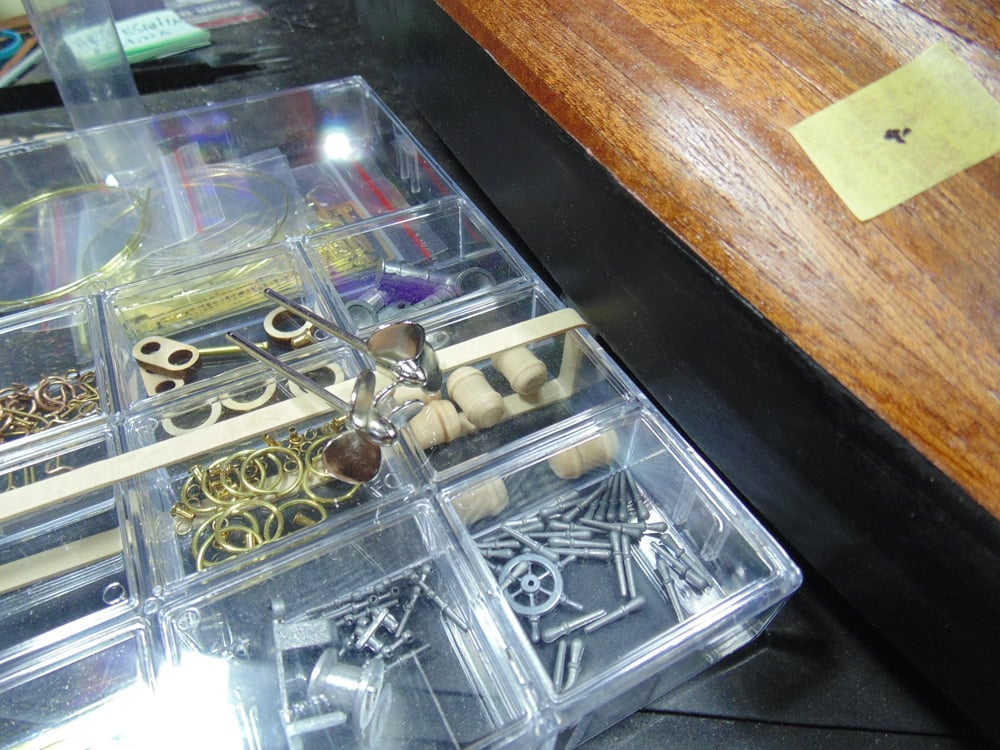
Even with many decades of experience sometimes things just happen. Artesania Latina put tape on their parts containers. They do not snap shut. Yes, you know where this is going. After several hours of being inches away from the floor I found the last tiny black bead. Like the first parts box, both are now banded.
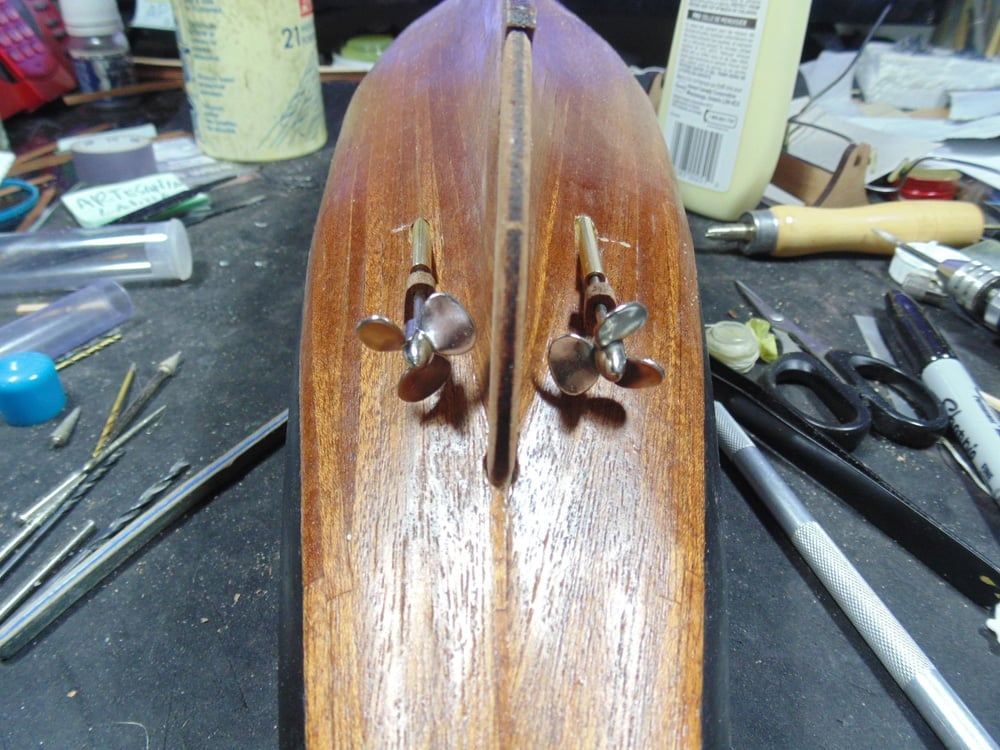
Welcome to Step 18. Let’s put some bling on the ship.
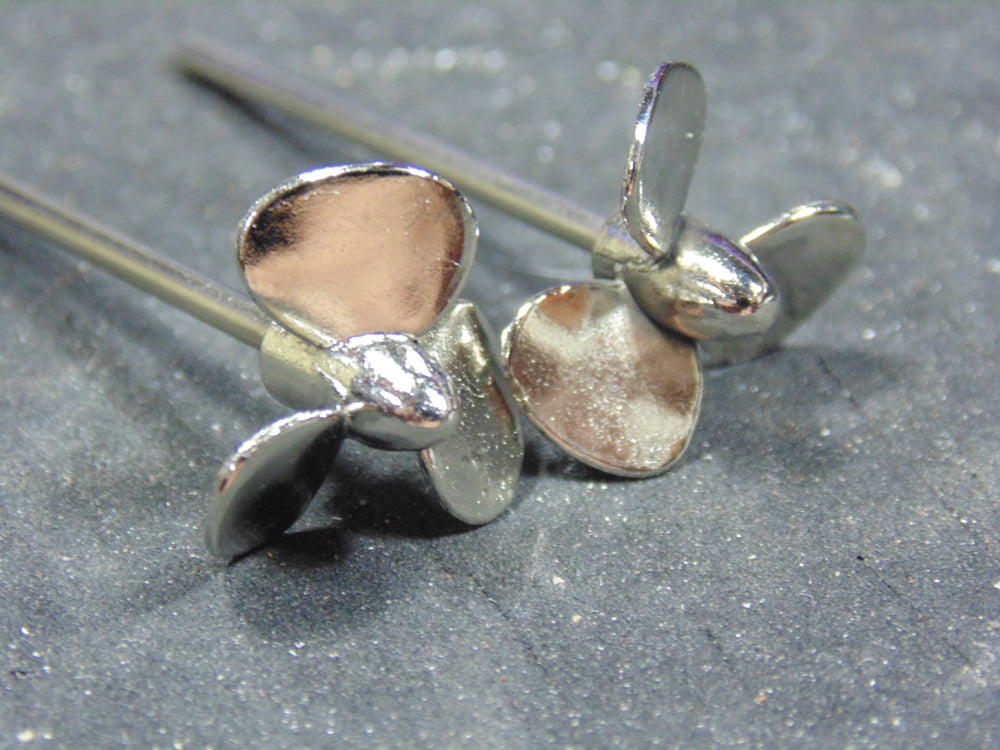
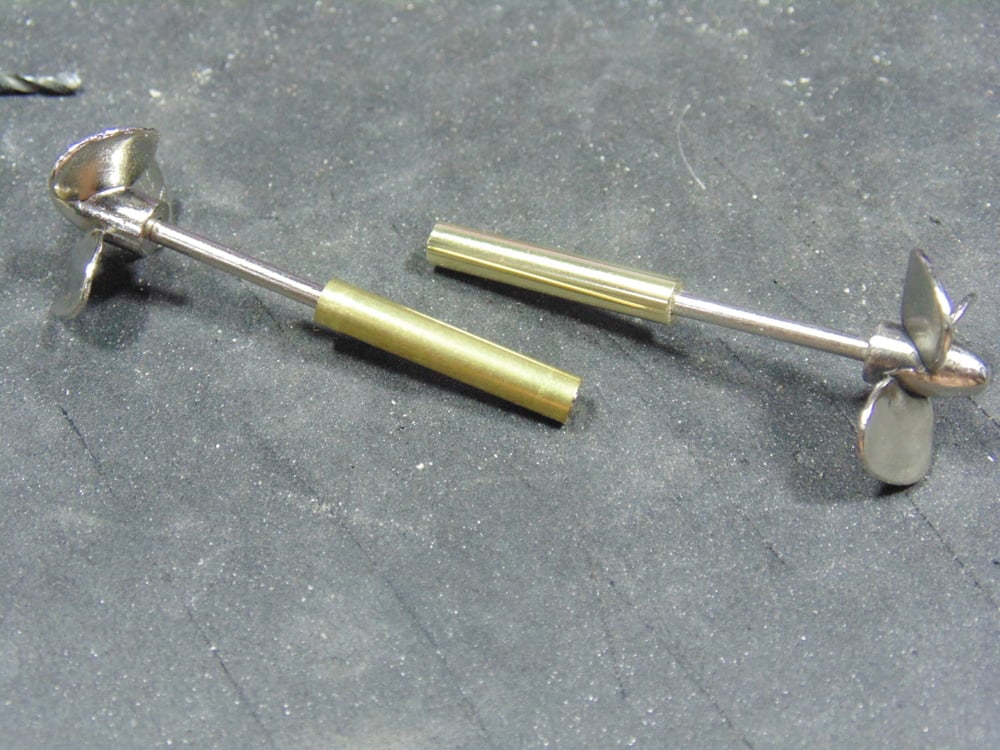
I began by spiffing up these screws with the Novus 3 step Polishing compound. which Sunward Hobbies had shipped some months ago. You can search for that “Parts Polishing” article on the website.
You can see the difference with the dull look of the prop at the top back of the part. And while I know there will be plenty of handling to come, getting most of the grim away now means just a light polish when the ship is complete.

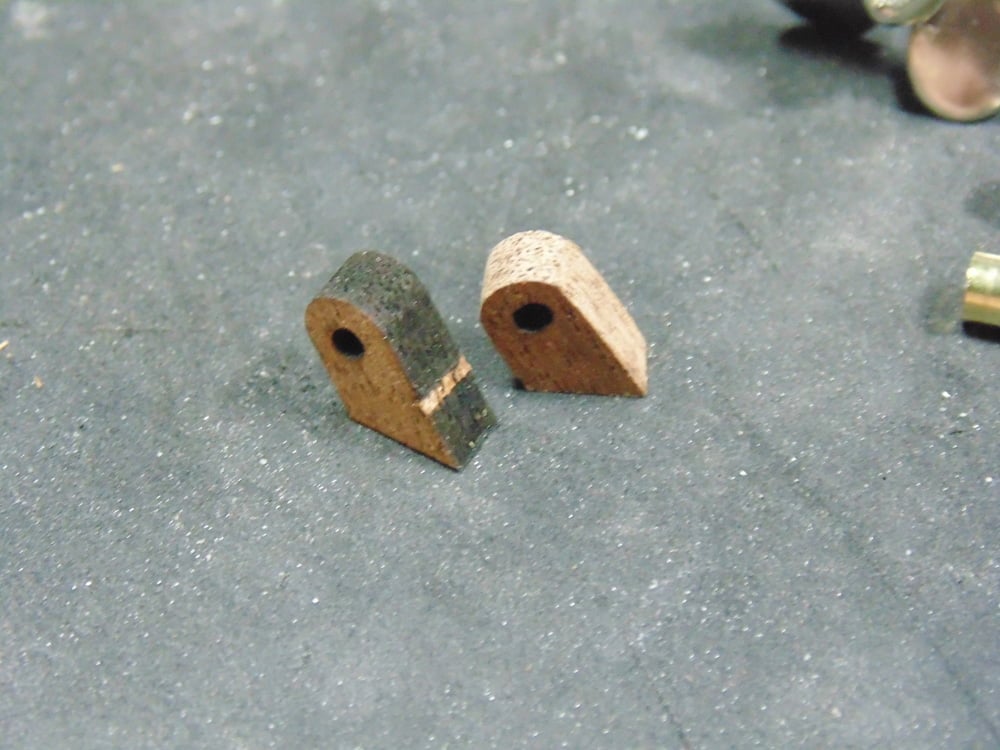
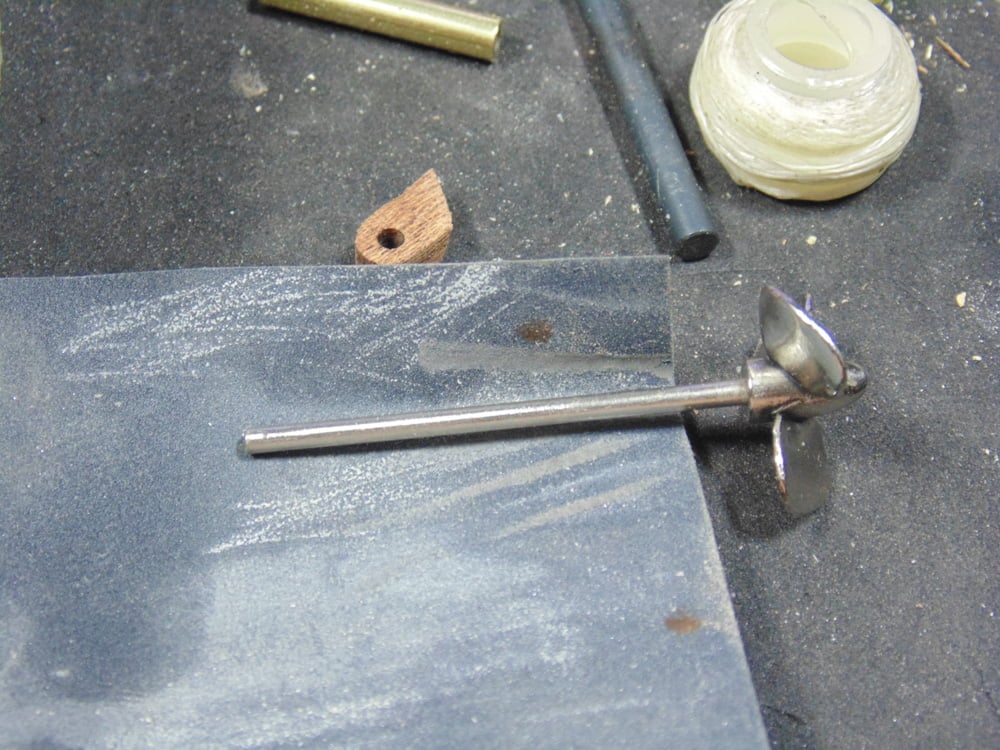
Next the holdouts need the soot sanded down. Later they will be clear coated, but you must also ream out the holes for the prop shafts to fit.
When polishing the brass tubes I discovered they were an extremely tight fit. Some Mr. Hobby 600-grit wet/dry sandpaper solved the problem without having to run a drill bit into the tubes.
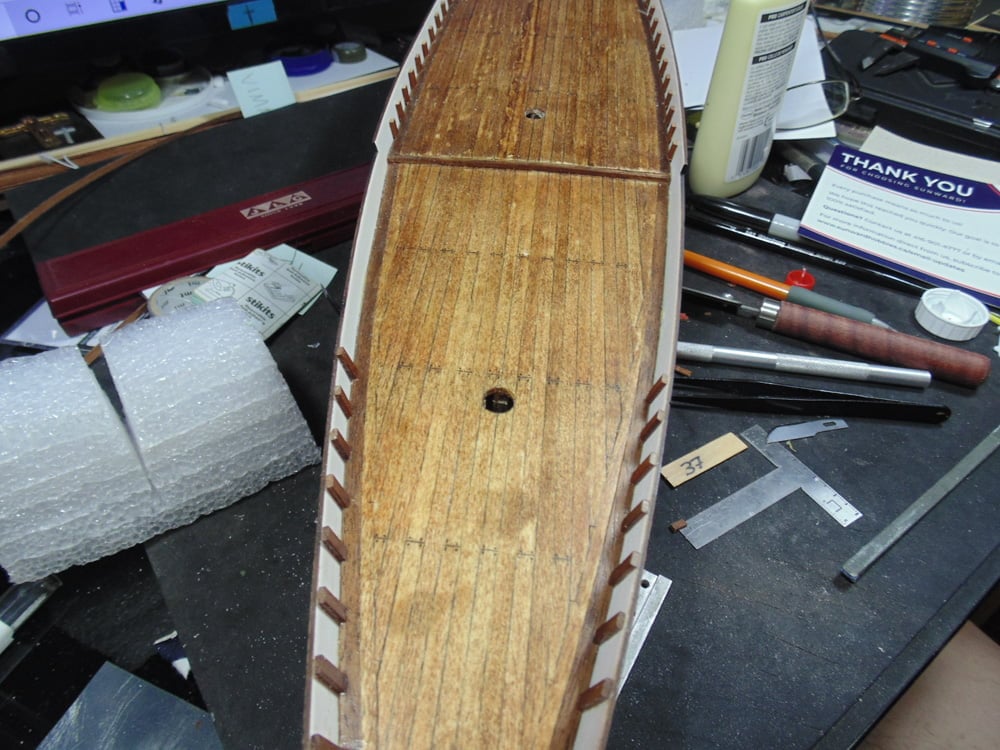
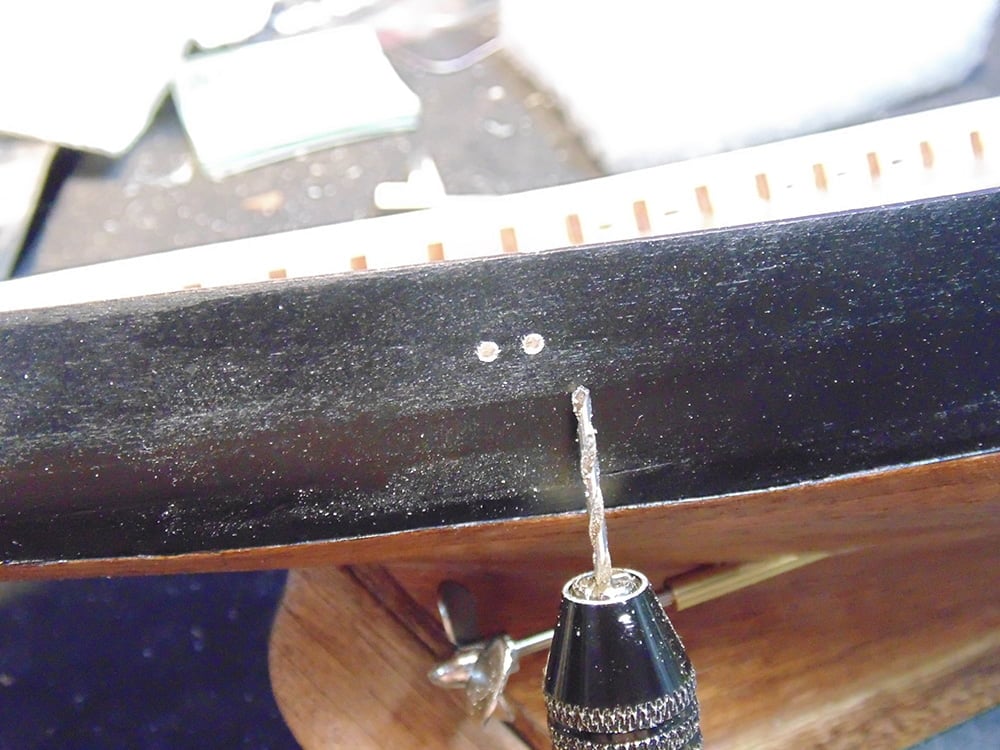
These holes have to be measured many times to get them in the correct places. Do your best to find the 130mm up from the stern plate and 17.5mm out from the keel blade. I looked directly above to come close and drilled the 3.5mm holes, but at an angle. Next, you’ll need a Flex-I-File FD630 conical reaming set which has a short coned shaped one that’s perfect.
Take your time and constantly place the tube in the hole and sanded slot with the propeller inserted. This way you can get the right angle for the screws to just clear the hull. Even more for it to look right.
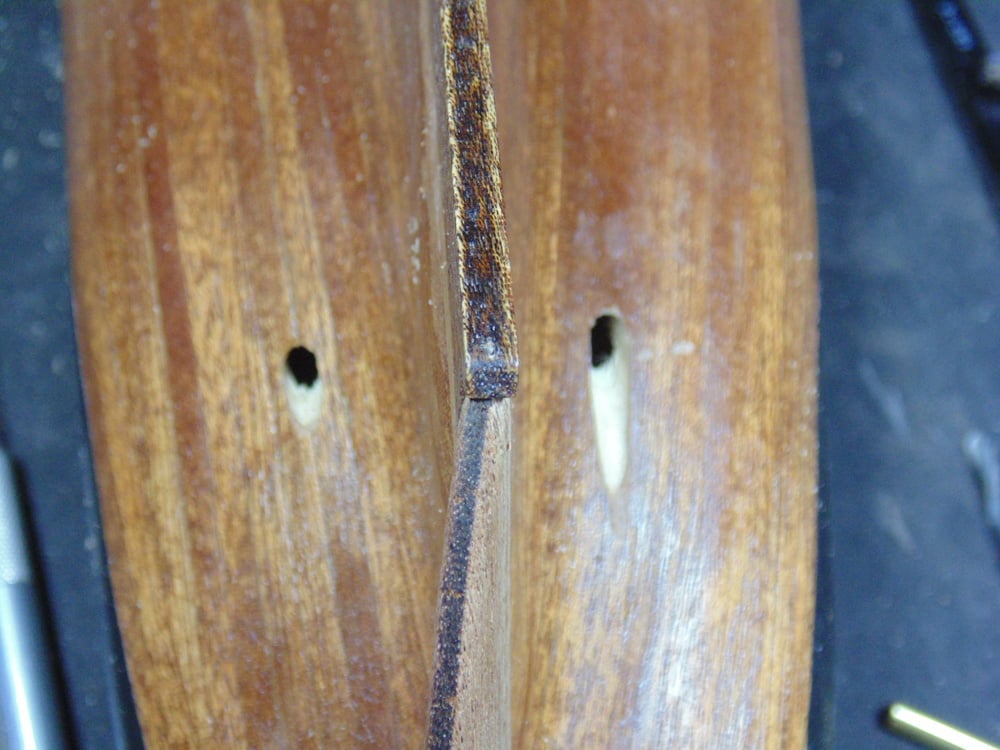
After many test fits, the holdouts were sanded to fit the angle of the hull. However, there was absolutely no way I was going to get the suggested 10mm space from the tube on either side. Do your best.
Make sure to scuff up the bottom of the tube to get a good bond with contact cement, but have the holdout and prop shaft dry fitted while the cement sets. Keep a watchful eye on it or better yet hold it in place for a couple of minutes.
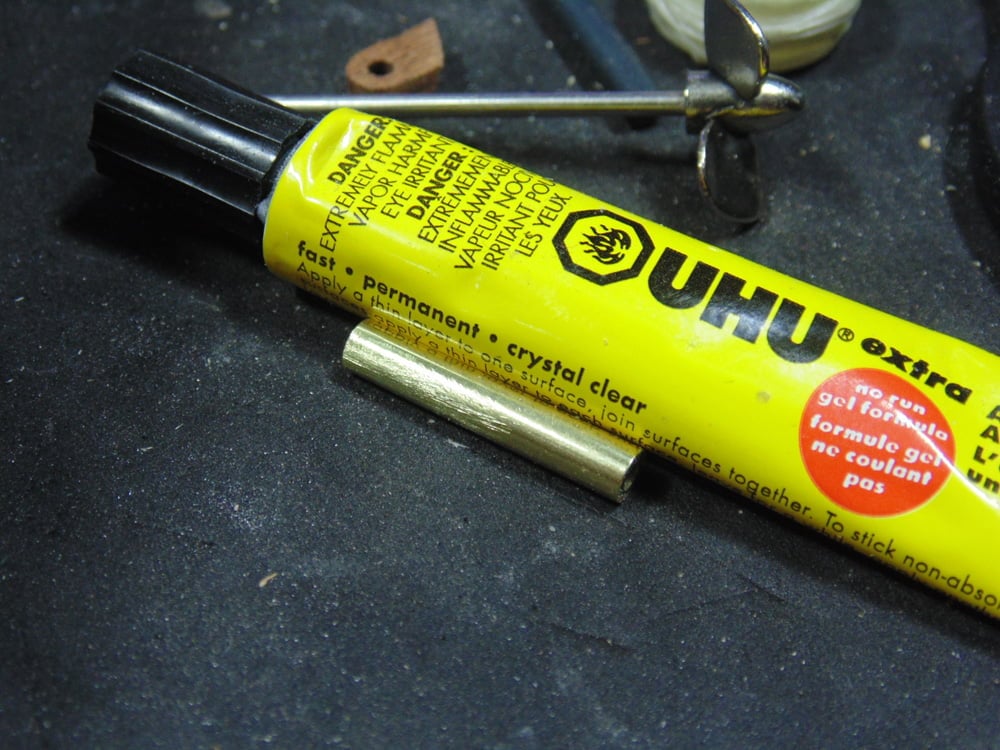
Once the tube cement has completely dried you can flip up the holdout and add carpenters glue to the bottom. I pulled out the prop shaft and added a small dab of Microscale Liquitape MI10 and slid it into the final position.
It is not perfect and I may later tear the port side hull apart, replank and redrill to get the few millimetres to make it look better. The numbers will be off, but it’s all about the appearance.
In Step 19 you may have to do some problem solving. Remember, this is wood with all its warps and flaws. That said, it’s super easy to adjust as you go.
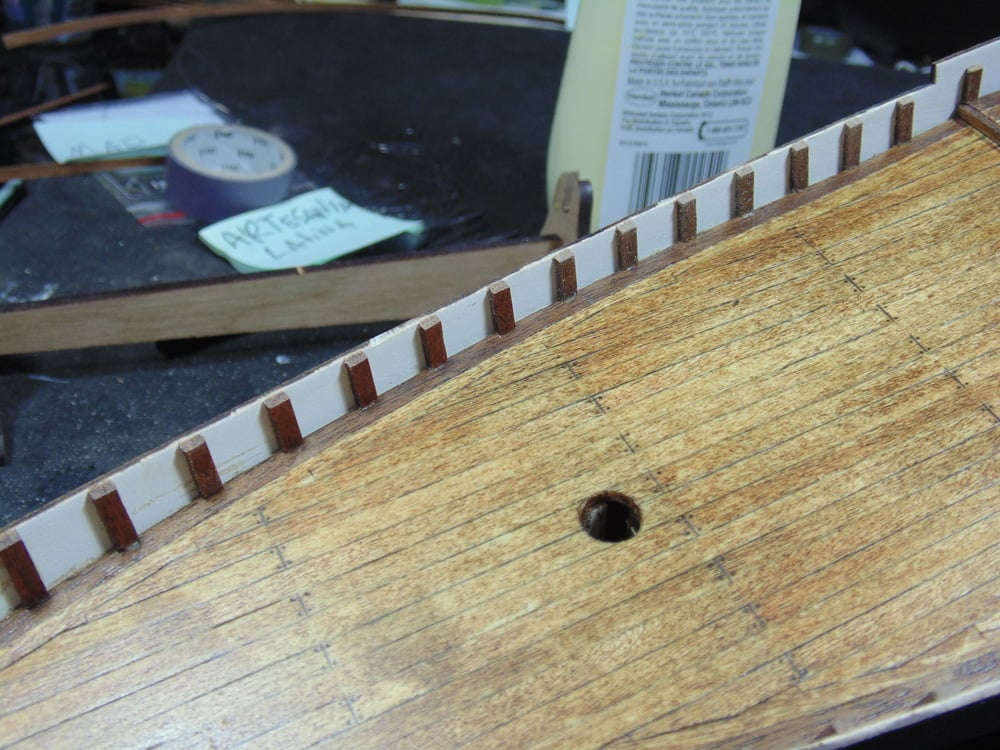
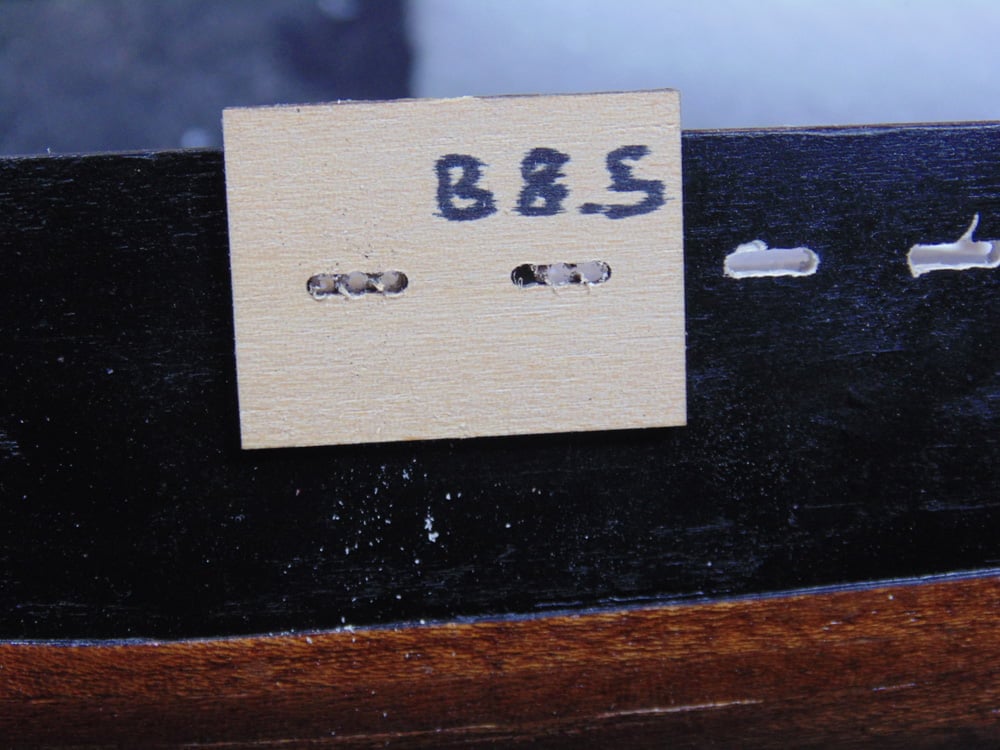
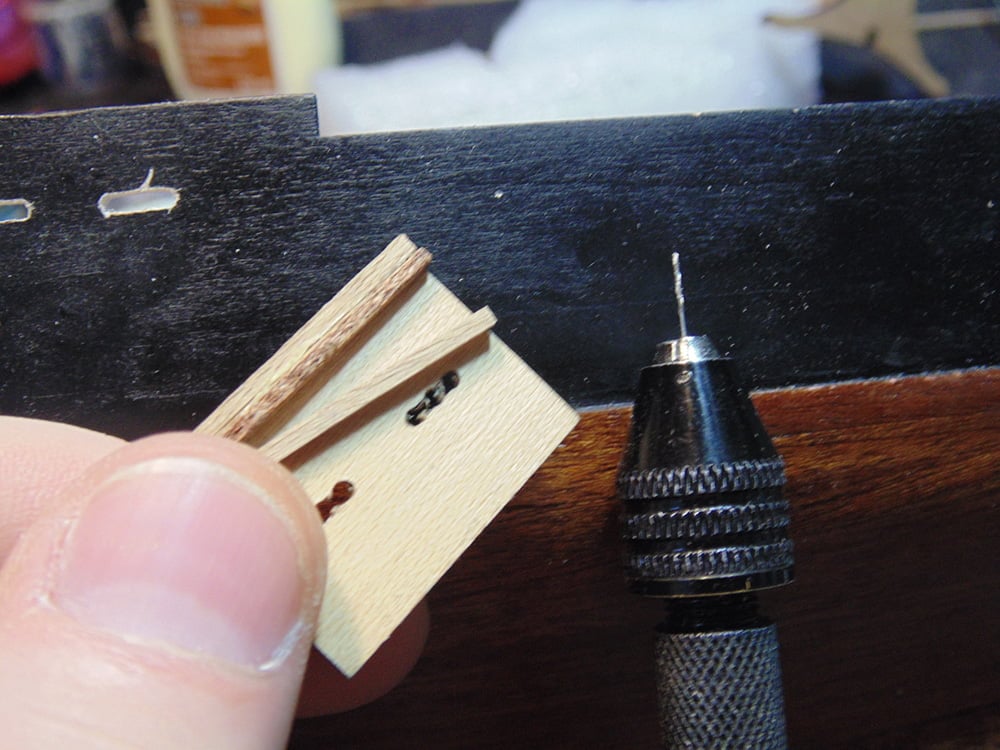
The provided template 41 works well measured at 8.5mm for the first few aft drain slots. I lined up the centre of the pre-cut out slot in the template with the centre of the inside stanchions. A small mark was made with my Excel Hobby 1.5mm drill bit and I eyeballed it again to confirm. Next, two more test holes went in at either end of the pre-made slot on the template. Then I removed the template and drilled my holes. Next, use a Excel Hobby No.11 blade to cut out the excess then a flat micro file to smooth the top and bottom.
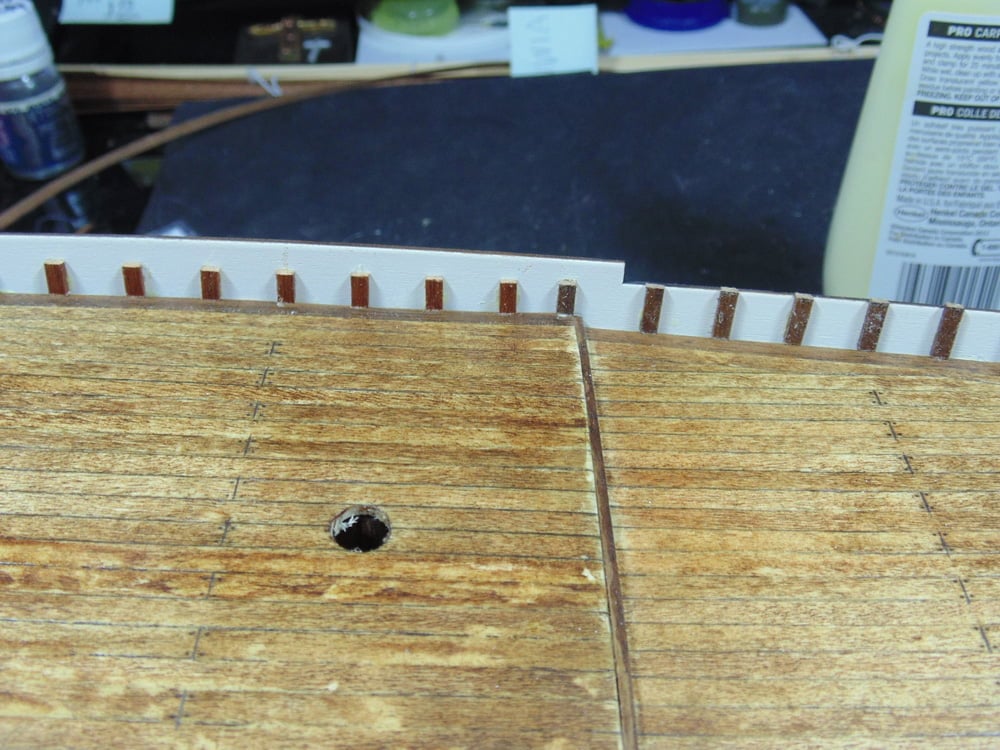
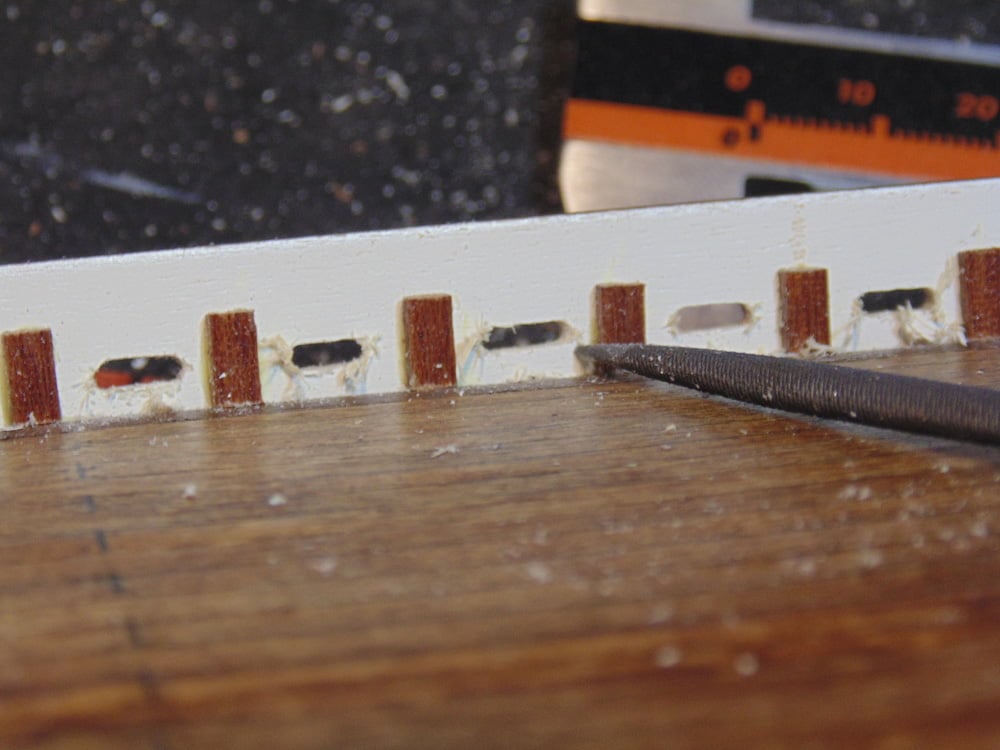
Remember in Step 17 that my stanchions were slightly off? The laser cut template does not account for this. Notice under the 8 a black undrilled hole, that’s the variance I was dealing with.
If you experience this simply do one drain slot at a time and check each one for the proper height from the deck. After six out of twelve completed I needed to adjust the lift on the template.
Then you may have to add some spacers to your template to raise the next few slots from the deck. A few strips of 0.5mm scrap worked great and I continued to check the height.
As I progressed an additional 0.5mm spacer was needed. I know this might sound complicated, but it took very little time to retool and carry on and match my work with the pictures.
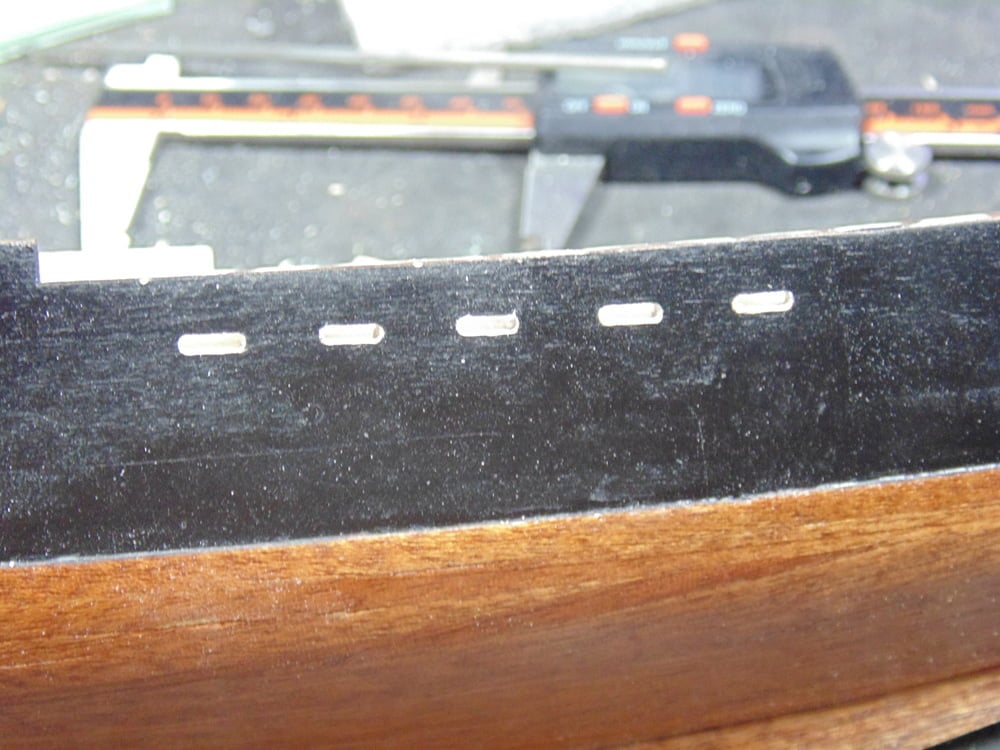
Finally, the aft drain holes. Here’s a tip when drilling, turn the bit 3 times clockwise then back once. This will give you a much smoother bore and finished look on the outside. (Please disregard the location of the propeller. That was just me testing for a possible refit location.)
To get the proper height of the midship’s drain slots you’ll need to measure from the bottom of the spacers on the template and the top of the bulwark. Took me 5 minutes but I still drilled a 0.3mm hole to be sure. I needed another 0.5mm bit of scrap.
Use the same practice as with the aft drain slots and in some cases you may simply spin the drill bit to remove the excess before filing. Be aware there will be plenty of debris left inside the slot. Use a fine modeller’s brush to get inside the slot so you can just how much needs to be filed down.
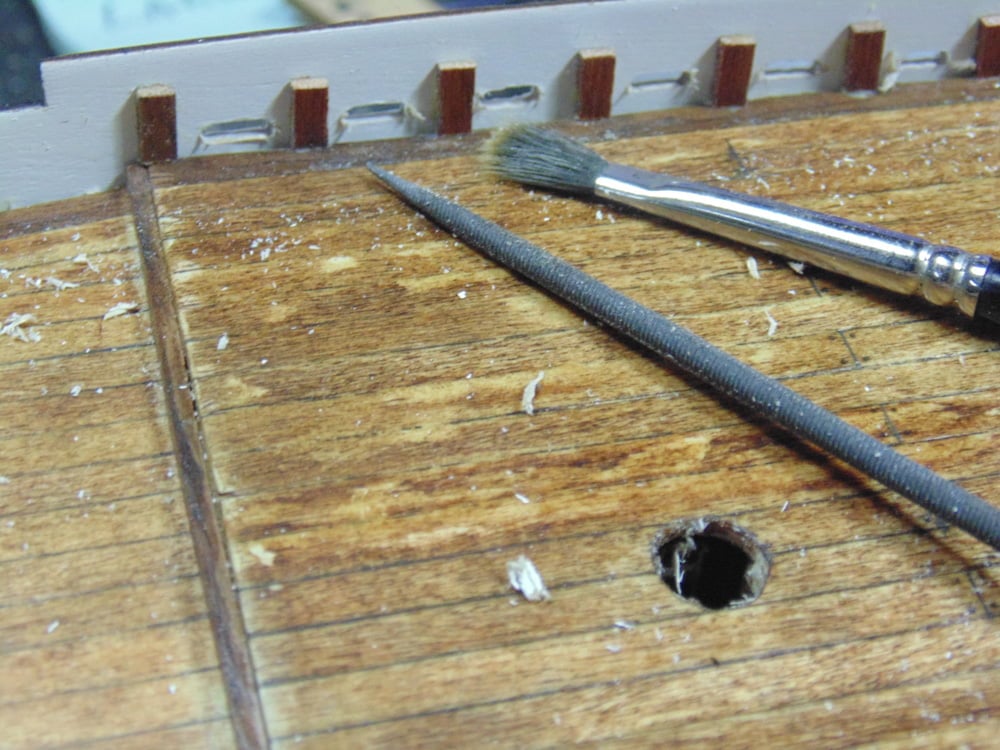
Now you can move to the inside. Notice how much debris has been caused even with slow careful drilling. You can now begin to even out the inside slots.
Before you begin to detail the inside slots take a minute or two to brush away the loose particles. Now you can see exactly what is clinging and where to even out.
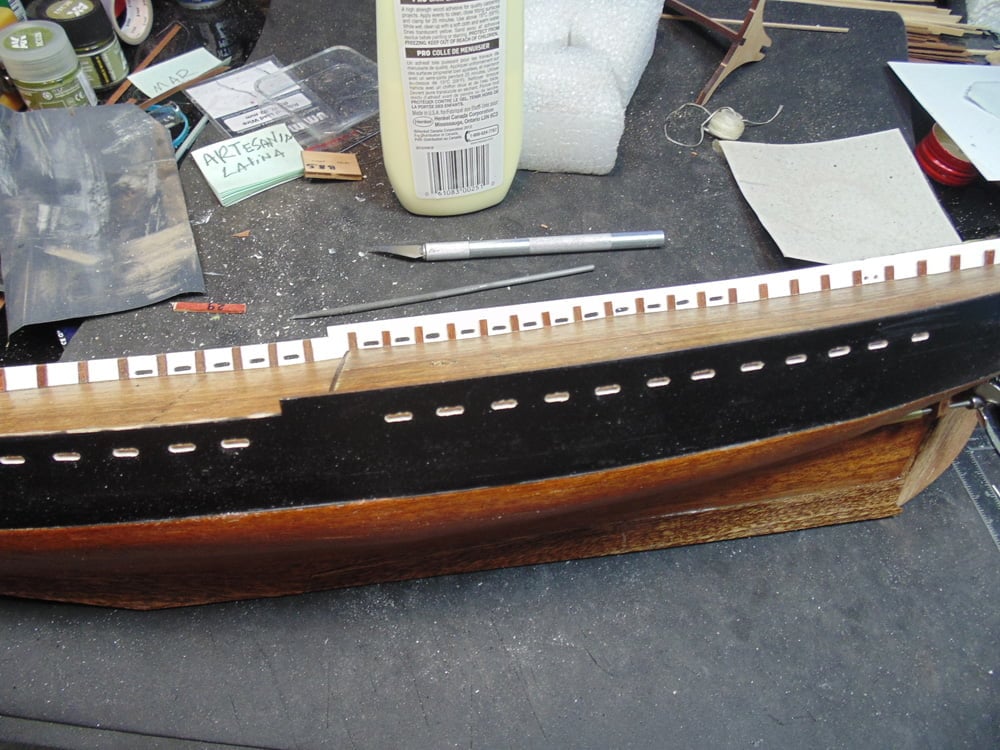
I went over the entire hull twice more and tweaked a few spots. There are definitely some marks on the inside and out. My advice is to wait until you have the black paint ready for more than one task and the same with the interior white.
Regardless of minor dings it’s certainly coming together.
Thanks again for taking the time to follow the build. If you have any questions about Artesania Latina products or the techniques used please feel free to ask when you pick-up or place your next Sunward Hobbies order
About the Author:
H.G. Barnes is a former voice-over artist and retired sales and marketing professional. He’s the author of two large volume science fiction adventure romance novels with many more in the works. For well over 40 years he’s been building scale model replicas and now does commission work for clients in Canada and the USA, plus completes projects for companies in Asia and Europe.
Currently H.G. is involved as an Associate Editor with KitMaker Network’s Online Magazine Channels.