
Elevate Your Craft: Advanced Colour Modulation for Historical Accuracy
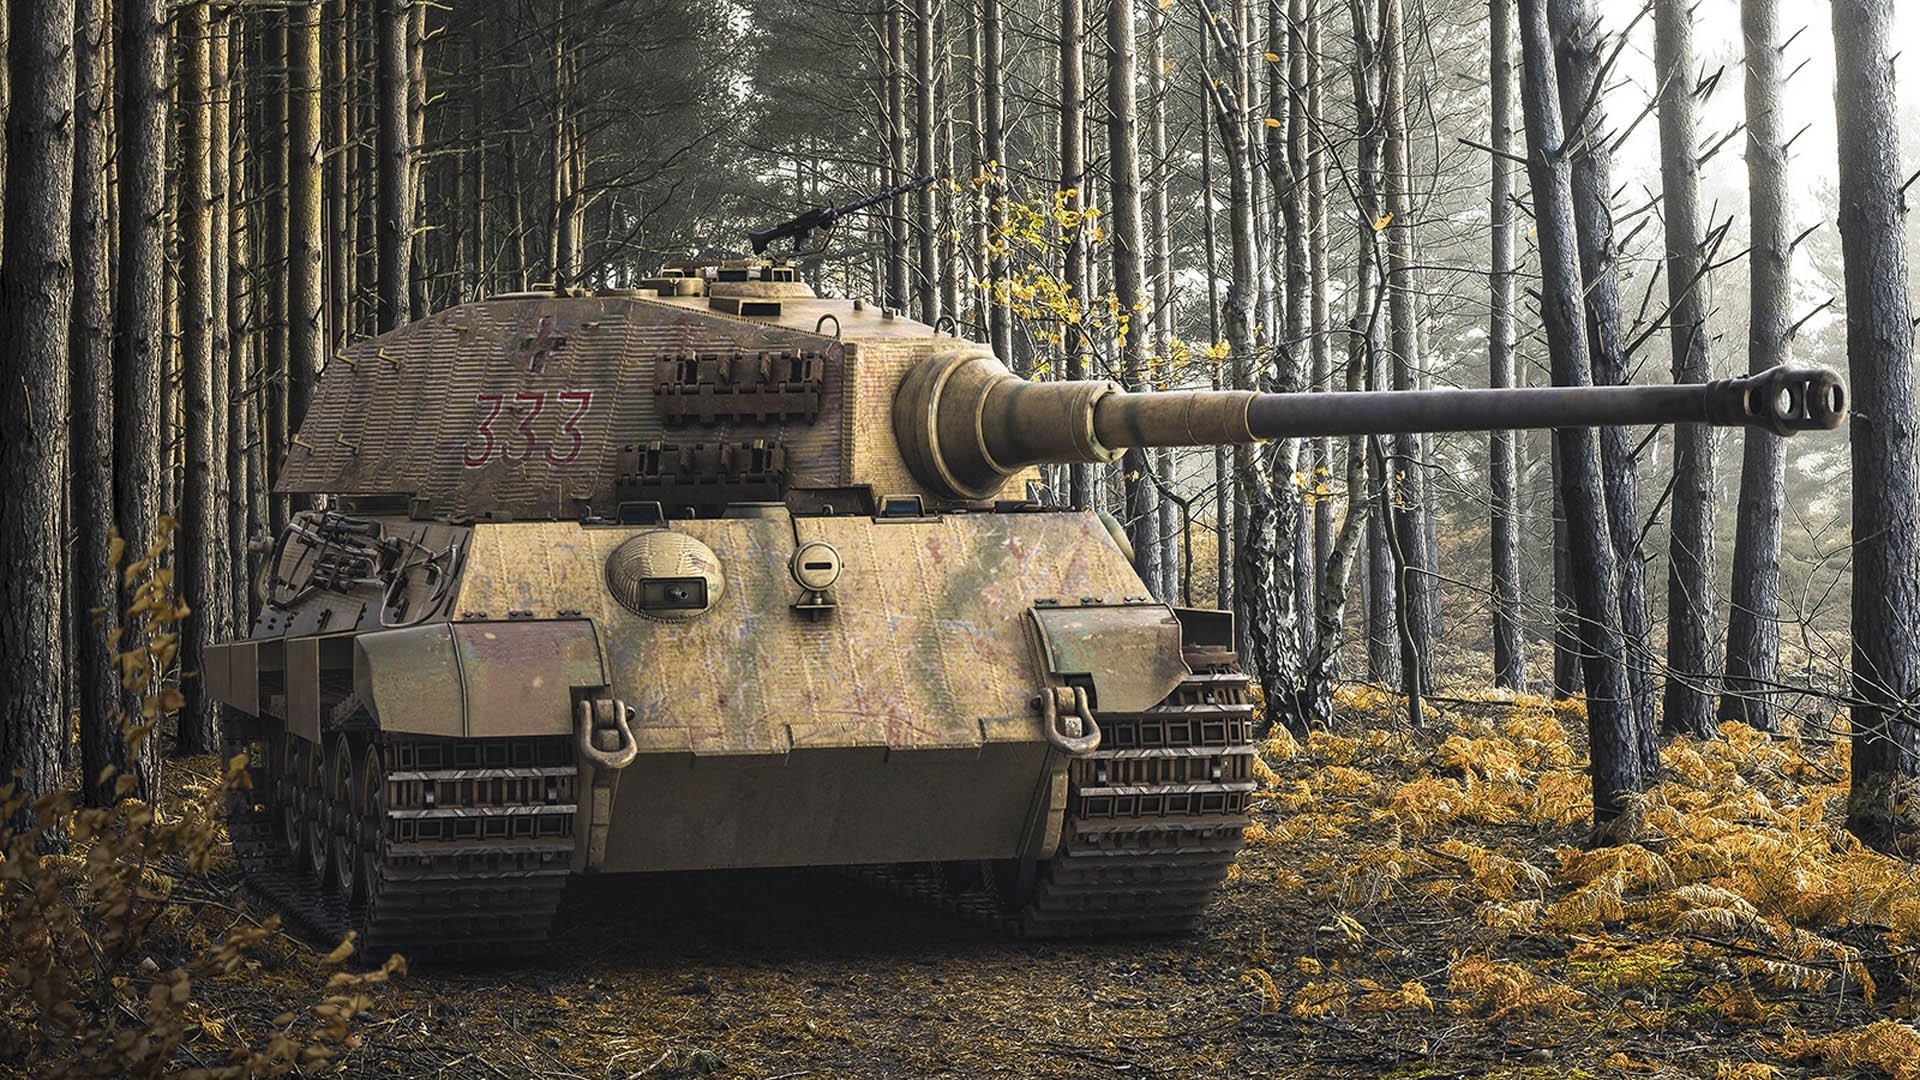
The German WWII tricolour ambush camouflage—featuring RAL 7028 Dunkelgelb (Dark Yellow), RAL 8017 Rotbraun (Red Brown, also known as Kaffeebraun), and RAL 6003 Olivgrün (Olive Green)—stands as an iconic representation of mid-20th-century military innovation. Originally designed to provide effective concealment in a variety of environments, this pattern is a testament to the strategic ingenuity of its time. For scale modellers, replicating this camouflage presents unique challenges due to its intricate interplay of colours and historical significance.
Achieving natural variations in colour and depth without relying on pure black or white requires a refined understanding of colour theory, weathering techniques, and blending methods. In this guide, we delve into advanced techniques for modulating these colours using AK Real Colors and 3G Acrylics, enabling you to produce an authentic, high-impact finish that captures both the essence and complexity of this historic camouflage.
The German Holy Trinity of Camouflage Colours: Working with Individual Colours
How to Lighten or Darken RAL 8012, RAL 8013, and RAL 8017 Using AK Real Colors and 3rd Generation Acrylics
When working with historically significant colours such as RAL 8012 (Rotbraun), RAL 8013 (Rotbraun), and RAL 8017 (Kaffebraun), particularly in modelling applications, achieving subtle variations in tone is essential for realism and visual appeal. Rather than relying on pure white or black, which can desaturate or overly simplify the colour’s depth, adjustments can be made using complementary and analogous shades from AK Real Colors and 3rd Generation Acrylics. These paints, known for their historical accuracy and ease of use, allow for fine-tuned customization that enhances the final effect.
Below is a detailed breakdown of techniques to lighten or darken each of these colours while preserving their unique characteristics and historical fidelity.
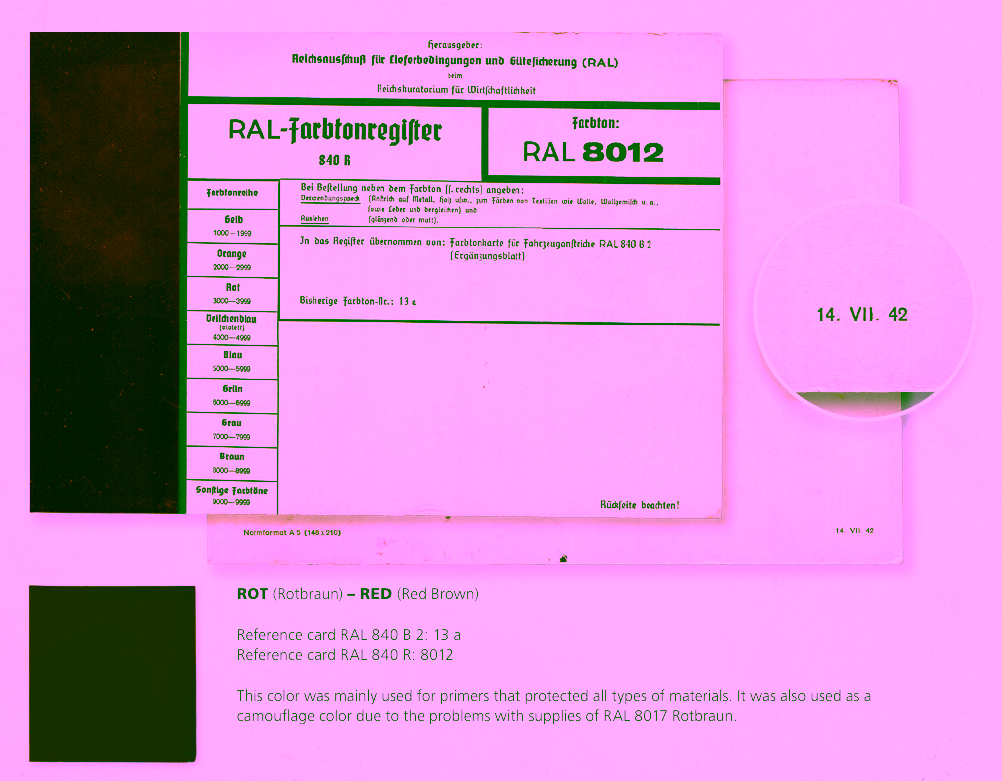
RAL 8012 – Rotbraun (AK RC023/AK11023)
- Lightening RAL 8012
- To achieve a lighter version of RAL 8012 without compromising its earthy red undertone, consider incorporating AK RC043 Light Rust (Real Colors) or AK11109 Rust Light (3rd Generation Acrylics). These shades introduce a reddish-orange tint, creating the appearance of sun-faded or lightly weathered paint, often observed on vehicles exposed to prolonged sunlight.
- For a softer and more muted approach, use AK RC233 Warm Sand (Real Colors). This tone lifts the original colour without introducing harsh contrasts, making it ideal for dry-brushing or subtle highlights on raised surfaces.
- Darkening RAL 8012
- To deepen the red-brown tone, mix in AK RC017 Burnt Umber or its 3rd Generation equivalent, AK11017 Burnt Umber. These colours add richness and shadow without veering into unnatural darkness.
- Alternatively, for a cooler, more shadowed effect, introduce AK RC242 Sepia (Real Colors) or AK11048 Smoke (3rd Generation Acrylics). These hues enhance depth by adding a neutral or slightly smoky tone, which can mimic dirt or grime accumulation in recessed areas.
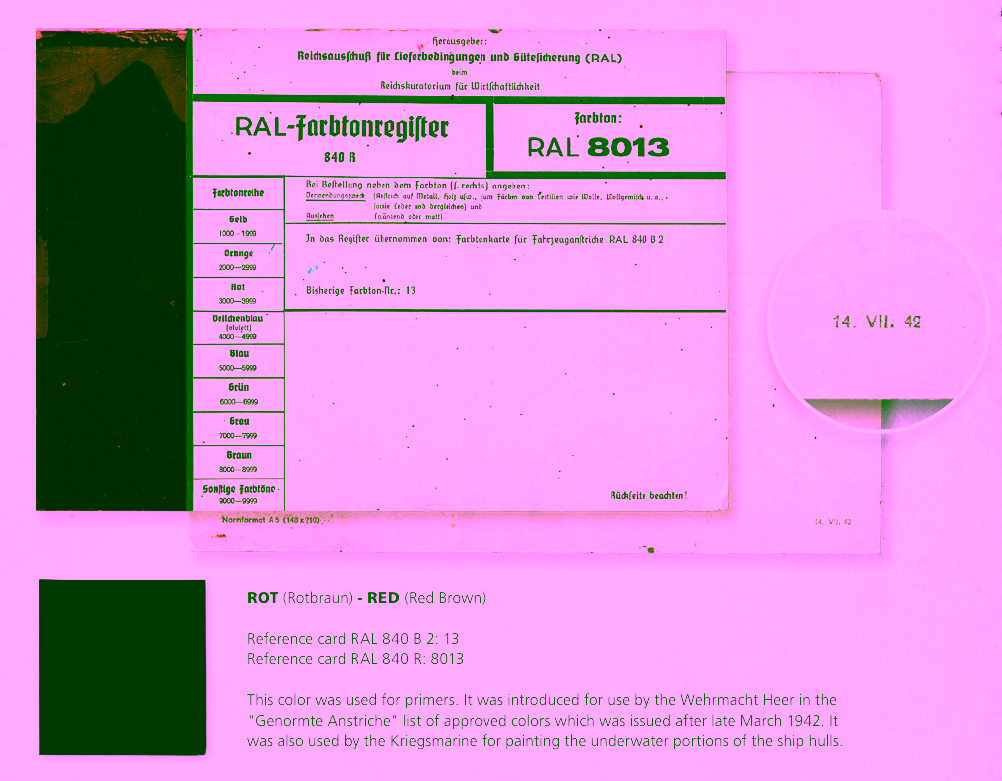
RAL 8013 – Rotbraun (AK RC024/AK11024)
- Lightening RAL 8013
- For a brighter, slightly reddish highlight, mix in AK RC041 Light Oxide Red or AK11110 Red Primer Light (3rd Generation Acrylics). These colours align naturally with the red-brown base of RAL 8013, enhancing its vibrancy and providing a fresh, weathered appearance often seen in industrial or military settings.
- If a more neutral lightening effect is preferred, AK RC235 Beige Brown (Real Colors) works well. This tone tempers the red while lifting the overall brightness, creating a faded appearance suitable for sun-exposed areas.
- Darkening RAL 8013
- To darken RAL 8013 without introducing stark contrasts, blend in AK RC038 Dark Rust (Real Colors) or AK11107 Rust Dark (3rd Generation Acrylics). These shades enhance the richness of the red-brown tone, making it appear more weathered and aged.
- Another option is to add AK RC017 Burnt Umber or AK11018 Dark Brown. These colours provide a slightly muted effect, ideal for shadowing or creating depth in panel lines and crevices.
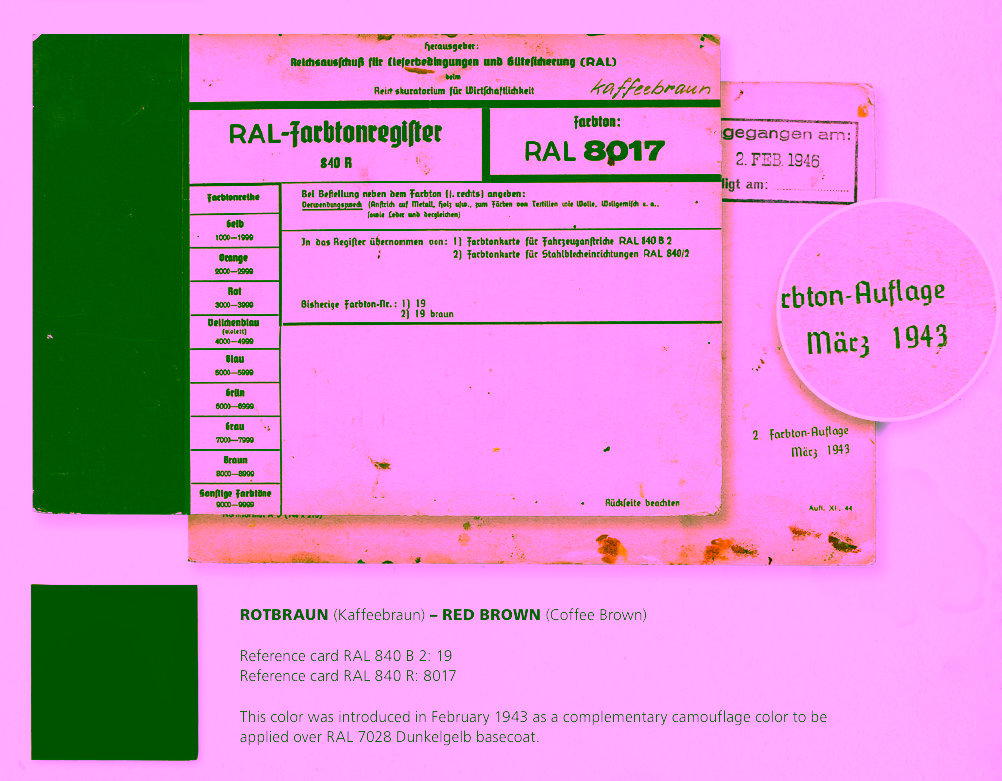
RAL 8017 – Kaffebraun (AK RC025/AK11025)
- Lightening RAL 8017
- To lighten this deep coffee brown colour, incorporate AK RC235 Beige Brown or AK11104 Dust (3rd Generation Acrylics). These tones soften the darkness of RAL 8017 while maintaining its earthy characteristics, ideal for subtle fading or weathering.
- For a slightly warmer highlight, mix in AK RC241 Ochre Earth (Real Colors) or AK11111 Ochre (3rd Generation Acrylics). This adds a hint of yellow, creating a sunlit effect on edges and exposed surfaces.
- Darkening RAL 8017
- Use AK RC017 Burnt Umber or AK11048 Smoke (3rd Generation Acrylics) to deepen the tone of RAL 8017. These colours work especially well for shadow areas, such as recessed lines or areas near the base of a model.
- If a stronger, more defined shadow is needed, try AK RC037 Smoke Black (Real Colors) or AK11106 Black Brown (3rd Generation Acrylics). These add significant depth without creating an overly stark or artificial appearance.
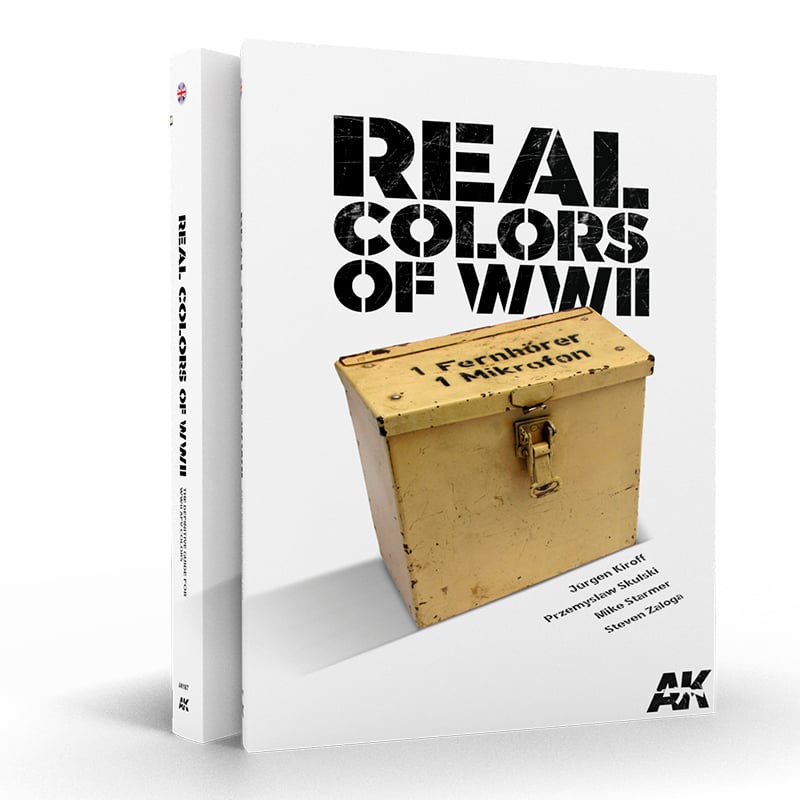
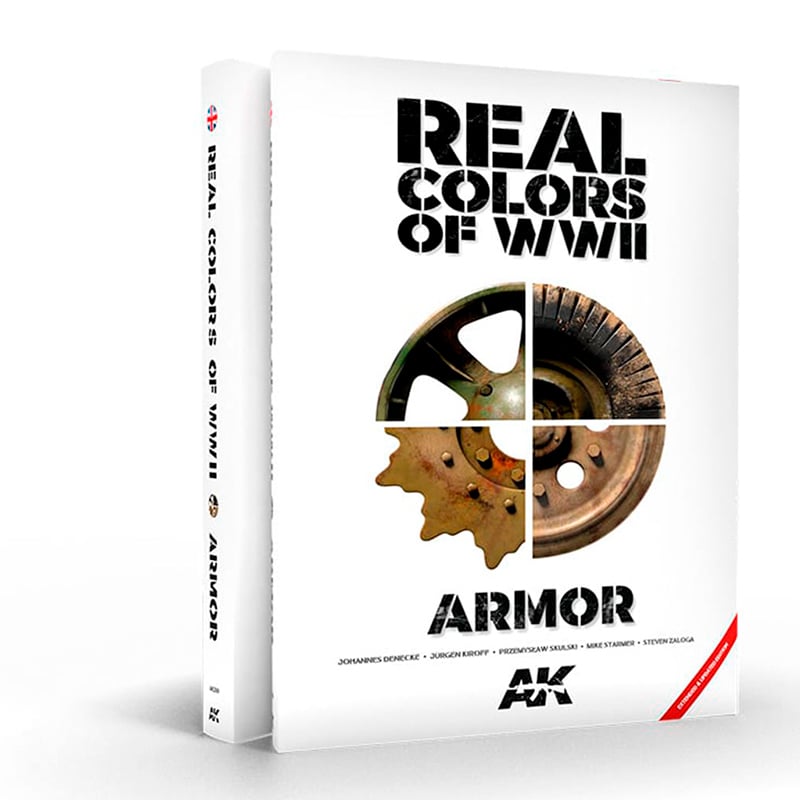
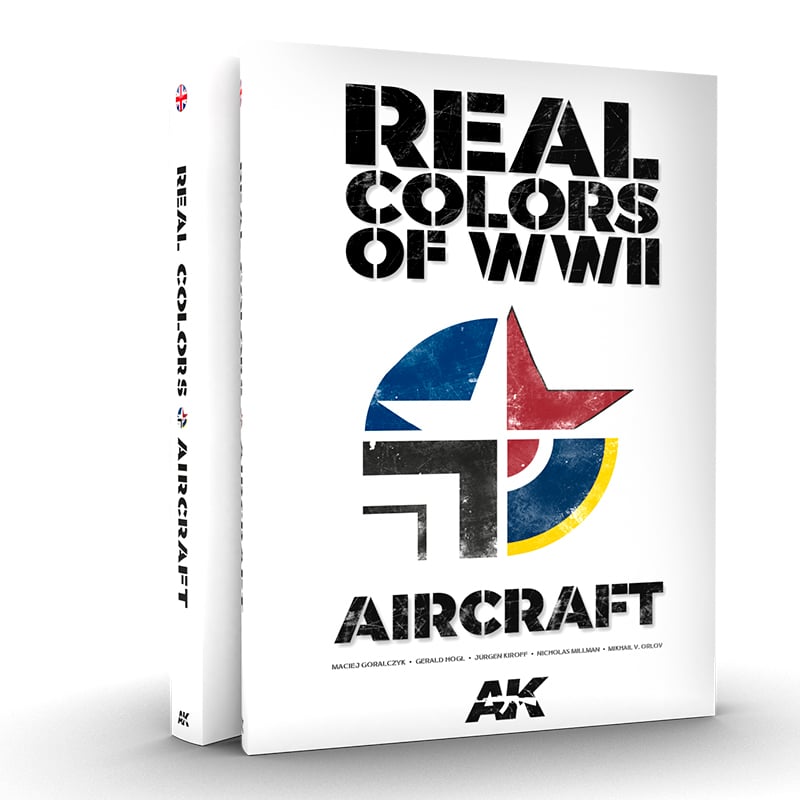
Real Colors of WWII: Unlocking the Authentic Palette of History
A Journey Through the Authentic Hues of WWII Armor and Aircraft with AK Interactive
Authenticity is the holy grail in the world of historical modelling and restoration. For enthusiasts and professionals alike, the quest for the exact colours of WWII machinery can be as thrilling as uncovering a buried relic. Enter AK Interactive’s groundbreaking trilogy: Real Colors of WWII, Real Colors of WWII Armor, and Real Colors of WWII Aircraft. These meticulously researched books serve as a beacon for anyone seeking to recreate the vivid, battle-hardened world of the Second World War.
Each volume delves into exhaustive studies of archival records, surviving artifacts, and rare photographs to decode the precise shades used on the era’s tanks, planes, and vehicles. Whether you’re an experienced modeller or a history buff, these books are more than a guide—they are a portal to the past, inviting you to see WWII through the eyes of those who lived it, one authentic brushstroke at a time.
Why Avoid Pure White and Black?
Using pure white to lighten a colour often results in a chalky, unnatural look, as it strips the original tone of its complexity and depth. Similarly, black can overpower the base colour, producing an overly flat or muddy appearance. By instead using complementary or analogous shades, you can achieve more realistic effects that reflect the nuanced variations seen in real-world objects, particularly in military and historical contexts.
Additional Tips for Using AK Real Colors and 3rd Generation Acrylics
- Mixing and Ratios: When mixing colours, always start with a small ratio of the lighter or darker shade (e.g., 10:1) and gradually adjust. This approach allows for precise control and prevents overcorrection, which can be challenging to fix.
- Testing Colours: Before applying your mix to a model, test it on a piece of scrap plastic or a primed surface to observe how it dries. Both AK Real Colors and 3rd Generation Acrylics can appear slightly different when wet versus dry.
- Contextual Adjustments: Consider the context in which the model or object will be displayed. For example, lighter tones may represent sun-bleached areas, while darker tones can simulate accumulated dirt, grease, or shadows.
- Compatibility: AK Real Colors are lacquer-based, offering a smooth, durable finish ideal for airbrushing, while 3rd Generation Acrylics are water-based and more versatile for brush painting. If blending the two, ensure proper surface preparation and compatibility testing.
- Layering Effects: When working with weathered or aged appearances, consider using the adjusted tones as part of a broader layering technique. Combine modulation, filters, and washes to enhance the dimensionality of your model.
By using AK Real Colors and 3rd Generation Acrylics to lighten or darken RAL 8012, RAL 8013, and RAL 8017, you maintain historical accuracy while introducing subtle tonal variations that bring your models to life. This approach ensures that every highlight, shadow, and transition feels intentional and rooted in realism, elevating the quality of your work.
Working with German Tricolour Ambush Camouflage
Why Avoid Using Black and White for Shading and Highlighting?
While black and white are common choices for darkening and lightening paints, they often produce harsh, unrealistic transitions that detract from the nuanced appearance of real-world camouflage. Pure black can flatten the visual depth of a model, while white tends to desaturate colours, leading to an unnatural, chalky finish. By exploring alternative methods, modellers can achieve subtler, more lifelike transitions that enhance realism.
In historical applications, the paints used on German vehicles aged and weathered in complex ways, with subtle shifts in tone influenced by environmental exposure. Replicating these effects requires a more refined approach, such as using complementary hues to deepen shadows or analogous tones to brighten highlights. These methods also add visual interest by mimicking the complex weathering patterns seen on real vehicles.
Another consideration is the “scale effect.” On smaller models, colours typically appear darker or more saturated than they would in real life. Modulating tones with complementary and analogous hues rather than defaulting to black or white not only addresses this but also ensures a finish that feels true to scale, enriching the overall authenticity of your work.
Laying Down the Base Colours
- Surface Preparation: Begin by priming the model with a neutral base such as grey or buff to ensure even paint adhesion. Sand the primed surface lightly to eliminate imperfections, as any roughness will disrupt subsequent paint layers.
- Mixing and Application: Thin AK Real Colors paints with their proprietary thinner (AK712) or a comparable alternative, maintaining a 2:1 ratio of paint to thinner for airbrushing. Apply the base coat in thin, consistent layers to avoid obscuring surface details. Start with RAL 7028 Dunkelgelb as the foundational colour before layering RAL 8017 Rotbraun and RAL 6003 Olivgrün in a disruptive pattern.
- Pattern Accuracy: Reference historical photographs or official camouflage guides to replicate authentic patterns. Mask off areas as needed to maintain crisp edges.
- Building Layers: Apply the camouflage progressively, starting with the lightest shade and moving to darker ones. This technique ensures the lighter tones remain vibrant, even under subsequent layers.
Techniques for Lightening Colours
RAL 7028 Dunkelgelb (Dark Yellow):
To brighten Dunkelgelb without compromising its warmth:
- Mix in AK 3G Acrylic “Ivory” (AK11010) or a pale yellow such as “Pale Sand” (AK11007). These shades enhance luminosity without introducing the chalky quality white often imparts.
- Use an airbrush at lower pressure to apply highlights, focusing on panel centres, raised edges, and upper surfaces exposed to light. Build highlights gradually, layering thin, translucent coats for a seamless transition.
- To simulate sun-bleached effects, incorporate AK’s “Warm Sand” (AK11013) or “Light Stone” (AK11016) into the mix for subtle tonal shifts.
RAL 8017 Rotbraun (Red Brown):
Lighten Rotbraun while preserving its earthy undertone:
- Add AK’s “Orange Brown” (AK11105) or “Light Red” (AK11103) for a softer, sunlit appearance. Avoid overly vibrant hues, which can disrupt the overall harmony of the camouflage.
- Apply dry brushing or airbrushed highlights to emphasize surface details like rivets, panel lines, and high-traffic areas. For smoother gradients, thin the mixture and apply as a glaze, gradually building intensity.
RAL 6003 Olivgrün (Olive Green):
Enhance Olivgrün’s vibrancy by introducing:
- AK’s “Light Green” (AK11109) or “Yellow Green” (AK11108). These shades retain the natural richness of olive green while brightening it subtly.
- To simulate wear or weathering, apply stippling or sponge techniques with thinned paint, creating delicate tonal variations.
Techniques for Darkening Colours
RAL 7028 Dunkelgelb:
Deepen Dunkelgelb’s tone by:
- Mixing in AK’s “Burnt Umber” (AK11019) or a desaturated olive brown such as “Olive Drab” (AK11447). These shades enhance depth without overwhelming the original warmth.
- Use fine airbrush control to apply shadows around panel lines, recesses, and weld seams. Gradually layer the darker tones to ensure a natural transition.
- For deeper shadows, incorporate AK’s “Shadow Brown” (AK11025), focusing on areas shielded from direct light.
RAL 8017 Rotbraun (Kaffeebraun):
To darken Rotbraun effectively:
- Blend AK’s “Dark Brown” (AK11115) or “Mahogany” (AK11107) into the base colour. These shades maintain richness and prevent the shadows from appearing harsh or flat.
- Concentrate darker tones in recessed areas, lower panels, and spots prone to grime accumulation, enhancing the three-dimensionality of the model.
RAL 6003 Olivgrün:
Achieve deeper greens by:
- Adding AK’s “Dark Green” (AK11421) or “Black Green” (AK11422). These complementary hues create realistic shadows while preserving the integrity of the original colour.
- Focus on areas beneath overhangs, around edges, and within crevices. Apply multiple thin layers to build depth gradually, avoiding abrupt transitions.
Creating Shadows and Depth
Layering and Glazing:
- Use highly thinned paint mixtures (e.g., a ⧁5:1 ratio of AK Real Colors Thinner (AK712) to paint) to create glazes. Apply these in transparent layers to build depth incrementally, allowing fine control over shadow placement.
- For nuanced effects, layer complementary glazes to introduce complexity and visual interest to the shadows.
Panel Lining:
- Enhance recessed details using AK’s “Dark Brown Wash” or “Neutral Gray Wash.” Apply washes sparingly with a fine brush, then clean excess with a damp cotton swab or brush for sharp, clean lines.
Feathering Transitions:
- Use a soft-bristled brush or airbrush to feather shadows into adjacent areas, ensuring smooth gradations. This technique is especially effective on curved surfaces, where light naturally transitions gradually.
Harmonizing and Refining Colours
- Apply a thinned coat of the original base colour to blend highlights and shadows, unifying the overall appearance. This step reduces stark contrasts and ensures a cohesive finish.
- For a weathered effect, use AK’s “Dust Effects” or “Light Dust” as a glaze to mimic natural fading and wear. This technique also ties together disparate tones, enhancing realism.
Final Details and Weathering
- Chipping: Recreate wear by applying fine chips with AK’s “Chipping Color” or a custom mix of dark brown tones. Focus on edges, access panels, and high-use areas. For added realism, layer smaller light-coloured chips within darker ones to simulate exposed metal.
- Filters: Use AK’s enamel filters to adjust tonal balance and enrich camouflage patterns. Filters subtly alter the colour palette, adding depth and cohesion.
- Matte Varnish: Seal the model with a matte varnish to protect the finish and unify the surface. A matte finish enhances realism by reducing reflective glare.
Using Abteilung Oils for Advanced Weathering and Depth
Abteilung Oils are an essential tool for modellers seeking a creative, multidimensional approach to colour modulation. What makes them exceptional is their ability to be both additive and subtractive—allowing you to enhance depth, create organic transitions, and subtly refine details with absolute control. Unlike acrylics or enamels, oils remain workable for extended periods, offering unparalleled blending capabilities that seamlessly integrate with base layers. This slow drying time makes them particularly effective for smooth transitions and nuanced shading, essential for achieving the realism of weathered and battle-worn camouflage.
Recommended Abteilung Oil Colours and Product Numbers
- ABT. 502 Faded Yellow (ABT165) – Ideal for refining highlights on RAL 7028 Dunkelgelb, simulating sun exposure and faded paint.
- ABT. 502 Shadow Brown (ABT080) – Enhances depth in shadowed areas of Dunkelgelb and Rotbraun without creating an artificial blackened effect.
- ABT. 502 Burnt Umber (ABT006) – A rich, earthy brown perfect for darkening Rotbraun and adding grime effects.
- ABT. 502 Olive Green (ABT092) – Blends seamlessly into RAL 6003 Olivgrün for subtle shadow effects and wear simulation.
- ABT. 502 Black Brown (ABT020) – Used sparingly for extreme depth in recesses, panel lines, and weathered edges.
Application Techniques
- Dot Filtering:
- Place small dots of different oil colours (e.g., Faded Yellow, Shadow Brown, Burnt Umber) across panels.
- Blend with a clean, slightly damp brush using downward strokes for vertical surfaces and circular motions for horizontal surfaces.
- This method subtly shifts tones, replicating natural variations in paint exposure.
- Pin Washes:
- Thin Shadow Brown (ABT080) or Black Brown (ABT020) with odourless thinner.
- Apply with a fine brush along panel lines, rivets, and crevices.
- Remove excess with a damp brush or cotton swab for sharp, defined recesses.
- Streaking Effects:
- Use Burnt Umber (ABT006) or Olive Green (ABT092) for subtle streaking effects on vertical surfaces.
- Apply small, fine streaks with a fine brush, then blend with a flat dry brush or a sponge for a weathered appearance.
- Glazing Shadows:
- Mix oil paint with thinner to create a highly transparent glaze.
- Apply in shadowed areas, such as recesses and lower hull panels, to deepen the visual depth.
- Layer gradually to avoid sudden contrast shifts.
- Oil Rendering for Panel Modulation:
- Apply thin layers of Faded Yellow (ABT165) to raised areas for highlights.
- Blend Burnt Umber (ABT006) or Olive Green (ABT092) into shadowed sections for a rich, dynamic finish.
By leveraging both the additive nature of oils—building up subtle variations in tone—and their subtractive capabilities, where excess pigment can be removed or blended to refine effects, you gain full artistic control over the final look. This balance of application and removal makes Abteilung Oils an indispensable tool in the modeller’s arsenal, transforming static camouflage into a dynamic, hyperrealistic finish.
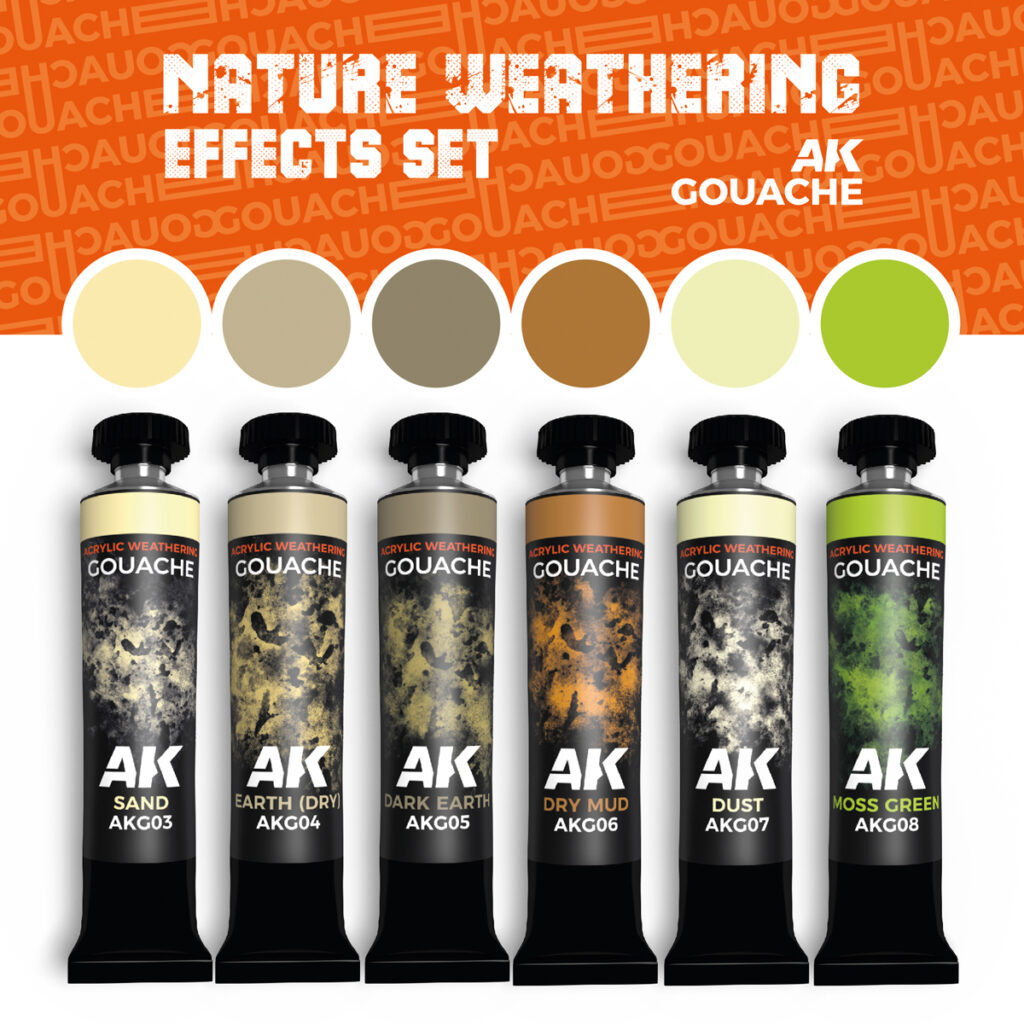
Unlocking the Power of AK Gouache for Dynamic Effects
AK Interactive’s gouache paints offer modellers an entirely new level of control, flexibility, and realism. These water-based, ultra-matte paints can be applied in thin layers, manipulated after drying, and even reactivated with water—giving you unprecedented freedom in refining your camouflage patterns.
- AKG03 SAND
- AKG04 EARTH (DRY)K
- AKG05 DARK EARTH
- AKG06 DRY MUD
- AKG07 DUST
- AKG08 MOSS GREEN
- AKG26 NATURE WEATHERING EFFECTS SET – AK GOUACHES
Why Use AK Gouache?
- Superb Blendability: Unlike acrylics, gouache remains workable for extended periods, allowing for soft transitions between colours.
- Reactivatable Formula: If a section appears too harsh or needs adjustment, simply moisten it and refine the effect.
- Ultra-Matte Finish: Perfect for reducing sheen and ensuring a natural, scale-appropriate appearance.
- Versatile Application: Ideal for fading, panel lighting, dust effects, and layered weathering.
Application Techniques
- Soft Fading: Apply diluted layers of lighter gouache (e.g., Buff or Sand) over Dunkelgelb to simulate sun-faded areas.
- Blended Shadows: Use Dark Earth or Olive Drab gouache to subtly deepen camouflage recesses.
- Dust and Dirt Effects: Stipple Light Earth or Tan onto lower panels for accumulated grime.
- Controlled Edge Highlighting: Drybrush with Pale Sand or Ivory to emphasize raised details without harsh contrasts.
By integrating AK Gouache into your workflow, you gain an incredibly adaptive toolset to refine and enhance your tricolour camouflage, ensuring the most lifelike and immersive results possible.
Key Takeaways
- Historical Context & Colours
- German WWII tricolour ambush camouflage uses RAL 7028 Dunkelgelb, RAL 8017 Rotbraun, and RAL 6003 Olivgrün.
- Avoid pure black/white for modulation—use complementary or analogous tones to preserve depth and authenticity.
- Lightening Techniques
- Dunkelgelb (RAL 7028): Add AK “Ivory” or “Pale Sand” for warmth; use “Warm Sand” for sun-bleached effects.
- Rotbraun (RAL 8017): Mix in “Orange Brown” or “Light Red”; apply as glaze or dry-brush for smooth highlights.
- Olivgrün (RAL 6003): Introduce “Light Green” or “Yellow Green”; employ stippling/sponging for natural variation.
- Darkening Techniques
- Dunkelgelb: Blend in “Burnt Umber” or “Olive Drab”; focus shadows around panel lines and recesses.
- Rotbraun: Use “Dark Brown” or “Mahogany”; concentrate in lower panels and grease-prone areas.
- Olivgrün: Add “Dark Green” or “Black Green”; build depth gradually in crevices and under overhangs.
- Advanced Shadow & Depth
- Glazing: Thin 5:1 thinner-to-paint for transparent layers, building depth incrementally.
- Panel Lining & Feathering: Apply fine washes in creases; feather edges with a soft brush or airbrush for smooth transitions.
- Harmonizing Coat: Seal with a thin layer of base colour to unify tones and reduce harsh contrasts.
- Oil & Gouache Enhancements
- Abteilung Oils: Use dot filtering, pin washes, and streaking with Faded Yellow, Shadow Brown, Burnt Umber, and Olive Green for organic variation and controlled depth.
- AK Gouache: Leverage reactivatable, ultra-matte layers (Sand, Earth, Moss Green, etc.) for soft fading, dust effects, and ultra-fine edge highlights.
- Practical Workflow Tips
- Mix Ratios: Start conservatively (e.g., 10:1) when adding lightening or darkening shades; adjust gradually.
- Testing: Always spray or brush test on scrap to see wet vs. dry behaviour.
- Contextual Weathering: Simulate sun-bleaching on upper surfaces and grime in recesses; use layers of filters, washes, and varnishes to tie everything together.
By combining precise colour modulation with glazing, oils, and gouache, you’ll recreate the nuanced, weathered look of German tricolour ambush camouflage—achieving historical accuracy and dynamic realism on every model.
Leveraging complementary and analogous colour modulation techniques, you can achieve striking depth and realism in German WWII tricolour ambush camouflage. These methods not only capture historical accuracy but also elevate your model to an advanced level of craftsmanship.
James Wooldridge
James is a dedicated scale modeller, researcher, and amateur historian whose expertise elevates every project he undertakes. Specializing in super detailing and the application of authentic colour schemes, his scholarly articles have been published in esteemed platforms such as Scalemates and have been recognized through inclusion in Google Featured Snippets. As an active contributor to a distinguished Facebook group, he disseminates innovative techniques and forward-thinking ideas within a vibrant community of enthusiasts. Moreover, James presents informative video content for a prominent Scale Modelling Club, further demonstrating his commitment to advancing the craft. His leadership is underscored by his role as a founding executive member of both KSM–IPMS and Kawartha Scale Modellers, thereby solidifying his influential position within the scale modelling field..💡📏 📐📱🎬 📷 🎥