
MPC A New Hope Hans Solo Edition
This is the eighth part of the MPC Star Wars A New Hope Hans Solo Millenium Falcon 1/72 Scale MPC953 build and review.
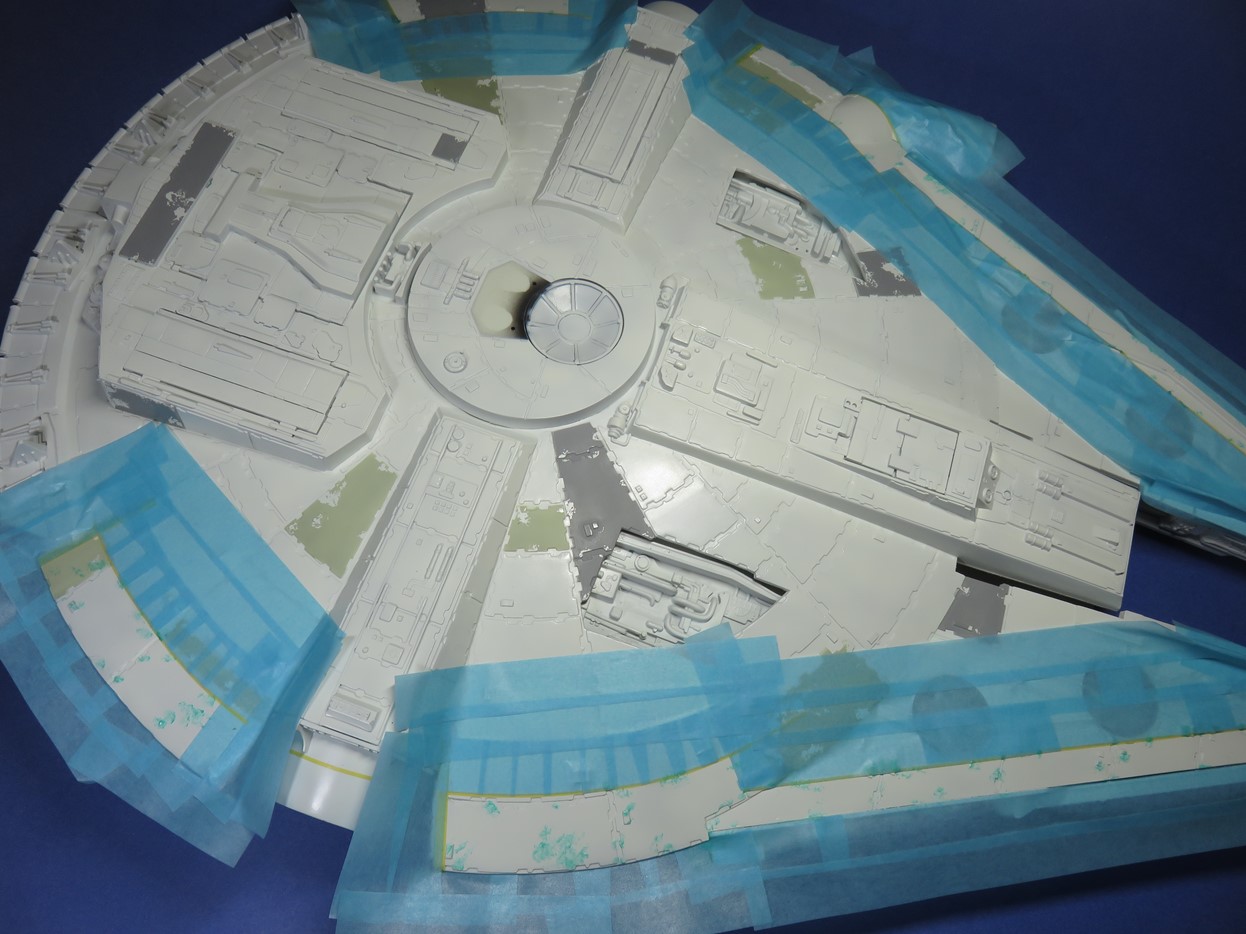
I’ve been trying to think of a time when I used this much hobby masking tape on a single project. I know that I used quite a bit when I built a Revell 1/72nd U-boat, but in all honesty, I think that this project will hold my personal record for the most tape used.
What made masking more difficult with this particular project was all of the indents that were cut into each of the raised panels. These are quite pronounced which is just part of the fashion of this vintage model.
Though the work might not look the most productive, I can assure you that all this extra time, tape, and patience really pays off for the overall look of this model. Let’s get into it!
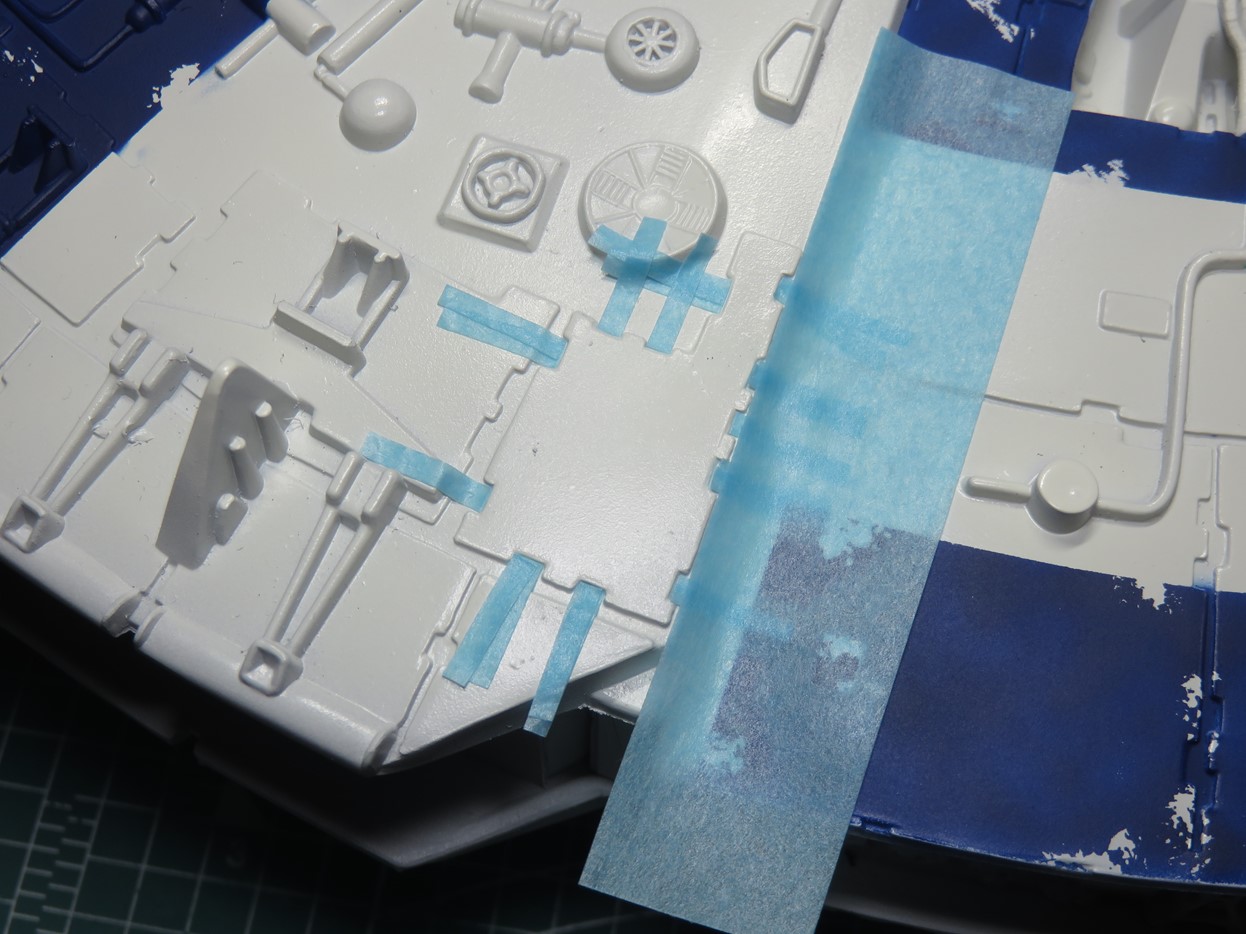
One of the first things that I did was cut a bunch of tiny strips of tape that I could push into each of the notches. This was time-consuming as all of the notches were different sizes, but in the end, it would add to the effect of the painted panel.
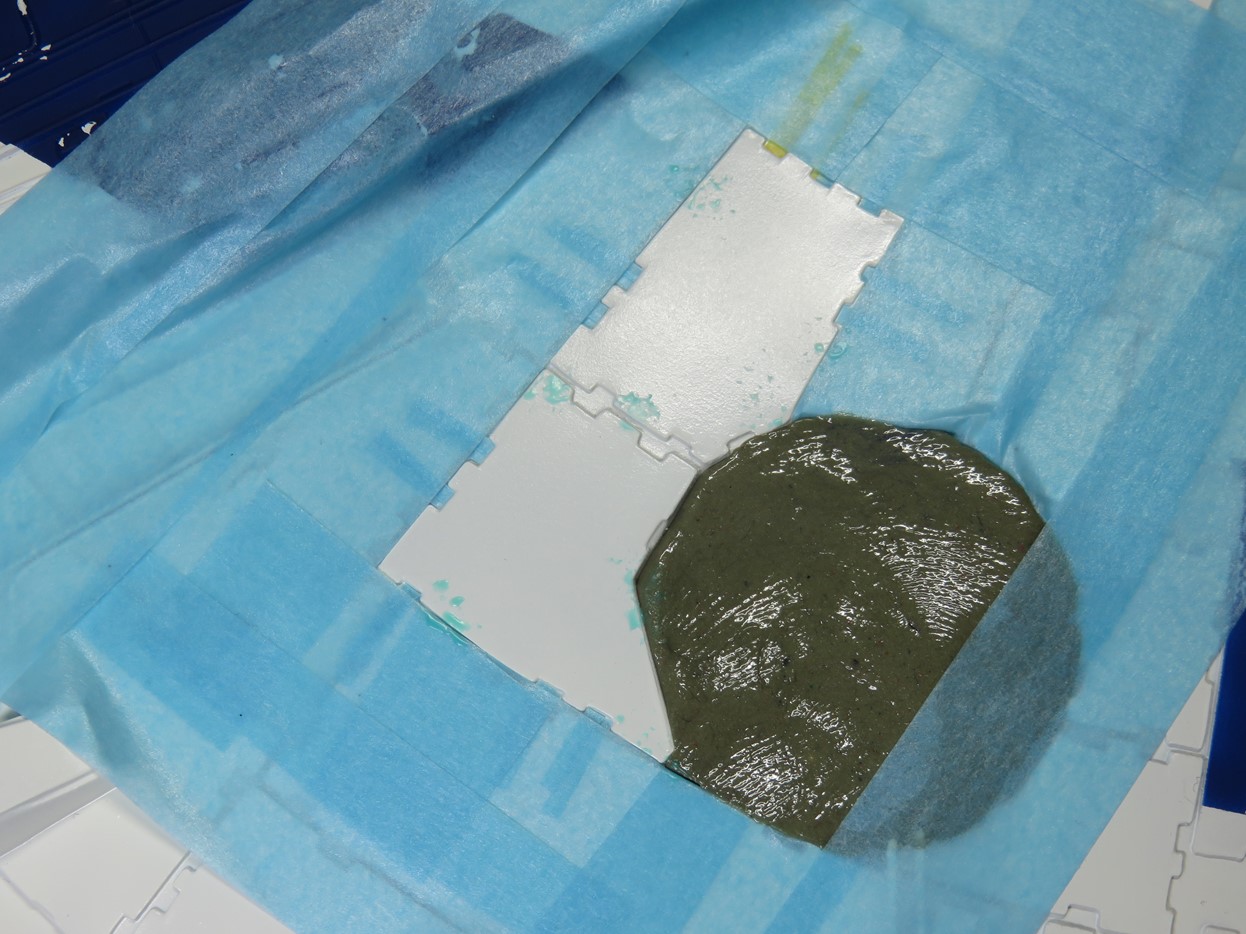
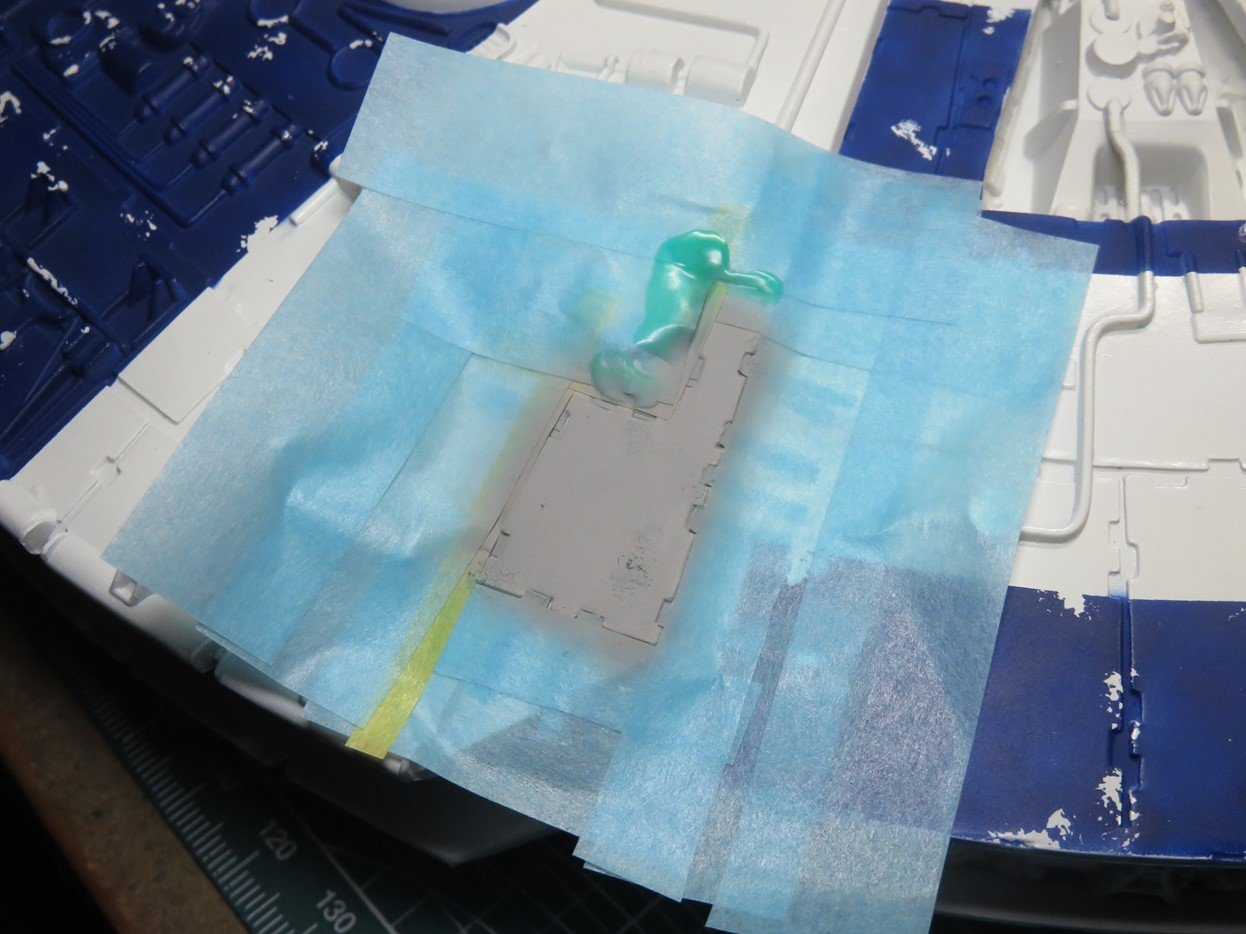
With most of the panels, masking was easy, however, because this panel was right next to the opened bay I once again stuffed it with putty. This saved me a lot of time and tape that I would have used to fill in the section.
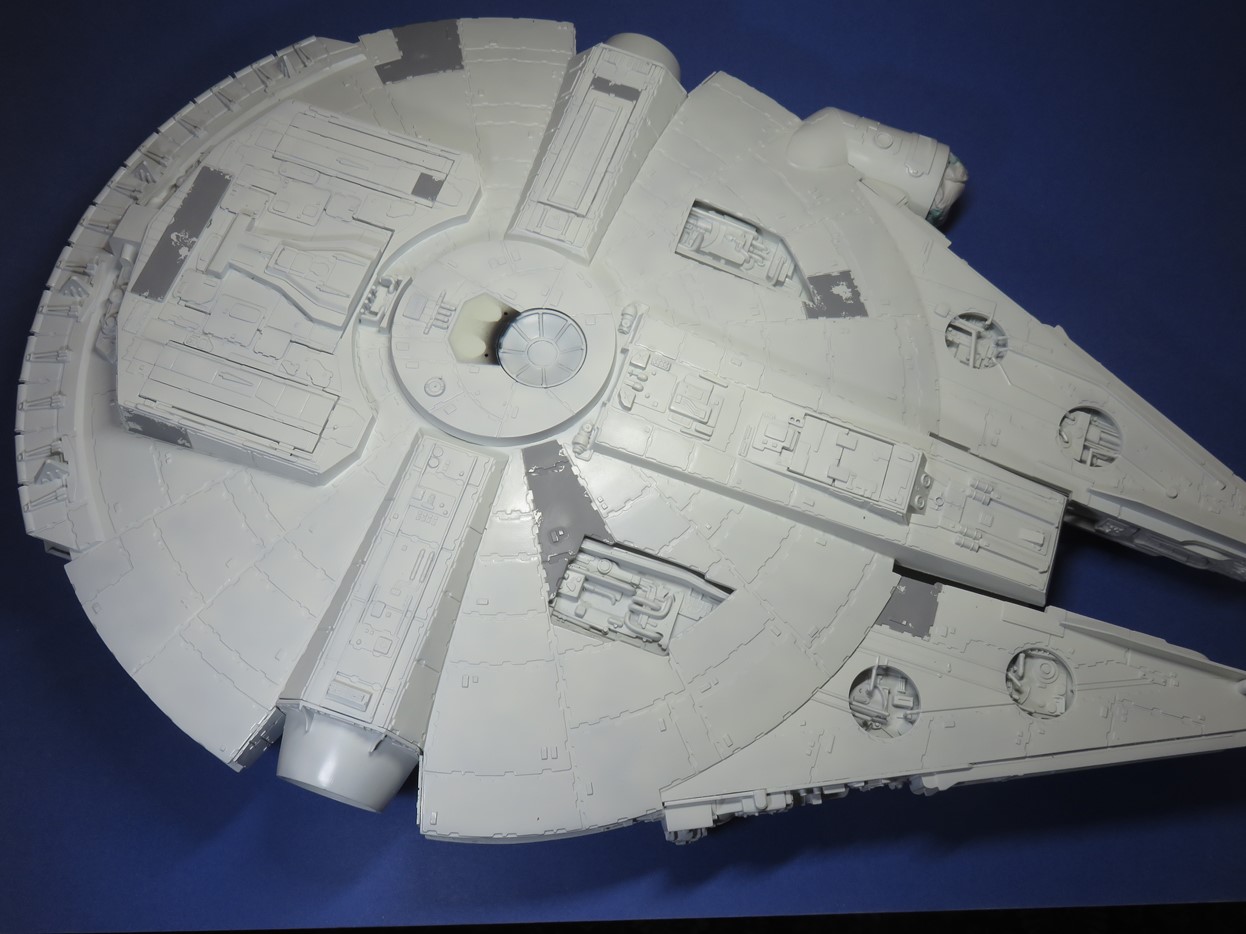
I chose a few panels on the top section and I painted these with Tamiya Acrylic paint XF-19 Sky Grey. Similarly to the Millennium Falcon, I decided to add a bit of extra color in the form of painted panels. I was careful to not choose too dark of colors so that they would overshadow the blue sections, and that would further compliment the Insignia White. I found Sky Grey to be an excellent paint to use and in keeping with the theme of the prequel era color pallet.
While I was painting the Sky Grey onto the upper side of the Envoy I found a lot of the panels that I wanted to paint were already, or mostly covered by the flat blue.
So when I flipped over the model to begin painting on the underside I decided to paint the Sky Grey panels first. I did refer to the Hasbro toy briefly before I realized Hasbro basically invented all new panels. So I decided to just pick out a few that I liked the best.
I’m really pleased with this result, and I’m hoping to find some sort of way to display this model so that the work on the underside will be appreciated.

I was really enjoying the look of the XF-19, but I thought that it still needed a bit more color, a slightly lighter grey would look the part. I decided to use Tamiya XF-14 J.A. Gray, mixed 50-50 with some XF-2 Flat White.
The J.A. Green has a nice green tint that doesn’t distract from the Insignia White. As before with the Flat Blue, I sponged on some Mr Hobby, Mr Masking Sol NEO M132 to create chipping.
The model is looking busier now, but in a good way, as these colors aren’t too dominant or distracting from the rest of the model. And the lightened XF-14 looks like a great Star Wars color that I’m sure you’d find on the Millennium Falcon.
I couldn’t find any references of the underside of the F-Toys Stellar Envoy, thankfully, I found a few of the Hasbro toy. And the blue sections are really minimal compared to the top, with the blue just covering the outer edges.
This wasn’t the most difficult masking, but it did take some time to properly cover everything. And just like before I sponged on Masking Sol NEO to create the chipping before I painted these areas with Tamiya XF-8 Flat Blue.
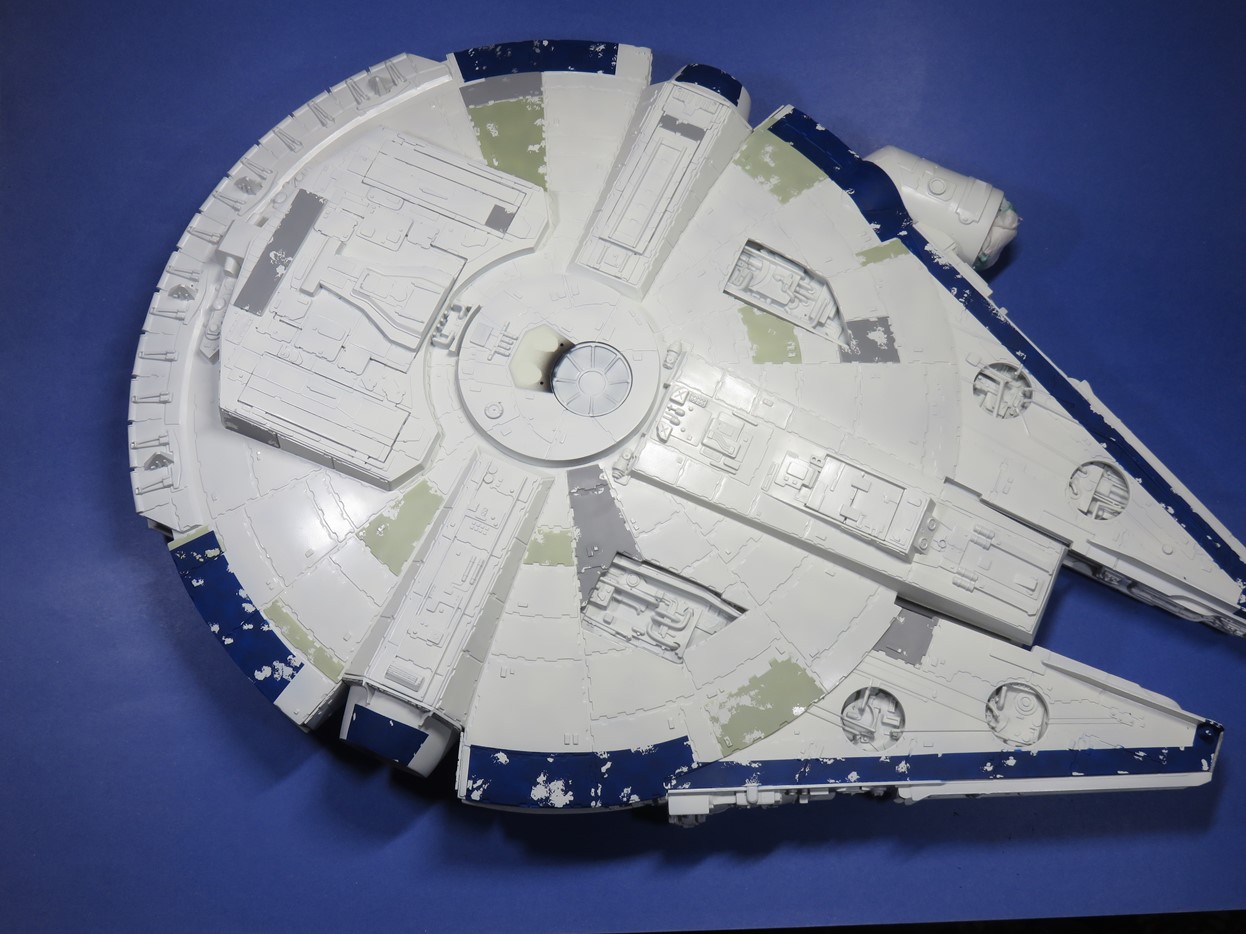
And here is the completed underside of the Envoy. I’m really pleased with the different grey panel colors, and the blue running along the outer edge of the ship. All of the masking was a lot of work, and some of the panels I chose were very difficult, but in the end, I think it’s worth that effort to help add a bit more character to a model.
You can also see that a few of the grey panels lead to the outer edges, and these would be covered with the Flat Blue, but when you look closely you can still see the grey paint in the chipping. This is a unique effect and something I wish I had realized sooner when I was working on the topside.
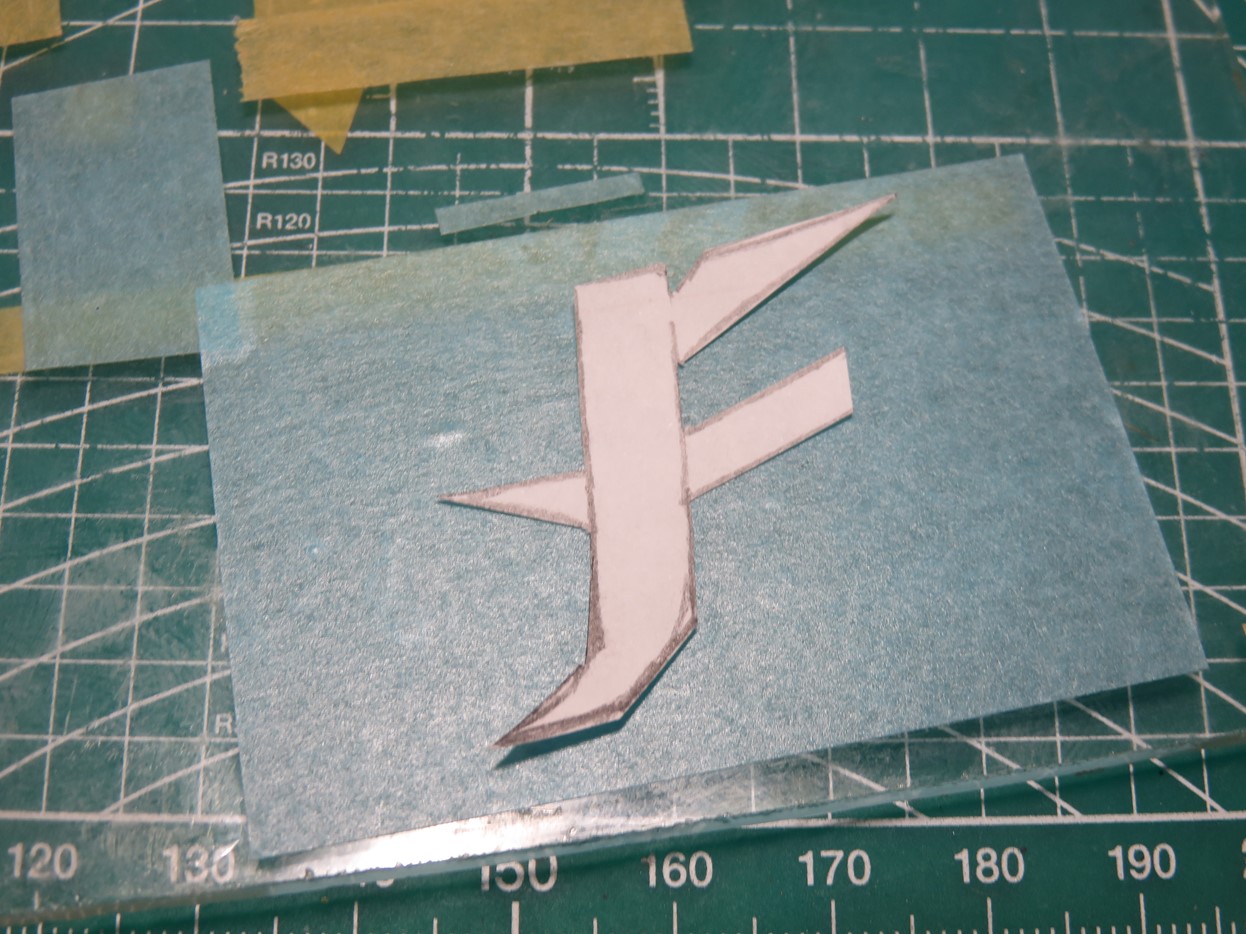
Moving back to the top surface I needed to paint what will likely be my last hull color, a few red panels and this strange symbol that is painted next to the dish. I looked online to see if this symbol was something in Aurebesh the made up Star Wars language, but I couldn’t find anything, so for now it’s just a cool symbol.
I decided to first draw out this symbol on paper and try to draw it to an appropriate scale. Once I was satisfied with my drawing I cut it out and placed it on some wide masking tape, so that I could cut out a painting mask.
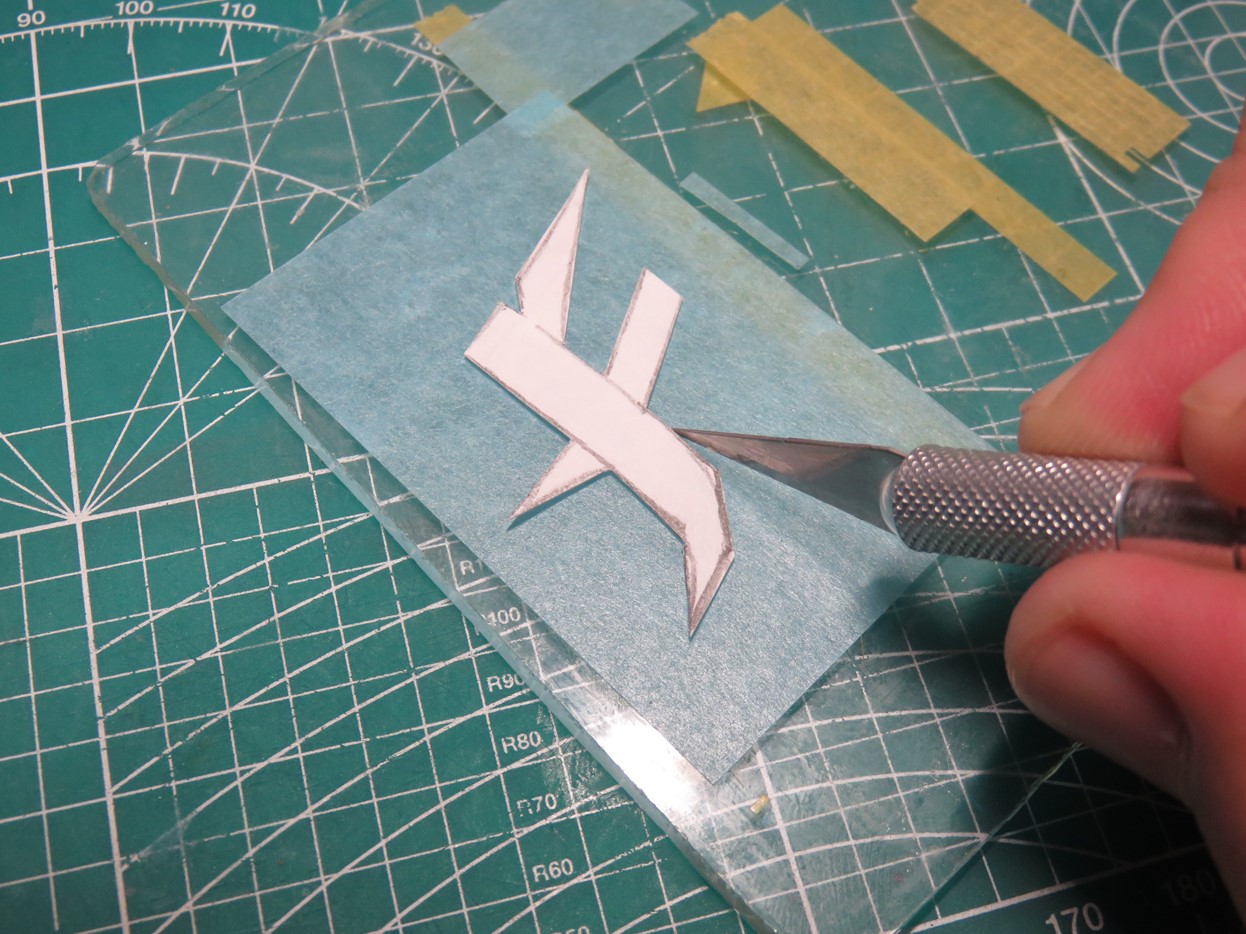
Taking a brand new Excel Blades hobby knife I carefully cut out the stencil from a piece of glass I got from my Dad’s shop. Hasbro has this symbol more curved, but I liked the angles featured on F-Toys. These straight angles also made it easier to cut out as I just had to keep the knife as straight as possible.
When I’m cutting tape, I like to use this small piece of glass. It makes it easy for me to handle and view the tape as I’m working, and it’s very easy to cut into without dulling the blade. Also, it’s easier for me to remove the tape versus using something like my cutting mat. And lastly, the glass won’t steal all of the tack from the tape so I can ensure a firm grip once it’s placed on the surface of the model.
This piece of glass is also where I was able to cut all of those tiny rectangles that I used to fill in the notches of the panels.
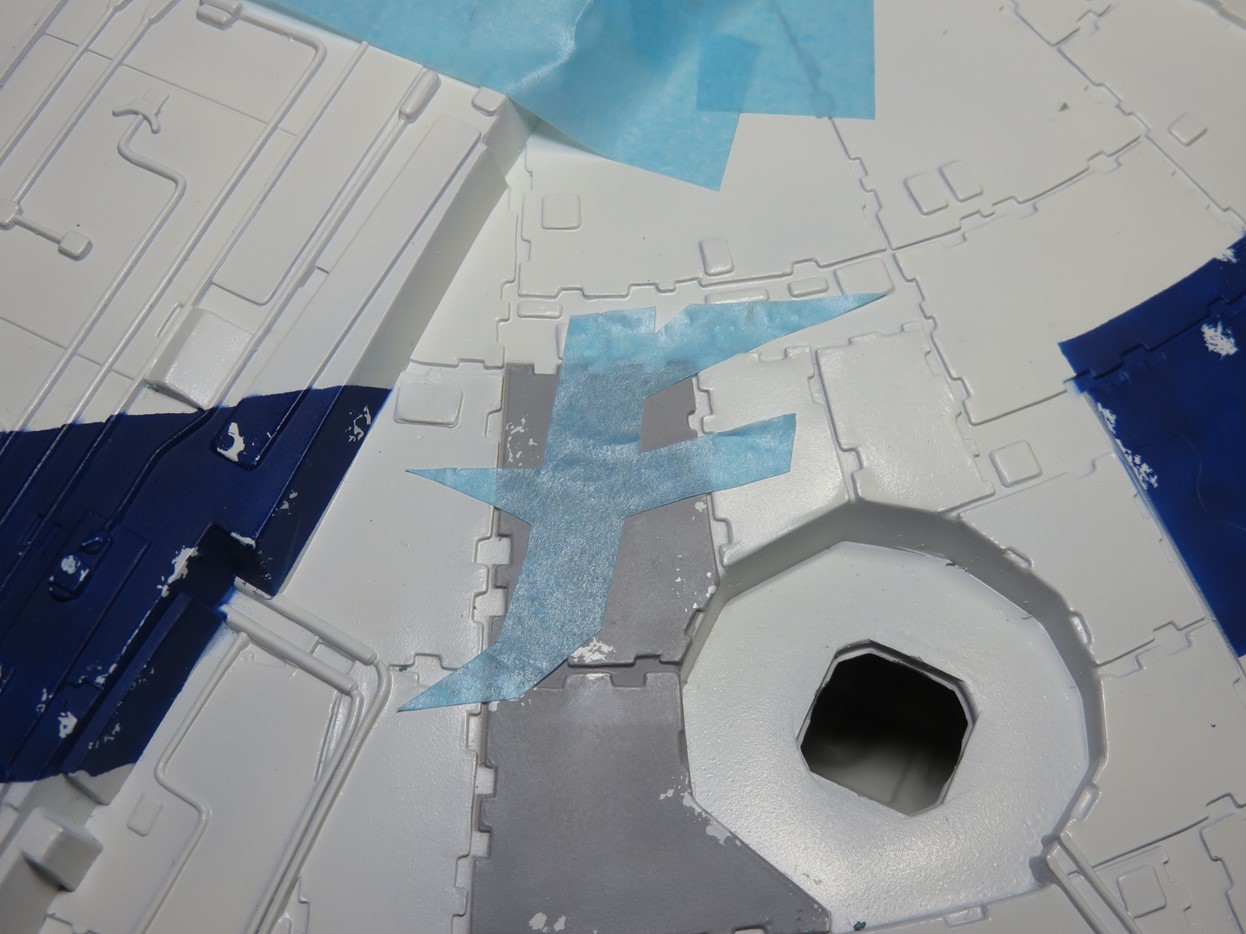
I took the negative from the stencil and gently placed it onto the model. This would act as my placement guide for the positive stencil. By using the negative I could reposition the stencil and find a correct/appropriate place without damaging the positive.
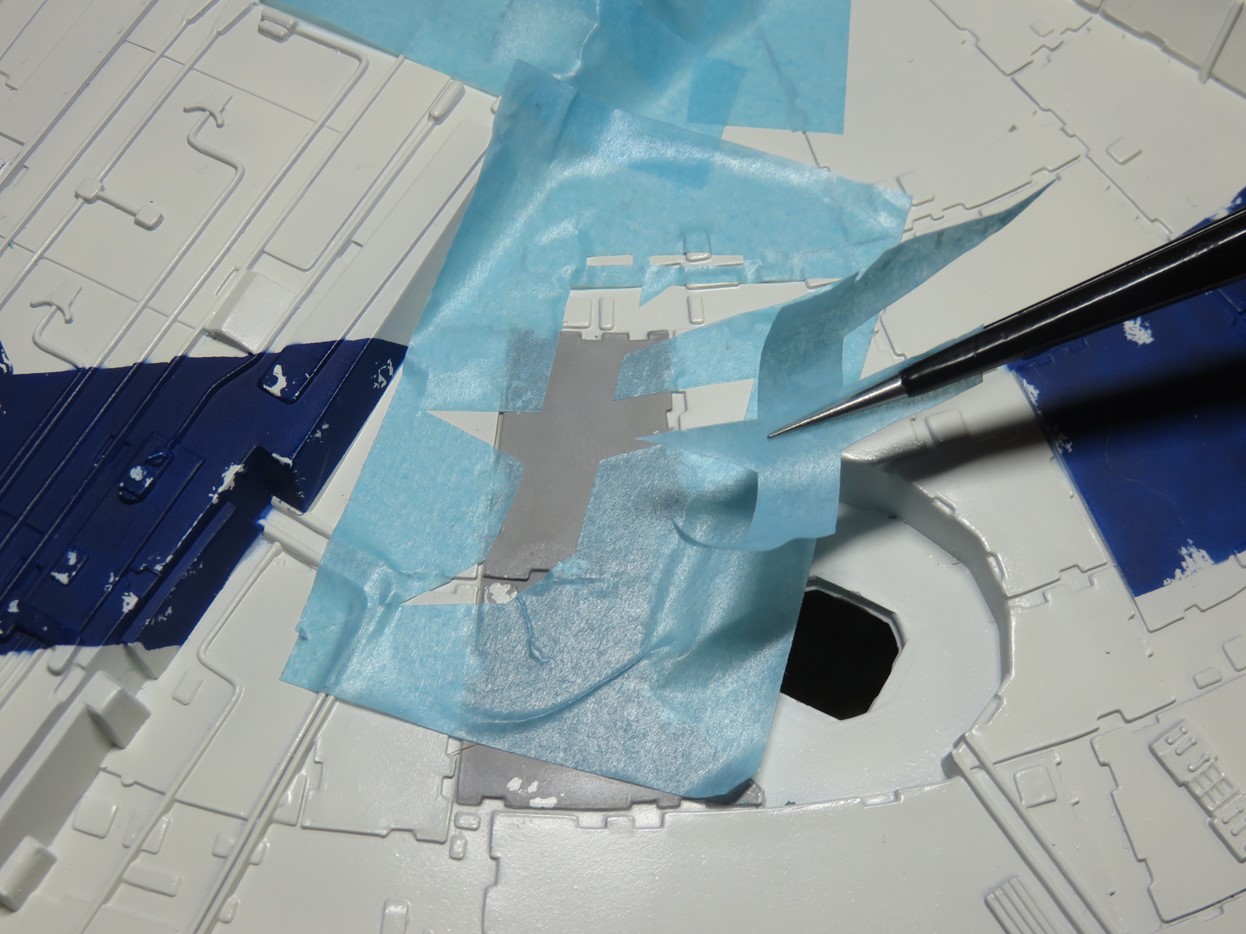
Now that I was satisfied with the placement, I laid down the positive stencil and removed the negative. Unfortunately, this section has a lot of bumps and grooves, so I’m going to press the tape down firmly. As before with the Flat Blue I’m going to try and fill in the gaps with Masking Sol NEO to try and prevent any paint bleeding.

Here is the newly painted symbol. I’m pleased that for the most part, the masking held up really well, and there are only a few small sections that will need touch-ups.
I wanted to create a dusty red for these sections so I tried a few mixtures and eventually, I stumbled on this color. It is 6 drops of Tamiya XF-7 Flat Red, 1 drop of XF-4 Yellow Green, and 1 drop of X-6 Orange. I’m very pleased with this color as it’s much more subtle red than using only XF-7, but it’s still bright enough when you see it on the rest of the model.
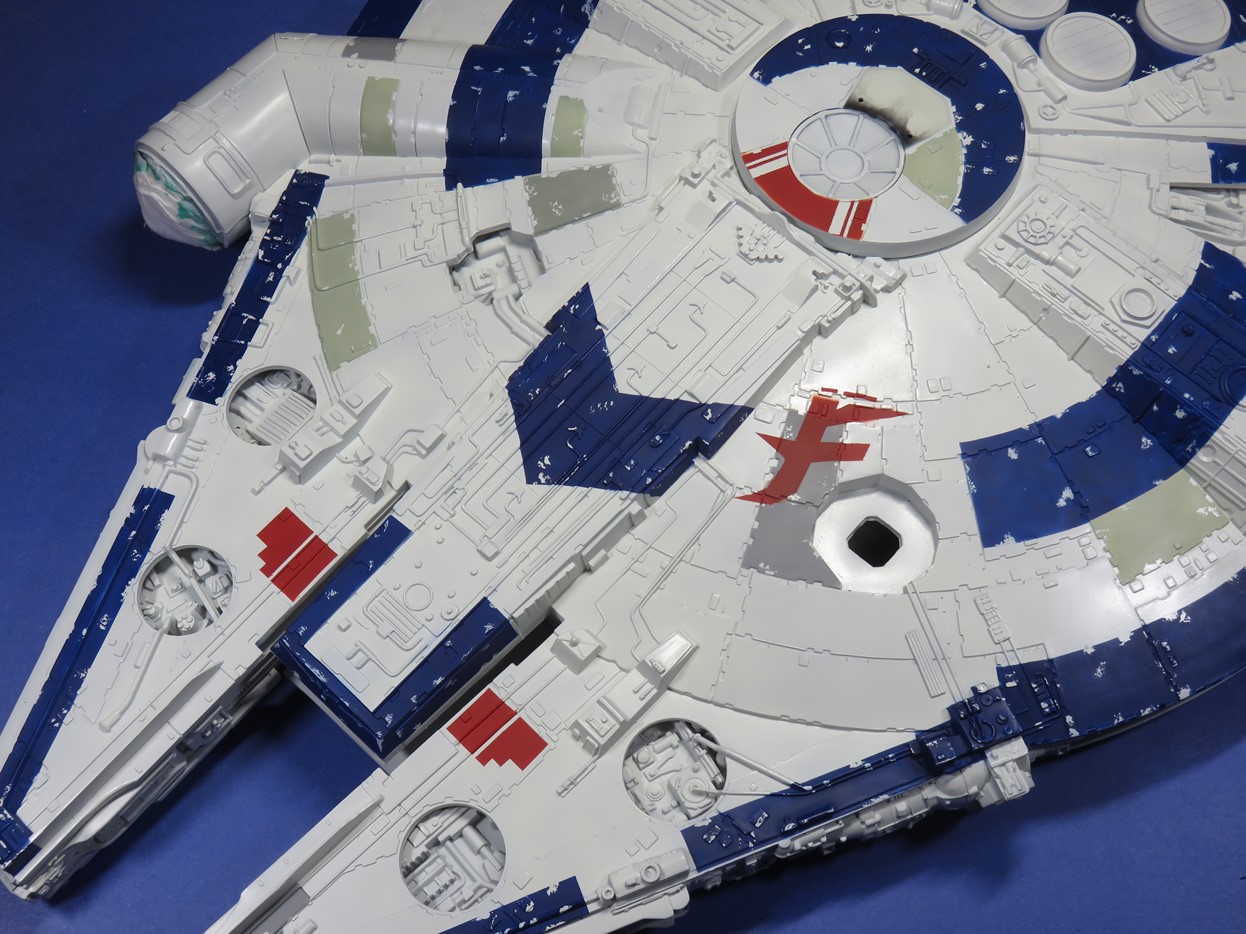
I painted a few other areas with the Dusty Red. The extra racing stripes in front of the gun turret should help the Envoy fly faster. And on the F-Toys Stellar Envoy they added a few sections of red to the mandibles. I thought that this looked really nice so I added it as well.
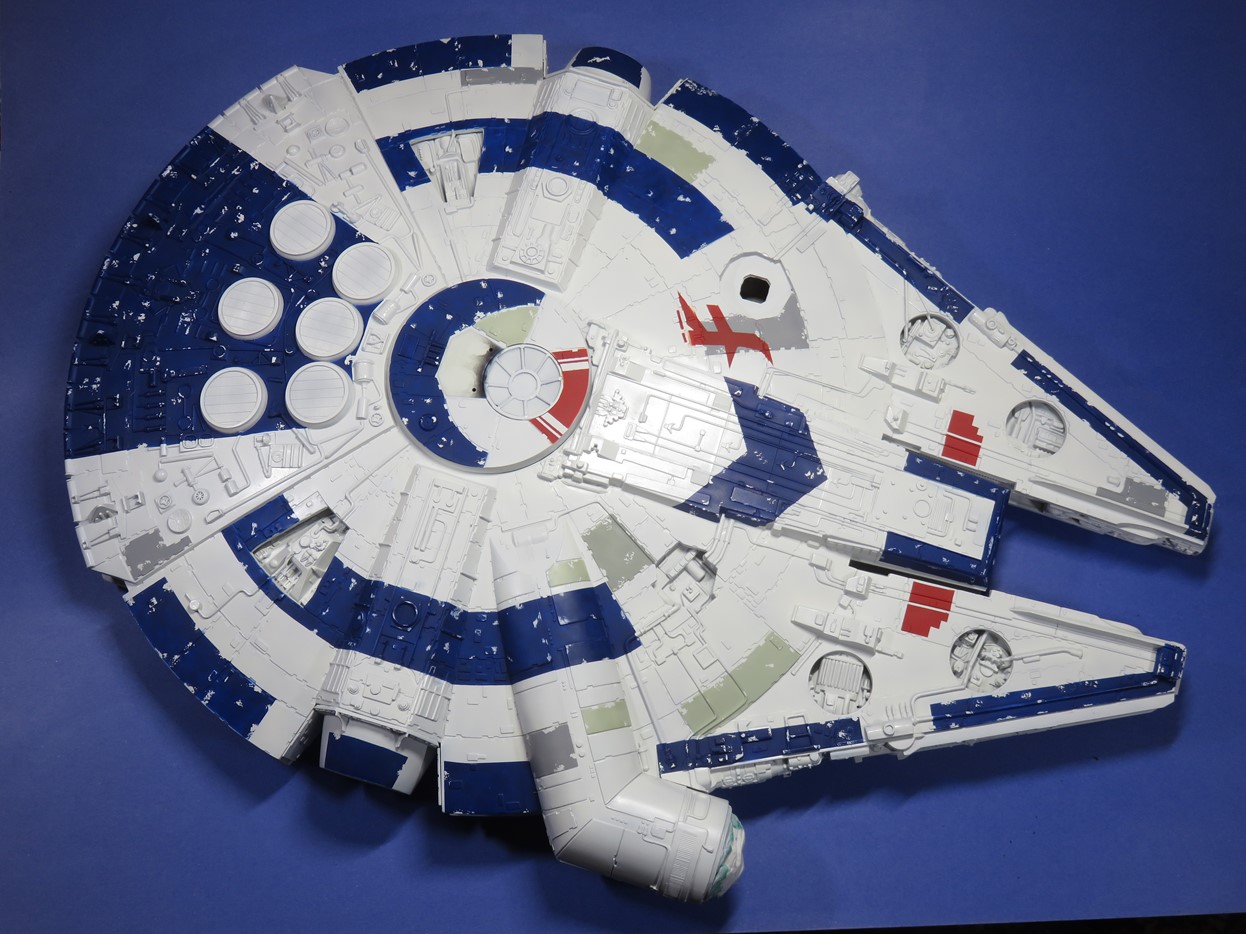
I think, and I hope, that I’m now done with masking and painting. As much as I love sitting and meshing colors together with my airbrush I think I’m ready to move on to something else with this project.
Next, I’m going to be adding a gloss coat to all of the newly painted sections, as it’s now time to begin weathering. And that is going to take me a while to do with such a large model. That being said it’s also going to be a lot of fun to do.
In the meantime, I think I’ll also get a restock on my masking tape!
To be continued…
Jared Demes is a modeler from southern Alberta. He has been building models since he was 4 years old when his Dad first introduced him to the hobby. He has written for several magazines including, Fine Scale Modeler, Scale Aircraft Modeling, Phoenix Scale Models, and others. He has an interest in all modeling subjects, with a focus on WWII Japanese aircraft and Science Fiction.
Jared has won several IPMS awards for his modeling, and currently operates his YouTube channel rebelsatcloudnine, where he showcases model builds and product demonstrations.