
Recessed Element Preservation: Super Detailing
Skill Level: Novice – Advanced
Read Time: 9 minutes
Modellers use diverse techniques and methodologies to attain authentic and lifelike results in detailing and weathering scale models. From fabricating rust effects to applying weathering to various model types, a broad spectrum of inventive solutions enriches the overall aesthetic of scale models. Seasoned modellers frequently employ advanced weathering techniques to accentuate the distinctive characteristics of each model and produce striking visual effects.
Building a scale model can be a gratifying pursuit that demands attention to detail and precision. Below is a comprehensive outline to assist in navigating the process:

Preserving Detail
Modern kits with state-of-the-art injection moulding and intricate 3D-printed aftermarket parts offer crisp, fine detail at never-before-seen quality standards. Reducing or eliminating detail levels can be summed up in one word: 2much.
2Much Fine Detail Eliminators
- heavy and improper use of plastic cement
- use of rattle cans
- excessive hosed-on primer and paint using an airbrush
- rushing and not being patient with processes
Any of the three or combinations fills in panel sections, seams, surface-mounted elements, hatch gaps and delicate surface texture. By comparison, builds preserving fine, crisp detail display significantly more depth and volume, making them more interesting and visually pleasing.
Modelling Strategies 101
To maintain the intricate details of a scale model, meticulous attention to several fundamental techniques is essential:
Surface preparation: Preparing the model’s surface is paramount before painting. This involves thorough cleaning and rectification of any imperfections. Sanding and priming the model will yield a smooth painting surface, safeguarding the preservation of fine details.
Paint application: Thin layers of paint are imperative to prevent the obfuscation of small details. Acrylic paints are favoured for model painting due to their capacity for thinning without compromising colour intensity.
Brush selection: You should acquire high-quality, fine-tipped brushes designed explicitly for model painting. Sable or synthetic sable brushes are frequently preferred for their precision and delicate application.
Painting techniques: Employing washes, dry brushing, and blending methods can enhance the model’s details without overwhelming them. Washes can seep into crevices, accentuating details, while dry brushing can highlight raised surfaces.
Patience and precision: Exercising patience while painting fine details is essential. Working in a well-lit area with appropriate ventilation and taking periodic breaks to alleviate hand fatigue are conducive to maintaining precision and minimizing errors.
These comprehensive techniques can preserve fine details on a scale model, culminating in a polished, masterful outcome.

Sequential Order
Sequential order plays a pivotal role in constructing and painting scale models. Adhering to a specific sequence ensures the systematic progression of tasks, preventing the omission of critical steps during the assembly process. Whether it pertains to the meticulous arrangement of components, the application of primer, or the incorporation of intricate details, following a predetermined order is instrumental in preserving the model’s structural integrity and aesthetic appeal.
Furthermore, adhering to sequential order is imperative for systematically layering colours and finishes in scale model painting. A lifelike and masterful outcome can be achieved by methodically progressing through each phase, such as commencing with a base coat, adding intricate details, and culminating with weathering effects.
Observing sequential order throughout the construction and painting of scale models ensures each stage’s comprehensive and precise completion, ultimately leading to a refined and superior final finish.
Planning Your Paints and Clear Coats
If you started using aqueous paint, continue using water-based acrylic paints: thinner, primer, top coat, and clear coat unless you are prepared to go off the rails, experience a train wreck, or venture into deep weeds overgrown with complications. The same holds true with lacquers.
Enamel Paint vs Enamel Washes
Although both are labelled enamel, their solvents differ significantly. Enamel paints may contain “hot” solvents that dissolve weaker water-based acrylic paint and clear coats.
Enamel washes are milder by comparison and will generally not damage surface paint or clear coats of any type.
Protective Sealer Clear Coat Layers: Less is More
A protective sealer clear coat aims to form a thin protective barrier on the previous layer without adding material in depth. An adequately thinned light layer is required to protect the substrate uniformly.
Always use a test card to determine base coat and protective clear coat compatibility.

Modelling Basics 101
Assembly Instructions
Read the assembly instructions cover to cover to familiarize yourself with the assembly of parts, sub-components and the most advantageous assembly order.
Getting Organized
Model Selection
- Choosing a model kit should be based on individual interests and skill levels. TAMIYA Model Kits are considered some of the easiest to build.
- Evaluating the scale, intricacy, and subject matter of the model.
Essential Tools and Materials
- Compiling a list of necessary tools, including hobby knives, sandpaper, and adhesive.
- Procuring materials such as paints, brushes, and Aftermarket super-detail upgrade parts such as 3D-printed Components, Wheels and Accessories, Photoetch, metal barrels, and 3D decals tailored to the model’s specifications.
Workspace Preparation
- Establishing a well-lit and organized workspace conducive to the task at hand.
- Ensuring adequate ventilation when working with paints and adhesives.
Instructions Review
- Familiarize oneself with the model kit’s instructions and parts layout from cover to cover.
- Grasping the assembly sequence and any specific techniques required.
Assembly and Detailing
- Methodically assembling the model components according to the provided instructions.
- Incorporating intricate details like panel lines, rivets, and surface textures enhances realism.
Painting and Finalization
- Priming the model and applying base coats to achieve the desired colour scheme.
- Implement weathering effects, decals, and a protective clear coat for a masterful finish.
Presentation and Enjoyment
- Showcasing the completed model through display cases or dioramas.
- Appreciating the acquired skills and the final product resulting from the meticulous building process.
- Join a local modelling club to learn advanced techniques and share your hobby.
This detailed outline is a valuable guide for navigating the intricacies of building a scale model. I wish you a fulfilling and enjoyable model-building experience.
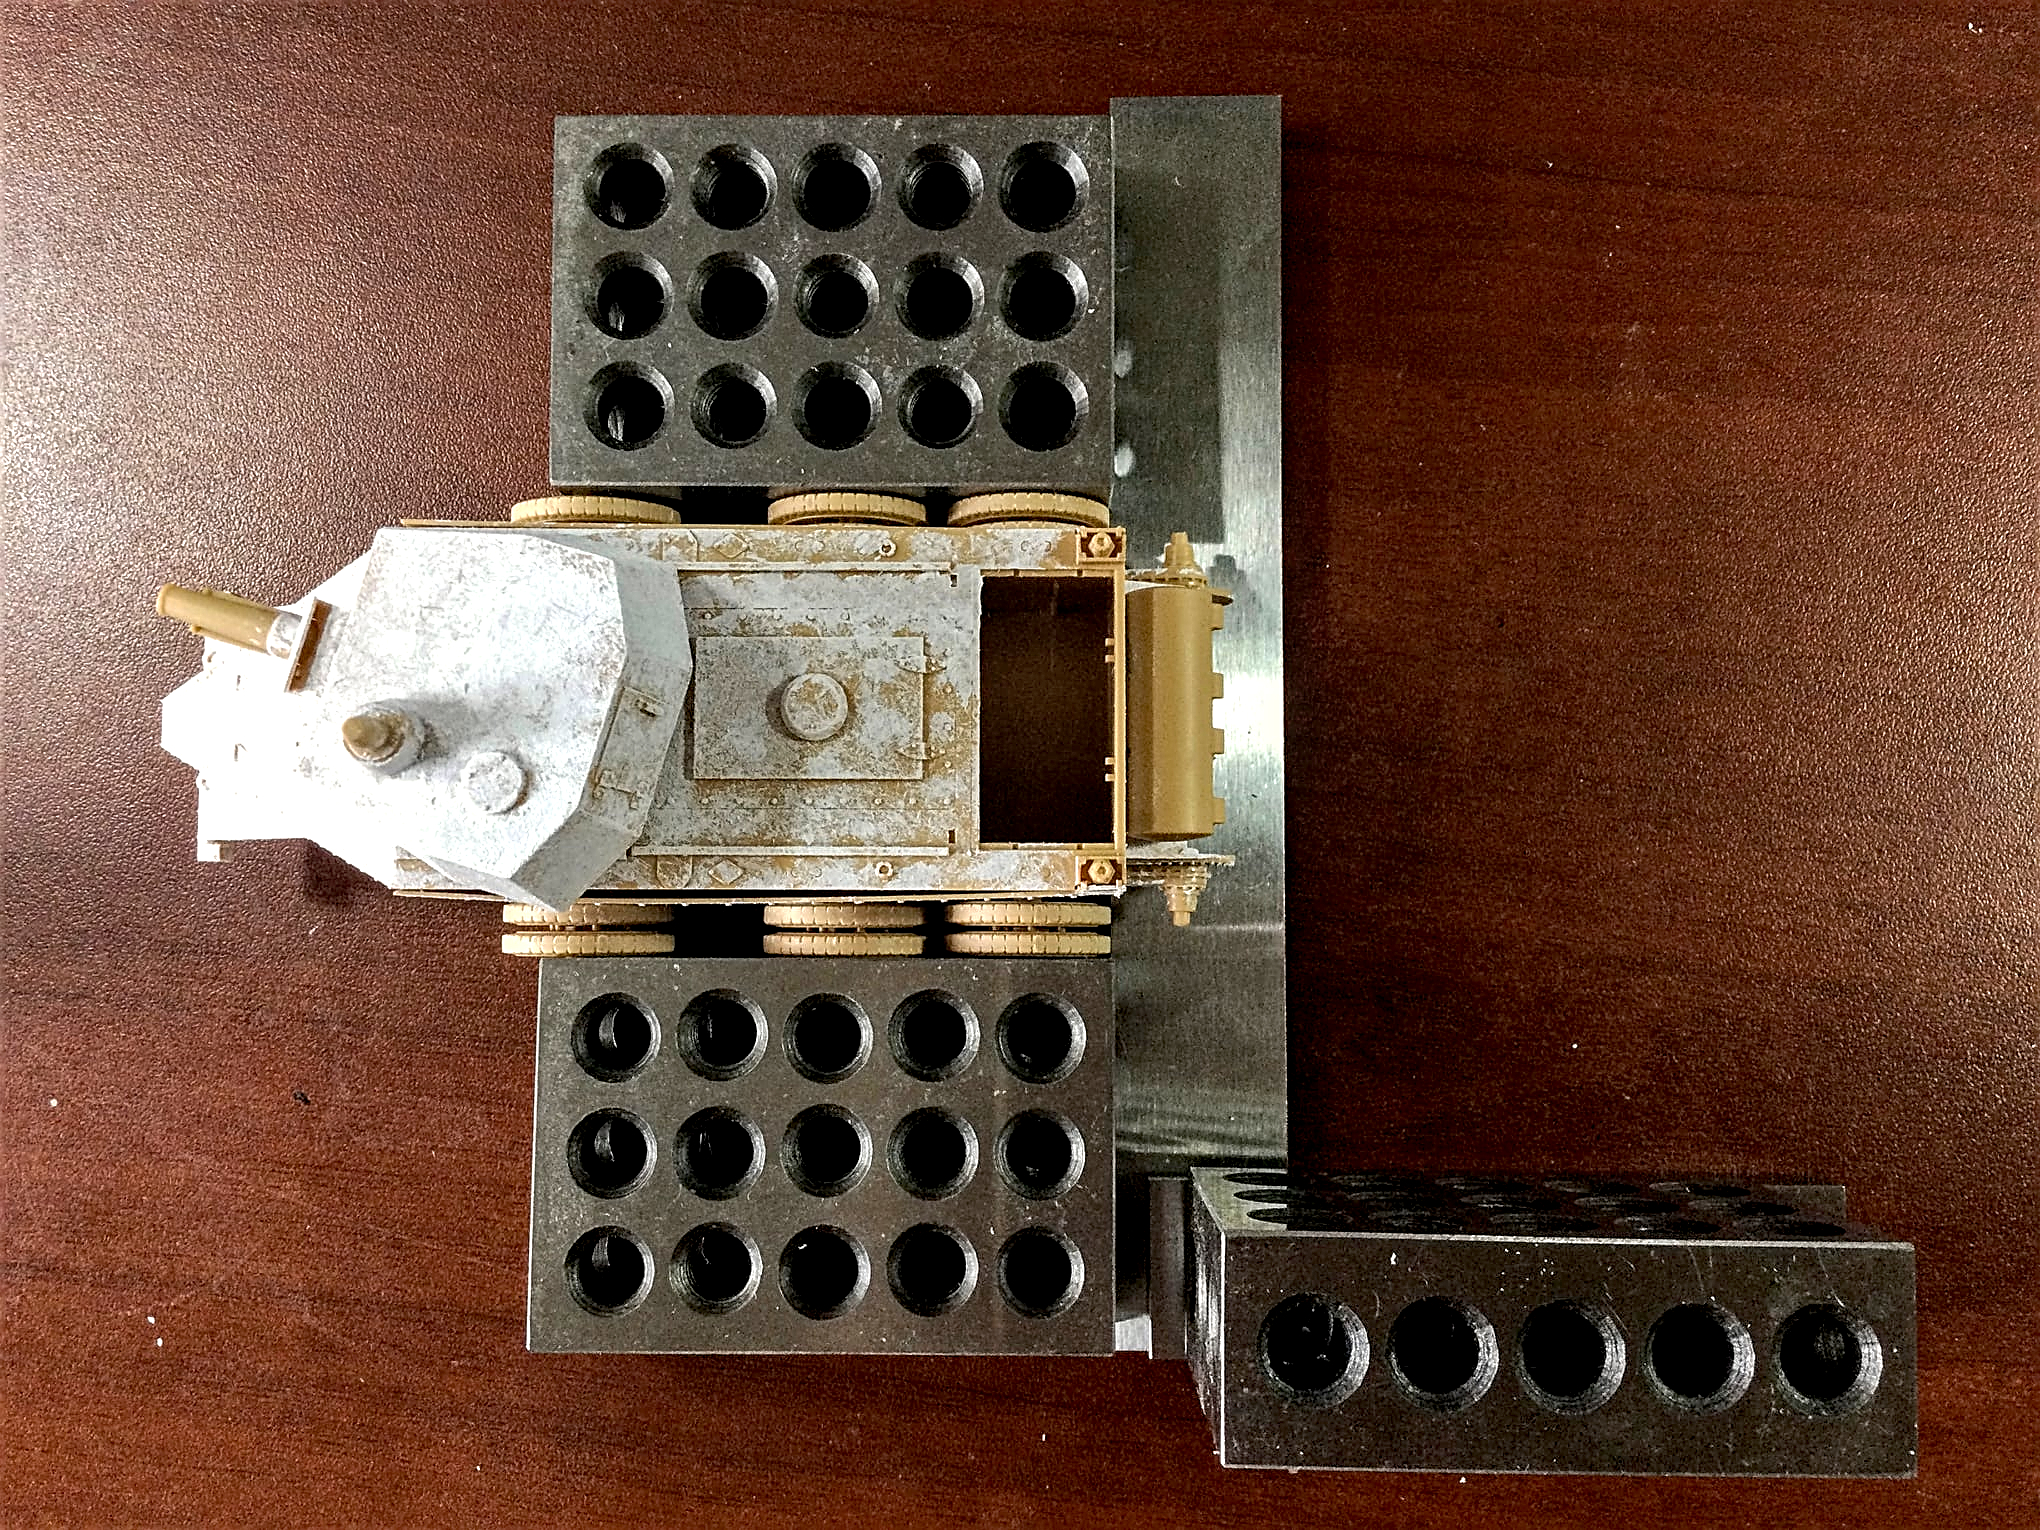
Keeping Your Build Squared Up
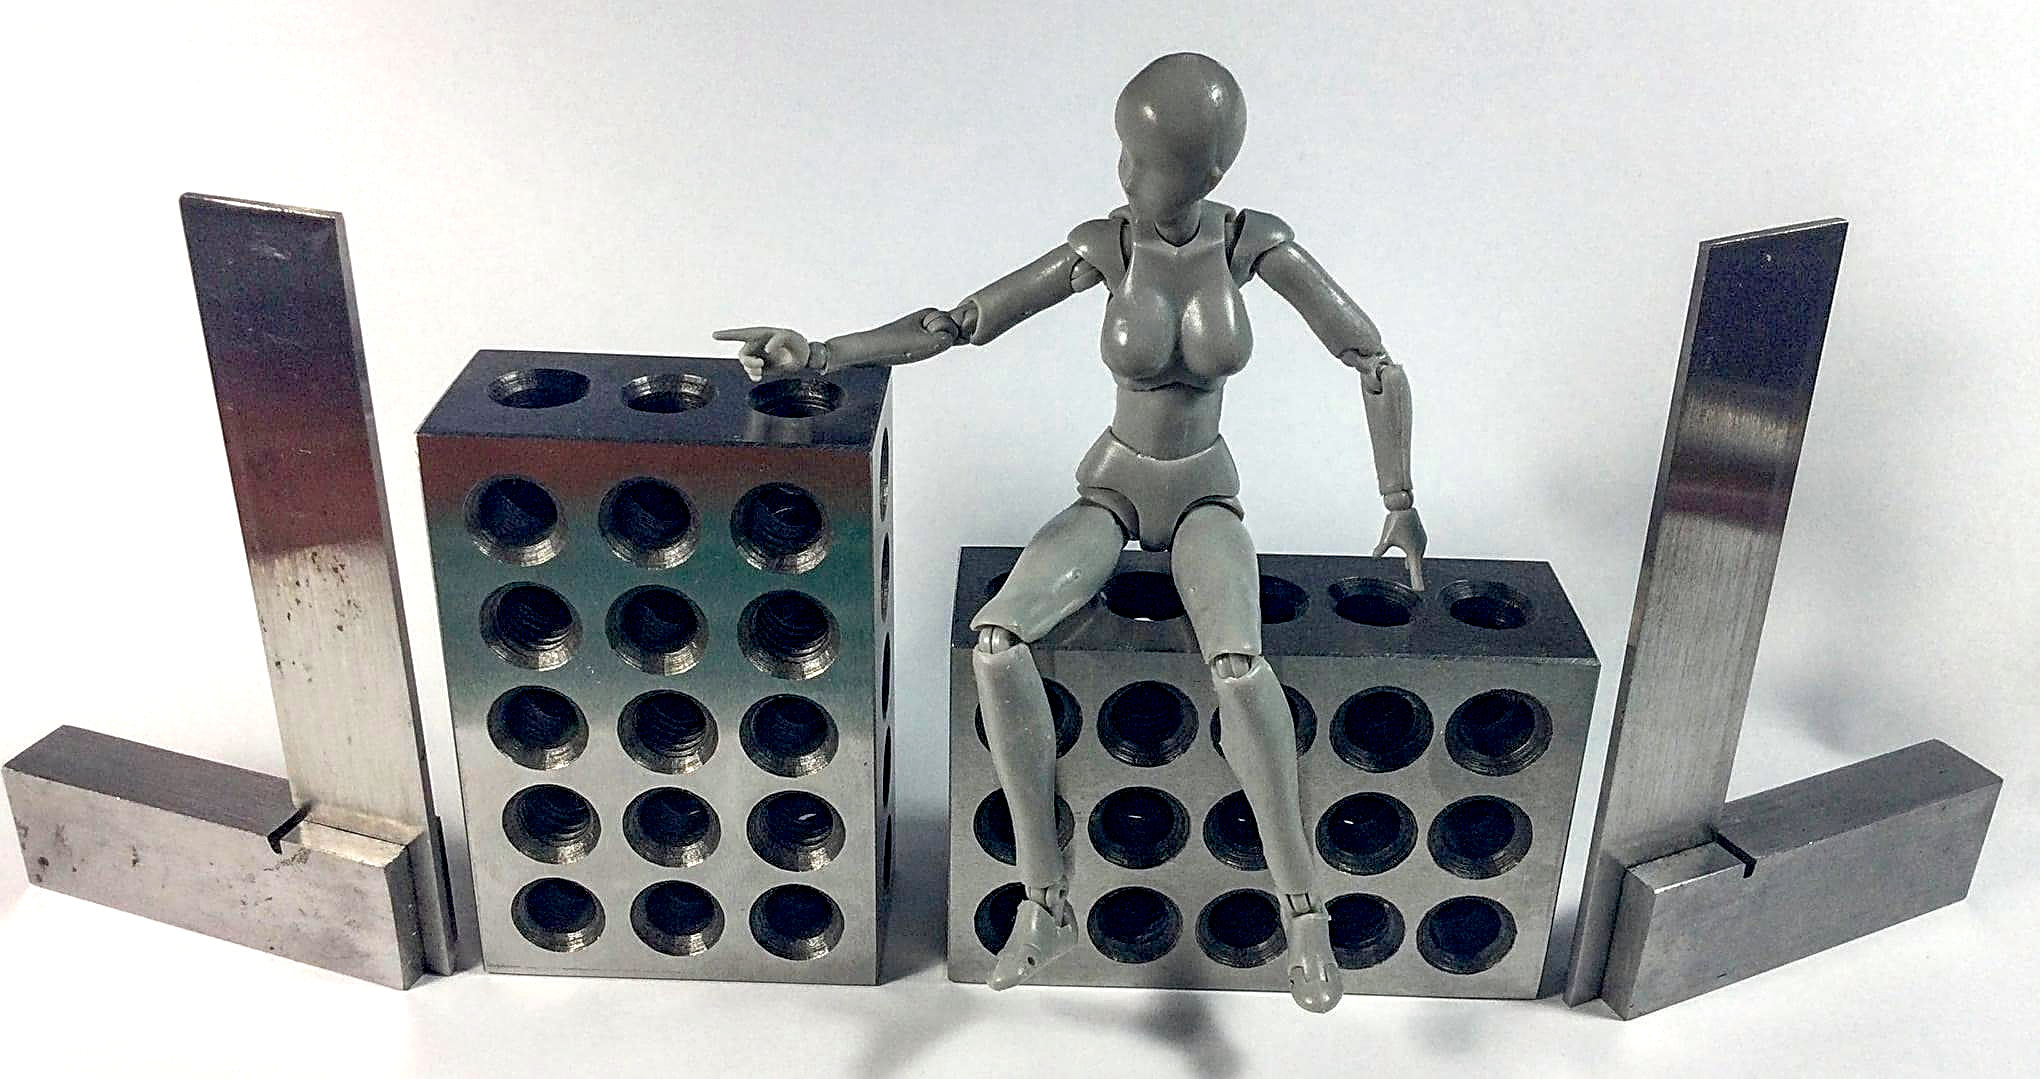
Machinist Squares & 1-2-3 Blocks
Machinist Squares
They are great for squaring and aligning right angles and weighting down objects while the cement or adhesive sets. Use them to align hulls, wings, tail sections, torsion bars, and road wheel assemblies.
1-2-3 Blocks
They are great for cementing tank road wheels and holding them together so they are parallel while the cement cures. Having weighty mass, they will hold sections for alignment by butting up to them or providing weight to hold something down, such as working on a vignette or diorama.
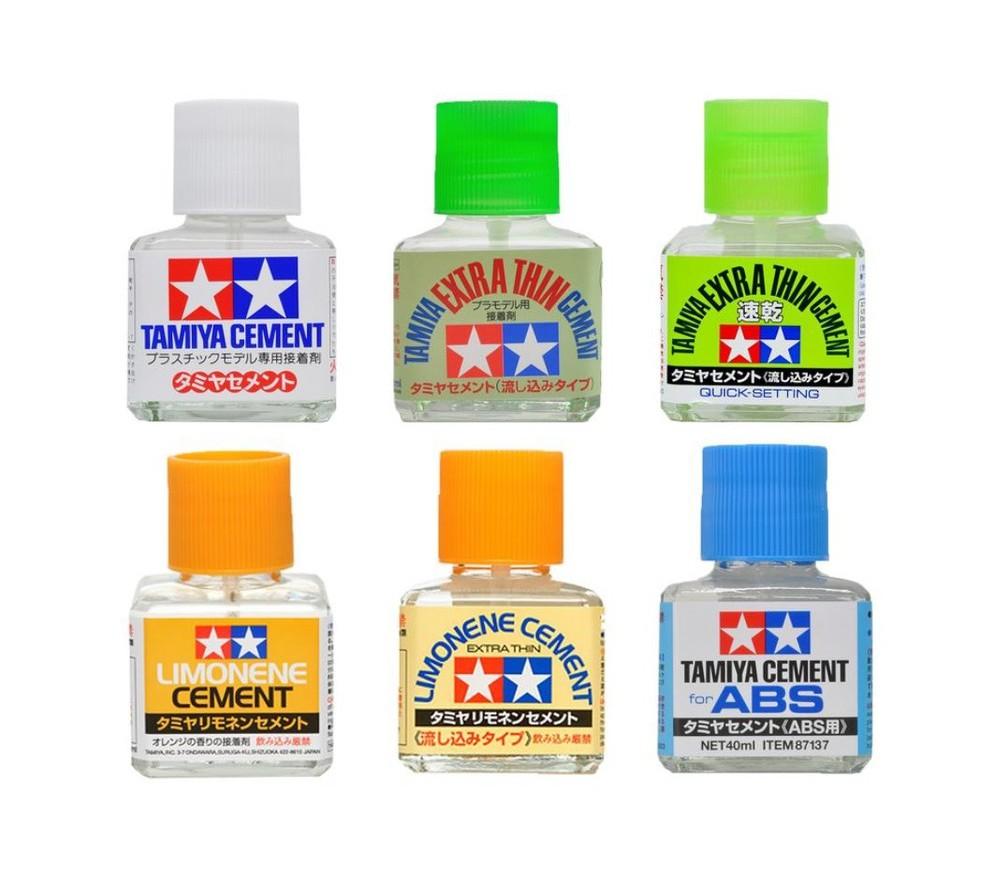
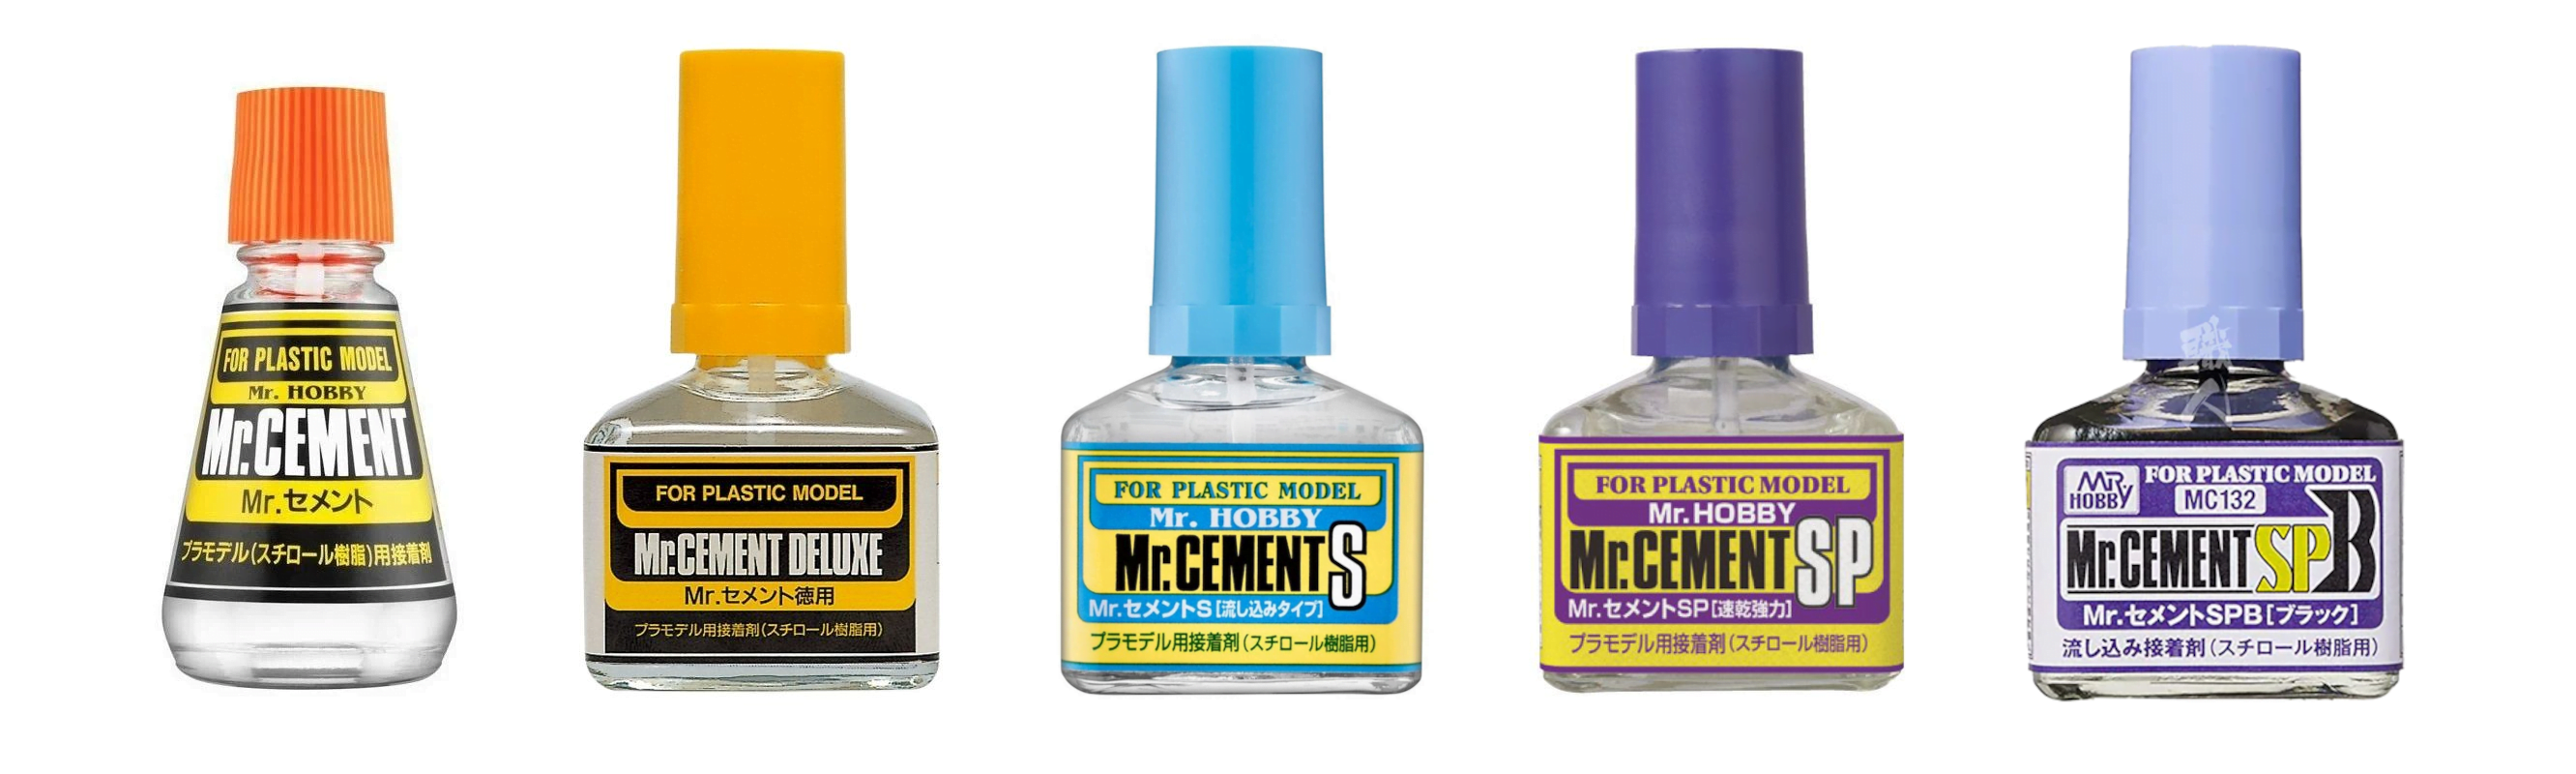
How-to use Plastic Cement for Modelling: Tools for the Job
Tamiya Cement, AK Interactive Cement, and Mr.Cement are blended to regulate solvent aggressiveness or “heat” in a controlled manner to prevent styrene deformation. When pooled or excessively applied to large parts, the hotter cement may disrupt or deform the styrene molecular structure, such as dimpling with prolonged softening before complete curing occurs.
💡 Heat is defined by how aggressively the plastic cement formulation dissolves the styrene. The hotter the plastic cement, the greater the care required for its application. Hot cement continues to soften styrene after it appears to have evaporated from the surface, especially where it is applied heavily and allowed to flow excessively in and around parts.
Cool cement permits the most extended work time, referred to as open time, whereas warm and hot cement reacts faster to styrene, reducing placement and readjustment time for parts. Hot types of plastic cement create an instant solvent weld between parts, making disassembly and adjustment difficult, if not impossible. Misaligned or misplaced parts often require separation by cutting to reposition or correct.
Plastic cement types are colour-coded for easy recognition. Learning how to use each type of cement will significantly increase your modelling experience and enjoyment.
- 🟦 🟩 Cool
- 🟨 Warm
- 🟥 Hot
Read the full article on How-to Use and Apply Plastic Cement for Models
Utilizing plastic cement in the assembly of scale models involves several key steps:
Preparation of Workspace: Before commencing, ensure work is conducted in a well-ventilated area, and consider using protective gloves to prevent contact with the cement.
Fitting of Parts: Ensure the components fit together seamlessly before application.
Application of Cement: Use a fine brush or applicator to apply a modest quantity of plastic cement to the joining surfaces.
Assembly of Parts: Firmly but gently press the parts together, allowing the cement to facilitate bonding.
Drying Period: Allow the cement to dry, allowing ample time for the parts to be set in place. The duration is contingent on the specific type of cement utilized.
Cleanup: Remove any surplus cement after it has hardened the styrene with light sanding where applicable.
⚠️ Do not touch wet plastic cement.
Adherence to the manufacturer’s instructions about the particular type of plastic cement is imperative. For a deep dive into the world of Plastic Cement and how to use it as a tool, read more.
Plastic Cement Solvent Welding
Solvent welding of plastic cement on styrene scale models involves using specialized solvents to create a strong and seamless bond between styrene plastic parts. The process works by applying the solvent-based cement to the mating surfaces of the styrene parts. The solvent in the cement softens and partially melts the plastic, allowing the two pieces to fuse as the solvent evaporates, resulting in a strong chemical bond as strong as the original styrene material. This method is used in scale model building to create durable, professional-looking, clean, and crisp assemblies.
Part №.2 of How-to Prepare Military AFV Models for Weathering and Protective Clear Coats covers the next steps in the finishing and weathering process.

James Wooldridge is An enthusiastic scale modeller, researcher, amateur historian, and contributor to scale modelling sites, including Scalemates. He is an active and progressive Facebook Group Expert, Presenter, and Scale Modelling Club Video Host. James is also the Executive founding member and KSM Group Expert – Kawartha Lakes Scale Modellers