
Tamiya Bismarck Battleship 1/350 Scale Kit 78013 – Part 5
In this Sunward Hobbies article I’ll continue with Part 5 of the build of the Tamiya 1/350 scale model of the German battleship Bismarck (items# 78013).
You’ll get to see all Steps on page 9 completed, plus get tips on correcting fit issues and paint masking.
We’ll begin with where I left off in Part 4. With the arrival of a few spray cans of Tamiya TS-33 Dull Red Spray Paint then can be masked to protect the XF-54 Dark Sea Grey. Mask down to the top demarcation line of where the Tamiya XF-1 Flat Black Acrylic Paint line will later be sprayed. This will save you time, having mask off two lines. Set the hull aside to have plenty of time to dry.

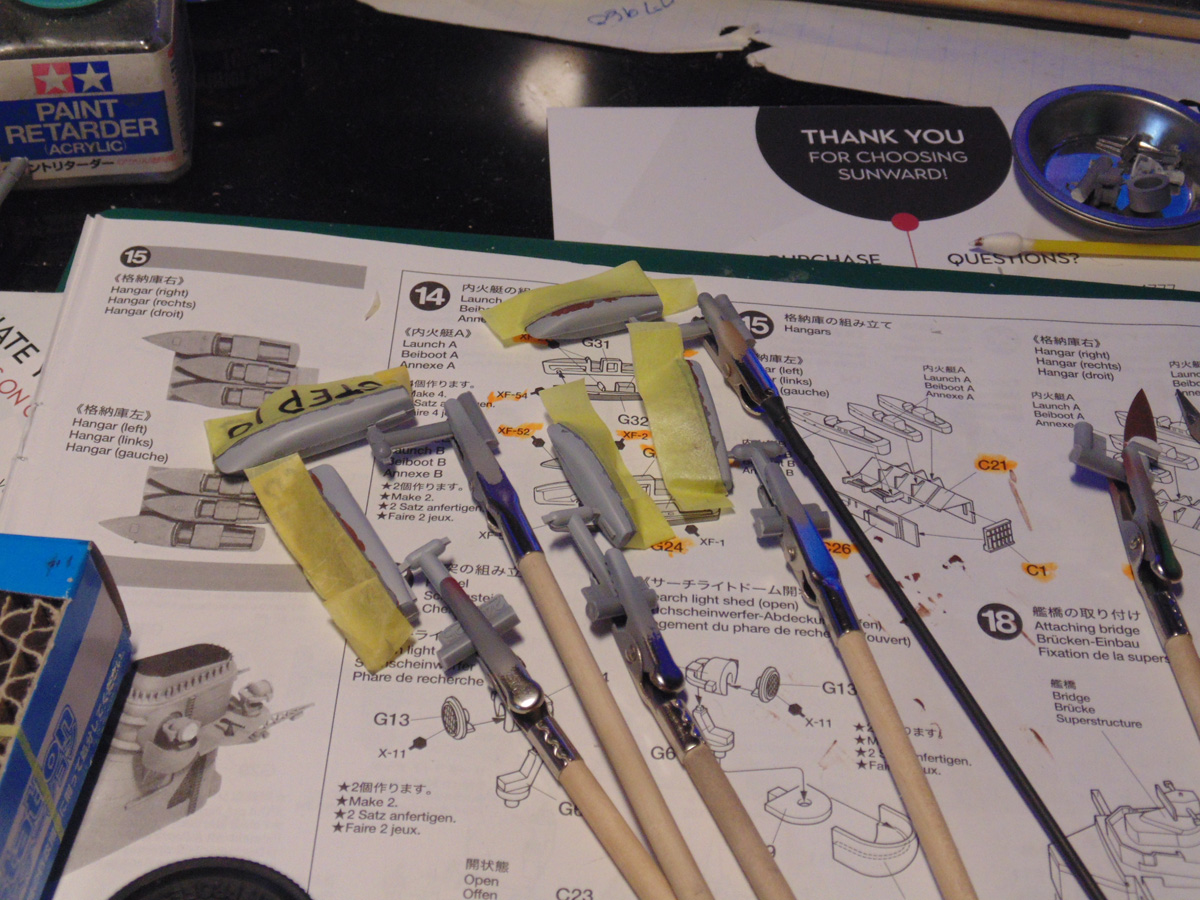
In Step 14 you’ll be building two types of yachts or launch boats. Keep these components on their sprue connections at the keel. They are so much easier to clean up and paint this way. Any removed paint from where the nubs were will never be seen after installation.
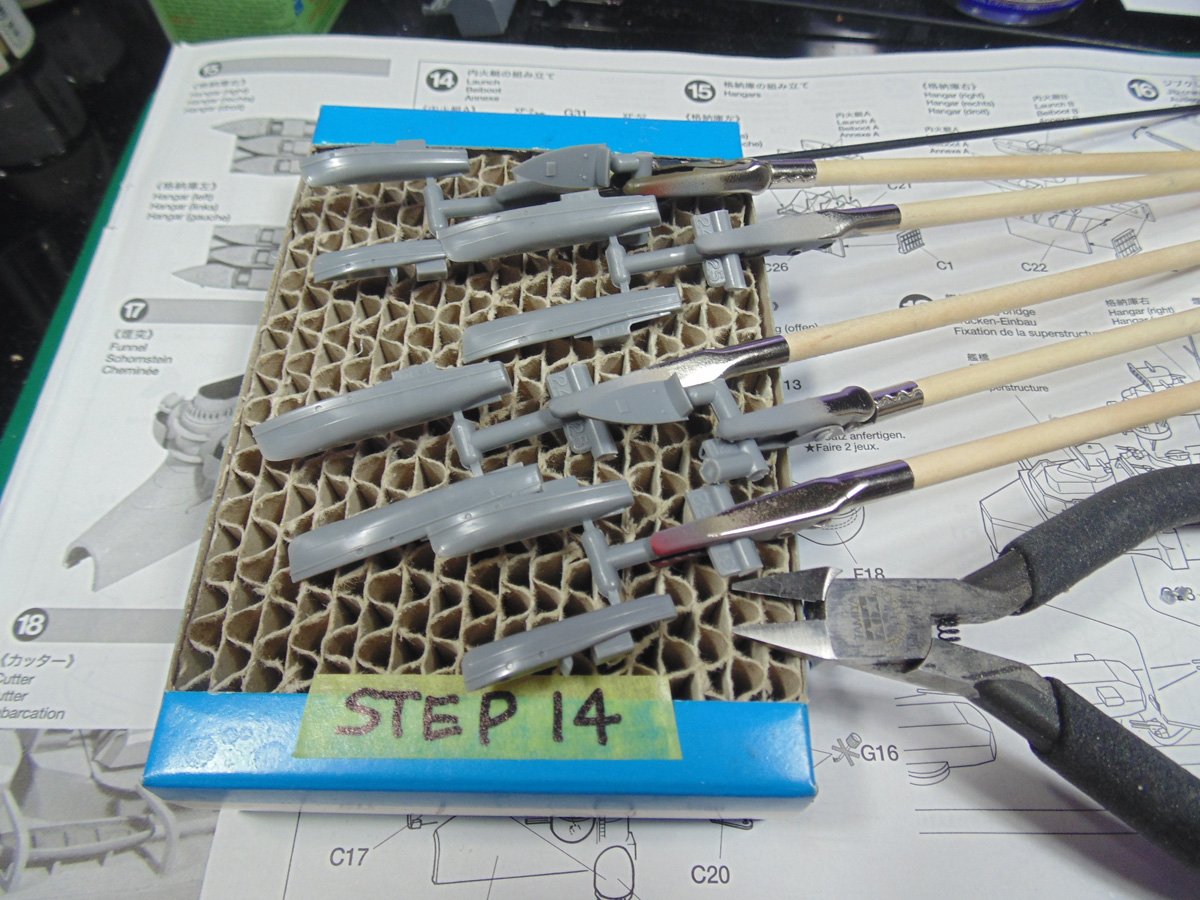
Snip the opposite side and attach. You may choose to prime the parts before or after. I found it easier to prime them before attaching because there is some detail inside which would be hard prime after installing the two halves. Regardless, they absolutely must be clamped due to the slightly poor fit.
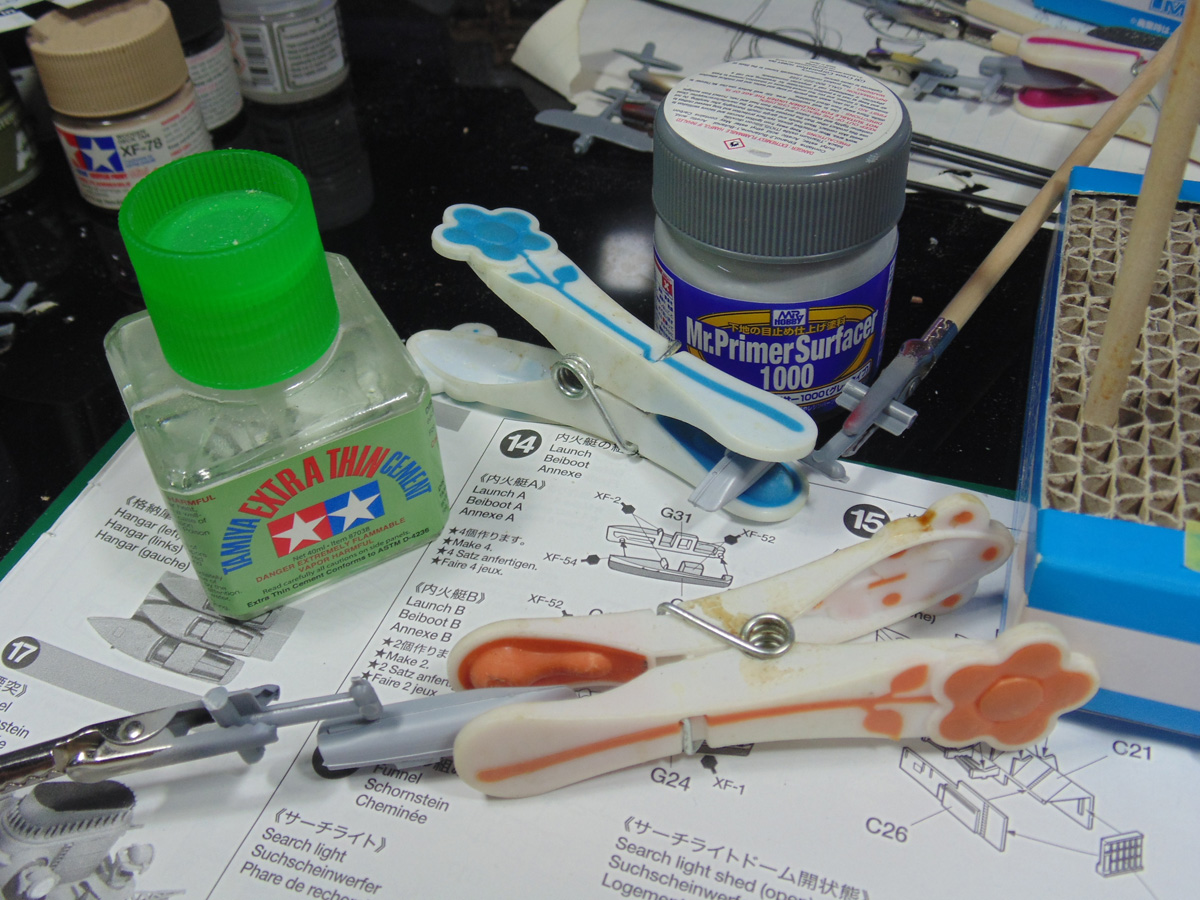
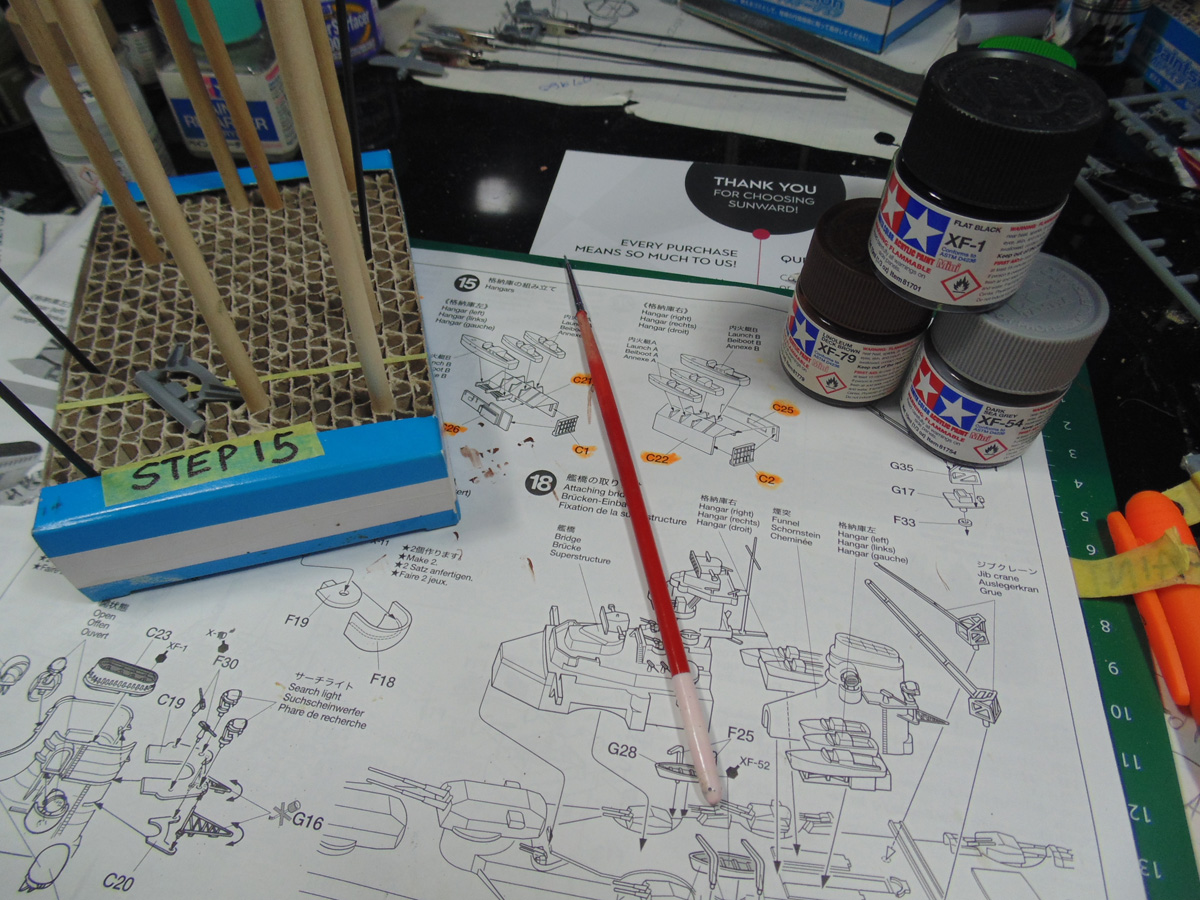
Please forgive me for bouncing around between steps, but while glue curing on the boats you can work on the Arado aircraft hangers in Step 15. There is some really nice fine detail in these mini models, yet they did need a slight amount of flash removed.

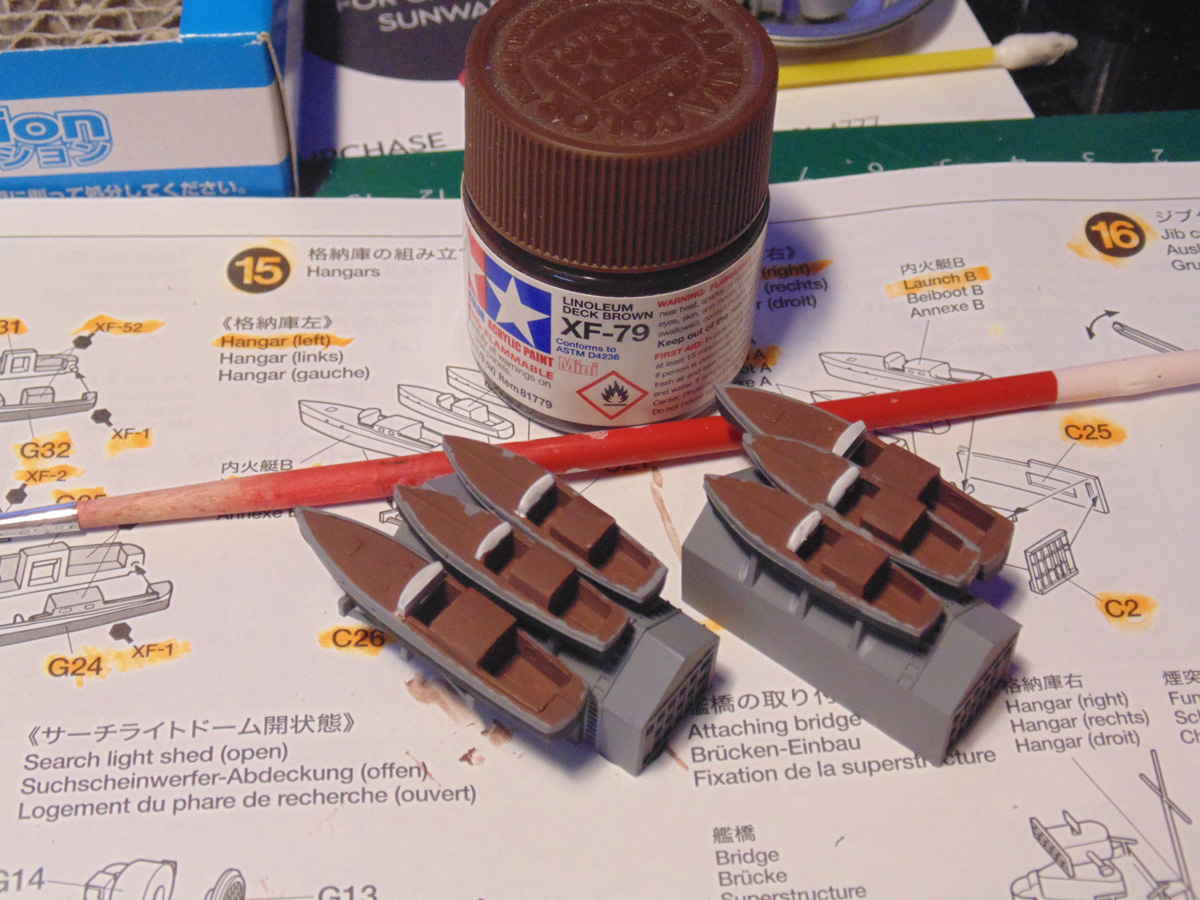
You’ll need three main colours and a flat white for the boats. Tamiya XF-79 Linoleum Deck Brown is a good substitute for XF-52 Flat Earth and adds so much more life to your project. Hand painting the smaller parts of these items will need to be done.
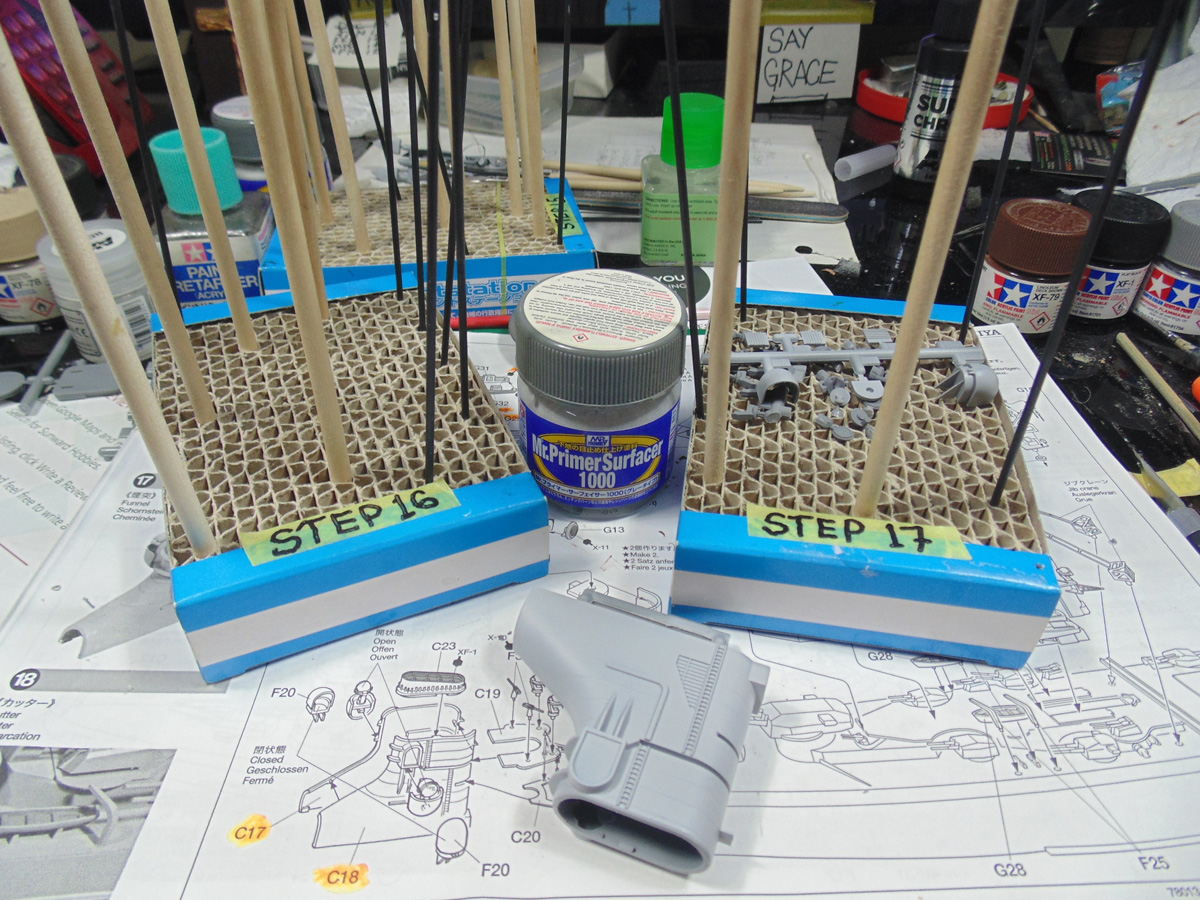
Another quick job you can do while other parts are drying is the funnel main body parts. As you can see, they need to be clamped, yet I’d run a line of extra thin glue on the inside of the mating lines. This subsection will need a decent amount of attention before any of the affixing parts are added, so make sure you have a super solid connection.

Once all the flash, parting lines and glue ooze is cleaned up you can prime it and the other attaching parts. You will possibly be doing manhandling to get this unit to fit in place, thus make certain there are a couple of primer coats.
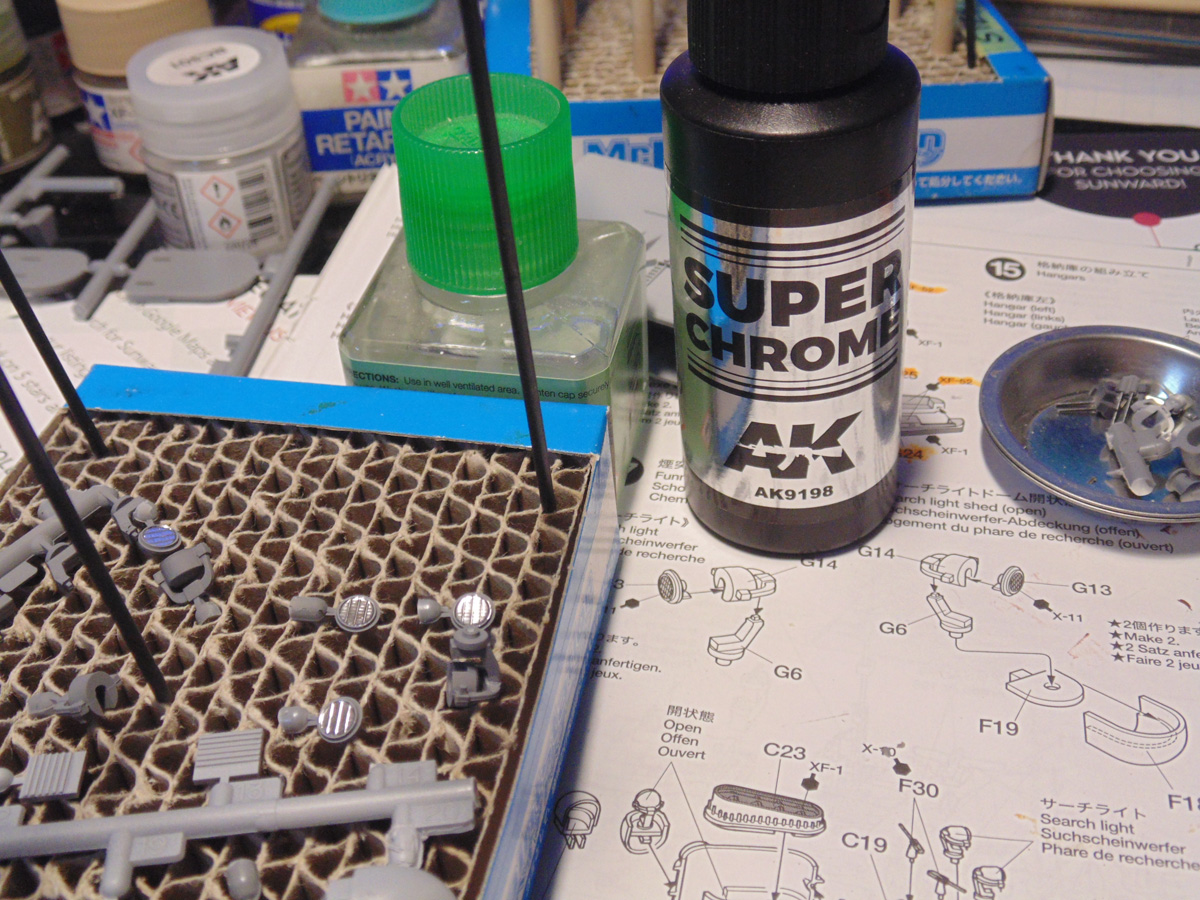
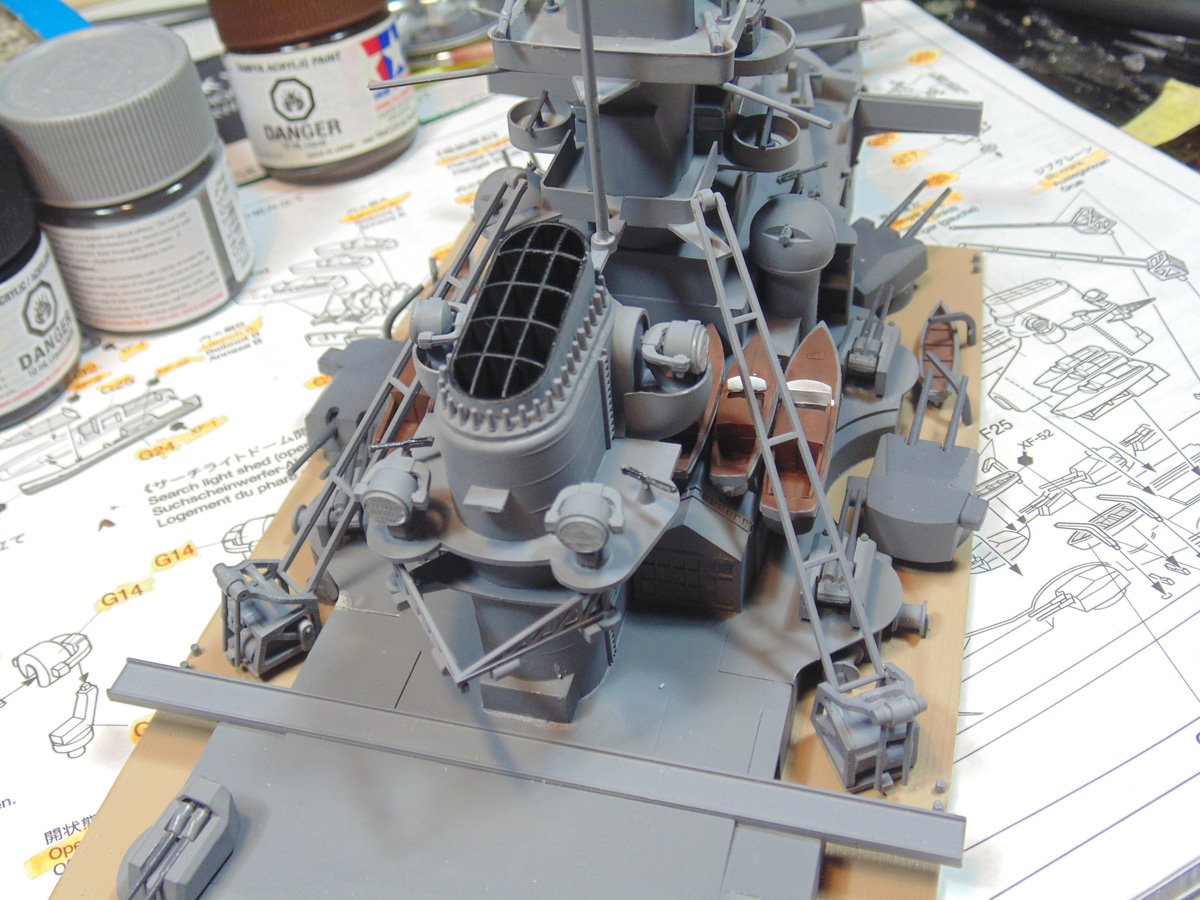
With the attaching parts now cleaned, primed, and sprayed you add some life to the searchlights. This AK Super Chrome is absolutely amazing when hand painted in small spots. Here’s the trick to get the best results. After painting, lay the parts upright and flat. This will allow the chrome pigment to float to the top, as you can see with these search light bezels. Also, a single drop of this product goes a long way.
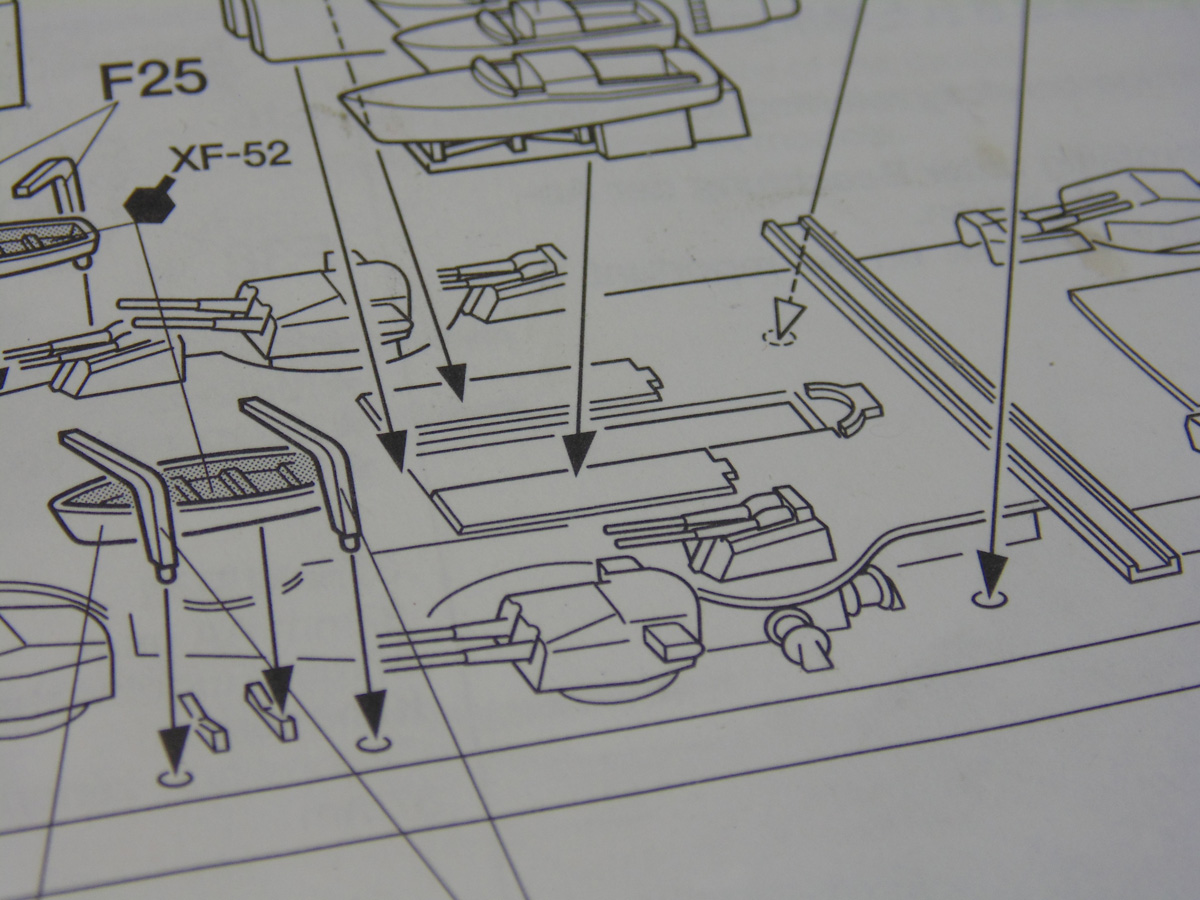
The Jib cranes in Step 16 were a bit finicky due to the moving parts. Let me save you the grief. Attach parts F33, G17 and either G35 or G36, but only one of the two. Let that set-up before slipping in the moving crane arm. Next, you have to clamp and glue the connection points again to prevent the arm from constantly coming out.

With the grey and white added to the boats you can now hand paint most the deck brown colour. Allow this to thoroughly dry before masking off the hull for its XF-1 flat black. This might seem like a lot of work, but you’ll get a great result and, as I’ve mentioned, completely forget the time involved.
All that’s left to complete these mini models is some touch-up paint for the decks and side rails. I find it much easier, not to mention more accurate, to hand paint at a ninety-degree angle. Otherwise, you risk the brush skipping off the edge where you’ll have to touch-up the grey or white. Naturally, this all boils down to your steady hand.
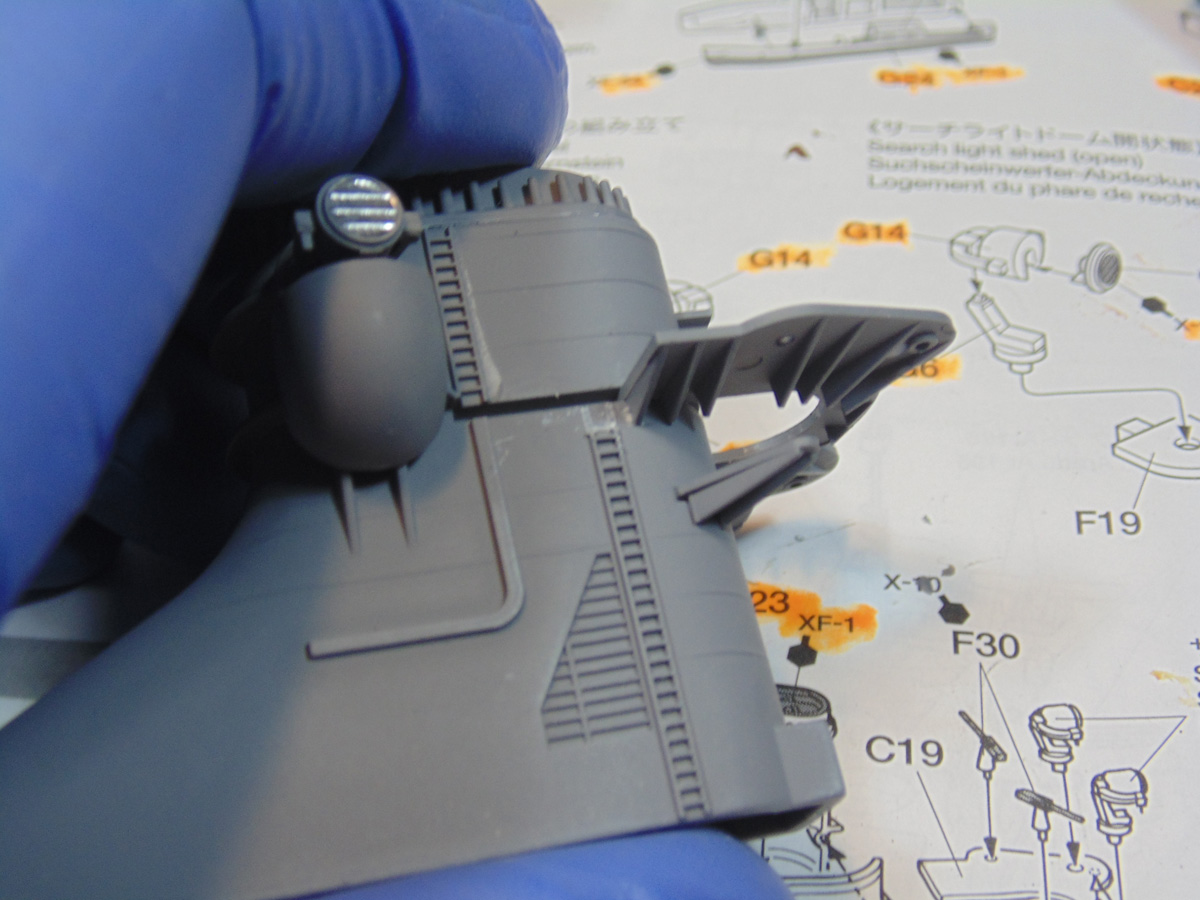
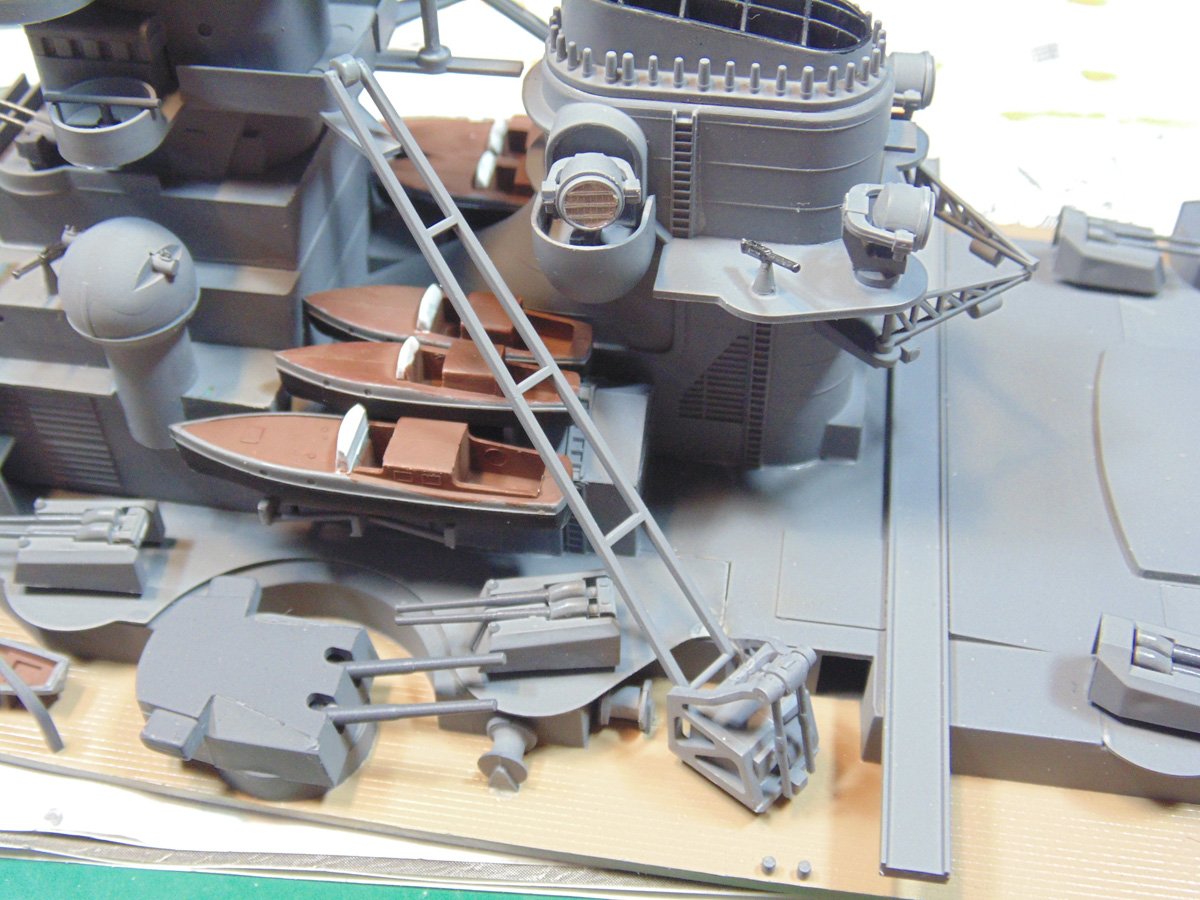
The upper gun and searchlight deck on the funnel will not slip in unless you do two things. First, you must remove the upper handrail section in order for the supports to slide by. Yes, this must be done on both sides. Second, you need to pull out the inner edge of the deck in order for it to jump over the “J” raised detail. Do not add any parts on the deck until it has been moved into place and glued. Once you’ve managed this the fit is quite nice.
I won’t bore you with pictures of adding all the parts on the funnel except that you can simply lift the upper deck, after it has dried, to insert the aircraft cranes. These two cranes are movable and you may wish to have them posed directly over the aircraft you’re going to add later.
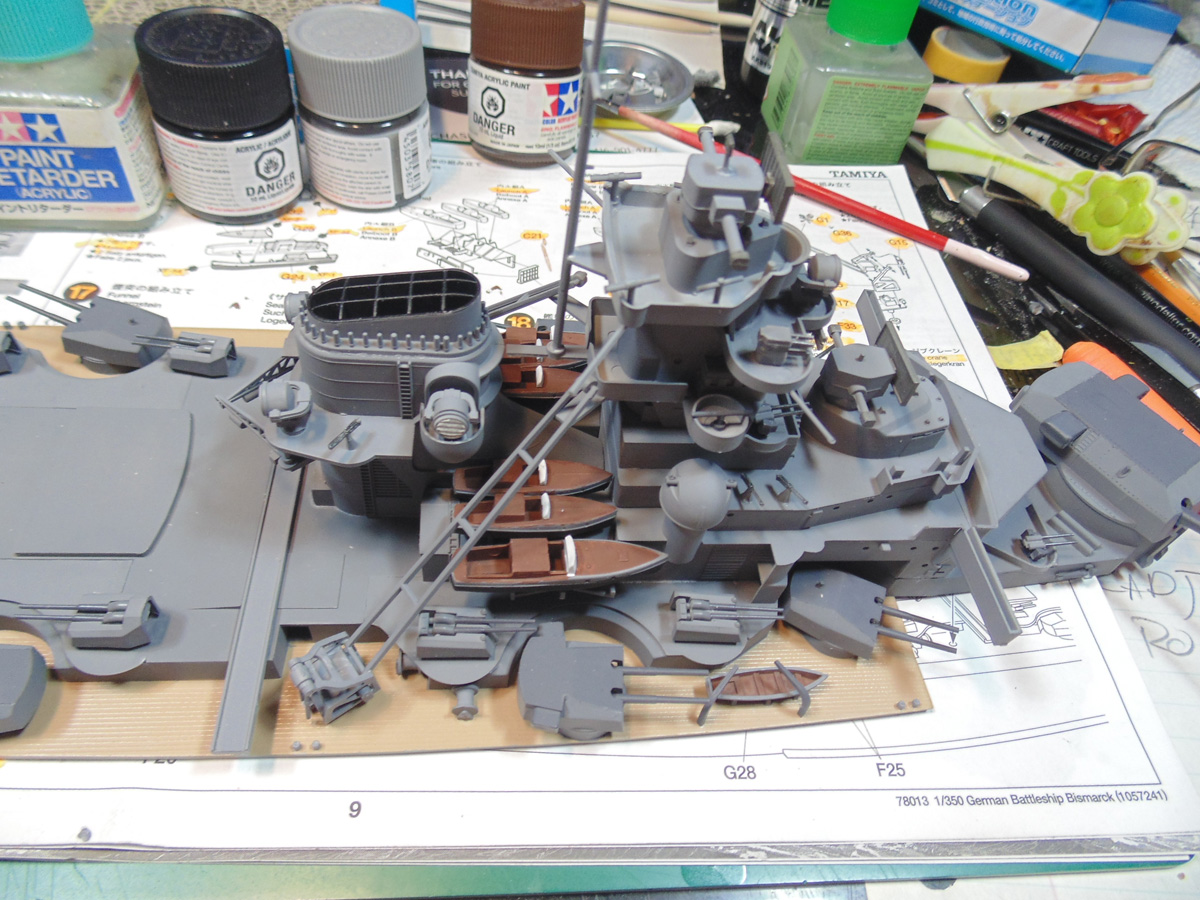
Step 18 has you adding major sub assemblies to the mid deck. I test fitted these six ways to Sunday and found adding and gluing the bridge in steps worked the best. Please let this dry for an hour before moving down its length to the next glue point. Wherever you can clamp it then add another touch of glue and allow that wick around the edge. It is a slow yet necessary process.

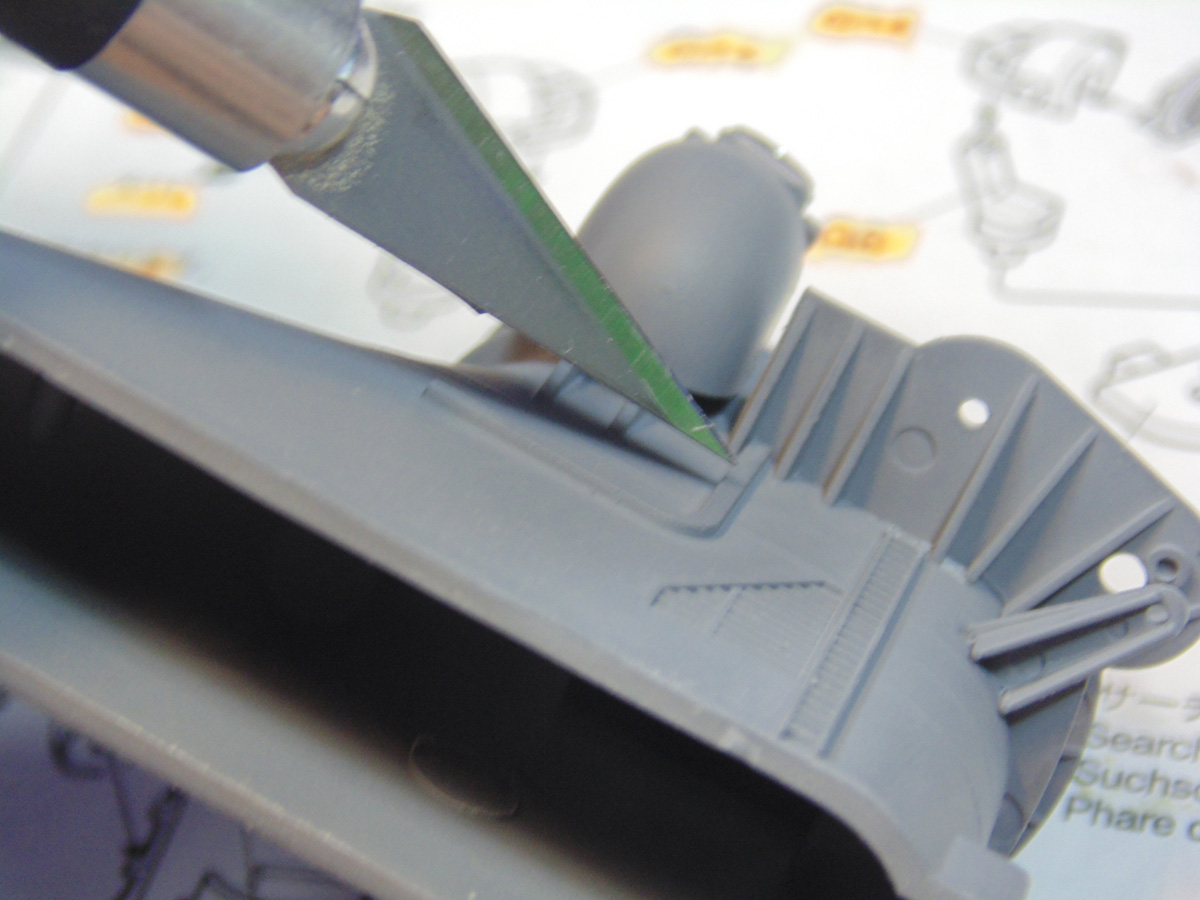
To get the hangars and funnel to place easily you’ll need to remove the paint and primer from both the raised and recessed fitment locators. Use the tip of a curved blade to scrape those and a tiny bit of the plastic as well.
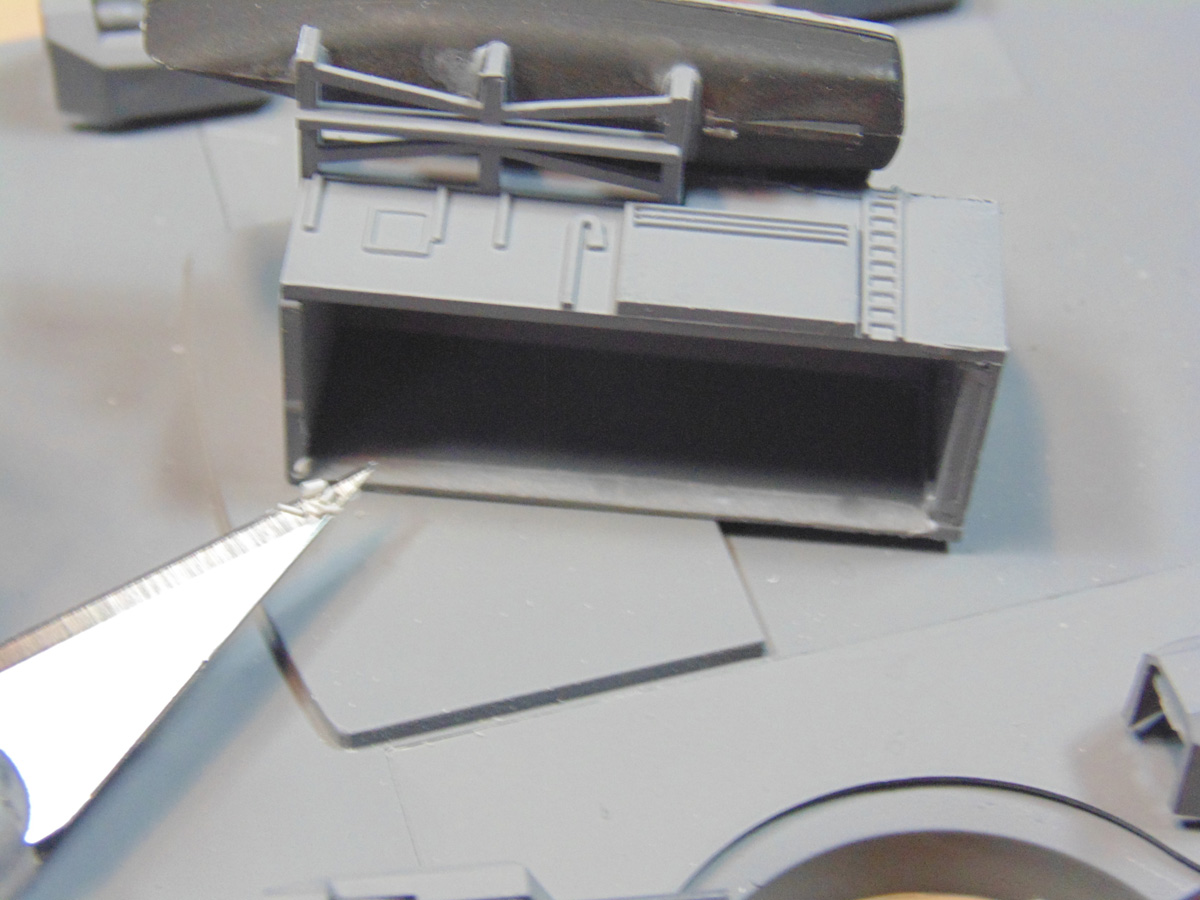
I’d also recommend removing some material from the inside of the hanger wall edges so they will slip onto the raised plastic where they are to be seated. A number eleven blade will make quick work of this. Then condition the scraped plastic with some glue to help the actual wet touches you’ll use to permanently attach the parts.
When you get the Jib cranes in their final location, glue them from the underside of the deck part. These crane arms tend to flop around, thus be careful placing them.
Rinse and repeat for the Port side, but I’d strongly suggest gluing them at the point where they rest on the bridge section. You still have a lot of handling and moving around the deck parts, so use this time to fully secure them. This wraps up page nine and sets you up to install all three deck components.
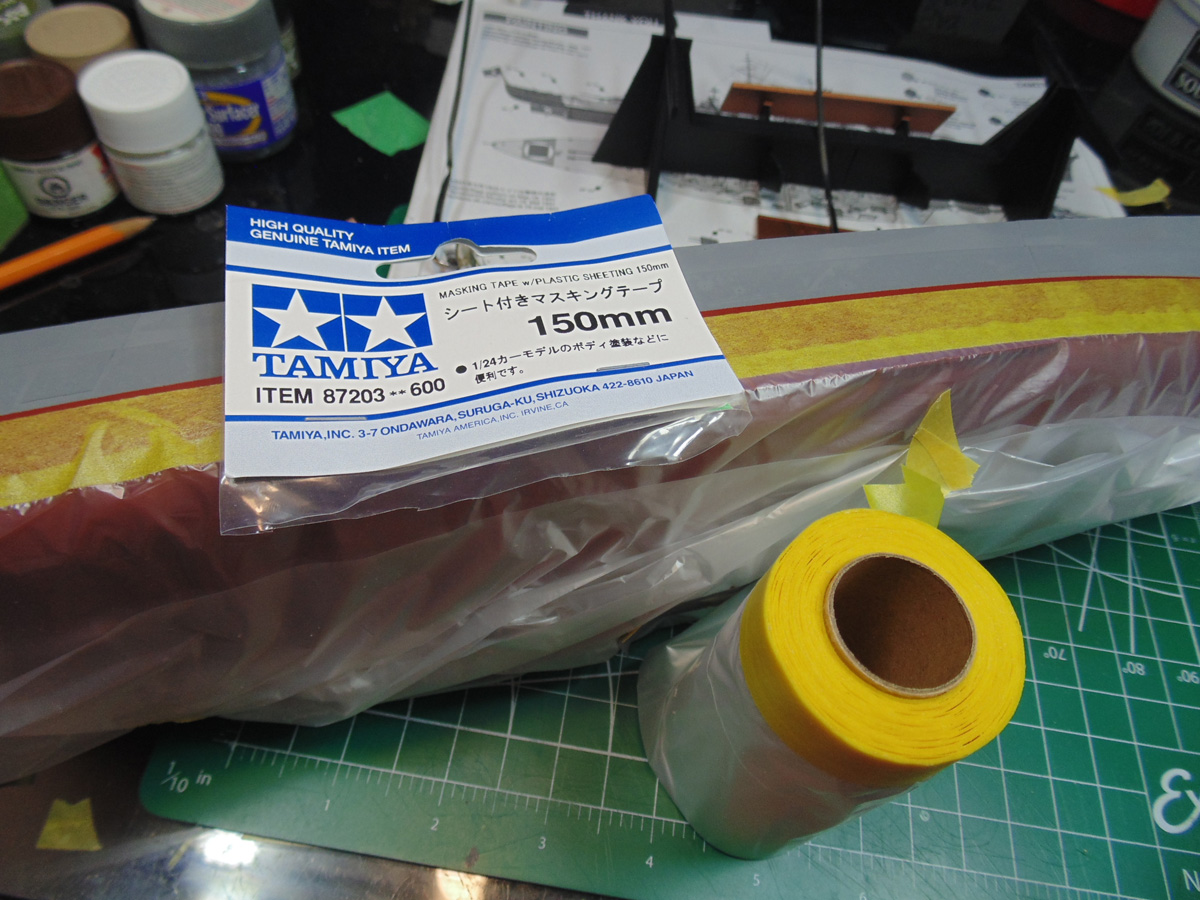
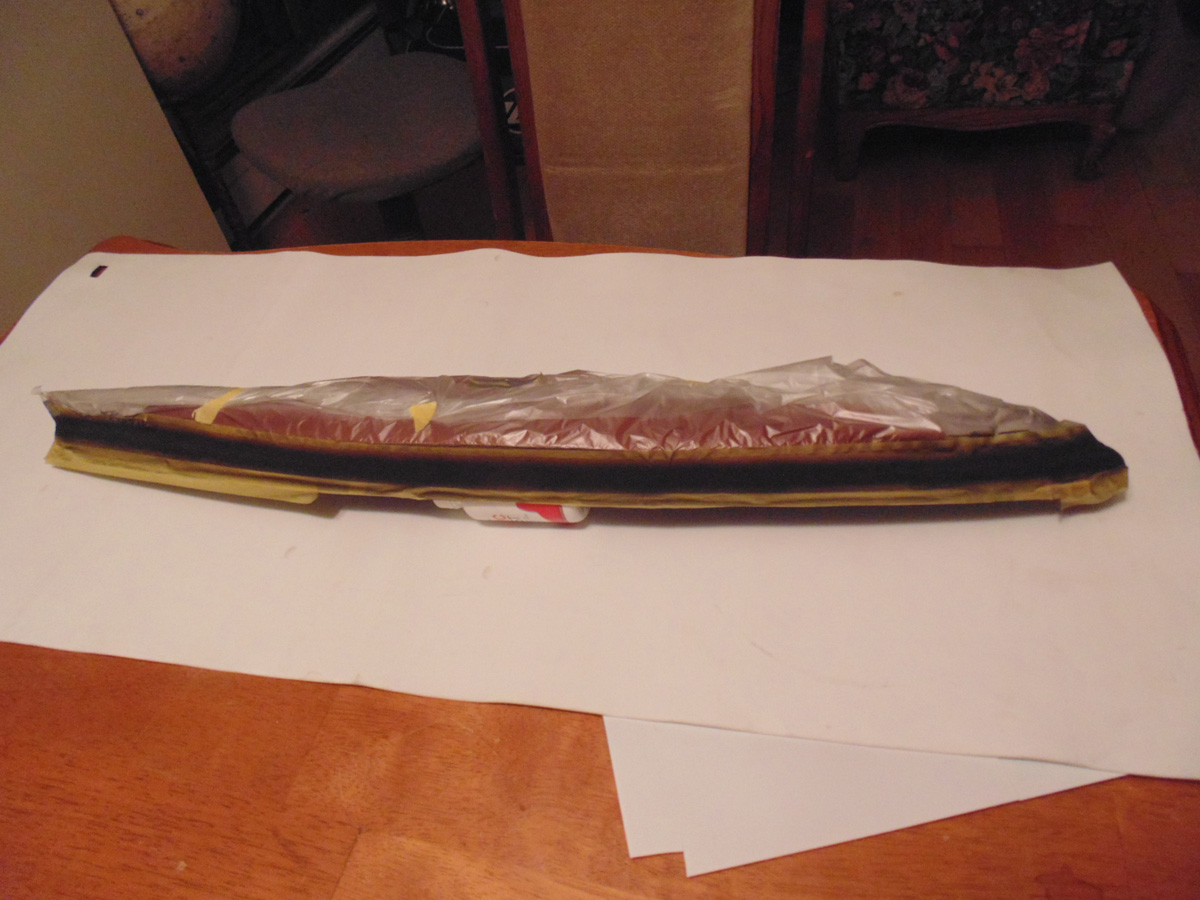
Now I can complete the major job of painting the hull. It is, literally, no small task and one of the largest model parts on the market. You will be spinning, flipping, holding and setting it down dozens of times. To properly protect the dark red and mask for the black at the same time Sunward Hobbies carry this Tamiya Masking Tape with Sheeting 87203. After the masking portion is completed, roll up the film, tape it and use the excess as a cushion. Believe me you thank yourself later for this purchase.
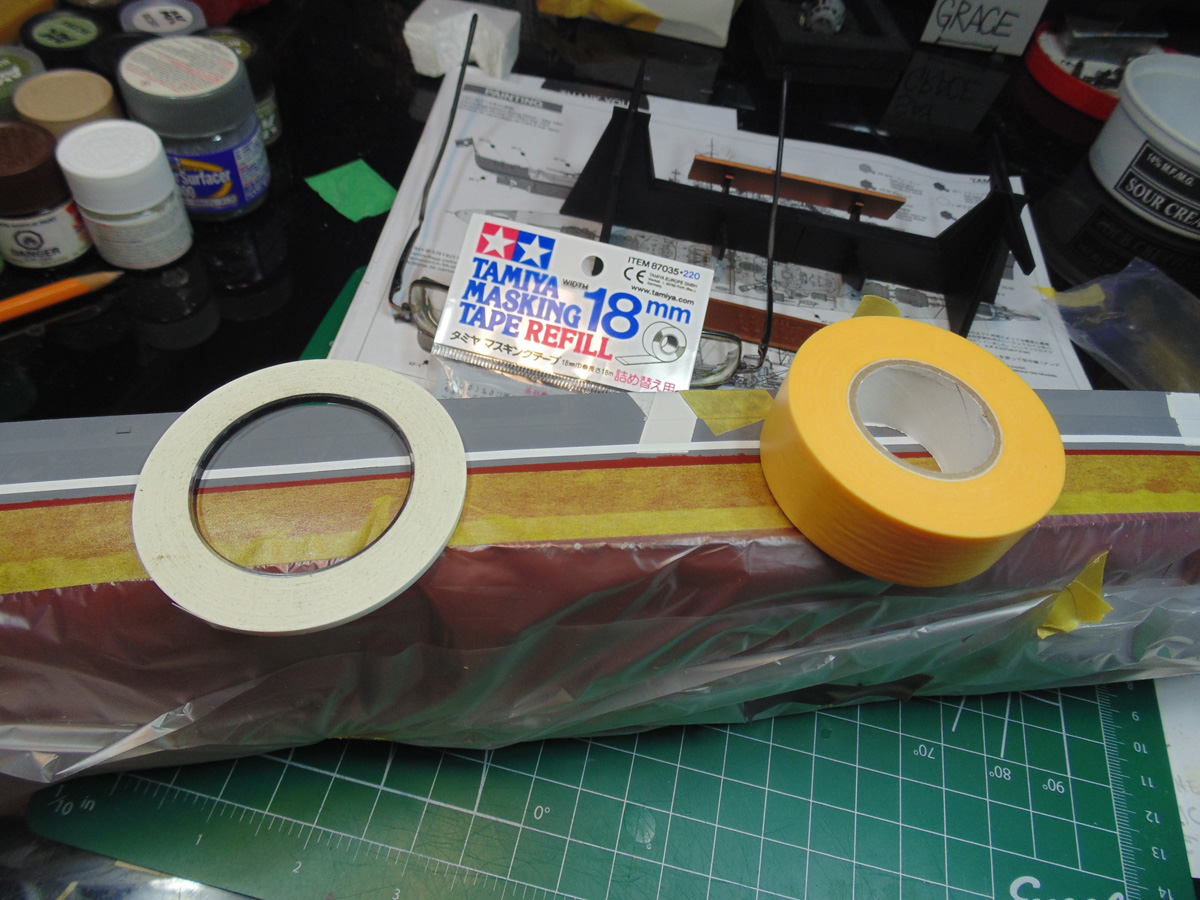
To mask the upper black waterline, begin with a flexible Tamiya tape you can pick up at the store. This tape is super easy to work with, adheres well without much risk of lifting and will conform to the curved surfaces at the bow and stern. Go slow and try not to pull or stretch it too much. Then you can add a wider type of tape, such as this Tamiya eighteen-millimeter width.
After the black has been sprayed let it dry for half an hour. There’s a ton of masking to come so I’d consider adding a few coats of dull varnish to protect it and prevent the colour from lifting.
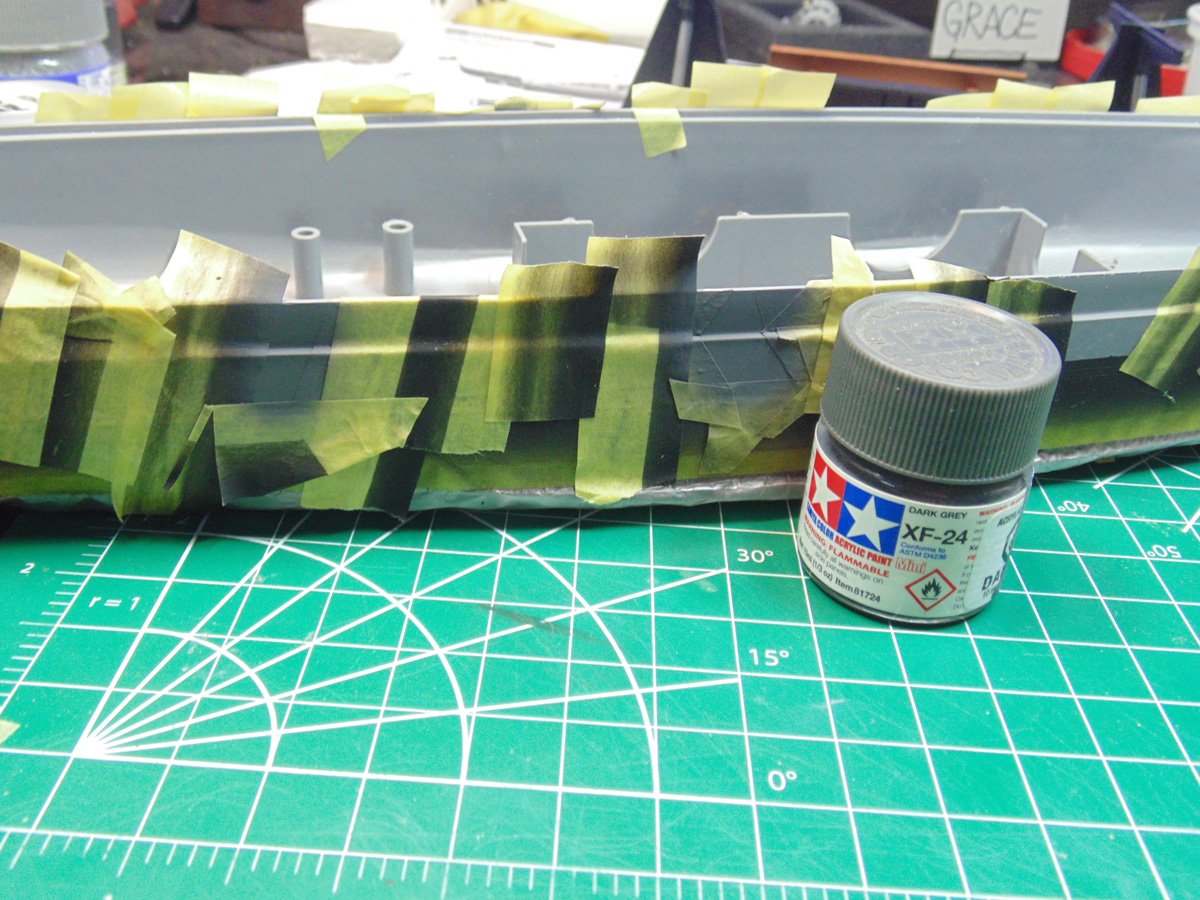
As you might recall the white camouflage bands have already been sprayed and masked. Now you can mask for the Tamiya XF-24 Dark Grey. Like I said before, you can get two uses from high quality hobby tape. Don’t worry about neatness here since you’re going to be tossing this anyway.
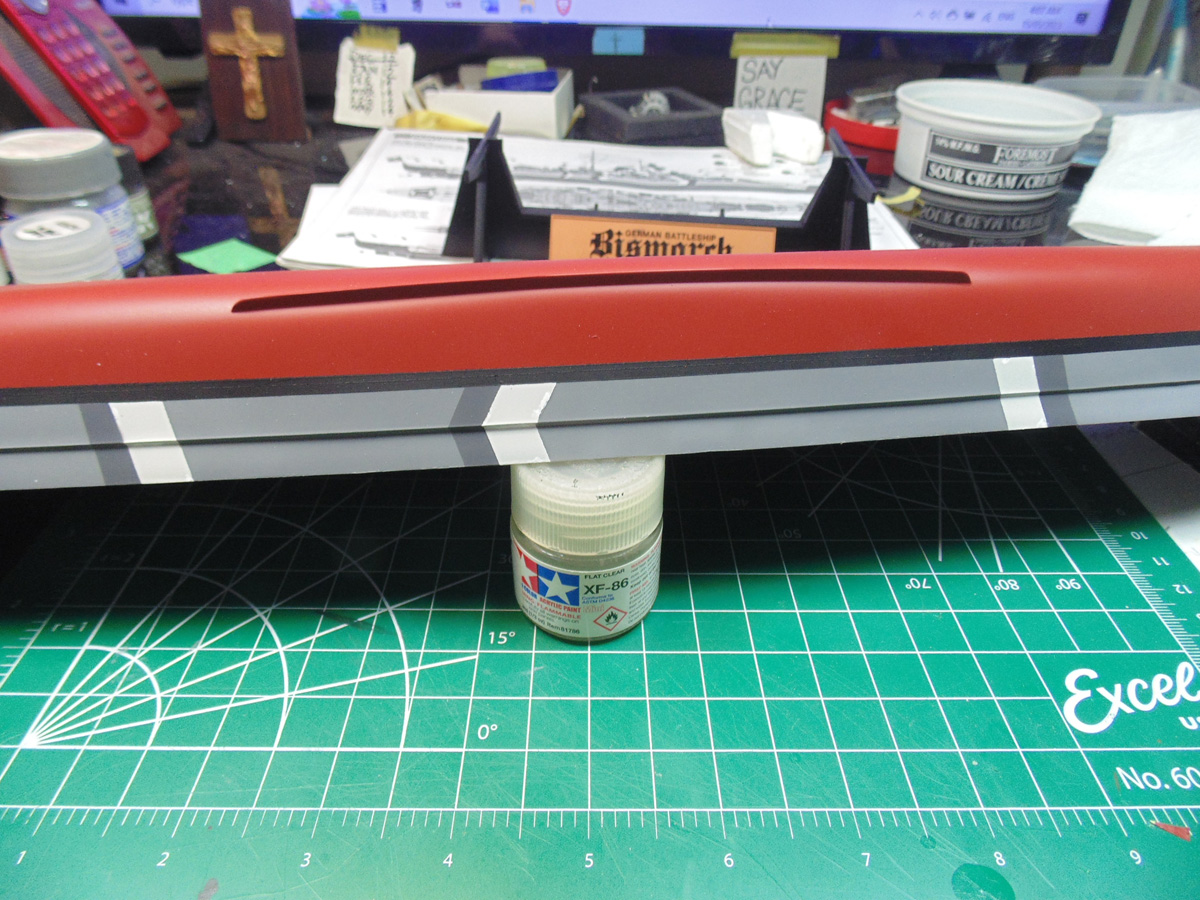
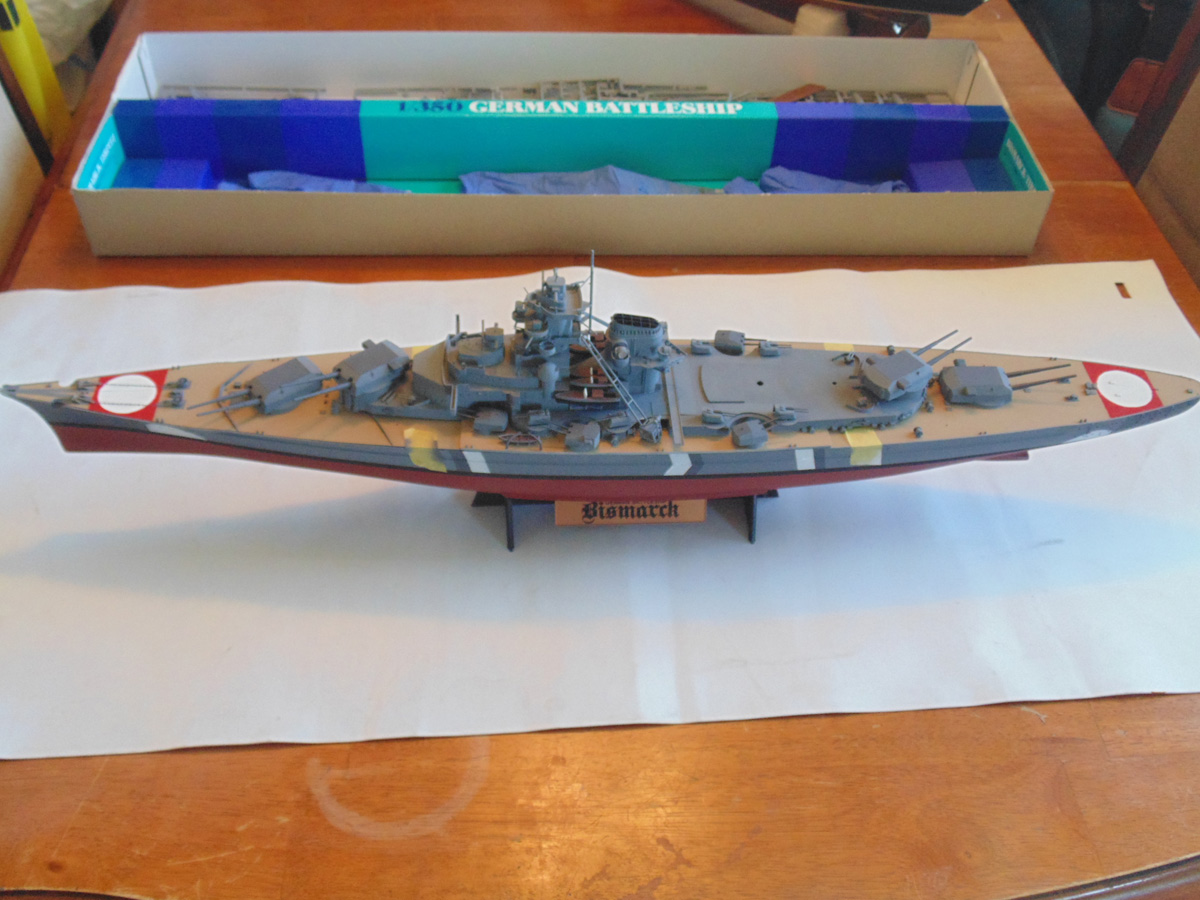
After any needed paint touch-ups, the hull was given two coats of Tamiya XF-86 Flat Clear. It took five millilitre of varnish and another five of lacquer thinner to completely cover this huge part. And it was well worth every drop. This will also help protect it during the return voyage back to the Sunward Hobbies dock. Let your clear coat rest for an hour to harden.
Now you can begin test fitting the hull components. Both the bow and stern need to be pushed down and forward/back in order for them to marry up properly. The points where the mid deck rests on the bow and stern are a plastic lip. These must be shaved down little by little and continually test fitted in order for the mid deck to sit flush. I’ll get into that in more depth in the next article.
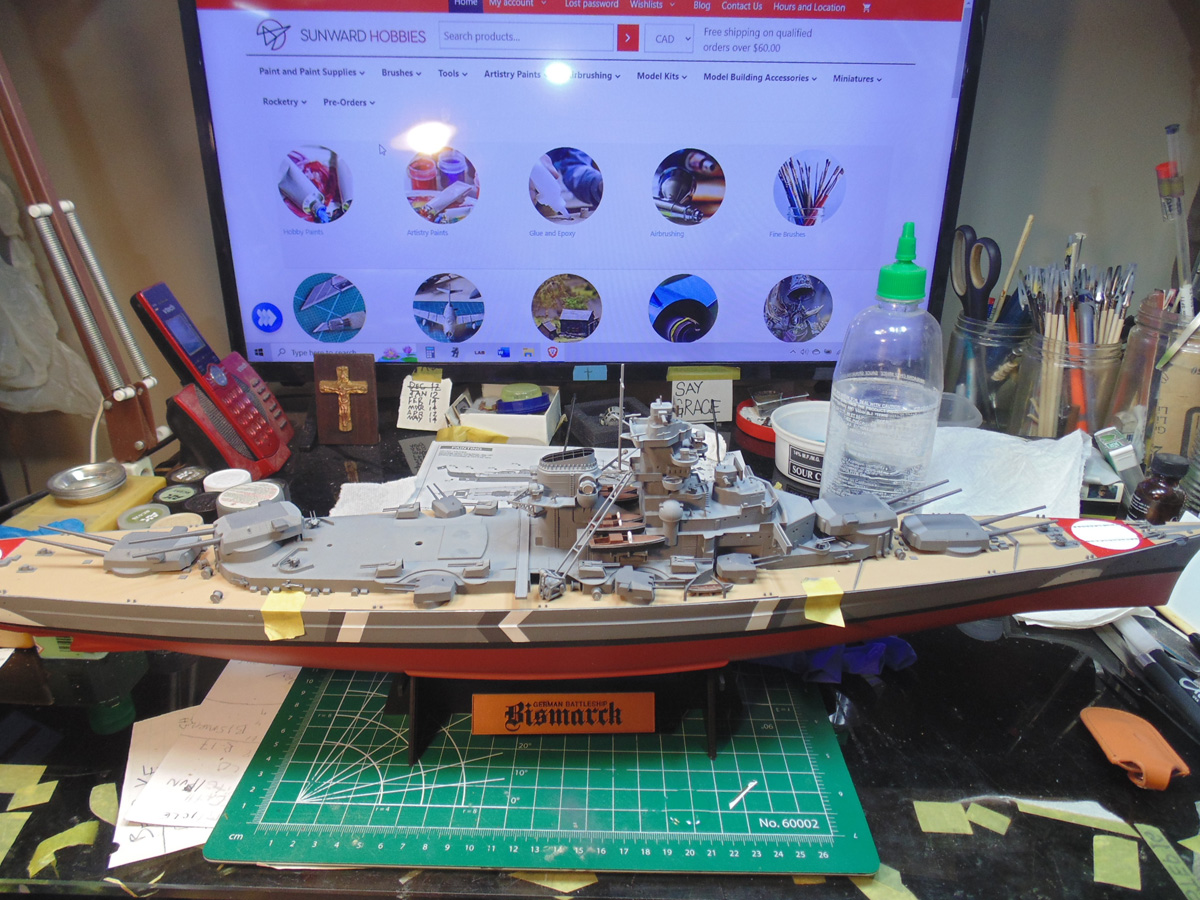
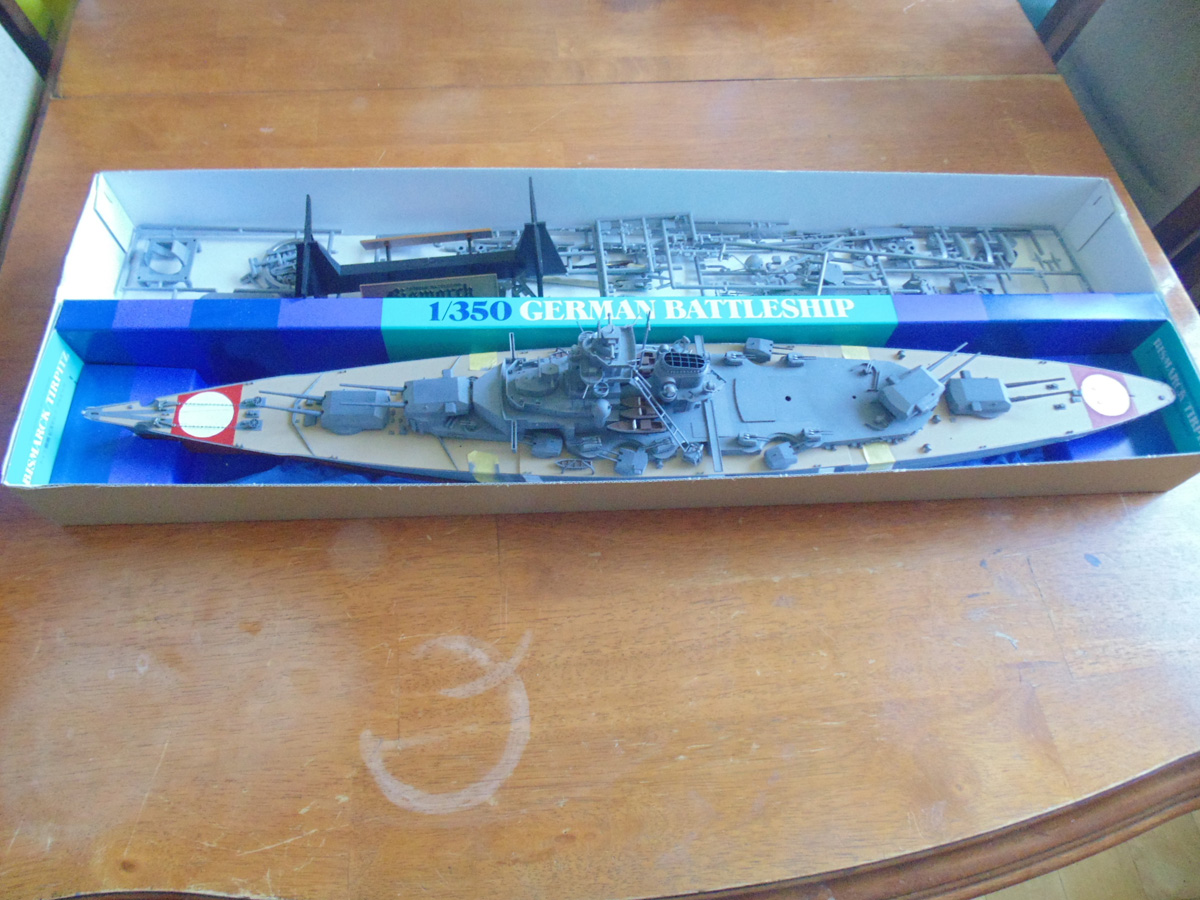
There are still many more parts to add to this mammoth of a kit, yet I think you’ll agree there was a major turning point in the build. Please note that I didn’t discard the box. It’s perfect as an extra set of hands and keeps everything in one place when you’re ready to return to the project.
If you have any questions about the products or methods used in this article, please feel free to ask the staff when you pick up or place your next order from Sunward Hobbies.
H.G. Barnes is a former voice-over artist and retired sales and marketing professional. He’s the author of two large volume science fiction adventure romance novels with many more in the works. For well over 40 years he’s been building scale model replicas and now does commission work for clients in Canada and the USA, plus completes projects for companies in Asia and Europe.
Currently H.G. is involved as an Associate Editor with KitMaker Network’s Online Magazine Channels.