
Tamiya 1/48 F4U-1D Corsair with Moto-Tug
This is the start and review of the Tamiya 1/48 F4U-1D Corsair with Moto-Tug 61085.
I’ve recently finished my longest project, lasting over 5 months. I’ve got to admit the project while fun and rewarding was also exhausting, and so I was looking for something fairly easy to build.
I built the Tamiya 1/48 Bird Cage Corsair a few years ago and I had a lot of fun building that one. I’ve wanted to build another, but to build it with the wings folded. Plus the inclusion of this Moto-Tug, I couldn’t resist picking up this model.

Tamiya released 4 different Corsair models (not including the motorized F4U-1A, which is basically the same as the standard kit). This version of the model was the last to be released and featured a new sprue with wing rockets, and a new pilot looking back. It features 3 markings from the USS Franklin, USS Hancock, and USS Wasp.
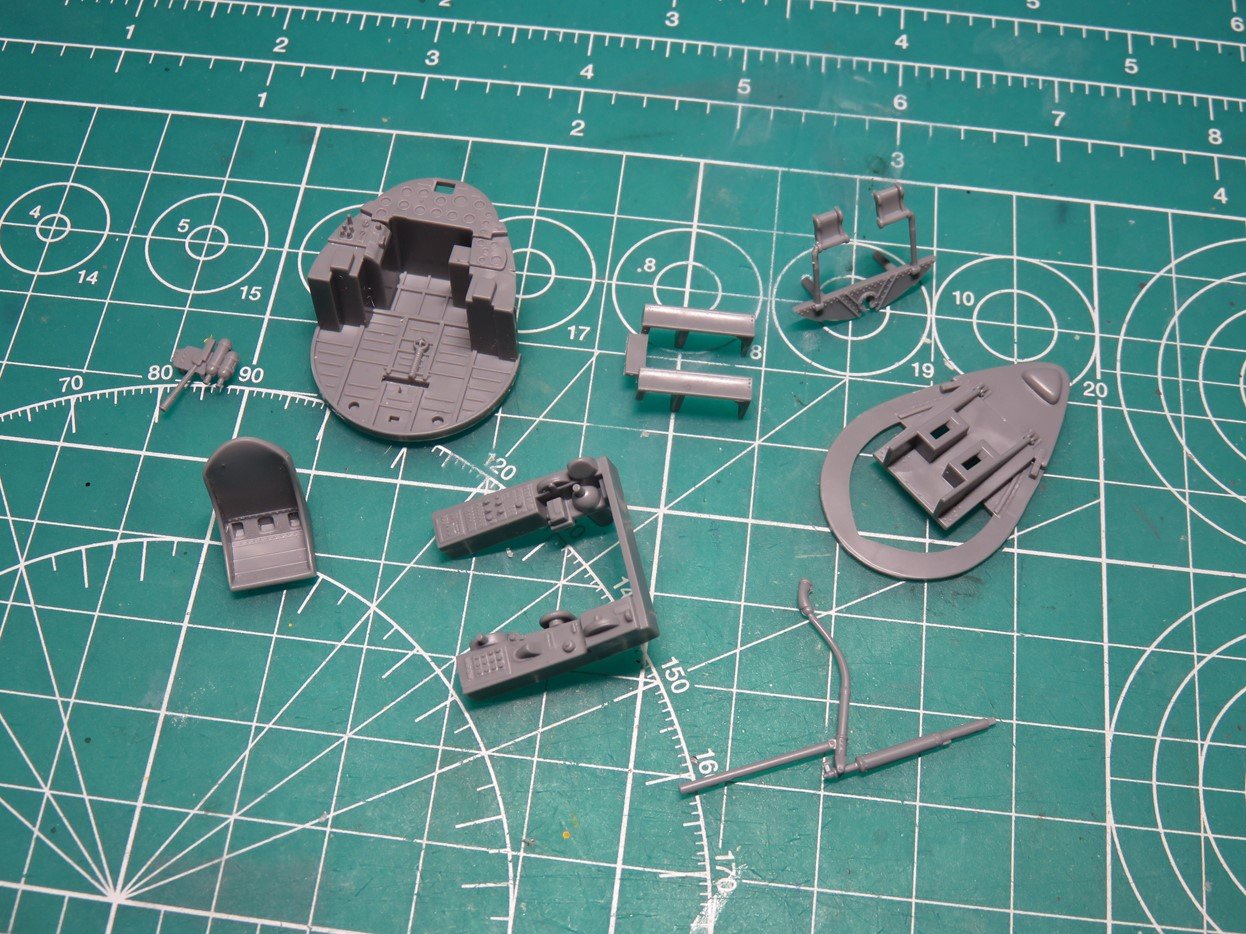
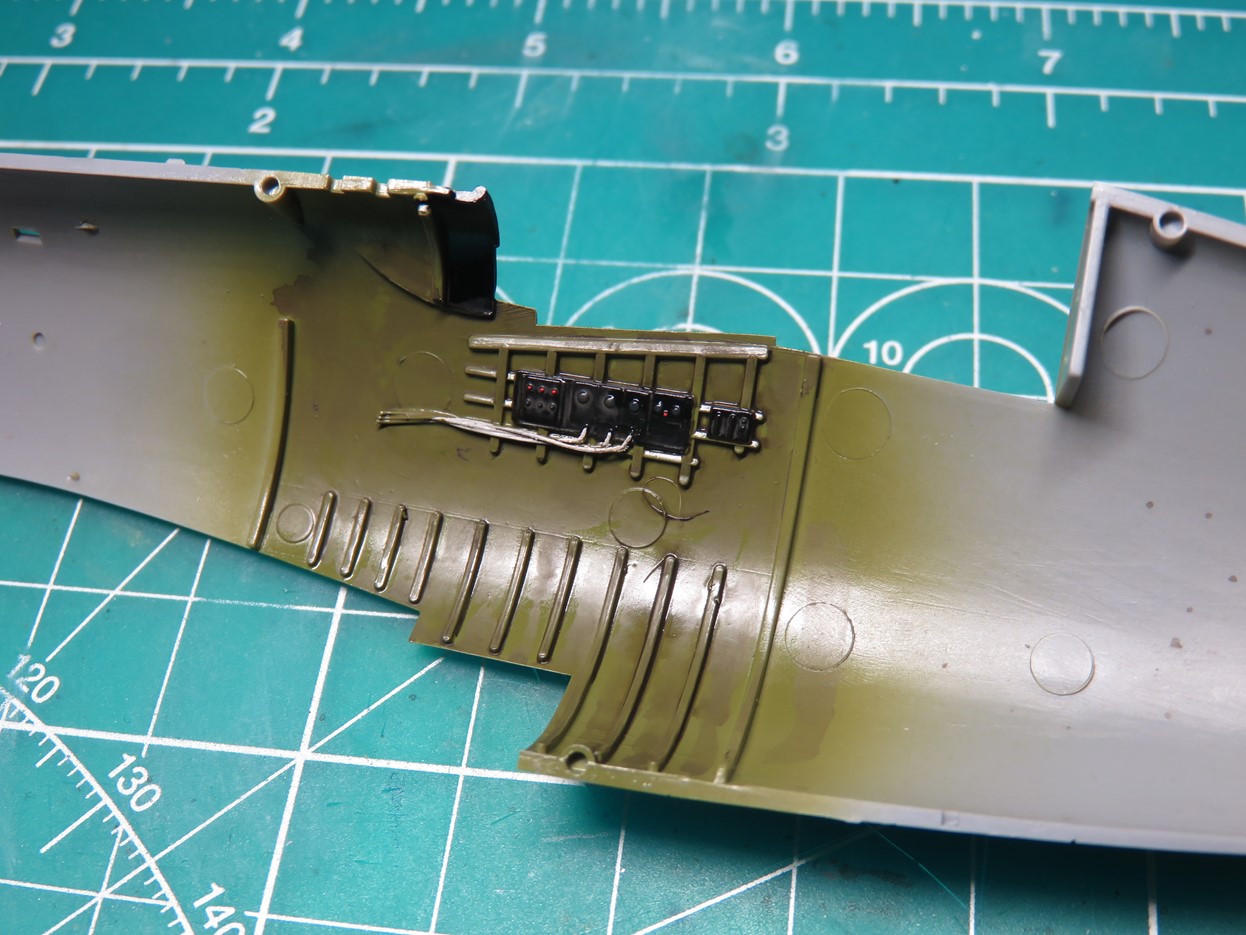
This kit was first released in 2002 and is now 21 years old, and it’s still a really great kit. I’m going to make some modifications to this model, especially in the cockpit since the canopy will be posed open.
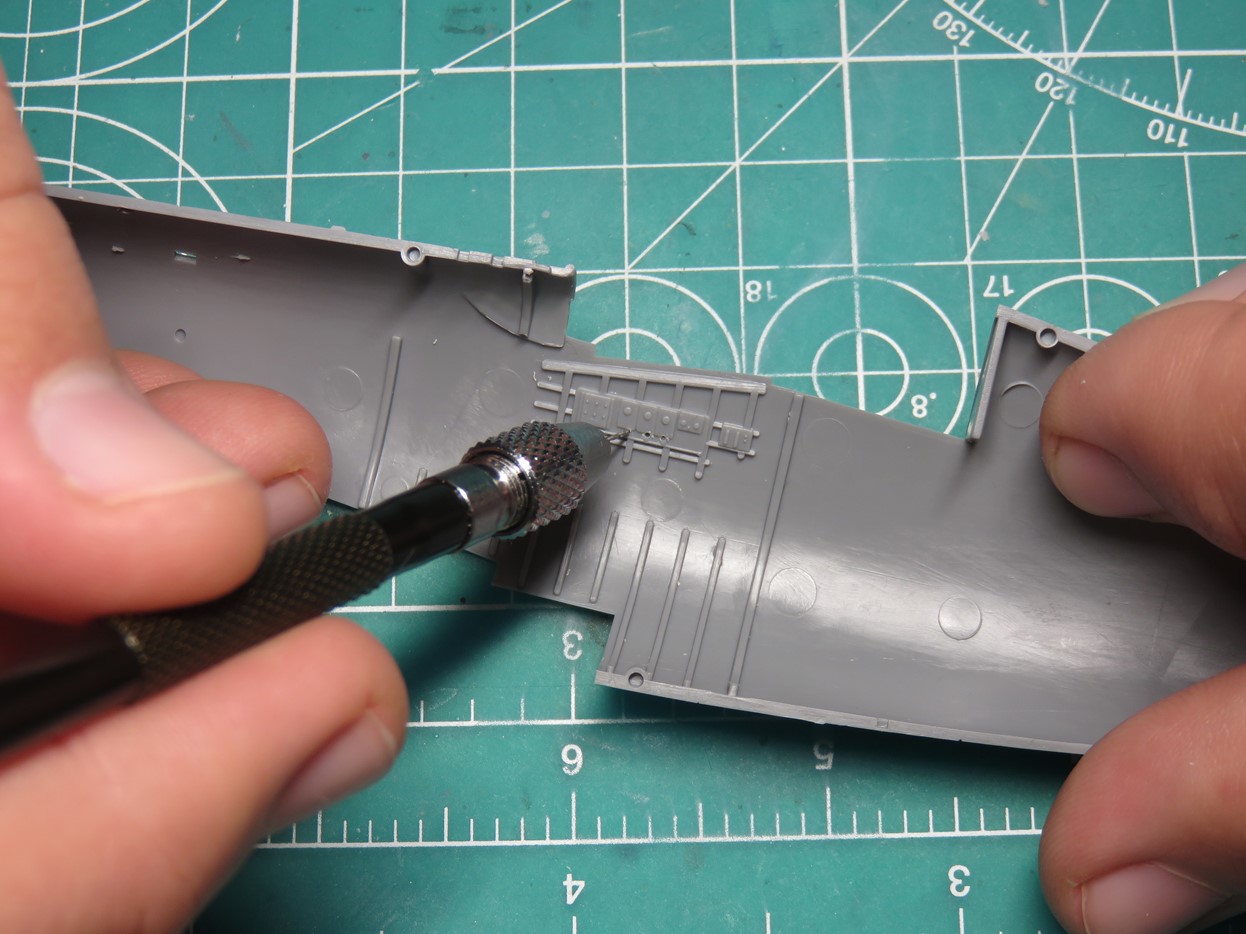
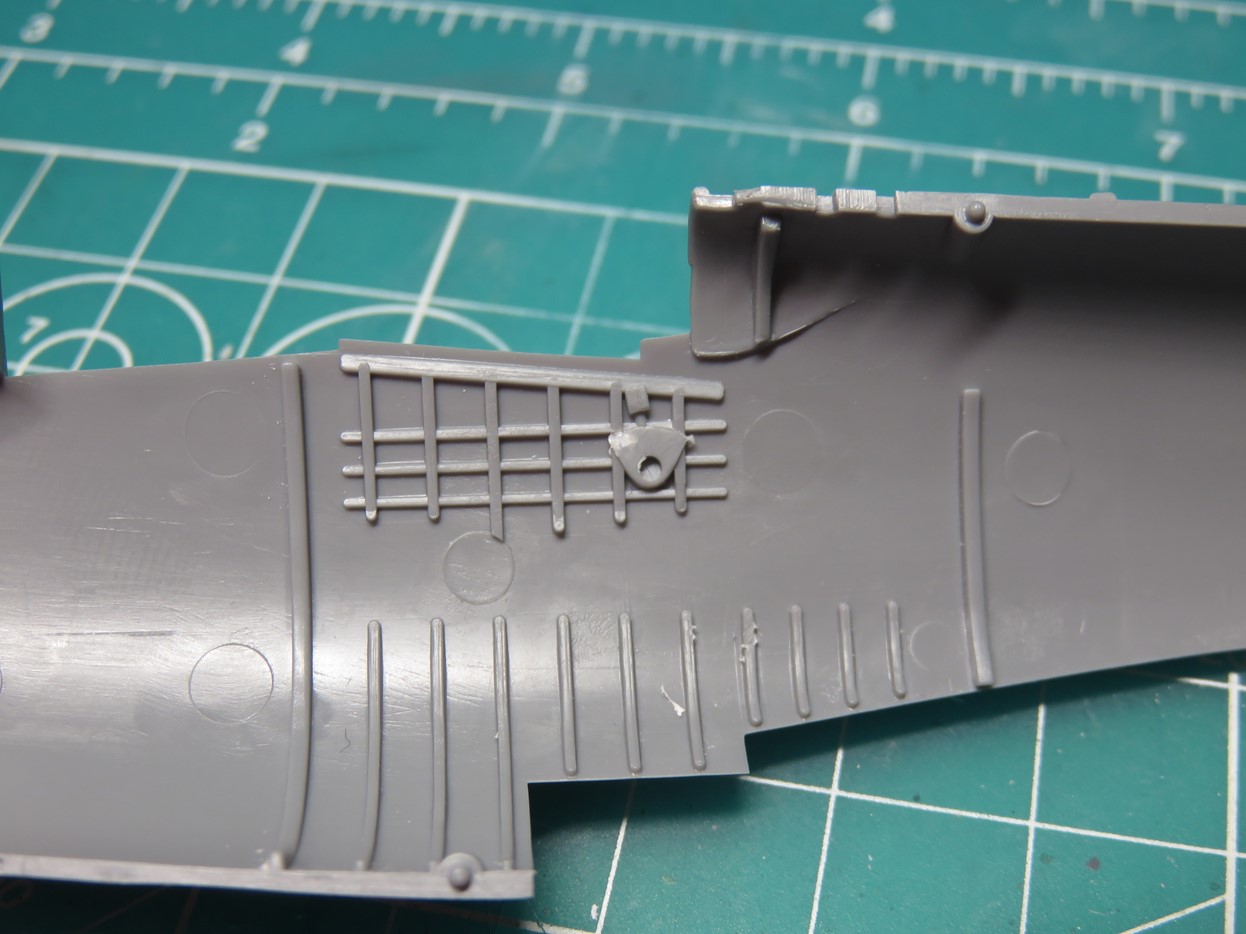
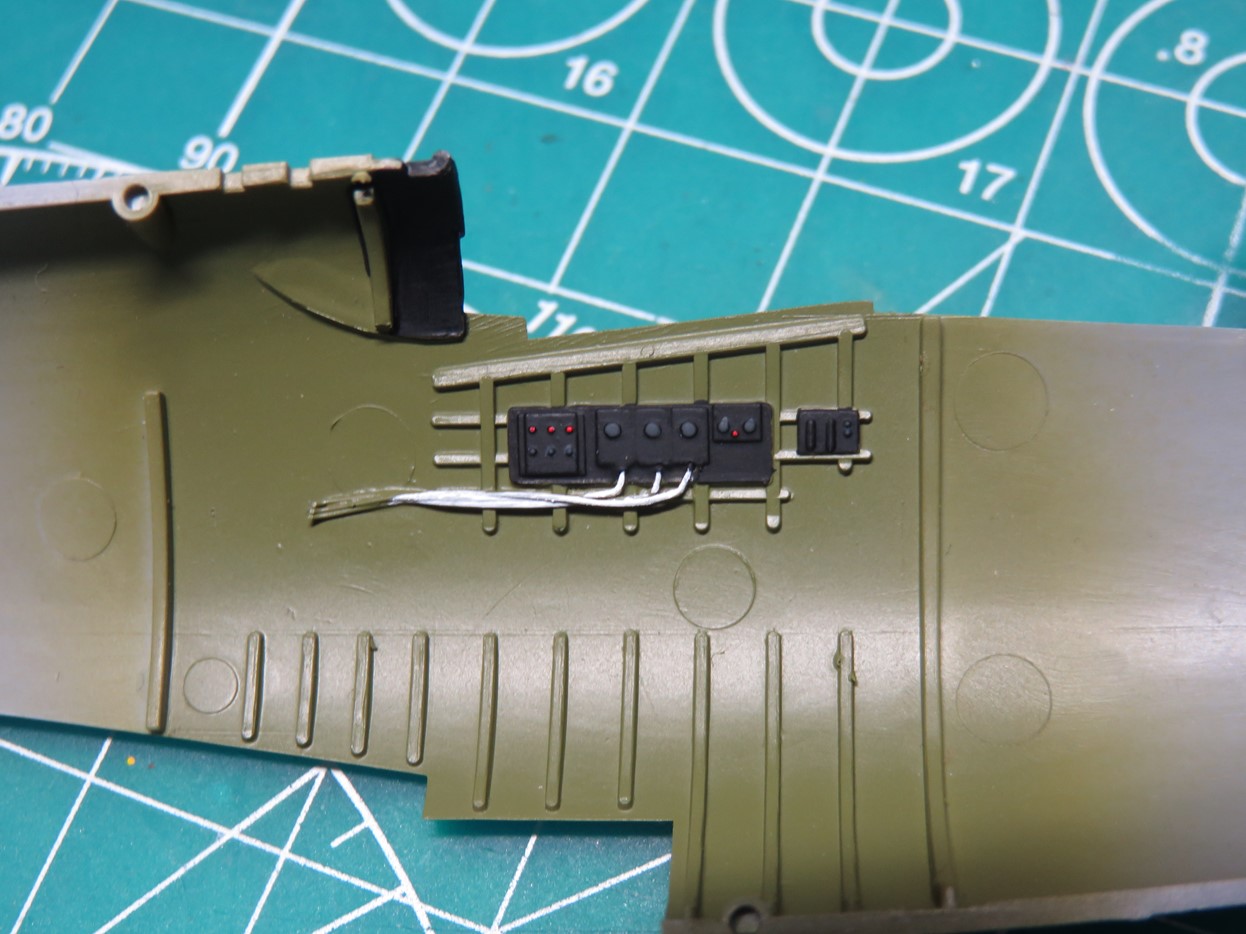
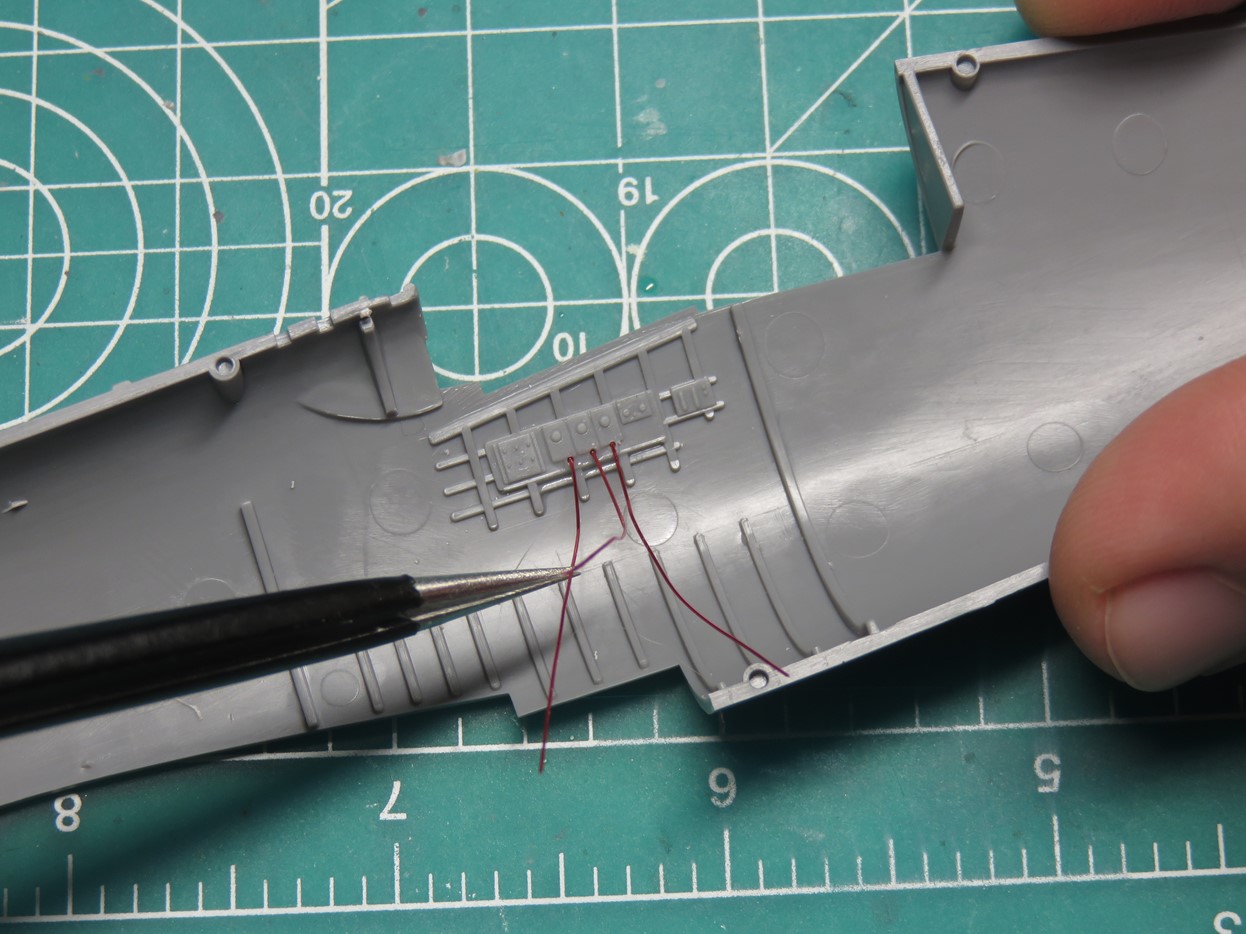
My first step is to add some extra wires beneath each of these side boxes. I drilled small holes just deep enough for the wires to sit but was careful that I didn’t drill through the side wall.

I used 0.2mm magnet wire and super glued these into the openings.
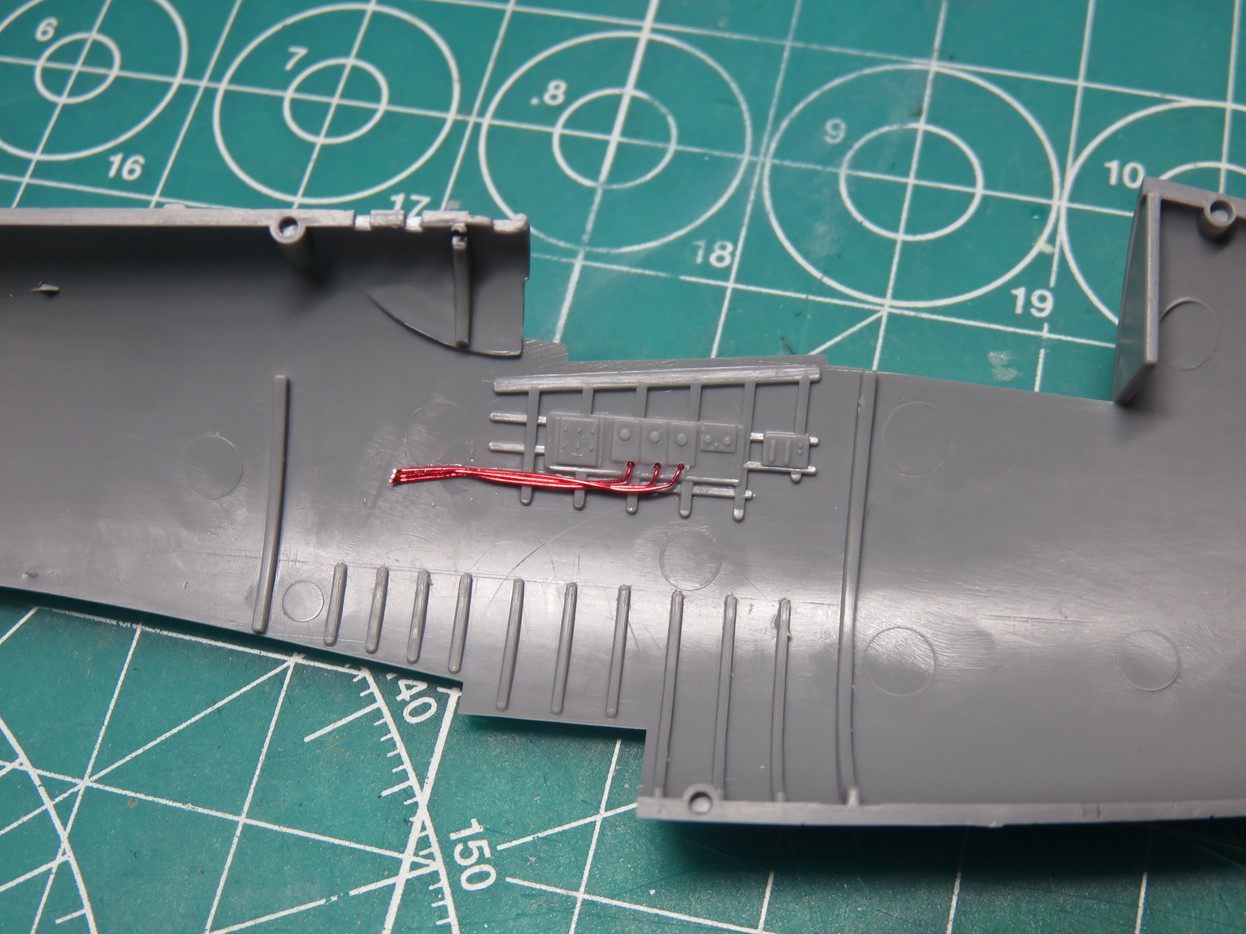
After the glue had dried I bent the wires forward, the extra wire would be hidden behind the instrument panel.
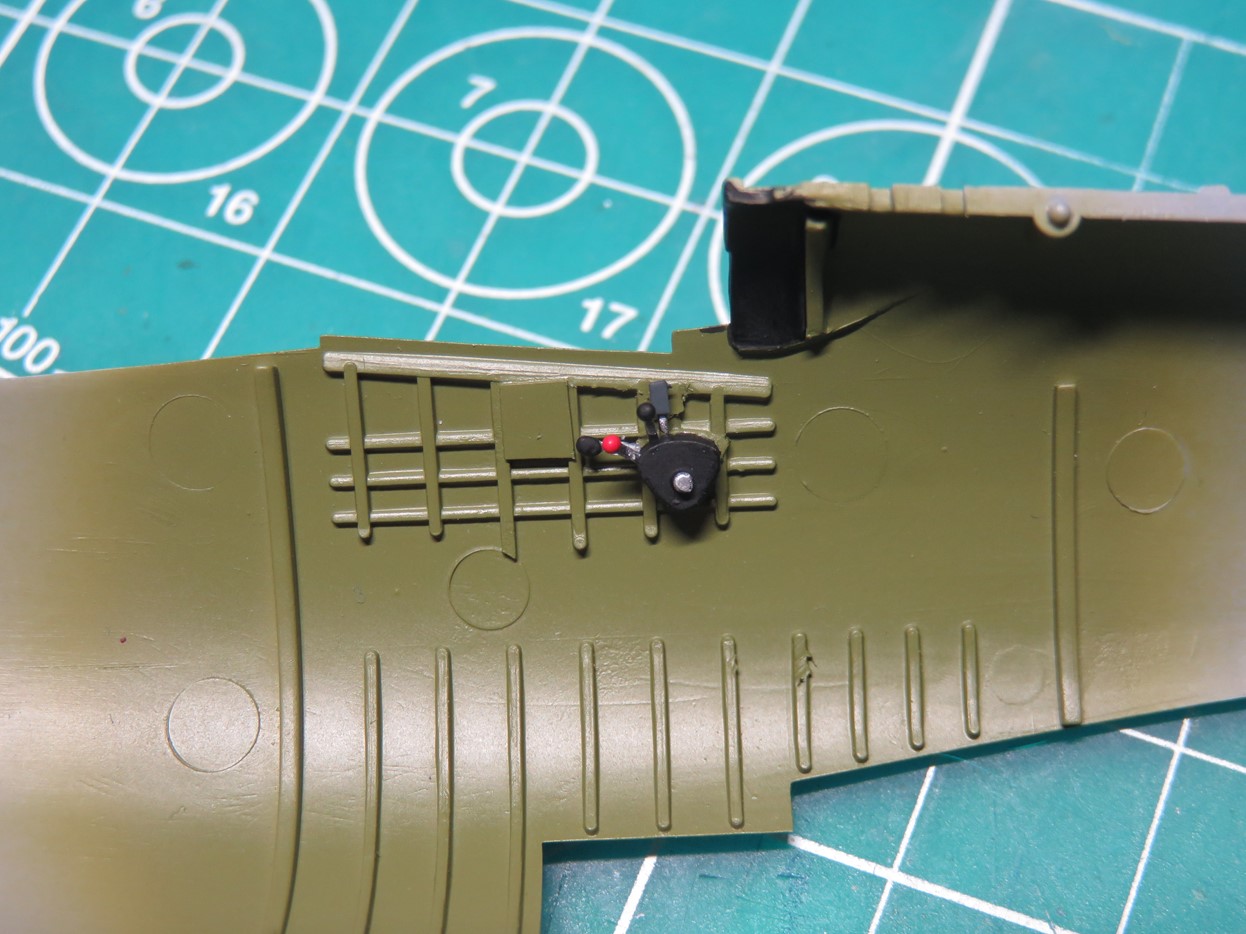
The throttle section is pretty flat to the side of the interior. On the real Corsair, this section is quite large and stands out quite a bit. Plus a few of the controls are missing.
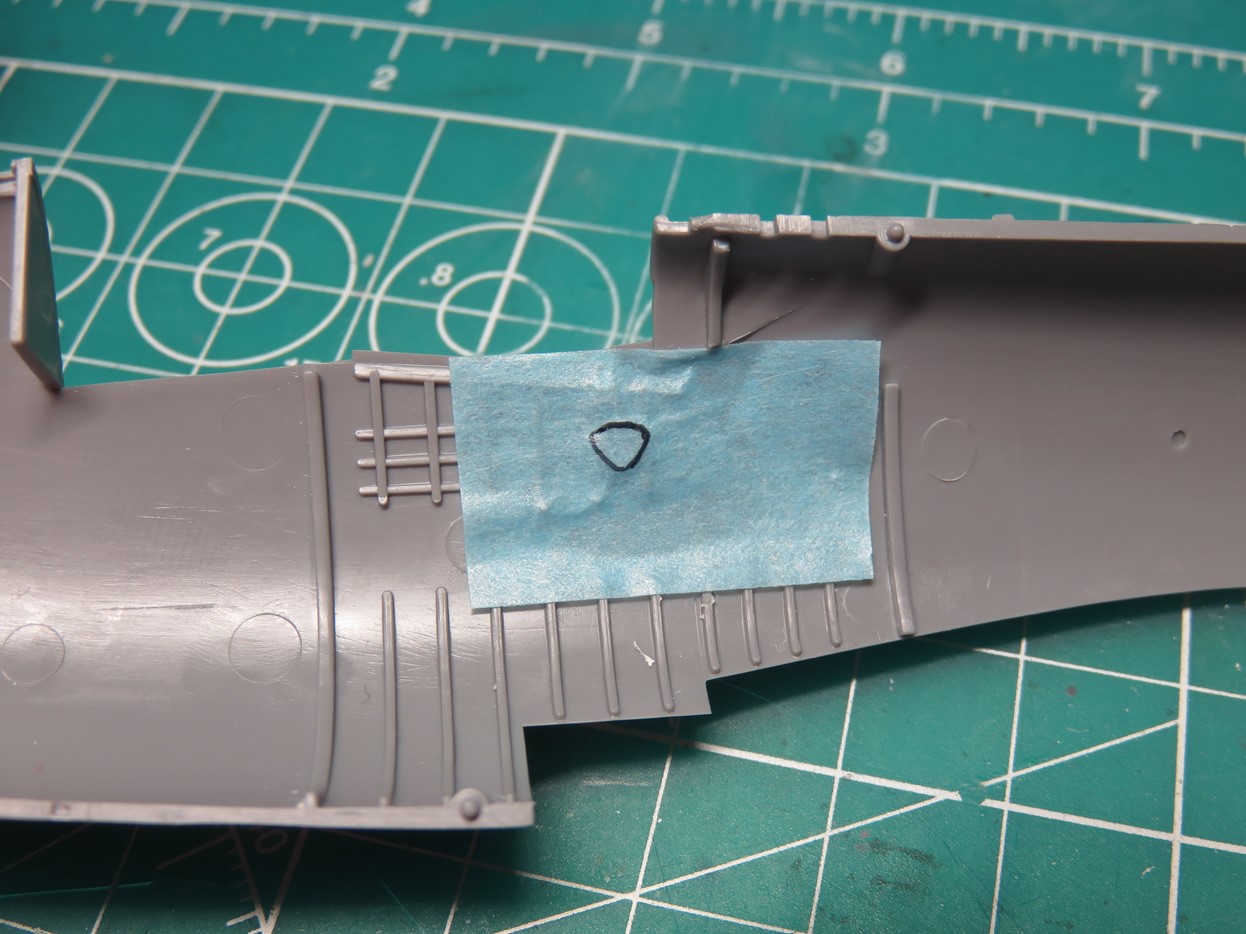
I took some masking tape and placed it over the throttle. Then I took a Gundam marker and carefully traced the outline I needed. I then cut out the tape using the inner oval section of tape as a guide.
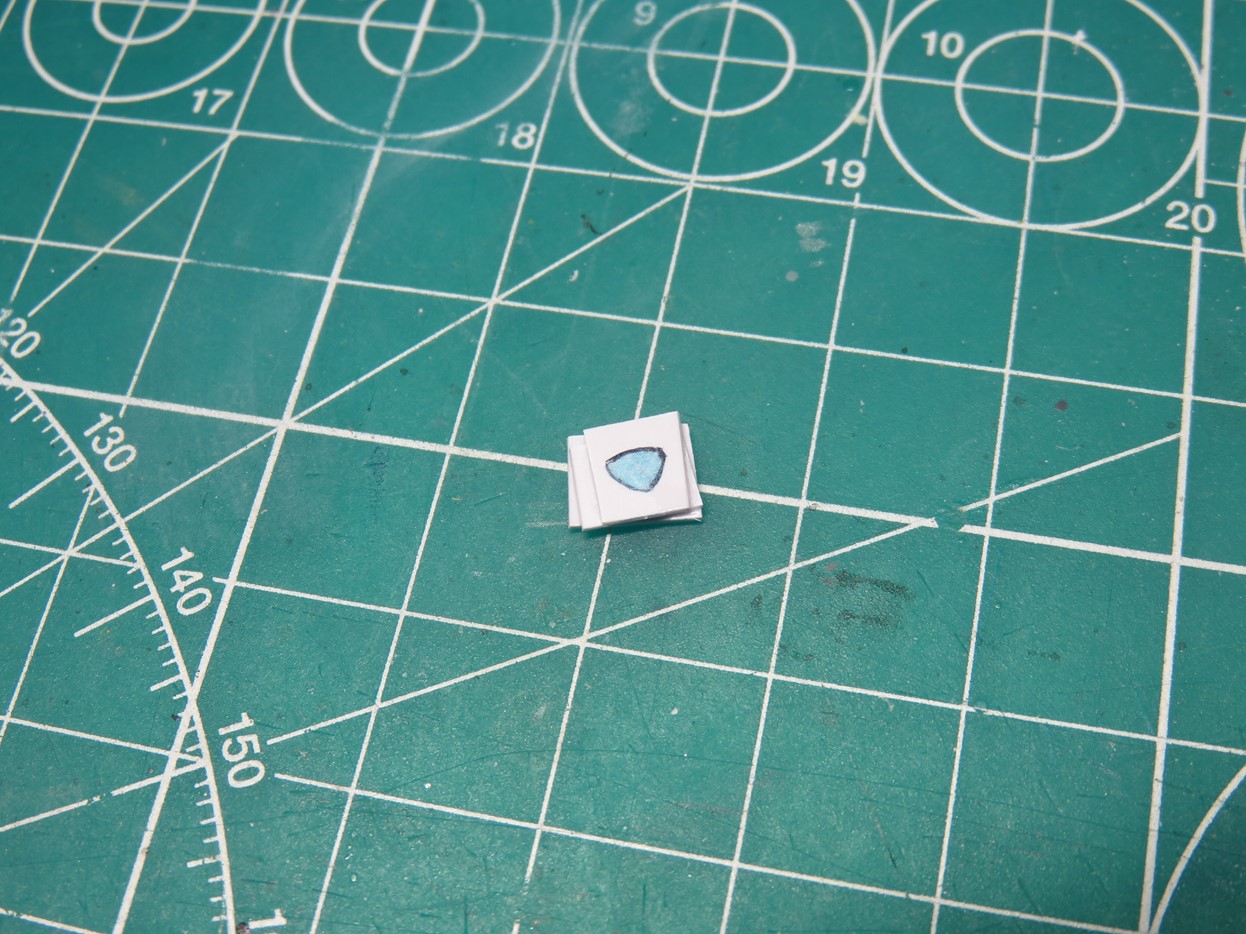
I stacked several small pieces of spare Evergreen Styrene I had laying around my desk. Once these were glued together I placed the tape on top and carefully sanded the excess plastic away until I had the correct shape.
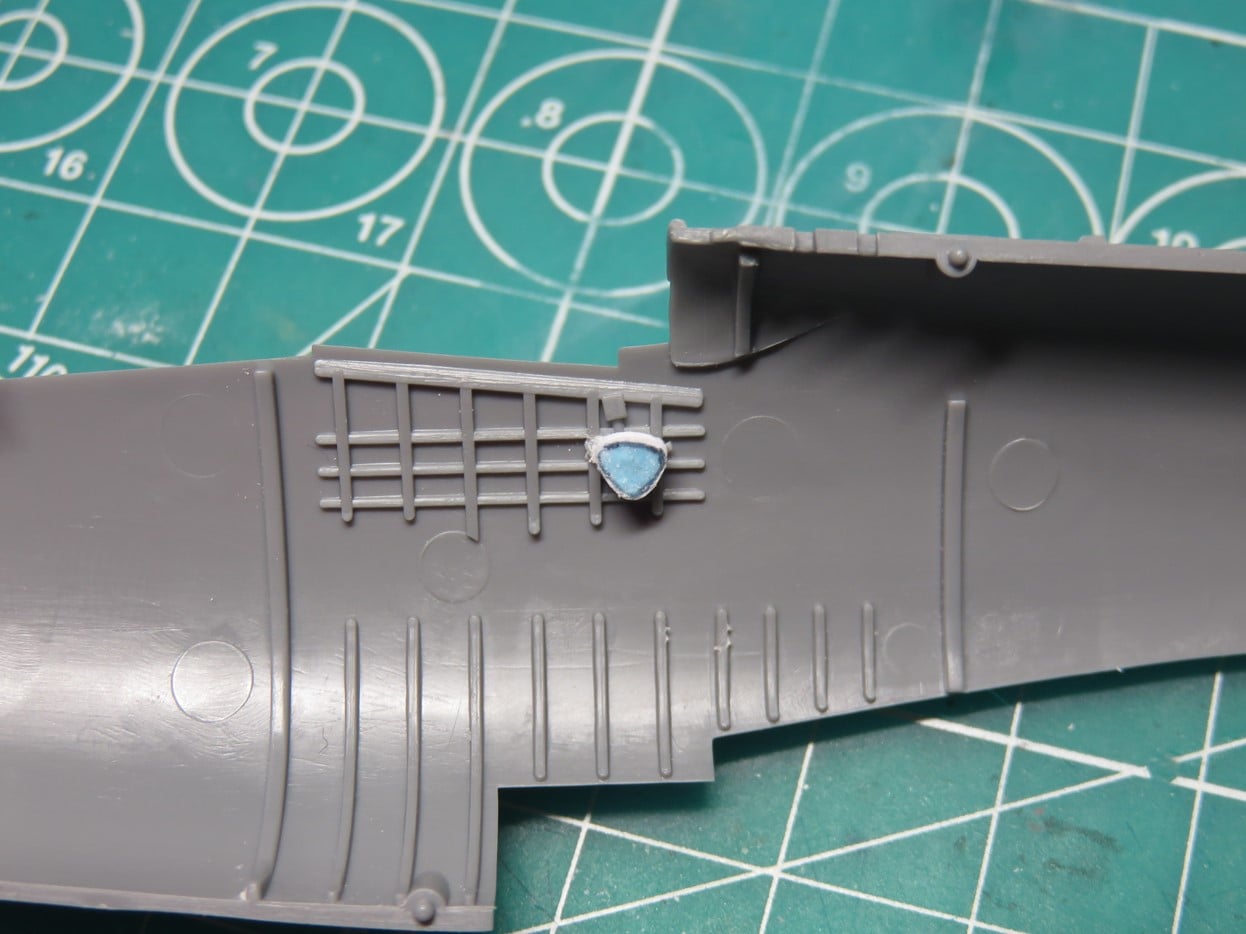
It took me two tries to get this small piece built up properly, but I’m really pleased with this result. It looks a lot better than before, and now I can add the new levers.
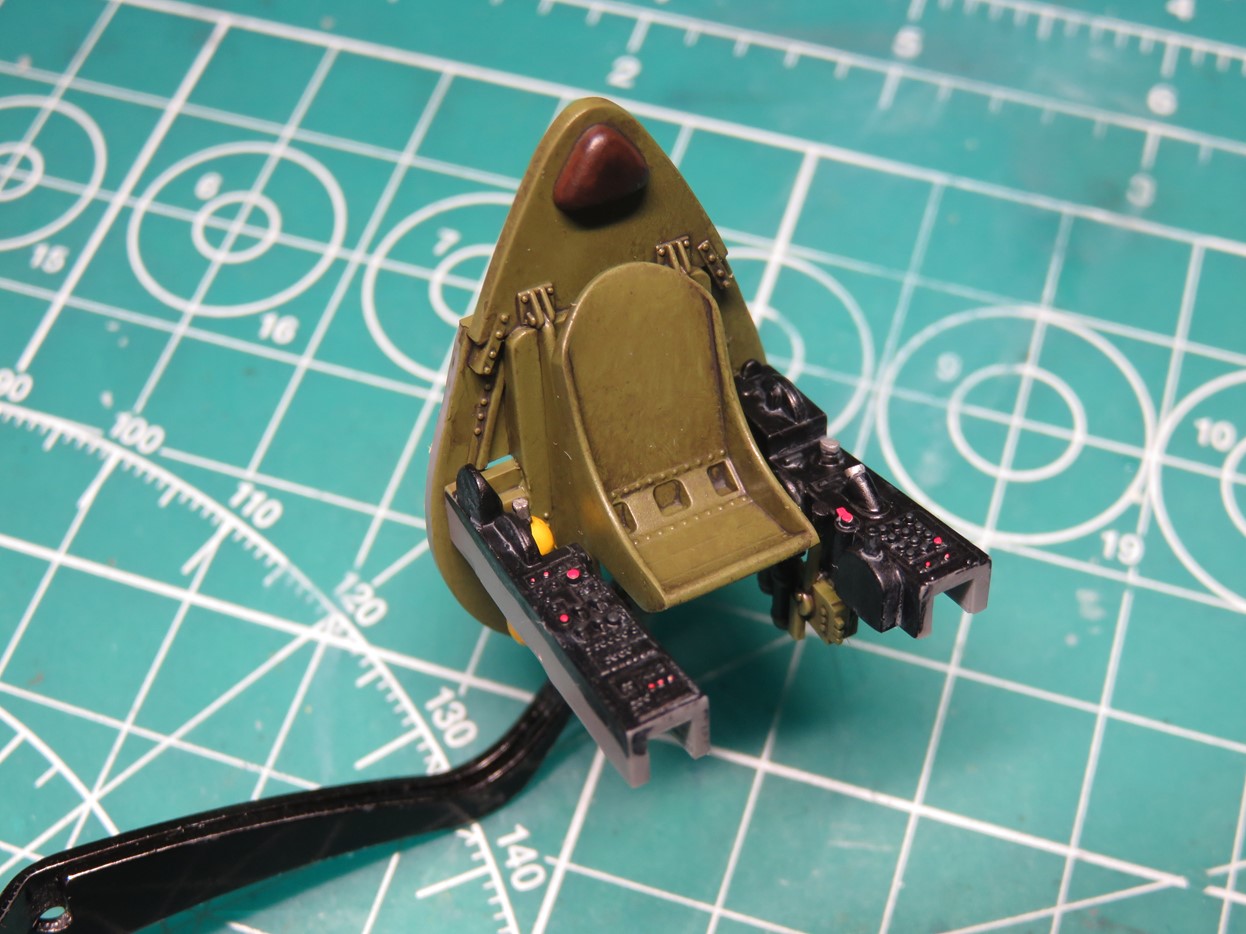
I made the handles out of some very thin and flexible styrene. I then took canopy glue and dabbed it to the ends of the handles. This dab of glue would dry into a nice sphere. It’s hard to see it in this picture as the glue is clear, but once it’s painted it will compliment the rest of the interior.
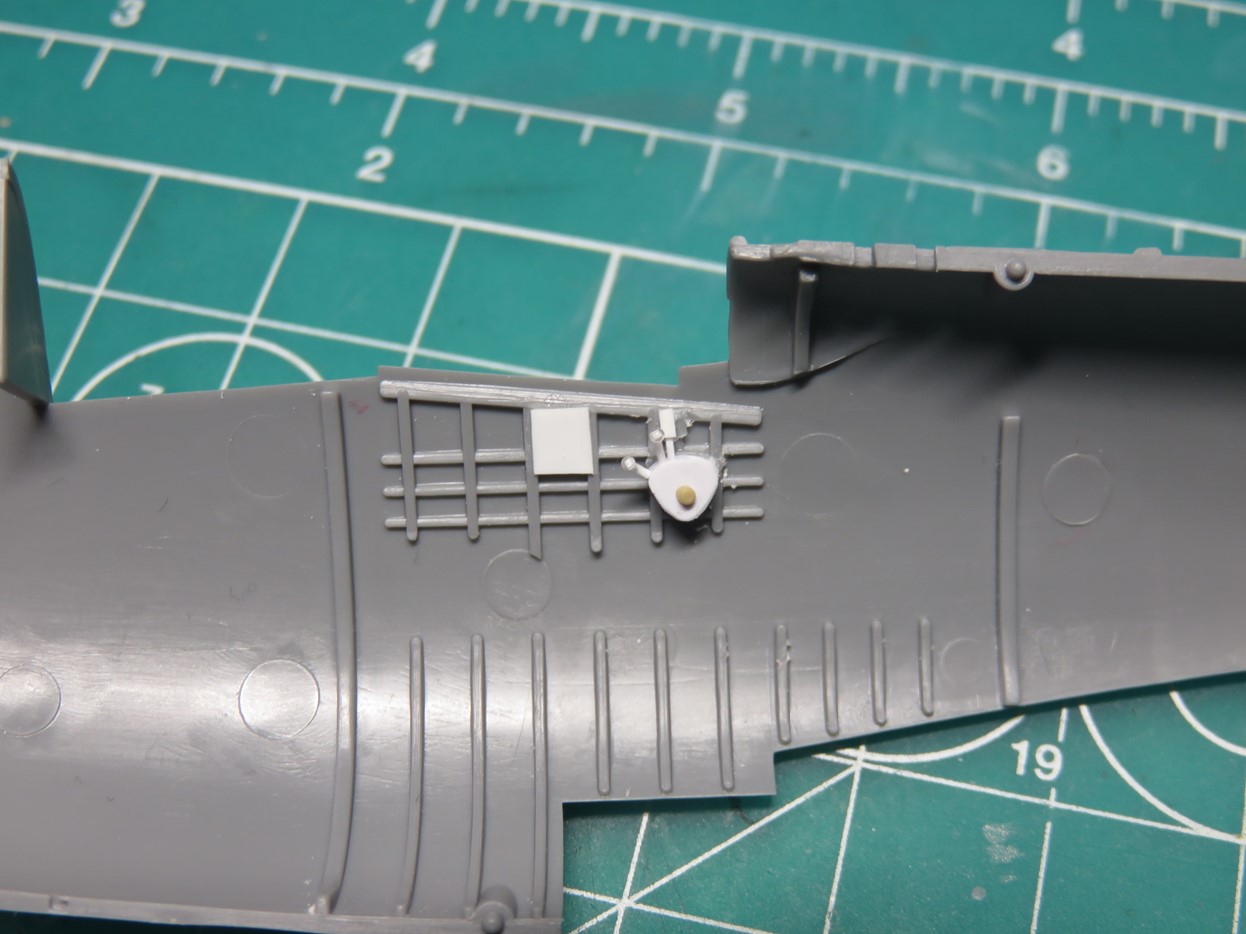
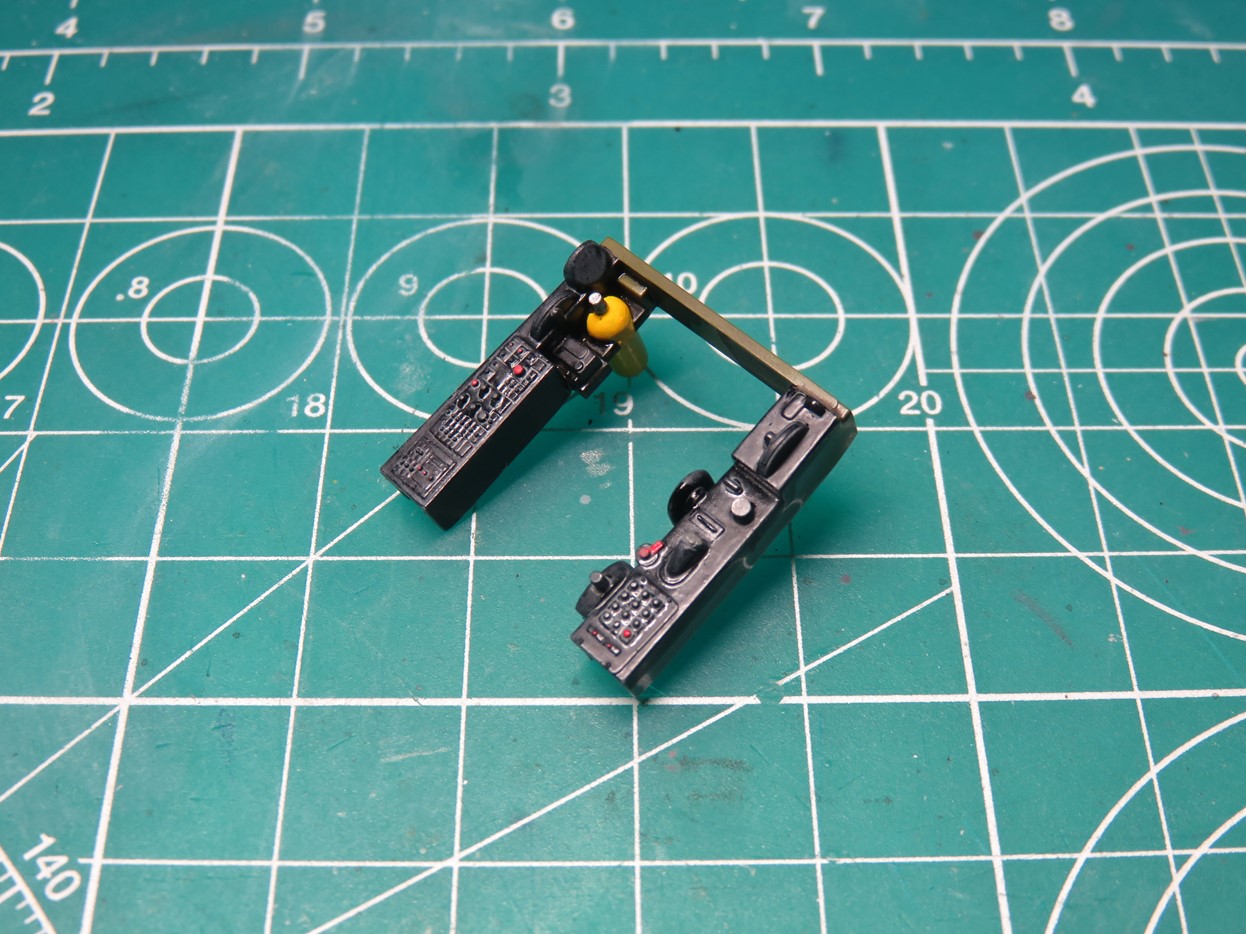
I also found a picture of a -1A Corsair that had a small placard panel. I have a set of 1/48 Cockpit Detail decals, and included in the set are random placards, I thought this would be a nice extra detail to add.
I painted the cockpit with Mr. Color 351 Zinc- Chromate. The wires were then painted white. I also like to paint the buttons with a dark grey, this helps them stand out from the rest of the panel.
I painted the throttle section Tamiya XF-1 Flat Black, and Mr. Color 8 Silver for the handles. Now that there is paint added it’s a lot easier to see the ends that were made out of the canopy glue. After all of the interior details were painted I sprayed a coat of Mr. Color 46 Clear to seal in and protect the paint for the washes I’d be adding next.
For the black side consoles and front instrument panel, I applied Tamiya Panel Line Accent Color Grey. This will break up the monotony of all black and help the small details pop out against the darker surfaces.
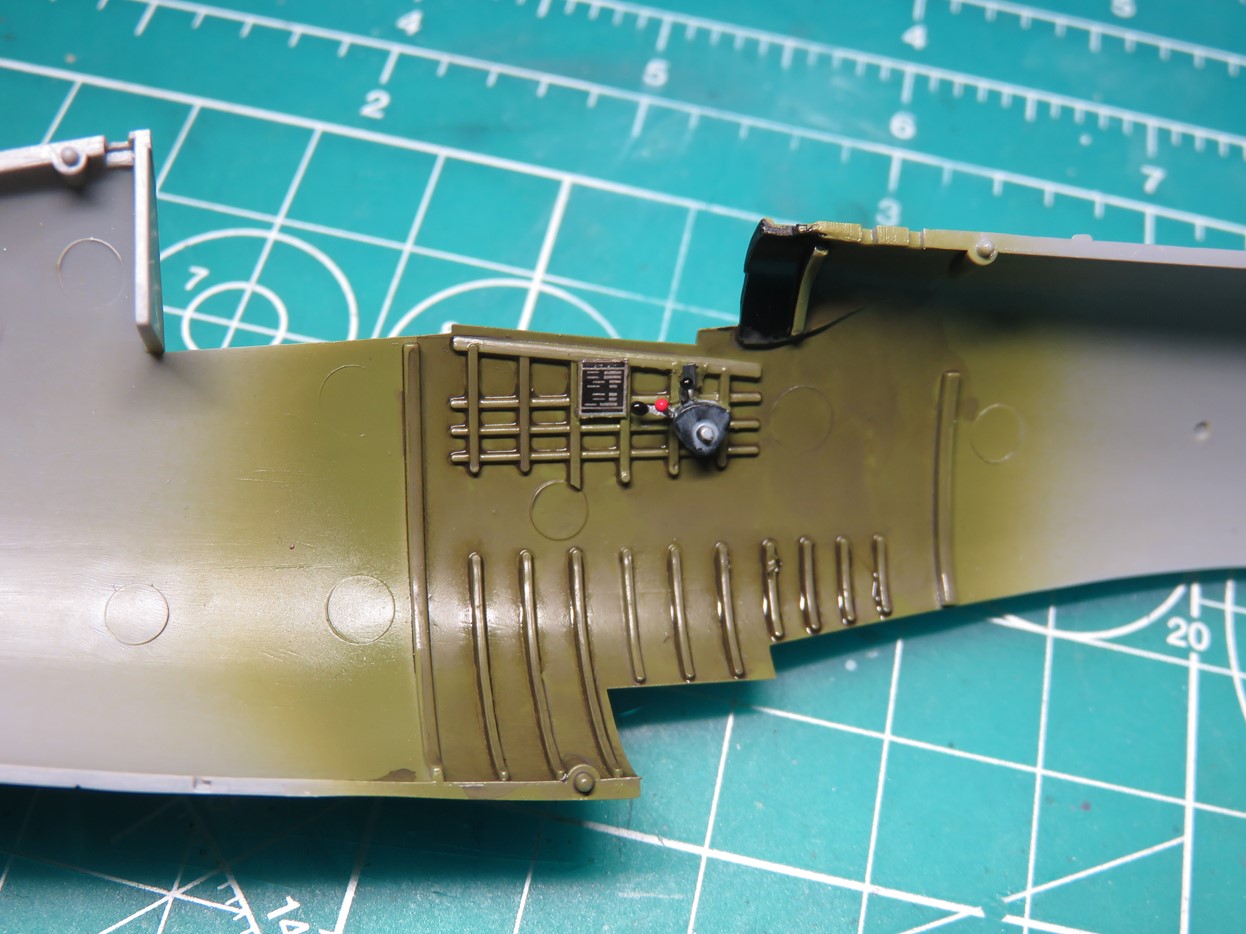
I applied Tamiya Panel Line Accent Color Dark Brown to the green sections. These Tamiya washes are enamel based, and can easily be applied over Acrylic and Lacquer based paint. I usually leave these washes to dry for about 24 hours as they are easier to manipulate once they have really dried out.
Removing the excess wash is easy with Tamiya Enamel Thinner (the blue cap). I’ll normally use a cotton bud dipped in the thinner to remove the excess paint, but in this case I used a stiff brush and slowly dabbed away at the paint. This is a late war Corsair, so I didn’t add any chipping, and I wanted to keep it fairly clean and not really dirty like some of the land based Corsairs. Most of the panel wash was kept around the raised details, this will also help highlight these details once the pilot is installed.
I sprayed the parts with Mr. Color 182 Flat Clear, and then I was able to assemble the parts. I really love how those brown and grey washes really show off the details. The cockpit sections were then fitted into the side of the fuselage, beginning with the rear section, and then carefully fitting in the section with the instrument panel and control column.
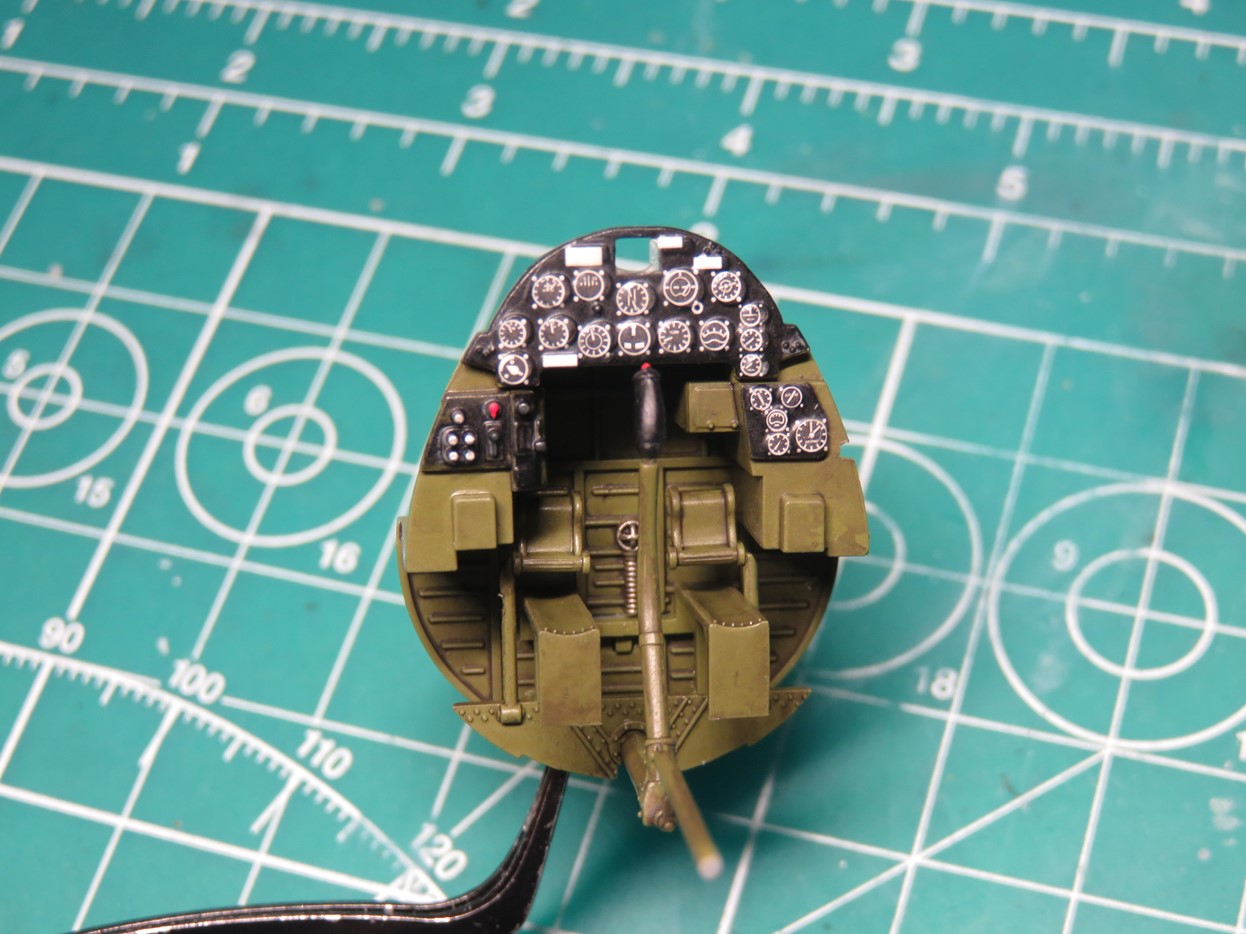
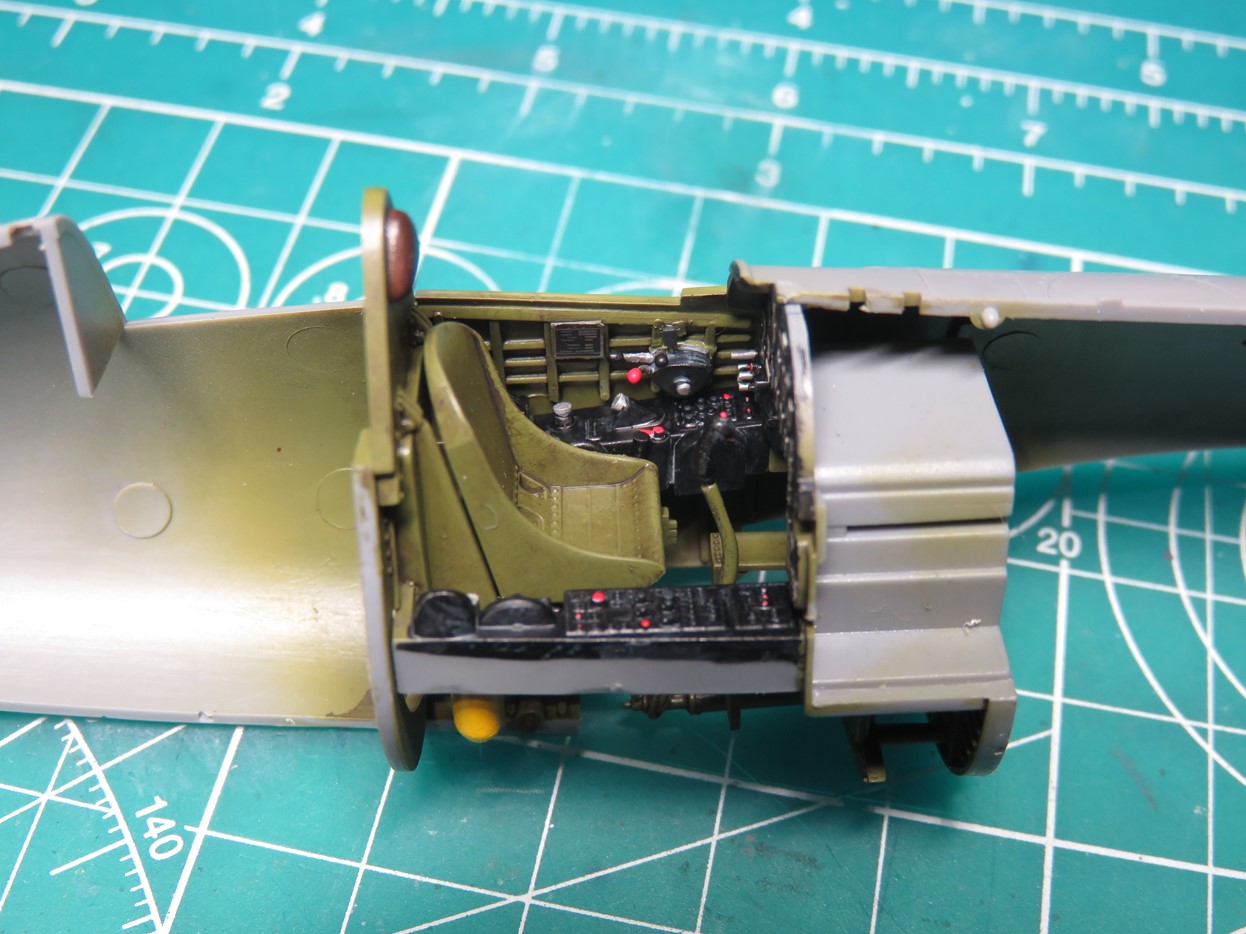
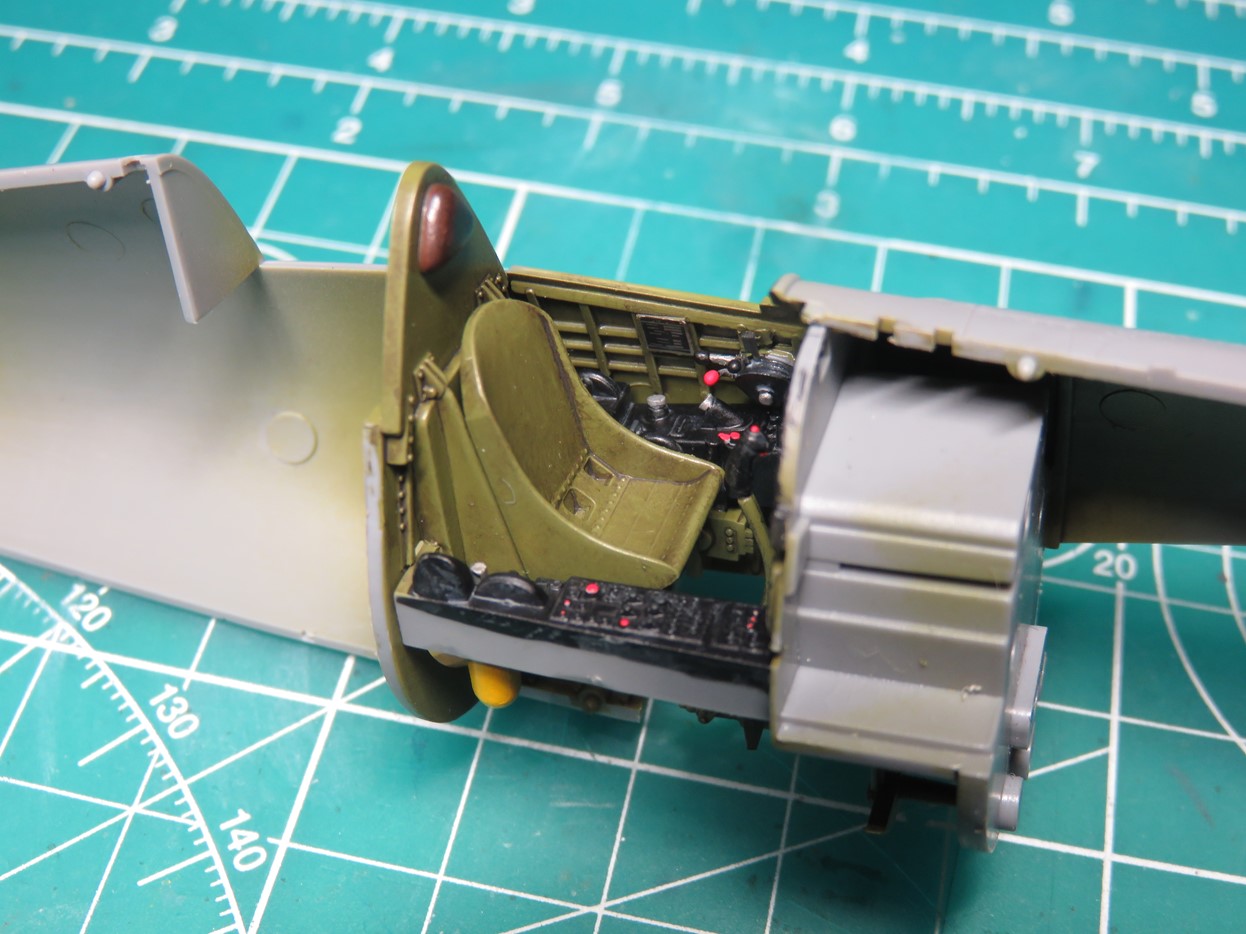
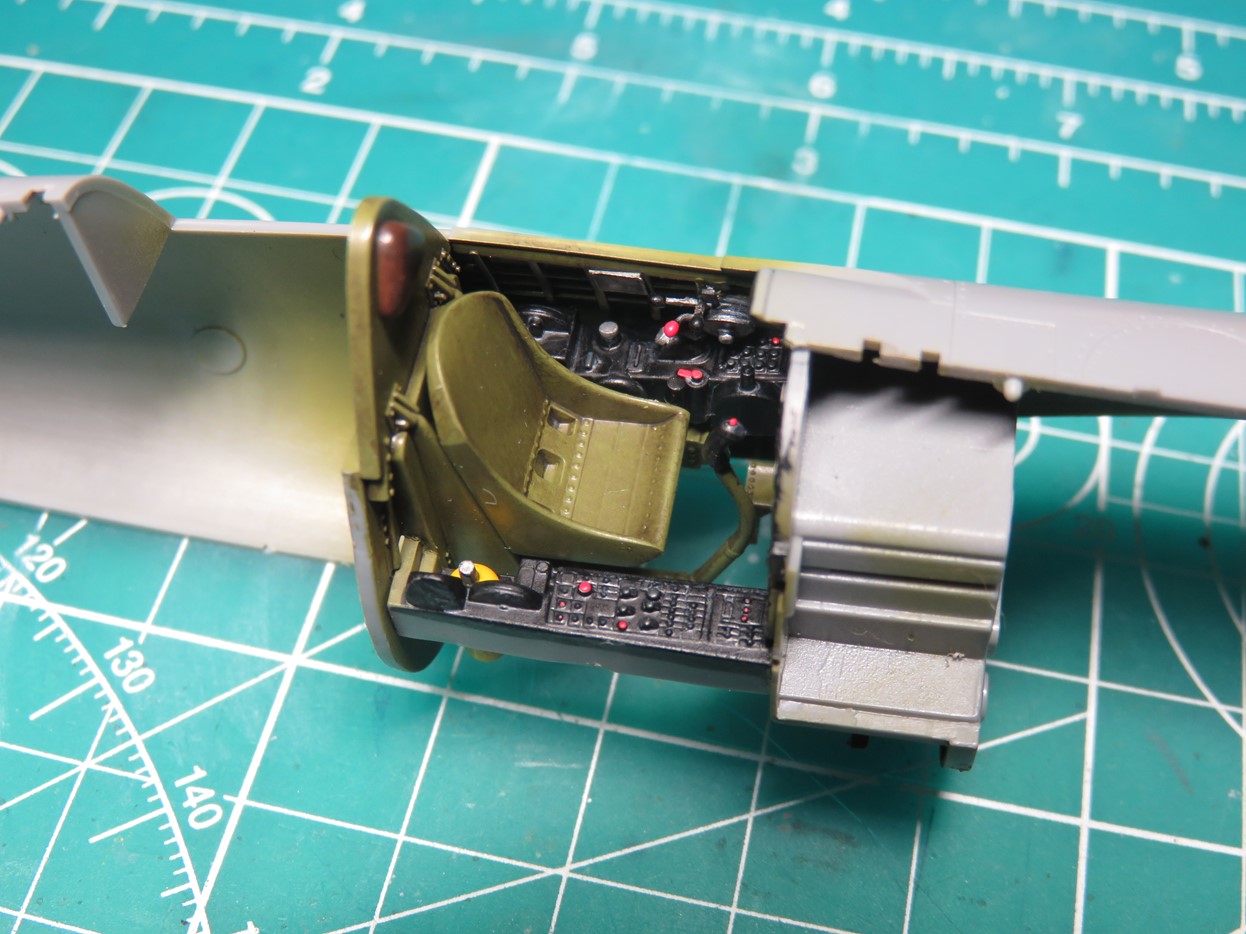
I’m really glad I went through and built those new throttle controls, as it’s a lot more accurate looking. Next, I’ll glue the fuselage halves together and then I can begin adding more details to the engine.
Jared Demes is a modeler from southern Alberta. He has been building models since he was 4 years old when his Dad first introduced him to the hobby. He has written for several magazines including, Fine Scale Modeler, Scale Aircraft Modeling, Phoenix Scale Models, and others. He has an interest in all modeling subjects, with a focus on WWII Japanese aircraft and Science Fiction.
Jared has won several IPMS awards for his modeling, and currently operates his YouTube channel rebelsatcloudnine, where he showcases model builds and product demonstrations.
Next Post: Part 2