
Tamiya Lockheed Martin F-35A Lightning II 1/48 Scale Kit 61124 – Part 4
In this Sunward Hobbies article and review I’ll be continuing with the major and finer details of the Tamiya F-35A Lightning II in 1/48 scale (item # 61124). Previous: Part 3
Again, an amazing kit and well worth the time invested in its construction. You’ll see more weathering tips, painting hints and some building info of the weapons bays.
This section of the model is super detailed, so I didn’t want to rush through it. After many hours of reaching out to ground and maintenance specialists the consensus was that after just a few test flights the bays would get dusty and highlight the interior ribbing and details.
All enamel oil-based products are workable after a few hours of drying time. Meaning they blend nicely over the surfaces. If you let them dry overnight, however, they will cake or clump up on you. Plan your day out accordingly.
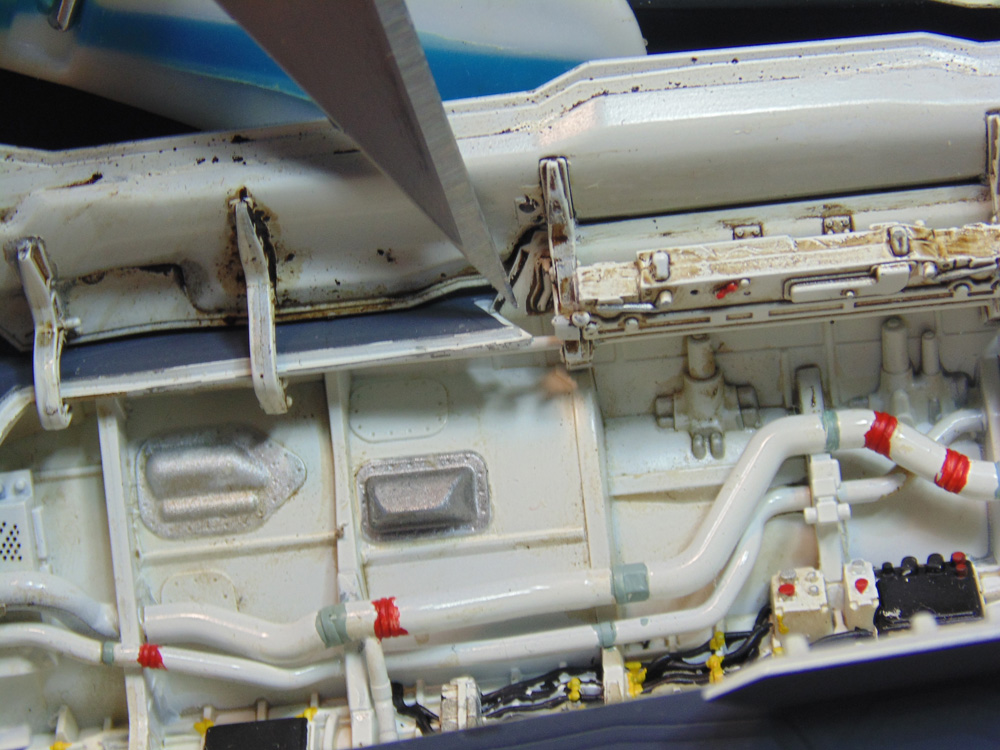
To get a uniform logical look you don’t have to slather the entire area. Just make sure the panel lines and ribbing detail are highlighted. You’ll see why in a second.
Dip your cotton swab in AK Interactive 470 Thinner or enamel thinner and then dab most of it off on a paper towel. Then gently rub away the excess from edges. This excess can be blended into the brighter areas.
Here you can see the decals have been cleaned of the wash, yet the ribs are highlighted. Yes there is more to clean up, but I wanted to show a step in the process. You can make this as strong or slight depending on the time invested.
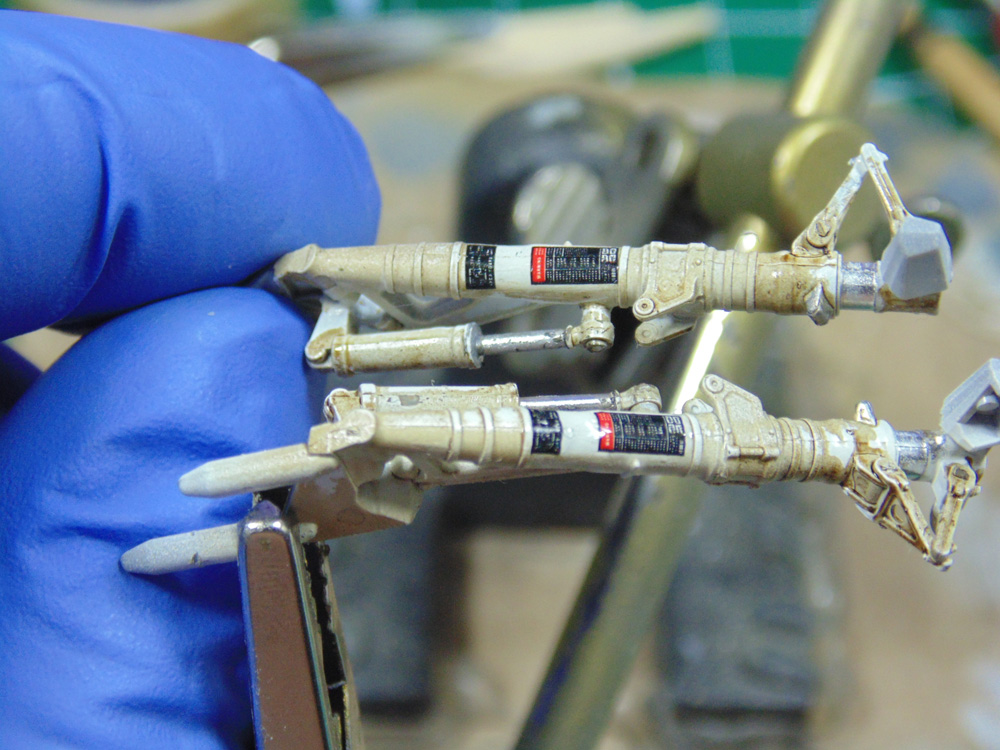
Here’s the before and after of the main landing gear. Tamiya offer very fine cotton swabs in several shapes to help with this task move along quickly, so don’t be intimidated with any excess oil wash. Even a fine brush, dipped in thinner, will help. The enamel thinner will not affect the decals so long as you don’t rub too hard. Always, always, always apply your decals first to any area that should look cleaner than the surrounding areas. That said, if there are transparent spaces between the stencils that you wish to have grime in then the decals will conform over a surface that has an oil wash. Just make sure that place has completely dried for 6 hours.
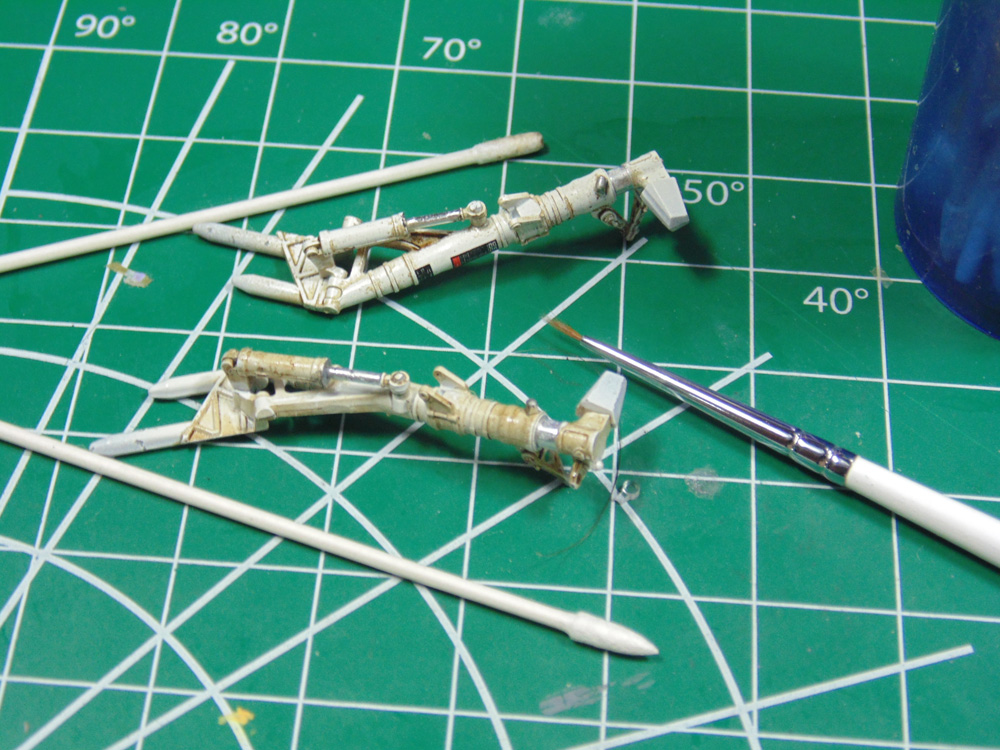
Another step in this section of the build process is the front landing wheel. Use a high-quality Flex-i-File sharp circle cutter for making roundels. Sure, there are plenty on the market and I have most of them, but this one does a great job in a jiffy.

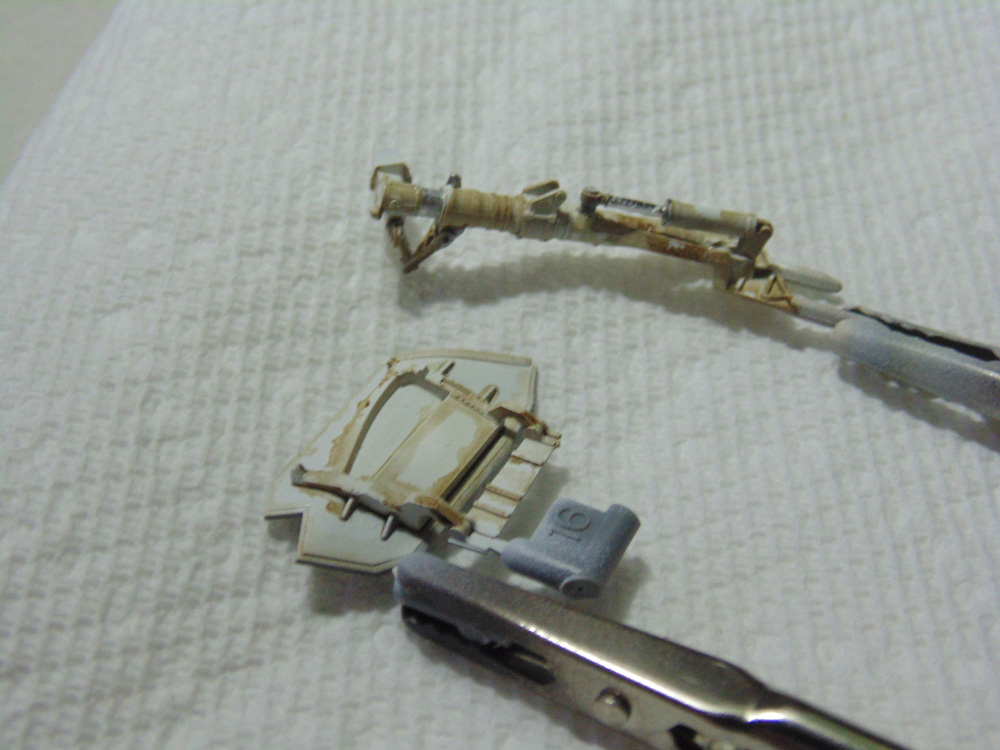
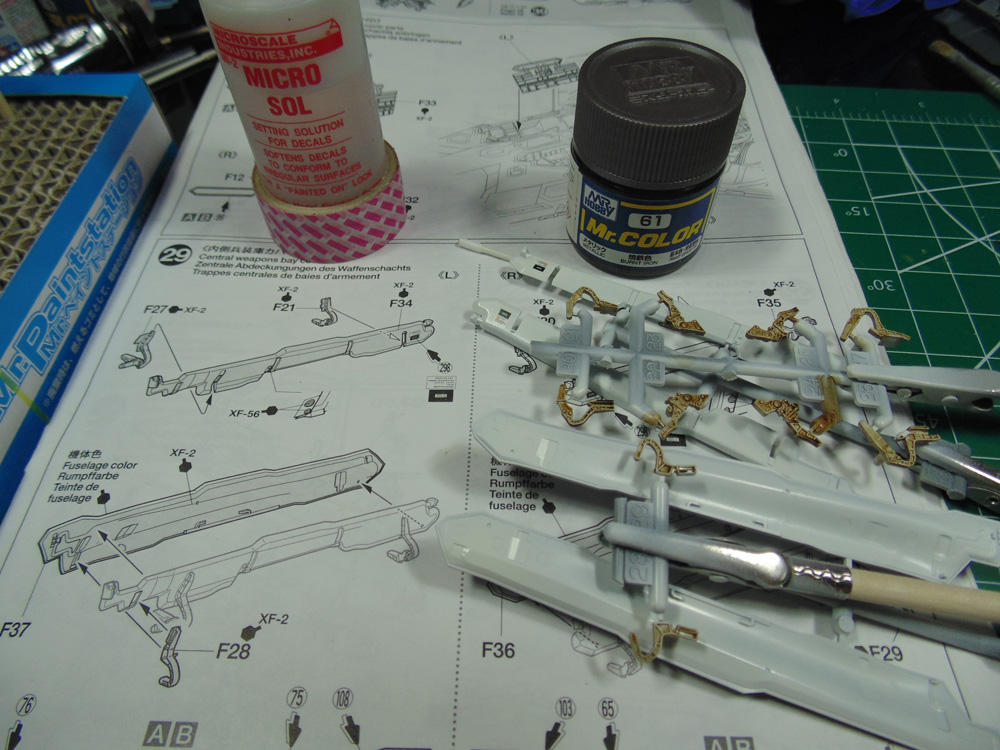
In this picture you can see that Tamiya have placed the stencils under a clear film. It’s done this way for a modeller not to have too many items to align up, which can be a major pain. Wash/highlight these parts and let them dry and add the decals afterwards. Used a high-quality setting solution to make certain the decals bed down properly. Just dab the solution on and let it do its job. There’s plenty of other fun tasks to begin.
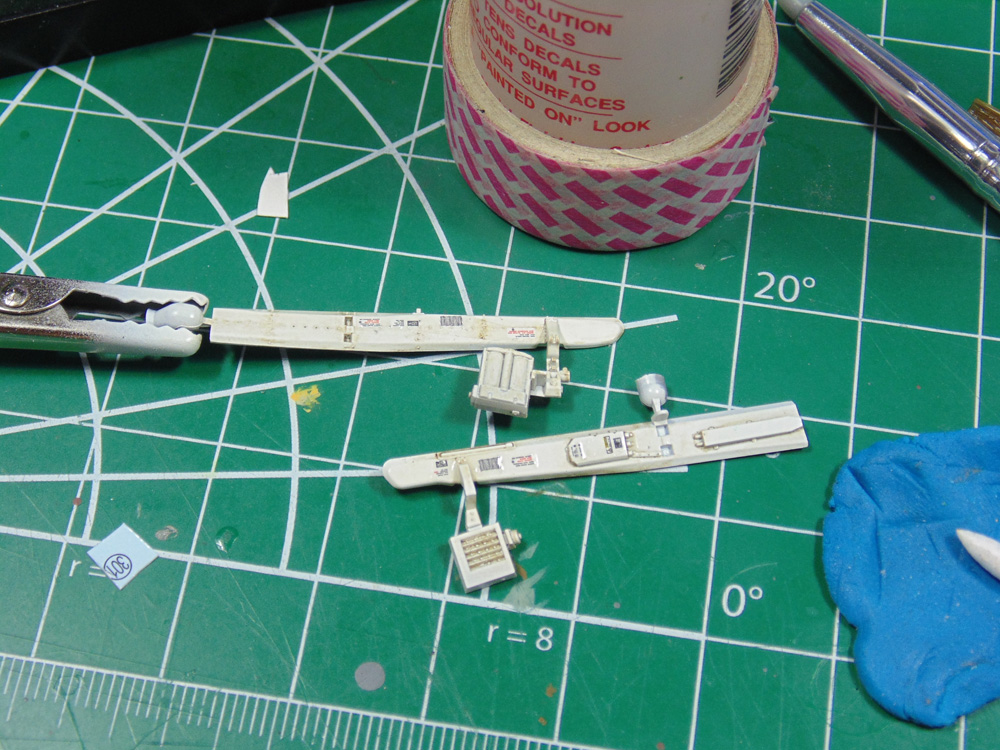
Follow the instructions carefully when attaching these arms. Give them a good wash and rub the high surfaces to bring out the brighter white color. You can, again, use some Tamiya or Mr. Hobby cotton swabs in the recesses to remove the wash and add a more life-like realism.
Cement points can be scraped clean or flooded with an extra thin product. It depends on the area. As a rule, I try to remove the paint and primer from any connecting area. That’s because my projects are being shipped internationally. If it’s for your shelf though, the cement and paint will blend into each other and form a bond. You make the call, but if you’re going to transport this for a modelling show then remove the paint from these points and have a solid styrene on styrene connection. Especially with any project as highly detailed like this.
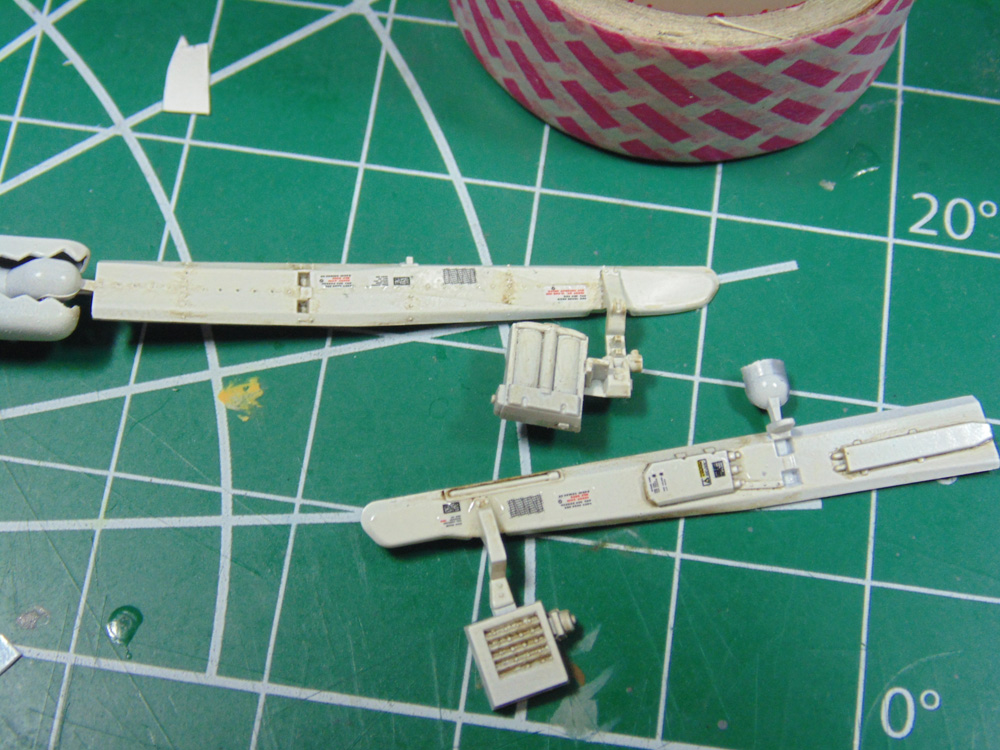
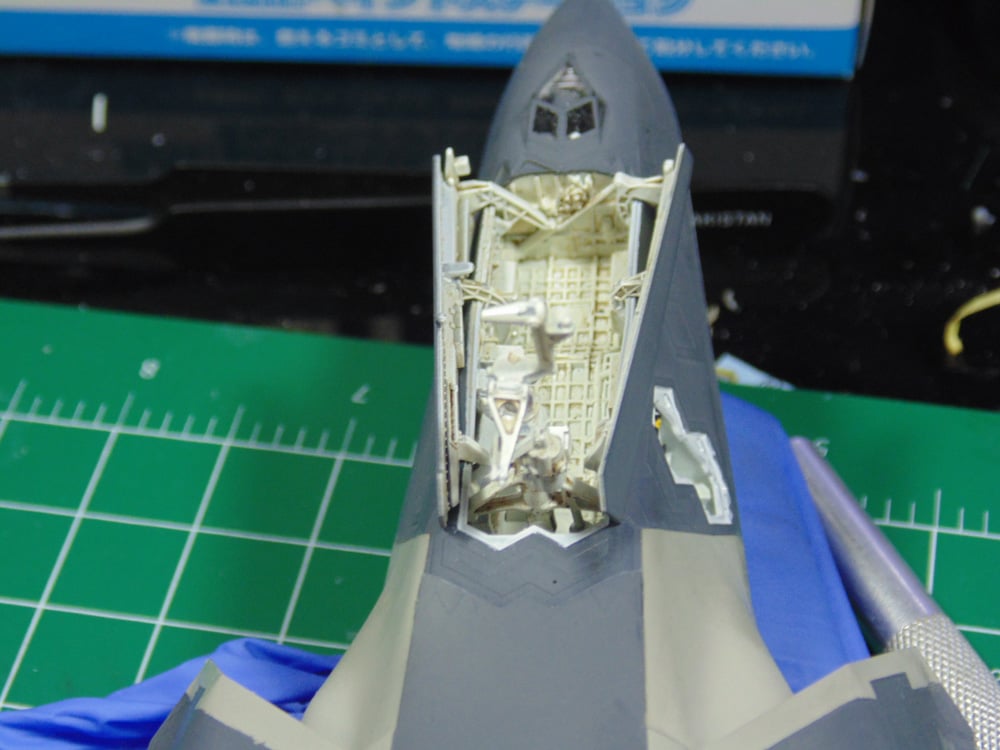
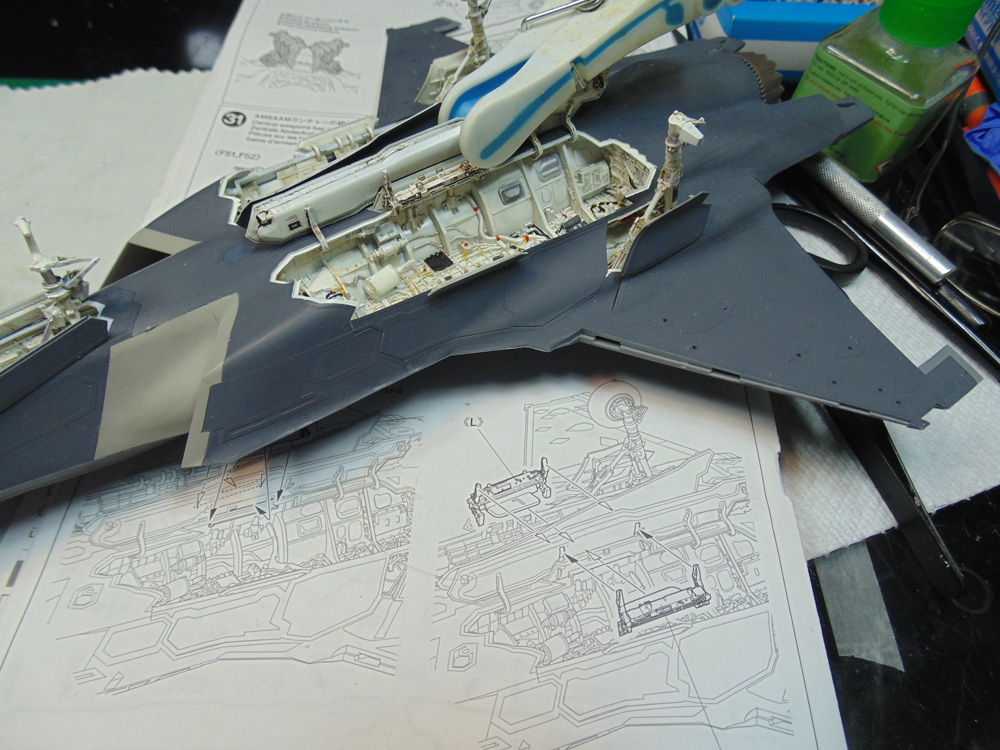
In this picture you can see the oil wash. It’s not too overdone, as normally I would overdo for WWII aircraft. Note the pilot access ladder area having no wash at all. It’s the same Mr Hobby H316 US Navy White as in the bay.
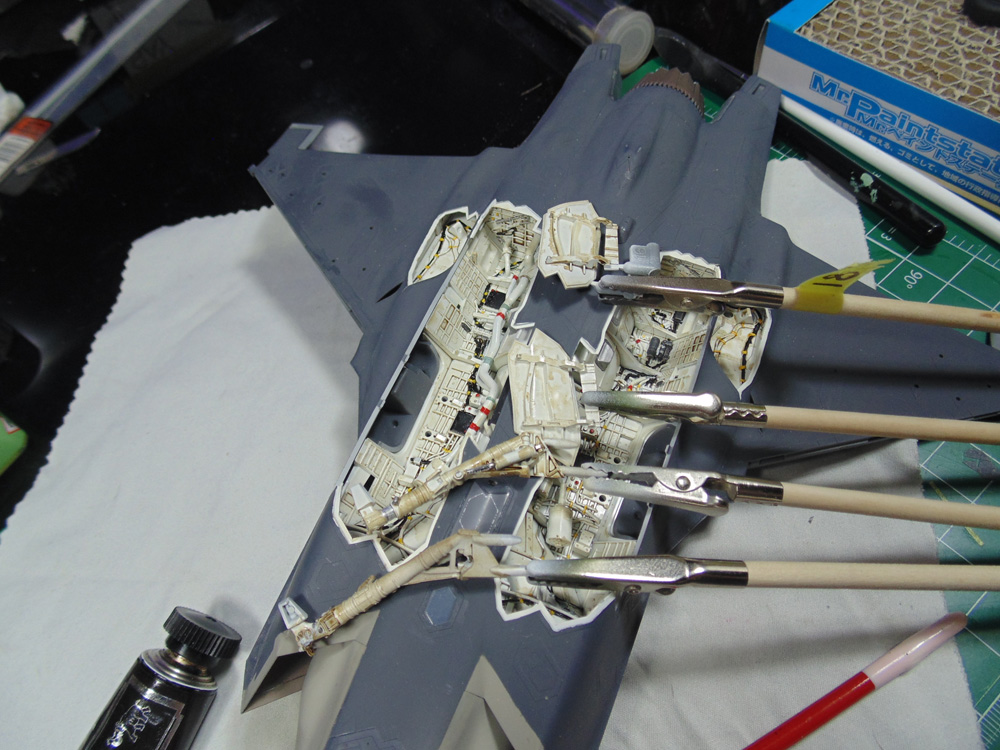
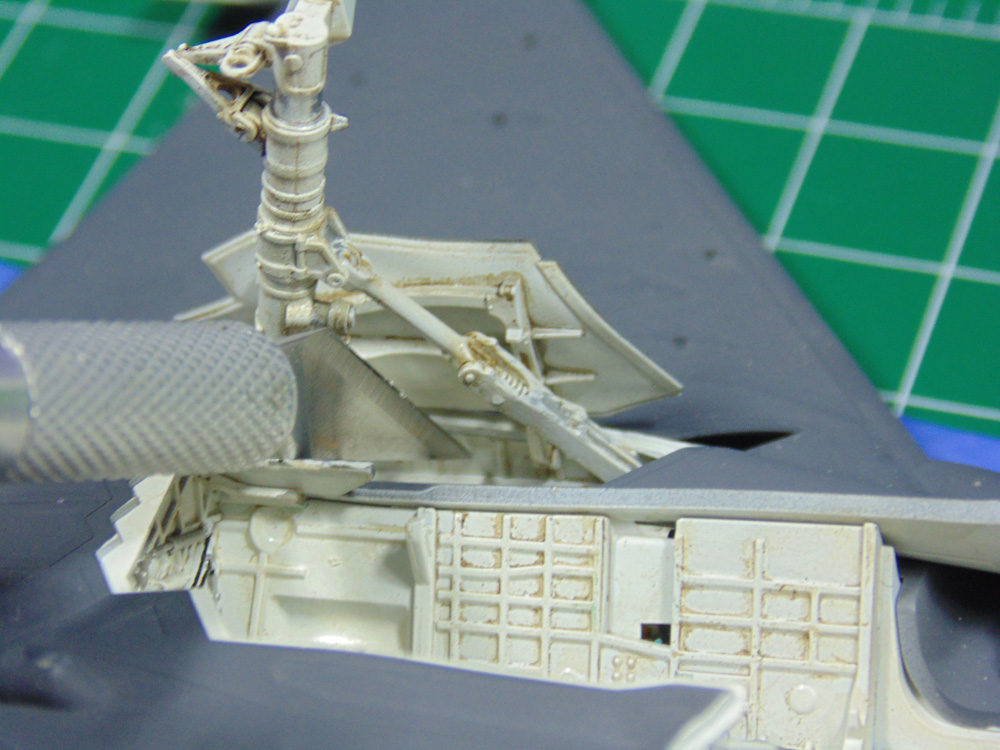
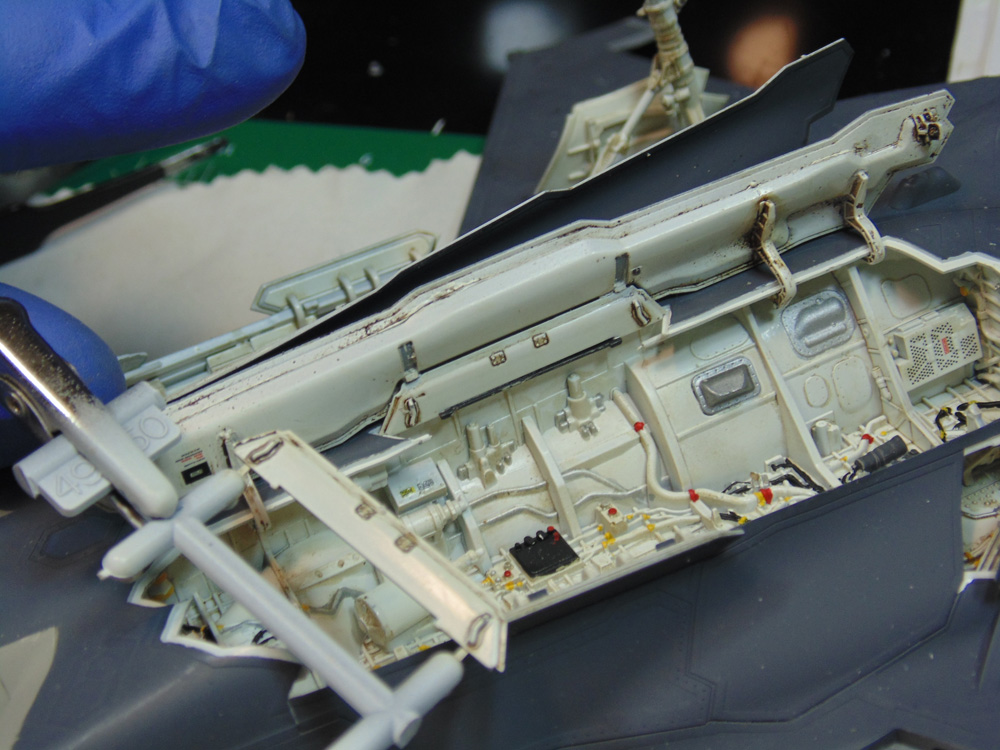
The retraction arms for the main landing need some special help getting to snugged in. Use a fine tip to force the upper and lower points in to place. Later, you can add a micro dab of cement to seal them properly. Please bear in mind the close-up shots are meant as instructional pictures. The ribs can always be cleaned up even more so long as you don’t clear coat the area.
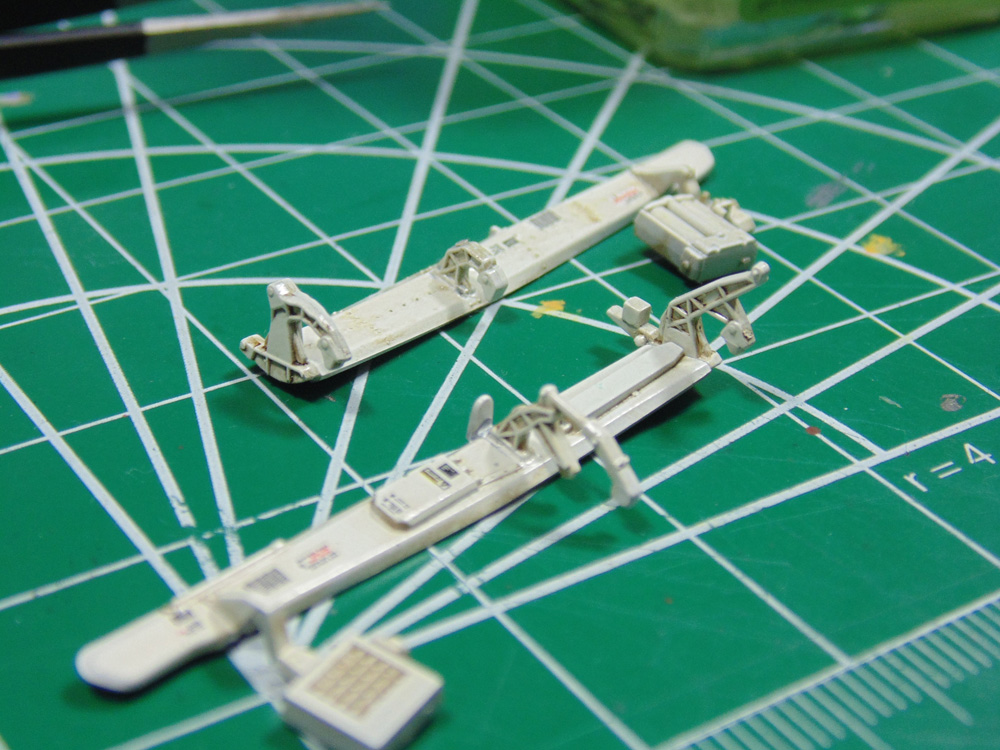
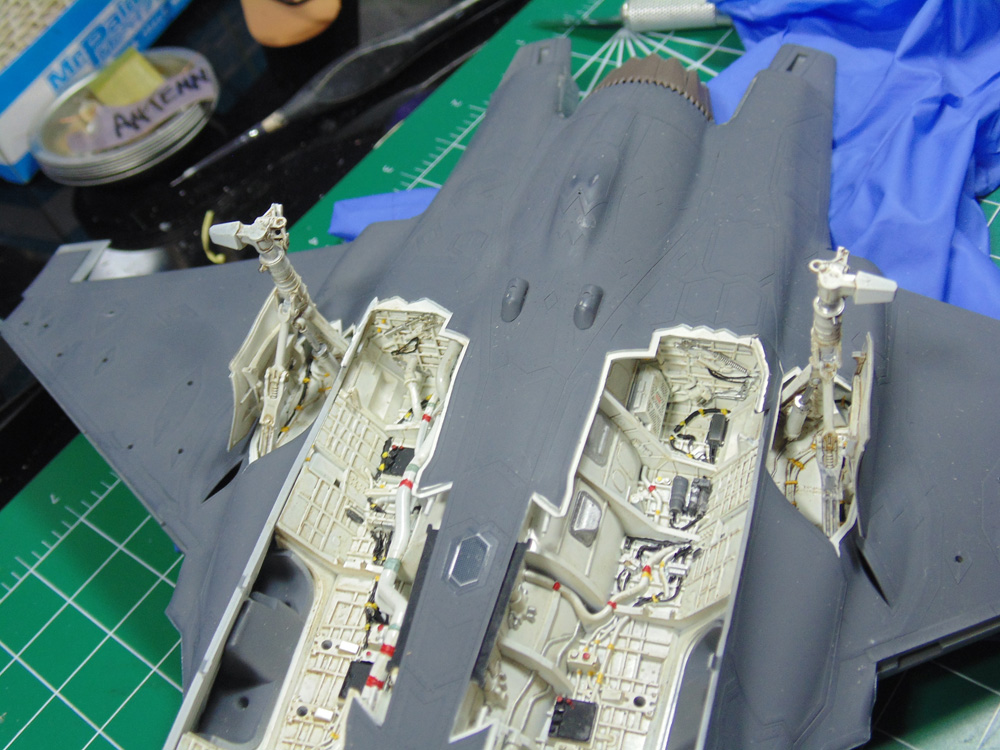
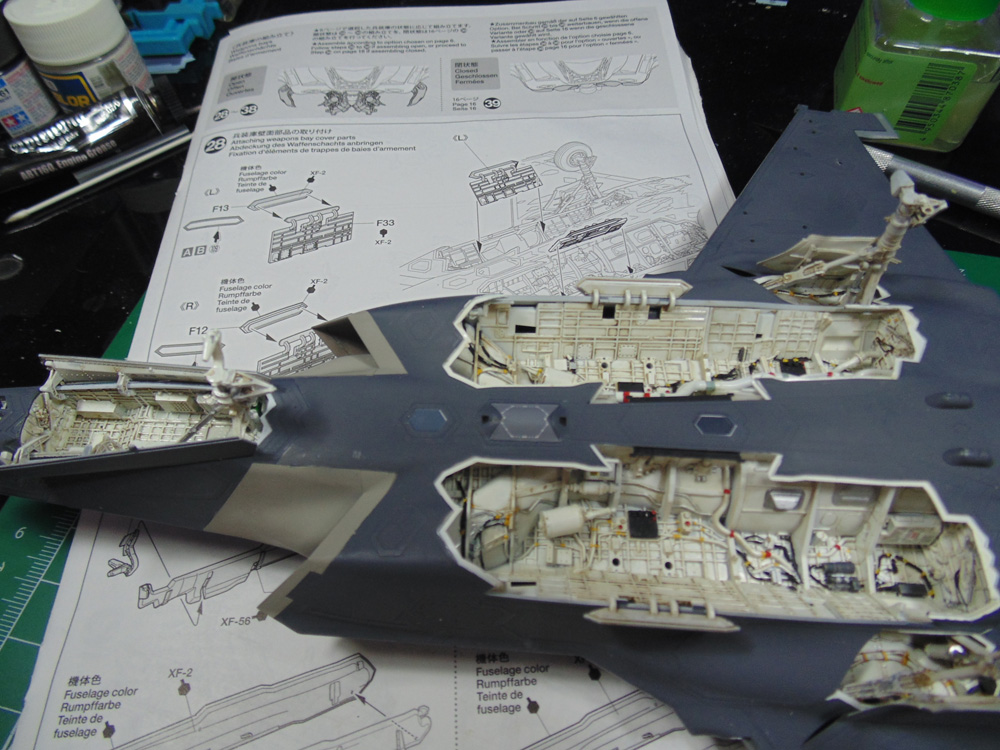
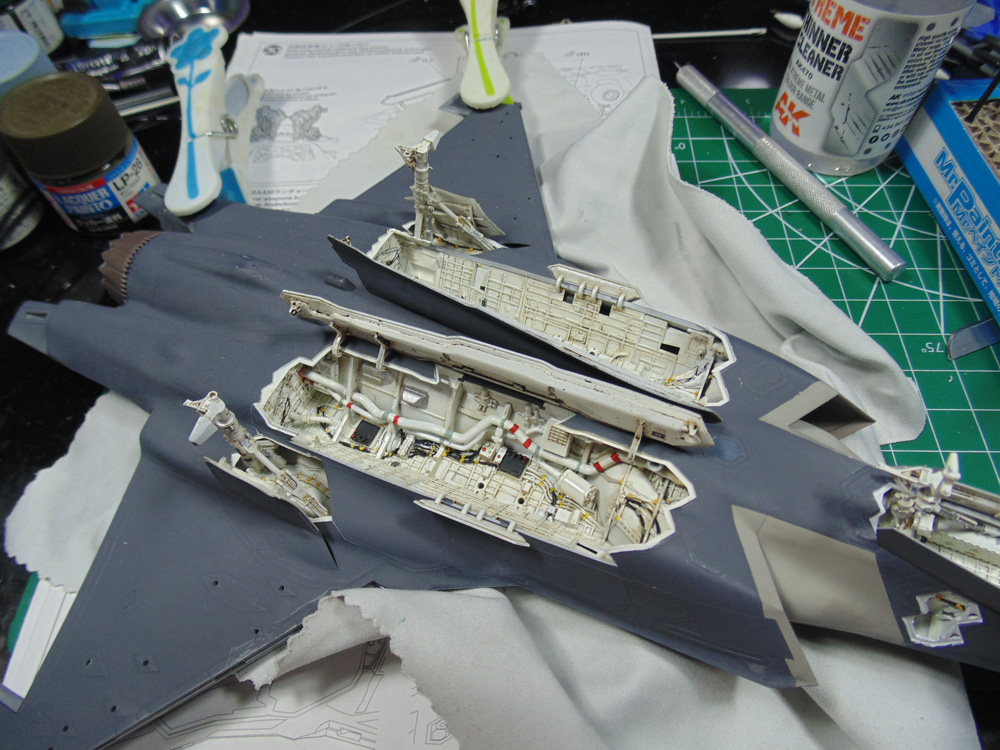
And here you can see the main gear and bay doors in place. I warned you about waxing on about this kit… wow, amazing detail!
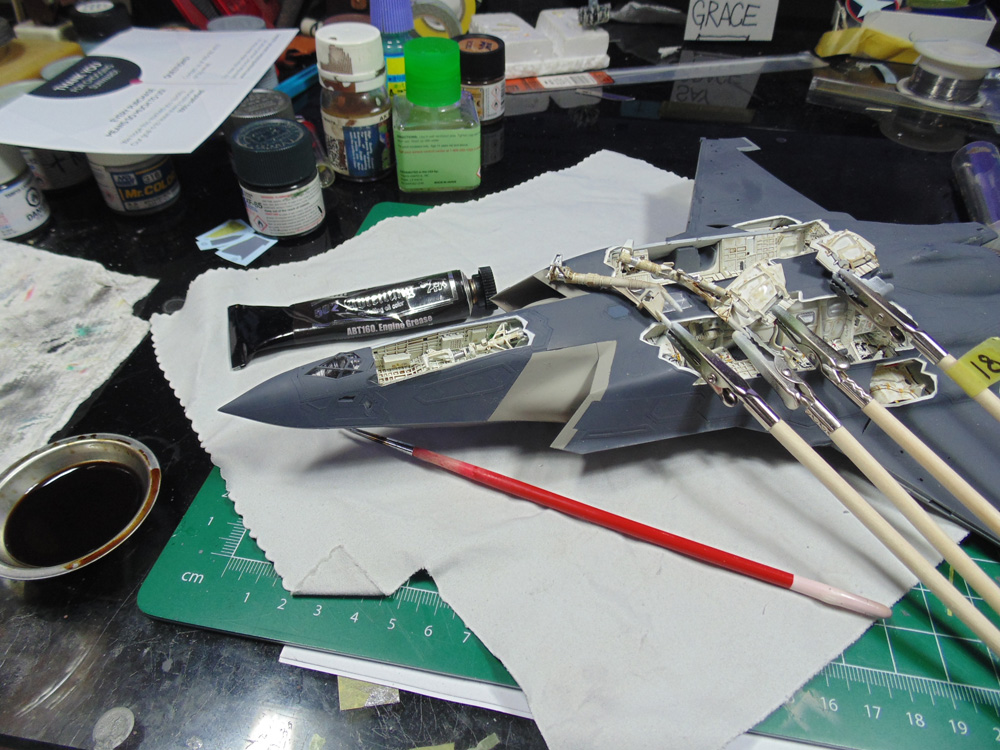
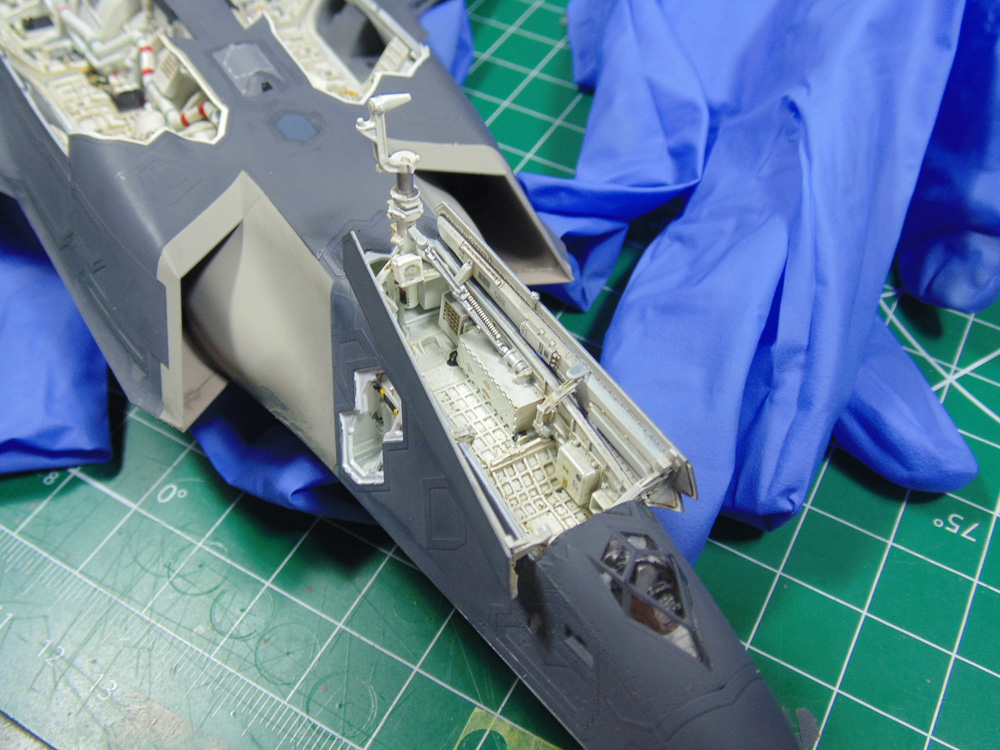
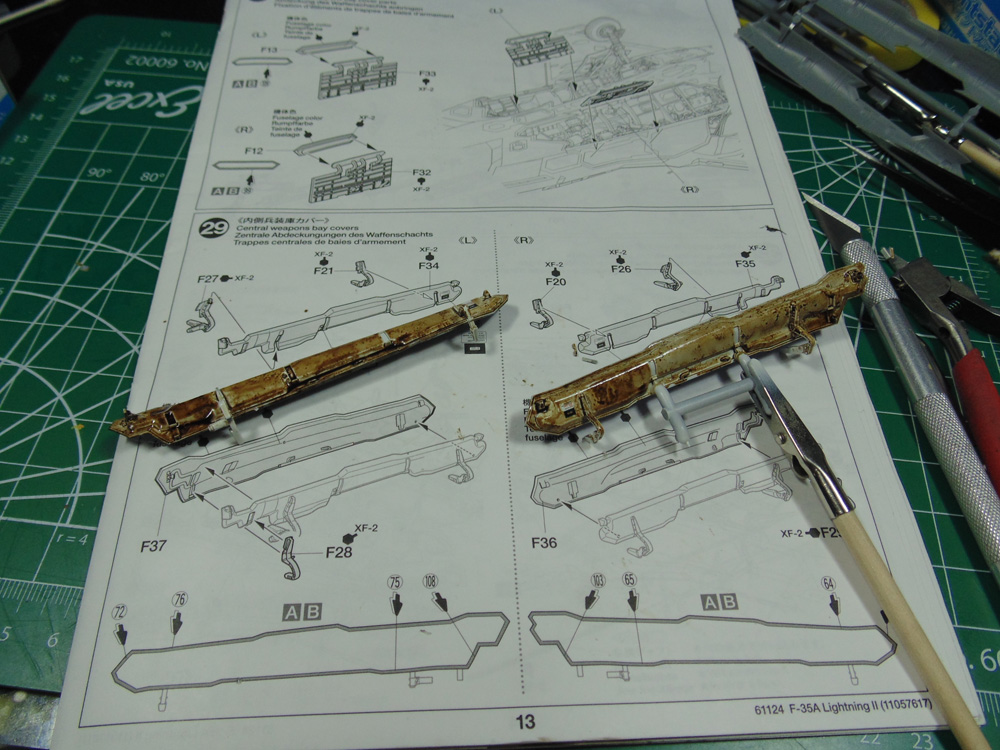
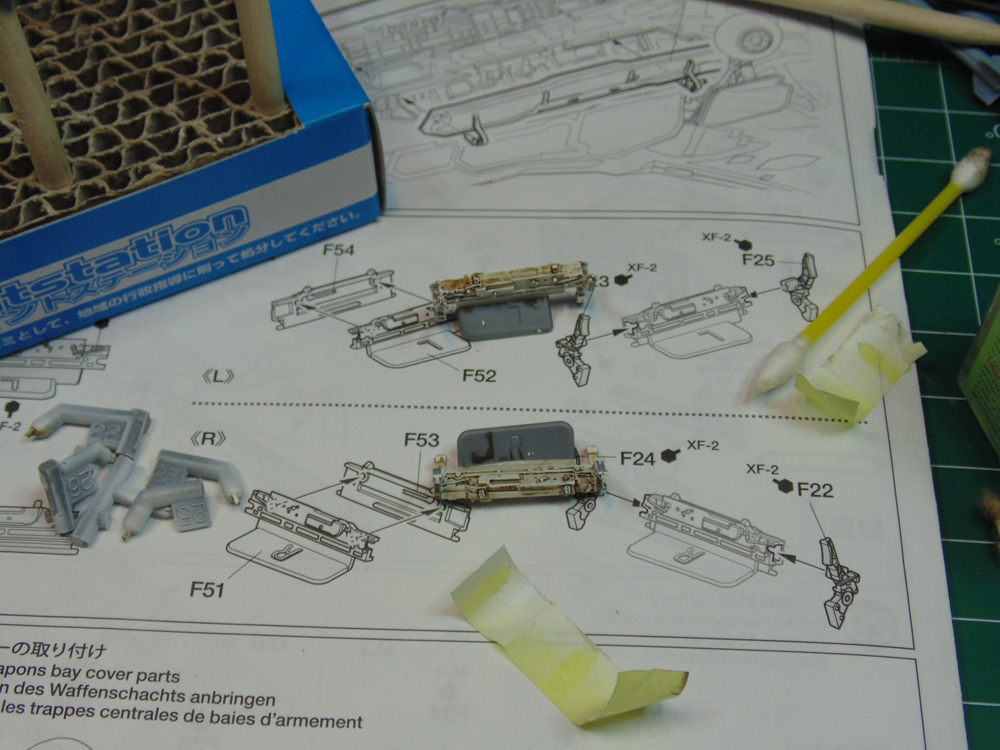
Now for the weapons bay door parts. You can see the deep color in the mixed Abteilung 502 Grease Oil Paint ABT160 wash. Use a thin Atlas paint brush to apply the wash on these tiny parts. Remember, it only takes 6 hours for the wash to dry enough to be removed from the high and very low points. It makes a huge difference to the look though.
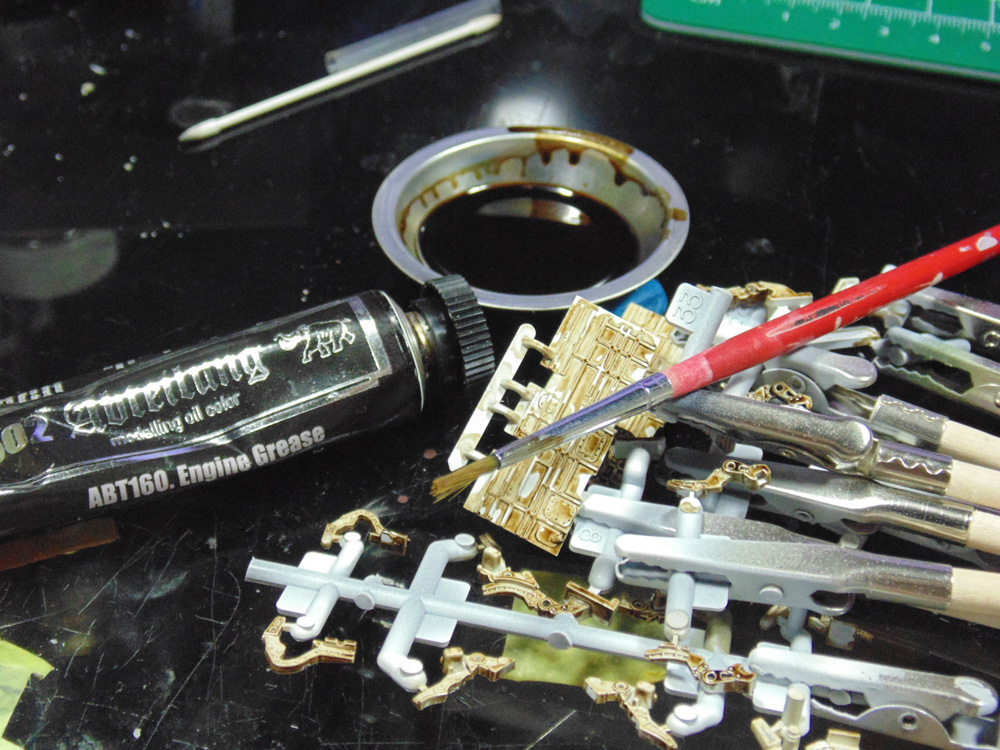
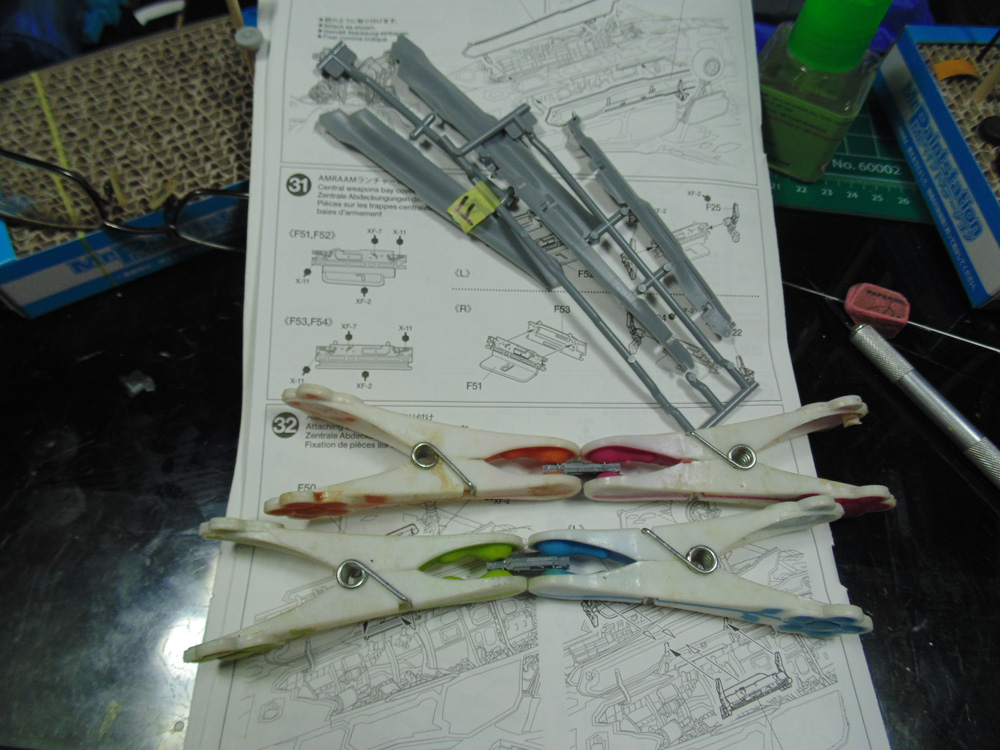
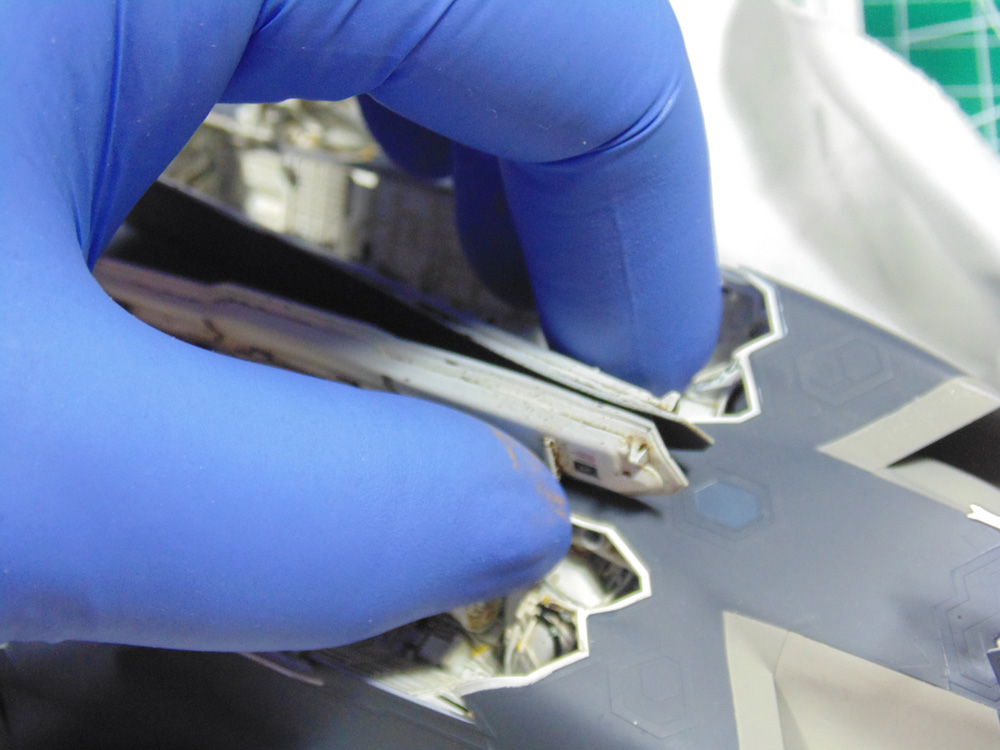
The intricate weapons bay door connecting parts needed to be sanded smooth and clamped. This is critical for the future alignment of the doors and the weapons attachments to follow. Plus, they need to be painted.
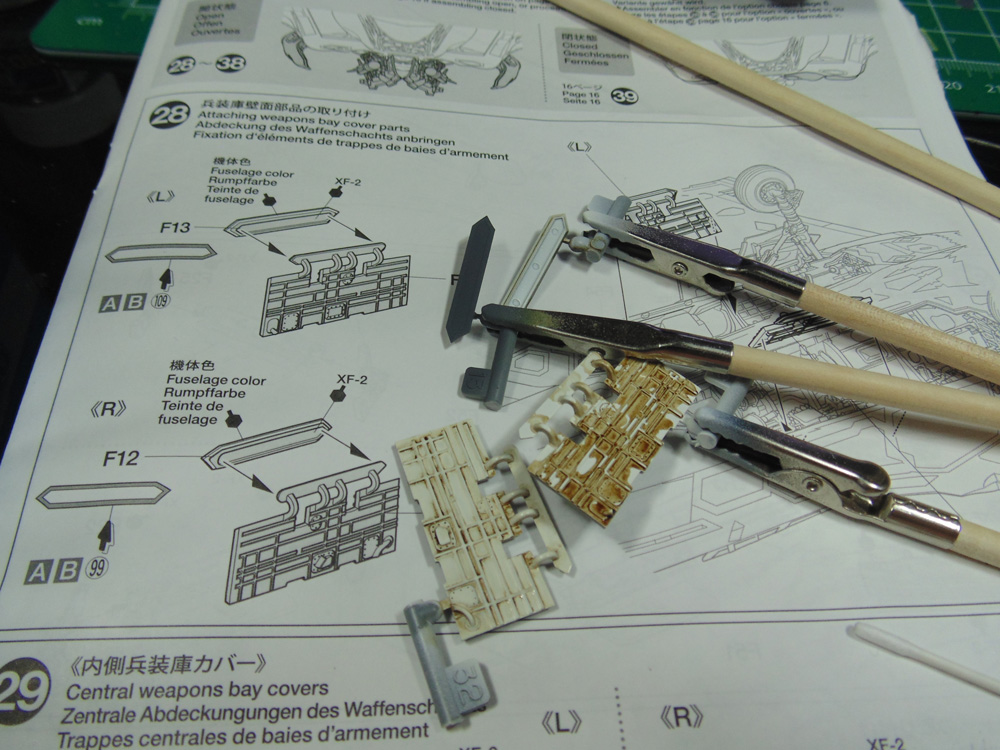
Here, you can see more color wash before and after along with the exterior color needed for the Danish version of this aircraft. Again, buy some nitryl gloves from Sunward Hobbies to protect these small areas from being stained by the many colors you have to apply.
Now it’s time to step back and see what’s been missed. Personally, I send photographs to techs who work on them for their opinions. The words are a darker tone of wash, thusly you decide. After all it’s your project.
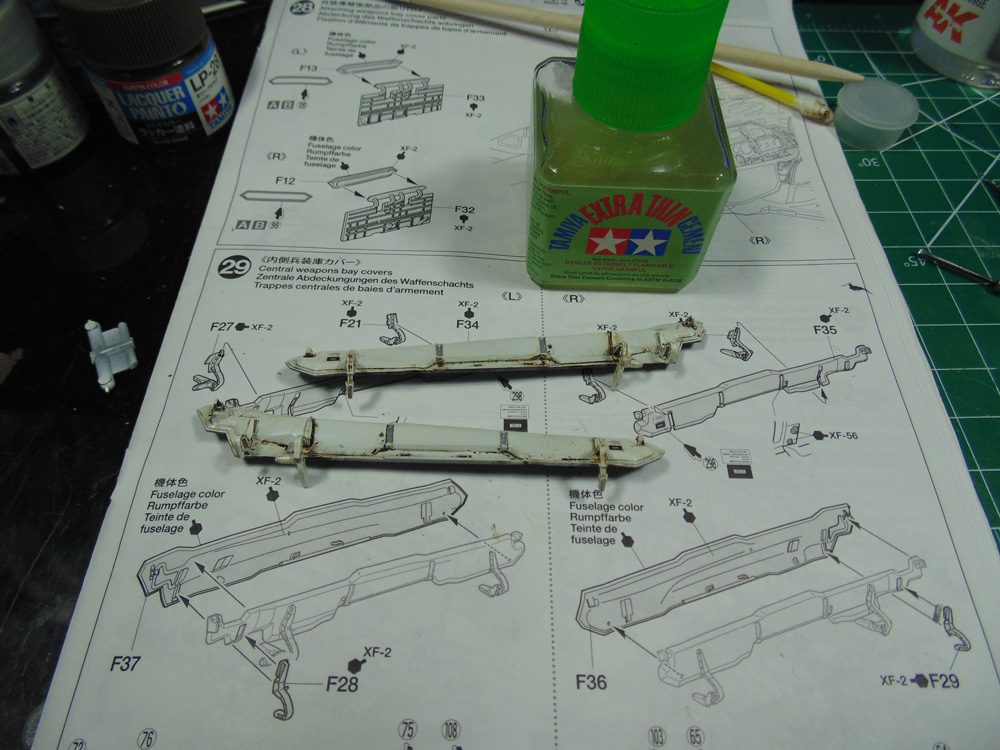
The inner and outer bay door skins have nice parts to wash and attach. There are small points to paint by hand. Use a silvery color for these little places. Remember the decal application suggestions.
Should you let your wash dry too long it can always be removed. It’s impossible to feather out if totally hardened. Make certain the paint has completely dried after 6 hours. This way you won’t have to strip the plastic and start over again. In this photo the wash was left to dry too long, hey we all make mistakes, but as long as you have the foundation color in place then you can adapt. Pay close note to which version of the aircraft you’re doing to prevent confusion.
Oddly enough, this looks closer to the real thing according to the techs I’ve contacted. Yet a model/replica is a whole different thing than a real-life subject. You are the artist, I’m just your guide. Regardless, you will have so much fun building this kit. There’s no horrible fit issues, no bending and holding parts for an hour and no ageless searching for paint conversion charts!
The inner doors slip into the notches with ease. I used a blade to help them, but it wasn’t really needed. Just a slight wiggle, like with all parts of any model, and they seat perfectly. Again, having removed the paint and oil wash. Sure looks nice yes?
If the forward tips flare out a little (could have been me) just crimp them slightly for a few seconds and they will bed down, just a builder’s tip. Guys, please use gloves when handling delicate parts. You’ll save yourself so much time in respraying and doing paint touch-ups.
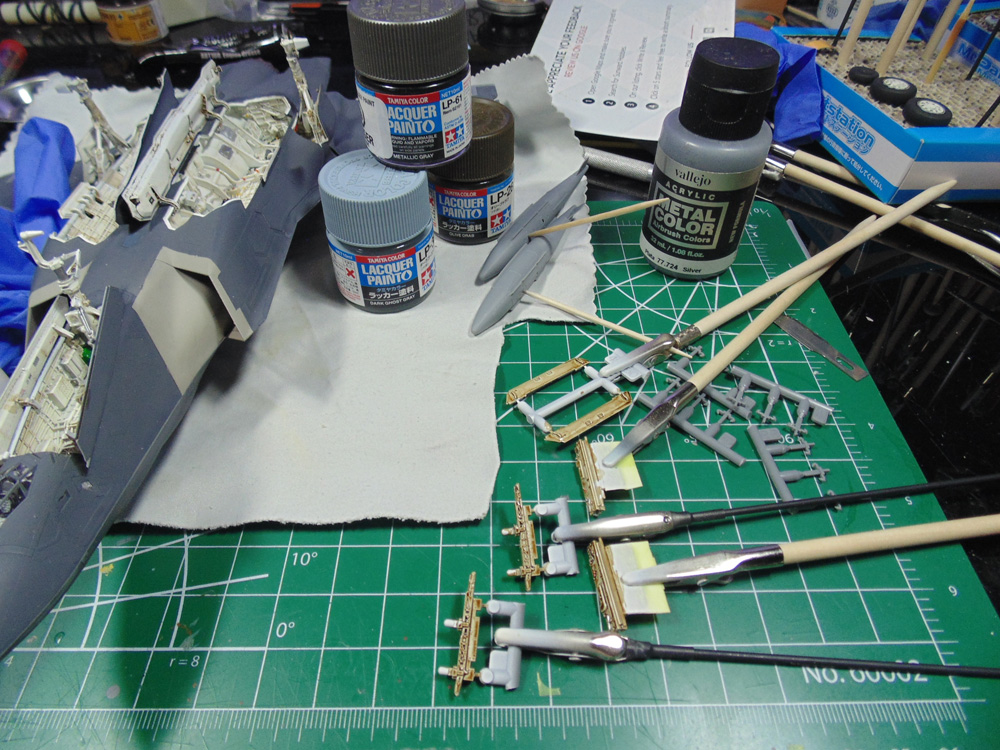
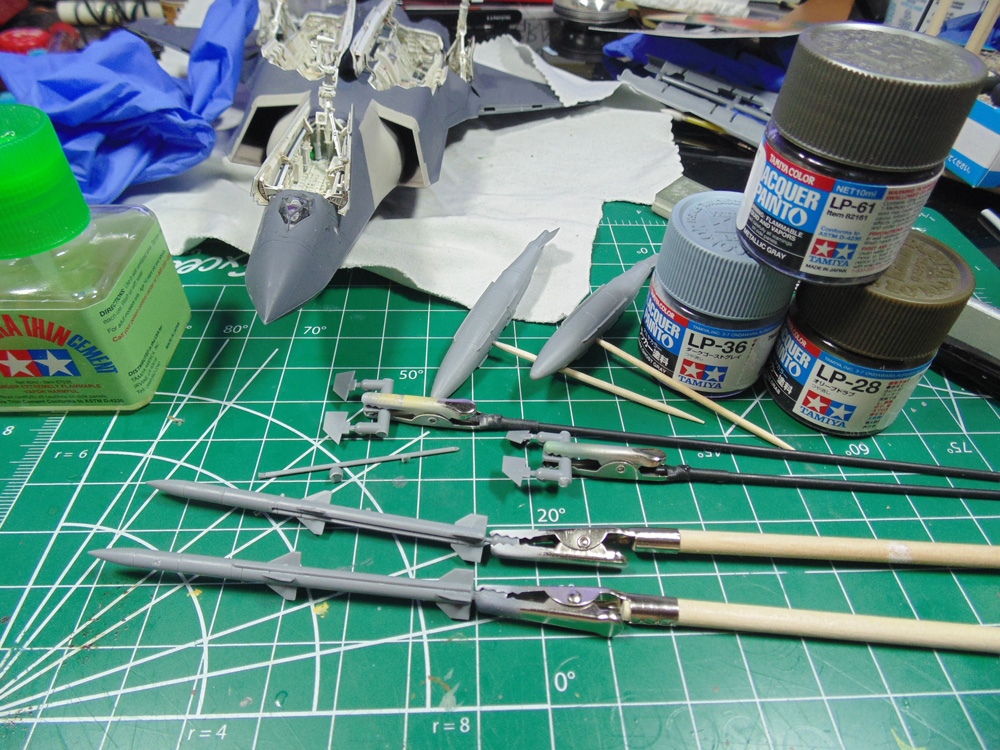
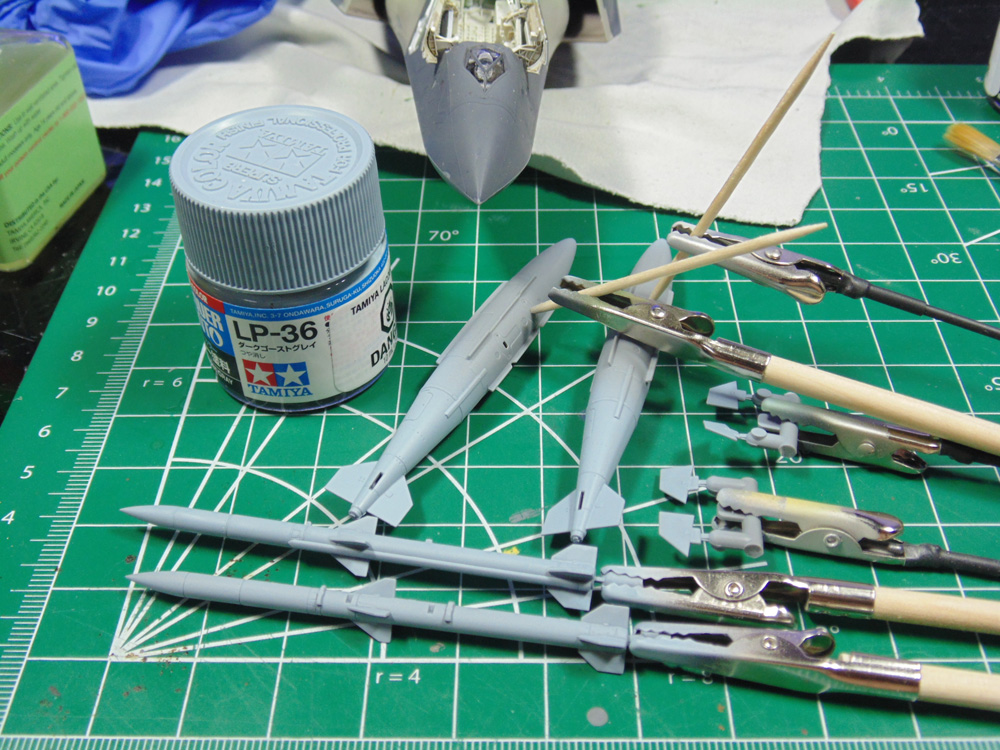
Now it’s time to paint and attach the ordinance. They have to connected to the usual suspects, which are vital, to the look of your model. Not to mention their replica accuracy. Apply the wash in an even coat, but not too dark. Obviously, you’ve painted the parts prior so I won’t bore you with that stage again. Just make sure the paint has fully dried. ALL these little parts need to have been completely painted and this hardened, as I’ve said before. Also, note I’ve dry brushed some highlights on tubes. No idea if this is accurate, but it looks good. Take any silvery paint or oil and roll the brush around on paper towel until you can barely see anything come off of it. Then ever so gently feather it on the place you wish to bring highlights to. Almost as if you were breathing on it. This will take any color to new level of realism.
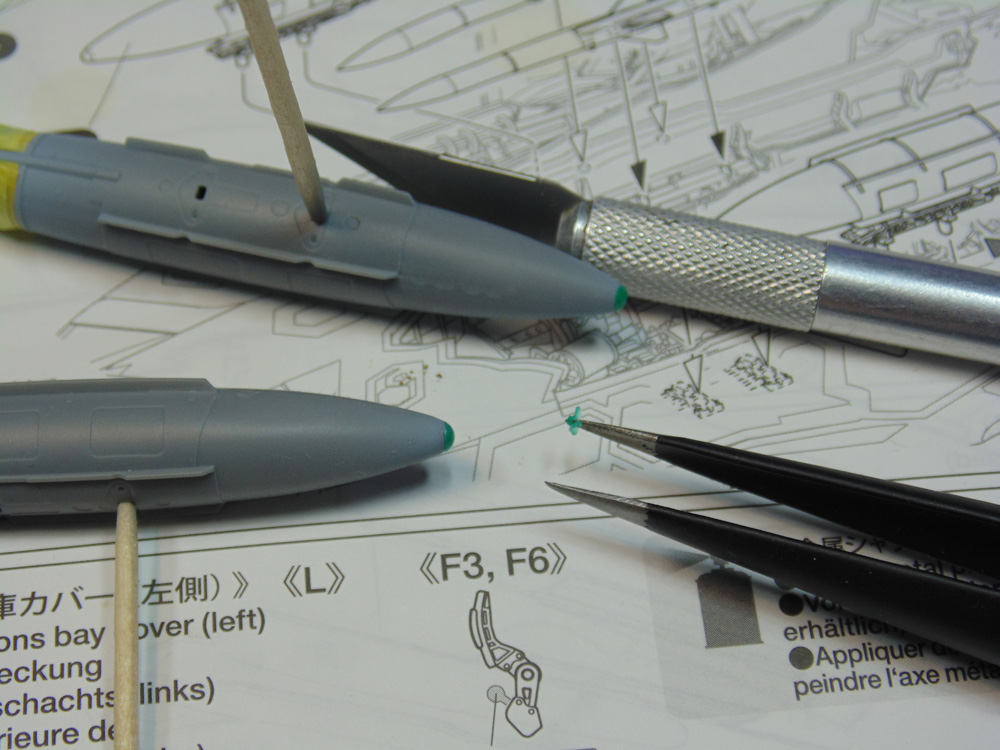
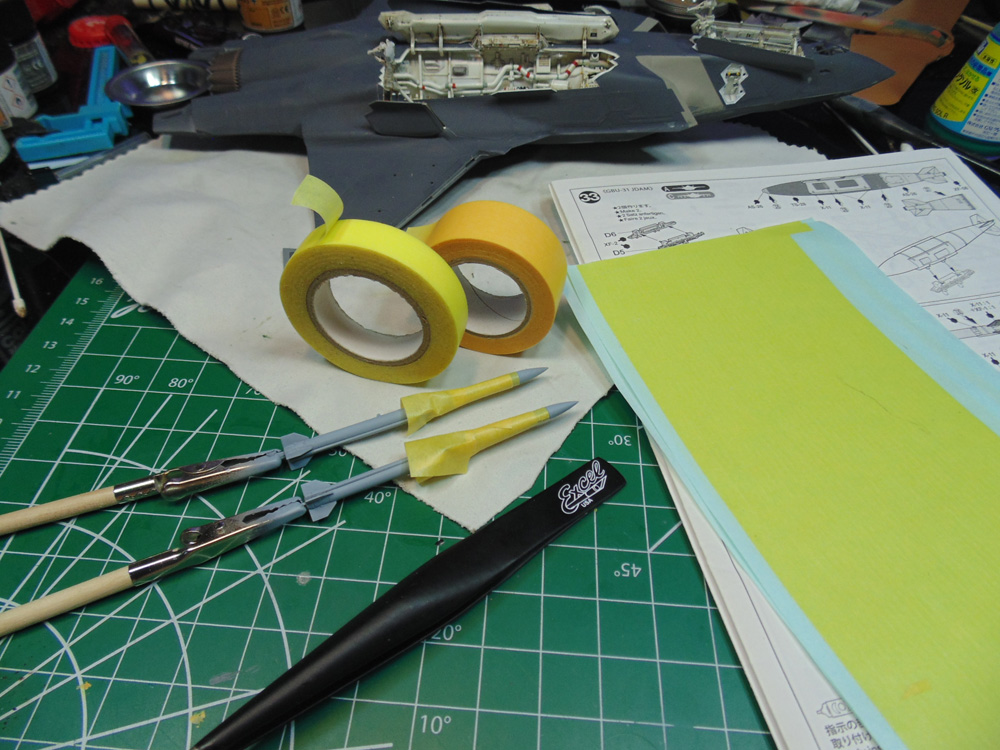
The first parts of the ordnance items need to be cleaned up with special attention placed on the seam lines. This is because I’m going to mask off the different areas with fluid and tape.
Tamiya lacquer thinner is a little “hotter” than Mr. Hobby. It will bite/grip on its own brand of plastic. Be cautious when bring out the heavy guns. Use very consistent passes from your airbrush. I twist my wrist as opposed to moving your entire arm back and forth.
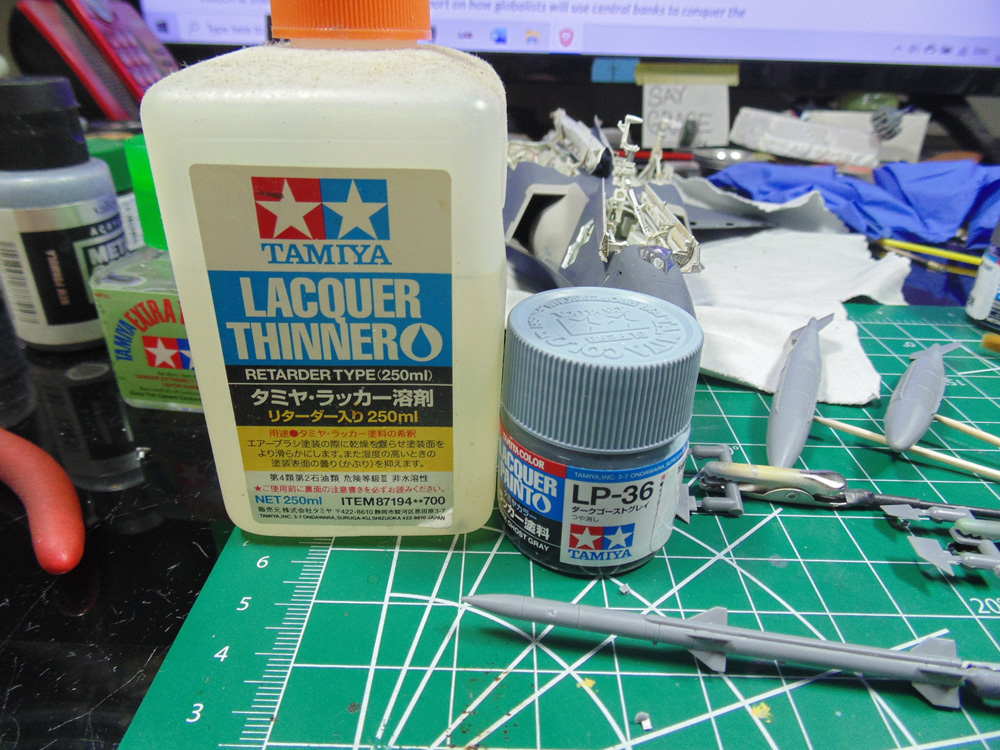
Tamiya lacquer thinner eats into the plastic a little more aggressively than other hobby thinners. This might knock down some of the edge detail if you put on too many wet layers. Be mindful to allow each spray pass to have a couple of minutes to flash/dry. The point is to melt the paint into the plastic.
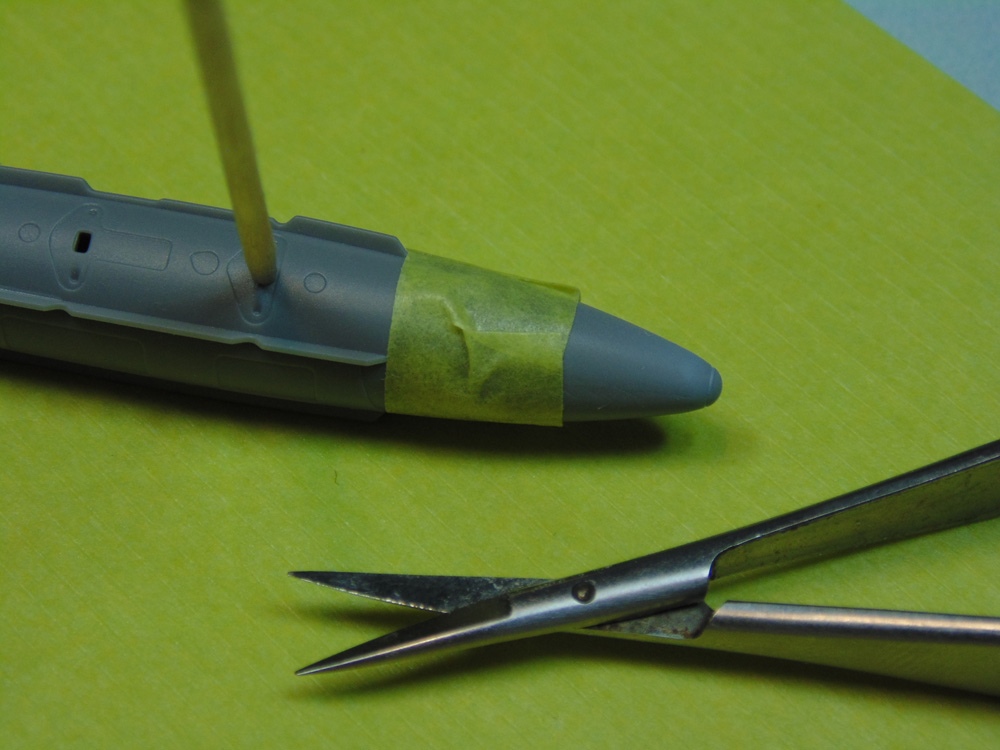
Masking the conical shapes of bombs can be tricky. Here’s a tip to help, snip the high points then tuck one end under the other.
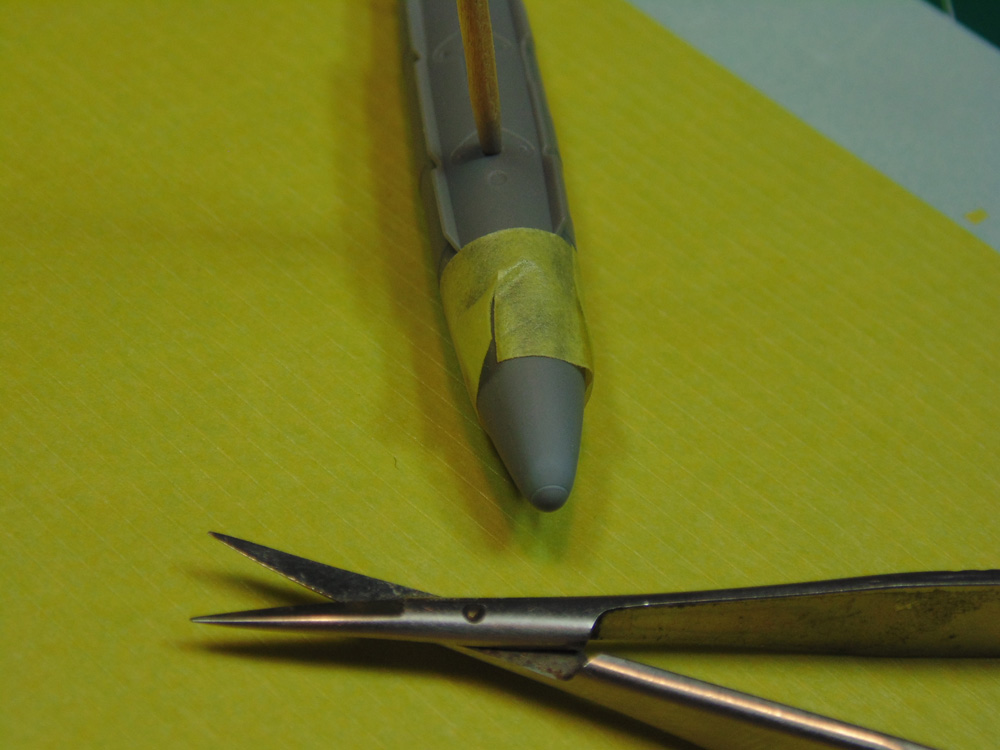
Obviously, you’ll have to overlap the sliced ends but don’t press too hard to burnish them down. The next color pass will be light. I’m illustrating this on a different part of the item, yet it shows this simple technique.
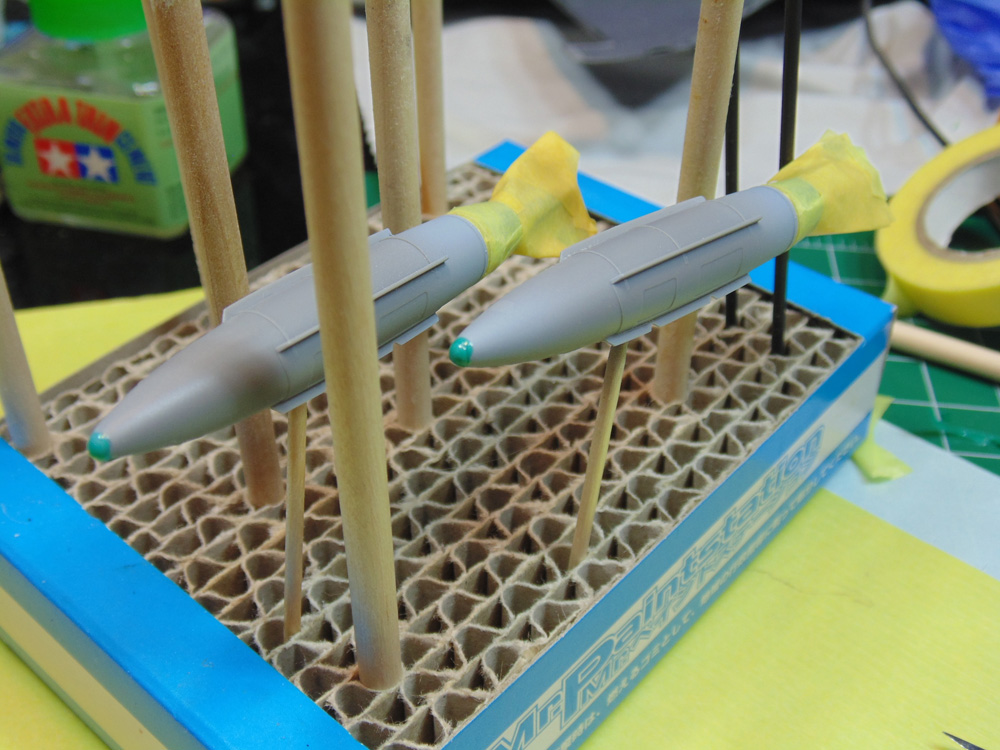
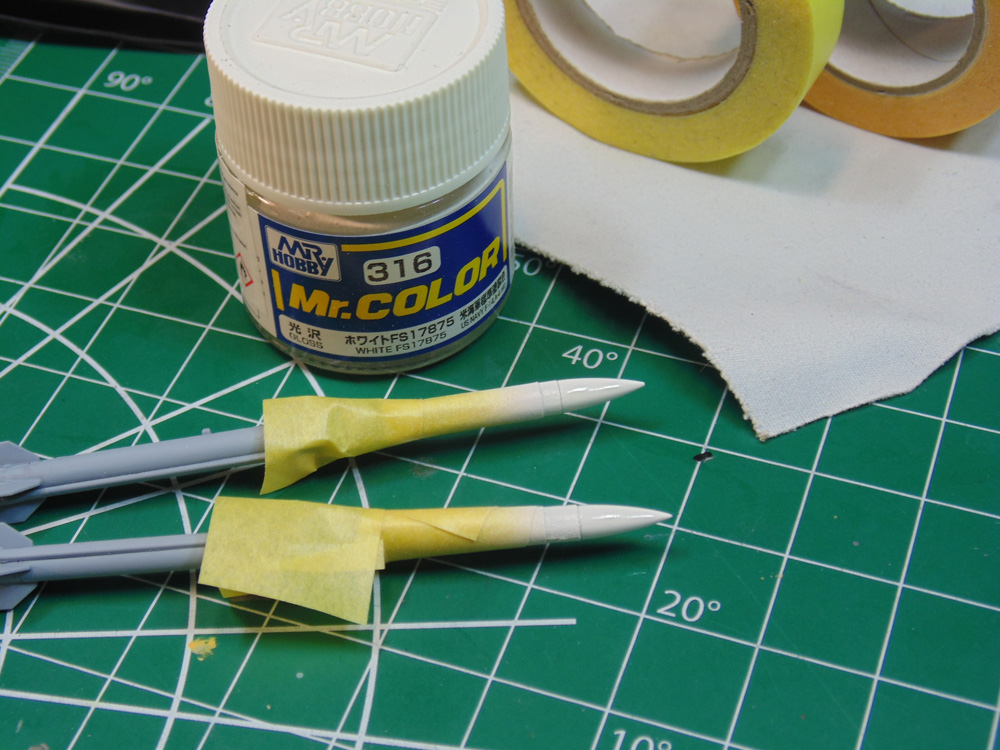
Some places are way too difficult to mask with tape. Mr Hobby SOL R is excellent for tiny places. These points were sprayed with ghost grey prior, as per the instructions.
Now, these weapons need hard points in order to be attached. The highly skilled engineers at Tamiya not only key fit the left and right side of many parts, but went a step further by labelling them. Awesome!
Attach these under cover parts first. You’ll have to push them gently into place due to wash and paint. Otherwise, gently remove the paint with a hobby knife. Just a gentle scraping will lift the paint away and the wet cement acts as a lubricant for the keyed parts to slip into one another. Yes, I rubbed away most of the engine grease wash.
Once the flaps have fully dried you need to attach the missile connection parts. Again, these are keyed and ladled “left and right”. There’s a lot of things going on in this small space. The fit is good though, yet a clamp will help you from having to hold these parts tight with fingers.
There is a plastic shaft which needs to slip into a hole of this weapon attachment. If you’re having issues with the fit, simply bend this little shaft out a hair and it will easily work its way into the hole and allow the other major connection points to seat properly. Make sure you remove the paint and wash from ALL connection points.
I’m using Mr. Hobby SOL R to mask many places of these ordnance parts. The reason is for a nicer/cleaner look compared to having them hand painted. Once the fluid has dried to this colour, you can easily roll your blade in the seam line and remove the tiny excess. Sure, you can hand paint the tips, I’m just offering a few tutorial points which might come in handy on other Sunward Hobbies projects.
Employ the tape masking tips you’ve seen (if needed) on the other ordnance, same rules apply. Just keep in mind that if you are spraying, and you should, that over spray goes everywhere. Mask back as far as you can.
Here’s another teaser about what’s to come.
If you have any questions about the products or methods used in this article, please feel free to ask the staff when you pick up or place your next order from Sunward Hobbies.
About the Author:
H.G. Barnes is a former voice-over artist and retired sales and marketing professional. He’s the author of two large volume science fiction adventure romance novels with many more in the works. For well over 40 years he’s been building scale model replicas and now does commission work for clients in Canada and the USA, plus completes projects for companies in Asia and Europe.
Currently H.G. is involved as an Associate Editor with KitMaker Network’s Online Magazine Channels.