
Tamiya Lockheed Martin F-35A Lightning II 1/48 Scale Kit 61124 – Part 3
In this Sunward Hobbies article and review I’ll be continuing the build of the Tamiya F-35A Lightning II in 1/48 scale (item # 61124). Previous: Part 2
In this Sunward Hobbies tutorial I’ll continue with the major and finer details with the Tamiya 1/48 F35A Lightning II fighter jet. Again, an amazing kit and well worth the time invested in its construction. You’ll see more masking tips, painting hints and some building info.
It’s necessary to sand the cement “squeeze” bubbles from the seam lines. It might take half a day to do the job, yet you’re modellers and know this must be done.
It’s best to wait until all the major parts are attached before respraying the sanded repairs. No matter how careful you are, there will always be spots to sand, thus the fewer times you mask and spray the better.

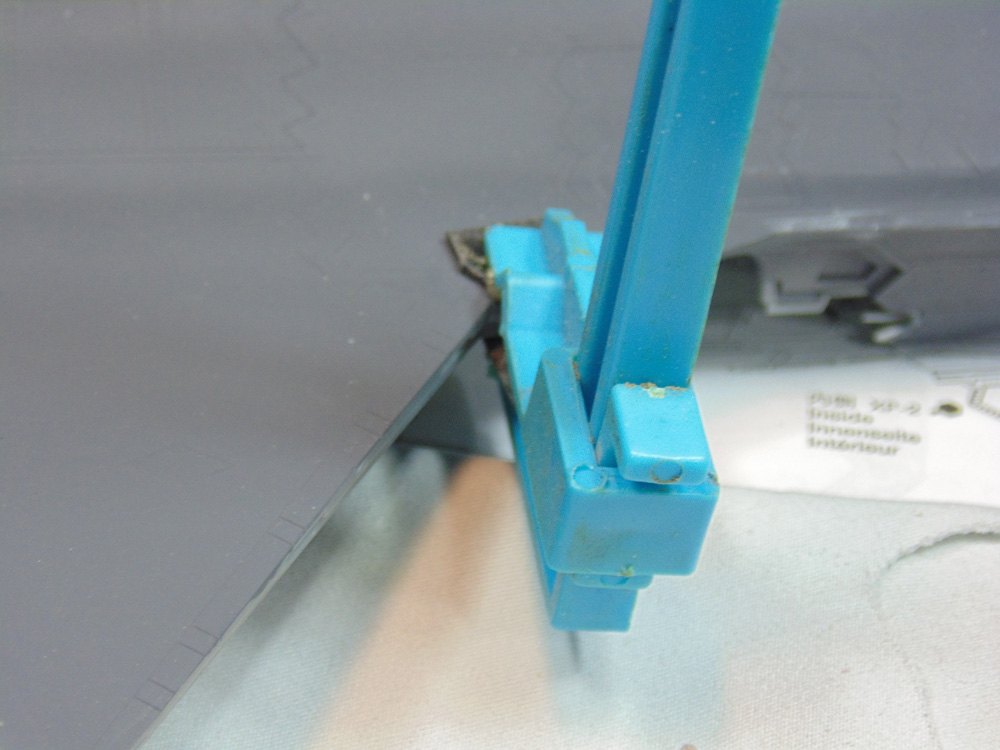
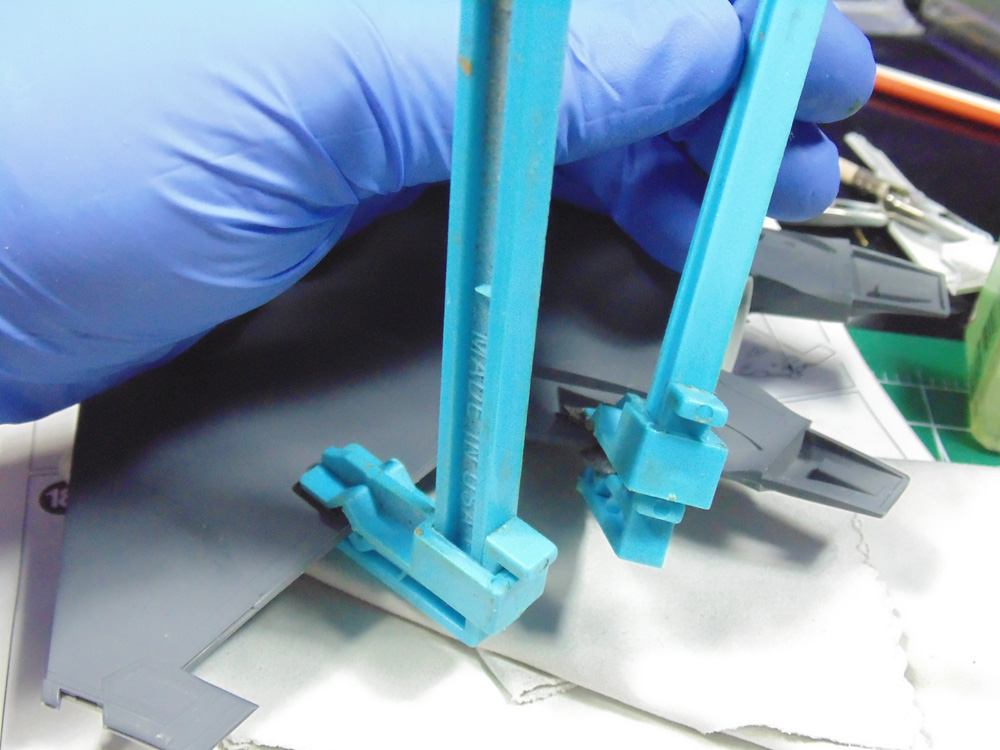
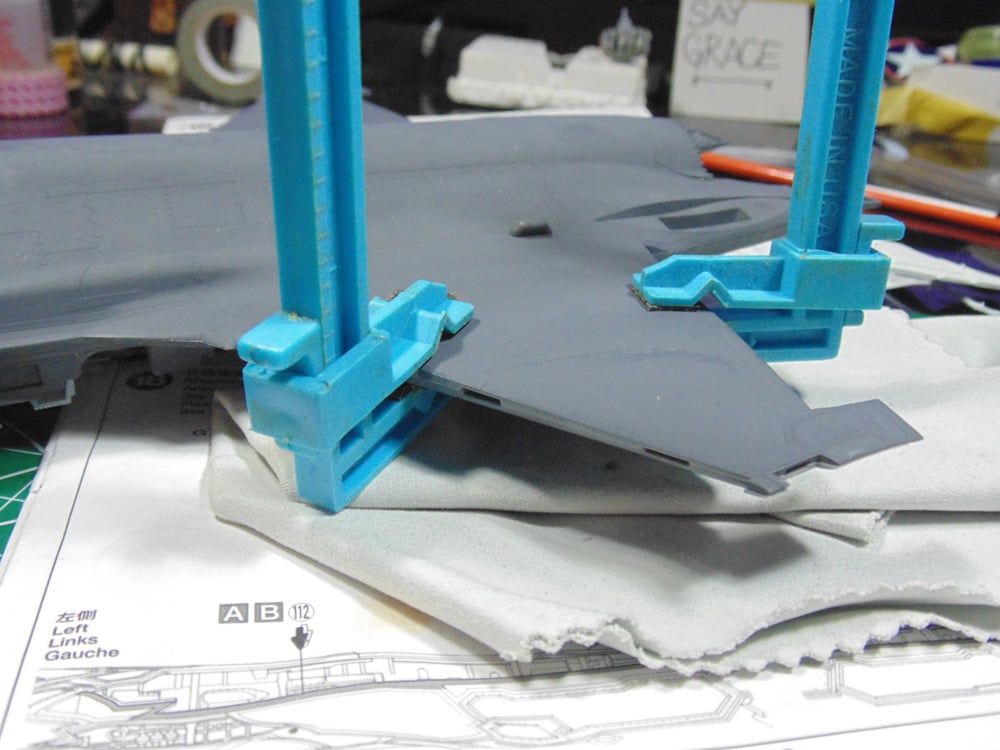
With the edges in good shape you have a couple of options to fill micro gaps. The dust, when mixed with cement, can act as a filler and may be all you need. The other is to blow the dust out and use a filler if the gap is too wide. Here you can see my clamp forcing a micro gap to shut.
“Walk” your cement and clamps around and let each section have 30 minutes to flash off/harden. Work in small sections so the cement doesn’t dry further along and has to be cemented again.

Make sure to double check your filling and sanding before adding additional smaller delicate parts. Tamiya engineering is brilliantly tight, however due to this the parts can be more prone to popping off unless you’re extra gentle.

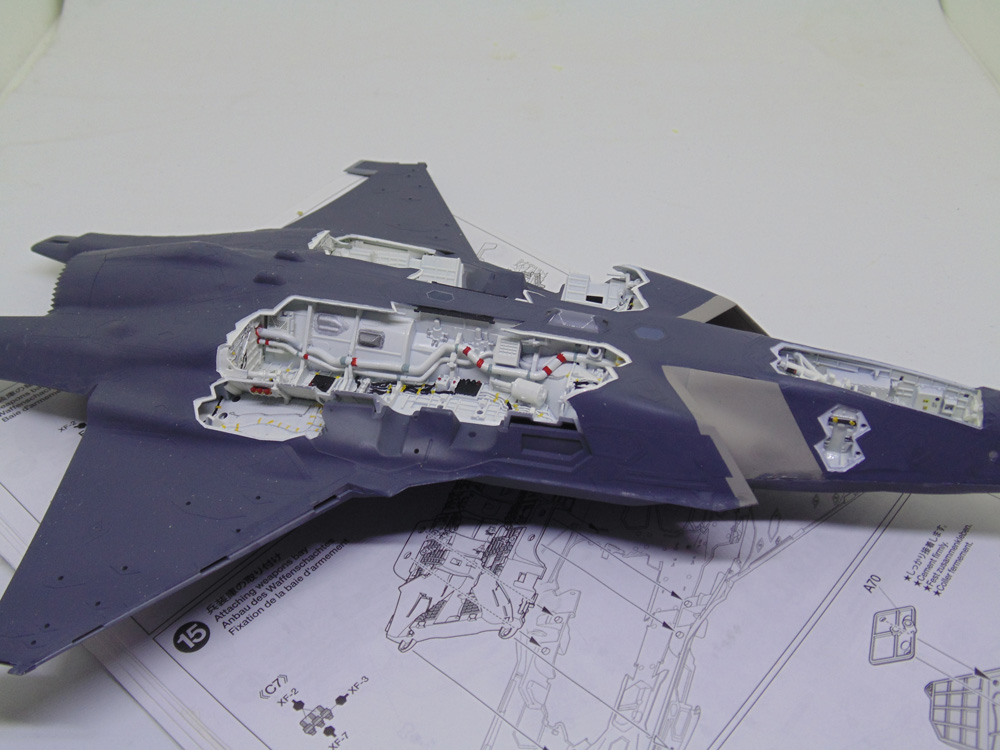
With a kit this complex it’s a good idea to run your finger along the edges and feel for imperfections. Take care of these issues now because they will show up like a sore thumb later after the next round of spraying, just an old builder’s tip.
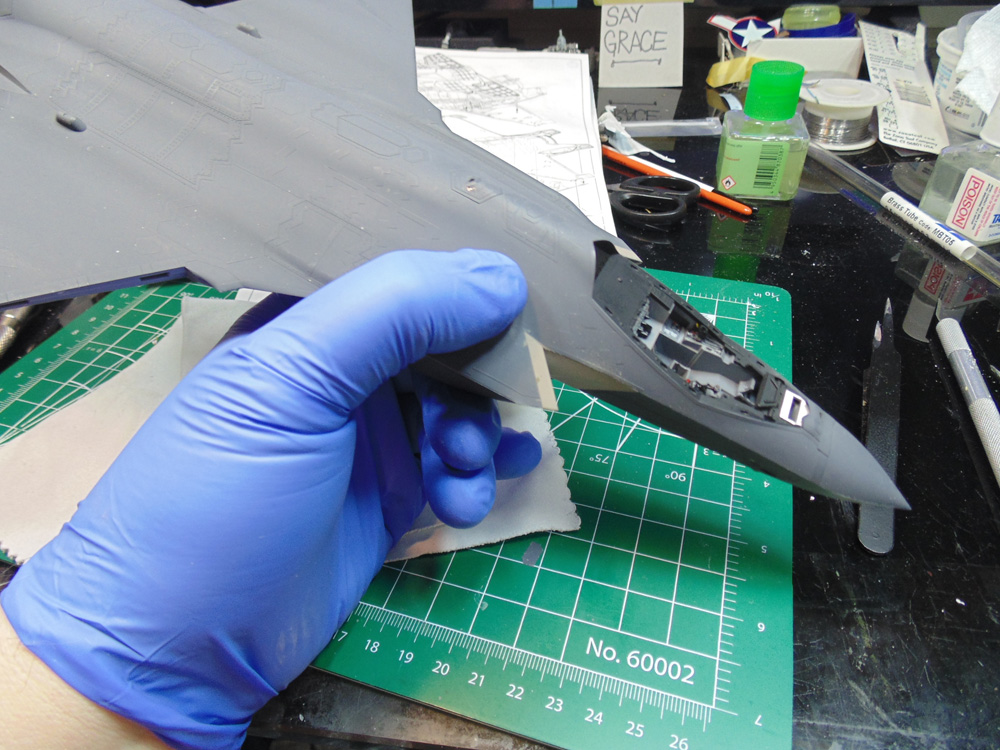
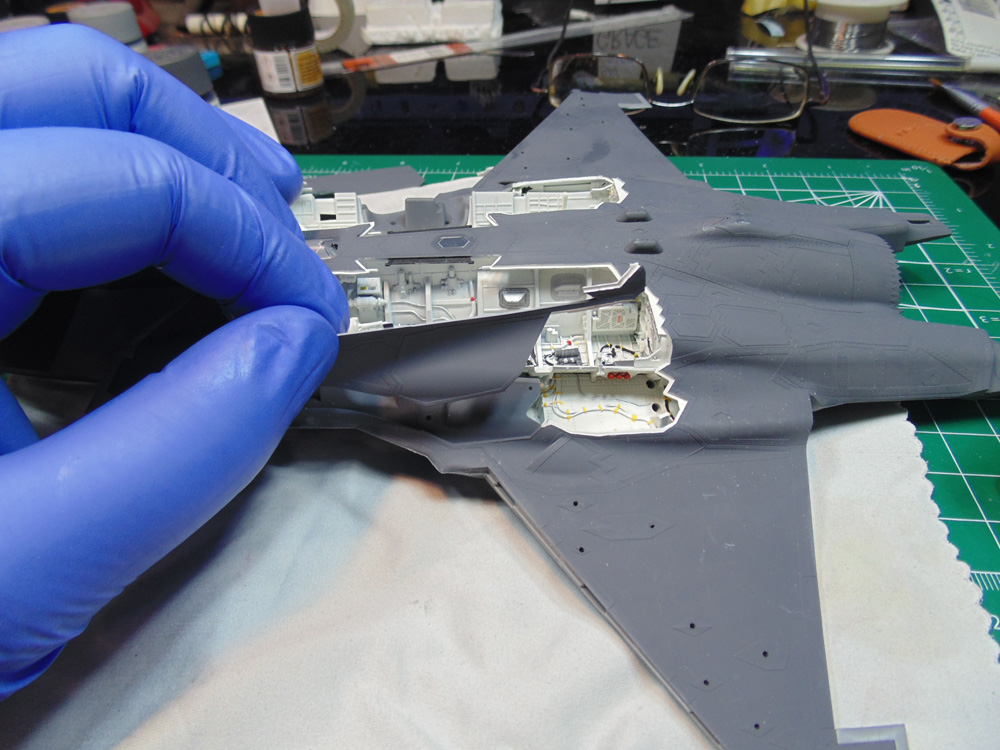
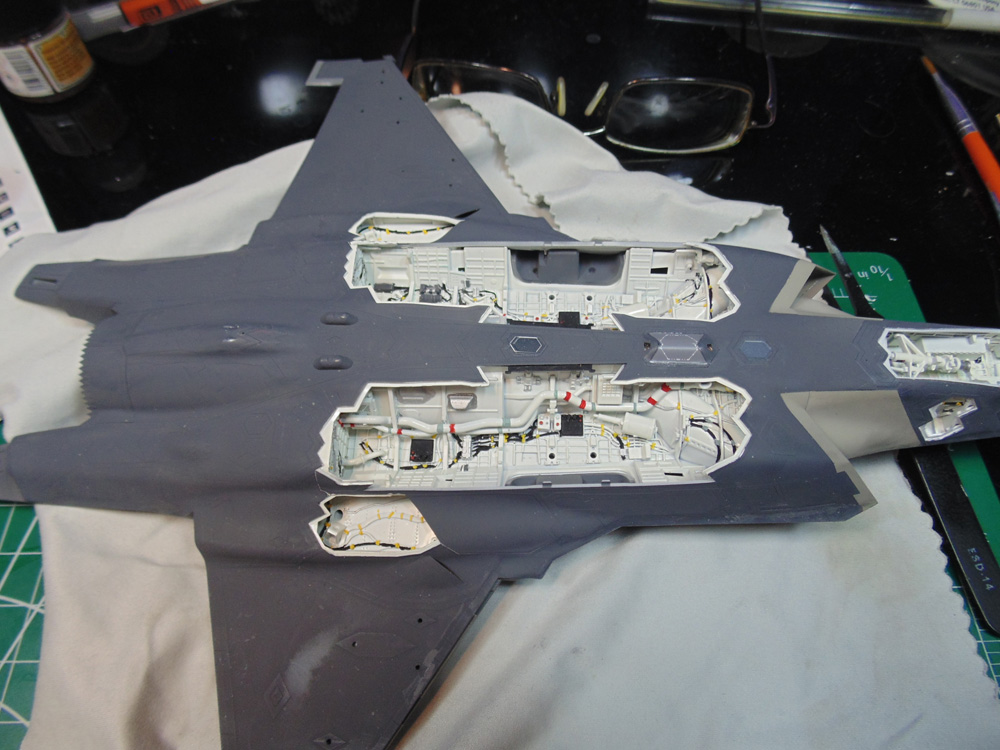
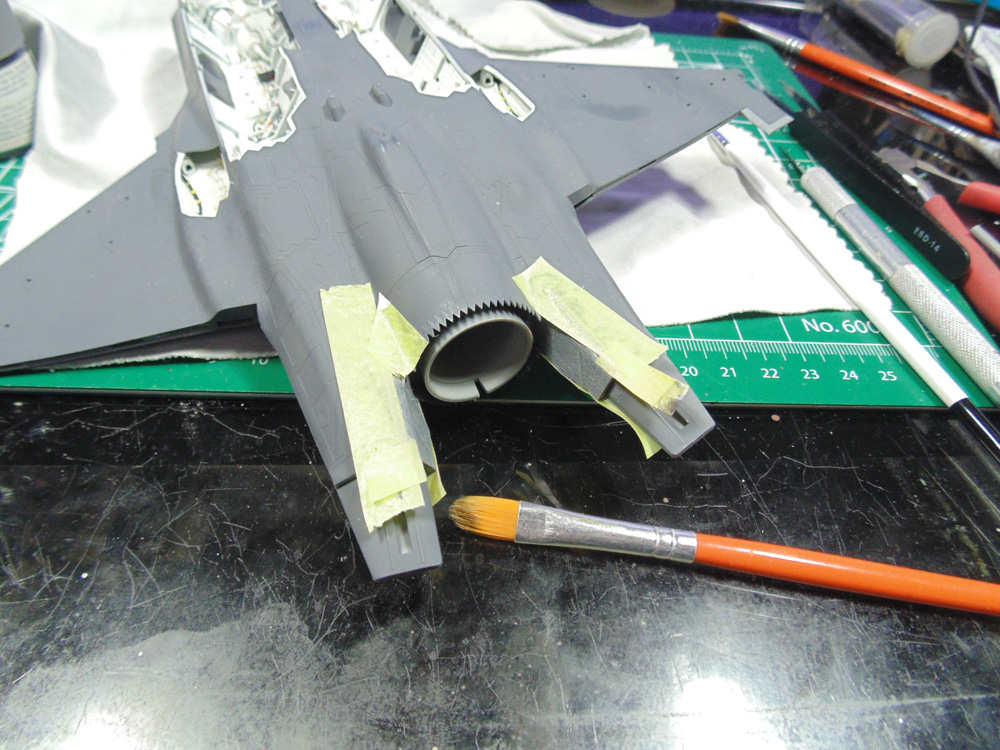
Now is a good time to do any touch-up hand painting in the bays. There will be many additional parts added here taking away from your room to maneuver. Also, wear some gloves from here on in. You’re going to be doing a lot of manhandling and the oils from your fingers will etch into the paint. These marks can be a nightmare to remove. Sunward Hobbies sell “Nitryl” disposable gloves. Just remember the oil from your hands will obviously be on the inside when you pull them off. Give the gloves a good wash, while you’ve got them on, before returning to your project.
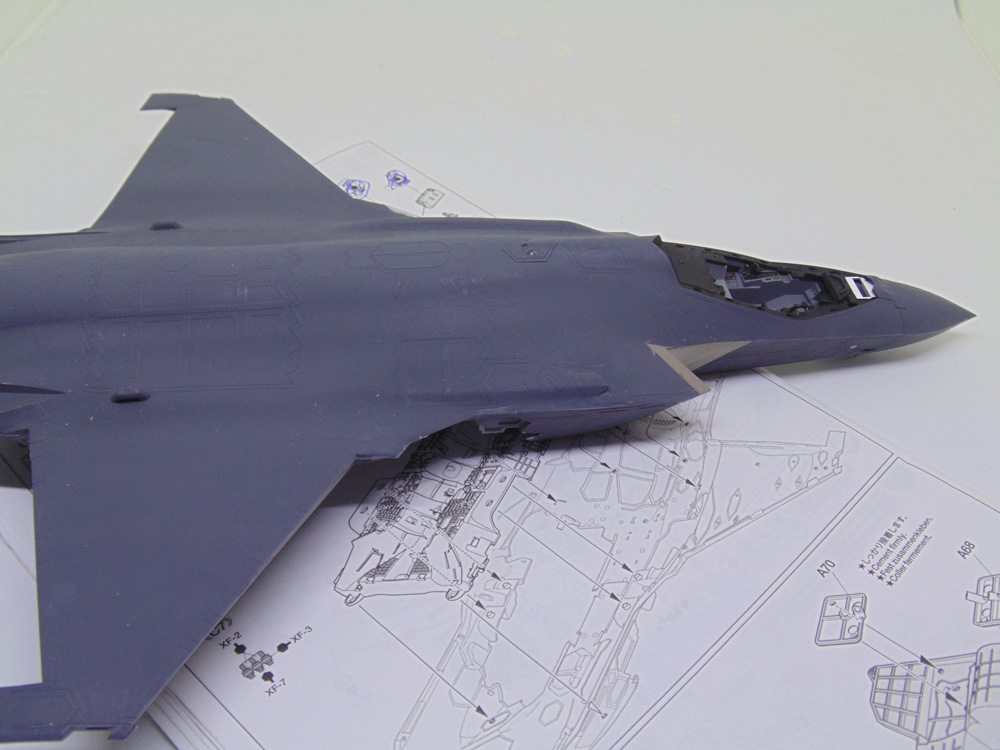
Here you can see the ultra finely smooth sanding. The tighter the area you sand will help tremendously when masking and cut down on the chance of over-spray in unwanted places. Again, wear gloves because the finger oil will reduce the next layer of paint adhering.
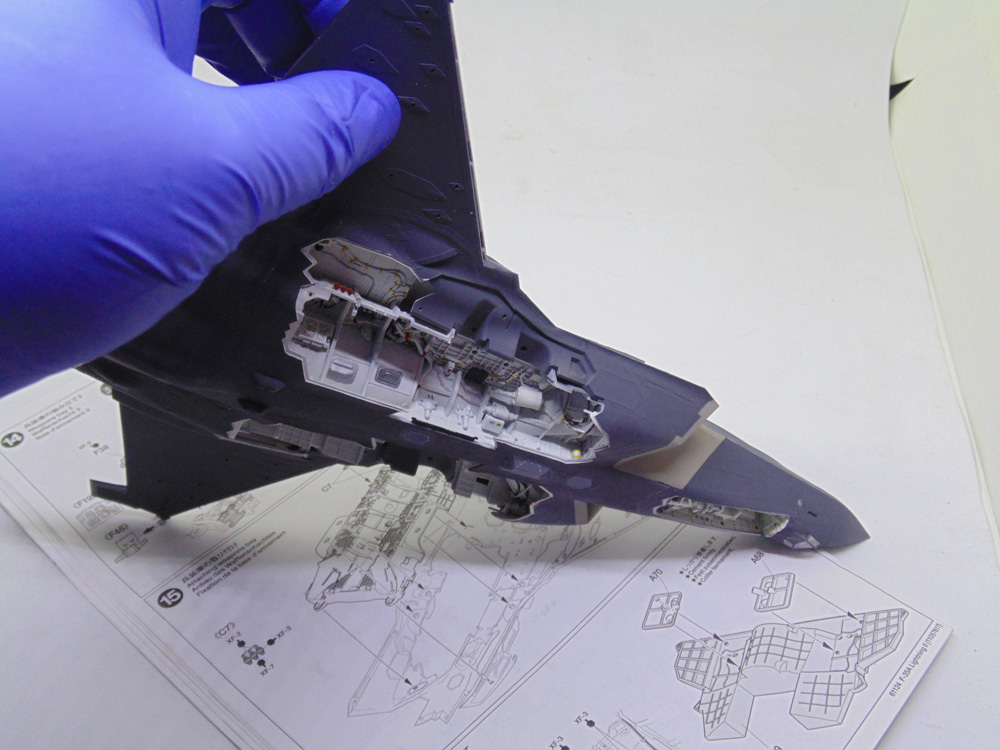
The weapons bay side walls should be sprayed inside first then add your fuselage color. A tiny bit of hand painting is needed on the tips. Be sure to mix the white extremely well when doing things by hand so that you cover the darker color properly. If it isn’t mixed well or you’ll have to paint several coats and lose the detail effect. The other option is to carefully mask off the dark grey and spray.
Make sure you let this paint dry for a couple of hours at a minimum. The dryer the paint the less chance of paint runs when adding the cement. Be super careful when attaching these walls or you might mess up the detail painting. Just let them fall into place, work them into the final location and touch the very tip of your cement applicator on a dark grey seam line. Again, let them dry for no less than 30 minutes, an hour is better.
The fit here is amazing and looks incredible. No clamping or sanding required.
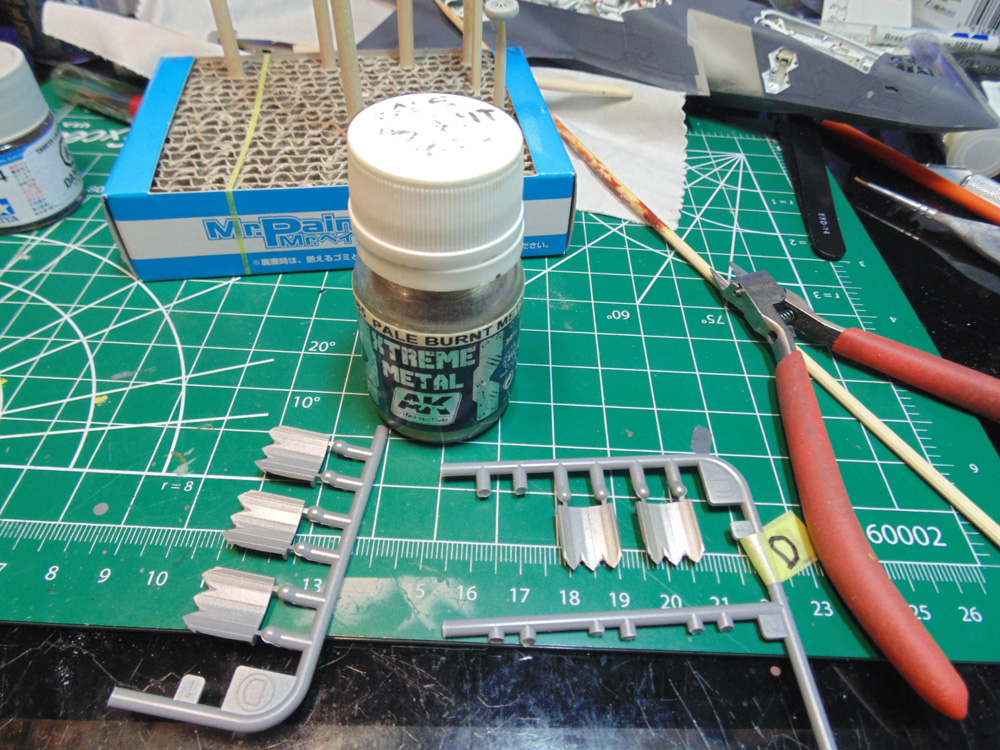
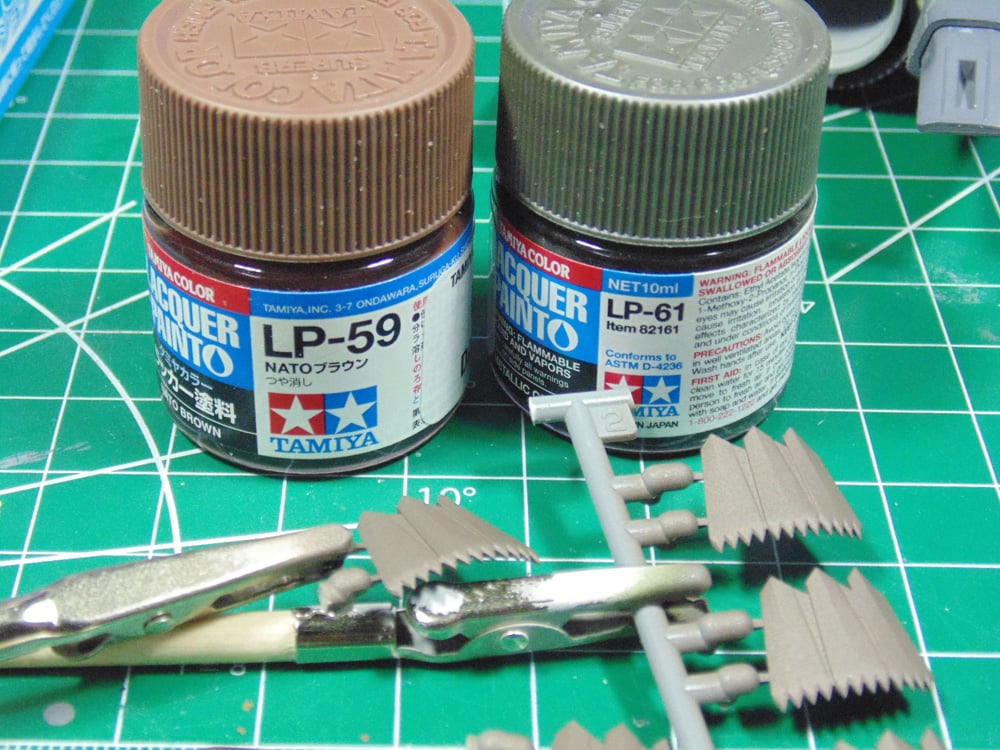
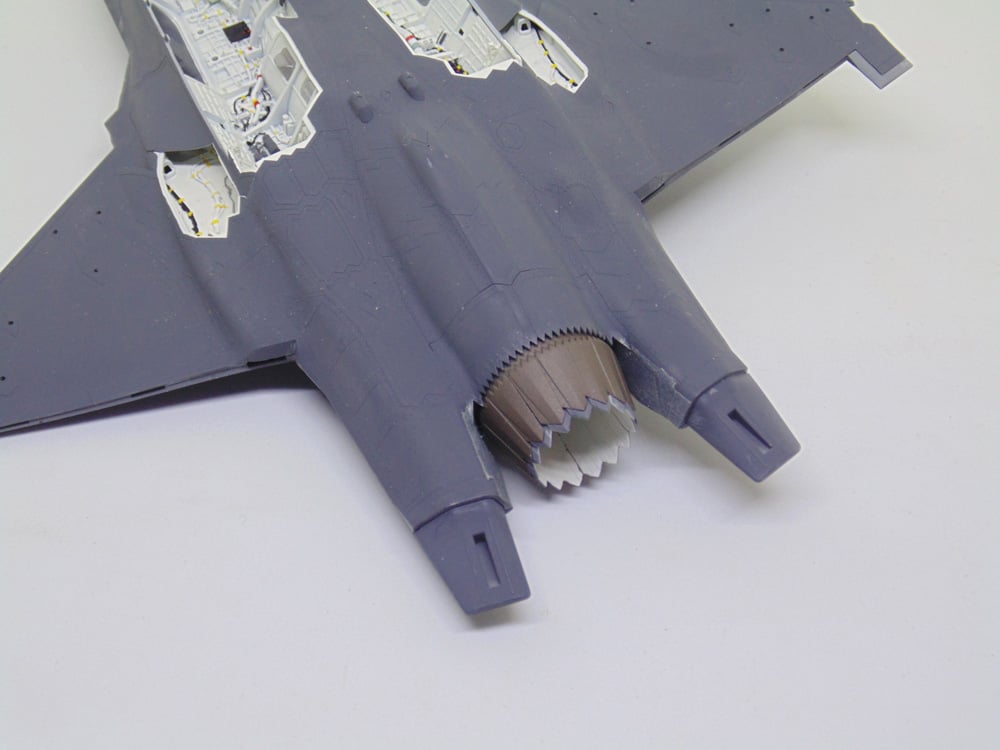
Step 19 has you assembling the thrust nozzle. A complicated little subsection with a half dozen paints. I wanted an undertone of burnt metal to bring more life in the suggested NATO brown and Metallic Grey colors.
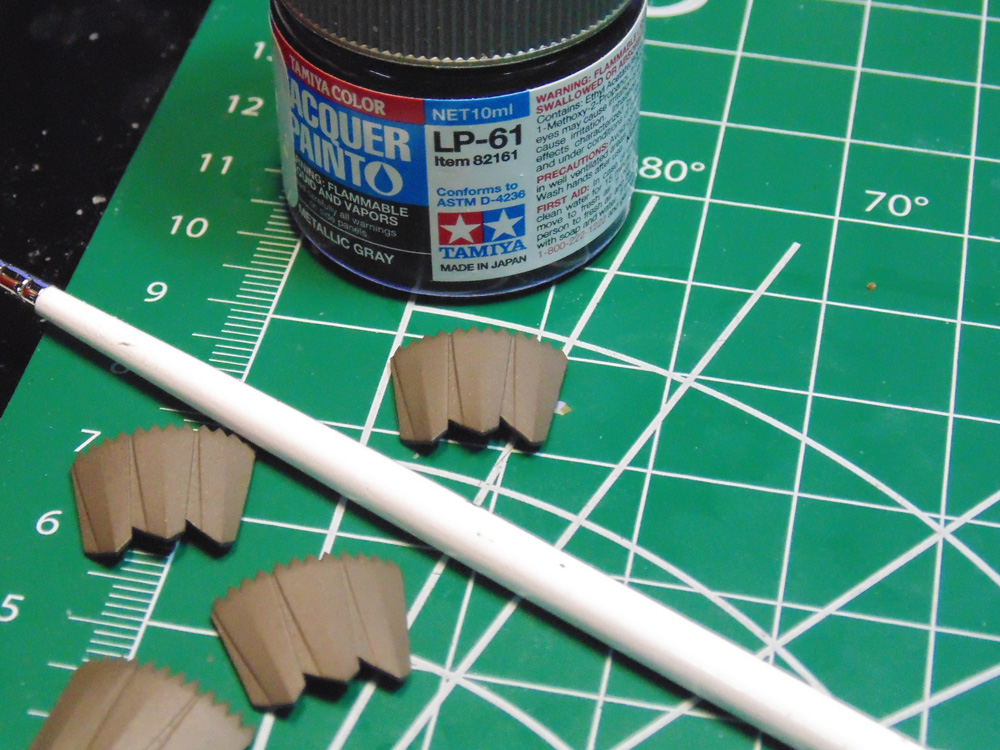
You can see the slight sheen at the tips. It’s a minor thing, but looks much better than just the two-tone LP-59 and LP-61. In a lower light this combination really stands out.
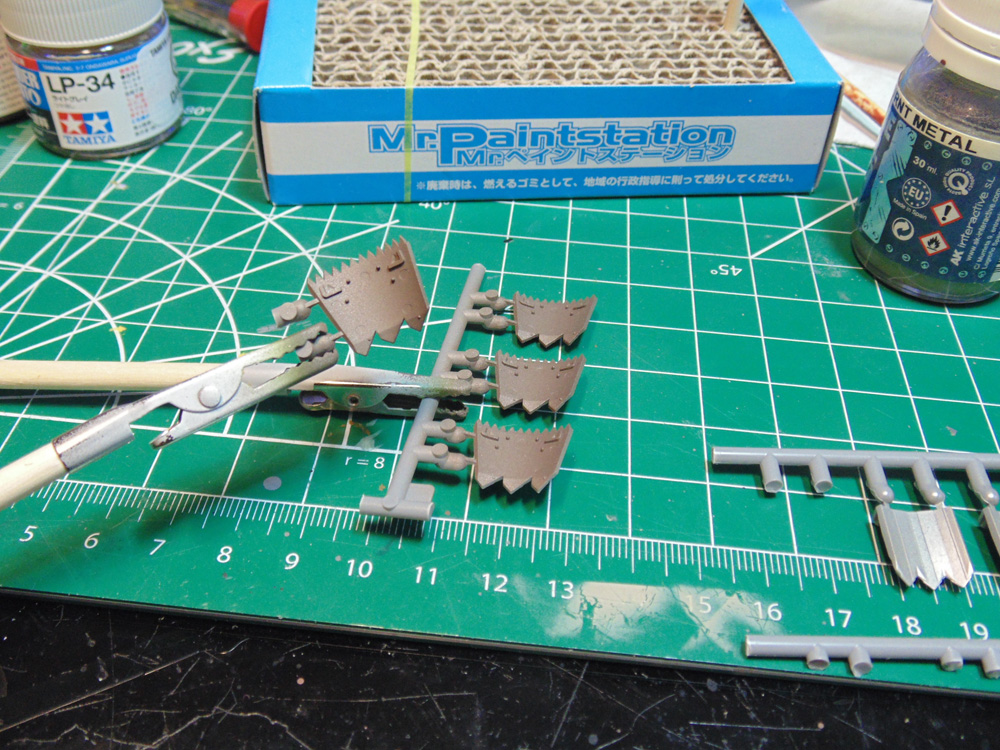
Here you can see the slight gold tint in the Pale burnt metal. This definitely shows through if you mist on the Tamiya colors and looks so much more realistic.
Beside the nozzle go two decals on either side. These decals look fine, but a little on the drab side. Their color is neutral grey and I wanted to add a hint of metallic. 502 oils are perfect for little tasks like this. Let the oils dry for 12 to 24 hours because the pigments are very fine and will make an awful mess of your gloves and parts touched later.
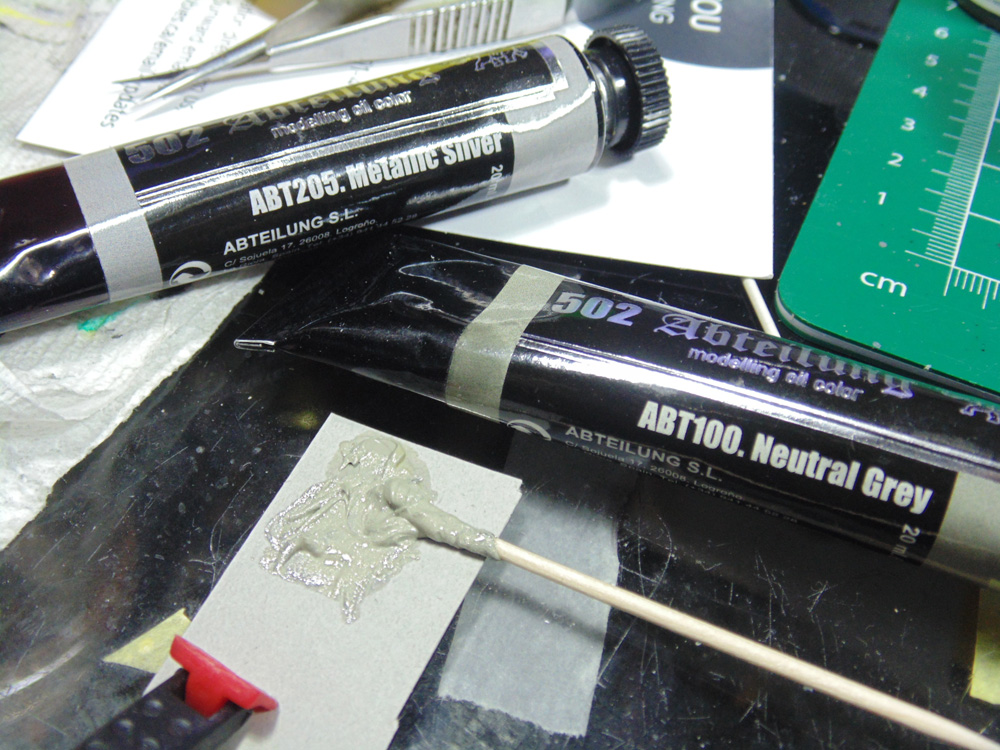
Masking off the areas is a good idea. These oils can be feathered easily for a nice smooth finish. Use a high-quality blending brush, such as this AK weathering product. The hairs are soft enough to feather the pigment yet strong enough to keep their shape. Plus, they’re easily cleaned with AK Interactive Xtreme Thinner AKI 470.
The outside of the nozzles will be sprayed as were the insides. Here it’s super important to mist the blended colors on the AK burnt metal. Your eyes will see the complexity of the layering even though you may not be able to describe what you’re looking at. Hold your airbrush back a foot and make a quick pass with low pressure. Examine the work and then determine if you have the look you want.
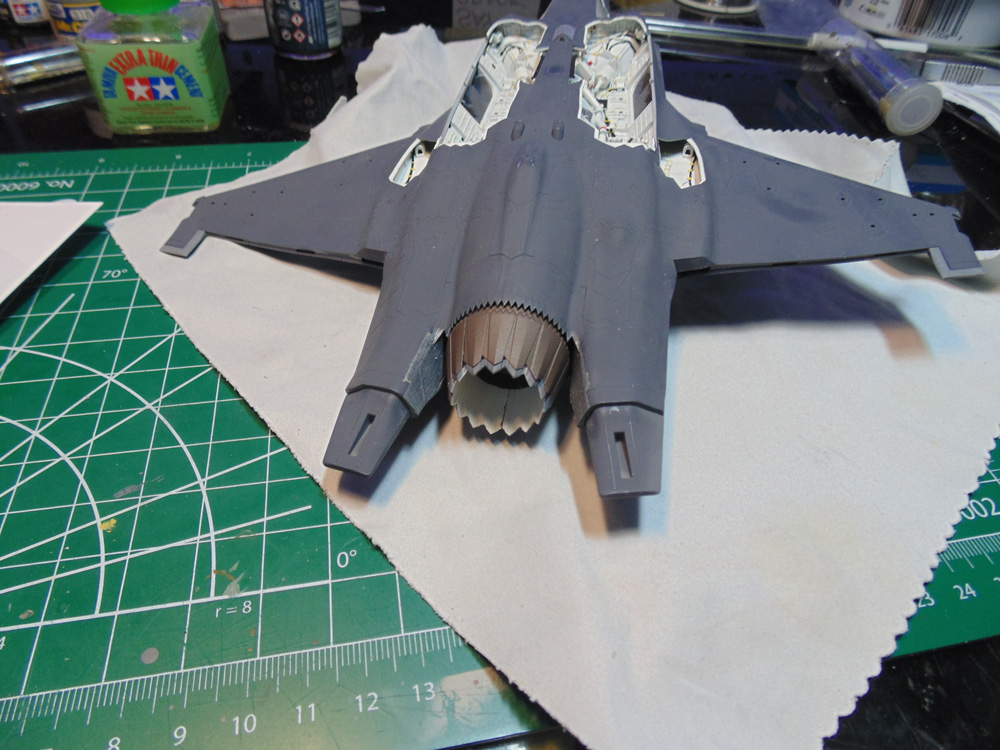
The insides of the tips need a mixture of LP-34 and 61. I’m waiting on a Sunward order to complete this small task so the nozzle assembly will be set aside. You can, however, dry-fit it to appreciate the effort.
After you’ve sprayed the white interior parts, assemble them. The fit with the ring is incredibly tight. Scrape off the paint on the wide guide posts and don’t be afraid to force them down and level with the others.
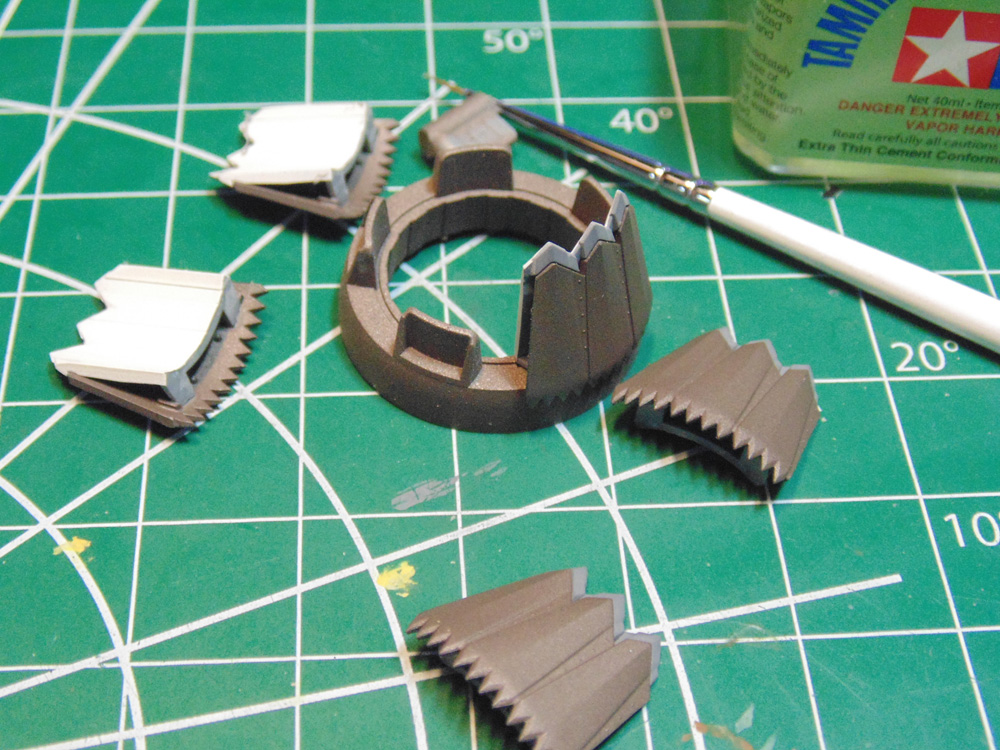
Any seam lines will blend in when the panel line pigment is added, but if you wish to hand paint them it’s your call. There’s just too much detail not to highlight them, plus it looks way more realistic to see all the lines. Remember, this subsection is only dry-fitted in place to show you the look.
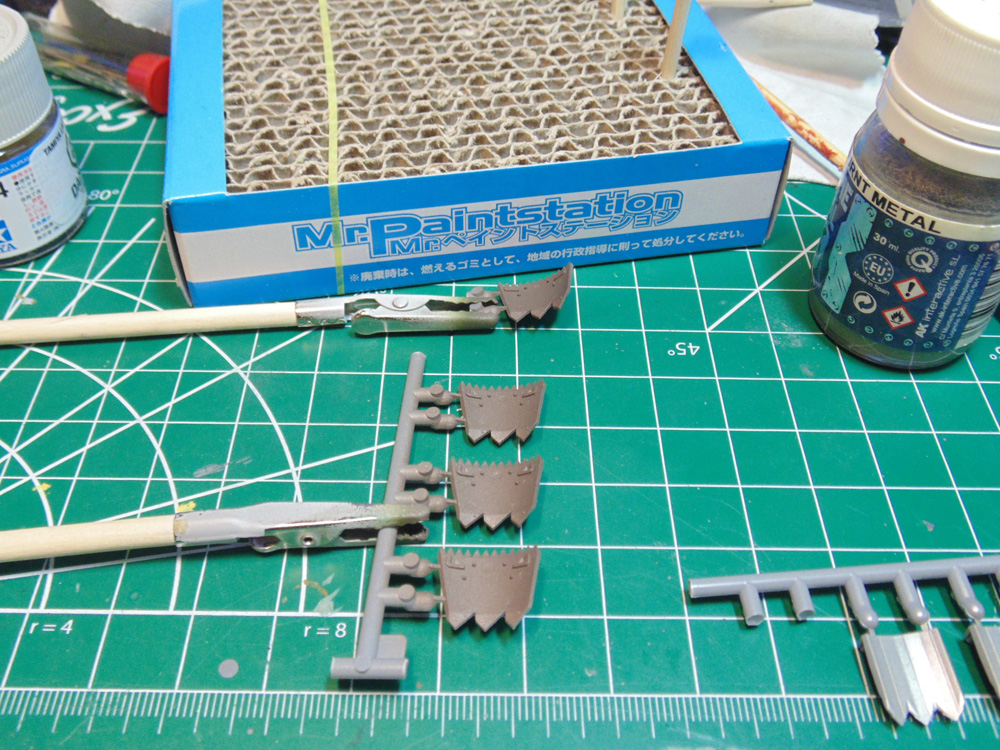
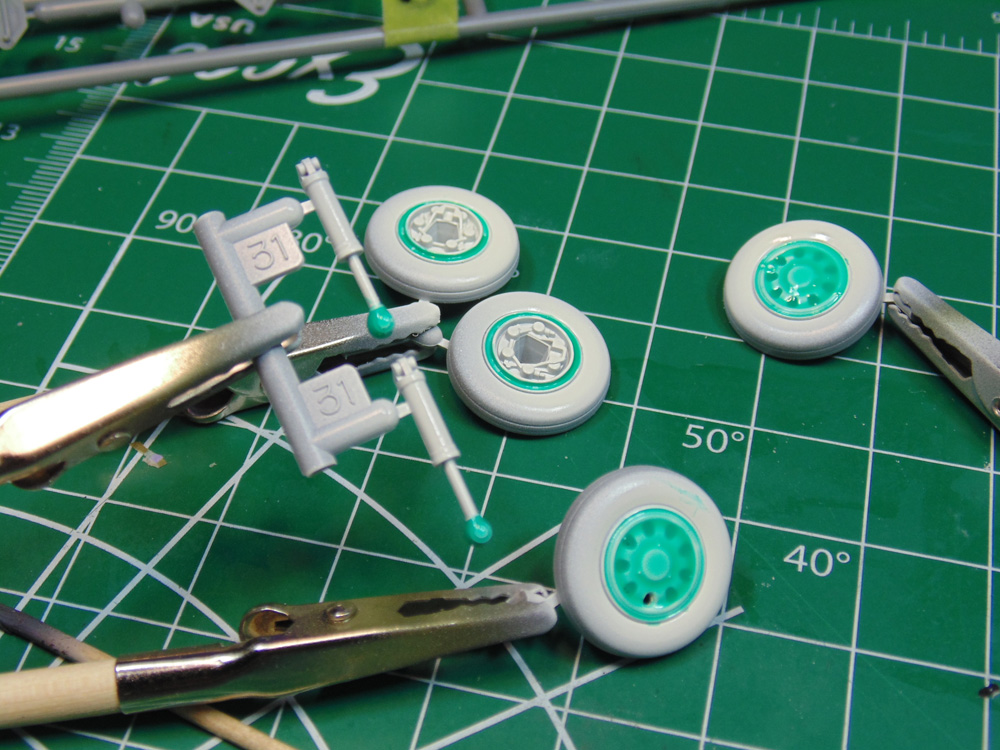
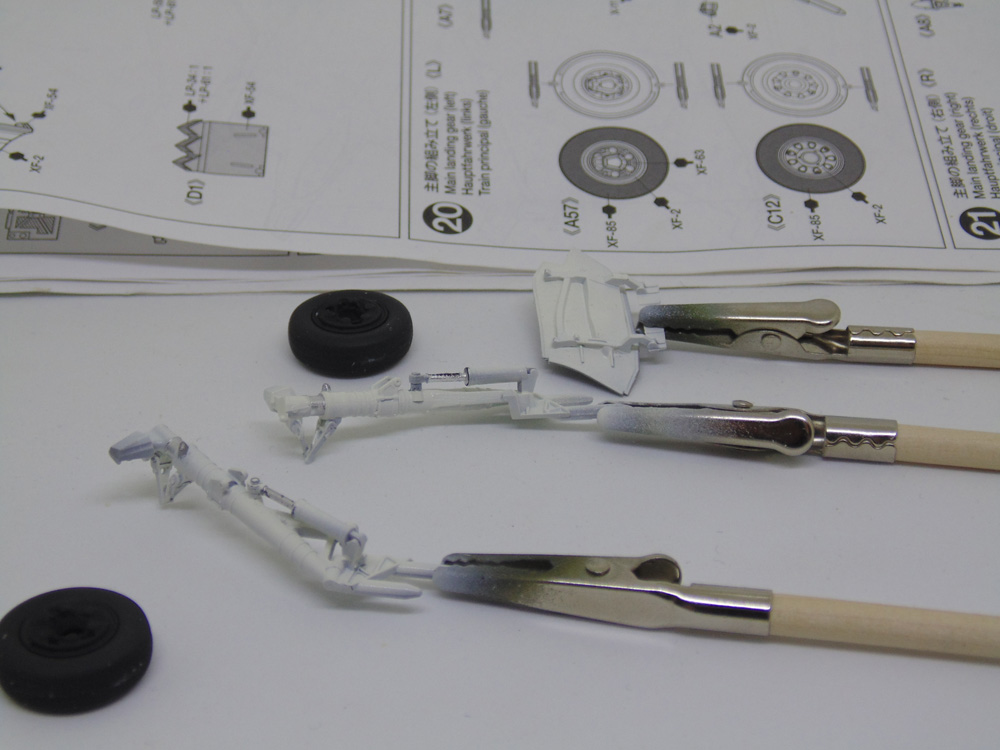
Steps 20 and 21 are the main landing gear and another complex bit of Tamiya engineering. The white, naturally, was sprayed first, but masking it off with tape was going to be problematic. Let the paint dry for 12 hours then apply masking fluid. This can easily be removed later for a finished look and not hand painted.
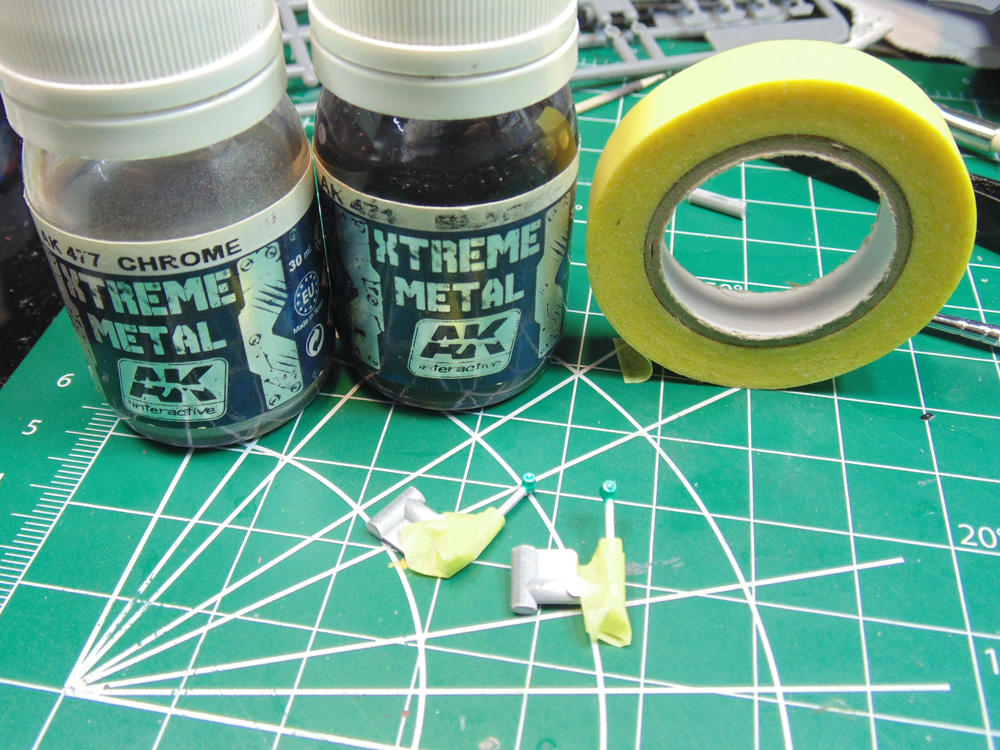
Regular tape will work fine for the piston housings. Now I’m going to add some life to them with AK Interactive Chrome AKI 477. The Black base really brings out the luster of the Chrome. I understand this might be a lot of steps for such small parts, but it adds so much more depth to the overall detail which anyone will be drawn to examine.
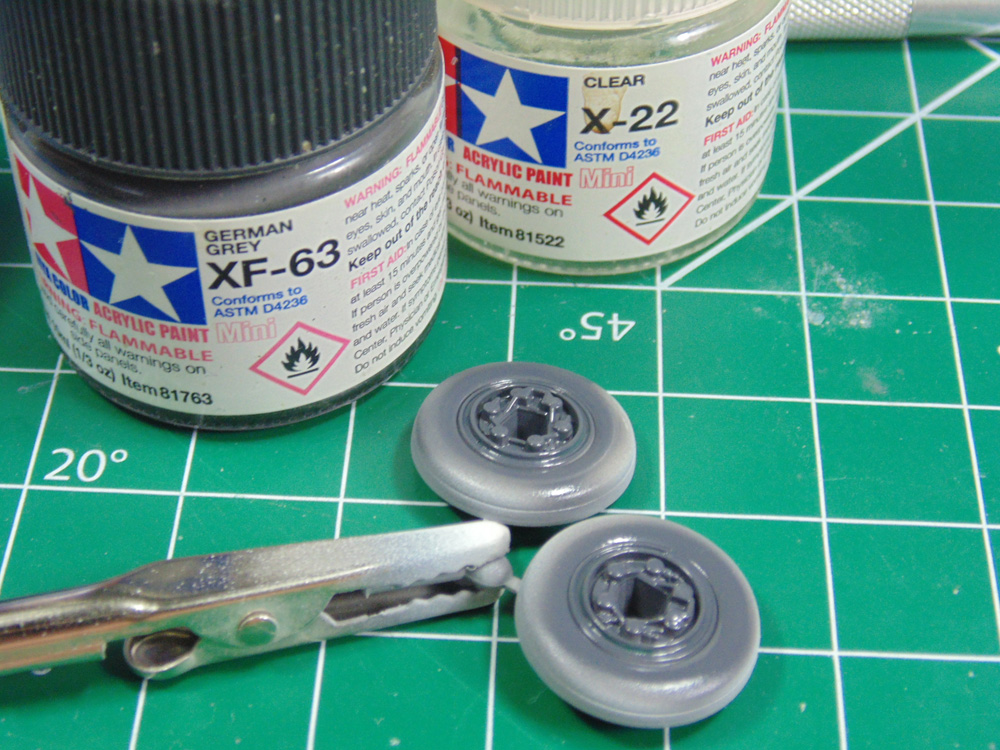
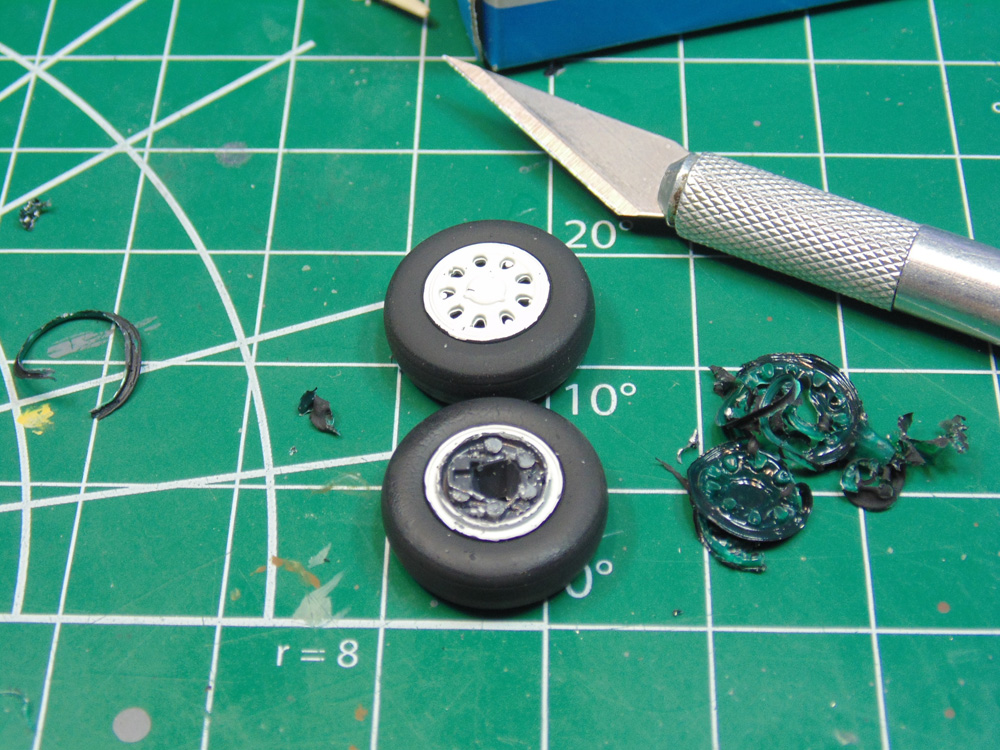
The insides of the wheels are a Darker German grey. Masking with tape would have taken ages and been frustrating to say the least. First, let this grey dry for 12 hours. Even though it has been diluted 50/50 with Tamiya lacquer thinner 87077 for fast drying there is still the acrylic thinner from the jar and needs long to harden. Next, thin and spray an even coat of Tamiya X-22 clear and let it dry for 12 hours. This gloss surface will help the masking fluid to peel off easier as opposed to the flat finish of the grey.
During the wheel dry time the chrome should have dried enough to remove the tape and fluid masks. Use a very sharp set of tweezers and if needed a hobby blade. Excel offers a three pack set of these tweezers that are needle point sharp. This will allow you to pick away at the masking materials. Be sure to wear your magnifiers to carefully grab the dried mask and not harm the paint.
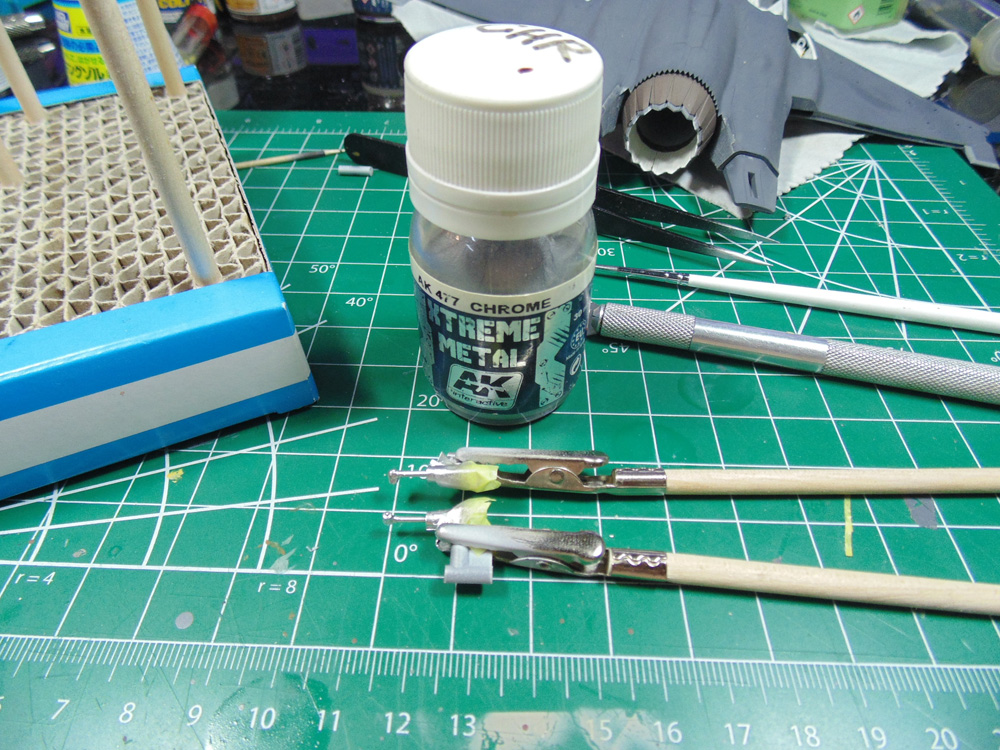
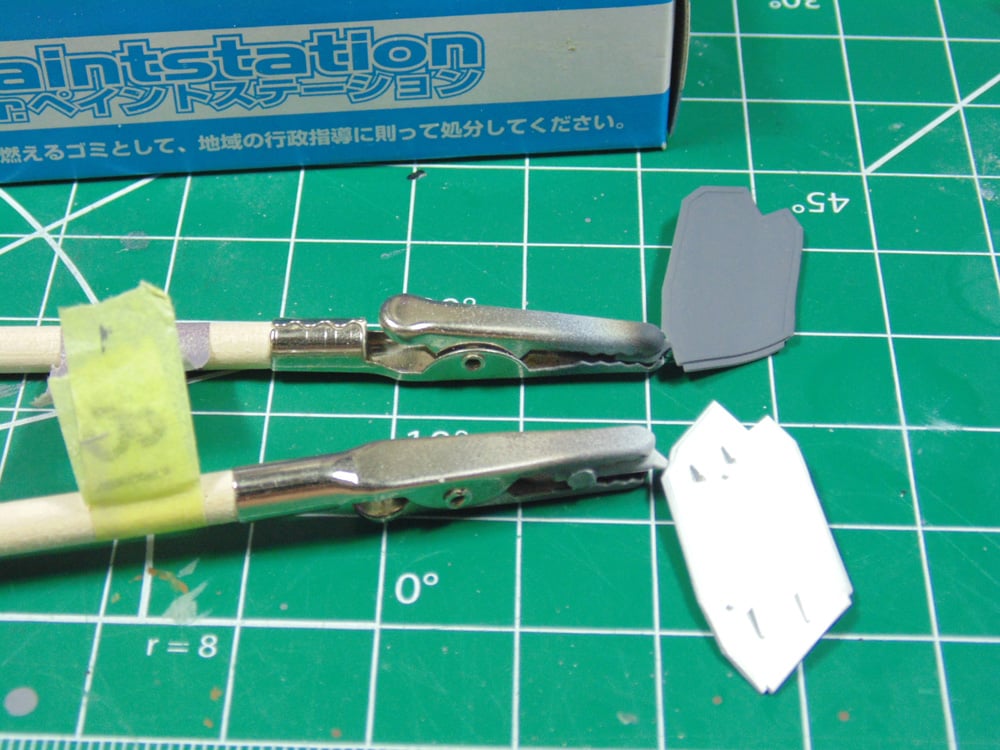
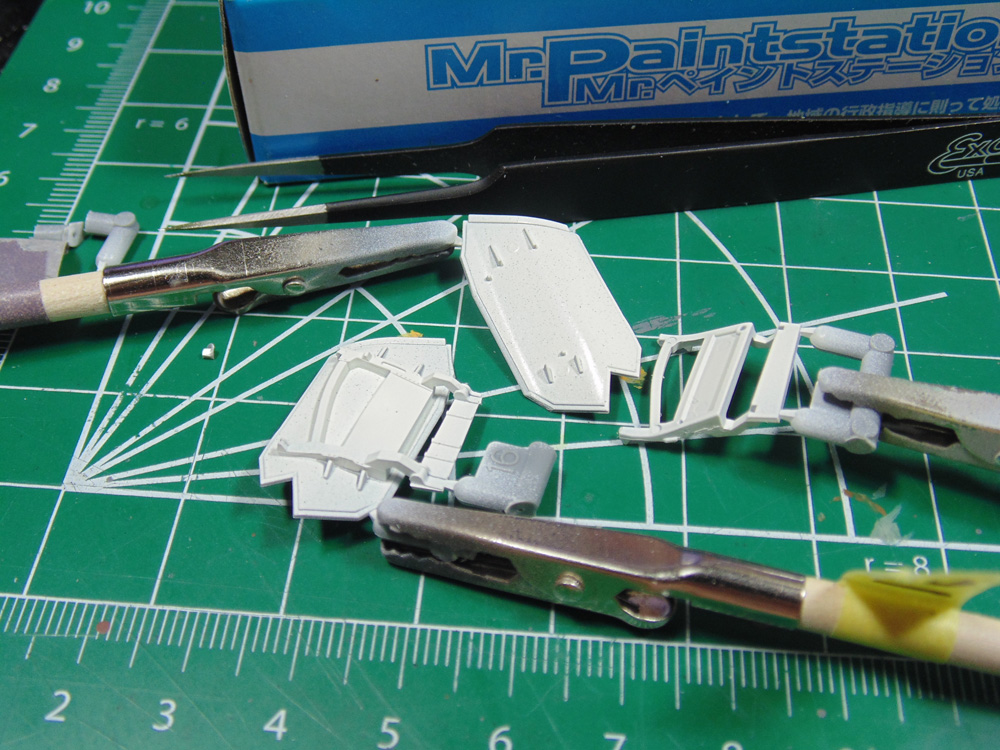
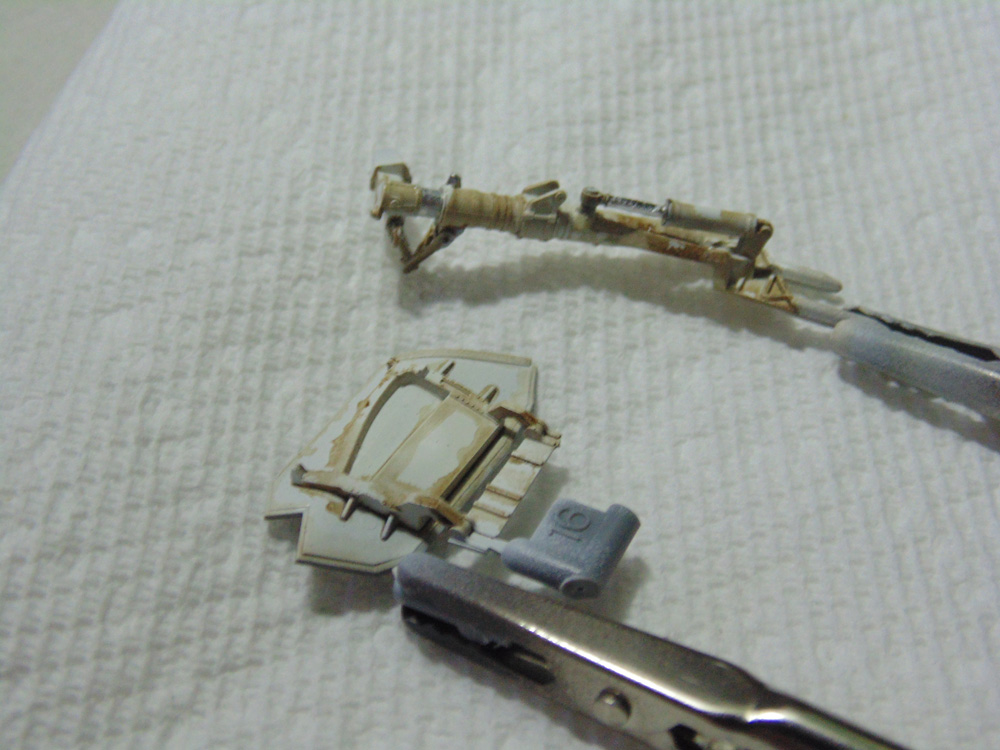
There are plenty of tasks to start while the wheel paint is drying. These landing gear bay doors will be added later, yet can be painted in advance and allowed enough time to properly dry. Also, if you’re worried about getting similar parts mixed up add a label to your parts sticks, as you see number 17 and 18 on the tape.
The landing bay doors are keyed to go on one way only to their respective mates. Here’s where you should remove the paint from the connecting area of the framework. You’ll get a much better fit and make weathering stand out more.
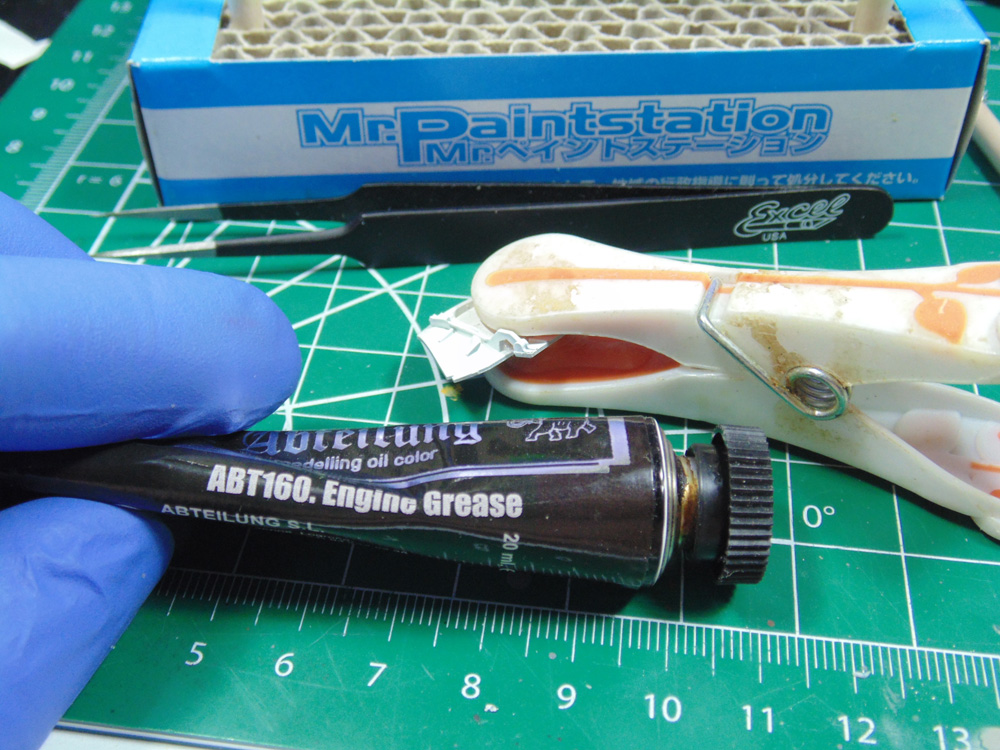
So much of the detail gets lost with monotone white. 502 engine grease has just the right orange tone for the look I’m after. It’s also less stark than black and cleans up much faster. The thinning ratio depends on the look you want. For me, it’s a lighter contrast for modern aircraft, especially the F35A model going to Denmark.
The tires were sprayed with Tamiya rubber black then sanded and resprayed. Again, adding another dimension to the look.
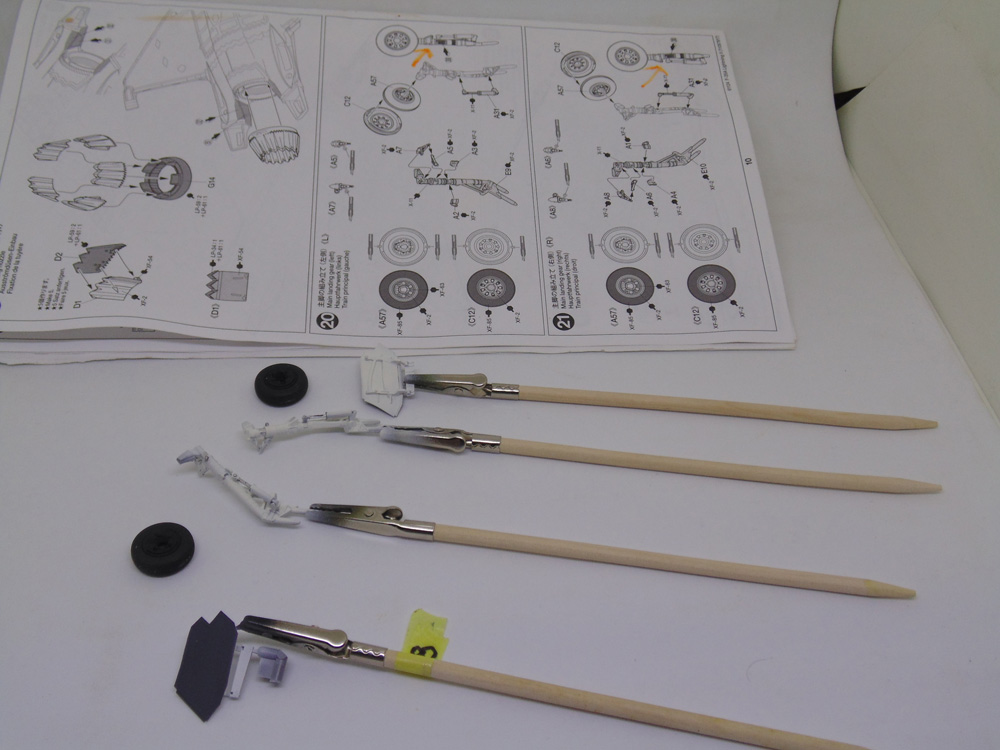
Here’s a closer look at the landing gear. Besides the molded detail, which is impressive enough, there are five additional parts to add to the realism. But wait, there’s even more to come! When adding these tiny bits I strongly recommend letting the cement setup for a minute then adding another droplet to both ends. This will allow the part to cling to its mating surface and not keep falling off. Ask me how I know.
Don’t fret if your masking job isn’t perfect. There will be a dark wash added that will cover-up any minute flaws. However, you can do some touch-up painting caused by the blade and the tweezers.
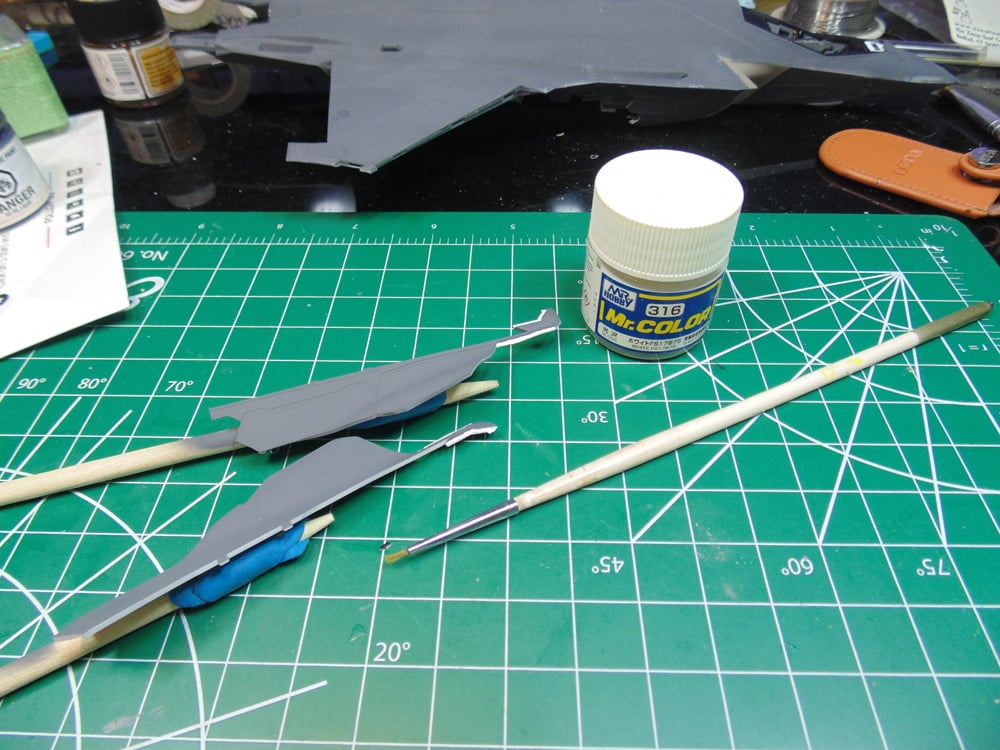
And now for a teaser into the next build tutorial. While this looks like a heck of a mess when next you see them it will become clear why it has to be done this way.
Thanks everyone!
If you have any questions about the products or methods used in this article, please feel free to ask the staff when you pick up or place your next order from Sunward Hobbies.
About the Author:
H.G. Barnes is a former voice-over artist and retired sales and marketing professional. He’s the author of two large volume science fiction adventure romance novels with many more in the works. For well over 40 years he’s been building scale model replicas and now does commission work for clients in Canada and the USA, plus completes projects for companies in Asia and Europe.
Currently H.G. is involved as an Associate Editor with KitMaker Network’s Online Magazine Channels.