
Airfix Supermarine Spitfire F Mk.IXc 1/24 Scale A17001 Build – Part 2
David will continues this series by building the cockpit of this large kit- the Airfix Supermarine Spitfire F – Item 17001
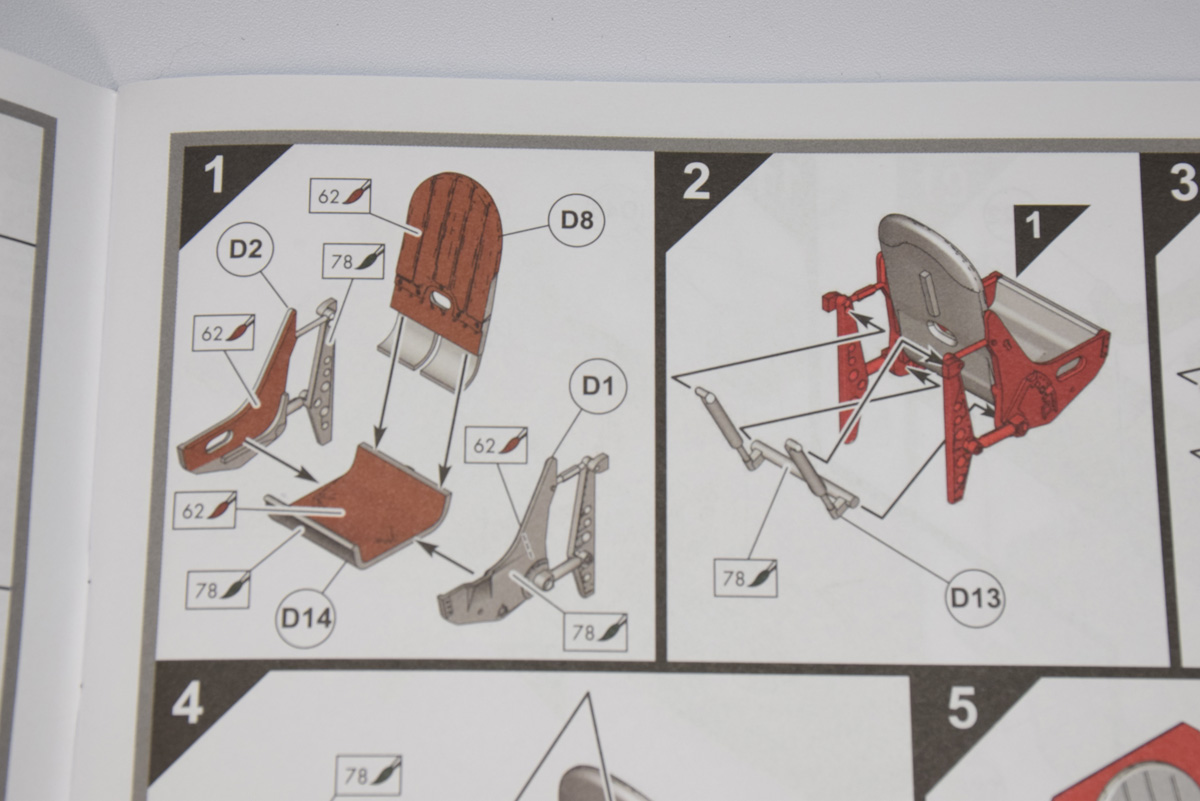
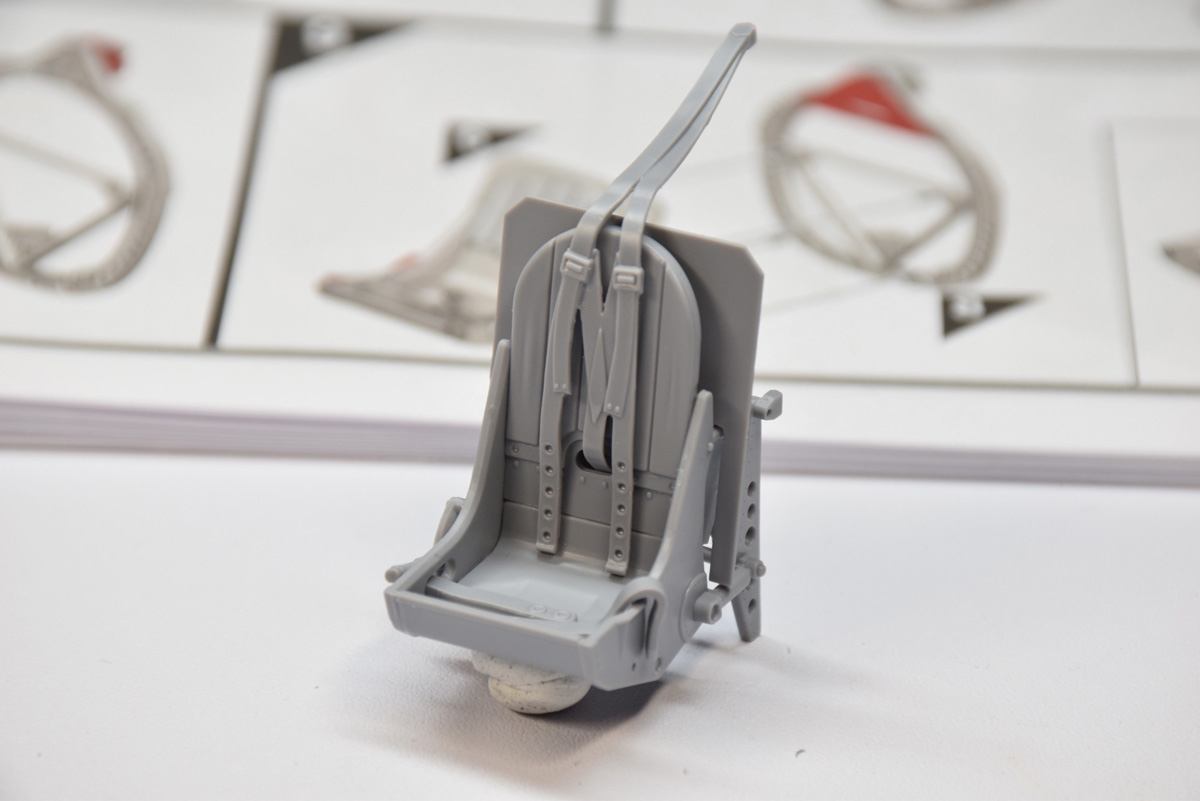
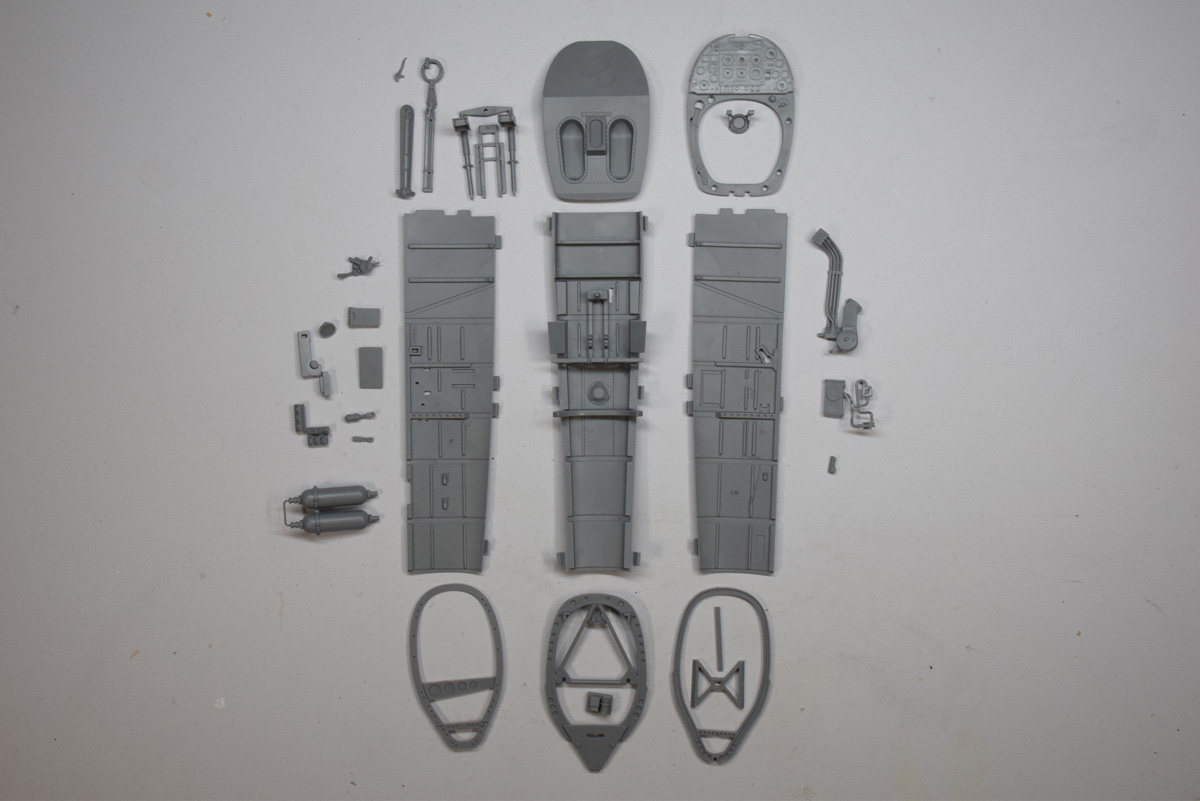
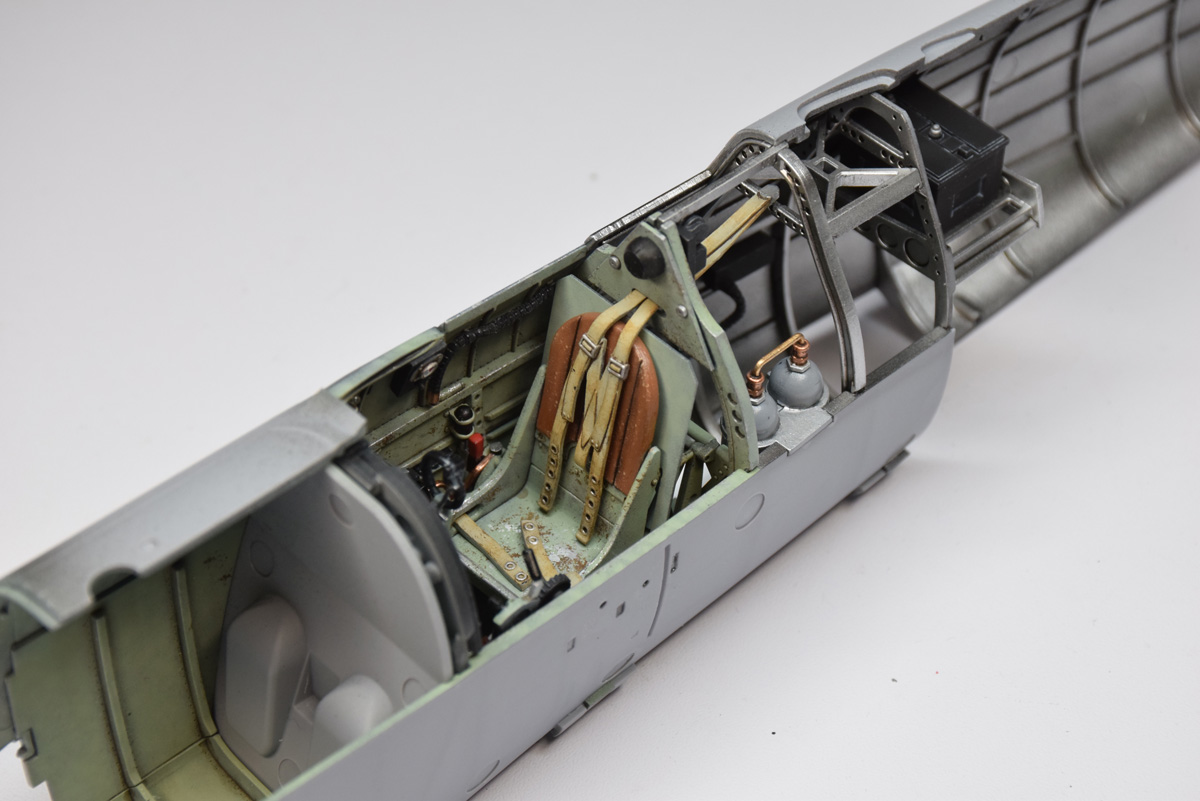
Like 99 percent of aircraft models, construction begins with the cockpit so why don’t I start there. Step 1 is building up the pilot seat which is made up in four sections, the seat, side rests, and back with leather cushioning. I glued together most of the seat except for some pieces as according to my paint process, I don’t like to glue two parts together if certain crevices will be hard to reach with the airbrush.
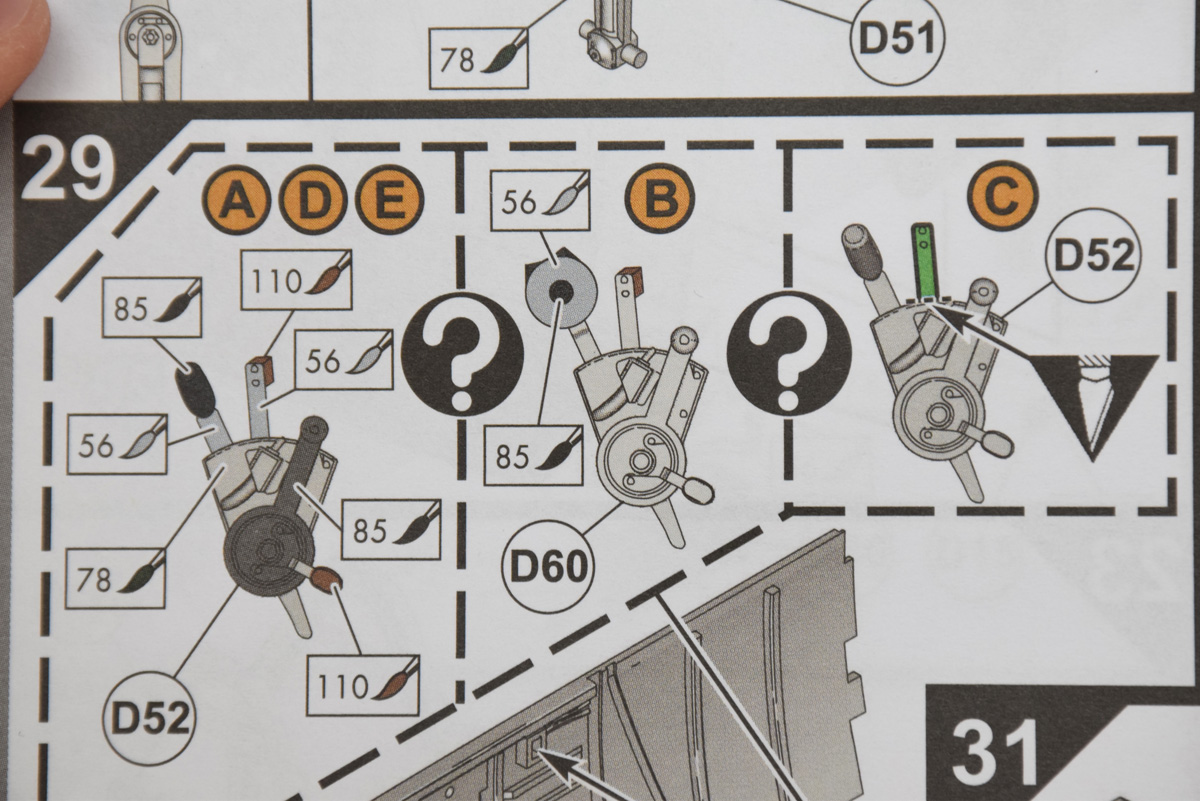
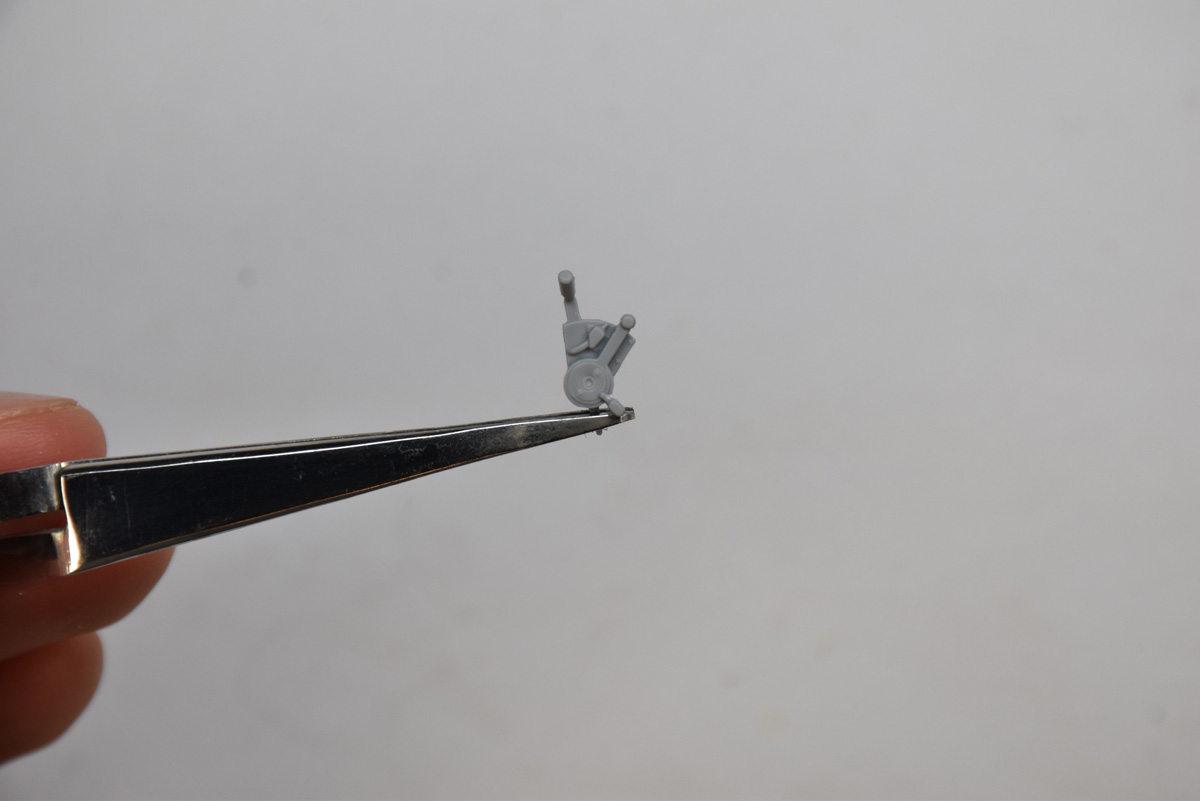
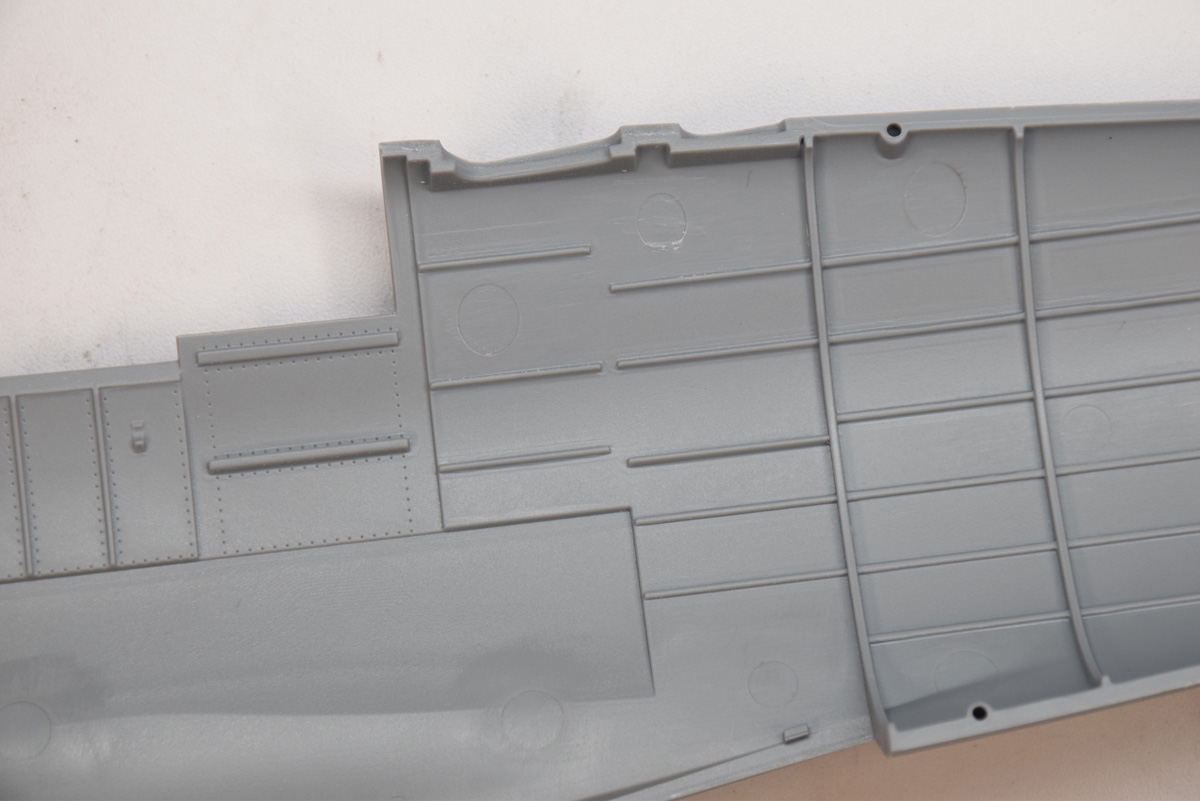
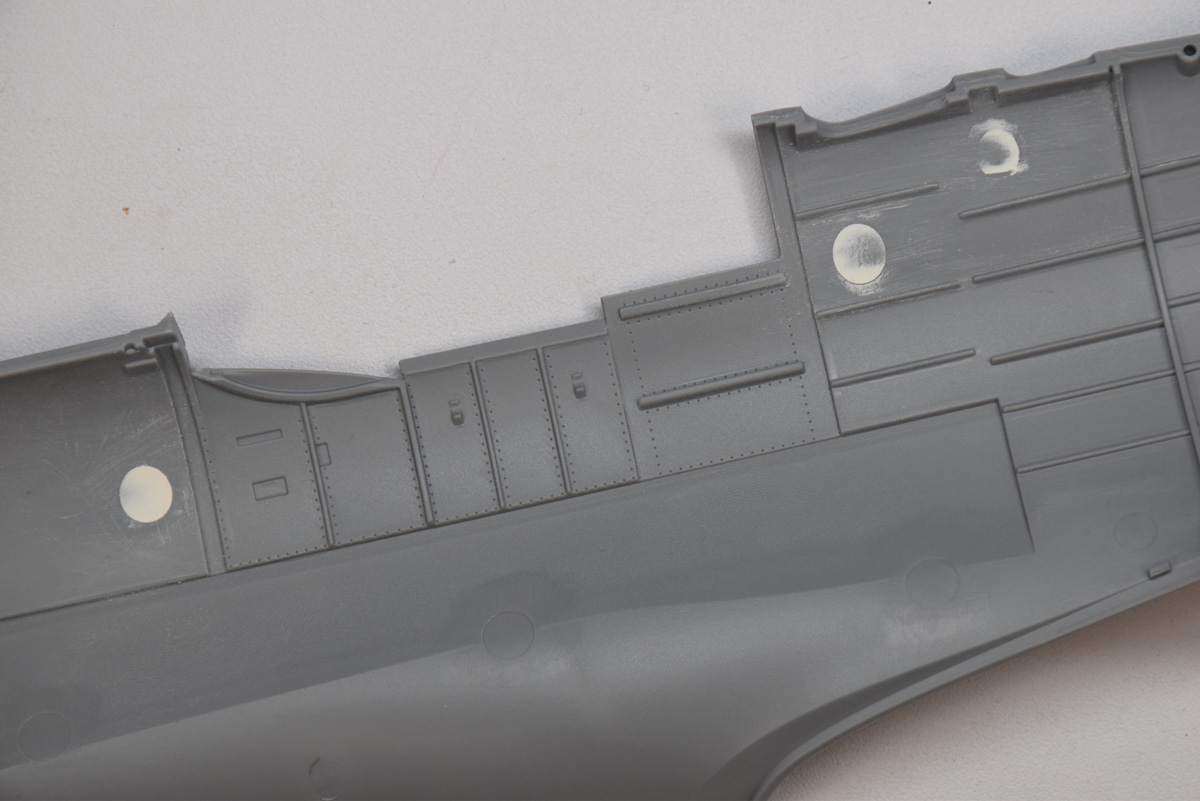
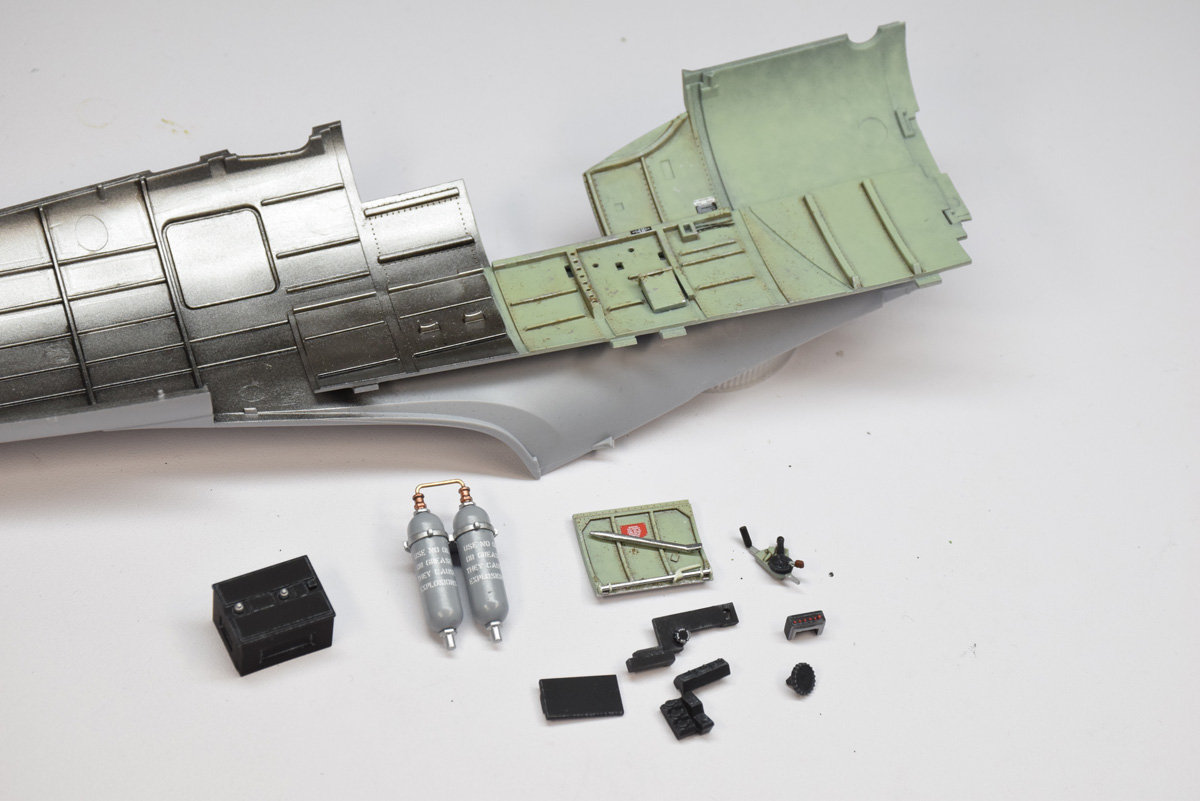
Next comes the bulkheads which are already one piece parts as well as intricate details such as the rudder pedals, control column, radio, landing gear hydraulics, and oxygen bottles Also worth noting, this kit has different marking options which each have subtle differences in the construction. For example I am building marking C thus the throttle in the kit needs to be slightly modified by cutting off one lever. Whichever version you build, be mindful of modifications like these. Plus as I noted in my unboxing, there are sink marks in the fuselage which will be visible if not dealt with. I filled these in with Tamiya White Putty, waited for it to dry and sanded the excess off with Tamiya or Alpha Abrasives sanding sponges.
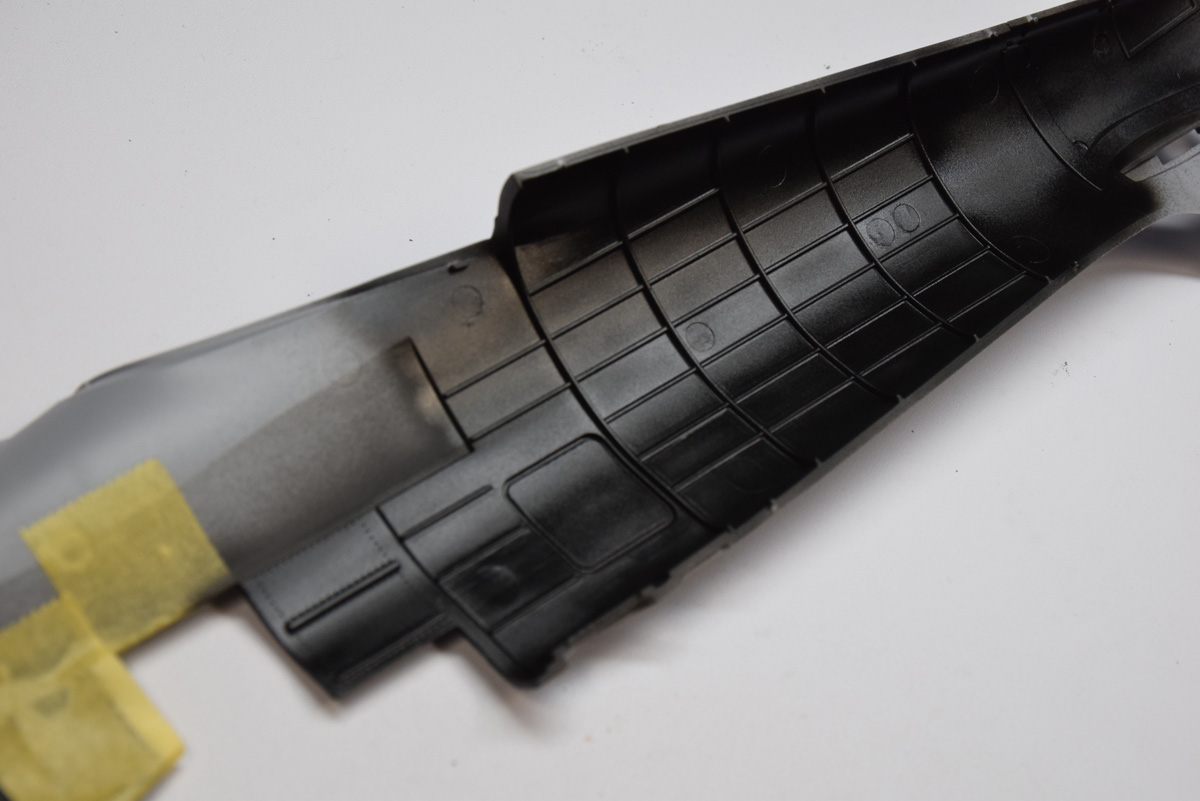
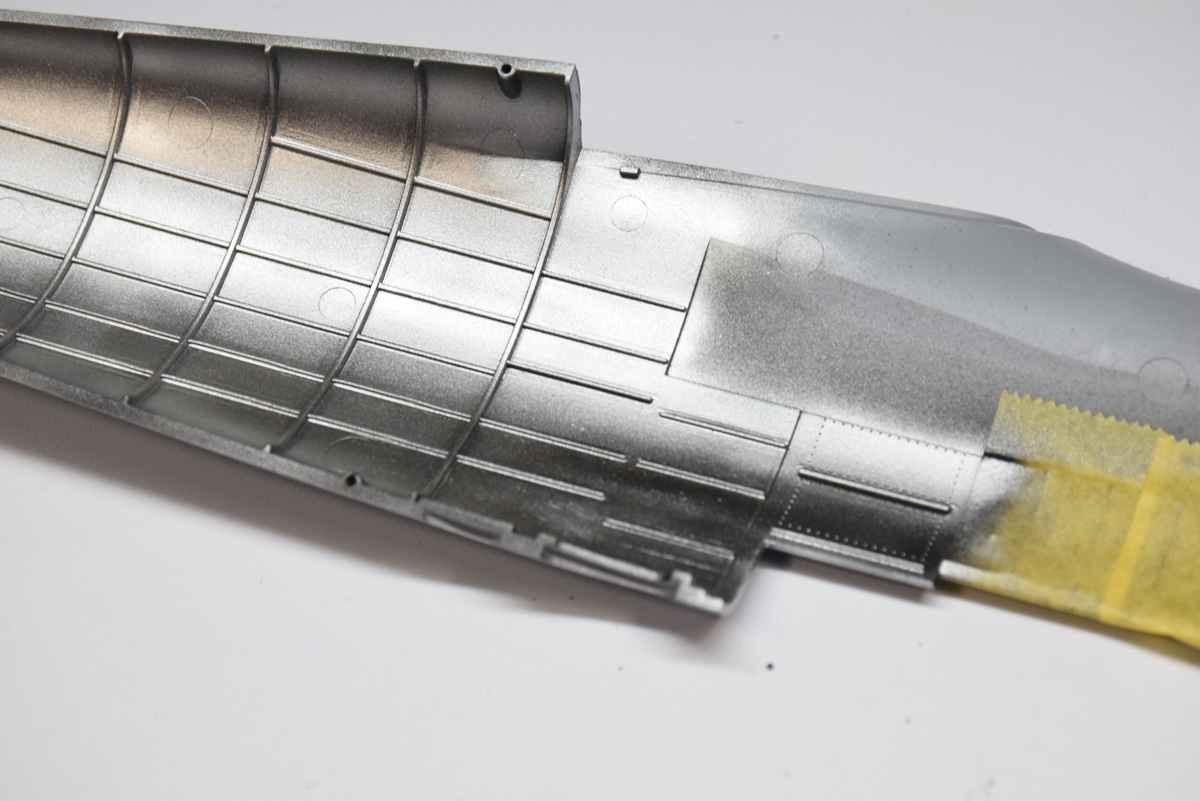
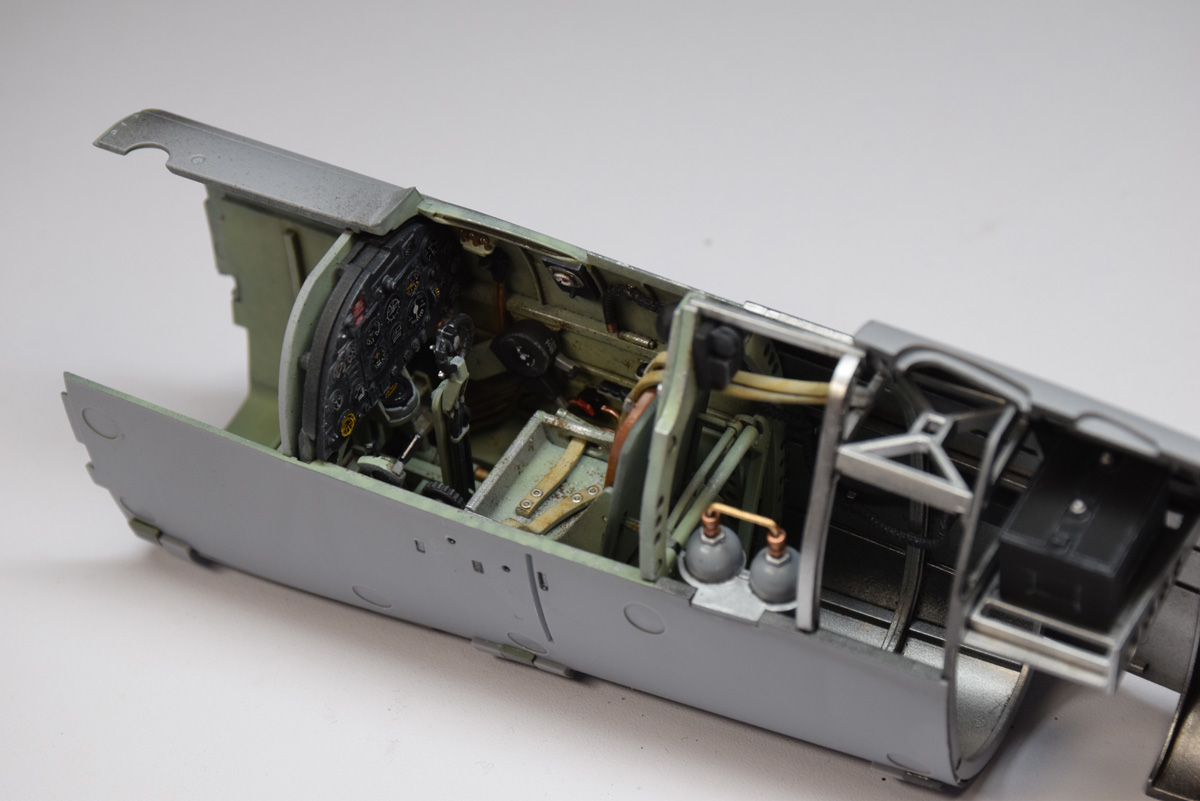
Once I fitted together all the parts I felt I could tackle I primed the entire inner fuselage and cockpit with Mr Finishing Surfacer 1500 Black. This lacquer primer I feel is the best option as sadly a good strong acrylic primer is as realistic as someone wiring their fortune to you for a favor. A majority of Spitfire cockpits were painted grey-green from the instrument panel to the seat bulkhead, then from the bulkhead to the tail it was left bare metal. I replicated this by masking the front section and painting the back with Mr Color GX2 Ueno Black (basically gloss black) which will enhance the shine of the metallic paint. Said metallic paint I used was AK Interactive Xtreme Metal Aluminum. I then masked off the metal section and gave the cockpit a marble coat of Testors Gloss Grey. This process involves carefully airbrushing a grey or white over the black primer between the panel lines to achieve a weathered effect. Then came the main cockpit color which was Vallejo Model Air Interior Grey Green. Then with the paint brush I picked off the pieces that needed black, red, brown, brass, copper, etc.
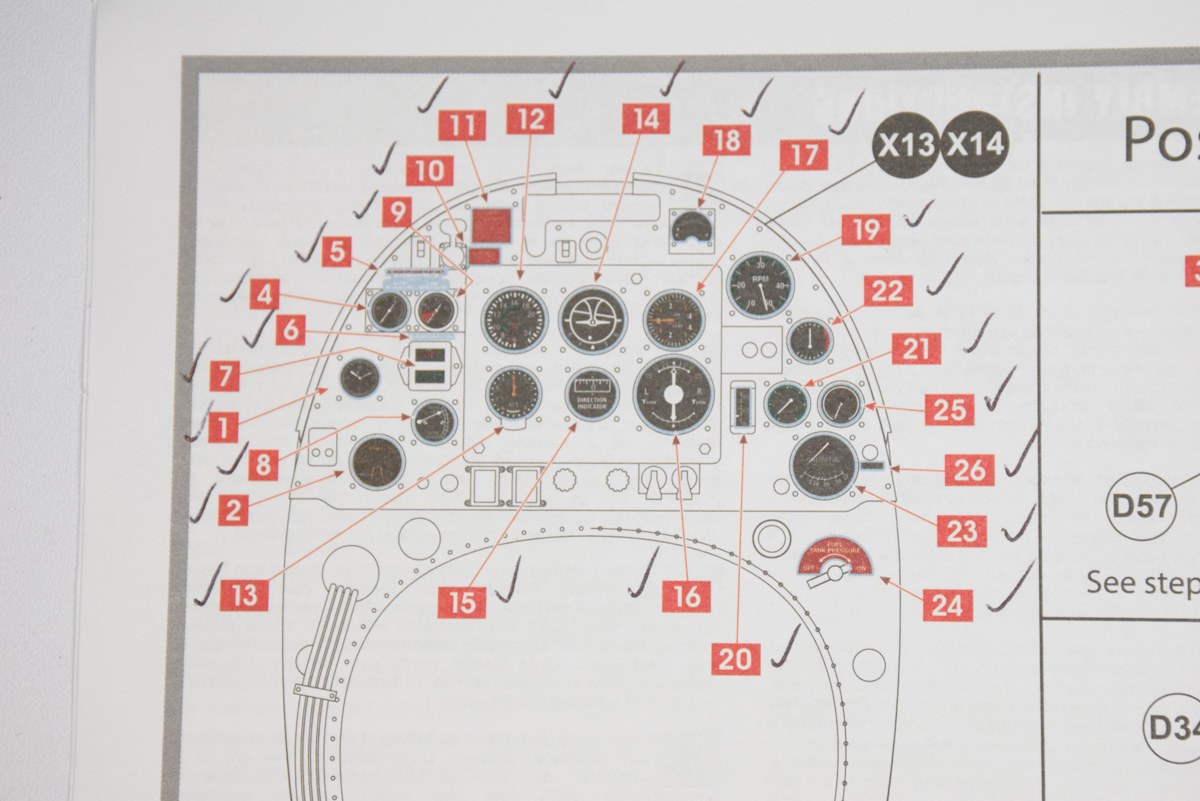
After painting comes the clear coat which acts a barrier to protect the acrylic paint from the enamel wash I use to darken the panel lines. I used Tamiya Panel Line Accent Color Dark Brown as this provides a dark, grimy look without the unrealistic look of a straight black wash. Most kits give you one full decal for the instrument panel but in this case each dial is it’s own decal. This panel is a clear part so I originally tried to apply the decals backwards so they would show through the glass but it didn’t look good and instead I just applied the dials on top. A trick I like to do with instrument decals is apply a dab of Microscale Kristal Klear on each dial which when dry will make them glossy giving the appearance of glass. Then after a coat of AK Ultra Matte Varnish it was time to start sealing everything up.
Gluing the seat, sidewalls, bulkheads and controls were all easy but like with any model I do that requires aligning several sections, a gap was apparent when gluing the fuselage halves together. I blame myself for this and not the kit as this is an issue I frequently tend to have and I won’t pin it on kit engineering. The gap was in the front section just behind the engine which I attempted to fix with some styrene pieces and Tamiya Extra Thin Cement. After some scraping and sanding it covered the gap nicely but I dread what future fit issues may arise because of this.
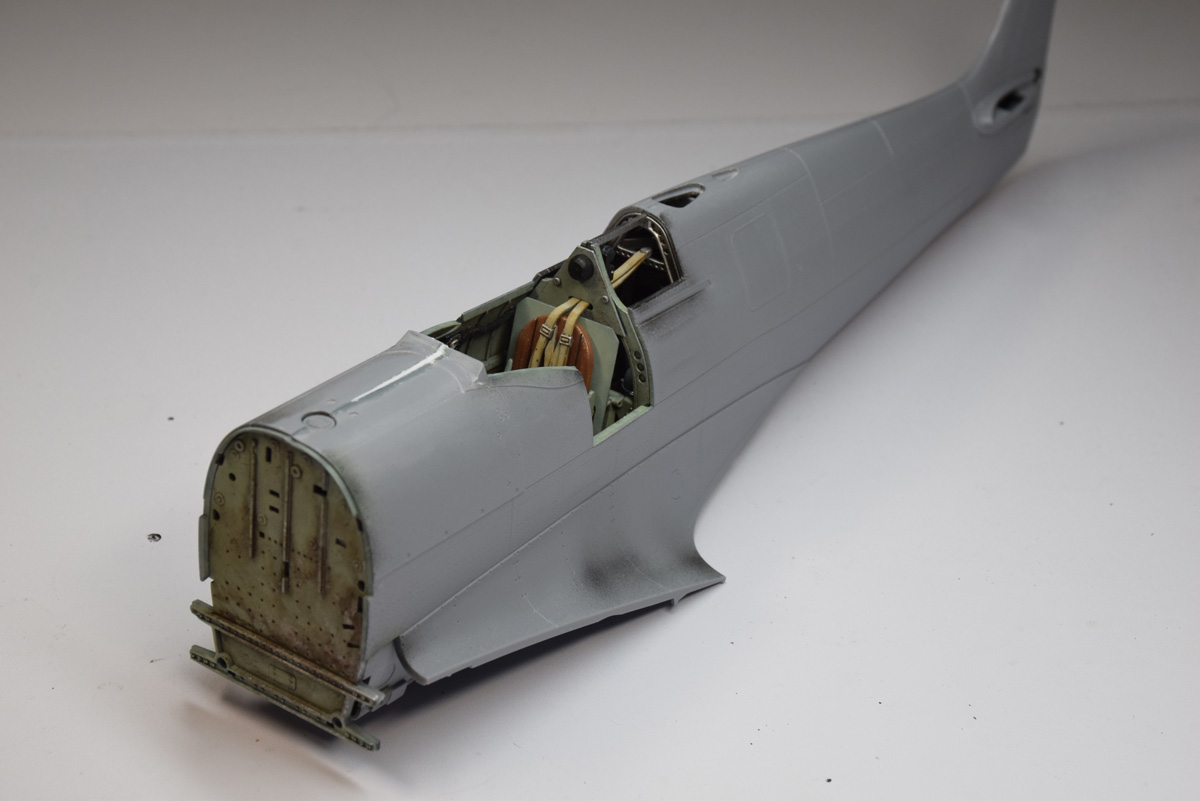
That concludes the cockpit construction of Airfix’s 1/24 scale Spitfire Mk.IXc. I am enjoying the process so far, no complaints or glaring errors to speak of. With the cockpit complete I will move on to the gun bays and the engine in part 3.


About the Author:
David Peckam has built scale models since he was 12, specializing largely on military aircraft. He is a makeup artist and background actor for films and TV. He enjoys watching hockey and of course, movies. He has an excellent knowledge of hobby products and if you have questions concerning scale model airplanes.